


PAP2T
Table of contents
 Loading...
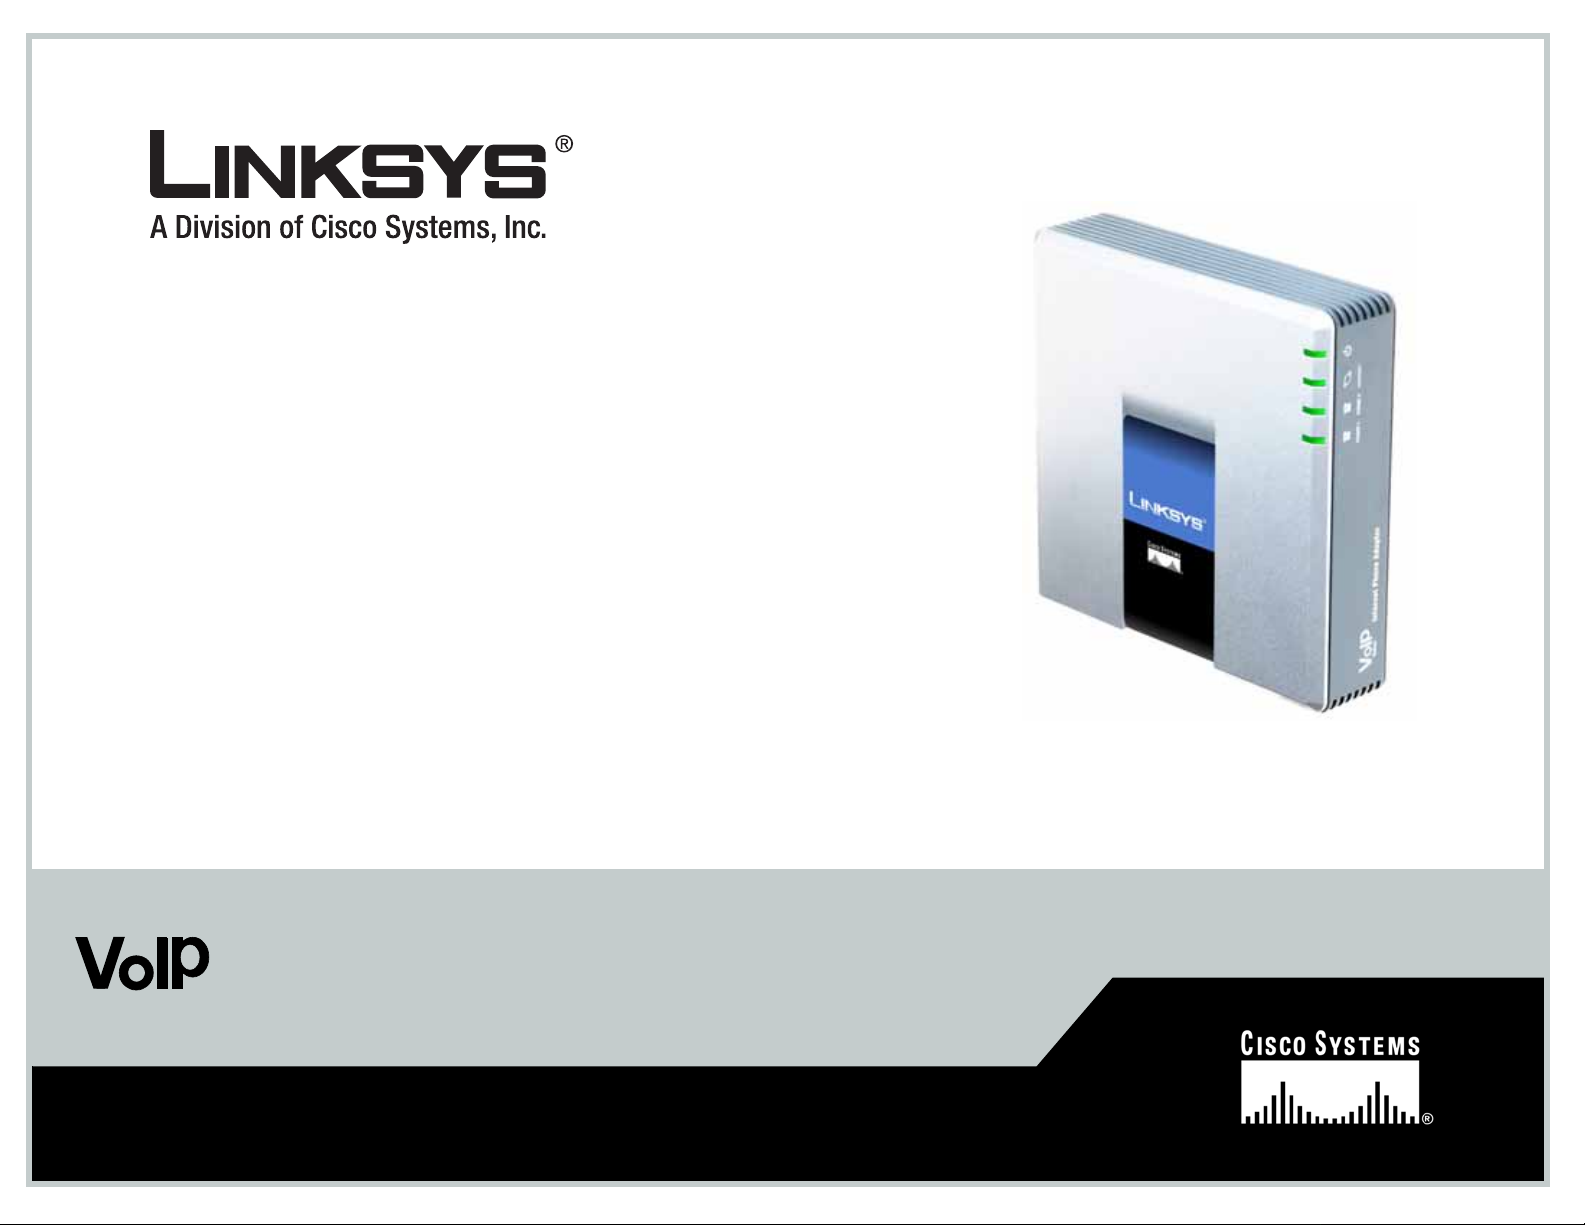
Model No.
with 2 Ports for Voice-over-IP
Internet Phone Adapter
PAP2T
User Guide
Voice

Internet Phone Adapter with 2 Ports for Voice-over-IP
Copyright and Trademarks
Specifications are subject to change without notice. Linksys is a registered trademark or trademark of Cisco
Systems, Inc. and/or its affiliates in the U.S . and certain other countries. Copyright © 2006 Cisco Systems, Inc . All
rights reserved. Other brands and product names are trademarks or registered trademarks of their respective
holders.
How to Use this Guide
Your guide to the Internet Phone Adapter has been designed to make understanding networking with the Internet
Phone Adapter easier than ever. Look for the following items when reading this User Guide:
In addition to these symbols, there are definitions for technical terms that are presented like this:
Also, each figure (diagram, screenshot, or other image) is provided with a figure number and description, like
this:
Figure numbers and descriptions can also be found in the “List of Figures” section.
This exclamation point means there is a caution or
warning and is something that could damage your
property or the Phone Adapter.
word: definition.
This checkmark means there is a note of interest and
is something you should pay special attention to while
using the Phone Adapter.
This question mark provides you with a reminder about something
you might need to do while using the Phone Adapter.
Figure 0-1: Sample Figure Description
PAP2T-UG-60807NC LH
WARNING: This product contains chemicals, including lead, known
to the State of California to cause cancer, and birth defects or other
reproductive harm. Wash hands after handling.

Internet Phone Adapter with 2 Ports for Voice-over-IP
Table of Contents
Chapter 1: Introduction . . . . . . . . . . . . . . . . . . . . . . . . . . . . . . . . . . . . . . . . . . . . . . 1
Welcome . . . . . . . . . . . . . . . . . . . . . . . . . . . . . . . . . . . . . . . . . . . . . . . . . . . . . . . . . . . . . 1
What’s in this Guide?. . . . . . . . . . . . . . . . . . . . . . . . . . . . . . . . . . . . . . . . . . . . . . . . . . . . 2
Chapter 2: Getting to Know the Phone Adapter . . . . . . . . . . . . . . . . . . . . 3
The Back Panel . . . . . . . . . . . . . . . . . . . . . . . . . . . . . . . . . . . . . . . . . . . . . . . . . . . . . . . . 3
The Front Panel. . . . . . . . . . . . . . . . . . . . . . . . . . . . . . . . . . . . . . . . . . . . . . . . . . . . . . . . 4
Chapter 3: Connecting the Phone Adapter. . . . . . . . . . . . . . . . . . . . . . . . . . 5
Overview . . . . . . . . . . . . . . . . . . . . . . . . . . . . . . . . . . . . . . . . . . . . . . . . . . . . . . . . . . . . . 5
Connecting the Phone Adapter . . . . . . . . . . . . . . . . . . . . . . . . . . . . . . . . . . . . . . . . . . . . 5
Chapter 4: Using the Phone Adapter’s
Interactive Voice Response Menu
. . . . . . . . . . . . . . . . . . . . . . 7
Overview . . . . . . . . . . . . . . . . . . . . . . . . . . . . . . . . . . . . . . . . . . . . . . . . . . . . . . . . . . . . . 7
Accessing the Interactive Voice Response Menu . . . . . . . . . . . . . . . . . . . . . . . . . . . . . . 7
Using the Interactive Voice Response Menu. . . . . . . . . . . . . . . . . . . . . . . . . . . . . . . . . . 8
Entering a Password . . . . . . . . . . . . . . . . . . . . . . . . . . . . . . . . . . . . . . . . . . . . . . . . . . . 12
Configuring the Settings for Your Internet Phone Service. . . . . . . . . . . . . . . . . . . . . . . 12
Appendix A: Troubleshooting. . . . . . . . . . . . . . . . . . . . . . . . . . . . . . . . . . . . . . . 13
Common Problems and Solutions. . . . . . . . . . . . . . . . . . . . . . . . . . . . . . . . . . . . . . . . . 13
Frequently Asked Questions . . . . . . . . . . . . . . . . . . . . . . . . . . . . . . . . . . . . . . . . . . . . . 16
Appendix B: Glossary. . . . . . . . . . . . . . . . . . . . . . . . . . . . . . . . . . . . . . . . . . . . . . . . 17
Appendix C: Specifications . . . . . . . . . . . . . . . . . . . . . . . . . . . . . . . . . . . . . . . . . 22
Appendix D: Warranty Information. . . . . . . . . . . . . . . . . . . . . . . . . . . . . . . . . 24
Appendix E: Regulatory Information . . . . . . . . . . . . . . . . . . . . . . . . . . . . . . . 26
Appendix F: Contact Information. . . . . . . . . . . . . . . . . . . . . . . . . . . . . . . . . . . 33
Internet Phone Service Provider . . . . . . . . . . . . . . . . . . . . . . . . . . . . . . . . . . . . . . . . . . 33
Linksys . . . . . . . . . . . . . . . . . . . . . . . . . . . . . . . . . . . . . . . . . . . . . . . . . . . . . . . . . . . . . 33

Analog Telephone Adapter with 2 FXS Ports
List of Figures
Figure 2-1: Back Panel . . . . . . . . . . . . . . . . . . . . . . . . . . . . . . . . . . . . . . . . . . . . 3
Figure 2-2: Front Panel . . . . . . . . . . . . . . . . . . . . . . . . . . . . . . . . . . . . . . . . . . . . 4
Figure 3-1: Connection Diagram of a Typical Setup . . . . . . . . . . . . . . . . . . . . . . 5
Figure 3-2: Connect the RJ-11 Telephone Cable. . . . . . . . . . . . . . . . . . . . . . . . . 5
Figure 3-3: Connect the Ethernet Network Cable . . . . . . . . . . . . . . . . . . . . . . . . 6
Figure 3-4: Connect the Power Adapter . . . . . . . . . . . . . . . . . . . . . . . . . . . . . . . 6

1
Chapter 1: Introduction
Welcome
Internet Phone Adapter with 2 Ports for Voice-over-IP
Chapter 1: Introduction
Welcome
Thank you for choosing the Linksys Internet Phone Adapter with 2 Ports for Voice-over-IP. This Phone Adapter will
allow you to make phone or fax calls using your broadband connection.
How does the Phone Adapter do this? Plug the Phone Adapter into your network router or gateway, then connect
your phones or fax machines to the Phone Adapter. Each of the Phone Adapter’s two telephone jacks operate
independently, with separate Internet phone services and phone numbers, so you can have up to two Internet
phone lines delivered through your cable or DSL Internet connection.
What does all of this mean? The Phone Adapter allows your phones or fax machines to take advantage of and
share your high-speed Internet connection. You can even make phone calls while you’re surfing the Internet
(Internet phone services required).
Refer to the instructions in the Quick Installation or this User Guide to help you connect the Phone Adapter after
you have set up an account with your Internet phone service provider. The instructions in this User Guide will help
you get the most out of your Phone Adapter.
NOTE: For information about your Internet phone service, refer to the materials provided by your
Internet phone service provider.

2
Chapter 1: Introduction
What’s in this Guide?
Internet Phone Adapter with 2 Ports for Voice-over-IP
What’s in this Guide?
This User Guide covers the steps for installing the Phone Adapter.
• Chapter 1: Introduction
Describes the Phone Adapter’s applications and the contents of this User Guide.
• Chapter 2: Getting to Know the Phone Adapter
Describes the physical features of the Phone Adapter.
• Chapter 3: Connecting the Phone Adapter
Explains how to connect the Phone Adapter to your network and phones (or fax machines).
• Chapter 4: Using the Phone Adapter’s Interactive Voice Response Menu
Explains how to configure the Phone Adapter’s network settings using the Interactive Voice Response Menu.
• Appendix A: Troubleshooting
Describes potential problems and solutions regarding use of the Phone Adapter.
• Appendix B: Glossary
Gives brief descriptions of terms frequently used in networking.
• Appendix C: Specifications
Provides technical specifications for the Phone Adapter.
• Appendix D: Warranty Information
Provides warranty information for the Phone Adapter.
• Appendix E: Regulatory Information
Provides regulatory information regarding the Phone Adapter.
• Appendix F: Contact Information
Provides contact information for a variety of Linksys resources, including Technical Support.
3
Chapter 2: Getting to Know the Phone Adapter
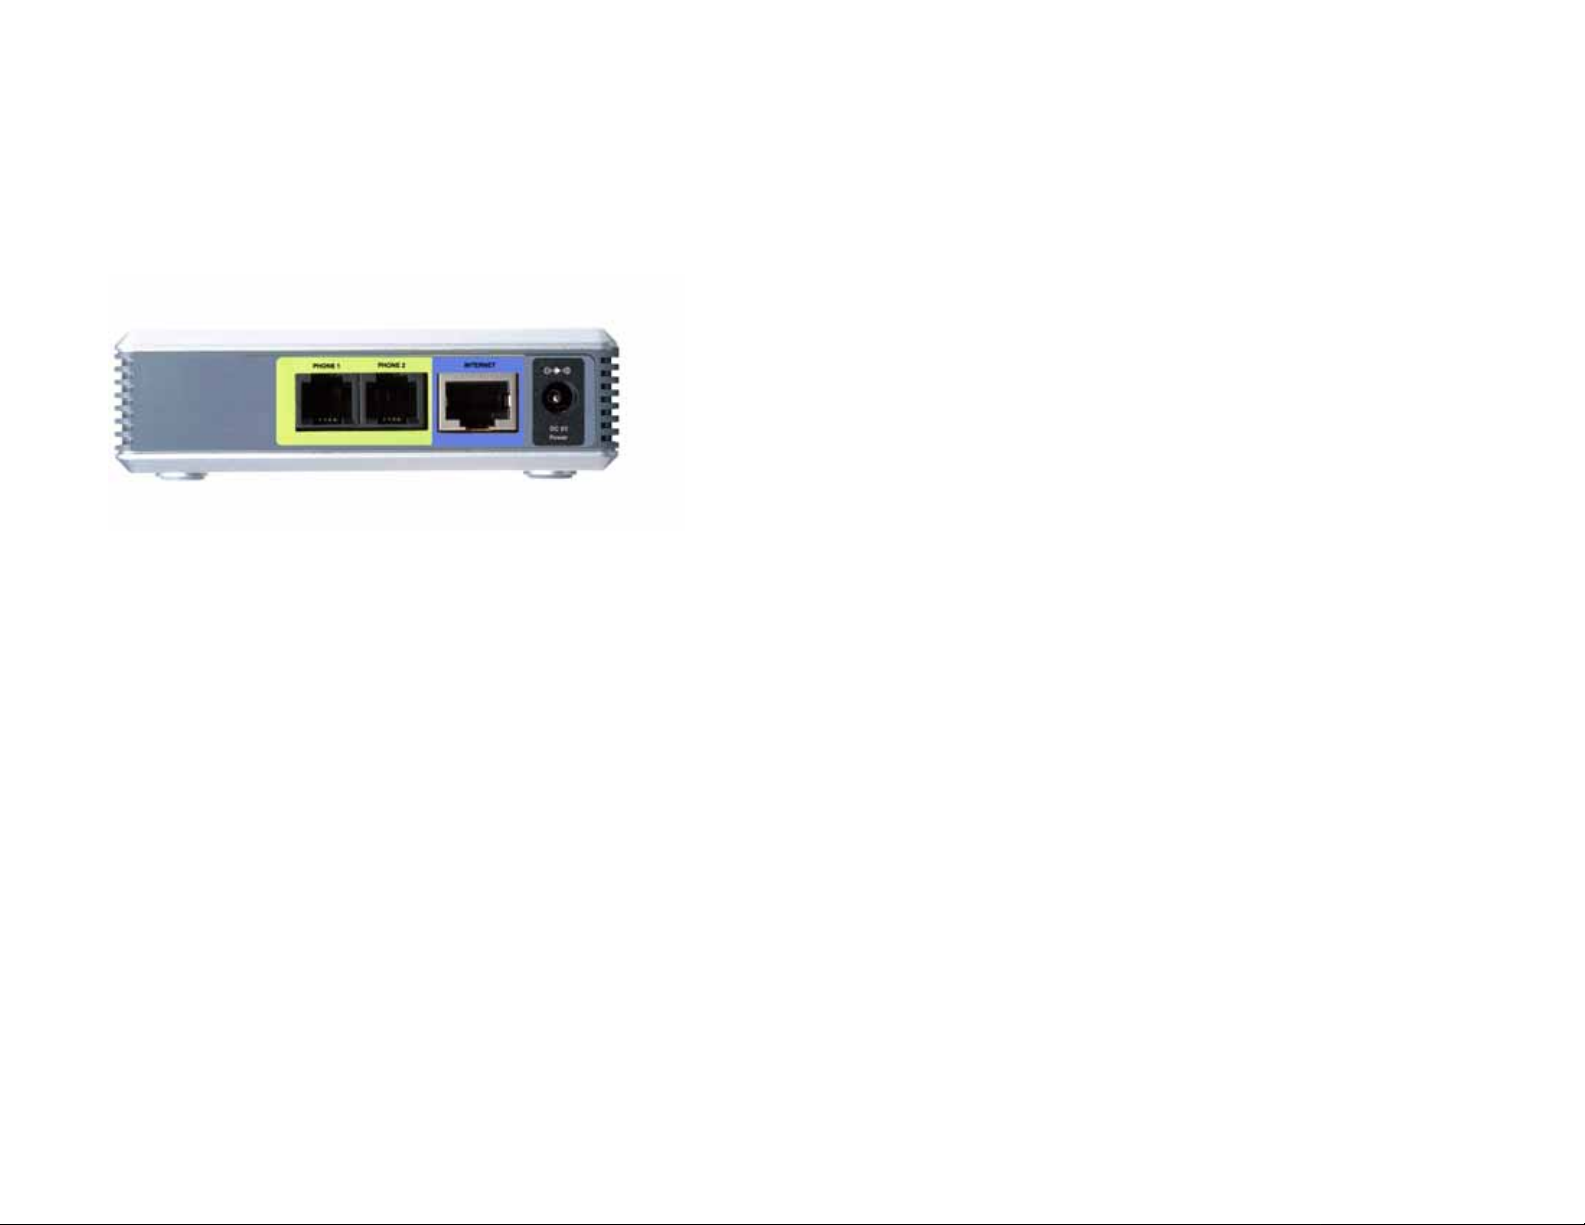
The Back Panel
Internet Phone Adapter with 2 Ports for Voice-over-IP
Chapter 2: Getting to Know the Phone Adapter
The Back Panel
The Phone Adapter’s ports are located on the back panel.
PHONE 1Port The PHONE 1 port (for your primary Internet phone line) allows you to connect your telephone
to the Phone Adapter using an RJ-11 telephone cable.
PHONE 2 Port If you have a second Internet phone service account, use the PHONE 2 port to connect a
second telephone (or fax machine) to the Phone Adapter using an RJ-11 telephone cable.
INTERNET Port The INTERNET port allows you to connect the Phone Adapter to your router or gateway using a
Category 5 (or better) Ethernet network cable.
POWER Port The POWER port is where you connect the included power adapter.
Figure 2-1: Back Panel

4
Chapter 2: Getting to Know the Phone Adapter
Internet Phone Adapter with 2 Ports for Voice-over-IP
The Front Panel
The Phone Adapter’s LEDs, which inform you about network activities, are located on the front panel.
Power Green. The Power LED lights up when the Phone Adapter is powered on and connected to the
Internet. It flashes when the Phone Adapter is not connected to the Internet. The LED also
flashes when the Phone Adapter is booting up or upgrading its firmware.
INTERNET Green. The INTERNET LED lights up when there is an active connection through the port. If the
LED is flashing, then there is traffic moving through that port.
PHONE 1/2 Green. The PHONE LED is solidly lit when a telephone or fax machine has an active or
registered connection to your Internet phone service provider through the corresponding port.
It flashes when the phone is being used or is off the hook.
Figure 2-2: Front Panel
5
Chapter 3: Connecting the Phone Adapter
Overview
Internet Phone Adapter with 2 Ports for Voice-over-IP
Chapter 3: Connecting the Phone Adapter
Overview
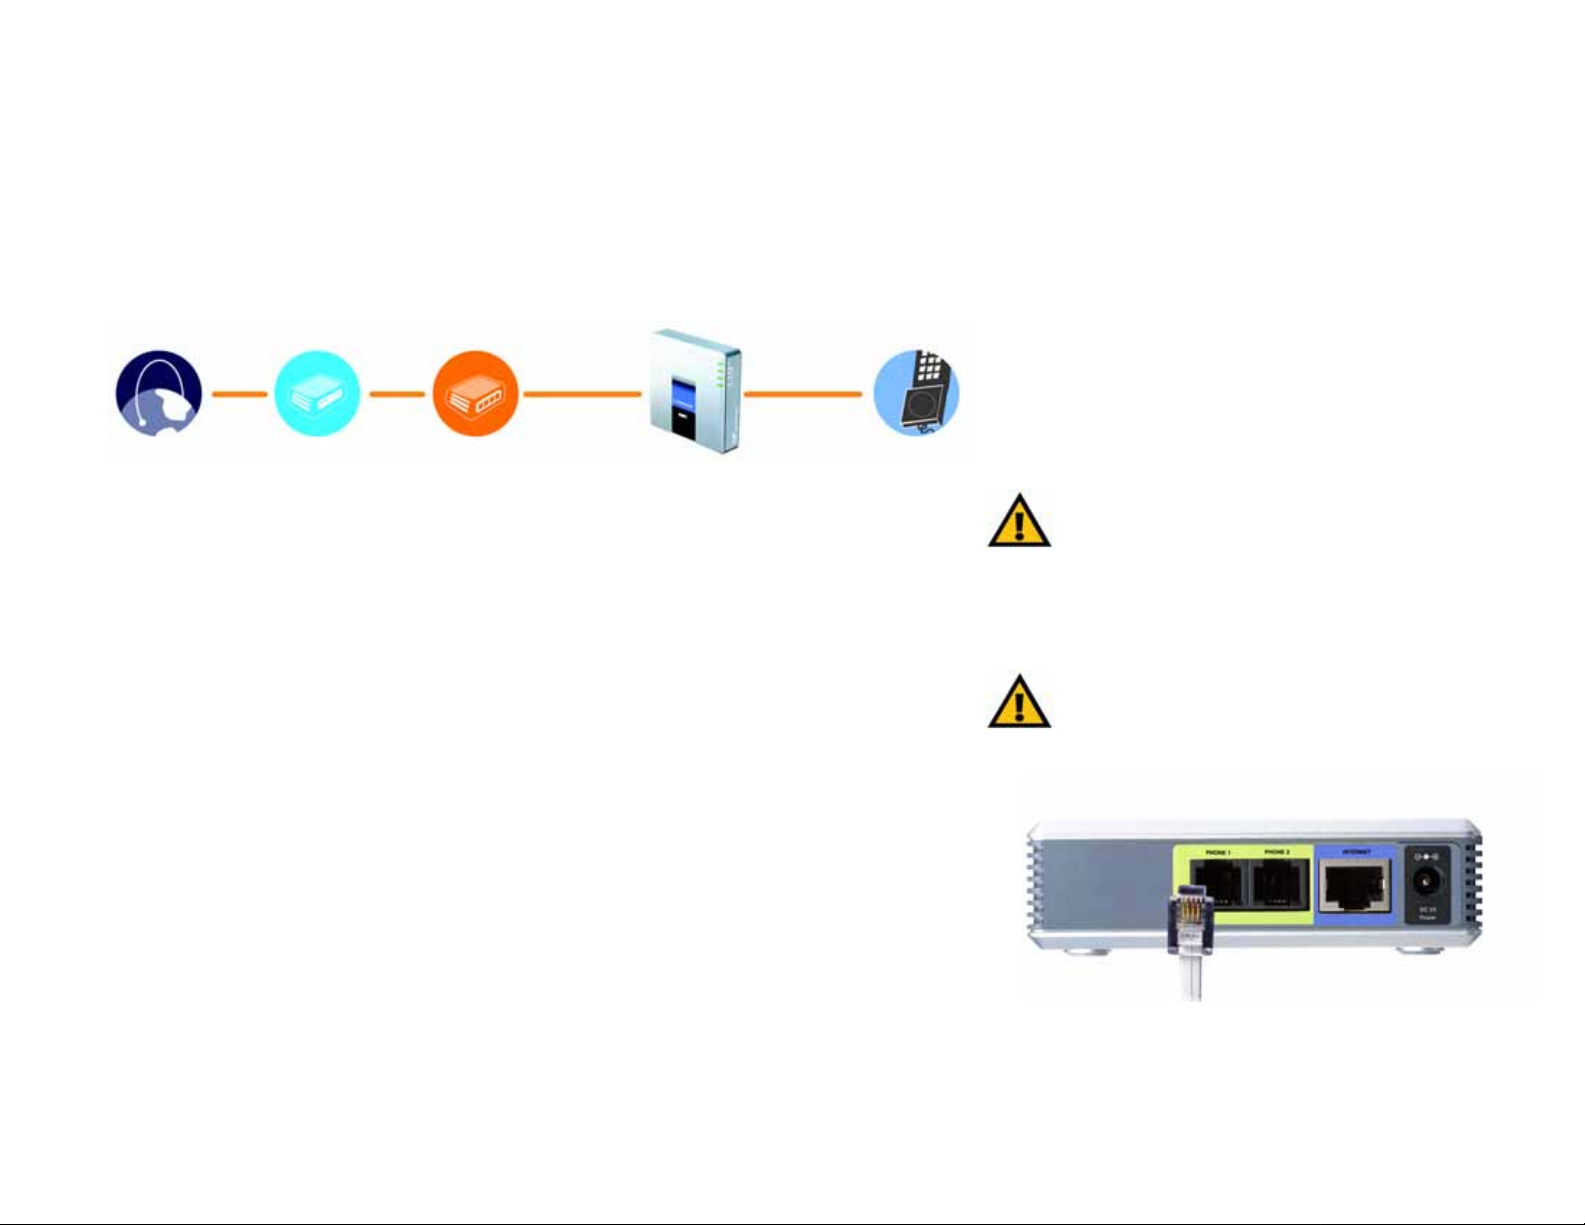
This chapter explains how to connect the Phone Adapter to your network and telephones or fax machines. Shown
below is a connection diagram displaying a typical setup.
Connecting the Phone Adapter
If you already have an account set up with your Internet phone service provider, then proceed to step 1.
If you do not have an account set up with your Internet phone service provider , then go to your provider’ s website
and sign up for service. After you have set up an account, proceed to step 1.
1. Using a telephone cable, connect your telephone to the PHONE 1 port of the Phone Adapter.
2. If you have a second Internet phone service account, connect another telephone or a fax machine to the
PHONE 2 port of the Phone Adapter.
Figure 3-1: Connection Diagram of a Typical Setup
Figure 3-2: Connect the RJ-11 Telephone Cable
Telephone
Router
Cable/DSL
Modem
Internet
Phone Adapter
IMPORTANT: Do not connect either of the Phone ports
to a telephone wall jack. Make sure you only connect a
telephone or fax machine to either of the Phone ports.
Otherwise, the Phone Adapter or the telephone wiring
in your home or office may be damaged.
IMPORTANT: The Phone Adapter includes a ringer
(ring signal generator), which is a source of hazardous
voltage. When the ringer is activated by an incoming
call, do not touch the Phone port wires, the wires of a
cable connected to either of the Phone ports, or the
internal circuitry of the Phone Adapter.

6
Chapter 3: Connecting the Phone Adapter
Connecting the Phone Adapter
Internet Phone Adapter with 2 Ports for Voice-over-IP
3. Connect the included Ethernet network cable to the INTERNET port of the Phone Adapter.
Connect the other end to one of the Ethernet ports on your router or gateway.
4. Connect the included power adapter to the POWER port on the back panel of the Phone Adapter.
Connect the other end to a standard electrical outlet.
5. The Status and Act LEDs will be solidly lit when the Phone Adapter is ready for use.
6. Follow the instructions provided by your Internet phone service provider.
If you need to manually configure the Phone Adapter’s network settings, you can use the telephone connected
to the Phone Adapter. See “Chapter 4: Using the Phone Adapter’s Interactive Voice Response Menu” for
instructions.
The installation of the Phone Adapter is complete. Now you can pick up your phone and make calls.
Figure 3-4: Connect the Power Adapter
Figure 3-3: Connect the Ethernet Network Cable

7
Chapter 4: Using the Phone Adapter’s Interactive Voice Response Menu
Overview
Internet Phone Adapter with 2 Ports for Voice-over-IP
Chapter 4: Using the Phone Adapter’s Interactive Voice
Response Menu
Overview
You may need to manually configure the Phone Adapter by entering the settings provided by your Internet phone
service provider. This chapter explains how to use the Interactive Voice Response Menu to configure the Phone
Adapter’s network settings. You will use the phone’ s keypad to enter your commands and select choices, and the
Phone Adapter will respond with voice responses.
Accessing the Interactive Voice Response Menu
1. Use a telephone connected to the PHONE 1 or PHONE 2 port of the Phone Adapter.
2. Press the * (star) key four times.
3. Wait until you hear “Configuration menu. Please enter option followed by the # (pound) key or hang up
to exit.”
4. Refer to the table on page 8 for a list of actions, commands, menu choices, and descriptions. After you select
an option, press the # (pound) key. To exit the menu, hang up the telephone.
NOTE: If your Internet phone service provider sent you the Phone Adapter, then it may be
pre-configured for you, and you may not need to change any settings. Refer to the instructions
provided by your service provider for more information.
Loading...