


 Loading...
GB ES
DE FR
Operator’s manual
Please read the operator’s manual carefully and make sure you understand the instructions before using the machine.
Manual de |
PP 480 HF |
|
instrucciones |
|
|
Lea detenidamente el manual de instrucciones y asegúrese de |
|
|
entender su contenido antes de utilizar la máquina. |
|
|
Bedienungsanweisung |
|
|
Lesen Sie die Bedienungsanweisung sorgfältig durch und machen |
|
|
Sie sich mit dem Inhalt vertraut,bevor Sie das Gerät benutzen. |
|
|
Manuel d’utilisation |
GB ES DE FR |
|
Lire attentivement et bien assimiler le manuel d’utilisation avant d’utiliser la machine.
KEY TO SYMBOLS
Symbols on the machine:
WARNING! The machine can be a dangerous tool if used incorrectly or carelessly, which can cause serious or fatal injury to the operator or others.
Please read the operator’s manual carefully and make sure you understand the instructions before using the machine.
Always wear:
• Approved protective helmet
• Approved hearing protection
•Protective goggles or a visor
•Breathing mask
This product is in accordance with applicable EC directives.
WARNING! High current.
Environmental marking. Symbols on the product or its packaging indicate that this product cannot be handled as domestic waste. It must instead be submitted to an appropriate recycling station for the recovery of electrical and electronic equipment.
By ensuring that this product is taken care of correctly, you can help to counteract the
potential negative impact on the environment and people that can otherwise result through the incorrect waste management of this product.
For more detailed information about recycling this product, contact your municipality, your domestic waste service or the shop from where you purchased the product.
Symbols in the operator’s manual:
Inspection and/or maintenance should be carried out with the motor switched off and the plug disconnected.
Always wear approved protective gloves.
Regular cleaning is required.
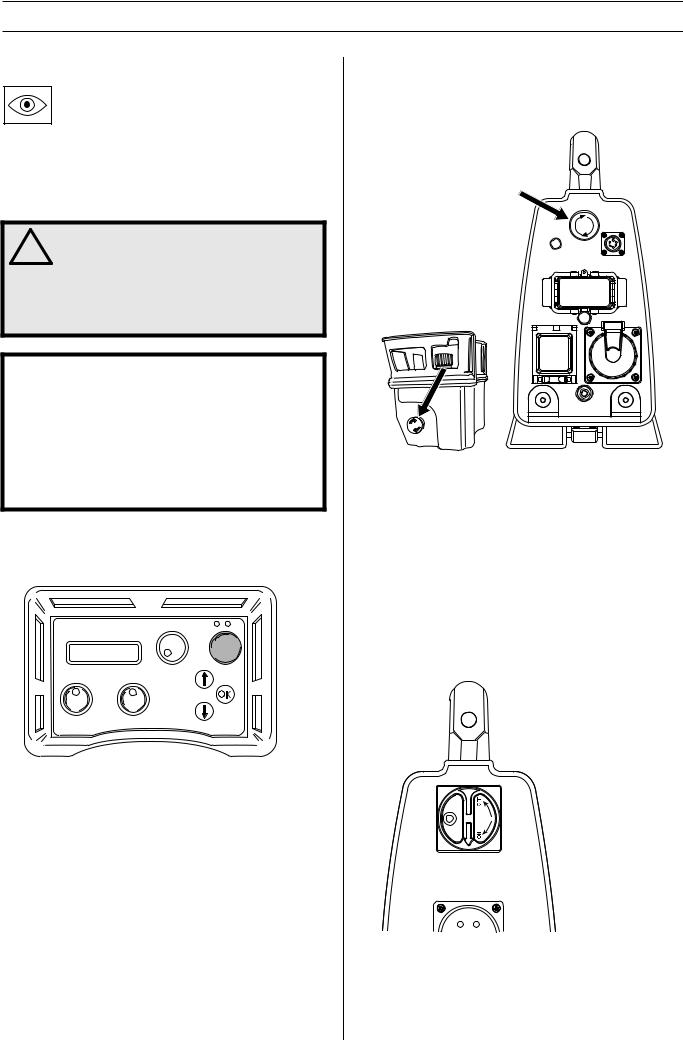
Visual check.
Protective goggles or a visor must be worn.
2 – English

|
CONTENTS |
Contents |
|
KEY TO SYMBOLS |
|
Symbols on the machine: ............................................. |
2 |
Symbols in the operator’s manual: ............................... |
2 |
CONTENTS |
|
Contents ...................................................................... |
3 |
WHAT IS WHAT? |
|
What is what on the power unit? .................................. |
4 |
SAFETY INSTRUCTIONS |
|
Steps before using a new power unit ........................... |
5 |
Personal protective equipment ..................................... |
5 |
Machine′s safety equipment ........................................ |
6 |
General safety precautions .......................................... |
7 |
General working instructions ....................................... |
7 |
PRESENTATION |
|
PP 480 HF ................................................................... |
8 |
ASSEMBLY |
|
Assembling/Installing equipment ................................. |
9 |
SETTINGS AND ADJUSTMENTS |
|
Start menu ................................................................... |
10 |
Operations menu ......................................................... |
10 |
STARTING AND STOPPING |
|
Before starting ............................................................. |
11 |
Starting ........................................................................ |
11 |
Stopping ....................................................................... |
12 |
After work is completed ............................................... |
12 |
MAINTENANCE |
|
Service ......................................................................... |
13 |
Daily maintenance ....................................................... |
13 |
TECHNICAL DATA |
|
PP 480 HF ................................................................... |
14 |
EC-declaration of conformity ........................................ |
15 |
English – 3
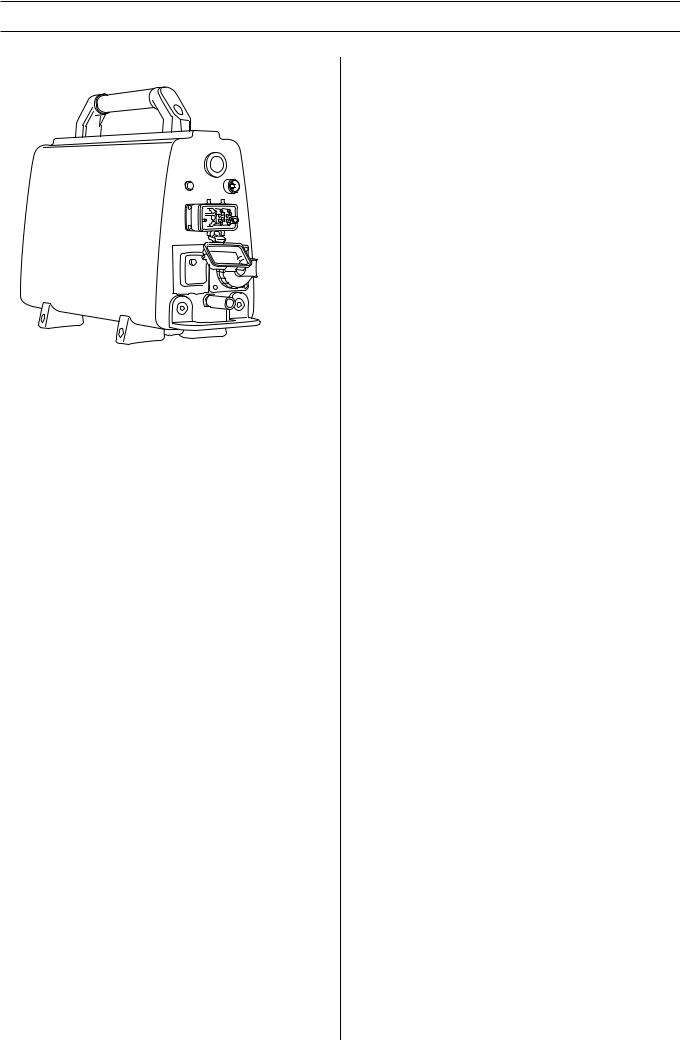
WHAT IS WHAT?
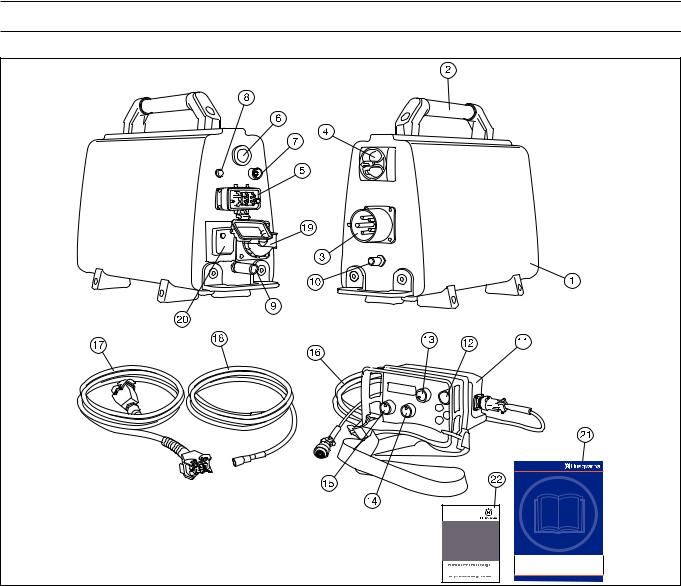
What is what on the power unit?
1 |
Power unit |
12 |
Start button |
2 |
Handle |
13 |
Blade rotation and start water coolant |
3 |
Electrical socket |
14 |
Travel feed |
4 |
Main switch |
15 |
Depth feed |
5 |
Cable connection |
16 |
Canbus cable |
6 |
Emergency stop |
17 |
Power cable |
7 |
Canbus port |
18 |
Water hose |
8 |
Power indicator |
19 |
Single phase socket - Only 5-pin machines |
9 |
Water connector, out |
20 |
Ground-fault circuit breaker - Only 5-pin machines |
10 |
Water connector, in |
21 |
Operator′s manual |
11 |
Remote control |
22 |
DVD - Product user guide |
4 – English
SAFETY INSTRUCTIONS
Steps before using a new power unit
•Please read the operator’s manual carefully and make sure you understand the instructions before using the machine.
•See the supplied DVD for working technique tips.
•This machine is only intended for use together with a Husqvarna WS 482 HF. All other use is forbidden.
•Read through the manual supplied with the wall saw before starting to use the hydraulic unit.
•The machine can cause serious personal injury. Read the safety instructions carefully. Learn how to use the machine.
Always use common sense
It is not possible to cover every conceivable situation you can face. Always exercise care and use your common sense. Avoid all situations which you consider to be beyond your capability. If you still feel uncertain about operating procedures after reading these instructions, you should consult an expert before continuing.
Do not hesitate to contact your dealer if you have any more questions about the use of the machine. We will willingly be of service and provide you with advice as well as help you to use your machine both efficiently and safely.
Let your Husqvarna dealer regularly check the machine and make essential adjustments and repairs.
All information and all data in the Operator’s Manual were applicable at the time the Operator’s Manual was sent to print.
! |
WARNING! Under no circumstances should |
you modify the original design of the |
|
machine without approval from the |
|
|
manufacturer. Always use original spare |
|
parts. Unauthorized modifications and/or |
|
accessories may lead to serious injury or |
|
death to the user or others. |
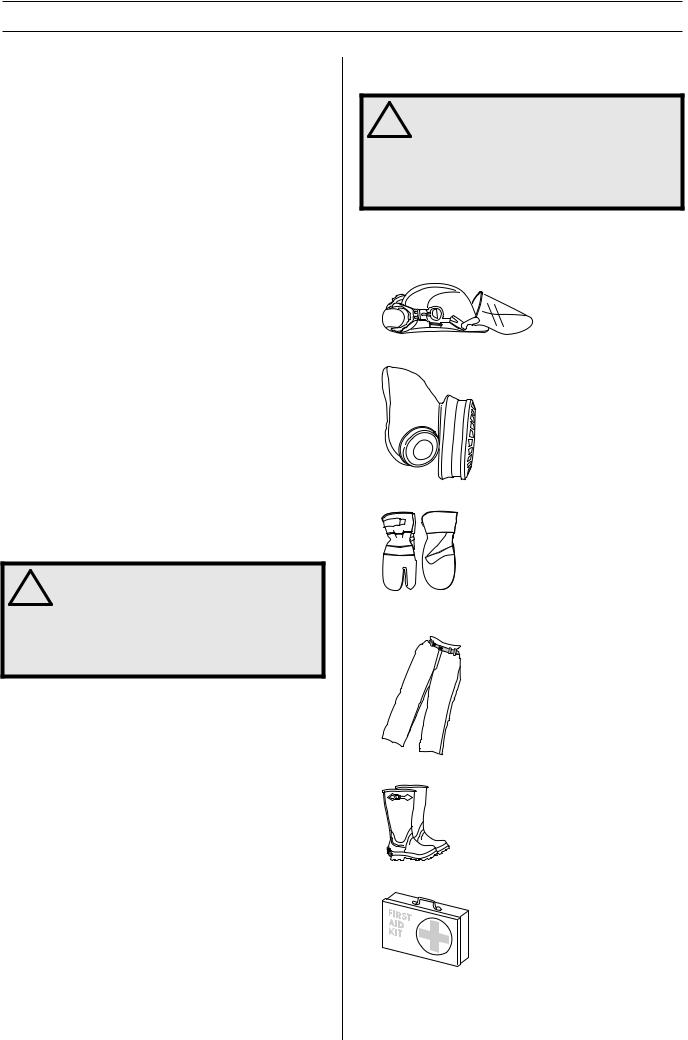
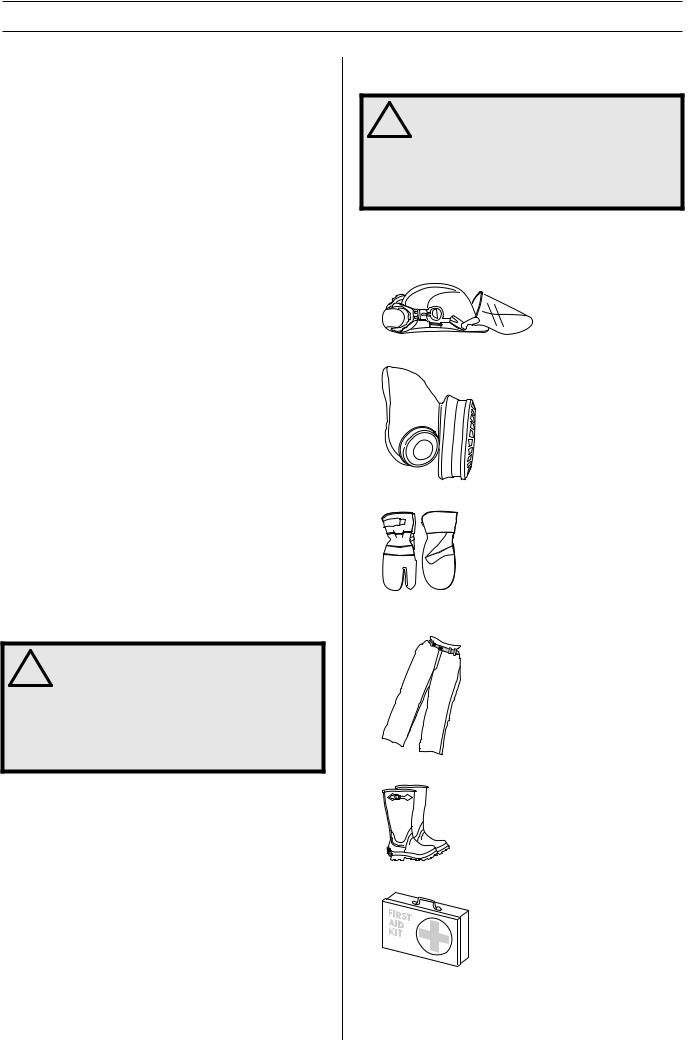
Personal protective equipment
! |
WARNING! You must use approved personal |
protective equipment whenever you use the |
|
machine. Personal protective equipment |
|
|
cannot eliminate the risk of injury but it will |
|
reduce the degree of injury if an accident |
|
does happen. Ask your dealer for help in |
|
choosing the right equipment. |
•Protective helmet
•Hearing protection
•Protective goggles or a visor
•Breathing mask
•Heavy-duty, firm grip gloves.
•Tight-fitting, heavy-duty and comfortable clothing that permits full freedom of movement.
•Boots with steel toe-caps and non-slip sole.
•Always have a first aid kit nearby.
English – 5

SAFETY INSTRUCTIONS
Machine′s safety equipment
This section describes the machine′s safety equipment, its purpose, and how checks and maintenance should be carried out to ensure that it operates correctly. See the ”What is what?” section to locate where this equipment is positioned on your machine.
! |
WARNING! Never use a machine with faulty |
safety equipment. The machine’s safety |
|
equipment must be checked and maintained |
|
|
as described in this section. If your machine |
|
fails any of these checks contact your |
|
service agent to get it repaired. |
IMPORTANT! All servicing and repair work on the machine requires special training. This is especially true of the machine′s safety equipment. If your machine fails any of the checks described below you must contact your service agent. When you buy any of our products we guarantee the availability of professional repairs and service. If the retailer who sells your machine is not a servicing dealer, ask him for the address of your nearest service agent.
Start button
The start button must be pushed and held to be able to start the blade rotation.This in order to prevent unintended starting of the blade rotation.
Checking the start button
•Turn the knob for blade rotation without pushing and holding the start button.
The blade rotation must not start.
•Push and hold the start button and turn the knob for blade rotation.
Now the blade rotation shall start.
Emergency stop and stop button
The power unit is equipped with an emergency stop and the remote control with a stop button. These are used to be able to quickly shut down the power unit.
Check the emergency stop and stop button
•Start the blade rotation.
•Push the emergency stop on the power unit and check that the blade rotation stops. Check the stop button on the remote control in the same way.
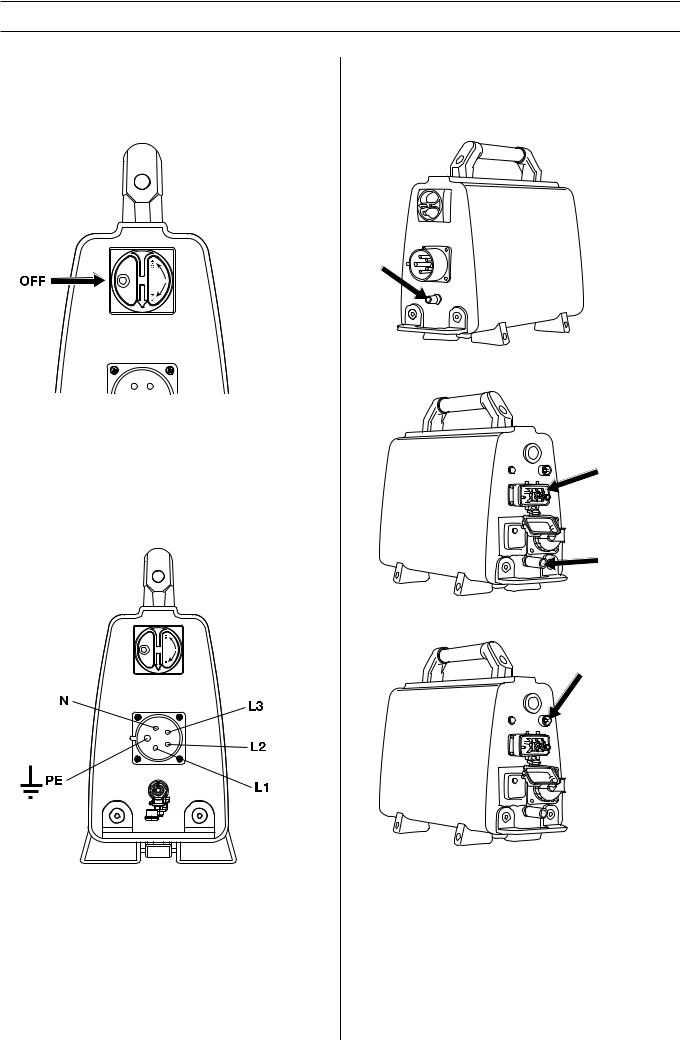
Main switch
The main switch is used to switch the electricity supply to the power unit on and off. The main switch must be in the "0"- position when the incoming cable is connected.
Checking the main power switch
•Turn the main switch to the "0"-position.
•Try to start the saw. The saw must not start.
6 – English

SAFETY INSTRUCTIONS
General safety precautions
! |
WARNING! Do not use the machine without |
first reading and understanding the contents |
|
of this Operator’s Manual. |
There is always a risk of shocks from electrically powered machines. Avoid unfavourable weather conditions and body contact with lightning conductors and metal objects. Always follow the instructions in the Operator’s manual to avoid damage.
•Never use the machine if you are tired, if you have drunk alcohol, or if you are taking medication that could affect your vision, your judgement or your co-ordination.
•Wear personal protective equipment. See instructions under the heading ”Personal protective equipment”.
•Never carry the machine by holding the cable and never pull the plug by pulling the cable.
•Keep all cables away of water, oil and sharp edges. Make sure the cable is not pinched in doors, fences or the like. It can cause the object to become live.
•Check that the cables are intact and in good condition. Never use the machine if any cable is damaged, but hand it in to an authorized service workshop for repair.
•Do not use an extension cord while it is rolled up to avoid overheating.
•The machine should be connected to an earthed outlet socket.
•Always connect the machine through an ground fault circuit interrupter with personal protection, i.e. an ground fault circuit interrupter that trips at an ground fault of 30 mA.
•Check that the mains voltage corresponds with that stated on the rating plate on the machine.
•Keep all parts in good working order and ensure that all fixtures are properly tightened.
•Never use a machine that is faulty. Carry out the checks, maintenance and service instructions described in this manual. Some maintenance and service measures must be carried out by trained and qualified specialists. See instructions under the heading Maintenance.
•Do not modify safety equipment. Check regularly that they function as they should.The machine must not be run with defective or disassembled safety equipment.
•Never allow anyone else to use the machine without first ensuring that they have understood the contents of the operator’s manual.
•People and animals can distract you causing you to lose control of the machine. For this reason, always remain concentrated and focused on the task.
•Be careful as clothing, long hair, and jewellery can get caught in moving parts.
•Observe care when lifting. You are handling heavy parts, which implies the risk of pinch injuries or other injuries.
Transport and storage
•Always switch of the power unit and pull out the electric cable before moving the equipment.
•Store the equipment in a lockable area so that it is out of reach of children and unauthorized persons.
•Store the machine and its equipment in a dry and frost proof place. If there is a risk of freezing, the machine must be drained of any remaining water coolant.
•Use the cases provided to store the equipment.
•Do not expose the machine to temperatures exceeding 45°C or to direct sunlight.
General working instructions
! |
WARNING! This section describes basic |
safety directions for using the machine. This |
|
information is never a substitute for |
|
|
professional skills and experience. If you get |
|
into a situation where you feel unsafe, stop |
|
and seek expert advice. Contact your dealer, |
|
service agent or an experienced user. Do not |
|
attempt any task that you feel unsure of! |
•All operators shall be trained in the use of the machine. The owner is responsible for ensuring that the operators receive training.
•Check that all couplings, connections and cables are intact and free from dirt.
•Check that all cables and the water supply are correctly connected to the machine before starting it.
•Never pull out the power cable without first switching off the power unit and waiting for the engine to come to a complete halt.
•If an emergency situation should arise anyway, push the red emergency stop button on the power unit or the stop button on the remote control.
•Always check and mark out where gas pipes are routed. Cutting close to gas pipes always entails danger. Make sure that sparks are not caused when cutting in view of the risk of explosion. Remain concentrated and focused on the task. Carelessness can result in serious personal injury or death.
•Make sure that no pipes or electrical cables are routed in the area to be cut.
•Check that electrical cables within the working area are not live.
•Never leave the machine unsupervised with the motor running.
•Always saw in a manner that permits easy access to the emergency stop.
•Make sure that there is always another person close at hand when you use the machines, so that you can call for help if an accident should occur.
•Do not use the machine in bad weather, such as dense fog, rain, strong wind, intense cold, etc. Working in bad weather is tiring and can lead to dangerous conditions, e.g. slippery surfaces.
•Ensure that the working area is sufficiently illuminated to create a safe working environment.
•Always ensure you have a safe and stable working position.
•Observe care when lifting. You are handling heavy parts, which implies the risk of pinch injuries or other injuries.
•Do not expose the machine to temperatures exceeding 45°C or to direct sunlight.
•Do not use the machine in wet or humid surroundings, close to water, in the rain or snow.
•Do not wash the machine with water, as water can enter the electrical system or the engine and cause damage to the machine or short circuit.
English – 7
|
PRESENTATION |
PP 480 HF |
PP 480 HF is supplied with the following |
|
equipment: |
|
• 1 x power unit |
|
• 1 x remote control |
|
• 1 x power lead |
|
• 1 x Canbus cable |
|
• 1 x water hose |
|
• Transport boxes for smooth transport. |
|
• DVD - Product user guide |
It is our wish that you will be satisfied with your product and that it will be your companion for a long time. Think of this operator′s manual as a valuable document. By following its′ content (using, service, maintenance etc) the life span and the second-hand value of the machine can be extended. If you will sell this machine, make sure that the buyer will get the operator′s manual.
A purchase of one of our products gives you access to professional help with repairs and services. If the retailer who sells your machine is not one of our authorised dealers, ask him for the address of your nearest service workshop.
Husqvarna Construction Products has a policy of continuous product development. Husqvarna reserves the right to modify the design and appearance of products without prior notice and without further obligation introduce design modifications.
General
•PP 480 HF is a power unit specially developed to be used with the electric wall saw WS 482 HF.
•It has a compact design and weighs just 23 kg (51 lb).
•Use 32 A for a 400 V system for full power.
•The power unit is connected to the saw with only a power lead and a water coolant hose.
•Equipped with a 230 V power outlet and a terminal for Canbus-cable.
•Equipped with an electric water valve which is controlled from the remote control.
•Through the remote control the operator receives information on power output, can measure the time and other things about the sawing process.
8 – English
ASSEMBLY
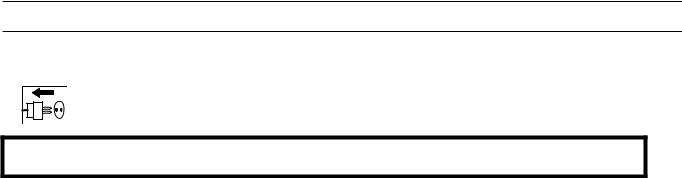
Assembling/Installing equipment
When the machine has been transported to a suitable site, it should be connected:
•Turn the main switch to the "0"-position.
•Connect the incoming power cable (380-480 V, 32 A European connector). Power units equipped with a single phase socket (230 V) must also have a neutral wire in order for the socket to work. The power pack functions even it there is no neutral wire present.
To be able to use full power output, the power unit must be connected to a 32 A fuse. With a 16 A or 25 A fuse the power output is lower so as not to overload the fuse. This is selected when starting up the power unit.
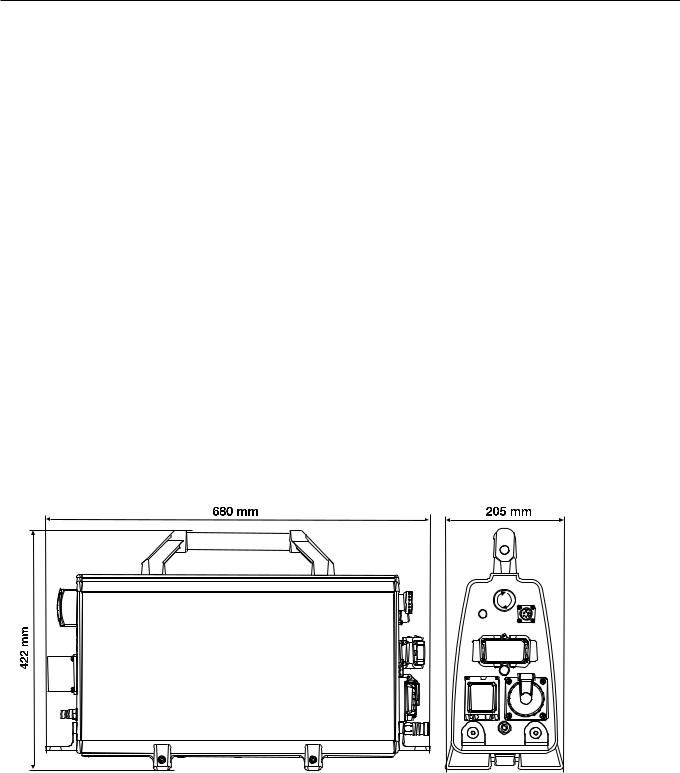
•Connect the water hose to the incoming water connector.
The power unit is equipped with an electric water valve, which is closed when the power pack is activated. When the power pack is without electricity, the valve is open to be able to drain water coolant if there is a risk of freezing.
•Connect the supplied power lead and water hose from the power unit to the saw unit.
•Connect the remote control using the supplied Canbus cable. Tighten the cable connector screws by hand.
English – 9

SETTINGS AND ADJUSTMENTS
Start menu
The start menu is shown each time the power to the hydraulic unit is switched on.
•The remote control display shows "SELECT FUSE". The last alternative used is preset. Choose another gear using the arrow keys. Press OK to confirm the selection.
With a 25 A fuse you can use approx. 70% of the full output. With 16 A you can use approx. 50% of full output. The function is intended to obtain as high output as possible without overloading the fuse.
•The remote control display shows "SELECT GEAR". The last alternative used is preset. Choose another gear using the arrow keys. Press OK to confirm the selection.
On gear 1, the speed range is 600-900 rpm and on gear 2 the speed range is 800-1200 rpm. Check that the mechanical gear on the saw unit is corresponding with the electrically set gear in the remote control.
•The display now shows "HUSQVARNA PP-480 HF PRESS START".
Operations menu
As long as the power unit has voltage but the blade rotation stands still, the display shows "Husqvarna PP-480 HF PRESS START".
Before starting, all controls must be turned to zero position. If this is not done, a message in the display will prompt this when the start button is pushed. "TURN OFF TRAVEL FEEDING" or "TURN OFF DEPTH FEEDING" or "TURN OFF BLADE".
When the blade rotation is started, the display shows "X RPM, Y%, Z A", where X equals the engine speed, Y equals the output percentage of the maximum effect, and Z equals the selected fuse.
By navigating with the arrow keys, the following settings can be reached:
•Water coolant
•Select language
•Id power unit
•Time
•Total machine time
•Rotation direction
•Battery status
Water coolant
Select mode AUTO or ON. If AUTO is selected the water cooling is activated when the blade rotation starts. If ON is selected the water valve is always open. The water can be switched of manually with the water tap. The default mode at startup is AUTO. Selected mode is shown in the display. Change mode by pressing OK.
Select language
Using this sub-menu you can set the language you wish to use on the display.
Scroll using the arrow keys until the required language is shown. Confirm with 'OK”.
Id power unit
The display shows the identity number for the power unit.
Time
The function is used to measure the amount of time a job takes. The time is counted from when the saw starts working.
Select:
•ON, to enable.
•OFF, to disable.
•RESET TIME, to reset.
Browse with the arrow keys and confirm with "OK".
Total machine time
Here the total operation time of the power unit is shown. The time is shown in hours and minutes (hhhh:mm).
Rotation direction
Here you can set the rotation direction of the blade. Select standard or backwards by pressing "OK".
Battery status
Here you can see the battery status of the remote control for machines with radio communication.
•"NO BATT. CONNECT" - The machine does not have radio communication.
•"CHARGING BATTERY" - The CAN cable is connected and the battery is charging.
•"0% BATTERY 100%" - The bar shows the battery status.
•"BATTERY FULL" - The battery is fully charged.
10 – English
STARTING AND STOPPING
Before starting
Before starting the saw, check that:
•The incoming electrical cable has been connected to a fuse rated at least 16 A.
•The power lead is connected to the saw unit.
•All controls on the remote control have been set to zero position. If this is not done, a message in the display will prompt this when the start button is pushed.
•Enclose the area to be cut so that unauthorised persons can not be injured or disturb the operator.
IMPORTANT! A higher speed than the recommended speed can result in personal injury and damage to the equipment.
Starting
•Check that the emergency stop button on the power unit and the stop button on the remote control are not pressed by turning the them clockwise.
•Turn the main switch to "1"-position.
ON


•The power unit is activated and this is shown by the indicator light shining.
The water valve in the power unit is now closed.This valve opens again when the blade rotation is started.
•The remote control display shows "SELECT FUSE". The last alternative used is preset. Choose another gear using the arrow keys. Press OK to confirm the selection.
With a 25 A fuse you can use approx. 70% of the full output. With 16 A you can use approx. 50% of full output. The function is intended to obtain as high output as possible without overloading the fuse.
The power output for the chosen fuse is shown in percent on the display.
•The remote control display shows "SELECT GEAR". The last alternative used is preset. Choose another gear using the arrow keys. Press OK to confirm the selection.
Check that the mechanical gear on the saw unit is corresponding with the electrically set gear in the remote control. On gear 1, the speed range is 600-900 rpm and on gear 2 the speed range is 800-1200 rpm. For more information on recommended blades and speeds, see "Recommended blade speeds" in the "Technical data" section.
English – 11

STARTING AND STOPPING
•The display now shows "HUSQVARNA PP-480 HF PRESS START".
•On the saw unit WS 480 HF, the blade’s rotation direction is adjustable.
Press "arrow up" on the remote control unit’s membrane key to select the direction. The display shows "BLADE ROTATION STANDARD" or "BLADE ROTATION REVERSE". To change the current selection, press "OK". This must only be done when the blade is not moving.
•Start the blade rotation by pushing and holding the green start button while turning the control for rotation direction clockwise. There is a three seconds delay before the blade rotation starts. You can follow the countdown in the display. The delay is to cool down the power unit which can get hot when active and no cooling water is circulating.
•There is no delay If selected mode for water coolant is ON.
•The water cooling starts automatically when the knob for blade rotation is turned from its zero position. NOTE! Applies only if the water coolant mode is set to AUTO.The water flow is adjusted with the ball valve at the incoming water connector on the power unit.
•Start the depth feeding of the blade by turning the depth feeding control in the desired direction.
•Start the saw unit's travel feed by turning the travel feed control in the desired direction.
•Read through the manual supplied with the wall saw for further instructions in sawing technique.
Stopping
•To switch off the blade rotation, turn the blade rotation control anti-clockwise back to its zero position.
• The water coolant is turned off automatically with a 3 sec delay. NOTE! Applies only if the water coolant mode is set to AUTO.
Also turn the depth feeding and travel feeding controls to their zero positions.
•Turn the main switch on the power unit to "0"-position.
After work is completed
Dismantling the equipment
•Disconnect the incoming power lead and incoming water hose.
•Disconnect the power lead and water hose between the power unit and the saw unit.
•If there is a risk of freezing, the machine must be drained of any remaining water coolant.
Cleaning
Make sure to keep the connectors and pins clean. Clean with a rag or brush.
Do not use a high pressure washer to clean the power unit.
12 – English
MAINTENANCE
Service
IMPORTANT! All types of repairs may only be carried out by authorised repairmen. This is so that the operators are not exposed to great risks.
After 100 hours of operation, the message "Time for servicing" is displayed. The entire equipment shall then be taken to an authorized Husqvarna dealer for servicing. The message reappears 100 hours after each service.
Error messages
In case of any defects, an error message appears on the display. Follow the directions supplied or contact an authorized dealer.
Fault Code |
Error message |
Procedure |
Steps |
|
F01 |
MOTOR |
Water coolant lacking/insufficient |
Check that the water coolant flows to the saw motor and |
|
OVERHEATED |
to saw motor. |
that it is max. 25ºC and min 3.5 l/min. |
||
|
||||
|
|
|
|
|
|
|
|
Check that the water coolant flows to the power unit and |
|
|
|
|
that it is max 25°C and min 3.5 l/min. If the message pops |
|
F02 |
POWER |
Water coolant lacking/insufficient |
up when the blade rotation is started - go to the operations |
|
OVERHEATED |
to power unit. |
menu and ”Water coolant” and select ”ON”. Let the water |
||
|
||||
|
|
|
coolant circulate the power unit for a minute before you turn |
|
|
|
|
the blade rotation on again. |
|
|
|
|
|
|
|
|
Low voltage supply to the power |
Check the voltage during operation. Check that all three |
|
F03 |
LOW VOLTAGE |
phases exist. Check that incoming cables have sufficient |
||
|
|
unit. |
cross-sectional area. |
|
|
|
|
||
|
|
|
|
|
F04 |
HIGH VOLTAGE |
High voltage to the power unit. |
Check the voltage during operation. This message is |
|
shown mainly when using a generator as power source. |
||||
|
|
|
||
|
|
|
|
|
|
|
|
Check that the power lead is fitted correctly and that it is not |
|
F05 |
OVER CURRENT |
Over current to saw motor |
damaged. The message can appear in case of a loose |
|
|
|
|
contact. |
|
|
|
|
|
|
F06 |
NO HALL SENS. |
Fault on HALL-sensor card for |
Take the equipment to an authorized service shop. |
|
TRAVEL MOTOR |
travel feed |
|||
|
|
|||
|
|
|
|
|
F07 |
NO HALL SENS. |
Fault on HALL-sensor card for |
Take the equipment to an authorized service shop. |
|
DEPTH MOTOR |
depth feeding |
|||
|
|
|||
|
|
|
|
|
|
|
|
To reset, reverse the feeding function. If the fault message |
|
F08 |
TRAVEL MOTOR |
Travel motor overloaded. |
returns, grease the feeder gears, clean the rails and adjust |
|
OVERLOADED |
the saw carriage. If this does not help, hand in the |
|||
|
|
|||
|
|
|
equipment to an authorized Husqvarna service workshop. |
|
|
|
|
|
|
|
|
|
To reset, reverse the feeding function. If the fault message |
|
F09 |
DEPTH MOTOR |
Depth motor overloaded. |
returns, grease the feeder gears. If this does not help, hand |
|
OVERLOADED |
in the equipment to an authorized Husqvarna service |
|||
|
|
|||
|
|
|
workshop. |
|
|
|
|
|
|
F10 |
BLADE JAM |
Blade can not rotate. |
Remove the blade from the cut and start the blade rotation. |
|
|
GROUND FAULT |
Incorrect earthing of power pack/ |
Check the incoming electrical connection to the power pack |
|
F11 |
saw or no saw unit connected to |
and that the saw unit is connected to the power pack. If this |
||
OR NO SAW HEAD |
does not help, hand in the equipment to an authorized |
|||
|
|
the power pack. |
Husqvarna service workshop. |
|
|
|
|
||
|
|
|
|
|
F12 |
NON-COMPATIBLE |
Incorrect saw unit connected to |
Connect a compatible saw unit to the power pack. |
|
SAW UNIT |
the power pack. |
|||
|
|
|||
|
|
|
|
|
|
NO CONTACT |
No contact between power unit |
|
|
F13 |
CHECK CAN- |
Replace the Canbus-cable. |
||
and remote control |
||||
|
CABLE |
|
||
|
|
|
||
|
|
|
|
|
|
|
|
Check that the power pack is activated and that the green |
|
|
NO RADIO |
No radio contact between remote |
indicator light is on. If this does not help, hand in the |
|
F14 |
equipment to a Husqvarna service workshop.The machine |
|||
|
CONTACT |
control and power unit. |
can be used with the Canbus cable between the power |
|
|
|
|
||
|
|
|
pack and remote control. |
|
|
|
|
|
Daily maintenance
Regularly check:
•Any abnormal noises.
•Make sure to keep the connectors and pins clean. Clean with a rag or brush.
•Do not use a high pressure washer to clean the power unit.
English – 13
TECHNICAL DATA |
|
PP 480 HF |
|
Max. output, kW |
20 (32 A) |
Rated current, A |
16-32 |
Input voltage, V |
380-480 V, 50-60 Hz |
Output voltage, V |
340 V, 0-500 Hz |
Sec. output voltage, V |
24 V, 0-1500 Hz |
Power supply |
3P+PE (4-pin) / 3P+N+PE (5-pin) |
1x230V one phase outlet |
Only 5-pin machines |
Effect generator - min., kWA |
|
400V, 16A |
12 |
400V, 25A |
20 |
400V, 32A |
24 |
Weight, kg/lbs |
23/51 |
Cooling water pressure - max, bar |
7 |
Water coolant flow min., l/min |
3,5 |
Max cooling water temperature at 3,5 l/min, ºC |
25 |
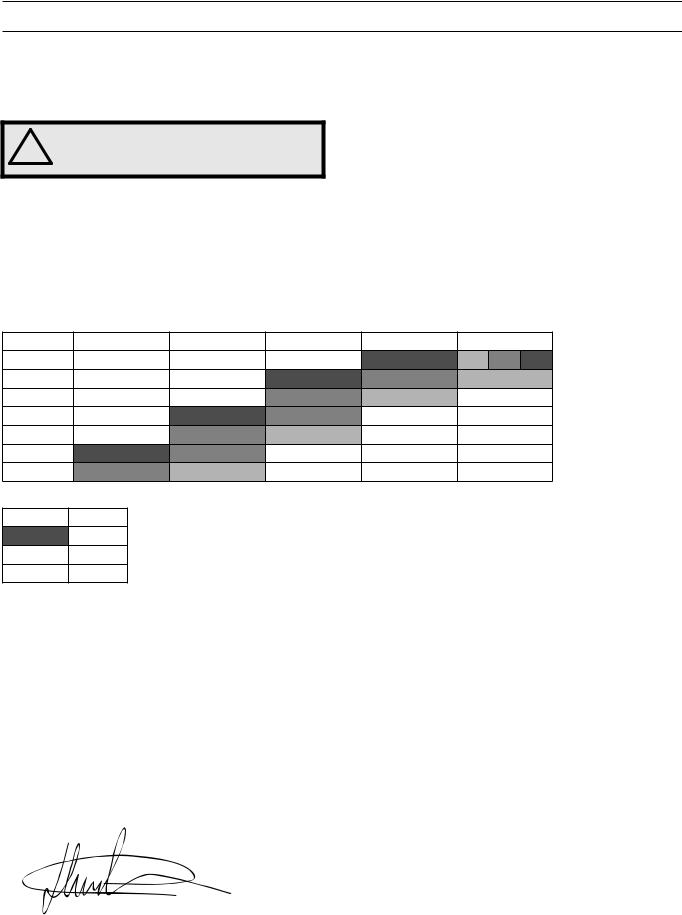
Dimensions
14 – English
TECHNICAL DATA
Blade
Recommended blade speed
! |
WARNING! Cutting at too high revs can cause damage to the blade and lead to personal injury.
Speed, rpm |
|
|
|
Gear 1 |
600-900 |
|
|
Gear 2 |
800-1200 |
|
|
When sawing at 800-900 rpm, a higher sawing output is obtained if gear 1 is used.
Follow the blade manufacture´s recommendations regarding material and blade speed when choosing blade. When cutting in hard concrete, a lower speed or a more shallow cut is required compared to cutting in soft concrete.
600 mm (24”) 800 mm (32”) 1000 mm (40”) 1200 mm (48”) 1600 mm (63”)
600 rpm
700 rpm
800 rpm
900 rpm
1000 rpm
1100 rpm
1200 rpm
Concrete
Hard
 Medium
 Soft
Soft
EC-declaration of conformity
(Applies to Europe only)
Husqvarna AB, SE-433 81 Gothenburg, Sweden, tel: +46-31-949000, declares under sole responsibility that the power unit Husqvarna PP 480 HF from 2010´s serial numbers and onwards (the year is clearly stated in plain text on the type plate with subsequent serial number) is in conformity with the requirements of the COUNCIL’S DIRECTIVES:
•of May 17, 2006 "relating to machinery" 2006/42/EC
•of December 15, 2004 ”relating to electromagnetic compatibility” 2004/108/EC.
•of December 12, 2006 ”relating to electrical equipment” 2006/95/EC.
The following standards have been applied: EN ISO 12100:2003, EN 55014-1:2006, EN 55014-2/A1:2001, EN 61000-3-11:2000, EN 60204-1:2006.
Göteborg December 29, 2009
Henric Andersson
Vice President, Head of Power Cutters and Construction Equipment
Husqvarna AB
(Authorized representative for Husqvarna AB and responsible for technical documentation.)
English – 15
ACLARACIÓN DE LOS SÍMBOLOS
Símbolos en la máquina:
¡ATENCIÓN! La máquina, si se utiliza de forma errónea o descuidada, puede ser una herramienta peligrosa que puede causar daños graves e incluso la muerte al usuario y a otras personas.
Lea detenidamente el manual de instrucciones y asegúrese de entender su contenido antes de utilizar la máquina.
Utilice siempre:
• Casco protector homologado
• Protectores auriculares homologados
•Gafas protectoras o visor
•Máscara respiratoria
Este producto cumple con la directiva CE vigente.
¡ATENCIÓN! Corriente intensa.
Etiquetado ecológico. El símbolo en el producto o en su envase indica que no se puede tratar este producto como desperdicio doméstico. Deberá por lo tanto depositarse en un centro de recogida adecuado para el reciclado de equipos eléctricos y electrónicos.
Haciendo que este producto sea manipulado adecuadamente, se ayuda a evitar consecuencias negativas potenciales para el medio ambiente y las personas, lo que puede ocurrir con la manipulación inadecuada como residuos del producto.
Para obtener información más detallada sobre el reciclado de este producto, contacte con la oficina municipal local, con el servicio de eliminación de desperdicios domésticos o con la tienda donde compró el producto.
Símbolos en el manual de instrucciones:
El control y/o mantenimiento de la máquina debe hacerse con el motor parado y el enchufe desenchufado.
Utilice siempre guantes protectores homologados.
La máquina debe limpiarse regularmente.
Control visual.
Debe utilizarse gafas protectoras o visor.
16 – Spanish

|
ÍNDICE |
Índice |
|
ACLARACIÓN DE LOS SÍMBOLOS |
|
Símbolos en la máquina: ............................................. |
16 |
Símbolos en el manual de instrucciones: .................... |
16 |
ÍNDICE |
|
Índice ........................................................................... |
17 |
¿QUÉ ES QUÉ? |
|
Piezas de la unidad eléctrica ....................................... |
18 |
INSTRUCCIONES DE SEGURIDAD |
|
Antes de utilizar una nueva unidad eléctrica ............... |
19 |
Equipo de protección personal .................................... |
19 |
Equipo de seguridad de la máquina ............................ |
20 |
Instrucciones generales de seguridad ......................... |
21 |
Instrucciones generales de trabajo .............................. |
22 |
PRESENTACIÓN |
|
PP 480 HF ................................................................... |
23 |
MONTAJE |
|
Montaje / instalación del equipo .................................. |
24 |
REGLAJES Y AJUSTES |
|
Menú de arranque ........................................................ |
25 |
Menú de funcionamiento ............................................. |
25 |
ARRANQUE Y PARADA |
|
Antes de arrancar ........................................................ |
26 |
Arranque ...................................................................... |
26 |
Parada ......................................................................... |
27 |
Después de terminar el trabajo .................................... |
27 |
MANTENIMIENTO |
|
Servicio ........................................................................ |
28 |
Mantenimiento diario ................................................... |
29 |
DATOS TECNICOS |
|
PP 480 HF ................................................................... |
30 |
Declaración CE de conformidad .................................. |
31 |
Spanish – 17

¿QUÉ ES QUÉ?
Piezas de la unidad eléctrica
1 |
Unidad eléctrica |
12 |
Botón de arranque |
2 |
Mango |
13 |
Rotación de la hoja y activación del agua refrigerante |
3 |
Toma eléctrica |
14 |
Avance longitudinal |
4 |
Interruptor principal |
15 |
Avance de entrada |
5 |
Conexión del cable |
16 |
Cable CAN-BUS |
6 |
Parada de emergencia |
17 |
Conductor de alimentación |
7 |
Puerto CAN-BUS |
18 |
Manguera de agua |
8 |
Indicador de corriente |
19 |
Toma monofásica (solo para dispositivos con 5 pines) |
9 |
Conexión de salida de agua |
20 |
Interruptor de circuito de pérdida a tierra (solo para |
10 |
Conexión de entrada de agua |
|
dispositivos con 5 pines) |
|
|
||
11 |
Mando a distancia |
21 |
Manual de instrucciones |
|
|
||
|
|
22 |
DVD - Guía del usuario del producto |
18 – Spanish
INSTRUCCIONES DE SEGURIDAD
Antes de utilizar una nueva unidad eléctrica
•Lea detenidamente el manual de instrucciones y asegúrese de entender su contenido antes de utilizar la máquina.
•Consulte el DVD suministrado para obtener consejos sobre técnicas de funcionamiento.
•Esta máquina sólo está destinada a ser utilizada junto con Husqvarna WS 482 HF. Está prohibida cualquier otra aplicación.
•Lea el manual de instrucciones suministrado con la sierra de pared antes de utilizar la unidad hidráulica.
•La máquina puede ocasionar lesiones graves. Lea atentamente las instrucciones de seguridad. Aprenda a utilizar la máquina.
Emplee siempre el sentido común
Es imposible abarcar todas las situaciones en las que puede encontrarse. Utilice siempre el equipo con cuidado y sentido común. Evite todas aquellas situaciones que considere que sobrepasan sus capacidades. Si, después de leer estas instrucciones, no está seguro del procedimiento que debe seguir, consulte a un experto antes de utilizar el equipo.
No dude en ponerse en contacto con su distribuidor si tiene preguntas acerca del uso de la máquina. Estaremos encantados de poder aconsejarle y ayudarle a utilizar la máquina de manera eficaz y segura.
Diríjase a su distribuidor de Husqvarna para que revise la máquina regularmente y para que realice ajustes y reparaciones básicas.
Toda la información y todos los datos contenidos en este manual de instrucciones son vigentes en la fecha de impresión del manual.
! |
¡ATENCIÓN! No está permitido modificar el |
diseño original de la máquina, por ningún |
|
motivo, sin la autorización del fabricante. |
|
|
Utilice siempre accesorios originales. Las |
|
modificaciones y/o el uso de accesorios no |
|
autorizados comportan riesgo de daöos |
|
personales graves y peligro de muerte para |
|
el usuario y otras personas. |
Equipo de protección personal
! |
¡ATENCIÓN! Para trabajar con la máquina |
debe utilizarse un equipo de protección |
|
personal homologado. El equipo de |
|
|
protección personal no elimina el riesgo de |
|
lesiones, pero reduce su efecto en caso de |
|
accidente. Pida a su distribuidor que le |
|
asesore en la elección del equipo. |
•Casco protector
•Protectores auriculares
•Gafas protectoras o visor
•Máscara respiratoria
•Guantes resistentes de agarre seguro.
•Prendas de vestir ceñidas, resistentes y cómodas que permitan una libertad de movimientos total.
•Botas con puntera de acero y suela antideslizante.
•Tenga siempre a mano el equipo de primeros auxilios.
Spanish – 19
INSTRUCCIONES DE SEGURIDAD
Equipo de seguridad de la máquina
En este capítulo se describen los componentes de seguridad de la máquina, su función y el modo de efectuar el control y el mantenimiento para garantizar un funcionamiento óptimo. En cuanto a la ubicación de estos componentes en su máquina, vea el capítulo Qué es qué.
! |
¡ATENCIÓN! Nunca utilice una máquina que |
tenga un equipo de seguridad defectuoso. |
|
Efectúe el control y mantenimiento del |
|
|
equipo de seguridad de la máquina como se |
|
describió en este capítulo. Si su máquina no |
|
pasa todos los controles, entréguela a un |
|
taller de servicio para su reparación. |
¡IMPORTANTE! Todos los trabajos de servicio y reparación de la máquina requieren una formación especial. Esto es especialmente importante para el equipo de seguridad de la máquina. Si la máquina no pasa alguno de los controles indicados a continuación, acuda a su taller de servicio local. La compra de alguno de nuestros productos le garantiza que puede recibir un mantenimiento y servicio profesional. Si no ha adquirido la máquina en una de nuestras tiendas especializadas con servicio, solicite información sobre el taller de servicio más cercano.
Botón de arranque
Mantenga pulsado el botón de arranque para que la hoja empiece a girar. Así evitará que la hoja gire por accidente.
Control del botón de arranque
•Gire el pulsador para activar la rotación de la hoja sin mantener pulsado el botón de arranque.
La rotación de la hoja no debería accionarse.
•Mantenga pulsado el botón de arranque y gire el pulsador para que la hoja rote.
La rotación de la hoja se pondrá en marcha.
Parada de emergencia y botón de parada
La unidad eléctrica dispone de parada de emergencia y el control remoto tiene un botón de parada. Se utilizan para parar rápidamente la unidad eléctrica.
Verifique la parada de emergencia y el botón de parada
•Ponga en marcha la rotación del disco.
•Pulse la parada de emergencia de la unidad eléctrica y compruebe que la rotación de la hoja se detiene. Compruebe de igual modo el botón de parada situado en el control remoto.
Interruptor principal
El interruptor principal se utiliza para conectar y desconectar la unidad del suministro eléctrico. El interruptor principal debe estar en la posición «0» al conectar el cable de entrada.
Control del interruptor principal
•Seleccione la posición «0» del interruptor principal.
•Intente poner en marcha la sierra. La sierra no debe accionarse.
20 – Spanish
Loading...