


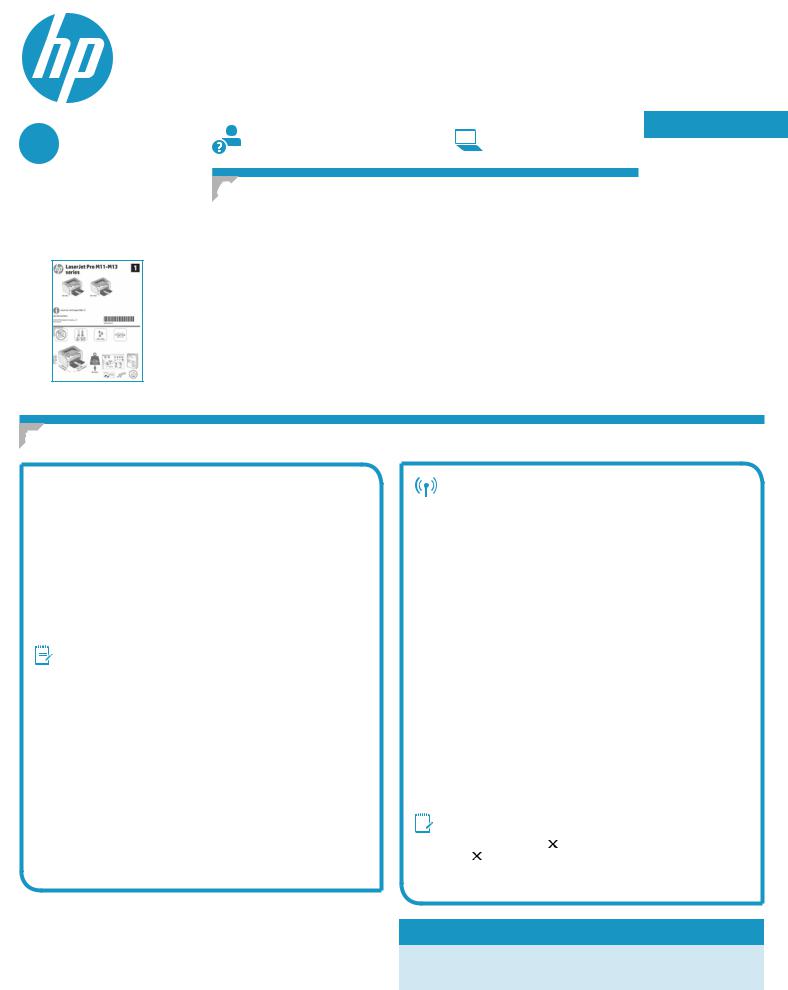
LaserJet Pro M11-M13 series |
2 |
Getting Started Guide |
IMPORTANT:
First, follow Steps 1 - 3 on the printer hardware setup poster, then continue with Step 4.
www.hp.com/support/ljm11-m13 |
www.register.hp.com |
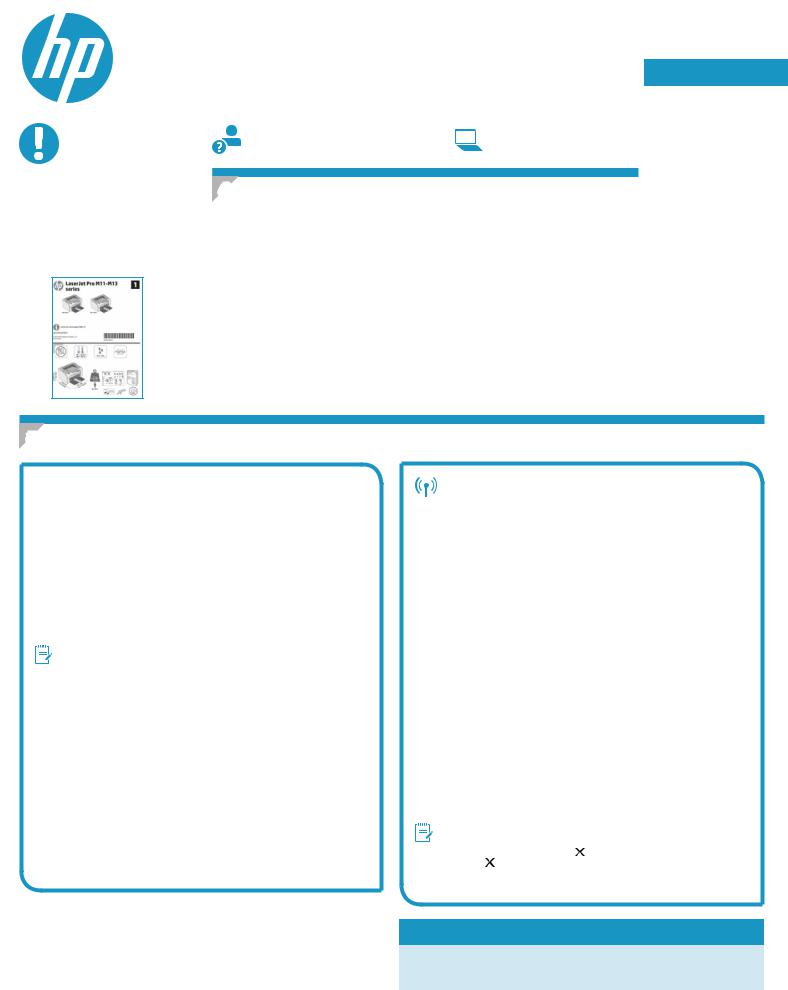
4. Set up the Control Panel
Attheprintercontrolpanel,checktheLEDstatusbeforebeginningsoftwareinstallation.
English.............. |
1 |
Français............. |
3 |
Deutsch............. |
5 |
Italiano.............. |
7 |
Español.............. |
9 |
Català.............. |
11 |
Dansk.............. |
13 |
Nederlands...... |
15 |
Eesti................ |
17 |
Suomi.............. |
19 |
Latviešu........... |
21 |
Lietuvių........... |
23 |
Norsk............... |
25 |
Português........ |
27 |
Svenska........... |
29 |
5. Select a connection method
 USB connection directly between the printer and the computer
UseanA-to-BtypeUSBcable.
Windows
1.For Windows 7 or earlier, do not connect the USB cable before installing the software. The installation process prompts to connect the cable at the appropriate time. If the cable is already connected, restart the printer when installation prompts to connect the cable.
2.Continue to “6.Locateordownloadthesoftwareinstallationfiles.”
NOTE: During software installation, select the option to Directly connect this computer using a USB cable.
Mac
1.Connect the USB cable between the computer and the printer before installing the software.
2.Continue to “6.Locateordownloadthesoftwareinstallationfiles.”
Perform a wireless installation (M12w wireless models only)
Before starting the installation, verify that the wireless access point is working correctly. Make sure that the printer, router, and computer are all turned on and that the computer is connected to the same wireless network that the printer will be connected to.
If there is not a solid blue light on the top of the printer, go to Process A. If there is a solid blue light on the top of the printer, go to Process B.
Process A
1.Place the CD in the CD-ROM drive, and then click Install. When the Printer connections dialog appears, choose Configuretoprintover the Wireless Network.
2.Follow the on-screen instructions.
Process B
1.Place the CD in the CD-ROM drive, and then click Install. When the Printer connections dialog appears, choose Connecttoaconfigured
Wireless Network printer.
2.Follow the on-0screen instructions.
3.Select the printer detected by the software. If the printer cannot be detected by the installer, manually input the printer’s IP address to continue the installation.
 NOTE: Printaconfigurationpagetofindtheprinter’sIPaddress.Atthe printer control panel, press and hold the Cancel button for 5 seconds, and then release the Cancel buttontoprinttheconfigurationpage.The IPaddressislistedontheconfigurationpageintheNetworkInformation section.
 ManuallyconfiguretheIPaddress
See the printer user guide for information on how to manually configure the IP address www.hp.com/support/ljm11-m13.
1
6. Locateordownloadthesoftwareinstallationfiles
Install from the printer CD
ForWindows,thesoftwareinstallationfilesareprovidedontheCDthatcamewith the printer.
For OS X, the installer file on the CD includes a DMG file.
Install notes
Formoredetailsaboutthesoftwarefortheprinter,seetheinstallnotesfileonthe printer CD.
 Download from the web
1.Go to www.hp.com/support/ljm11-m13.
2.Under Download options, click Drivers,Software&Firmware, and then select the appropriate operating system.
3.Click Download.
4.Follow the on-screen instructions.
5.Continue with “7.Installthesoftware”.


 NOTE: HPEasyStartcanalsobedownloadedbydoingthefollowing:
1.Go to 123.hp.com
2.Select the printer model, and then click Begin.
3.Launchthesoftwarefilefromthefolderwherethefilewassaved,andcontinue with “7.Installthesoftware”.
7. Install the software
Windows full solution
1.Insert the printer CD into the computer, or launch the software installationfiledownloadedfromtheweb.
2.Follow the on-screen instructions. When prompted to select a connection type, select the appropriate option:
•Configure to print over the Wireless Network
•Configure to print using USB
CAUTION: Do not connect the USB cable until prompted by the installation program.
•Connect to a configured Wireless Network Printer
For wireless models only |
|
3. Whentheinstallationiscomplete,printaconfigurationpage |
makesure |
that the printer has a SSID name. (Press and hold the Cancel |
button until |
thereadylightblinks,andthenreleaseittoprintaconfigurationpage).
4.When installation is complete, disconnect the USB cable.To print from a phone or tablet, connect the device to the same wireless network as the printer.
Windows basic installation
1.Turn on the printer.
2.Disconnect the USB cable from the printer and the computer (if it is alreadyconnected).Iftheprinterisconnectedtothenetwork,leaveit connected.
3.Go to www.hp.com/support/ljm11-m13.
4.Select a printer or category from the list, then click Drivers, and then download the installation software for the printer.
OS X full solution
1.Launchthesoftwareinstallation.dmgfiledownloadedfromtheweb.
2.The software installer detects the language of the operating system, and then it displays the main menu of the installation program in the same language.
3.The Installation Options screen details the software to be installed. Click the Install button.
4.Follow the on-screen instructions to install the software.
5.Attheendofthesoftwareinstallationprocess,usetheHP Utility Setup Assistant toconfigureprinteroptions.
OS X basic installation
To install basic print drivers without running the HP full solution software from the CD or hp.com download, follow these steps:
1.Connect the printer to the computer or network.
2.From System Preferences, and click Printers and Scanners.
3.Click the plus [+] button on the bottom left, and select M11-M13 using the driver named HP Printer.
8.  Mobile and wireless printing (optional)
8.1 Connectthedevicetothewirelessnetwork
To print from a phone or tablet, connect the device to the same wireless network as the printer.
NewerAndroiddevices(4.4ornewer)Open the item to print, and select the
Menu button. Select Print, select the printer, and select Print.
Some devices require downloading the HP Print Service plugin app from the Google Play store.
OlderAndroidDevices(4.3orolder)Download the HP ePrint app from the Google Play store.
Windows Phone DownloadtheHPAiORemoteappfromtheWindowsStore.
 Learn more about mobile printing
To learn more about other mobile printing options, including additional ePrint solutions, scan the QR code, or see the “Mobile printing” section of the user guide.
8.2 HP Wireless Direct (M12w)
HP Wireless Direct allows Wi-Fi capable devices, such as smart phones, tablets, or computers, to make wireless network connection directly to the printer without using a wireless router or access point. Connect to the printer’s
HPwirelessdirectsignalthesamewayWi-Ficapabledevicesareconnectedto a new wireless network or hotspot.
Enable HP Wireless Direct
Enable HP Web Services in the HP Embedded Web Server (EWS) by following these steps:
1.Connecttheprintertoanetwork,andprintaconfigurationpagetogetthe printer IP address.


 NOTE: TosettheIPaddressmanuallyorconfigureitautomatically,see
“Configurethenetworkproduct”in the user guide.
2.Open a web browser, and enter the printer IP address into the address line.
Example IP address: 192.168.0.1
2

Guide de démarrage LaserJet Pro dessériesM11-M13
|
IMPORTANT: |
www.hp.com/support/ljm11-m13 |
www.register.hp.com |
||
|
|
|
|||
Suivez tout d’abord les |
|
|
|||
|
|
||||
4. Configurerlepanneaudecommande |
|||||
étapes1à3indiquées |
|||||
sur le poster d’installation |
Surlepanneaudecommandedel’imprimante,vérifiezl’étatdesvoyantsavantdecommencer |
||||
matérielle de l’imprimante, |
|||||
l’installation du logiciel. |
|
||||
puis passez à l’étape4. |
|
|
|||
|
|
|
|
|
|
|
|
|
|
|
|
English.............. |
1 |
Français............. |
3 |
Deutsch............. |
5 |
Italiano.............. |
7 |
Español.............. |
9 |
Català.............. |
11 |
Dansk.............. |
13 |
Nederlands...... |
15 |
Eesti................ |
17 |
Suomi.............. |
19 |
Latviešu........... |
21 |
Lietuvių........... |
23 |
Norsk............... |
25 |
Português........ |
27 |
Svenska........... |
29 |
5. Sélectionner une méthode de connexion
 Connexion USB directement entre l’imprimante et l’ordinateur
Utilisez un câble USB de type A-à-B.
Windows
1.Pour Windows 7 ou les systèmes d’exploitation plus anciens, ne branchez pas le câble USB avant d’installer le logiciel. Le processus d’installation vous invite à connecter le câble au moment opportun. Si le câble est déjà connecté, redémarrez l’imprimante lorsque le processus d’installation vous invite à connecter le câble.
2.Passez à l’étape « 6.Localiseroutéléchargerlesfichiers d’installationdulogiciel».
REMARQUE:Lors de l’installation du logiciel, sélectionnez l’option pour
Connecterdirectementcetordinateuràl’aided’uncâbleUSB.
Mac
1.Pour Mac, branchez le câble USB entre l’ordinateur et l’imprimante avant d’installer le logiciel.
2.Passez à l’étape « 6.Localiseroutéléchargerlesfichiers d’installationdulogiciel».
Installationsansfil(modèlessansfilM12w uniquement)
Avant de commencer l’installation, vérifiez que le point d’accès sans fil fonctionne correctement. Assurez-vous que l’imprimante, le routeur et l’ordinateur sont tous sous tension et que l’ordinateur est connecté au réseau sans fil auquel vous souhaitez connecter l’imprimante.
Si le voyant bleu sur le dessus de l’imprimante n’est pas allumé, passez au
ProcessusA.
Si le voyant bleu sur le dessus de l’imprimante est allumé, passez au
ProcessusB.
ProcessusA
1.Placez le CD dans le lecteur de CD-ROM, puis cliquez sur Installer.
LorsquelaboîtededialoguedeConnexions de l’imprimante s’affiche, sélectionnez Configurerpourimprimersurunréseausansfil.
2.Suivez les instructions affichées à l’écran.
ProcessusB
1.Placez le CD dans le lecteur de CD-ROM, puis cliquez sur Installer.
Lorsque la boîte de dialogue de Connexions de l’imprimante apparaît, sélectionnez Connecter à une imprimante en réseau sans filconfigurée.
2.Suivez les instructions affichées à l’écran.
3.Sélectionnez l’imprimante détectée par le logiciel. Si l’installateur ne peut pas détecter l’imprimante, saisissez manuellement l’adresse IP de l’imprimante pour continuer l’installation.
REMARQUE:Imprimez une page de configuration pour déterminer
l’adresse IP de l’imprimante. Sur le panneau |
commande de |
l’imprimante, appuyez sur la touche Annuler |
et maintenez- |
enfoncée pendant 5 secondes, puis relâchez la touche Annuler pour imprimer la page de configuration. L’adresse IP est mentionnée sur la page de configuration dans la section Information réseau.
 Configurermanuellementl’adresseIP
Consultez le manuel de l’utilisateur de l’imprimante pour obtenir des informations sur la configuration manuelle de l’adresseIP www.hp.com/support/ljm11-m13.
3
6. Localiseroutéléchargerlesfichiersd’installationdulogiciel
Installation à partir du CD de l’imprimante
Pour Windows, les fichiers d’installation du logiciel sont fournis sur le CD de l’imprimante.
Pour OS X, le fichier d’installation sur le CD comprend un fichier DMG.
Notes d'installation
Pour plus de détails sur le logiciel de l'imprimante, consultez le fichier des notes d'installation sur le CD de l'imprimante.
 Téléchargement à partir du Web
1.Allez à www.hp.com/support/ljm11-m13.
2.Dans les options Téléchargement, cliquez sur Pilotes,Logicielet micrologiciel, puis sélectionnez le système d’exploitation approprié.
3.Cliquez sur Télécharger.
4.Suivez les instructions affichées à l’écran.
5.Passez à l’étape «7.Installerlelogiciel».

 REMARQUE:HP Easy Start peut également être téléchargé comme suit :
1.Allez à 123.hp.com
2.Sélectionnez le modèle de l’imprimante, puis cliquez sur Commencer.
3.Lancez le fichier logiciel à partir du dossier dans lequel il a été enregistré, puis passez à l’étape «7.Installerlelogiciel».
7. Installer le logiciel
SolutioncomplèteWindows
1.Insérez le CD de l’imprimante dans l’ordinateur, ou lancez le fichier d’installation du logiciel téléchargé à partir du Web.
2.Suivez les instructions affichées à l’écran. Lorsque l’on vous invite à choisir un type de connexion, sélectionnez l’option appropriée :
•Configurer pour imprimer sur un réseau sans fil
•Configurer pour imprimer à l’aide de l’USB
ATTENTION: Ne connectez pas le câble USB avant d’y avoir été invité par le programme d’installation.
•Connecter à une imprimante en réseau sans fil configurée
Pourmodèlessansfiluniquement
3.Une fois l’installation terminée, imprimez une page de configuration pour vérifier l’imprimante dispose d’un nom SSID. (Appuyez sur la touche Annuler et maintenez-la enfoncée jusqu’à ce que le voyant Prêt clignote, puis relâchez la touche pour imprimer une page de configuration.)
4.Lorsque l’installation est terminée, débranchez le câble USB. Pour imprimer à partir d’un téléphone ou d’une tablette, connectez le périphérique au même réseau sans fil que l’imprimante.
Installation de base Windows
1.Mettez l’imprimante sous tension.
2.Débranchez le câble USB de l’imprimante et de l’ordinateur (s’il est déjà branché). Si l’imprimante est connectée au réseau, laissez-la connectée.
3.Allez à www.hp.com/support/ljm11-m13.
4.Sélectionnez une imprimante ou une catégorie dans la liste, puis cliquez sur Pilotes, et téléchargez le logiciel d’installation de l’imprimante.
SolutioncomplèteOSX
1.Lancez le fichier .dmg d’installation du logiciel que vous avez téléchargé à partir du Web.
2.Le logiciel d’installation détecte la langue du système d’exploitation, puis affiche le menu principal du programme d’installation dans la même langue.
3.L’écran Options d’installation indique les logiciels à installer.
Cliquez sur le bouton Installer.
4.Suivez les instructions à l’écran pour installer le logiciel.
5.À la fin du processus d’installation du logiciel, utilisez l’assistant deconfigurationdeHPUtility pour configurer les options de l’imprimante.
Installation de base d’OS X
Pour installer les pilotes d’impression de base sans exécuter le logiciel de la solution complète HP à partir du CD ou du téléchargement à partir de hp.com, procédez comme suit :
1.Connectez l’imprimante directement à l’ordinateur ou au réseau.
2.Dans Préférencessystème, cliquez sur Imprimantes et scanners.
3.Cliquez sur la touche [+] en bas à gauche, puis sélectionnez M11-M13
à l’aide du pilote nommé HP Printer.
8.  Imprimeràpartird’unpériphériquemobileousansfil(facultatif)
8.1 Connexionduproduitàunréseausansfil
Pour imprimer depuis un téléphone ou une tablette, connectez le périphérique au même réseau sans fil que l’imprimante.
Périphériques Android plus récents (4.4 ou ultérieurs) Ouvrez l’élément à imprimer puis sélectionnez le bouton Menu. Sélectionnez Imprimer, puis l’imprimante et appuyez sur Imprimer.
Pour certains périphériques, il est nécessaire de télécharger l’application du module d’extension du service d’impression HP sur Google Play.
Périphériques Android plus anciens (4.3 ou antérieurs) Téléchargez l’appli
HP ePrint, disponible sur Google Play.
Téléphones Windows Téléchargez l’appli HP AiO Remote disponible dans le
Windows Store.
 Ensavoirplussurl'impressionmobile
Pour en savoir plus sur les autres options d'impression mobile, notamment les solutions ePrint supplémentaires, numérisez le code QR ou consultez la
section«Impressionmobile»dumanueldel'utilisateur.
8.2 HP Wireless Direct (M12w)
HP Wireless Direct permet aux périphériques Wi-Fi (smartphones, tablettes ou ordinateurs) d’effectuer une connexion réseau sans fil directement vers l’imprimante sans utiliser de routeur sans fil ou de point d’accès.
Les utilisateurs se connectent au signal d’impression directe sans fil
HP de l’imprimante de la même manière qu’ils connectent un périphérique Wi-Fi à un nouveau réseau sans fil ou à une borne d’accès.
ActiverHPWirelessDirect
Activez les services Web HP dans le serveur Web intégré (EWS) HP en procédant comme suit :
1.Connectez l’imprimante à un réseau et imprimez une page de configuration pour déterminer l’adresse IP de l’imprimante.


 REMARQUE:Pour configurer manuellement ou automatiquement
l’adresse IP, consultez « Configurer le produit en réseau » dans le manuel de l’utilisateur.
2.Lancez un navigateur Internet, puis saisissez l’adresse IP de l’imprimante dans le champ d’adresse. Exempled’adresseIP: 192.168.0.1
LaserJet Pro M11-M13-Serie Handbuch für die Inbetriebnahme
WICHTIG:
Führen Sie die Schritte 1 bis 3 auf dem Plakat zurEinrichtungder
Druckerhardware aus, und fahren Sie dann mit
Schritt 4 fort.
www.hp.com/support/ljm11-m13 |
www.register.hp.com |
4. Bedienfeld einrichten
Überprüfen Sie den LED-Status auf dem Bedienfeld des Druckers, bevor Sie die
Softwareinstallation starten.
English.............. |
1 |
Français............. |
3 |
Deutsch............. |
5 |
Italiano.............. |
7 |
Español.............. |
9 |
Català.............. |
11 |
Dansk.............. |
13 |
Nederlands...... |
15 |
Eesti................ |
17 |
Suomi.............. |
19 |
Latviešu........... |
21 |
Lietuvių........... |
23 |
Norsk............... |
25 |
Português........ |
27 |
Svenska........... |
29 |
5. Verbindungsmethode auswählen
 Direkte USB-Verbindung zwischen dem Drucker und dem Computer
Verwenden Sie ein USB-Kabel des Typs A nach B.
Windows
1.Für Windows 7 oder älter schließen Sie das USB-Kabel erst nach der Installation der Software an. Beim Installationsvorgang werden Sie zum passenden Zeitpunkt zum Anschließen des Kabels aufgefordert.
Wenn das Kabel bereits angeschlossen ist, starten Sie den Drucker neu, wenn Sie die Installation zum Anschließen des Kabels auffordert.
2.Fahren Sie mit „6.Software-Installationsdateienauffindenund herunterladen“ fort.
HINWEIS: Wählen Sie während der Softwareinstallation die Option
Directly connect this computer using a USB cable (Direkte Verbindung zu diesem Computer mit einem USB-Kabel) aus.
Mac
1.Schließen Sie das USB-Kabel zwischen dem Computer und dem Drucker vor der Installation der Software an.
2.Fahren Sie mit „6.Software-Installationsdateienauffindenund herunterladen“ fort.
Durchführen einer drahtlosen Installation
(nurfürdieM12w-Wireless-Modelle)
ÜberprüfenSievordemBeginnderInstallation,obderWirelessAccessPoint ordnungsgemäß funktioniert. Stellen Sie sicher, dass Drucker, Router und Computer eingeschaltet sind und dass der Computer mit dem gleichen Wireless-
Netzwerkverbundenist,mitdemauchderDruckerverbundenwerdensoll.
Wenn oben am Drucker nicht dauerhaft ein blaues Licht leuchtet, gehen Sie zu VorgangA.
Wenn oben am Drucker dauerhaft ein blaues Licht leuchtet, gehen Sie zu
VorgangB.
VorgangA
1.Legen Sie die CD in das CD-ROM-Laufwerk ein, und klicken Sie auf
Installieren. Wenn das Dialogfeld Druckerverbindungenangezeigt wird, wählen Sie die Option ConfiguretoprintovertheWireless
Network (Für WLAN-Druck konfigurieren) aus.
2.Befolgen Sie die angezeigten Anweisungen.
VorgangB
1.Legen Sie die CD in das CD-ROM-Laufwerk ein, und klicken Sie auf Installieren. Wenn das Dialogfeld Printer connections
(Druckerverbindungen) angezeigt wird, wählen Sie die Option
ConnecttoaconfiguredWirelessNetworkprinter (Verbindung zu einem konfigurierten WLAN herstellen) aus.
2.Befolgen Sie die Anweisungen auf dem Bildschirm.
3.Wählen Sie den von der Software erkannten Drucker aus. Wenn der Drucker vom Installationsprogramm nicht erkannt wird, geben Sie die
IP-AdressedesDruckersmanuellein,umdieInstallationfortzusetzen.
HINWEIS: Drucken Sie eine Konfigurationsseite, um die IP-Adresse
des Druckers zu ermitteln. Drücken Sie auf dem Druckerbedienfeld |
|
5 Sekunden |
die Abbrechen -Taste. Lassen Sie die |
Abbrechen |
-Taste dann los, um die Konfigurationsseite zu drucken. |
Die IP-Adresse ist auf der Konfigurationsseite im Abschnitt mit den
Netzwerkinformationen aufgeführt.
 ManuelleKonfigurationderIP-Adresse
Informationen zur manuellen Konfiguration der IP-Adresse finden Sie im
Benutzerhandbuch zum Drucker unter www.hp.com/support/ljm11-m13.
5
6. Software-Installationsdateienauffindenundherunterladen
Installation über die Drucker-CD |
|
|
Aus dem Internet herunterladen |
|
Bei Windows befinden sich die Software-Installationsdateien auf der mit dem |
1. |
Rufen Sie die Website www.hp.com/support/ljm11-m13 auf. |
||
Drucker mitgelieferten CD. |
2. |
Klicken Sie unter den Downloadoptionen auf Drivers,Software&Firmware |
||
Bei OS X enthält die Installationsdatei auf der CD eine DMG-Datei. |
|
|
(Treiber, Software und Firmware), und wählen Sie dann das entsprechende |
|
|
|
Betriebssystem aus. |
||
|
|
|
||
|
3. |
Klicken Sie auf Download. |
||
Installationshinweise |
||||
4. |
Befolgen Sie die angezeigten Anweisungen. |
|||
|
5. |
Fahren Sie mit „7. Software installieren“ fort. |
||
Weitere Informationen zur Software für den Drucker finden Sie in der Datei mit |
||||
|
|
HINWEIS: HPEasy Start kann auch auf folgende Weise heruntergeladen werden: |
||
den Installationshinweisen auf der Drucker-CD. |
|
|
||
|
|
|||
|
1. |
Rufen Sie die Website 123.hp.com auf. |
||
|
||||
|
2. |
Wählen Sie das Druckermodell aus, und klicken Sie dann auf Begin (Starten). |
||
|
3. |
Starten Sie die Softwaredatei in dem Ordner, in dem die Datei gespeichert |
||
|
|
|
wurde, und fahren Sie mit „7. Software installieren“ fort. |
|
7. Software-Installation
Windows–vollständigeLösung
1.Legen Sie die Drucker-CD in den Computer ein, oder starten Sie die aus dem Internet heruntergeladene Softwareinstallationsdatei.
2.Befolgen Sie die angezeigten Anweisungen. Wenn Sie zur Auswahl eines Verbindungstyps aufgefordert werden, wählen Sie die entsprechende Option aus:
•Konfiguration für den Druck über WLAN
•Konfiguration für den Druck über USB
ACHTUNG: Schließen Sie das USB-Kabel erst an, wenn Sie dazu aufgefordert werden.
•Verbindung mit einem konfigurierten WLAN-Drucker
Nur für drahtlose Modelle
3. Drucken Sie nach Abschluss der Installation eine Konfigurationsseite, |
|
um sicherzustellen, dass der Drucker einen SSID-Namen besitzt. |
|
(Halten Sie die Abbrechen |
-Taste gedrückt, bis die Bereit-LED blinkt. |
Lassen Sie die Taste dann los, um eine Konfigurationsseite zu drucken).
4.Ziehen Sie nach Abschluss der Installation das USB-Kabel ab. Um von einem Telefon oder Tablet aus zu drucken, verbinden Sie das Gerät mit dem gleichen WLAN, in dem sich auch der Drucker befindet.
Grundinstallation unter Windows
1.Schalten Sie den Drucker ein.
2.Trennen Sie das USB-Kabel vom Drucker und vom Computer, falls es bereits angeschlossen wurde. Wenn der Drucker mit einem Netzwerk verbunden ist, behalten Sie die Verbindung bei.
3.Rufen Sie die Website www.hp.com/support/ljm11-m13 auf.
4.Wählen Sie in der Liste einen Drucker oder eine Kategorie aus, klicken
Sie auf Treiber, und laden Sie dann die Installationssoftware für den Drucker herunter.
OSX–vollständigeLösung
1.Starten Sie die aus dem Internet heruntergeladene DMGSoftwareinstallationsdatei.
2.Das Softwareinstallationsprogramm erkennt die Sprache des Betriebssystems und zeigt das Hauptmenü des Installationsprogramms in der erkannten Sprache an.
3.Im Bildschirm Installation Options (Installationsoptionen) wird die zu installierende Software angezeigt. Klicken Sie auf die Schaltfläche
Installieren.
4.Befolgen Sie zur Installation der Software die am Bildschirm angezeigten Anleitungen.
5.Verwenden Sie nach Abschluss der Softwareinstallation den HP Utility Setup Assistant zum Konfigurieren der Druckeroptionen.
Grundinstallation bei OS X
Um die grundlegenden Drucktreiber zu installieren, ohne die vollständige
Software der HP Lösung von CD oder von hp.com auszuführen, gehen Sie folgendermaßen vor:
1.Verbinden Sie den Drucker mit einen Computer oder Netzwerk.
2.Klicken Sie unter Systemeinstellungen auf Drucker und Scanner.
3.Klicken Sie unten links auf das Pluszeichen [+], und wählen Sie M11-M13 mit dem Treiber namens HP Printer aus.
8.  Mobiles und kabelloses Drucken (optional)
8.1 Verbinden des Geräts mit einem Wireless-Netzwerk
Wenn Sie von einem Mobiltelefon oder Tablet aus drucken möchten, müssen Sie das Gerät mit dem Wireless-Netzwerk verbinden, mit dem auch der
Drucker verbunden ist.
Neuere Android-Geräte (4.4 oder neuer) Öffnen Sie das zu druckende Dokument, und wählen Sie die Schaltfläche Menü aus. Wählen Sie die OptionPrint (Drucken), dann den Drucker und anschließend Print (Drucken).
Bei einigen Geräten muss die HP Print Service Plugin-App aus dem Google
Play Store heruntergeladen werden.
Ältere Android-Geräte (4.3 oder älter) Laden Sie die HP ePrint-App aus dem Google Play Store herunter.
Windows Phone Laden Sie die HP AiO Remote-App aus dem Windows Store herunter.
 Weitere Informationen zum mobilen Druck
Informationen zu weiteren Mobildruckoptionen wie zu weiteren ePrint-Lösungen oder zum Scannen des QR-Codes finden Sie im Abschnitt zum Mobildruck im
Benutzerhandbuch.
8.2 HP Wireless Direct (M12w)
HP Wireless Direct ermöglicht WLAN-fähigen Geräten wie Smartphones, Tablets oder Computern das Herstellen einer direkten WLAN-Verbindung mit dem Drucker, ohne dass dafür ein Wireless-Router oder Access Point erforderlich ist. Die Verbindung mit dem HP Wireless Direct-Signal erfolgt auf dieselbe Weise, wie die Verbindung eines WLAN-fähiges Geräts mit einem neuen Wireless-Netzwerk oder einem Hotspot.
AktivierenvonHPWirelessDirect
Aktivieren Sie HP Web Services im HP Embedded Web Server (EWS), indem
Sie die folgenden Schritte ausführen:
1.Verbinden Sie den Drucker mit einem Netzwerk, und drucken Sie eine Konfigurationsseite, um die IP-Adresse des Druckers zu erhalten.


 HINWEIS: Informationen zum manuellen Festlegen und automatischen
Konfigurieren der IP-Adresse finden Sie unter „Konfigurieren des Netzwerkprodukts“ im Benutzerhandbuch.
2.Öffnen Sie einen Webbrowser, und geben Sie in der Adresszeile die IP-Adresse des Druckers ein. Beispiel-IP-Adresse: 192.168.0.1
6

Guidaintroduttivaperserie
LaserJet Pro M11-M13
IMPORTANTE:
Seguire prima i passaggi 1 - 3 del poster di installazione dell’hardware della stampante, quindi
continuare con il passaggio 4.
www.hp.com/support/ljm11-m13 |
www.register.hp.com |
4. Configurazionedelpannellodicontrollo
Prima di iniziare l’installazione del software, controllare lo stato del LED dal pannello di controllo della stampante.
English.............. |
1 |
Français............. |
3 |
Deutsch............. |
5 |
Italiano.............. |
7 |
Español.............. |
9 |
Català.............. |
11 |
Dansk.............. |
13 |
Nederlands...... |
15 |
Eesti................ |
17 |
Suomi.............. |
19 |
Latviešu........... |
21 |
Lietuvių........... |
23 |
Norsk............... |
25 |
Português........ |
27 |
Svenska........... |
29 |
5. Scelta del metodo di connessione
 Collegamento USB diretto tra stampante ecomputer
Utilizzare un cavo USB di tipo A/B.
Windows
1.Per Windows 7 o versioni precedenti, non collegare il cavo USB prima di installare il software. Il processo di installazione richiede di collegare il cavo al momento appropriato. Se il cavo è già connesso, riavviare la stampante quando il programma di installazione di collegare il cavo.
2.Continuare con “6.Individuareoscaricareifilediinstallazionedel software”.
NOTA: Durante l’installazione del software, selezionare l’opzione
CollegadirettamenteaquestocomputerutilizzandouncavoUSB.
Mac
1.Collegare il cavo USB tra il computer e la stampante prima di installare il software.
2.Continuare con “6.Individuareoscaricareifilediinstallazionedel software”.
Installazione wireless
(solo modelli wireless M12w)
Prima di avviare l’installazione, verificare il corretto funzionamento del punto di accesso wireless. Verificare che la stampante, il router e il computer siano accesi e che il computer sia connesso alla stessa rete wireless a cui si connetterà la stampante.
Se non è presente una luce blu fissa sulla parte superiore del prodotto, andare alla procedura A.
Se è presente una luce blu fissa sulla parte superiore del prodotto, andare alla procedura B.
Procedura A
1.Inserire il CD nell’unità CD-ROM, quindi fare clic su Installa. Quando viene visualizzata la finestra di dialogo Printer connections (Connessioni stampante), scegliere Configuretoprintoverthe Wireless Network (Configura per la stampa sulla rete wireless).
2.Seguire le istruzioni visualizzate.
Procedura B
1.Inserire il CD nell’unità CD-ROM, quindi fare clic su Installa. Quando viene visualizzata la finestra di dialogo Printer connections (Connessioni stampante), scegliere ConnecttoaconfiguredWireless Network printer (Connetti a una stampante della rete wireless).
2.Seguire le istruzioni visualizzate.
3.Selezionare la stampante rilevata dal software. Se il programma di installazionenonèingradodirilevarelastampante,percontinuare l’installazione, immettere manualmente l’indirizzo IP della stampante.
NOTA: Per determinare l’indirizzo IP della stampante, stampare una
paginadiconfigurazione.Dalpannellodicontrollodellastampante,tenere |
|
premuto |
pulsanteAnnulla per 5 secondi, quindi rilasciare il pulsante |
Annulla |
perstamparelapaginadiconfigurazione.L’indirizzoIPè |
riportatonellapaginadiconfigurazionenellasezioneInformazionidirete.
 Configurazionemanualedell’indirizzoIP
Per informazioni su come configurare manualmente l’indirizzo IP, vedere la Guida utente della stampante all’indirizzo www.hp.com/support/ljm11-m13.
7

6. Individuareoscaricareifilediinstallazionedelsoftware
Installazione dal CD della stampante
Per Windows, i file di installazione del software sono disponibili nel CD fornito con la stampante.
Per OS X, il programma di installazione nel CD comprende un file DMG.
Note di installazione
Per maggiori dettagli sul software per la stampante, vedere il file Note di installazione nel CD della stampante.
 Download dal Web
1.Accedere all’indirizzo www.hp.com/support/ljm11-m13.
2.Da Download options (Opzioni di download), selezionare Drivers,Software&
Firmware, quindi selezionare il sistema operativo appropriato.
3.Fare clic su Download.
4.Seguire le istruzioni visualizzate.
5.Continuare con “7.Installareilsoftware”.


 NOTA: HP Easy Start può anche essere scaricato seguendo la procedura
descritta sotto:
1.Accedere a 123.hp.com
2.Selezionare il modello della stampante, quindi fare clic su Begin (Inizia).
3.Avviare il file del software dalla cartella in cui è stato salvato e continuare con
“7.Installareilsoftware”.
7. Installare il software
Soluzione completa Windows
1.Inserire il CD della stampante nel computer o avviare il file di installazione del software scaricato dal Web.
2.Seguire le istruzioni visualizzate. Quando viene richiesto di selezionare un tipo di connessione, selezionare l’opzione appropriata:
•Configure to print over the Wireless Network (Configura per la stampa sulla rete wireless)
•Configure to print using USB (Configura la stampa mediante USB) ATTENZIONE: Non collegare il cavo USB fino a quando non viene richiesto dal programma di installazione.
•Connect to a configured Wireless Network Printer (Connetti a una stampante della rete wireless configurata)
Solo nei modelli wireless
3.Al termine dell’installazione, stampare una pagina di configurazione per verificare che la stampante disponga di un nome SSID. (Per stampare una pagina di configurazione, tenere premuto il pulsante Annulla fino a quando la spia Pronta lampeggia, quindi rilasciare il pulsante).
4.Al termine dell’installazione, scollegare il cavo USB. Per stampare da un telefono o un tablet, connettere il dispositivo alla stessa rete wireless della stampante.
Installazione di base per Windows
1.Accendere la stampante.
2.Disconnettere il cavo USB dalla stampante e dal computer, se già connesso. Se la stampante è collegata alla rete, lasciarlo connesso.
3.Accedere all’indirizzo www.hp.com/support/ljm11-m13.
4.Selezionare la stampante o una categoria dall’elenco, quindi selezionare Driverse scaricare il software di installazione per la stampante.
Soluzione completa OS X
1.Avviare il file .dmg di installazione del software scaricato dal Web.
2.Il programma di installazione del software rileva la lingua del sistema operativo, quindi visualizza il menu principale del programma di installazione nella stessa lingua.
3.Nella schermata Opzioni di installazione vengono riportati i dettagli relativi al software da installare. Fare clic sul pulsante Installa.
4.Seguire le istruzioni visualizzate per installare il software.
5.Al termine del processo di installazione del software, utilizzare
HPUtilitySetupAssistant per configurare le opzioni della stampante.
Installazione di base per OS X
Per installare i driver di stampa di base senza eseguire il software della soluzione completa HP dal CD o dal download effettuato da hp.com, seguire la procedura descritta:
1.Collegare la stampante al computer o alla rete.
2.Da Preferenze di sistema selezionare Stampanti e scanner.
3.Fare clic sul pulsante più [+] in basso a sinistra e selezionare M11-M13 utilizzando il driver denominato Stampante HP.
8.  Stampadadispositivimobiliewireless(facoltativo)
8.1 Collegamento della periferica a una rete wireless
Per stampare da un telefono o un tablet, connettere il dispositivo alla stessa rete wireless della stampante.
DispositiviAndroidpiùrecenti(4.4oversionepiùrecente) Aprire il documento da stampare e selezionare il pulsante Menu. Selezionare Stampa, selezionare la stampante, quindi selezionare Stampa.
Alcuni dispositivi richiedono il download del plugin Servizio di stampa HP dallo store di Google Play.
DispositiviAndroidmenorecenti(4.3oversioniprecedenti) Scaricare l’app HP ePrint dallo store di Google Play.
Windows Phone Scaricare l’app HP AiO Remote da Windows Store.
 Maggiori informazioni sulla stampa da dispositivimobili
Per maggiori informazioni su altre opzioni per la stampa da dispositivi mobili, comprese altre soluzioni ePrint, acquisire il codice QR o vedere la sezione “Stampa da dispositivi mobili” della Guida per l’utente.
8.2 HP Wireless Direct (M12w)
HP Wireless Direct consente ai dispositivi con Wi-Fi quali smartphone, tablet o computer, di stabilire una connessione di rete wireless direttamente
a una stampante senza dover utilizzare un router wireless o un punto di accesso. La connessione avviene tramite il segnale HP wireless direct della stampante allo stesso modo con cui si connette un dispositivo Wi-Fi a una nuova rete o un nuovo hotspot wireless.
Abilitare HP Wireless Direct
Attivare i servizi Web HP nel server Web incorporato (EWS) di
HP attenendosi alla seguente procedura:
1.Connettere la stampante alla rete e stampare una pagina di configurazione per ottenere l’indirizzo IP della stampante.


 NOTA: Per impostare l’indirizzo IP manualmente o per configurarlo
automaticamente, vedere “Configurazione del prodotto di rete” nella Guida utente.
2.Aprire un browser Web e digitare l’indirizzo IP della stampante nella riga dell’indirizzo. Esempio di indirizzo IP: 192.168.0.1
8
Guía de inicio de la serie LaserJet Pro M11-M13
 IMPORTANTE:
En primer lugar, siga los pasos 1 - 3 del folleto de
configuración del hardware de la impresora y, después, continúe con el paso 4.
www.hp.com/support/ljm11-m13 |
www.register.hp.com |
4. Configuracióninicialenelpaneldecontrol
En el panel de control de la impresora, compruebe el estado del diodo emisor de luz antes de comenzar a instalar el software.
English.............. |
1 |
Français............. |
3 |
Deutsch............. |
5 |
Italiano.............. |
7 |
Español.............. |
9 |
Català.............. |
11 |
Dansk.............. |
13 |
Nederlands...... |
15 |
Eesti................ |
17 |
Suomi.............. |
19 |
Latviešu........... |
21 |
Lietuvių........... |
23 |
Norsk............... |
25 |
Português........ |
27 |
Svenska........... |
29 |
5. Selección del método de conexión
 Conexión USB directamente entre la impresora y el equipo
Utilice un cable USB de tipo A a B.
Windows
1.En Windows 7, ni en versiones anteriores, no conecte el cable USB antes de instalar el software. El proceso de instalación del software muestra un aviso para conectar el cable en el momento adecuado. Si el cable ya está conectado, reinicie la impresora cuando el proceso de instalación muestre el aviso para conectar el cable.
2.Continúe con el paso “6.Localizaciónodescargadelosarchivosde instalacióndelsoftware”.
NOTA: Durante la instalación del software, seleccione la opción
Conectar directamente este equipo mediante un cable USB.
Mac
1.Conecte el cable USB entre el equipo y la impresora antes de instalar el software.
2.Continúe con el paso “6.Localizaciónodescargadelosarchivos deinstalacióndelsoftware”.
Realice una instalación inalámbrica (solo para los modelos inalámbricos M12w)
Antes de comenzar la instalación, verifique que el punto de acceso inalámbrico funcione correctamente. Asegúrese de que la impresora, el direccionador y el equipo estén encendidos y que el equipo esté conectado a la misma red inalámbrica a la que desea conectar la impresora.
Si en la parte superior de la impresora no se ilumina una luz azul constante, pase al Proceso A.
Si en la parte superior de la impresora se ilumina una luz azul constante, pase al Proceso B.
Proceso A
1.Coloque el CD en la unidad de CD-ROM y, a continuación, haga clic en Instalar. Cuando se muestre el cuadro de diálogo Conexiones de la impresora, seleccione Configurarparaimprimiratravésdela red inalámbrica.
2.Siga las instrucciones que se muestran en la pantalla.
Proceso B
1.Coloque el CD en la unidad de CD-ROM y, a continuación, haga clic en Instalar. Cuando se muestre el cuadro de diálogo Conexiones de la impresora, seleccione Conectar a una impresora de red inalámbricaconfigurada.
2.Siga las instrucciones que se muestran en la pantalla.
3.Seleccione la impresora que el software ha detectado. Si el programa de instalaciónnopuededetectarlaimpresora,introduzcamanualmentela direcciónIPdelaimpresoraparaproseguirconlainstalación.
 NOTA: Para obtener la dirección IP de la impresora, imprima una página
de configuración. En el panelde control de la impresora, mantenga
pulsado |
botón Cancelar durante 5 segundos y, después, |
suéltelo |
para imprimir la página de configuración. La dirección IP |
consta en la sección Información de la red de la página de configuración.
 ConfiguraciónmanualdeladirecciónIP
Consulte la Guía del usuario de la impresora para obtener información sobre cómo configurar manualmente la dirección IP www.hp.com/support/ljm11-m13.
9
6. Localizaciónodescargadelosarchivosdeinstalacióndelsoftware
Instalación desde el CD de la impresora |
Descargar de la Web |
En Windows, los archivos de instalación del software se proporcionan en el CD que se suministra con la impresora.
En OS X, el archivo del programa de instalación del CD incluye un archivo DMG.
Notas sobre la instalación
Para obtener más información acerca del software de la impresora, consulte el archivo de notas sobre la instalación del CD de la impresora.
1.Vaya a www.hp.com/support/ljm11-m13.
2.En Opciones de descarga, haga clic en Controladores,SoftwareyFirmware y, luego, seleccione el sistema operativo correspondiente.
3.Haga clic en Descargar.
4.Siga las instrucciones que se muestran en la pantalla.
5.Continúe con “7.Instalacióndelsoftware”.


 NOTA: HP Easy Start también se puede descargar mediante el siguiente método:
1.Vaya a 123.hp.com
2.Seleccione el modelo de la impresora y, a continuación, haga clic en Comenzar.
3.Inicie el archivo de software de la carpeta en la que se guardó el archivo y continúe con “7.Instalacióndelsoftware”.
7. Instalación del software
Solución completa para Windows
1.Inserte el CD de la impresora en el equipo o inicie el archivo de instalación del software descargado de la Web.
2.Siga las instrucciones que se muestran en la pantalla. Cuando se muestre un aviso para seleccionar un tipo de conexión, seleccione la opción que corresponda:
•Configurar para imprimir a través de la red inalámbrica
•Configurar para imprimir mediante USB
PRECAUCIÓN: No conecte el cable USB hasta que se le solicite durante la instalación del software.
•Conectar a una impresora de red inalámbrica configurada
Solo para modelos inalámbricos
3.Una vez finalizado el proceso de instalación, imprima una página de configuración para asegurarse de que la impresora tenga un nombre de identificador conjunto de servicios (SSID). (Mantenga pulsado el botón Cancelar hasta que la luz preparada parpadee y, luego, suéltelo para imprimir una página de configuración).
4.Una vez finalizado el proceso de instalación, desconecte el cable USB.
Para imprimir desde un teléfono o una tableta, conecte el dispositivo a la misma red inalámbrica que la impresora.
Instalación básica en Windows
1.Encienda la impresora.
2.Desconecte el cable USB de la impresora y del equipo (si estaba conectado). Si la impresora está conectada a la red, déjela así.
3.Vaya a www.hp.com/support/ljm11-m13.
4.Seleccione una impresora o una categoría en la lista, haga clic en
Controladores y, a continuación, descargue el software de instalación de la impresora.
Solución completa para OS X
1.Abra el archivo de instalación del software .dmg que haya descargado de la Web.
2.El programa de instalación del software detecta el idioma del sistema operativo y, después, muestra el menú principal del programa de instalación en ese idioma.
3.En la pantalla Opciones de instalación se muestran los detalles del software que se va a instalar. Haga clic en el botón Instalar.
4.Siga las instrucciones en pantalla para instalar el software.
5.Al final del proceso de instalación del software, utilice el Asistente de configuracióndeUtilidaddeHP para configurar las opciones de la impresora.
InstalaciónbásicaenOSX
Para instalar los controladores de impresión básicos sin ejecutar la solución de software completa de HP desde el CD o los archivos que haya descargado de hp.com, siga estos pasos:
1.Conecte la impresora al equipo o a la red.
2.En Preferencias del sistema, haga clic en Impresoras y escáneres.
3.Haga clic en el botón “más” [+] que hay en la parte inferior izquierda y seleccione M11-M13 mediante el controlador llamado HP Printer.
8.  Impresiónmóvileinalámbrica(opcional)
8.1 Conexióndeldispositivoalaredinalámbrica
Para imprimir desde un teléfono o una tableta, conecte el dispositivo a la misma red inalámbrica que la impresora.
DispositivosAndroidactuales(4.4oversionesposteriores) Abra el elemento que desee imprimir y seleccione el botón Menú. Seleccione primero Imprimir, después la impresora y por último, de nuevo, Imprimir.
Algunos dispositivos requieren que se descargue el complemento HP Print
Service de Play Store de Google.
DispositivosAndroidantiguos(4.3oversionesanteriores) Descargue la aplicación HP ePrint de Play Store de Google.
Windows Phone Descargue la aplicación HP AiO Remote de Windows Store.
 Obtenermásinformaciónsobrelaimpresiónmóvil
Para obtener más información acerca de otras opciones de impresión móvil, incluidas las soluciones adicionales de ePrint, escanee el código QR o consulte la sección “Impresión móvil” de la guía del usuario.
8.2 Impresión inalámbrica directa de HP (M12w)
HP Wireless Direct permite que los dispositivos con capacidad Wi-Fi, como por ejemplo, los teléfonos inteligentes, las tabletas o los ordenadores, realicen conexiones de red inalámbricas directamente a la impresora sin utilizar un direccionador ni un punto de acceso inalámbricos. Conéctese
a la señal directa inalámbrica de HP de la impresora del mismo modo que conecta un dispositivo con capacidad Wi-Fi a una red inalámbrica nueva o a una conexión inalámbrica en una zona Wi-Fi.
ActivarHPWirelessDirect
Active los Servicios Web de HP en el servidor Web incorporado de HP (EWS) siguiendo estos pasos:
1.Conecte la impresora a una red e imprima una página de configuración para obtener la dirección IP de la impresora.


 NOTA: Para establecer manualmente la dirección IP o configurarla de manera automática, consulte la sección “Configuración del producto de red” de la Guía del usuario.
2.Abra un navegador web y escriba la dirección IP de la impresora en la barra de direcciones. Dirección IP de ejemplo: 192.168.0.1
10
 Loading...