


Pedometer
Operation and Safety Notes
Brojač koraka
Napomene za montažu i sigurnosne napomene
Dispozitiv pentru numărat paşii
Instrucţiuni de montare şi de siguranţă
Крачкомер
Инструкции за монтаж и безопасност
Βηματομετρητής
Οδηγίες συναρμολόγησης και ασφάλειας
Schrittzähler
Bedienungs - und Sicherheitshinweise
H14347 |
7 |
GB / CY |
Assembly and safety advice |
Page |
5 |
HR |
Napomene za montažu i sigurnosne napomene |
Stranica |
16 |
RO |
Instrucţiuni de montare şi de siguranţă |
Pagina |
27 |
BG |
Инструкции за монтаж и безопасност |
Страница |
38 |
GR / CY |
Οδηγίες συναρμολόγησης και ασφάλειας |
Σελίδα |
50 |
DE / AT / CH |
Bedienungsund Sicherheitshinweise |
Seite |
62 |
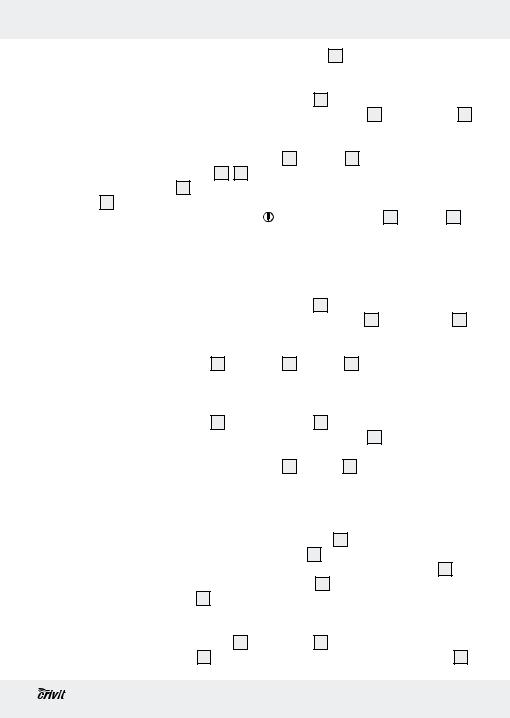
A
1
6 


 2
2
5 |
3 |
4
B
7
|
13 |
|
12 |
10 |
8 |
|
|
|
|
11 |
9 |
|
|
3

C |
|
|
14 |
|
|
|
|
|
|
|
|
|
|
15 |
30 |
|
|
|
|
29 |
|
|
|
16 |
|
|
|
|
|
28 |
|
|
|
|
27 |
|
|
|
17 |
|
|
|
18 |
|
|
|
|
|
|
26 |
|
|
|
19 |
|
|
|
|
|
25 |
24 23 |
22 |
21 |
20 |
D
4

Table of Contents
Introduction |
|
|
Proper use.......................................................................................................................... |
Page |
6 |
Description of parts........................................................................................................... |
Page |
6 |
Technical Data................................................................................................................... |
Page |
6 |
Supply scope..................................................................................................................... |
Page |
7 |
Safety |
|
|
General Safety Information.............................................................................................. |
Page |
7 |
Safety Instructions for Batteries......................................................................................... |
Page |
8 |
Before you start |
|
|
Removing the isolating strip.............................................................................................. |
Page |
8 |
Getting started.......................................................................................................... |
Page |
8 |
Hold mode / Count mode................................................................................................. |
Page |
9 |
Setting parameters ........................................................................................................... |
Page |
9 |
Setting the day of the week.............................................................................................. |
Page 10 |
|
Using the pedometer......................................................................................................... |
Page 10 |
|
Viewing current training records....................................................................................... |
Page 11 |
|
Viewing the weekly record................................................................................................ |
Page 11 |
|
Using the countdown function.......................................................................................... |
Page 12 |
|
Using the stopwatch.......................................................................................................... |
Page 12 |
|
Alarm function.................................................................................................................... |
Page 13 |
|
Using the panic alarm....................................................................................................... |
Page 13 |
|
Restore factory settings...................................................................................................... |
Page 13 |
|
Changing the batteries...................................................................................................... |
Page 13 |
|
Cleaning and Care.................................................................................................. |
Page 14 |
|
Disposal........................................................................................................................... |
Page 14 |
|
GB/CY 5
Introduction
Pedometer
Q Introduction
Familiarise yourself with the product before using it for the first time. In addition please refer carefully to
the operating instructions below and the safety advice. Use the product only as described and for the indicated purpose. Keep these instructions in a safe place. If you pass the product on to anyone else, please ensure that you also pass on all the documentation.
Q Proper use
This pedometer records the number of steps taken, distance covered and time elapsed. The pedometer also displays average speed, maximum speed and current speed as well as calories and fat burned, and fat burned in per cent. The device also functions as a stop-watch, timer alarm and as a panic alarm. Any other use or modification of the device constitute improper use and may result in injury and / or damage to the device. The manufacturer is not liable for damage caused by improper use. The device is not intended for commercial use.
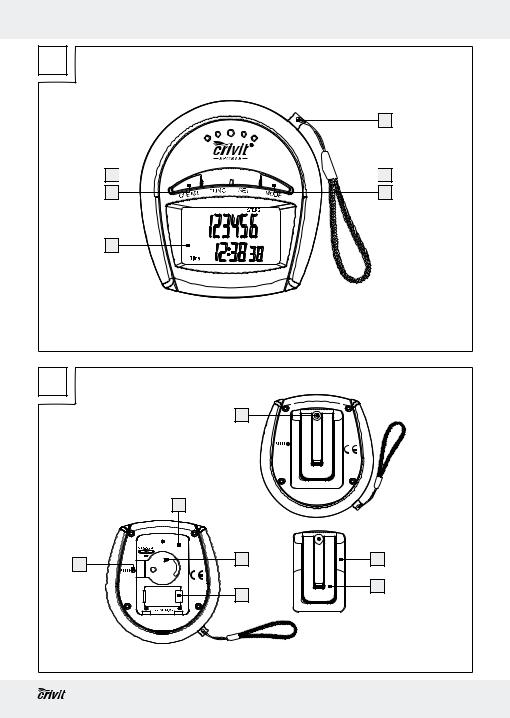
Q Description of parts
Device:
1Panic alarm plug with wrist strap
2SET button
3MODE button
4Display
5CLEAR button
6FUNC button
7Screw
6 GB/CY
8Battery compartment cover
9Belt clip
10Battery CR2032 (3 V, lithium)
11Batteries LR44 (1.5 V, alkali)
12RESET button
13Battery compartment
Display:
14Function bar
15Low battery indicator
16kg, cm, km; lb, inch, mile – symbol (size indicator)
17CUR Speed / km / h - symbol (current speed)
18MAX Speed / km / h - symbol (maximum speed)
19Fat-burning symbol
20kcal symbol (kilocalories)
21Fat-burning in %
22Multifunction display
23AVG Speed / km / h icon (average speed)
24Alm symbol
25Time / Timer display (time / elapsed time) / Countdown
26Alarm icon 
27PM icon
28Stopwatch display
29Age
30Sex (MAN / WOMAN)
Note: It is not possible to switch off the LCD screen on the device. However, the power consumption required to operate the LCD is very low and comparable to that of a wristwatch.
Q Technical Data
Measuring method: pendulum Step display: 999,999 steps
Introduction / Safety
Distance display: |
9999.99 km |
||||
Calorie display: |
9999.99 kcal |
||||
Length of stride: |
30 - 200 cm (can be set |
||||
|
to 1 cm accuracy) / |
||||
|
10 - 80 inch |
||||
Default: |
60 cm / 25 inch |
||||
Adjustable |
|
|
|
|
|
user weight: |
30 - 200 kg (can be set |
||||
|
to 1 kg accuracy) / |
||||
|
60 – 400 lb |
||||
Default: |
60 kg / 120 lb |
||||
Age: |
5 – 99 |
|
|
||
Default: |
18 |
|
|
|
|
Sex: |
Man / Woman |
||||
Default: |
Man |
|
|
||
Height: |
60 – 250 cm / |
||||
|
20 – 100 inch |
||||
Default: |
60 cm / 65 inch |
||||
Stopwatch / |
|
|
|
|
|
Countdown |
|
|
|
|
|
(timing range): |
59 minutes / |
||||
|
59.59 seconds |
||||
Time unit: |
12 / 24 hr |
||||
Default: |
24 hr |
|
|
||
Batteries: |
4 x LR44 battery |
||||
|
(1.5 V |
|
|
, alkaline) |
|
|
|
|
|||
|
1 x CR2032 battery |
||||
Permissible |
(3 V |
|
, lithium) |
||
|
|||||
|
|
|
|
|
|
temperature range: |
0 - 50 °C |
||||
Dimensions: |
approx. 76 x 70 x |
||||
|
40 mm (W x H x D) |
||||
Weight: |
|
|
|
|
|
Pedometer |
|
|
|
|
|
(without battery): |
approx. 53 g |
||||
Q Supply scope
1 Pedometer (with ripcord for panic alarm) 4 Batteries LR44 (1.5 V  , alkali)
1 Battery CR2032 (3 V  , lithium) 1 Operating manual
 Safety
 Warning! Please read all safety information and instructions. Failure to comply with the safety information and instructions may result in an electric shock, fire and / or severe injuries.
YOU SHOULD STORE ALL SAFETY INFORMATION AND INSTRUCTIONS IN A SAFE PLACE IN CASE YOU NEED TO REFER TO THEM AGAIN IN THE FUTURE!
General Safety
Information
J Warning! RISK OF
FATAL INJURY AND RISK
OF ACCIDENTS FOR INFANTS AND CHILDREN! Never leave children unattended with the packaging material or the product. The packaging material carries a risk of suffocation, and there is a risk of fatal injury by strangulation. Children often underestimate dangers. Always keep children away from the product. This is not a toy.
 Warning! DANGER TO LIFE!
Batteries can be swallowed, which may represent a danger to life. If a battery has been swallowed, medical help is required immediately.
JDo not use the device if it is damaged. Damaged devices represent a danger of death from electric shock!
JDo not expose the device to - extreme temperatures,
GB/CY 7
Safety / Before you start / Getting started
-strong vibrations,
-heavy mechanical loads,
-direct sunlight,
-moisture / rain.
Otherwise there is a danger that the device will be damaged.
JPlease note that the guarantee does not cover damage caused by incorrect handling, non-compliance with the operating instructions or interference with the device by unauthorised individuals.
JUnder no circumstances should you take the device apart. Improper repairs may place the user in considerable danger.
Repairs should only be carried out by specialist personnel.
Safety Instructions for Batteries
JRemove the batteries from the device if they are not going to be used for a prolonged period.
JCAUTION! DANGER OF EXPLOSION! The batteries must never be recharged!
JMake sure that the polarity is correct when you insert a battery. This is indicated in the battery compartment 13.
JIf necessary, clean the batteries and device contacts with a dry cloth before inserting the batteries.
JInsert the battery type CR2032 and the four batteries type LR44 into the device. Otherwise the pedometer will not work properly.
JRemove spent batteries immediately from the device. There is an increased danger of leaks!
JBatteries must not be disposed of in the normal domestic waste!
JEvery consumer is legally obliged to dispose of batteries in the proper manner!
JKeep batteries away from children; do not throw them in the fire, short-circuit them or take them apart.
JIf the above instructions are not complied with, the batteries may discharge themselves beyond their end voltage. There is then a danger of leaking. If the batteries have leaked inside your device, you should remove them immediately in order to prevent damage to the device!
JAvoid contact with the skin, eyes and mucous membranes. Any parts of the body coming into contact with battery acid should be rinsed off with copious amounts of water and / or a doctor contacted if necessary!
JOnly use the type of battery specified.
QBefore you start
QRemoving the isolating strip
The batteries are already installed in the device on delivery.
jPull the insulating strip at the back of the appliance off in the direction indicated by the arrow. An acoustic signal will sound.
Your pedometer is now ready to be configured.
Q Getting started
Before using the device for the first time, you have to set the following parameters: unit of measurement (metric or US system), length of step, body weight, height, age, sex, time unit (12-hour/24-hour clock), current time, alarm
8 GB/CY
function. Otherwise the functions of the pedometer cannot be used properly. Note: After you have set all the parameters before using it for the first time, you can change the parameters at any time. The only
thing you cannot change at a later date is the unit of measurement (metric or US system). If you wish to change the unit of measurement, you will have to remove all the batteries 10, 11 from the battery compartment 13 or press the RESET button 12. This process resets the preset values again.
Q Hold mode / Count mode
When you start the device, the pedometer is automatically in count mode.
Note: In hold mode the measuring functions of the pedometer are disabled.
jPress and hold the MODE button 3 for about 3 seconds. An acoustic signal will
sound. The display 

 will flash alternately with the number of the steps.
jPress and hold the MODE button 3 for approx. 3 seconds to enter count mode. You will hear a signal. 

 disappears.
Q Setting parameters
jWhen you start to operate the device for the first time or switch the device to hold mode (see “Hold mode/counting mode”), you can set or change various parameters.
jTo do so, press the SET button 2 , to get to set mode. The word “SET” will light up in the LC display.
jThe indicators kg, cm, km or lb, inch, mile 16 flash. Press the buttons MODE 3
Getting started
or CLEAR 5 to set the desired unit of measurement (metric or US system).
jConfirm your entry by pressing the SET button 2 . The word STRIDE will appear in the function bar 14. The cm symbol 16 and the preset value 60 cm / 25 inch flash in the LC display. Press the buttons MODE 3 or CLEAR 5 in order to set the desired length of your stride.
Note: You can specify a stride length of between 30 to 200 cm / 10 to 80 inch.
Tip: Press the MODE 3 or CLEAR 5 button for about 3 seconds. This will speed up the process of setting the values. You can use this fast way of setting the parameters for the setting procedures that follow.
jConfirm the entry by pressing the SET button 2 . The word WEIGHT will appear in the functionbar 14. The kg symbol 16 and the preset value 60 kg / 120 lb flash in the LC display. Press the buttons MODE 3 or CLEAR 5 to set the desired weight. Note: You can specify a weight of between 30 to 200 kg / 60 to 400 lb.
jConfirm the entry by pressing the SET button 2 . The word HEIGHT will appear in the function bar 14. The preset value flashes in the LC Display. Press the MODE 3 or CLEAR 5 button to enter the desired value.
Note: A value between 60 and 250 cm / 20 and 100 inch can be entered.
jConfirm your settings by pressing the SET button 2 . The LC display shows the AGE 29 indicator and the number 18 as the preset value. Press the MODE 3 or
CLEAR 5 button to enter the desired age. Note: Any age between 5 and 99 years can be entered.
jConfirm the entry by pressing the SET button 2 . The words MAN or WOMAN will light up. Press the buttons MODE 3
GB/CY 9
Getting started
or CLEAR 5 in order to set the desired sex. Q Setting the day of the week
jConfirm the entry by pressing the SET
button |
2 |
|
. The word Time |
25 |
as well as |
j |
Switch the device to hold mode (see |
||||||||||||||||||||||||||||||||||||
(24-hour format) or |
(12-hour |
j |
“Hold mode / Count mode”). |
||||||||||||||||||||||||||||||||||||||||
format) will light up. Press the buttons |
Press the FUNC button |
6 |
. DAY appears |
||||||||||||||||||||||||||||||||||||||||
MODE |
|
|
|
|
or CLEAR |
|
|
|
to set the desired |
|
on the function bar |
|
|
|
. |
|
|
|
|
|
|
|
|||||||||||||||||||||
3 |
|
5 |
|
|
j |
14 |
|
|
|
|
|
|
|
||||||||||||||||||||||||||||||
time format. |
|
|
|
|
|
|
|
|
|
|
|
. The number for |
|||||||||||||||||||||||||||||||
|
|
|
|
|
|
|
|
Press the SET button |
2 |
|
|||||||||||||||||||||||||||||||||
Note: The PM symbol |
27 |
in the 12-hour |
j |
the day of the week starts to flash. |
|||||||||||||||||||||||||||||||||||||||
format stands for afternoon/evening. |
|
|
|
|
|
|
|
||||||||||||||||||||||||||||||||||||
Press the buttons MODE |
3 |
or CLEAR |
5 |
||||||||||||||||||||||||||||||||||||||||
j Confirm the entry by pressing the SET |
|
to set the required day of the week. The |
|||||||||||||||||||||||||||||||||||||||||
button |
2 |
. The word time |
25 |
will appear |
|
different numbers have the following |
|||||||||||||||||||||||||||||||||||||
|
|
|
|
|
|
|
|
|
|
|
|
|
|
|
|
|
|
|
|
|
meanings: |
|
|
|
|
|
|
|
|
|
|
|
|
||||||||||
and the hour of the multifunction display |
22 |
|
|
|
|
|
|
|
|
|
|
|
|
|
|
||||||||||||||||||||||||||||
will flash. Press the buttons MODE |
3 |
or |
|
Monday = |
1 |
|
|
|
|
|
|
|
|
|
|
||||||||||||||||||||||||||||
CLEAR |
|
|
5 |
|
in order to set the desired time. |
|
Tuesday = |
2 |
|
|
|
|
|
|
|
|
|
|
|||||||||||||||||||||||||
j Confirm the entry by pressing the SET |
|
Wednesday = |
3 |
|
|
|
|
|
|
|
|
|
|
||||||||||||||||||||||||||||||
button |
2 |
. The minutes in the multifunction |
|
Thursday = |
4 |
|
|
|
|
|
|
|
|
|
|
||||||||||||||||||||||||||||
|
|
|
|
|
|
|
|
|
|
|
|
|
|
|
|
|
|
|
|
Friday = |
5 |
|
|
|
|
|
|
|
|
|
|
||||||||||||
display |
|
22 |
will flash. Press the buttons |
|
|
|
|
|
|
|
|
|
|
|
|||||||||||||||||||||||||||||
|
|
|
|
|
|
|
|
in order to set the |
|
Saturday = |
6 |
|
|
|
|
|
|
|
|
|
|
||||||||||||||||||||||
MODE |
|
|
3 |
or CLEAR |
5 |
|
|
|
|
|
|
|
|
|
|
|
|||||||||||||||||||||||||||
desired time. |
|
|
|
|
|
|
|
|
j |
Sunday = |
7 |
|
|
|
|
|
|
|
|
|
|
||||||||||||||||||||||
j Confirm the entry by pressing the SET |
Press the SET button |
2 |
|
to confirm your |
|||||||||||||||||||||||||||||||||||||||
button |
|
|
|
|
|
. The word ALM |
|
|
|
will light up |
|
entry. |
|
|
|
|
|
|
|
|
|
|
|
|
|||||||||||||||||||
|
|
2 |
24 |
j |
|
|
|
|
|
|
|
|
|
|
|
|
|||||||||||||||||||||||||||
|
|
|
|
|
|
|
|
|
|
|
|
|
Press the FUNC button |
|
|
|
|
3 times to |
|||||||||||||||||||||||||
and the hour of the multifunction display |
22 |
|
|
6 |
|||||||||||||||||||||||||||||||||||||||
will flash. Press the buttons MODE |
3 |
or |
|
return to hold mode. |
|
|
|
|
|
|
|
||||||||||||||||||||||||||||||||
|
|
|
|
|
|
|
|
|
|
|
|
|
|
|
|
|
|
|
|
|
|
|
|
|
|||||||||||||||||||
CLEAR |
|
5 |
in order to set the desired |
|
|
|
|
|
|
|
|
|
|
|
|
|
|
||||||||||||||||||||||||||
alarm time. |
|
|
|
|
|
|
|
|
|
Using the pedometer |
|||||||||||||||||||||||||||||||||
j Confirm the entry by pressing the SET |
Q |
||||||||||||||||||||||||||||||||||||||||||
button |
2 |
. The minutes of the multifunction |
|
|
|
|
|
|
|
|
|
|
|
|
|
|
|||||||||||||||||||||||||||
display |
22 |
will flash. Press the button |
For this function, the device must be in count |
||||||||||||||||||||||||||||||||||||||||
MODE |
3 |
in order to set the desired |
mode (see “Hold mode / Count mode”). |
||||||||||||||||||||||||||||||||||||||||
alarm time. |
|
|
|
|
|
|
|
|
j |
|
|
|
|
|
|
|
|
|
|
|
|
|
|||||||||||||||||||||
j Confirm the entry by pressing the SET |
Attach the pedometer tightly onto your |
||||||||||||||||||||||||||||||||||||||||||
button |
2 |
. The device is now in hold |
|
belt using the belt clip |
9 |
(see Fig. D). |
|||||||||||||||||||||||||||||||||||||
mode again. |
|
|
|
|
|
|
|
|
|
IMPORTANT! The pedometer must be |
|||||||||||||||||||||||||||||||||
IMPORTANT! The CLEAR button |
5 |
|
|
|
secured properly and safely. This is the |
||||||||||||||||||||||||||||||||||||||
has a different function after setting the |
|
only way to ensure accurate measurement. |
|||||||||||||||||||||||||||||||||||||||||
alarm. Press the CLEAR button |
5 |
to |
|
|
|
|
|
|
|
|
|
|
|
|
|
|
|||||||||||||||||||||||||||
activate the alarm. The alarm symbol |
26 |
|
The pedometer now registers the jolts of the |
||||||||||||||||||||||||||||||||||||||||
will appear in the LC display. Press the |
body and records the number of steps taken, |
||||||||||||||||||||||||||||||||||||||||||
CLEAR button |
5 |
again to deactivate the |
the distance covered, the time required and |
||||||||||||||||||||||||||||||||||||||||
alarm. The alarm symbol |
26 |
will go out |
calculates the current speed, the maximum |
||||||||||||||||||||||||||||||||||||||||
(see also “Alarm function”). |
|
|
|
|
|
|
|
|
speed and the average speed as well as the |
||||||||||||||||||||||||||||||||||
|
|
|
|
|
|
|
|
|
|
|
|
|
|
|
|
|
|
|
|
|
|
|
|
|
|
|
|
|
|
calories consumed, the body fat burnt and |
|||||||||||||
10 GB/CY
the body fat burnt in %. The pedometer automatically detects whether you are walking or running.
Note: The recorded values are approximate. A varying stride length and external factors such as clothing, terrain etc. can hinder exact measurement.
 Tip! Switch the device to hold mode to prevent unwanted measurement (route to training location etc.) (see “Hold mode / Count mode”).
QViewing current training records
For this function, the device must be in count mode (see “Hold mode / Count mode”).
jPress the MODE button 3 . STEPS appears on the function bar 14. The number of steps taken appears on the LCD screen 4 . Other training data appear on the LCD screen 4 . Press the MODE button 3 to switch from one item to the next.
It is possible to display the following: Time 25 = current time
km 16 = distance covered kcal 20 = calories burned
Fat 19 = Fat-burning in kg / lb Fat in % 21 = Fat-burning in %
Timer 25 = elapsed time CUR Speed 17 = current speed MAX Speed 18 = maximum speed AVG Speed 23 = average speed
Note: Only after you have exercised non-stop for 20 – 30 minutes will your body start to burn fat. That is why it will take a while before the amount of fat you have burnt (in kg/lb) 19 and the amount of fat you have burnt in % 21
Getting started
are indicated in the LC display.
Q Viewing the weekly record
For this function, the device must be in count mode (see “Hold mode / Count mode”). Note: The pedometer stores the distance covered and the calories burned for the current week of training. You also have the option of viewing separate training days.
Note: The record for a week always starts on a Monday. Please note that all the data recorded in the week is always deleted at midnight on Sunday.
Note: The current daily records are automatically stored in the weekly record every day at midnight and reset to 0.
Note: Either the large CR2032 battery or the small LR44 batteries are used to store the data. All the stored data are erased if all the batteries are out of the device at the same time.
jPress the FUNC button 6 to switch to function mode. DAY appears on the function bar 14. The km 16 and kcal 20 icons and the corresponding data for the entire week of training appear on the LCD screen.
jPress the MODE button 3 to switch from one training day to the next. The km 16 and kcal 20 icons and the corresponding data for each of the training days appear on the LCD screen.
Note: The days of the week are represented by numbers (see “Setting the day of the week”). If no number appears under DAY, the LCD is displaying the results for the entire week of training. Note: Please note that the records for Day 7 are not displayed. Day 7 is either the current day or has not yet occurred in
GB/CY 11
Getting started
the current week of training.
jPress the FUNC button 6 3 times to get back to counting mode.
Note: Please note that you can only delete data for the week as a whole – not for separate training days (see “Restore factory settings”).
QUsing the countdown function
Note: The countdown can count down from up to 23:59.59 hours.
Using the countdown function separately (the device is in counting or hold mode):
jPress the FUNC button 6 in order to get to countdown mode. The “Timer” indicator flashes in the LC display.
jPress the button SET 2 . The hour of the countdown will flash. Press the buttons MODE 3 or CLEAR 5 in order to set the desired number of hours.
jConfirm the entry by pressing the SET button 2 . The minutes of the countdown will flash. Press the buttons MODE 3 or CLEAR 5 in order to set the desired number of minutes.
jConfirm the entry by pressing the SET but-
ton 2 . The second display will flash. Press the buttons MODE 3 or CLEAR 5 in order to set the desired number of seconds.
jConfirm the entry by pressing the SET button 2 .
jPress the MODE button 3 to start the countdown.
jPress the MODE button 3 again to stop the countdown.
jPress the MODE button 3 again to continue the countdown.
jIf you wish to cancel the countdown, first
press the MODE button 3 to stop the countdown and then press the CLEAR button 5 to set the countdown to 0.
jAs soon as the countdown has come to an end, an acoustic signal will sound.
jPress the FUNC 6 , CLEAR 5 , SET 2 or MODE button 3 to deactivate the acoustic signal.
jPress the FUNC button 6 twice to get back into counting mode.
Q Using the stopwatch
Note: The stopwatch measures time up to a maximum of 59:59.99 (minutes / seconds). Beyond this amount the multifunction display 22 is automatically reset to 00:00.00 and continues counting.
Using the stopwatch alone
(the device is in count or hold mode):
jPress the FUNC button 6 3 times to get back to stopwatch mode. The word Stopwatch 28 will light up in the LC display. Note: The pedometer is not active in stopwatch mode. 
 appears on the LCD.
jPress the MODE button 3 to start the stopwatch.
jPress the MODE button 3 again to stop the stopwatch.
jPress the CLEAR button 5 to set the stopwatch to 0.
jPress the FUNC button 6 to return to count mode.
12 GB/CY
Using the stopwatch with the pedometer (the device must be in count mode):
jPress the FUNC button 6 3 times to get into stopwatch mode. The word Stopwatch 28 will light up in the LC display.
jPress the MODE button 3 to start the stopwatch.
jPress the FUNC button 6 to switch to count mode. The pedometer is active. The stopwatch continues running in the background.
jPress the FUNC button 6 3 times to return to stopwatch mode.
jPress the MODE button 3 again to stop the stopwatch.
jPress the CLEAR button 5 to set the stopwatch to 0.
Note: The stopwatch can only be set to 0 in stopwatch mode.
jPress the FUNC button 6 to return to count mode.
Q Alarm function
jSet the required alarm time (see “Setting parameters”).
Note: The set alarm is activated every day. The alarm signal rings for approx. 1 minute.
jPress the FUNC 6 , CLEAR 5 , SET 2 or MODE button 3 to deactivate the audible signal.
Q Using the panic alarm
jThe alarm is triggered when the panic alarm plug 1 is pulled out of the device.
Getting started
jPull out the panic alarm plug 1 on the wrist strap to trigger the panic alarm.
jInsert the panic alarm plug 1 back into the device to switch off the panic alarm.
Note: Four new LR44 batteries will sound the panic alarm for about five minutes. We recommend that you test the panic alarm briefly when you wish to use the pedometer. Replace the four LR44 batteries without delay if the low battery state indicator 15 illuminates.
Q Restore factory settings
jIf the equipment is exposed to a strong electro-magnetic high-frequency field, or if there is electro-static discharge, this may lead to malfunctions. If malfunctions do occur, for example the buttons do not reach or the display is shown incorrectly, press the RESET button 12 to reset the equipment to the factory defaults. Use a thin, pointed object to do this. The malfunctions should then be eliminated. IMPORTANT! Please note that this will delete all data. It will then be necessary to reset all the parameters.
Q Changing the batteries
The device takes two different battery types. Note: You should replace the smaller batteries (type LR44) immediately when the low battery state indicator 15 illuminates. If the smaller batteries (type LR44) become exhausted or low in charge, then the panic alarm and pedometer functions cannot be used. Do not use the pedometer without the larger battery (CR2032) in place or with a discharged larger battery (CR2032). The data storage function
GB/CY 13
Getting started / Cleaning and Care / Disposal
is not available to you if the larger battery (CR2032) is discharged or not in place. Note: Either the large CR2032 battery or the small LR44 batteries are used to store the data. All the stored data are erased if all the batteries are out of the device at the same time.
jRelease the screw 7 on the battery compartment cover 8 using a small appropriate screwdriver (not included). Remove the cover (see Fig. B).
jTake out the exhausted batteries. Note: Use a pointed object (e.g. paper clip) to remove the batteries.
jInsert four new batteries type LR44 (1.5 V  ) and / or one battery type CR2032 (3 V
  ).
).
Note: Make sure you fit the batteries the right way round (polarity). The correct polarity is shown inside the battery compartment 13.
jPut the battery compartent cover 8 back on to the battery compartment 13. The LC display comes on automatically.
jFasten the battery compartment lid 8 back onto the battery compartment 13 by tightening the screw 7 by means of a Phillips screwdriver.
Q Cleaning and Care
jClean the outside of the device only with a soft dry cloth. Use a slightly dampened soft cloth to remove more stubborn dirt.
jDo not under any circumstances use liquids or cleaning agents, as they will damage the device.
Q Disposal
The packaging is made entirely of recyclable materials, which you may dispose of at local recycling facilities.
Contact your local refuse disposal authority for more details of how to dispose of your worn-out product.
To help protect the environment, please dispose of the product properly when it has reached the end of its useful life and not in the household waste. Information on collection points and their opening hours can be obtained from your local authority.
Faulty or used batteries must be recycled in accordance with Directive 2006 / 66 / EC. Please return the batteries and / or the device to the available collection points.
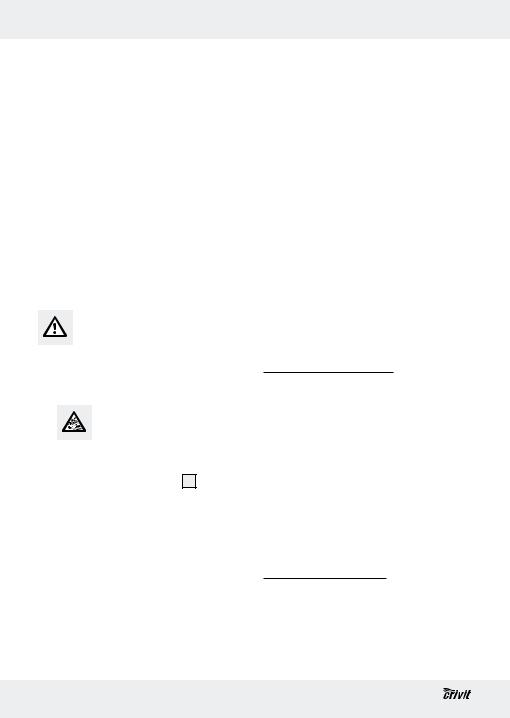
|
Environmental damage |
|
through incorrect disposal |
Pb Hg |
of the batteries! |
Batteries may not be disposed of with the usual domestic waste. They may contain toxic heavy metals and are subject to hazardous waste treatment rules and regulations. The chemical symbols for heavy metals are as follows: Cd = cadmium, Hg= mercury,
Pb = lead. That is why you should dispose of used batteries at a local collection point.
14 GB/CY

EMC 

Product Description:
Pedometer
Model-no.: H14347
Version: 11 / 2010
GB/CY 15

Popis sadržaja
Uvod |
|
|
Namjensko korištenje.................................................................................................. |
Stranica |
17 |
Opis dijelova............................................................................................................... |
Stranica |
17 |
Tehnički podaci............................................................................................................ |
Stranica |
17 |
Opseg pošiljke............................................................................................................. |
Stranica |
18 |
Sigurnost |
|
|
Općenite upute za sigurnost....................................................................................... |
Stranica |
18 |
Sigurnosne upute za baterije...................................................................................... |
Stranica |
19 |
Prije stavljanja u pogon |
|
|
Otklanjanje izolacijske trake....................................................................................... |
Stranica |
19 |
Stavaljanje u pogon....................................................................................... |
Stranica |
19 |
Modus Hold / Modus brojenja................................................................................... |
Stranica |
20 |
Namještanje parametara............................................................................................ |
Stranica |
20 |
Namještanje dana....................................................................................................... |
Stranica |
21 |
Uporaba brojila koraka.............................................................................................. |
Stranica |
21 |
Pozivanje trenutnih vrijednosti treninga...................................................................... |
Stranica |
22 |
Pozivanje tjednog pregleda........................................................................................ |
Stranica |
22 |
Uporaba odbrojavanja (Countdown)........................................................................ |
Stranica |
23 |
Uporaba štoperice...................................................................................................... |
Stranica |
23 |
Funkcija alarma........................................................................................................... |
Stranica |
24 |
Uporaba panik-alarma................................................................................................ |
Stranica |
24 |
Uspostavljanje stanja dostave.................................................................................... |
Stranica |
24 |
Zamjena baterija......................................................................................................... |
Stranica |
24 |
Čišćenje i njega................................................................................................... |
Stranica |
25 |
Zbrinjavanje.......................................................................................................... |
Stranica |
25 |
16 HR
Brojač koraka
Q Uvod
Upoznajte se sa uređajem, prije prvog stavljanja u pogon. Za to pomno pročitajte slijedeće upute za
uporabu i sigurnost. Rabite uređaj isključivo sukladno opisu i za navedena područja primjene. Dobro sačuvajte ove upute za uporabu. U slučaju prosljeđivanja uređaja trećim osobama, predajte također svu pripadajuću dokumentaciju.
Q Namjensko korištenje
Ovo brojilo koraka snima broj urađenih koraka, pređeni put i potrebno vrijeme. Dodatne pokazne vrijednosti su prosječna brzina, najveća brzina i trenutna brzina kao i potrošnja kalorija, izgaranje masti i izgaranje masti u postotcima. Uređaj je dodatno opremljen satom, štopericom i funkcijom za alarm kao i sa panik-alarmom. Druga vrsta uporabe ili promjene uređaja smatrat će se nenamjenskim i mogu prouzrokovati opasnosti od ozljeda i / ili oštećenja uređaja. Proizvođač ne preuzima nikakvu odgovornost za štete nastale od nenamjenske uporabe. Uređaj nije namijenjen u komercijalne svrhe.
Q Opis dijelova
Uređaj:
1utikač panik-alarma s narukvicom
2tipka SET
3tipka MODE
4pokazivač
5tipka CLEAR
Uvod
6tipka FUNC
7vijak
8poklopac baterijskog kućišta
9klip za pojas
10baterija CR2032 (3 V, litij)
11baterije LR44 (1,5 V, alkalije)
12tipka RESET
13baterijsko kućište
Pokazivač:
14funkcijska letva
15pokazivanje najnižeg stanja baterija
16znak kg, cm, km; lb, inch, mile (pokazivanje veličine)
17znak CUR Speed / km / h (trenutna brzina)
18znak MAX Speed / km / h (najveća brzina)
19znak izgaranja masti
20znak kcal (kilokalorije)
21izgaranje masti u %
22višenamjensko pokazivanje
23znak AVG Speed / km / h (prosječna brzina)
24znak ALM
25pokazivanje Time / Timer (vrijeme / mjereno vrijeme) / Countdown
26znak Alarm 
27znak PM
28pokazivanje Stopwatch (štoperica)
29godine
30spol (MAN / WOMAN)
Uputa: LC-pokazivač uređaja nemože se isključiti. Međutim, potrošnja struje za pogon LC-pokazivača je veoma niska i može se usporediti sa potrošnjom ručnog sata.
Q Tehnički podaci
Metoda mjerenja: |
metoda njihala |
|
Pokazivanje koraka: |
999.999 koraka |
|
Pokazivanje |
|
|
udaljenosti: |
9999,99 km |
|
|
HR 17 |
|
|
|
|
|
|
|
Uvod / Sigurnost
Pokazivanje kalorija: |
9999,99 kcal |
|||||
Duljina koraka: |
30 |
– 200 cm (u 1 cm |
||||
|
točno namjestivo) / |
|||||
|
10 |
– 80 inch |
||||
Prethodno namješteno: |
60 cm / 25 inch |
|||||
Namjestiva |
|
|
|
|
|
|
težina korisnika: |
30 |
– 200 kg (u 1 kg |
||||
|
točno na namjestivo ) / |
|||||
|
60 |
– 400 lb |
||||
Prethodno namješteno: 60 kg / 120 lb |
||||||
Starosna dob: |
5 – 99 |
|
|
|||
Prethodno namješteno: |
18 |
|
|
|
|
|
Spol: |
muško / žensko |
|||||
Prethodno namješteno: |
muško |
|
|
|||
Visina tjela: |
60 |
– 250 cm / |
||||
|
20 |
– 100 inch |
||||
Prethodno namješteno: 60 cm / 65 inch |
||||||
Štoperica / Countdown |
|
|
|
|
|
|
(područje snimanja): |
59 minute / |
|||||
|
59,99 sekunde |
|||||
Vremenski format: |
12 / 24 sata |
|||||
Prethodno namješteno: |
24 sata |
|
|
|||
Baterije: |
4 x baterije LR44 |
|||||
|
(1,5 V |
|
|
, alkalije) |
||
|
|
|
||||
|
1 x baterija CR2032 |
|||||
Dozvoljeno područje |
(3 V |
|
, litij) |
|||
|
||||||
|
|
|
|
|
|
|
temperature: |
0 – 50 °C |
|||||
Mjere: |
cca. 76 x 70 x 40 mm |
|||||
|
(š x v x d) |
|||||
Težina: |
|
|
|
|
|
|
Brojilo koraka |
|
|
|
|
|
|
(bez baterije): |
cca. 53 g |
|||||
Q Opseg pošiljke
1 brojilo koraka (s vrpcom za panika-alarm koju se može otkinuti)
4 baterije LR44 (1,5 V 

 , alkalije)
1 baterije CR2032 (3 V 

 , litij)
1 upute za uporabu
 Sigurnost
 Upozorenje! Pročitajte upute za sigurnost i ostale upute. Propusti pri pridržavanju uputa za sigurnost i ostalih uputa može prouzročiti strujni udar, požar i / ili teške ozljede.
SAČUVAJTE SVE UPUTE ZA SIGURNOST I INE UPUTE ZA UBUDUĆE!
Općenite upute za sigurnost
J Upozorenje! OPA-
SNOST PO ŽIVOT I OD NEZGODA ZA DJECU! Ne
ostavljajte djecu nikad bez nadzora u blizini omotnog materijala i proizvoda. Prijeti opasnost od gušenja omotnim materijalom i opasnost po život strangulacijom. Djeca često podcjenjuju opasnosti. Stoga držite djecu uvijek podalje od proizoda. Proizvod nije igračka.
 Upozorenje! OPASNOST PO ŽIVOT! Baterije se može progutati, što je opasno po život. Ako se je progutalo bateriju, potrebno je smjesta zatražiti liječničku pomoć.
JNe stavljajte uređaj u pogon, ako je oštećen. Oštećeni uređaji mogu prouzročiti opasnost po život strujnim udarom!
JNe izlažite uređaj
-ekstremnim temperaturama,
-snažnim vibracijama,
-snažnom mehaničkom opterećenju,
-izravnom suncu,
-vlagi / kiši.
Inače prijeti oštećenje proizvoda.
JVodite računa o tome, da jamstvo ne obuhvaća oštećenja prouzrokovana
18 HR
Sigurnost / Prije stavljanja u pogon / Stavaljanje u pogon
nestručnim rukovanjem, nepridržavanjem uputa za uporabu ili zahvatima od neovlaštenih osoba.
JNe rastavljajte uređaj ni u kojem slučaju. Nestručne popravke mogu prouzročiti znatnu opasnost za korisnika. Prepustite popravke isključivo stručnim osobama.
Sigurnosne upute za baterije
JOtklonite baterije iz uređaja, ako ih se dulje vijeme nije rabilo.
JOPREZ! OPASNOST OD EKSPLOZIJE! Ne punite baterije nikad ponovno!
JPri postavljanju vodite računa o ispravnoj polarnosti! Ista je prikazana u baterijskom kućištu 13.
JPrije postavljanja i ukoliko je potrebno, očistite kontakt baterije i uređaja suhom krpom.
JUmetnite također bateriju tipa CR2032, kao i četiri baterije tipa Typ LR44 u uređaj. Brojilo koraka inače nemože ispravno funkcionirati.
JIstrošene baterije smjesta izvucite iz uređaja. Prijeti povećana opanost da iscure!
JBaterije ne pripadaju u kućni otpad!
JSvaki potrošač je zakonski obvezan, propisno zbrinjavati baterije!
JDržite baterije podalje od djece, ne bacajte ih u vatru, ne spajajte ih ponovno i ne rastavljajte ih.
JU slučaju nepridržavanja uputa, baterije bi se mogle ispraznuti preko njihovog napona na kraju pražnjenja. U tom slučaju prijeti opasnost da iscure. Ako su baterije iscurijele u Vašem uređaju, smjesta ih izvadite, kako bi spriječili oštećenje uređaja!
JIzbjegavajte dodir s kožom, očima i sluznicom. Pri dodiru baterijskom kiselinom, smjesta isperite dotično mjesto sa dostatno vode i / ili obratite se liječniku!
JRabite isključivo navedene tipove baterija.
QPrije stavljanja u pogon
QOtklanjanje izolacijske trake
Uređaj je pri dostavi opremljen baterijama.
jIzvucite izolacijsku traku na poleđini uređaja u smjeru strijelice. Zazvučati će signalni zvuk.
Sad možete namjestiti Vaše brojilo koraka.
Q Stavaljanje u pogon
Prije prve uporabe, potrebno je namjestiti slijedeće parametre: mjerna jedinica (metrička tj. sustav SAD-a), duljina koraka, visina tijela, visina, starosna dob, spol, vremenska jedinica (12 / 24 sata), trenutno vrijeme, funkcija alarma. Inače se funkcije brojila koraka nemože smisleno koristiti.
Uputa: Nakon što ste prije prve uporabe namjestili sve parametre, iste možete u bilo kad opet promijeniti. Jedino jedinicu mjere (metrička tj. sustav SAD-a) nemože se naknadno promijeniti. Ako želite promijeniti jedinicu mjere, trebate izvaditi sve baterije 10,
11 iz baterijskog kućišta 13 i pritisniti tipku
RESET 12. Kod tog postupka se prethodno
namještene vrijednosti ponovno namjesti.
HR 19
Stavaljanje u pogon
QModus Hold / Modus brojenja
Pri stavljanju u pogon uređaja, brojilo koraka se nalazi u modusu brojenja.
Uputa: Funkcije mjerenja brojila koraka nisu aktivirane u modusu Hold.
jDržite tipku MODE 3 cca. 3 sekunde pritisnutom. Zazvučati će signalni zvuk.
Pokazivanje 

 izmijenično zasvijetli sa brojem koraka i riječ SET se pojavi na pokazivaču.
jDržite tipku MODE 3 cca. 3 sekunde pritisnutom, kako bi se ponovno vratili u modus brojenja. Zazvučati će signalni zvuk. Pokazivanje 

 se izgasi.
Q Namještanje parametara
jAko uređaj prvi put stavljate u pogon ili ako uključite uređaj na modus Hold (vidi „Modus Hold / Modus brojenja“), možete različite parametre namjestiti tj. promijeniti.
jZa to pritisnite tipku SET 2 , kako bi prebacili u modus unos. Pokazivanje SET se pojavi na LC-pokazivaču.
jPokazivanja kg, cm, km bzw. lb, inch, mile 16 zasvijetle. Pritisnite tipku MODE 3 tj. CLEAR 5 , kako bi namjestili željenu jedinicu mjere (metričku tj. sustav SAD-a).
jPotvrdite Vaš unos pritiskanjem tipke SET 2 . U funkcijskoj letvi 14 pojavi se pokazivanje STRIDE. Na LC-pokazivaču žmiga znak cm 16 kao i prethodno namještena vrijednost 60 cm tj. 25 inch. Pritisnite tipke MODE 3 tj. CLEAR 5 , kako bi namjestili željenu duljinu koraka.
Uputa: Duljina koraka može se namjestiti u području od 30 do 200 cm tj. 10 do 80 inch.
Savjet: Držite tipke MODE 3 tj. CLEAR 5 cca. 3 sekunde pritisnutim. Na
taj način postižete ubrzano namještanje vrijednosti. To ubrzano namještanje možete također koristiti za slijedeće postupke namještanja.
jPotvrdite unos pritiskanjem tipke SET 2 . U funkcijskoj letvi 14 se pojavi pokazivanje WEIGHT. Na LC-pokazivaču zasvijetle znak kg 16 kao i prethodno namještena vrijednost 60 kg tj. 120 lb. Pritisnite tipke MODE 3 tj. CLEAR 5 , kako bi namjestili željenu težinu.
Uputa: Težinu se može namjestiti u području od 30 do 200 kg tj. 60 do 400 lb.
jPotvrdite Vaš unos pritiskanjem tipke SET 2 . Na funkcijskoj letvi 14 se pojavi pokazivanje HEIGHT. U funkcijskoj letvi žmiga prethodno namještena vrijednost. Pritisnite tipku MODE 3 tj. CLEAR 5 , kako bi unijeli željenu visinu.
Uputa: Može se namjestiti visina između 60 i 250 cm tj. 20 i 100 inch.
jPotvrdite Vaš unos pritiskanjem tipke SET 2 . Na LC-pokazivaču se pojavi pokazivanje AGE 29 kao i broj 18 kao prethodno namještena vrijednost. Pritisnite tipke MODE 3 tj. CLEAR 5 , kako bi namjestili željenu starosnu dob.
Uputa: Može se namjestiti starosna dob 5 do 99 godina.
jPotvrdite Vaš unos pritiskanjem tipke SET 2 . Pokazivanja MAN tj. WOMAN zasvijetle. Pritisnite tipku MODE 3 tj. CLEAR 5 , kako bi namjestili željeni spol.
jPotvrdite Vaš unos pritiskanjem tipke SET 2 . Pokazivanja Time 25 kao i 
 (format 24 sata) tj.
 (format 12 sati) zasvijetle.
20 HR
Pritisnite tipke MODE 3 tj. CLEAR 5 , kako bi namjestili željeni format vremena. Uputa: Znak PM 27 stoji u formatu 12
sati za poslijepodne.
jPotvrdite Vaš unos pritiskanjem tipke SET 2 . Pokazivanje Time 25 se pojavi i pokazivanje sati višenamjenskog pokazivanja 22 žmiga. Pritisnite tipke MODE 3 tj. CLEAR 5 , kako bi namjestili željeno vrijeme.
jPotvrdite Vaš unos pritiskanjem tipke SET 2 . Pokazivanje minuta višenamjenskog pokazivanja 22 žmiga. Pritisnite tipke MODE 3 tj. CLEAR 5 , kako bi namjestili željeno vrijeme.
jPotvrdite Vaš unos pritiskanjem tipke SET 2 . Pokazivanje Alm 24 se pojavi i pokazivanje sati višenamjenskog pokazivanja 22 žmiga. Pritisnite tipku MODE 3 tj. CLEAR 5 , kako bi namjestili željeno vrijeme alarma.
jPotvrdite Vaš unos pritiskanjem tipke SET 2 . Pokazivanje minuta višenamjenskog poka zivanja 22 žmiga. Pritisnite tipku MODE 3 , kako bi namjestili željeno vrijeme alarma.
jPotvrdite Vaš unos pritiskanjem tipke SET 2 . Uređaj se sad ponovno nalazi u modusu Hold.
VAŽNO! Tipka CLEAR 5 ima drugu funkciju nakon namještanja alarma. Pritisnite tipku CLEAR 5 , kako bi uključili alarm. Znak alarma 26 se pojavi na LC-pokazivaču. Ponovno pritisnite tipku CLEAR 5 , kako bi isključili alarm. Znak alarm 26 se izgasi (vidi također „Funkcija alarma“).
Q Namještanje dana
jPrebacite uređaj u modus Hold (vidi „Modus Hold / Modus brojenja“).
Stavaljanje u pogon
jPritisnite tipku FUNC 6 . Na funkcijskoj letvi 14 se pojavi pokazivanje DAY.
jPritisnite tipku SET 2 . Brojka dana žmiga.
jPritisnite tipku MODE 3 tj. CLEAR 5 , kako bi namjestili željeni dan u tjednu. Različite brojke imaju slijedeća značenja:
ponedjeljak = 1 utorak = 2 srijeda = 3 četvrtak = 4 petak = 5 subota = 6 nedjelja = 7
jPritisnite tipku SET 2 , kako bi potvrdili Vaš unos.
jPritisnite 3 puta tipku FUNC 6 , kako bi se ponovno vratili u modus Hold.
Q Uporaba brojila koraka
Za tu funkciju uređaj se treba nalaziti u modusu brojenja (vidi „Modus Hold / Modus brojenja“).
jPričvrstite brojilo koraka pomoću klipova za pojas 9 čvrsto na pojasu (vidi prik. D). VAŽNO! Brojilo koraka treba biti sigurno i čvrsto pričvršćeno. Samo na taj način je omogućeno točno mjerenje.
Brojilo koraka sad registrira vibracije tijela i snima broj urađenih koraka, prijeđeni put, potrebno vrijeme i izračuna trenutnu brzinu, najveću brzinu i prosječnu brzinu kao i potrošnju kalorija, izgaranu tjelesnu mast i izgaranu tjelesnu mast u %. Brojilo koraka automatski prepoznaje da li hodate ili trčite.
Uputa: Kod ustanovljenih vrijednosti radi se o približnim vrijednostima. Duljina koraka koja
HR 21
Stavaljanje u pogon
se mijenja kao i vanjski utjecaji, kao odjeća, teren i.sl. ne omogućuje točno mjerenje.
 Savjet: Uključite uređaj u modus Hold, kako bi spriječili neželjena mjerenja (put do treninga i.sl.) (vidi „Modus Hold /
Modus brojenja“).
QPozivanje trenutnih vrijednosti treninga
Za tu funkciju uređaj se treba nalaziti u modusu brojenja (vidi „Modus Hold / Modus brojenja“).
jPritisnite tipku MODE 3 . U funkcijskoj letvi 14 pojavi se pokazivanje STEPS. LC-pokazivač 4 pokazuje broj urađenih koraka. Dodatno se pojave dodatne vrijednosti treninga na LC-pokazivaču 4 . Pritisnite tipku MODE 3 , kako bi prebacili s jedne vrijednosti treninga na drugu. Moguća su slijedeća pokazivanja:
Time 25 = trenutno vrijeme km 16 = prijeđeni put kcal 20 = potrošene kalorije
Fat 19 = izgaranje masti u kg / lb Fat in % 21 = izgaranje masti u
postotcima Timer 25 = mjereno vrijeme
CUR Speed 17 = trenutna brzina MAX Speed 18 = najveća brzina AVG Speed 23 = prosječna brzina
Uputa: Tek kad 20 – 30 minuta neprestano trenirate, Vaše tijelo počinje izgarati mast. Stoga se tek nakon određenog vremena pojave pokazivanja izgaranja masti u kg / lb 19 i izgaranja masti u % 21 na LC-pokazivaču.
22 HR
Q Pozivanje tjednog pregleda
Za tu funkciju uređaj se treba nalaziti u modusu brojenja (vidi „Modus Hold / Modus brojenja“).
Uputa: Brojilo koraka snima prijeđeni put kao i potrošene kalorije tjednog treninga koji je u tijeku. Prema odabiru možete također pozvati pojedine dane treninga.
Uputa: Snimanje tjedna počinje uvijek ponedjeljkom. Vodite računa o tome, da se snimanje tjedna nedjeljom uvijek u 24 sata potpuno poništi.
Uputa: Trenutna dnevna snimanja se svaki dan u 24 sata automatski prebacuju u tjedni pregled i time se postavlja na 0.
Uputa: Za snimanje podataka, koristi se ili velike CR2032-baterije ili male LR44-baterije. Ako istovremeno izvadite sve baterije iz uređaja, svi podaci će se izbrisati.
jPritisnite tipku FUNC 6 , kako bi prebacili u modus funkcije. U funkcijskoj letvi 14 se pojavi pokazivanje DAY. Na LC-pokazi- vaču pojave se znakovi km 16 i kcal 20 kao i uz to pripadajuće vrijednosti ukupnog tjedna treninga.
jPritisnite tipku MODE 3 , kako bi iz jednog dana treninga stigli u drugi. Na LC-pokazivaču se pojave znakovi km 16 i kcal 20 kao i pripadajuće vrijednosti pojedinih dana treninga.
Uputa: Pri tome su dani označavani brojkama (vidi „Namještanje dana“). Ako se pod pokazivanjem DAY ne pojavi brojka, LC-pokazivač pokazuje vrijednosti ukupnog tjedna treninga.
Uputa: Vodite računa o tome, da se snimanja za dan 7 ne pokazuju. Dan 7 je ili trenutni dan ili se nije pojavio.
jPritisnite 3 puta tipku FUNC 6 , kako bi se ponovno vratili u modus brojenja.
 Loading...