


English
Brother Laser Printer HL-660 Series Quick Setup Guide
Read this guidebook first to set up your printer.
Action 1: Getting Started
Check the Supplied Items
After taking the printer out of the carton and removing the packing materials, make sure that the following items are not damaged and none are missing:
• Printer |
• Multi-purpose sheet feeder |
|
|
|
|
|
|
|
|
|
|
|
|
|
• Drum unit |
• Starter Toner cartridge |
NOTE: This is a starter toner cartridge
– expected yield 1,000 pages TN-100 Replacement toner cartridge
– expected yield 3,000 pages
∙3.5” floppy disks for DOS/Windows ®
∙Software setup guide
∙Quick setup guide (this guidebook)
∙User’s guide
∙Plastic Bag
NOTE
You will need to purchase an interface cable that matches the interface of your computer. If you do not know what cable you need, consult your dealer or reseller.
The product names in this guidebook are trademarks or registered trademarks of each manufacturer. The specifications are subject to change without notice.
© 1994 Brother Industries, Ltd. |
UL7075001 A Printed in |
Japan
1
English
Action 2: Install the Toner Cartridge / Drum Unit
1 |
|
|
|
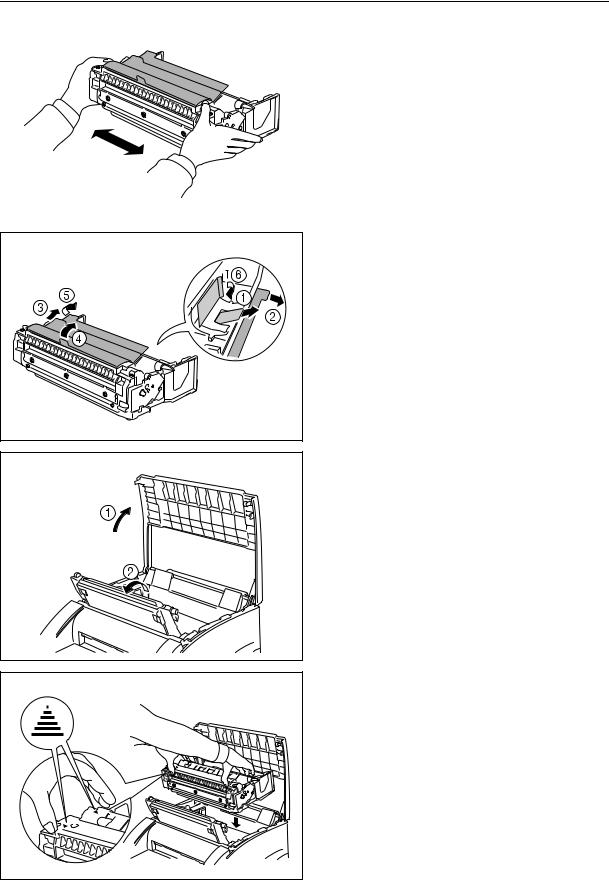
Unpack the drum unit and gently shake it |
|
|
|
|
from side to side five or six times. |
|
|
|
|
|
|
|
|
|
|
|
|
|
|
|
|
|
|
|
|
|
|
|
|
|
|
|
|
|
|
|
|
|
|
|
2 |
3 |
4 |
2 |
Remove the protective parts, in order, as shown in the illustration.
NOTE
Do not expose the drum unit to light for longer than a few minutes, as this will damage the drum.
Open the top cover. Open the drum cover by pushing the two blue tabs in toward the center of the unit and lifting the cover toward you.
Install the drum unit into the printer.
Make sure that you gasp the ▲ marks.

English |
5 |
6 |
7 |
8 |
Unpack the toner cartridge and gently rock it from side to side well before installing. ( )
Then, remove the protective parts.( )
CAUTION
DO NOT MOVE THE SHUTTER LEVER UNTIL THE CARTRIDGE IS INSTALLED.
Install the toner cartridge into the drum unit. Make sure that the marks are aligned.
Gently pull the blue shutter lever on the toner cartridge forward until the red arrows are aligned.
Close the drum cover ( ) and push gently until it clicks into place.
Close the top cover. ( )
See “CHAPTER 5 MAINTENANCE” in the User’s Guide for more information about replacement of the toner cartridge.
3
 Loading...