


 Loading...
Quick Setup Guide |
|
Start Here |
HL-2280DW |
|
Please read the Safety and Legal booklet first before you set up your machine. Then, please read this Quick Setup Guide for the correct setup and installation.
To view the Quick Setup Guide in other languages, please visit http://solutions.brother.com/.
WARNING |
WARNING indicates a potentially hazardous situation which, if not avoided, |
could result in death or serious injuries. |
|
|
|
CAUTION |
CAUTION indicates a potentially hazardous situation which, if not avoided, may |
result in minor or moderate injuries. |
1 |
Unpack the machine and check the components |
||
|
Installation CD-ROM, |
Product Registration |
AC Power Cord |
|
Documentation CD-ROM |
Sheet |
|
|
|
(USA only) |
|
|
Basic User’s Guide |
Quick Setup Guide |
Safety and Legal booklet |
|
Drum Unit and Toner Cartridge Assembly |
|
|
|
(pre-installed) |
|
|
 WARNING
Plastic bags are used in the packaging of your machine. Plastic bags are not toys. To avoid danger of suffocation, please keep these bags away from babies and children and dispose of them properly.
USA/CAN Version A
1
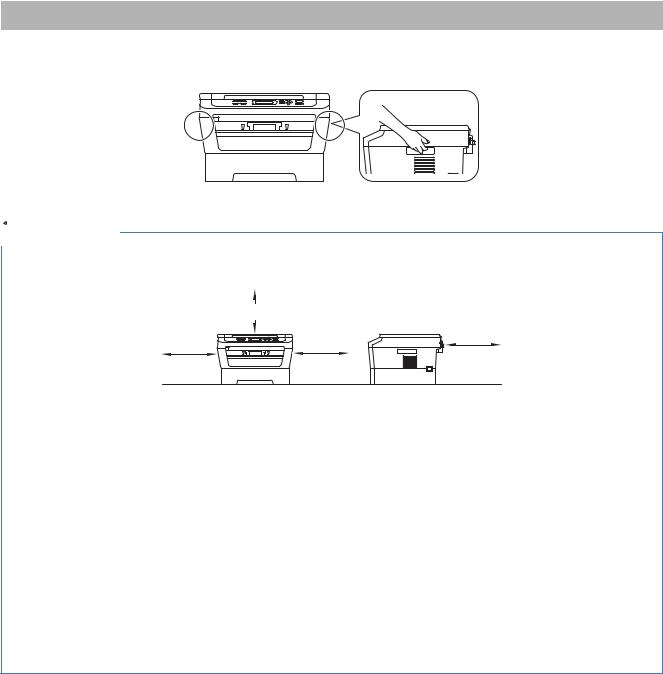
 CAUTION
When you move the machine, grasp the side handholds that are under the scanner. DO NOT carry the machine by holding it at the bottom.
 Note
Note
•Keep a minimum gap around the machine as shown in the illustration.
13.8in. (350 mm)
3.95 in. |
3.95 in. |
3.55 in. |
(90 mm) |
||
(100 mm) |
(100 mm) |
|
•The components included in the box may differ depending on your country.
•Please save the original packaging should you need to ship the machine in future.
•If for any reason you must ship your machine, carefully repack the machine in the original packaging to avoid any damage during transit. The machine should be adequately insured with the carrier. For how to repack the machine, see Packing and shipping the machine in the Advanced User's Guide.
•The interface cable is not a standard accessory. Buy the appropriate interface cable for the interface you want to use (USB or Network).
USB cable
•It is recommended to use a USB 2.0 cable (Type A/B) that is no longer than 6 feet (2 meters).
•DO NOT connect the interface cable at this time. Connecting the interface cable is done during the MFL-Pro installation process.
Network cable
Use a straight-through Category5 (or greater) twisted-pair cable for 10BASE-T or 100BASE-TX Fast Ethernet Network.
2

2 |
Remove the packing |
machinematerial from the |
 IMPORTANT
DO NOT connect the AC power cord yet.
a Remove the packing tape from the outside of the machine and the film covering the scanner glass.
b Open the front cover.
c Remove the Silica Pack from the inside of the machine.
 CAUTION
DO NOT eat the Silica Pack. Please discard. If ingested seek medical attention immediately.
d Lift the elastic band off the drum.
e Pull the paper strip to remove the protective material as shown in the illustration.
f Take out the drum unit and toner cartridge assembly.
3
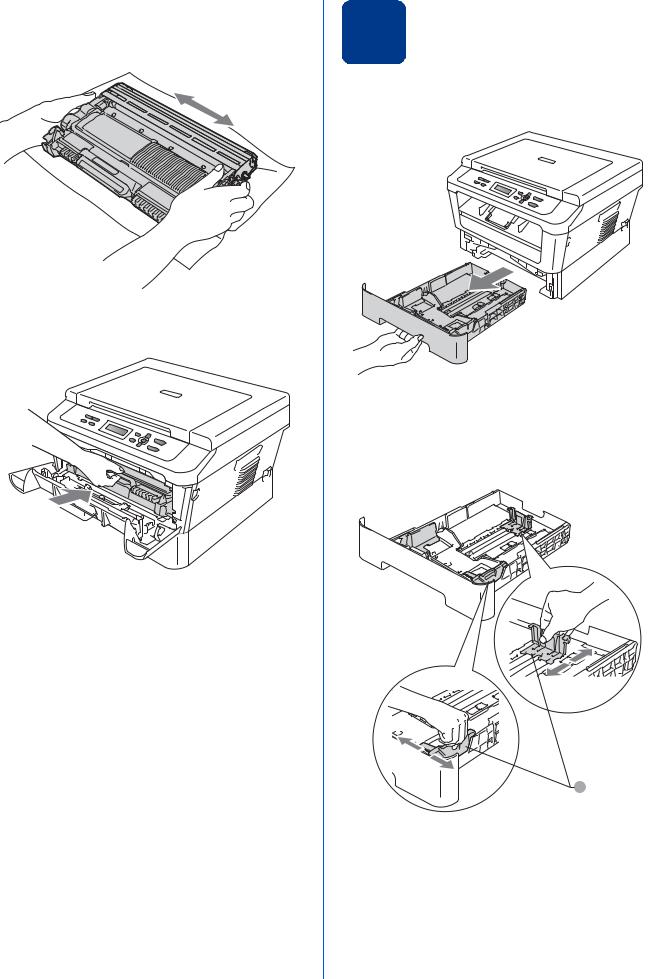
g Gently shake it from side to side several times to distribute the toner evenly inside the assembly.
h Put the drum unit and toner cartridge assembly back in the machine.
i Close the front cover of the machine.
4
3 |
Load paper in the paper |
|
|
|
tray |
a Pull the paper tray completely out of the machine.
b While pressing the green paper-guide release lever a, slide the paper guides to fit the paper size you are loading in the tray. Make sure that the guides are firmly in the slots.
1
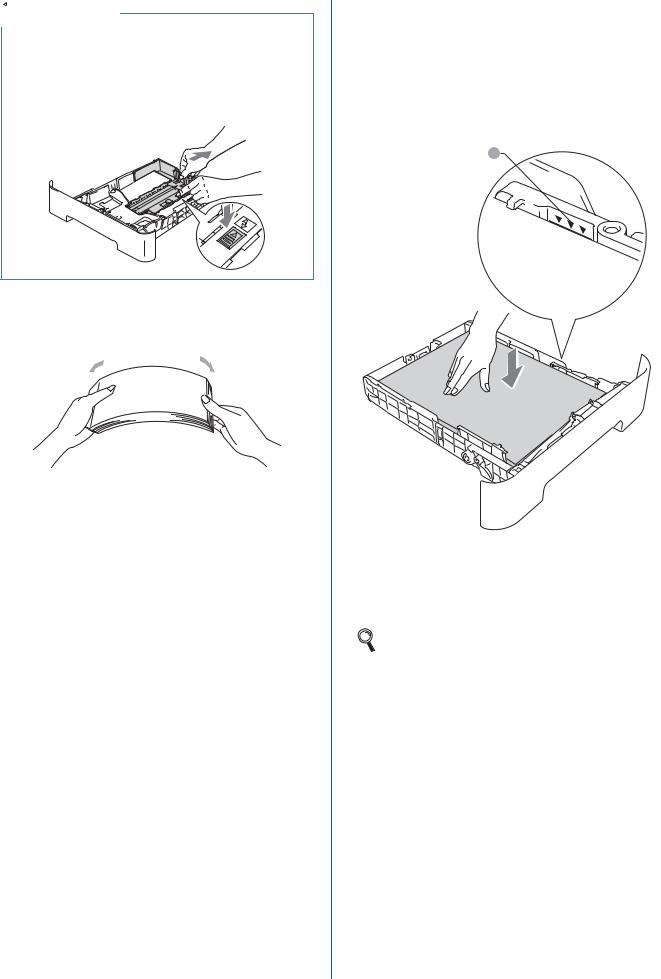

 Note
Note
For Legal or Folio size paper, press the release button in the bottom of the paper tray and then pull out the back of the paper tray.
(Legal or Folio size paper are not available in some regions.)
c Fan the stack of paper well to avoid paper jams and misfeeds.
d Put paper in the tray and make sure:
The paper is below the maximum paper mark (b b b) a.
Over filling the paper tray will cause paper jams.
The side to be printed on must be face down.
The paper guides touch the sides of the paper so it will feed properly.
1
e Put the paper tray firmly back in the machine. Make sure that it is completely inserted into the machine.
For more information about recommended paper, see Recommended paper and print media in the Basic User’s Guide.
5
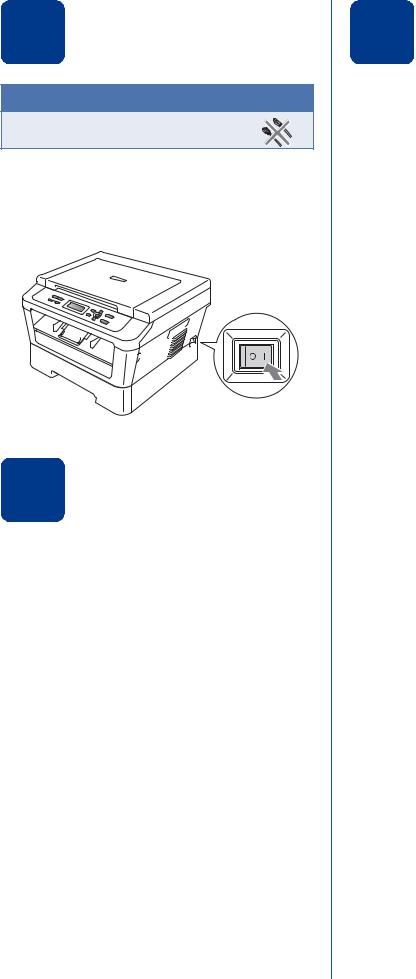
4 Connect the power cord
 IMPORTANT
DO NOT connect the interface cable yet.
a Connect the AC power cord to the machine, and then plug it into an AC power outlet.
b Turn on the machine’s power switch.
5 |
Choose your language |
|
|
|
(if needed) |
a Press Menu.
b Press a or b to choose 1.General Setup. Press OK.
c Press a or b to choose 0.Local Language. Press OK.
d Press a or b to choose your language. Press OK.
e Press Stop/Exit.
6
6 |
Set the LCD contrast |
|
|
|
(if needed) |
If you are having difficulty reading the LCD, try changing the contrast setting.
a Press Menu.
b Press a or b to choose 1.General Setup. Press OK.
c Press a or b to choose 3.LCD Contrast. Press OK.
d Press a to increase the contrast. —OR—
Press b to decrease the contrast. Press OK.
e Press Stop/Exit.
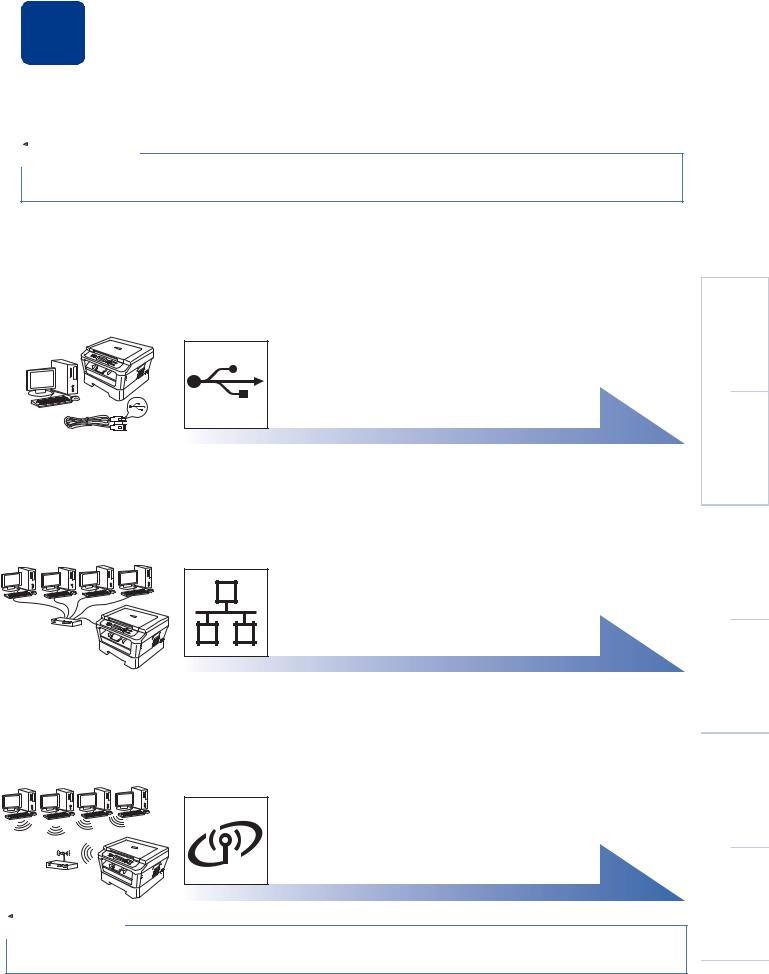
7 Choose your connection type
These installation instructions are for Windows® 2000 Professional, Windows® XP Home/Windows® XP
Professional, Windows® XP Professional x64 Edition, Windows Vista®, Windows® 7, and Mac OS X (versions 10.4.11, 10.5.x and 10.6.x).
 Note
Note
For Windows Server® 2003/2003 x64 Edition/2008/2008 R2, visit your model page at http://solutions.brother.com/.
For USB Interface Users
Windows®, go to page 8
Macintosh, go to page 10
For Wired Network
Windows®, go to page 12
Macintosh, go to page 14
For Wireless Network
Windows® and Macintosh go to page 16
 Note
Note
You can download the latest drivers and utilities for your machine from the Brother Solutions Center at http://solutions.brother.com/.
USB |
Macintosh ®Windows |
|
|
Wired |
®Windows |
Network |
Macintosh |
|
|
Wireless |
®Windows |
Network |
Macintosh |
|
|
7

USB |
Windows® |
For USB Interface Users
(Windows® 2000 Professional/XP/XP Professional x64 Edition/Windows Vista®/Windows® 7)
8 Before you install
a Make sure that your computer is ON and you are logged on with Administrator rights.
 IMPORTANT
•If there are any programs running, close them.
•The screens may differ depending on your operating system.
 Note
Note
The installation CD-ROM includes ScanSoft™ PaperPort™ 12SE. This software supports Windows® XP (SP3 or greater), XP Professional x64 Edition (SP2 or greater), Windows Vista® (SP2 or greater) and Windows® 7. Update to the latest Windows® Service Pack before installing MFL-Pro Suite. For Windows® 2000 (SP4 or greater) users, when the ScanSoft™ PaperPort™ 11SE download screen appears during the installation of MFL-Pro Suite, follow the on-screen instructions.
b Turn off the machine and make sure the USB interface cable is NOT connected to the machine. If you have already connected the cable, disconnect it.
9 Install MFL-Pro Suite
a Put the installation CD-ROM into your CD-ROM drive. If the model name screen appears, choose your machine. If the language screen appears, choose your language.
 Note
Note
If the Brother screen does not appear automatically, go to My Computer (Computer), double-click the CD-ROM icon, and then double-click start.exe.
b Click Initial Installation and then Install MFL-Pro Suite.
c Click Yes if you accept the license agreements.
 Note
Note
•If the installation does not continue automatically, open the top menu again by ejecting and then reinserting the CD-ROM or
double-click the start.exe program from the root folder, and continue from step b to install MFL-Pro Suite.
•For Windows Vista® and Windows® 7 users, when the User Account Control screen appears, click Allow or Yes.
d Follow the on-screen instructions until this screen appears.
8
USB
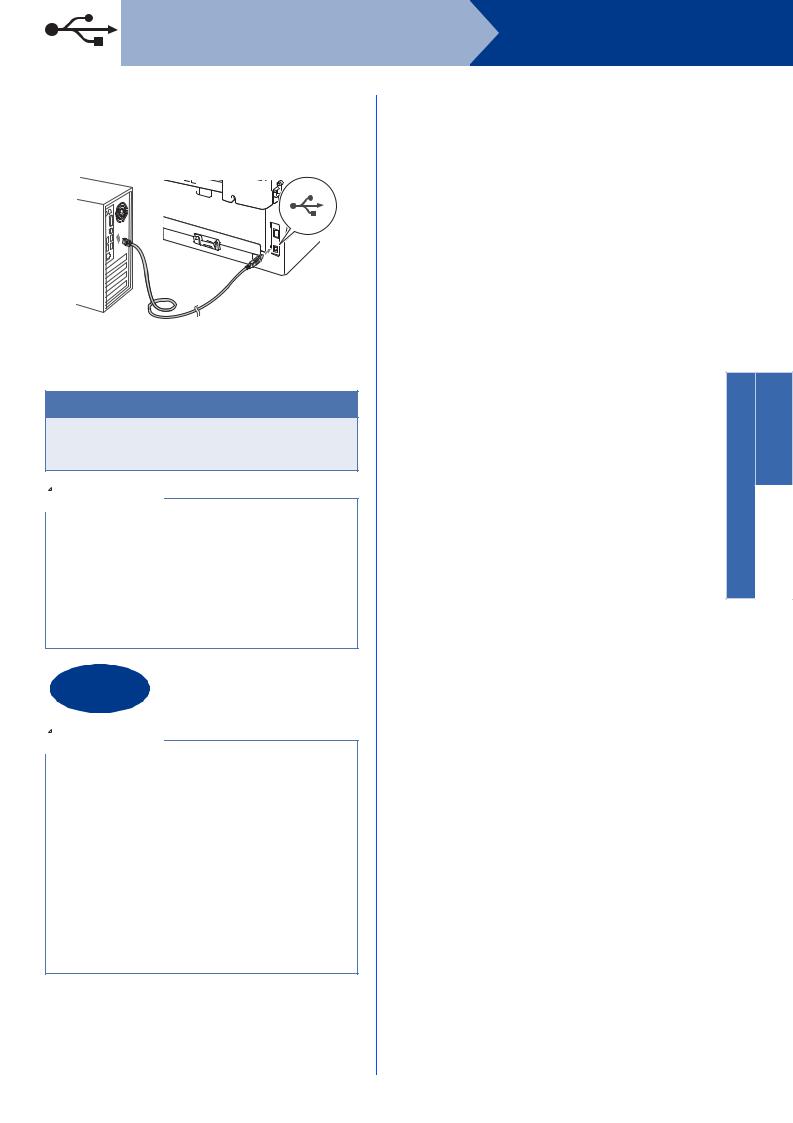
e Connect the USB cable to the USB connector
marked with the  symbol on your machine and then connect the cable to your computer.
f Turn the machine on, and follow the on-screen instructions to complete setup.
 IMPORTANT
DO NOT cancel any of the screens during the installation. It may take a few seconds for all screens to appear.

 Note
Note
•For Windows Vista® and Windows® 7 users, when the Windows Security screen appears, click the check box and click Install to complete the installation correctly.
•If an error message appears during the software installation, run the
Installation Diagnostics located in Start/All Programs/Brother/HL-2280DW.
Finish |
The installation is now |
complete. |

 Note
Note
•Depending on your security settings, a Windows Security or antivirus software window may appear when using the machine or its software. Please allow or permit the window to continue.
•XML Paper Specification Printer Driver
The XML Paper Specification Printer Driver is the most suitable driver for Windows Vista® and Windows® 7 when printing from applications that use the XML Paper Specification documents. Please download the latest driver by accessing the Brother Solutions Center at http://solutions.brother.com/.
Windows®
Macintosh ®Windows
USB
9

USB |
Macintosh |
|
|
For USB Interface Users (Mac OS X 10.4.11 - 10.6.x)
8 Before you install
a Make sure your machine is connected to the power and your Macintosh is ON. You must be logged on with Administrator rights.
 IMPORTANT
For Mac OS X 10.4.10 users, upgrade to Mac OS X 10.4.11 - 10.6.x. (For the latest
drivers and information on the Mac OS X you are using, visit http://solutions.brother.com/.)
b Connect the USB cable to the USB connector
marked with the  symbol on your machine and then connect the cable to your Macintosh.
c Make sure your machine’s power switch is on.
9 Install MFL-Pro Suite
a Put the installation CD-ROM into your CD-ROM drive.
b Double-click the Start Here OSX icon. Follow the on-screen instructions.
 Note
Note
It may take a few minutes for installation to complete.
c Follow the on-screen instructions until this screen appears. Choose your machine from the list, and then click OK.
d When this screen appears, click Next.
The installation of MFL-Pro Suite is now complete.
Go to step 10 on page 11.
10
USB
10 Download and install Presto! PageManager
When Presto! PageManager is installed OCR capability is added to Brother ControlCenter2. You can easily scan, share and organize photos and documents using Presto! PageManager.
On the Brother Support screen, click
Presto! PageManager and follow the on-screen instructions.
Finish |
The installation is now |
complete. |
Macintosh
USB |
Macintosh ®Windows |
11
Loading...