


CP 857 GT
CP 859 MT.2
CP 057 GT
CP 058 MT.2
CP 059 MT.2
CP 059 MD.2
CP 058 GT (X) F
CP 059 MD.3 (X) F
Cucina mista
Istruzioni per l'uso e l'installazione
Mixed cooker
Instructions for use and installation
Cuisinière mixte
Instructions pour l'emploi et l'installation
Cocina mixta
Instrucciones para el uso y la instalación
Fogão Misto
Instruções para o uso e a instalação

Congratulations for choosing an Ariston appliance, which you will find is dependable and easy to use. We recommend you read though this booklet for the best performance and to extend the life of your appliance. Thank you.
WARNINGS
THESE INSTRUCTIONS ARE ONLY VALID FOR THE COUNTRIES OF DESTINATION WHOSE SYMBOLS ARE SHOWN IN THE BOOKLET AND ON THE APPLIANCE RATING PLATE.
1.This appliance has been designed for private, nonprofessional domestic use in the home.
2.Read this instruction booklet carefully, as it provides important advice regarding safe installation, use and maintenance. Keep this booklet in a safe place for future reference.
3.The oven accessories that may come into contact with food are made of materials which comply with the provisions set forth by the EEC Directive 89/109 of 21/ 12/88 and the applicable national norms in force.
4.After removing the packaging, check that the appliance is intact. If in doubt, do not use the appliance and contact a qualified serviceman.
5.Some parts are covered with a removable scratch-proof film. Before using the appliance, the film should be removed and the underlying part cleaned with a cloth and a non-abrasive household cleaning product. When switching on the appliance for the first time, we recommend you heat the oven at the maximum temperature setting for about 30 minutes with nothing in it to eliminate any residue from manufacture.
6.All installation and adjustment operations should be carried out by a qualified serviceman in accordance with the applicable norms in force. Specific instructions are provided in the section intended for the installer.
7.Before connecting the appliance, make sure that the data on the rating plate (situated underneath the appliance and on the last page of this instruction booklet) correspond to the mains electricity and gas supplies.
8.During operation, the oven glass door and adjacent parts of the appliance become hot. Make sure, therefore, that children do not touch the appliance. For greater safety, an additional child-safety device is available from our Head Office and our Authorised Service Centres (see enclosed list). When ordering this, please give the code: BAB - followed by the appliance model. The model is stamped on the rating plate affixed to the rear of the appliance and at the back of this booklet.
9.Check that the capacity of the electrical system and the power outlets are suitable for the maximum power of
the appliance, indicated on the rating plate. If in doubt, consult a qualified technical engineer.
10.Check the condition of the gas connection pipe regularly and have it replaced by a qualified technical engineer as soon as it shows any signs of wear or anomaly.
11.Under no circumstances should the user replace the power supply cable or the gas connection pipe of this appliance. In the event of damage or the necessity for replacement, contact an authorised service centre only.
12.Do not leave the appliance plugged in if it is not in use. Switch off the main switch and turn off the gas supply when the appliance is not in use.
13.The burners and the cast-iron pan supports remain hot for a long time after use. Do not touch them.
14.To avoid accidental spills, do not use cookware with uneven or warped bottoms on the burners.
15.Never use flammable liquids such as alcohol or gasoline, etc. near the appliance when it is in use.
16.If the cooker is placed on a pedestal, take the necessary precautions to prevent the same from sliding off the pedestal itself.
17.If the appliance is fitted with a lid, any boiled over liquid should be removed from the hob before shutting it.
18.Where present, do not shut the lid if the hob is still hot.
19.do not use steam cleaners to clean your oven
1

COOKER DESCRIPTION
F |
|
E |
fig.1 |
|
AAuxiliary gas burner
BSemi-rapid gas burner
CRapid gas burner
DTriple ring gas burner DC-DR gas burner
EIgnitor for Gas Burners
FSafety Device - Activates if the flame accidentally goes out (spills, drafts, etc.), interrupting the supply of gas to the burner.
GElectric oven selector knob (cooking mode selection)
HElectric oven thermostat knob (temperature selection)
M Control knobs for gas burners
RSupport grid for cookware
PTimer
SElectric heating element indicator light
TMinute minder
UEnd of cooking programmer
VGas oven thermostat knob (gas oven mode selector
with temperature adjustment and electric grill) Z Gas oven light button
2

INSTRUCTIONS FOR USE
Gas burners
On the control panel, the following symbols are indicated around each knob "M" or on the knob itself: Cock
Off |
|
High flame |
|
Low flame |
|
Moreover, the symbols |
near the knobs indicate the |
position of the relative burner on the hob.
The burners are fitted with a safety thermocouple device against gas leaks. This device interrupts the gas supply should the burner flame go out during operation.
To light one of the burners, proceed as follows:
•turn the relative knob anti-clockwise until the pointer is on the high-flame symbol;
•press the knob down fully to actuate the automatic gas ignition;
•keep the knob pressed down for about 6 seconds with the flame lit to allow the safety thermocouple to heat;
•release the knob, checking that the flame is stable. If it is not, repeat the operation.
For minimum power, turn the knob towards the low flame symbol. Intermediate positions are possible by simply setting the knob anywhere between the high and the low flame symbol.
Important:
•Do not actuate the automatic ignition device for more than 15 consecutive seconds.
•Difficulty in ignition is sometimes due to air inside the gas duct.
•If a burner flame accidentally goes out, the gas continues to exit for a few moments before the safety device is actuated. Turn the control knob to the off position and do not attempt ignition again for at least 1 minute, thereby letting the gas disperse, which could otherwise be a danger.
•When the appliance is not in operation, check that the
knobs are set to the off position " ". The main gas supply cut-off cock should also be turned off.
Practical advice on using the burners
To obtain maximum efficiency from the burners, we recommend you only use pans with a diameter suitable for the burner being used, so that the flame does not extend beyond the pan base (see the following table).
When a liquid starts boiling, we recommend you turn the flame down just enough to keep the liquid simmering.
Burner |
ø Pan Diameter (cm) |
|
|
|
|
A.Auxiliary |
6 – 14 |
|
|
|
|
B.Semi-rapid |
15 – 20 |
|
|
|
|
C.Rapid |
21 |
– 26 |
|
|
|
D. Triple ring |
24 |
- 26 |
|
|
|
I.Double ring DC-DR (inner) |
10 - 14 |
|
|
|
|
I.Double ring DC-DR (outer) |
24 |
- 28 |
|
|
|
The hob is fitted with reducing pan stands |
|
(fig. 2), which should only be used on |
|
auxiliary burner "A" and on the DC-DR |
|
(inner) "I". |
fig.2 |
|
The "dual independent flame" burner
This gas burner consists of two concentric burner rings which can be actuated together or independently. When the two rings are used together at the highest setting, the burner reduces the length of cooking time with respect to traditional burners. The dual ring also distributes heat more evenly on the bottom of cookware, especially when both burner rings are used at the lowest setting. Cookware of any size can be used. If small pots or pans are used, only turn the inner burner on. Each burner ring has its own control knob:
the knob indicated by symbol |
|
|
controls the inner ring; |
|
|
||
the knob indicated by symbol |
|
|
controls the outer ring; |
|
|
To turn on one of the two rings, press the relative knob in all
the way and turn it anti-clockwise to the maximum setting  The burner is fitted with an electronic ignitor that is actuated automatically when the knob is pressed.
Since the burner is fitted with a safety device "F", the knob should be pressed for approximately 6 seconds for the device keeping the flame lit automatically to heat up.
To turn the burner off, turn the knob clockwise until it stops (corresponding again with the “ ” symbol).
For the best performance of your burners, keep the following in mind: All types of pans can be used on the burners. The important thing is that the bottom should be completely even.
3
GAS OVEN-ELECTRIC GRILL
The oven burner features a thermocouple safety device.
This device automatically cuts off the gas from the burner in a few seconds should the flame accidentally go out.
Lighting the oven burner
•open the oven door;
•press and turn the thermostat knob "V" (with the symbol
 ) and set it to maximum; keep it pushed.
Should there not be any electric energy, hold a lighted match near the central hole on the oven bottom as in fig.3;
fig.3
•keep the knob pressed in for around 10 seconds;
•release the knob, checking that the flame is stable;
•Close the oven door carefully to prevent the flame from going out;
•wait around 10-12 minutes before placing any food to be cooked into the oven, so as to preheat the oven suitably;
•set the temperature required for cooking by turning the thermostat knob to the positions ranging from 1 to 8 according to the following table:
Important: if the burner flame accidentally goes out, the gas continues to exit for a few moments before the safety device activates.
Turn the control knob to the off position and do not attempt ignition again for at least 1 minute, thereby letting the gas disperse, which could otherwise be a danger.
Electric grill operation
To grill food, turn the oven control knob clockwise to position  ; the indicator light "S" will also come on.
When cooking with the grill, we recommend that you keep the oven door open and that you apply the knob protection shield as indicated in figure 4.
Position Knobs |
1 |
2 |
3 |
4 |
5 |
6 |
7 |
8 |
|
|
|
|
|
|
|
|
|
°C |
140 |
155 |
175 |
190 |
210 |
230 |
250 |
270 |
|
|
|
|
|
|
|
|
|
fig.4
WARNING: when the grill is in operation, the surrounding parts can become very hot. Please keep children away from the cooker.
Oven light
To turn the gas oven light on, press button "Z" with the symbol


 .
.
Minute minder "T"
This is a buzzer timer situated on the control panel and is suitable for timing up to a max. of 60 minutes.
Turn the knob with the symbol  until the pointer is aligned
with the required time.
When the set time has elapsed, a buzzer sounds (it does not turn the oven off).
It is advisable to turn the knob to 60 and then back to the time required, even if this less than 60 minutes.
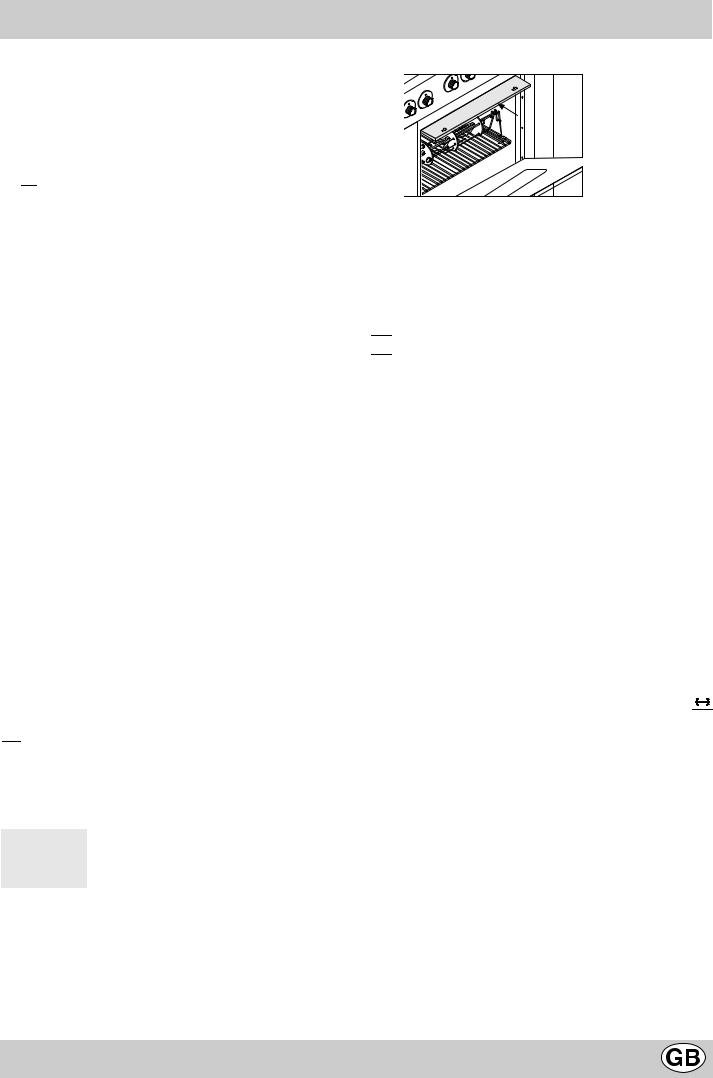
Spit - Rotisserie
This accessory is to be used exclusively when grilling food. Proceed as follows: insert the meat to be cooked along the length of the spit rod, securing it with the special adjustable forks (fig.5a).
Introduce the supports “A” and “B” (fig.5b) into the holes in the drip tray “E”, rest the rod groove on the seat “C” and insert the oven rack into the lowest guide of the oven; now insert the spit rod into the relative hole, moving the groove forward into seat “D”. Start the grill and the rotisserie by
turning the thermostat knob "G" to the position with the  symbol.
fig.5a fig.5b
4
 Loading...