

Page 1

Page 2

Tutorial
There are six commands on the reference card indented one
level under NEW: UP, DOWN, LEFT, RIGHT, PARAGRAPH, and MODE.
They correspond to six of the options on ThinkTank’s NEW Com—
mand menu and they allow you to specify what kind of new
material to add and where. Press N (the command key for NEW)
to display this menu, which is shown in Figure 3—5.
There is a seventh option on the NEW Command Menu ——
ESCAPE —— that’s not listed under NEW on your reference card.
That’s because ThinkTank’s escape valve, which stops whatever
you’re doing, is always an option. It’s listed separately on
the reference card under “Notes.”
You can reach these NEW options only by selecting the NEW
command first. In ThinkTank terminology, these options are
beneath or under NEW; they are one level deeper or subordinate
to NEW in ThinkTank’s command structure. On the reference
card, and in ThinkTank in general, this relationship is expressed by levels of indentation from left to right.
The reference card is a map of ThinkTank
in which one level of indentation corresponds to
one level deeper in the command structure.
Now press N to select the NODE option from the NEW Com-
mand Menu. MODE disappears from the menu but a new option,
EDIT, replaces it as shown in Figure 4—1. The explanation
line reads TEXT EDITOR FOR HEADLINES. On the reference card,
EDIT is indented one level under NODE (which is indented one
level under NEW). In other words, to reach the “headline
editor” from the NEW Command Menu, you must go through NODE
first.
Notice that EDIT appears twice under “Adding Information”
on the reference card, once under MODE and once under
PARAGRAPH. As you can see from the two entries, each EDIT has
a different meaning; EDIT under PARAGRAPH gets you to the TEXT
EDITOR FOR PARAGRAPHS. Some other commands (such as DELETE
and COPY) also have more than one meaning in ThinkTank, depending on the context in which they appear. In all cases, the appropriate meaning will be clear from the screen, the reference
card, and the reference guide.
—45—
Page 3

Living Videotext, Inc.
ThinkTank Manual
Program by: David Winer
with assistance from: Jonathan Liewellyn
Manual by: John Unger Zussman
with assistance from: David Greene
Page 4

Software:
Copyright Cc) 1983
Living Videotext. Inc.
All rights reserved
Copyright (c) 1981
Apple Computer, Inc.
Parts of this software are copyrighted by
The Regents of the University of California, 1979
Manual:
Copyright (c) 1983
Living Videotext, Inc.
All rights reserved
Living Videotext, Inc.; Apple Computer, Inc.; and the Regents
of the University of California make no warranties, either express or implied, regarding the enclosed computer software
package, its merchantability or its fitness for any particular
purpose. The exclusion or implied warranties is not permitted
by some states. The above exclusion may not apply to you.
This warranty provides you with specific legal rights. There
may be other rights that you have which vary from state to
state.
Page 5

Table of Contents
TABLE OF CONTENTS
PART I: LEARNING ABOUT THINKTANK 1
Chapter 1: INTRODUCTION TO THINKTANK 1
Box 1—1: Sample Uses of ThinkTank 2
The Outline Approach 3
Overview of the ThinkTank Manual 5
Support 6
Copy Protection and Software Piracy 7
Chapter 2: THINKTANK ON APPLE PERSONAL COMPUTERS 9
System Requirements 9
Tour of the Apple Keyboards 11
Starting Up ThinkTank 14
Don’t Write—Protect Your Working Disks 25
Exiting From ThinkTank 25
Special Considerations 26
Summary 28
Chapter 3: A BRIEF TOUR OF THINKTANK 29
Getting Synchronized 29
The ThinkTank Screen 30
The Text Area 31
Expanding a Headline 31
The Command Area 33
Command Menus 33
Adding a New Headline 36
Deleting a Headline 38
Correcting Mistakes 38
Leave Disks in Place 39
Backing Up 40
Summary 41
Chapter 4: USING THINKTANK: A TUTORIAL 43
Learning More About ThinkTank 43
The ThinkTank Reference Guide 44
The ThinkTank Reference Card 44
ThinkTank’ s Command System 47
Putting It All Together 51
A Comprehensive Example 53
Getting Around 54
Adding and Editing 57
-i-
Page 6

ThinkTank Manual
Reorganizing an Outline 63
Printing an Outline 66
Creating a New Outline 66
Concluding Note 68
Box 4-1: Printing with 'Uppercase Computers 69
Chapter 5: USING THINKTANK: NOTES AND SUGGESTIONS 71
General Advice 71
Getting Started 72
Getting Around 73
Adding Information 74
Reorganizing 76
Printing and Porting 77
Editing Text 80
Special Features 82
Summary 86
Appendix A: GLOSSARY 87
Appendix B: INTRODUCTION TO THE PASCAL OPERATING SYSTEM 93
What is an Operating System? 93
Files 93
Disks and Devices 94
PASCAL Commands and Programs 95
Appendix C: DISK MANAGEMENT 97
Disk Management Tasks 97
Apple II Series: Floppy Disk Systems 98
Apple II Series: Hard Disk Systems 104
Apple III Systems 104
Appendix D: TECHNICAL INFORMATION 107
Installing ThinkTank on a Hard Disk 107
ASCII Conversion Table 109
ThinkTank Technical Notes 110
PART II: REFERENCE GUIDE 113
THINKTANK COMMANDS 113
ERROR MESSAGES 197
INDEX 217
-ii-
Page 7

Table of Contents
LIST OF FIGUKES AND TABLES
Figure 1—1: Product Plan Outline 4
Figure 1—2: ThinkTank Product Plan Outline 6
Figure 2—1: Apple II Keyboard Figure 2—2: 11
Figure 2—2: Apple IIe Keyboard 12
Figure 2—3: Apple III Keyboard 13
Figure 2—4: ThinkTank Date Display 16
Figure 2—5: Setting the Date 17
Figure 2—6: ThinkTank Sample Outline 19
Figure 2—7: FILES Command Menu 20
Figure 2—8: EXISTING FILE Menu 21
Figure 2—9: Exit Screen 26
Figure 3—1: ThinkTank Screen 30
Figure 3—2: Expanding a Headline 32
Figure 3—3: Main Command Menu 34
Figure 3—4: Secondary Command Menu 35
Figure 3—5: NEW Command Menu 36
Figure 3—6: Mding a New Headline 37
Figure 4—1: NEW Command Menu Mter Selecting MODE 46
Figure 4—2: Reviewing the Port Format Settings 52
Figure
Figure 4—4: Searching for a Keyword 56
Figure 4—5: Entering a New Paragraph 57
Figure 4—6: Top Level of the Paragraph Editor 58
Figure 4—7: EDIT Command Menu 59
Figure 4—8: Editing a Paragraph 61
Figure 4—9: Defining a Selection 61
Figure 4—10: Moving a Selection 62
Figure 4—11: New Headlines 63
Figure 4—12: Reorganizing an Outline 64
Figure 4—13: Merged Paragraphs 65
Figure 4—14: Creating a New Outline 67
Figure 5—1: Translating Your Commands 84
Figure C—i: SPECIAlIST Command Menu 99
Figure 0—2: DISK MANAGER Command Menu 100
Figure 0—3: Listing a Disk Directory 103
Figure R—1: ThinkTank Screen 113
Table R—1: Minimal Port Format Settings 169
4-3: Expanding and Collapsing 55
—iii—
Page 8

PART I
LEARNING ABOUT THINKTANK
Chapter 1
INTRODUCTION TO THINKTANK
ThinkTank (tm) is a visual tool for working with ideas
and information on your personal computer. The ThinkTank
program uses the familiar format of an outline to help you
generate, organize, store, and retrieve ideas with remarkable
ease and efficiency. It is the first idea processor.
ThinkTank is flexible; you can apply it in many ways. It
can serve as your:
* notebook
* address book
* appointment calendar
* card file
* file folder
* file cabinet
* secretary
* administrative assistant
* bulletin board
Because ThinkTank is electronic, you can examine, add, alter,
reorganize, print, or delete your information in seconds.
ThinkTank’s flexibility means that you can adapt it to
your needs and applications. You can choose what kind of in—
formation to store in ThinkTank and how to organize it. You
can use it to write a memo, store a customer list, look up a
telephone number, organize a report, record a family tree, or
catalogue a stamp-collection. Box 1—1, which lists representative uses of ThinkTank, contains just a fraction of its many
applications. ThinkTank is like having an administrative
genie at your beck and call.
—1—
Page 9

ThinkTank Manual
------------------------------------------------------------------
Box 1—1
Sample Uses of ThinkTank
The applications of ThinkTank are as unlimited as your
imagination. Here are a few of its many uses:
Business and Professional Scientific and Technical
* Action lists * Bibliographies
* Appointment calendars * Computer programs
* Business plans * Curriculum vitae
* Catalogues * Grant proposals
* Checklists * Journal articles
* Client records * Monographs
* Corporate reports * Research notes
* Correspondence * Research presentations
* Customer lists * Research reports
* Instruction manuals * Specifications
* Inventory lists
* Legal briefs Educational
* Marketing plans * Bulletins
* Medical records * Class notes
* Memos * Course catalogues
* Minutes * Course outlines
* Notices * Courseware
* Product analyses * Lesson plans
* Product plans * Heading lists
* Project plans * Student records
* Proposals * Test item files
* Personnel records
* Presentations Home
* Reports * Address books
* Resumes * Catalogues of collections
* Schedules * Appointment calendars
* Telephone directories * Correspondence
* To do lists * Genealogies
* Training manuals * Household records
* Word processing * Shopping lists
------------------------------------------------------------------
—2—
Page 10

Introduction
THE OUTLINE APPROACH
The key to the power and flexibility of ThinkTank is its
outline approach to organizing information. The outline approach mirrors our natural way of processing information. Suppose this morning when you came to work you learned that:
There is snow on the ground
Your car needs gas
The price of gas is up again
The stack market is down
It is cold
The consumer price index is up
Your boss is absent
When you think about this information, you don’t think of
it as seven separate, independent items. Instead, you group
related items together in organized categories:
Weather
Snow
Cold
Economy
Stock market down
Inflation
Consumer price index up
Price of gas up
Work
Boss absent
In other words, you organize the items very much like an
outline.
Let’s take a more practical example. Suppose you are a
corporate product manager developing a proposal for a new
product line. You might start by writing down your thoughts
as they occur to you, in random fashion:
—3—
Page 11

ThinkTank Manual
Product type: alcoholic beverage
Primary market: young adults
Taste: sweet and fruity
Position: high Status and sophisticated
But random thoughts do not make a product plan; they must
be arranged into a coherent, persuasive document. So you
might organize your thoughts into an outline as shown in
Figure 1—1. With an outline it is easy to find information.
For example, if you want to examine your ideas on product
positioning, you can go straight to the section on marketing
instead of searching through an unorganized list. You can see
at a glance how your ideas fit together, which sections are
solid and which need further thought. In addition, since the
outline is organized just like the product plan will be, it
makes the document much easier to write.
But it is difficult to work with an outline on paper.
Some sections always seem to end up cluttered and hard to
read, others sparse and empty. If you want to move an idea
from one section of the outline to another, or eliminate it altogether. you have to do a lot of erasing, crossing out, or
cutting and pasting. If you want to share the outline with a
Figure 1—1: Product Plan Outline
—4—
Page 12

Introduction
colleague, you may have to decipher your handwriting or
(worse) have it typed. Outlines on paper can be major
hassles.
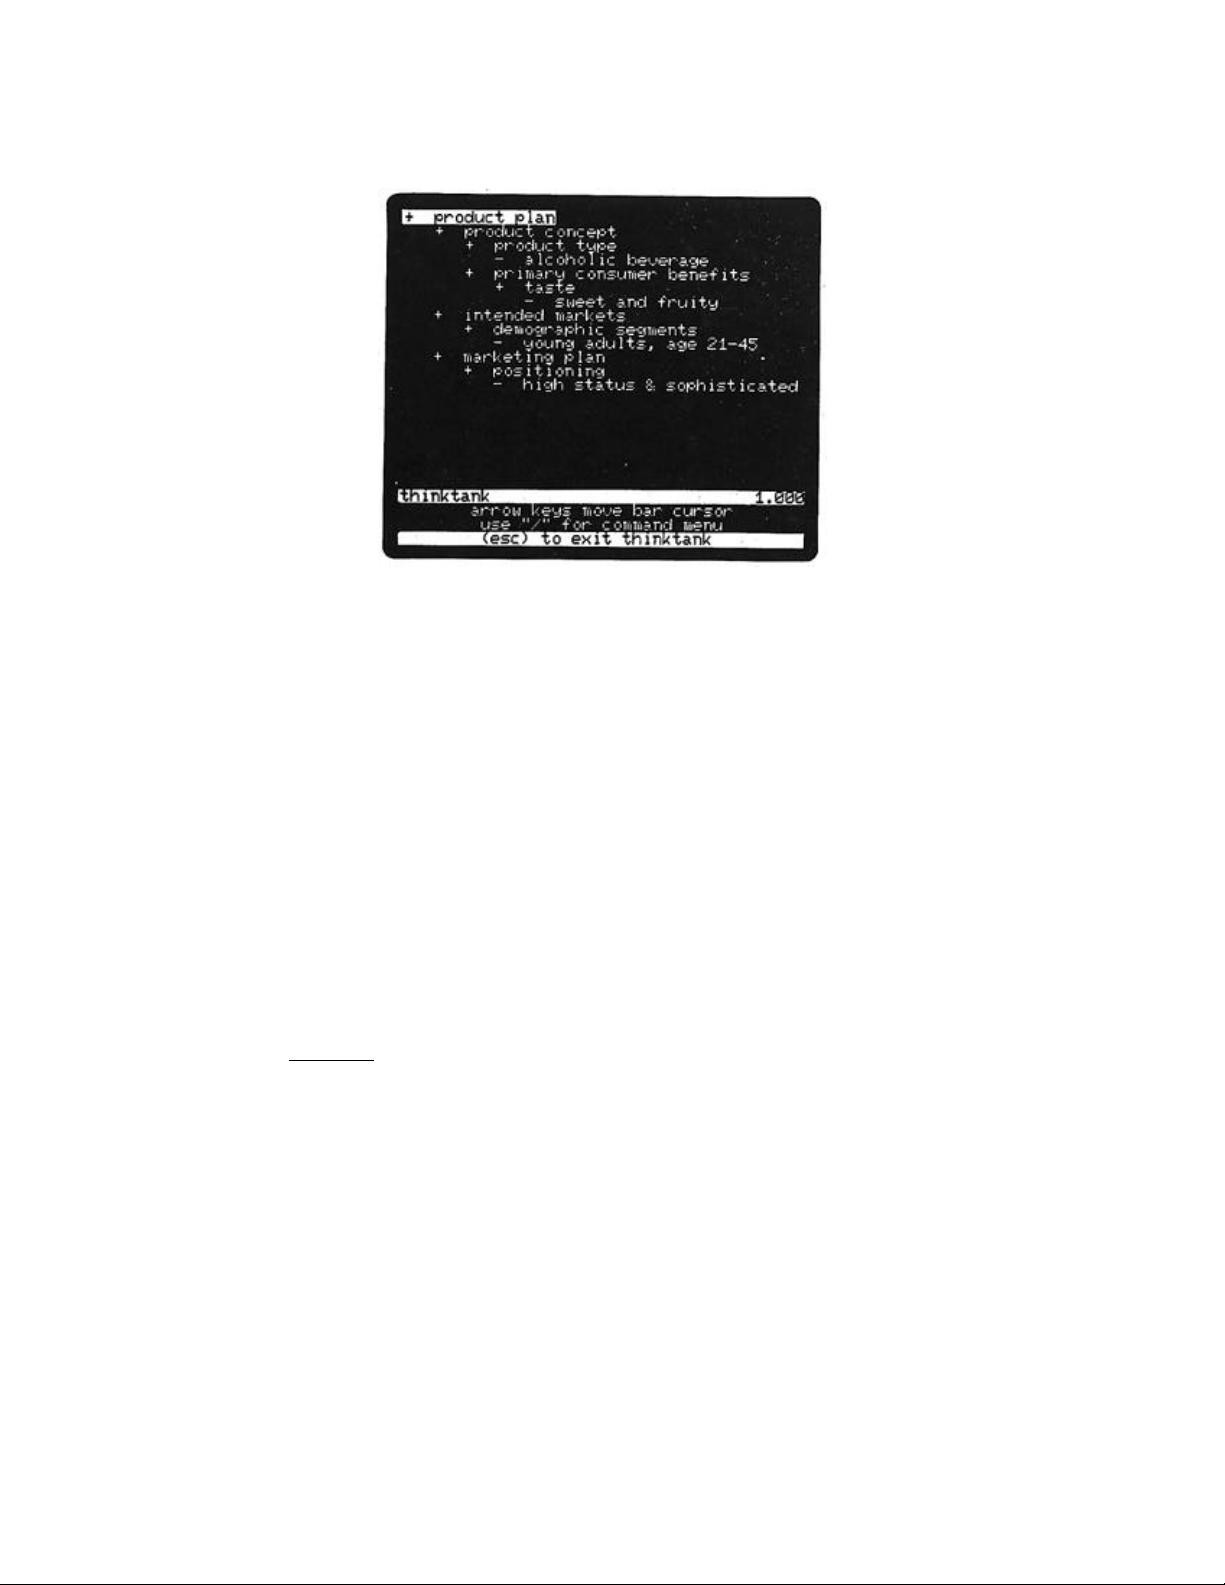
Figure 1—2 shows the same outline as ThinkTank might
display it on your computer screen. (This is actually an excerpt from a larger outline included with the ThinkTank
program and used as an example in this manual.) Unlike a
paper outline, a ThinkTank outline is easy to work with
because it is freeform, flexible, and controllable. You can
readily:
* examine any part of it
* change any part of it
* add as many headings as you wish
* add as many levels of subheadings as you wish
* add paragraphs as well as headings
* copy any part of it
* delete any part of it
* move part of it from one section to another
* reorganize it
* search for specific information
* replace specific information
* print any part of the outline
* edit it with a word processor
* send it to other ThinkTank users
In other words, you have complete control over your outline.
You can personalize it to your own needs. And you can perform
all of these.operations with commands that are easy to learn
and easy to use.
As you can see, ThinkTank is an organizing tool that can help
you be more productive and efficient. There seems to be no limit
to its usefulness; the more you use it, the more uses you’ll find.
OVERVIEW OF THE TRINKTANK MANUAL
The ThinkTank manual is divided into two parts, the first
devoted to helping you learn ThinkTank, the second to helping
you use it.
—5—
Page 13
ThinkTank Manual
Figure 1—2: ThinkTank Product Plan Outline
The first part is called Learning About ThinkTank. Following this introduction, Chapter 2 describes how to start up
and begin to operate ThinkTank on your computer. Chapter 3
gives you a brief tour of ThinkTank and contains essential information about using it. Chapter 4 is a tutorial which shows
you how to learn about ThinkTank and introduces you to its
most important commands. Once you have learned the basics,
Chapter 5 contains notes and suggestions to help you get the
most out of ThinkTank. At the end of Part I is a set of appendices including a glossary, an introduction to the PASCAL
operating system, instructions for disk management, and technical information.
The second part of the manual is the Reference Guide,
which contains a comprehensive alphabetical summary of all
ThinkTank commands. The manual concludes with an index.
SUPPORT
The ThinkTank program and manual have been extensively
tested and refined to minimize problems. If a problem occurs,
ThinkTank generally displays an error message to help you diagnose it. There is a list of error messages and suggested solutions in the reference guide.
—6—
Page 14

Introduction
If you have questions or problems that the manual does
not resolve, check with your dealer. ThinkTank dealers are
trained to configure the program to your computer system,
provide guidance and information, solve problems, and help you
get the most out of ThinkTank.
Living Videotext, Inc., is committed to supporting Think—
Tank. If you have a question that your dealer can’t resolve,
or if you purchased your copy of ThinkTank directly from
Living Videotext, please feel free to call us for help. We
also welcome your comments and suggestions for improving subsequent versions of ThinkTank.
In this package you will find the ThinkTank license
agreement. Read it carefully, sign the attached card, and
fill in all requested information including your ThinkTank
serial number, which is displayed on your screen when you
start up the program or change outlines. Mail the card back
to Living Videotext (it is postage—free within the United
States). It registers you as a ThinkTank user and entitles
you to receive support and information about ThinkTank updates, applications, and new products.
Living Videotext maintains a library of ThinkTank
technical notes which contain technical information not
ordinarily required to operate the program. They are meant
for specialized uses and include such topics as custom installation on a hard disk system and how to use ThinkTank with compatible word processing programs. You can order these notes
from Living Videotext for a nominal cost of $5.00. Appendix D
of this manual contains a list of technical notes currently
available; others may be offered periodically.
COPY PROTECTION AND SOFTWARE PIRACY
The ThinkTank license agreement entitles you to use the
program personally or in your business. You may not give or
sell this program, or copies of it, to anyone else. Violation
of this agreement is sometimes called software piracy and it
is illegal.
—7—
Page 15

ThinkTank Manual
Some software companies have chosen to combat piracy by
making their programs impossible to copy. We decided against
such copy protection because it could prevent you from getting
the full benefit of ThinkTank. There are legitimate reasons
for you to make copies.of ThinkTank —— to back up your program
disk in case it becomes damaged, for example. Copy protection
also increases the cost of a program.
We believe strongly in this open policy, but it’s risky.
We will reevaluate it when we release future versions of Think—
tank and other products. If experience shows that our trust
was unwarranted, we will have to implement copy protection and
other defensive measures to protect our software.
We ask that you help us keep ThinkTank flexible, open,
and easy to use. Don't pirate our software!
-8—
Page 16

Apple Versions
Chapter 2
THINKTANK ON APPLE PERSONAL COMPUTERS
ThinkTank comes in three different versions for Apple computers: one for the Apple II and II Plus; one for the Apple
IIe; and one for the Apple III. This chapter contains information and instructions for each version. It covers:
* system requirements
* the Apple keyboards
* starting up ThinkTank
* exiting from ThinkTank
* special considerations for Apple computers
Make sure you have the right version of ThinkTank for your computer, and read the instructions below that apply to it.
SYSTEM REQUIREMENTS
Your equipment should be set up according to the manufacturer’s instructions. Your dealer can provide any assistance
you need.
App1e II and App1e II Plus
To use the Apple II version of ThinkTank, you will need:
* an Apple II or Apple II Plus computer
* 48K bytes or more of internal (random access) memory
(RAM)
* a 16K Apple language or memory card
* two or more floppy disk drives; or one hard disk
drive with the PASCAL operating system
—9—
Page 17

ThinkTank Manual
* a video monitor (preferable) or television set (and
adapter)
* a printer (recommended but not required)
On the Apple II, ThinkTank uses the simple 40—column,
uppercase—only display. If you have an 80—column card, Think—
Tank will automatically switch it off or ask you to do so.
The Apple II version of ThinkTank will also run on an Apple IIe computer -in 40—column, uppercase mode. However, if
you have an Apple 80—Column Text Card in your Apple IIe, you
should obtain the version of ThinkTank specifically designed
for the Apple IIe.
Apple IIe
To use the Apple IIe version of ThinkTank, you will need:
* an Apple IIe computer
* an Apple 80—Column Text Card or Extended 80—Column
Text Card
* two or more floppy disk drives; or one hard disk
drive with the PASCAL operating system
* a video monitor (preferable) or television set (and
adapter)
* a printer (recommended but not required)
Apple III
To use the Apple III version of ThinkTank, you will need:
* an Apple III computer, which includes one floppy
disk drive
* one additional floppy disk drive, or a hard disk
drive
— 10—
Page 18
Apple Versions
* the video monitor supplied with the Apple III
* the System Utilities Disk supplied with the Apple
III
* a printer (recommended but not required)
TOUR OF THE APPLE KEYBOARDS
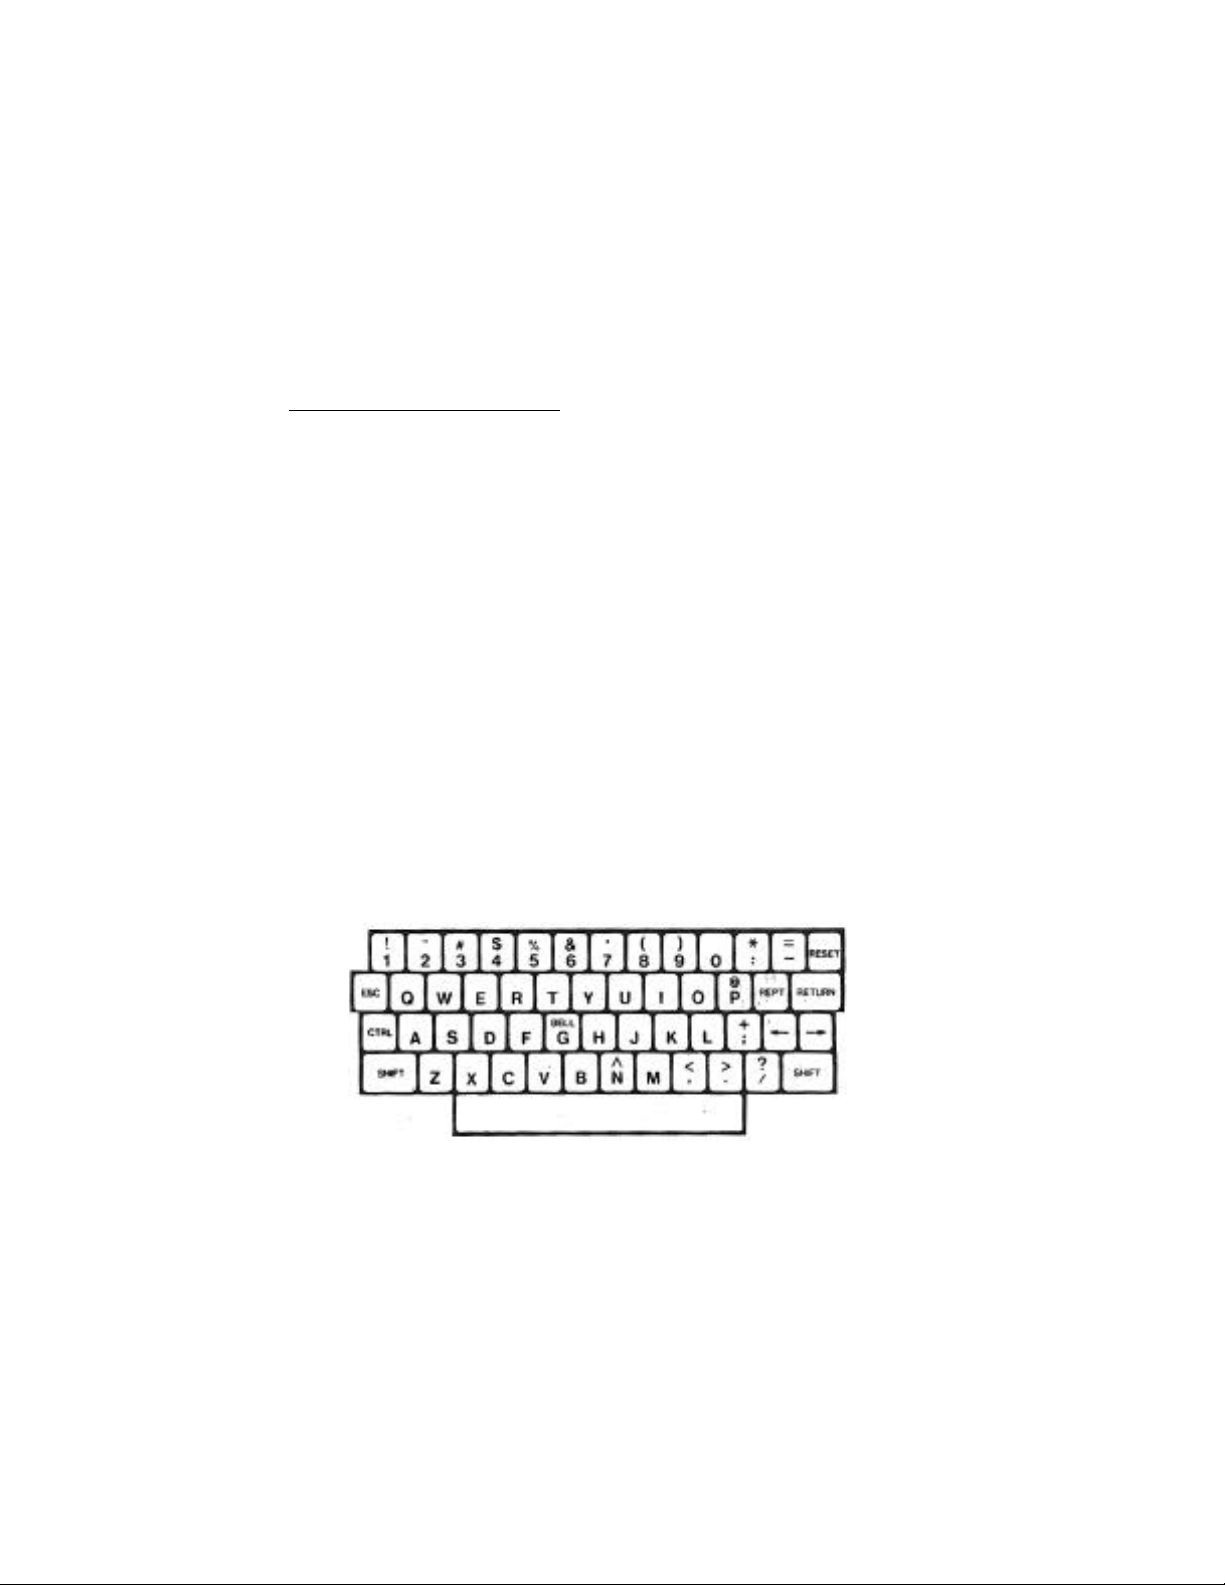
The keyboards of the Apple II, Apple IIe, and Apple III
computers are illustrated in Figures 2—1, 2—2, and 2—3. They
are very much like a typewriter
—— with some important excep-
tions. Apple computers have several keys. that are not found
on a standard typewriter, and ThinkTank uses some standard
keys in nonstandard ways. These special keys are highlighted
in the figures. Moving roughly counter—clockwise from the upper left, they include:
* ESCAPE OR ESC: The ESCAPE key, as its name implies,
is an all—purpose escape valve which is used to cancel, terminate, or conclude a ThinkTank command or
operation.
* CONTROL or CTRL: The CONTROL key has no effect by
“Reproduced by permission of Apple Computer, Inc. 1983”
Figure 2—1: Apple II Keyboard
—11—
Page 19
ThinkTank Manual
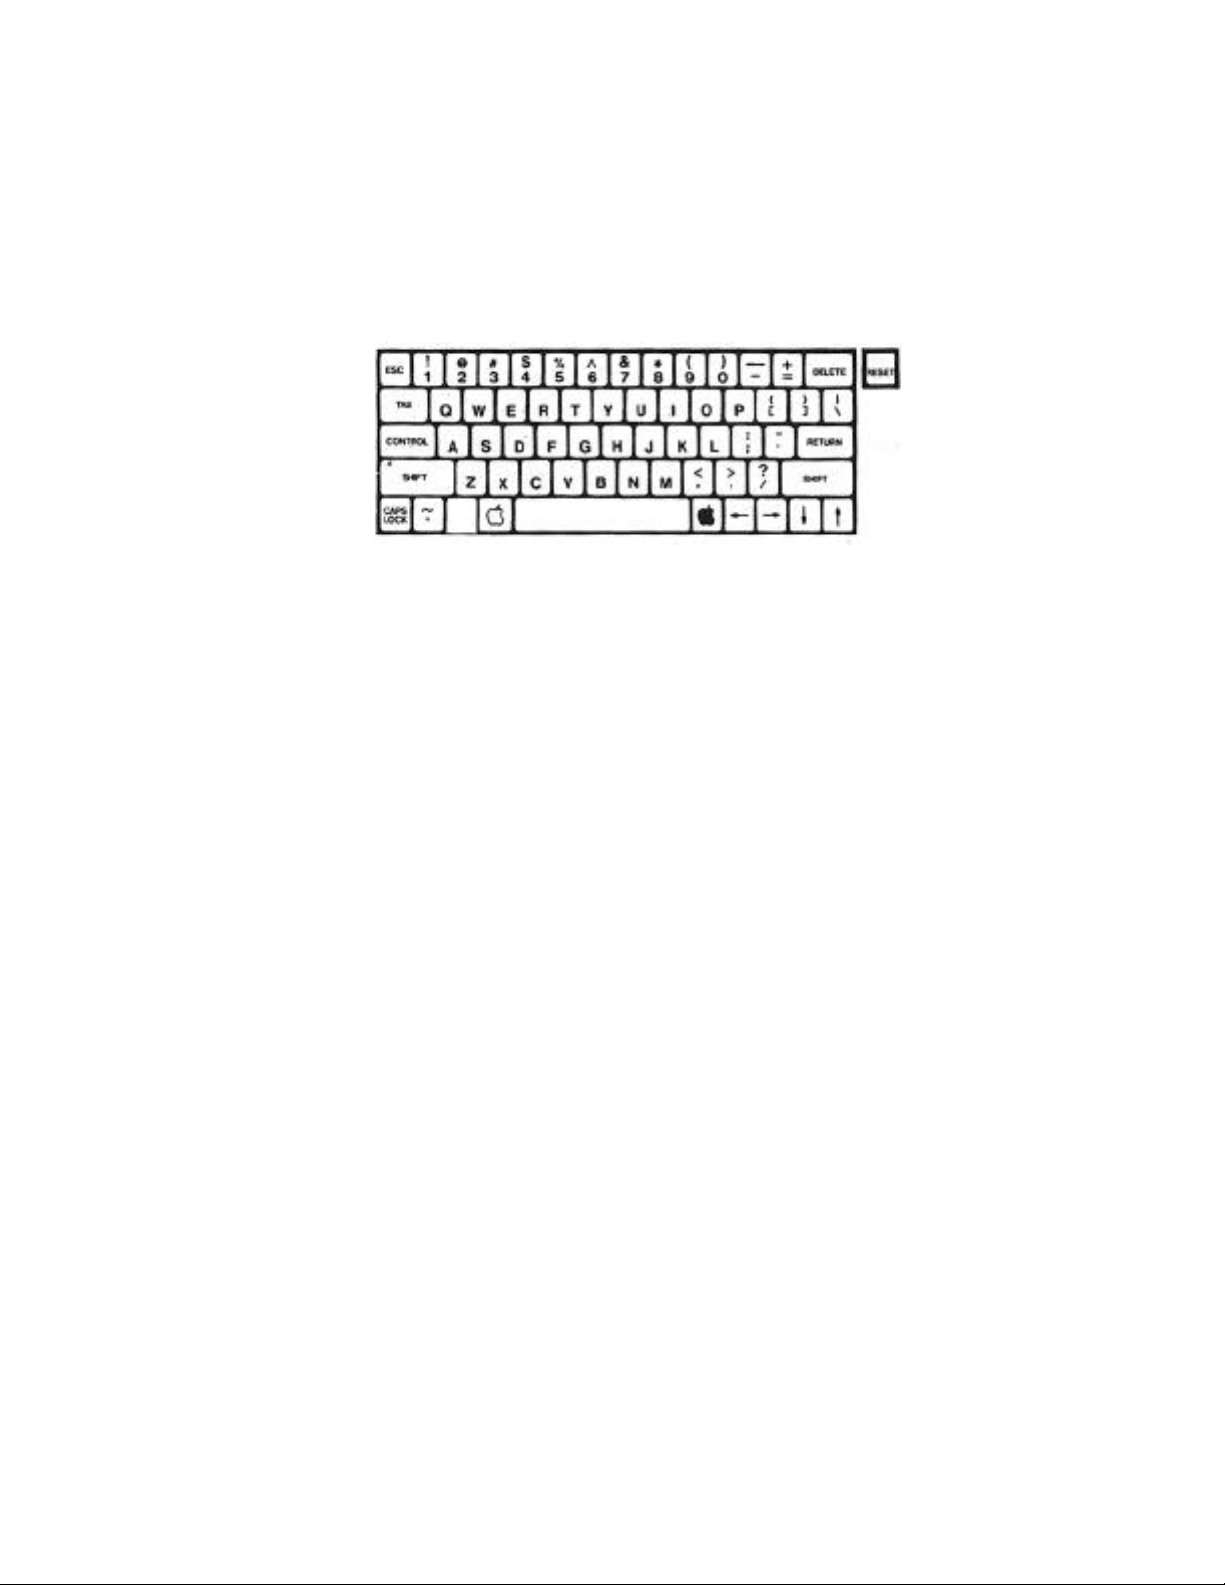
“Reproduced by permission of Apple Computer, Inc. 1983”
Figure 2—2: Apple IIe keyboard
itself, but it is often used with other keys to give
ThinkTank commands. For example, you give the command CTRL—D, which is used to delete text in Think—
Tank’s text editor, by holding down the CTRL key and
pressing D. You must press the CTRL key first and
must not release it before pressing D. The CTRL key
is sometimes abbreviated by the caret ("^“) symbol,
as in ^D.
* SHIFT: As on a typewriter, some Apple keys have two
characters printed on them, like “," (comma) and "<"
(less than) at the bottom right. You can enter the
lower character (",”) simply by pressing the key, or
the upper character (‘<“) by pressing it while holding down either SHIFT key.
On the Apple IIe and Apple III, you can hold down
the SHIFT key to capitalize letters that would otherwise be entered in lowercase. The Apple II SHIFT
key has no effect on letters. All letters are entered and displayed in uppercase regardless of
whether you press SHIFT.
—12—
Page 20
Apple Versions
“Reproduced by permission of Apple Computer, Inc. 1983”
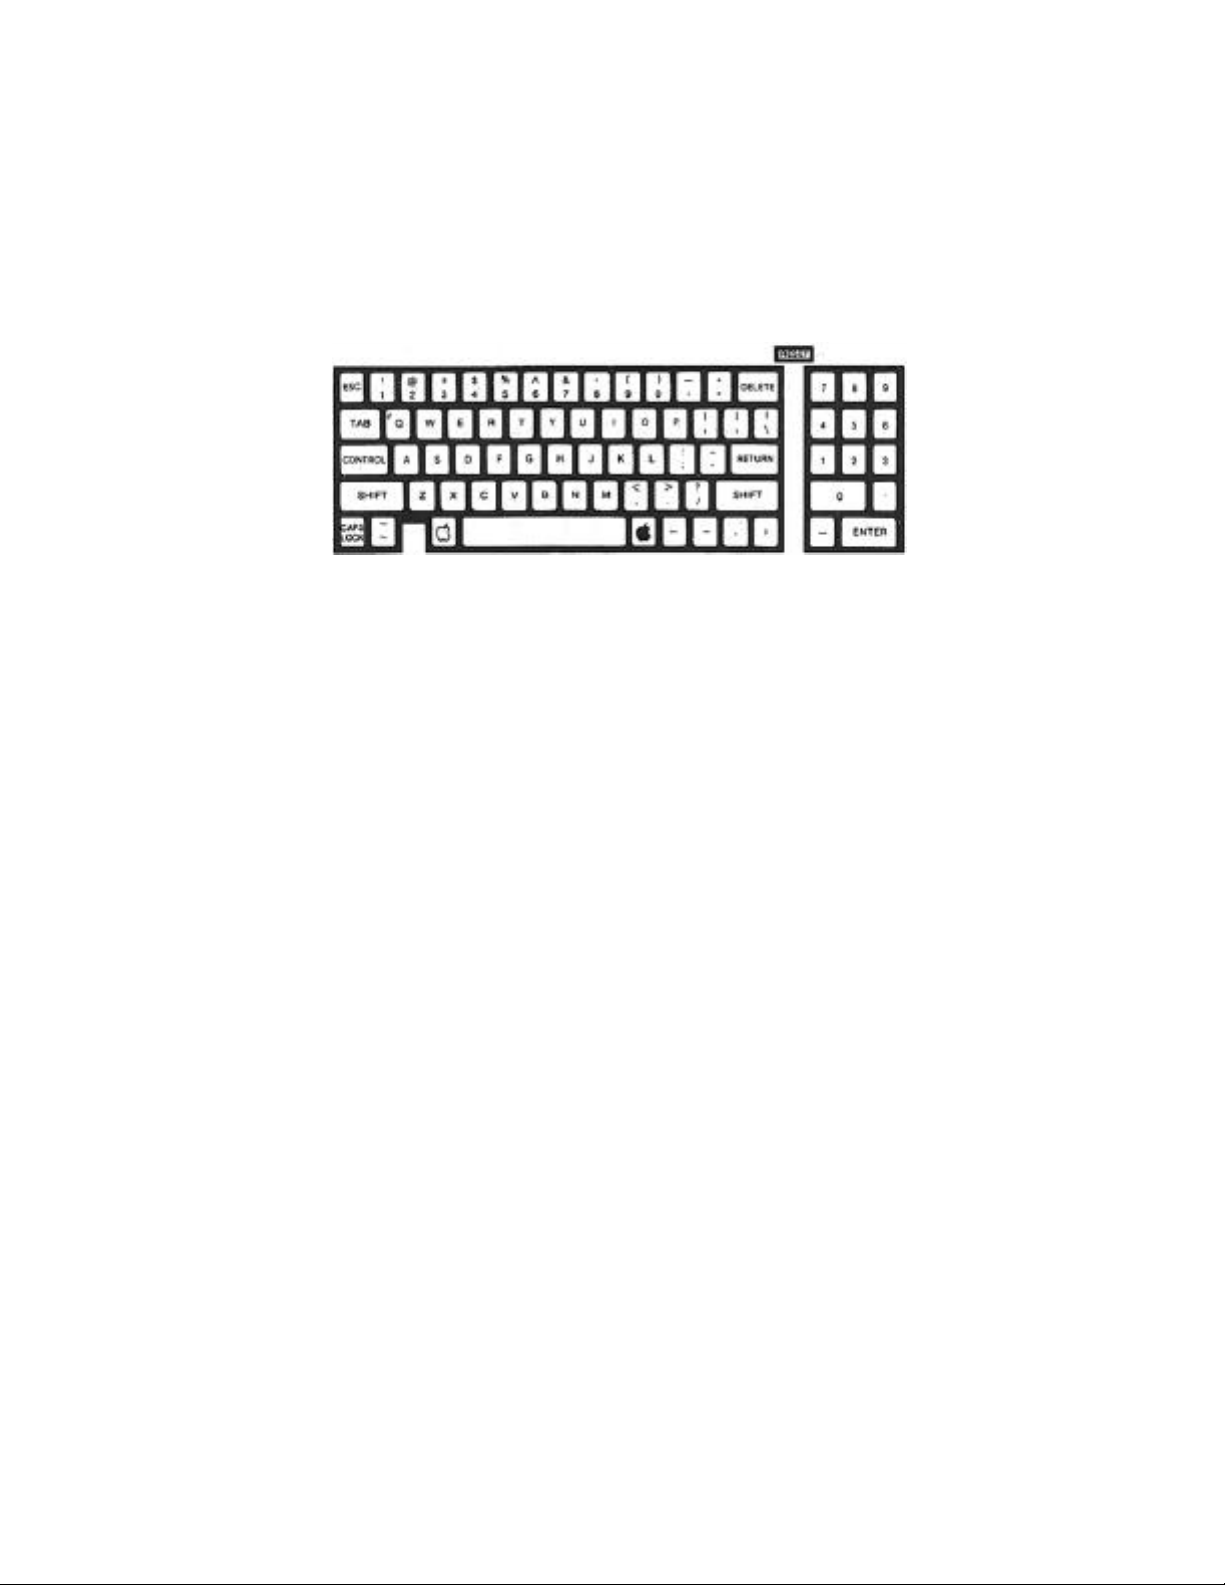
Figure 2—3: Apple III Keyboard
* CAPS LOCK or ALPHA LOCK: [Apple IIe and III only]
A shift lock key. Once you press it, all letters
are capitalized until you press it again.
* OPEN—APPLE: [Apple IIe and III only] Not used in
ThinkTank.
* SOLID—APPLE: [Apple IIe and III only] On the Apple
III, accelerates the repeating effect of holding
down a key. Not used in ThinkTank on the Apple IIe.
* SPACE BAR: The space bar is used to enter spaces in-
to your outline, to change lines in ThinkTank menus,
and to enter the SPACE conmmand.
* ARROW KEYS: The left, right, up, and down arrow
keys are used to move a pointer, or cursor, to dif—
ferent headlines, characters, or commands. The left
arrow key is also used as a backspace. Since the Apple II has no up and down arrow keys, we have configured CTRL—O and CTRL—K to substitute for them.
—13—
Page 21

ThinkTank Manual
* REPT: [Apple II only] The REPEAT key, when held
down simultaneously with another key, causes the
other key to repeat. On the Apple IIe and III, you
can repeat a key by simply holding it down.
* RETURN: The RETURN key enters a headline into Think—
Tank or selects a command. You use it to indicate
that you are satisfied with your current entry or
command and want the computer to accept it. Although it is sometimes called a carriage return, you
will generally not use it to move from the end of
one line to the beginning of the next, since Think—
Tank does this automatically.
* DELETE: [Apple IIe only] In ThinkTank’s text
editor, the DELETE key is used to erase characters
or selected blocks of text.
* RESET: The RESET key terminates whatever program is
running and causes your computer to act like it had
just been turned on. (Since this can be a rather
drastic measure, some computers require you to press
CTRL—RESET to minimize the chance of accidentally
resetting your computer.) You may use RESET to
start up ThinkTank (see below). However, DO NOT
PRESS THE RESET KEY while running ThinkTank except
in the rare case that your computer “hangs” and will
not respond to your commands. Pressing RESET causes
a premature exit from the program and you will lose
any information that hasn’t yet been recorded on
your data disk.
In addition to these special keys, the Apple III has a
numeric keypad on the right side of the keyboard. You can use
all of its keys in ThinkTank. The ENTER key is equivalent to
the RETURN key described above.
STARTING UP THINKTANK
This section is divided into two parts. If you have a
hard disk drive on your computer system, skip to the section
on “Hard Disk Systems” later in this chapter.
—14—
Page 22

Apple Versions
Floppy Disk Systems
If you are operating ThinkTank on a floppy disk system,
you will need at least two disk drives. Drive 1 is considered
your main disk drive and is used to load and hold the THINK—
TANK PROGRAM DISK. Drive 2 and other drives contain ThinkTank
data disks. Your drives and their controller should be installed in standard fashion (Slot 6, Drives 1 and 2 on the Apple II and IIe). Your dealer will normally take care of this
for you.
Step 1: INSERT PROGRAM AND DATA DISKS
Depending on your computer, the ThinkTank package may contain two or three disks. One is labelled THINKTANK PROGRAM
DISK and it contains the instructions your computer uses to
run ThinkTank. The second is labelled THINKTANK DATA DISK and
it contains the sample outlines discussed in this manual.
Once you learn how to use ThinkTank, you will create your own
data disks to store your own outlines. If you have an Apple
III, you have a third disk called the THINKTANK BOOT DISK; it
contains the instructions your computer uses to start up Think—
Tank.
(a) Apple II and IIe. Place the THINKTANK PROGRAM DISK
in Drive 1 of your machine and your ThinkTank data disk in
another drive. If this is your first time using ThinkTank,
use the THINKTANK( DATA DISK supplied with the program and insert it in Drive 2.
(b) Apple III. Place the THINKTANK BOOT DISK in the Apple III’s. built—in drive (Drive 1) and your ThinkTank data
disk in another drive. If this is your first time ~using Think—
Tank, use the THINKTANK DATA DISK supplied with ‘the program
and insert it in Drive 2.
Step 2: POWER UP OR RESET
(a)If power is off, turn it on. ThinkTank is designed
to start up automatically when you turn on your computer.
First turn on your monitor or television set if it has a
separate switch. Now simply turn on the power switch, which
is located on the back of your computer near the left—hand
corner.
—15—
Page 23

ThinkTank Manual
Your disk drives will whir and their lights will turn on
as your computer reads information from the disks. On the Apple II or IIe, you will soon see the ThinkTank date display
shown in Figure 2—4, which means that the program has loaded
successfully. Skip to Step 3.
Apple III. Before it loads the program, your com-
puter will display the message:
PUT PASCAL SYSTEM DISK IN BUILT—IN DRIVE. PRESS RETURN.
Remove the THINKTANK BOOT DISK from your built—in
disk drive (Drive 1) and replace it with the THINK—
TANK PROGRAM DISK. Then press RETURN. In a few sec-
onds you will see the date display; skip to Step 3.
(b)If power is on, reset your computer. Make sure you
have completed whatever program you were previously using.
Now simply press the BESET key (on some computers you may have
to press CTRL-~RESET). The program will start as described in
Step 2(a) above.
Figure 2—4: ThinkTank Date Display
— 16—
Page 24

Apple Versions
Step 3: SET THE DATE
ThinkTank keeps a record of the current date, which it
“stamps" on the outlines you create and print. Each time you
start up the program, ThinkTank displays the last date entered
and asks you if you want to change it, as shown in Figure 2—4.
Suppose the date shown is incorrect-. Press Y (for YES)
to tell ThinkTank that you want to change it. The program now
displays the current date and your options as shown in Figure
2—5.
Look~at the message:
<— MOVES BACK IN TIME, —> FORWARD
<— and —> represent the left and right arrow keys
respectively. Press these keys and watch what happens to the
date. The right arrow key advances it, while the left arrow
key sets it back. Use the arrow keys to set the correct date.
Now look at the message:
PRESS "/” TO CHANGE MONTH
Figure 2—5: Setting the Date
— 17—
Page 25

ThinkTank Manual
Press the slash ("/“) key and notice that the month begins to
flash. You can now use the arrow keys to set the correct
month. When you’re finished, press the slash key again and
set the year. If you make a mistake, press the slash key
several times to cycle back to the incorrect component.
The message:
PRESS (RETURN) TO EXIT
tells you what to do when the date is correct: press the
RETURN key. The program registers the new date and displays
the ThinkTank title screen as it prepares to load in an
outline.
The process of setting the date is representative of
ThinkTank in general. The program always guides you through
the steps and lets you know what your major options are.
If the date shown in Figure 2—4 is correct, or if you’d
like to skip the date and go right into ThinkTank, just press
N (for NO) or the ESC key —— ThinkTank’s all—purpose escape
valve. ThinkTank will assume that the original date was correct and go directly to the title screen. No damage will be
done if the date is incorrect.
Step 4: LOAD YOUR THINKTANK OUTLINE
(a) Automatic Loading. If you are using ThinkTank for
the first time, it is set to load the sample outline from the
THINKTANK DATA DISK. As you continue to use ThinkTank, it
keeps a record of the last outline you worked on. If you insert the same disk in the same drive next time, ThinkTank will
automatically load it along with the program.
Thus, if you see the title of your outline at the top of
your screen, you have successfully started up ThinkTank. (The
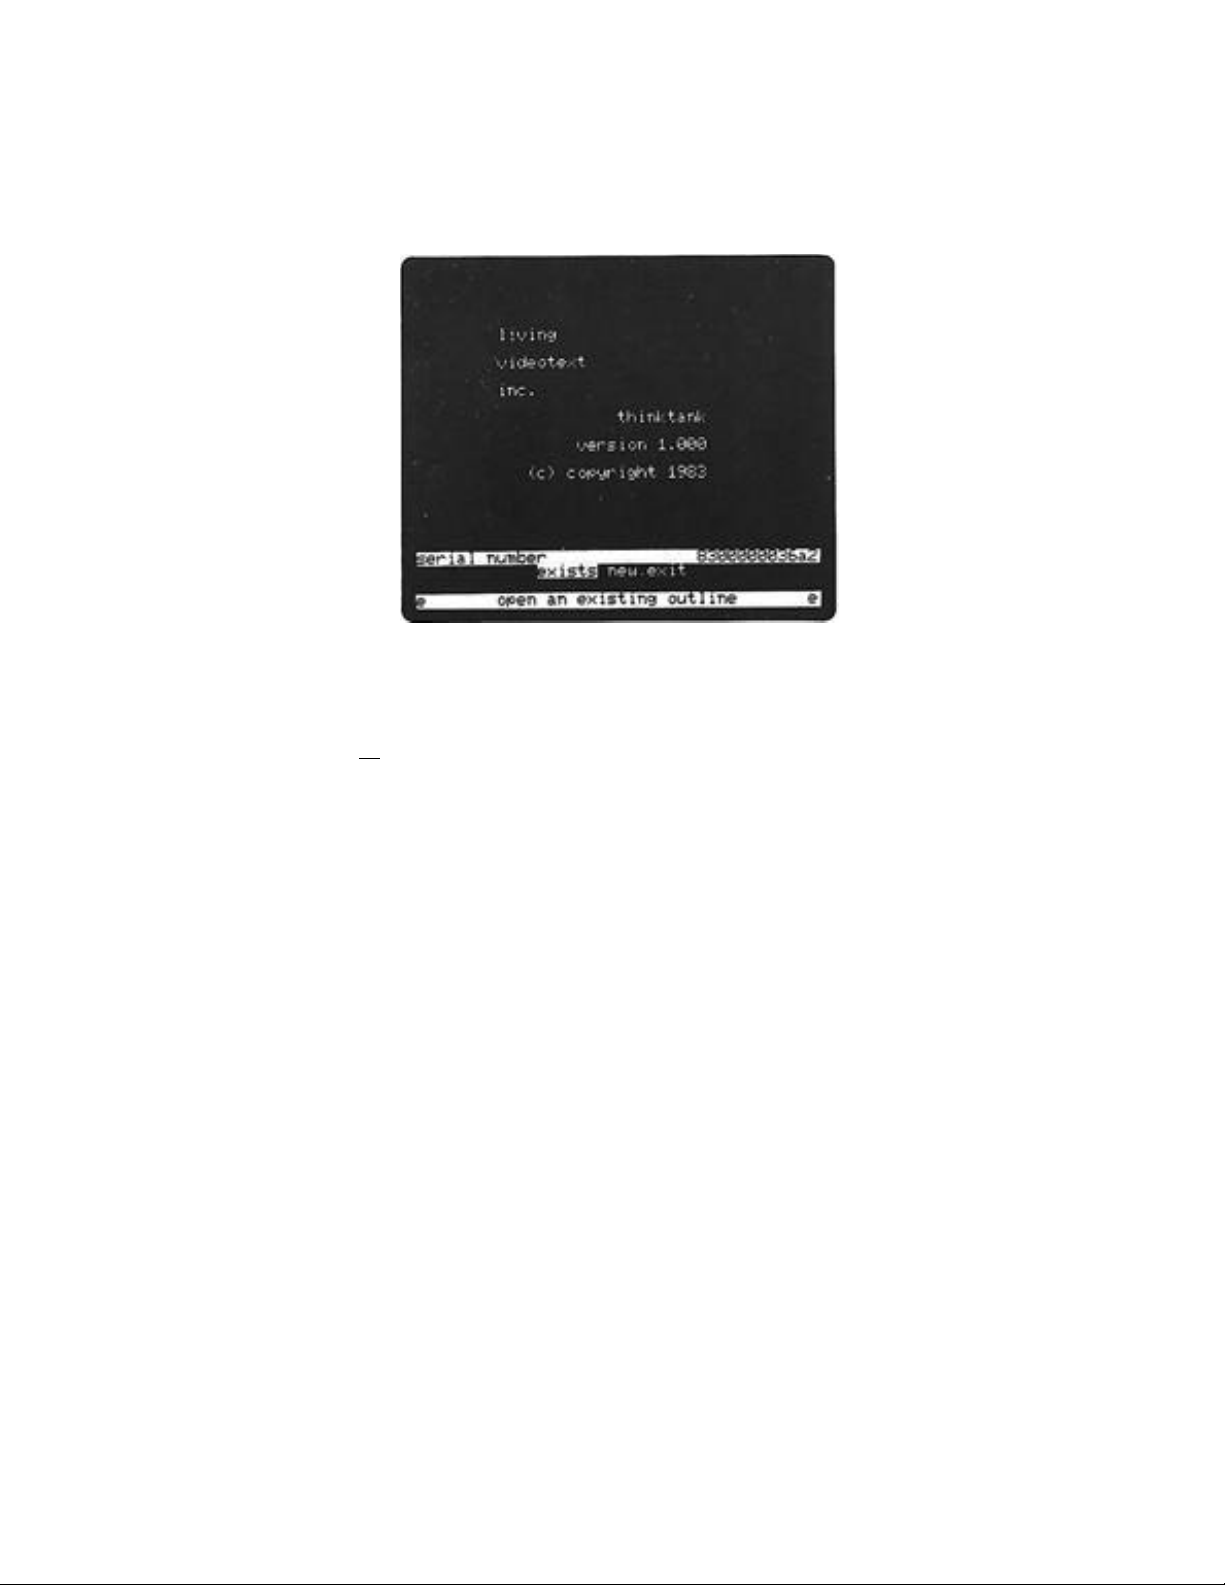
title of the sample outline is THINKTANK( DEMONSTRATION, as
shown in Figure 2—6.) Skip the next section on “Operator
Loading” (as well as the following one on “Hard Disk Systems”)
and continue with “Don’t Write—Protect Your Working Disks.”
— 18—
Page 26
Apple Versions
Figure 2—6: ThinkTank Sample Outline
(b)Operator Loading. If you are not loading the sample
outline or the same one you used last time, you will see the
FILES Command Menu at the bottom of your screen as shown in
Figure 2—7. Press E to tell ThinkTank that you want to open
an existing outline, as indicated at the bottom of the screen.
ThinkTank’s response depends on how it has been
configured to your disk drives. (For more information on configuring ThinkTank, see the DISK command in the reference
guide.)
1. If ThinkTank displays the message:
PRESS (SPACEBAR)
AFTER INSERTING DISKETTE IN DRIVE 2
then it is configured for two floppy disk drives. Simply
place your data disk in Drive 2 and press the space bar. You
will see the title of the outline appear at the top of your
screen.
2. If ThinkTank displays an EXISTING FILE Menu like the one
shown in Figure 2—8, it is configured for more than two floppy
—19—
Page 27
ThinkTank Manual
Figure 2—7: FILES Command Menu
drives or a hard disk drive. Press ~ and ThinkTank will give
you a chance to browse through your outlines. It begins to
display the names or titles of the outlines it finds on your
disks. You can press RETURN to select an outline or the right
arrow key to display the next name. If you want to load the
sample outline, its title is THINKTANK DEMONSTRATION and the
file is called THINKTANK.DB.
When you press RETURN to select the outline you want,
ThinkTank will read it from your data disk and display its
title at the top of your screen. Skip the following section
on “Hard Disk Systems” and continue with "Don’t Write—Protect
Your Working Disks."
If your computer is set up correctly and you follow these
steps, you should have no trouble starting up ThinkTank. In
the rare case that a problem arises, ThinkTank will help to
diagnose it by displaying an error message at the bottom of the
screen. These messages are listed in the reference guide
along with their most likely causes and recommended courses of
action. If problems persist, consult your dealer or Living
Videotext.
—20—
Page 28

Figure 2—8: EXISTING FILE Menu
Apple Versions
Hard Disk Systems
If you have a hard disk drive, its increased capacity and
rapid access will make ThinkTank especially powerful and convenient. To use a hard disk with an Apple II or IIe, you will
need access to the PASCAL operating system (p—System) under
which ThinkTank runs, and you must format at least part of
your hard disk for this system. (For an introduction to the
PASCAL operating system, see Appendix B).
You will also need to install ThinkTank on your hard
disk. Your dealer can take care of this, or y~u can follow
the instructions in Appendix D. The instructions in this section assume that you have already installed ThinkTank on your
hard disk.
If you have floppy disk drives as well as a hard disk,
you may load the ThinkTank program and outlines from either
type of disk.
—21-
Page 29

ThinkTank Manual
Step 1: ENTER THE PASCAL OPERATING SYSTEM
There are several ways to do this, depending on your
system. You may simply have to turn on your computer or press
the RESET key (CTRL—RESET on some machines). If you are running a PASCAL program, simply exit from it. If you are using
another operating system, you may have to execute a program
which loads PASCAL. Your dealer can help you determine which
method to use.
When you enter the PASCAL system you will see the system
command prompt~
Command: E(dit, R(un, F(ile, C(omp,
L(ink, X(ecute, A(ssem, D(ebug, ?
(If you see only half of this prompt line, press CTRL—A to
switch from one half to the other.)
Step 2: SET SWAPPING’ OPTION (APPLE II and IIe ONLY)
Once the command prompt is displayed, turn on PASCAL’s
"swapping” option if you have an Apple II or IIe. Type S and
PASCAL will tell you whether swapping is on or off and ask you
whether you want to “toggle” (change) it. Assuming it’s cur-
rently off, type Y (for YES) PASCAL will activate swapping
mode and display the command prompt again. (If swapping is
currently on —— as it would be if you had already run Think—
Tank in the current PASCAL session —— type N for NO instead of
Y.)
Step 3: EXECUTE THINKTANK
When PASCAL displays the command prompt again, press X
(for execute). The computer will respond:
EXECUTE WHAT FILE?
Enter the program name TANK, preceded by its volume or device
number. Suppose you have installed the program on Drive I
(PASCAL device #4) in a volume called TANK:. Then you could
enter either of the following:
—22—
Page 30

Apple Versions
#4: TANK
TANK: TANK
and press RETURN. In a moment you will see the ThinkTank date
display (Figure 2—4 above), which indicates that you have successfully loaded ThinkTank. If you have any trouble, check
the installation information in Appendix D.
Step 4: SET THE DATE
Setting the date on a hard disk system is identical to
doing ‘so on a floppy disk system. Follow the instructions for
Step 3 under “Floppy Disk Systems” above. Then return here
for Step 5.
Step 5: LOAD YOUR THINKTANK OUTLINE
(a) Automatic Loading. If you are using ThinkTank for
the first time, it is set to load the sample outline from
Drive 2 (PASCAL device #5). As you continue to use ThinkTank,
it keeps a record of the last outline you worked on. If it’s
available in the same drive next time, ThinkTank will
automatically load it along with the program.
Thus, if you see the title of your outline at the top of
your screen, you have successfully started up ThinkTank. (The
title of the sample outline is THINKTANK DEMONSTRATION, as
shown in Figure 2—6 above.) Skip the next section on
“Operator Loading.”
(b) Operator Loading. If you are not loading the sample
outline or the same one you used last time, you will see the
PILES Command Menu at the bottom of your screen as shown in
Figure 2—7 above. Press E to tell ThinkTank that you want to
open an existing outline, as indicated at the bottom of the
screen.
ThinkTank’s response depends on how it has been
configured to your disk drives. (For more information on configuring ThinkTank, see the DISK command in the reference
guide.)
1. If ThinkTank displays an EXISTING FILE Menu like the one
—23—
Page 31

ThinkTank Manual
shown in Figure 2—8 above, it is correctly configured for a
hard disk drive (or possibly for more than two floppy
drives). Press B and ThinkTank will give you a chance to
browse through your outlines. It begins to display the names or
titles of the outlines it finds on your disks. You can
press RETURN to select an outline or the right arrow key to
display the next name. If you want to load the sample
outline, its title is THINKTANK DEMONSTRATION and the file is
called THINKTANK.DB.
When you press RETURN to select the outline you want,
ThinkTank will read it from your data disk and display its
title at the top of your screen.
2. If ThinkTank displays the message:
PRESS (SPACEBAR)
AFTER INSERTING DISKETTE IN DRIVE 2
then it is configured for two floppy disk drives. If Drive 2
(PASCAL device #5) on your system is a floppy disk drive,
simply place your data disk in Drive 2 and press the space
bar. If not, you (or your dealer) will have to reconfigure
ThinkTank as a hard disk system as described in Appendix D under “Installing ThinkTank on a Hard Disk.”
If your computer is set up correctly and you follow these
steps, you should have no trouble starting up ThinkTank. In
the rare case that a problem arises, ThinkTank will help to
diagnose it by displaying an error message at the bottom of
the screen. These messages are listed in the reference guide
along with their most likely causes and recommended courses of
action. -You should also recheck the instructions for installing ThinkTank on a-hard disk in Appendix D. If problems persist, consult your dealer or Living Videotext.
You may want to configure your hard disk system to start up
ThinkTank automatically when you turn on your computer, or
at least to set the swapping option when you enter PASCAL or
execute ThinkTank. Your dealer can help you do this or you
can do it yourself. Detailed technical information on this
topic is available from Living Videotext in a ThinkTank
technical note described in-Appendix D of this manual.
—24—
Page 32

Apple Versions
DON’T WRITE—PROTECT YOUR. WORKING DISKS
Most disks have a small notch on one edge called a
write—enable or write—protect notch. Only if your computer
senses that this notch is present will it record new information on the disk. Many programs.suggest that you protect them from
inadvertent erasure by covering this notch with a small
“write—protect tab.” DON’T do this with your ThinkTank working disks! ThinkTank is designed so that information must
often be stored on both the THINKTANK PROGRAM.DISK and your
data disks. They must not be write—protected.
For extra security, you may Want to write—protect your
backup copies of these disks -- the ones you don’t use from
day to day. You may cover the notch with one of the tabs supplied with most disks or with a piece of adhesive tape. Remember to remove it if you ever have to use one of your backup
disks in your computer.
EXITING FROM THINKTANK
Once you’ve loaded an outline, the ThinkTank screen looks
like Figure 2—6. Notice the message:
(ESC) TO EXIT THINKTANK
at the bottom of the screen. To exit from the program, you
simply press the ESC (ESCAPE) key -- ThinkTank’s all—purpose
escape valve.
Try it. ThinkTank asks you to confirm your intention as
shown in Figure 2—9. If you respond Y (for YES), ThinkTank
will close your files and return you to the PASCAL operating
system. (If you respond N for NO, ThinkTank will return you
to your outline.) When you see the PASCAL command prompt:
Command: E(dit, R(un, F(ile, C(omp,
L(ink, X(ecute, A(ssem, D(ebug, ?
(or at least part of it), you can run another program or turn
off your computer.
—25—
Page 33

ThinkTank Manual
Figure 2—9: Exit Screen
Always use this procedure to exit from the ThinkTank
program. DO NOT simply shut off or reset your computer; al-
though doing so will terminate the program without damage, you
always risk losing information that h~s not yet been recorded
on your data disk. The ESC procedure is the only method of
making sure your files are closed and all your information is
saved.
SPECIAL CONSIDERATIONS
Except for this chapter, the ThinkTank manual is designed
to be used with many different computers. Because of this,
the screen illustrations may not look quite like your computer
screen when you operate ThinkTank.
Here are several points to keep in mind about Apple computers as you read the rest of this manual:
Apple II and Apple II Plus
* A few keys found on many computers are missing on
the Apple II. ThinkTank allows you to substitute
other keystrokes for them as follows:
—26—
Page 34

Apple Versions
Character Description Keystroke
-----------------------------------------------
Up arrow CTRL—O
Down arrow CTRL—K
\ Backslash CTRL—Y
_ Underscore CTRL—Z
[ Left square bracket CTRL—J
] Right square bracket SHIFT—M
For example, if you want to insert a backslash into
your outline, press CTRL—T instead.
* The Apple II can only display 40 characters on a
line and all letters are shown in uppercase. The Apple II version of ThinkTank does not support special
cards designed to circumvent these limits and will
turn them off (or ask you to do so) when you start
up the program. The limits are significant because
ThinkTank headlines and patterns must fit on one
line.
Apple
* The Apple IIe version of ThinkTank requires an Apple
* In the upper—right corner of the keyboard, the Apple
Apple III
* You will need the System Utilities Disk supplied
IIe
80—Column Text Card or Extended 80—Column Text
Card. If you don’t have one, use the Apple II version instead.
IIe has a special key called DELETE. You can use it
in ThinkTank’s text editor to erase characters or
selected blocks of text. See the EDIT listing in
the reference guide f or further information.
with the Apple III to format, copy, and list Think—
Tank disks.
—27-
Page 35

ThinkTank Manual
SUMMARY
This chapter has discussed the use of ThinkTank on Apple
computers. After reading it, you should know:
* what equipment is needed to run ThinkTank on the Ap-
ple II, Apple IIe, and Apple III
* how the Apple’s special keys are used
* how to start up the ThinkTank program
* how to exit from ThinkTank
* what features of your computer to keep in mind as
you read this manual
In Chapter 3 we will complete our discussion of the fundamentals of ThinkTank by taking you on a brief tour of its
features.
—28—
Page 36

Brief Tour
Chapter .3
A BRIEF TOUR OF THINKTANK
This chapter Contains a brief tour of the ThinkTank
program. Like a ten—day, seven—country European tour, it hits
only a few of the highlights. But it also introduces you to
the way ThinkTank works and presents essential information
about operating it. After reading it, you can readily master
the program by experimentation, guided by the ThinkTank tut-
orial in Chapter 4.
This chapter includes material on:
* the ThinkTank screen
* examining an outline
* using menus
* command keys
* adding and deleting headlines
* correcting mistakes
* inserting and removing disks
* backing up
GETTING SYNCHRONIZED
Start up the ThinkTank program, set the date, and load in
the sample outline from the THINKTANK DATA DISK, as described
in Chapter 2 of this manual. Your screen should look approximately like Figure 3—1; it may look slightly different depending on your computer system. If you have any trouble, review
the startup instructions in Chapter 2.
If you’ve loaded in the sample outline but your screen
doesn’t look like Figure 3—1, someone may already have examined it. To restore it to its original condition, follow
these three instructions:
—29—
Page 37

ThinkTank Manual
1. Type the number 1000 and press the left arrow key.
2. Type “." (period).
3. Press the RETURN key. When ThinkTank finishes
expanding, press it again.
Take note of this procedure; you’ll need it again later. By
the end of the tutorial you’ll know why it works.
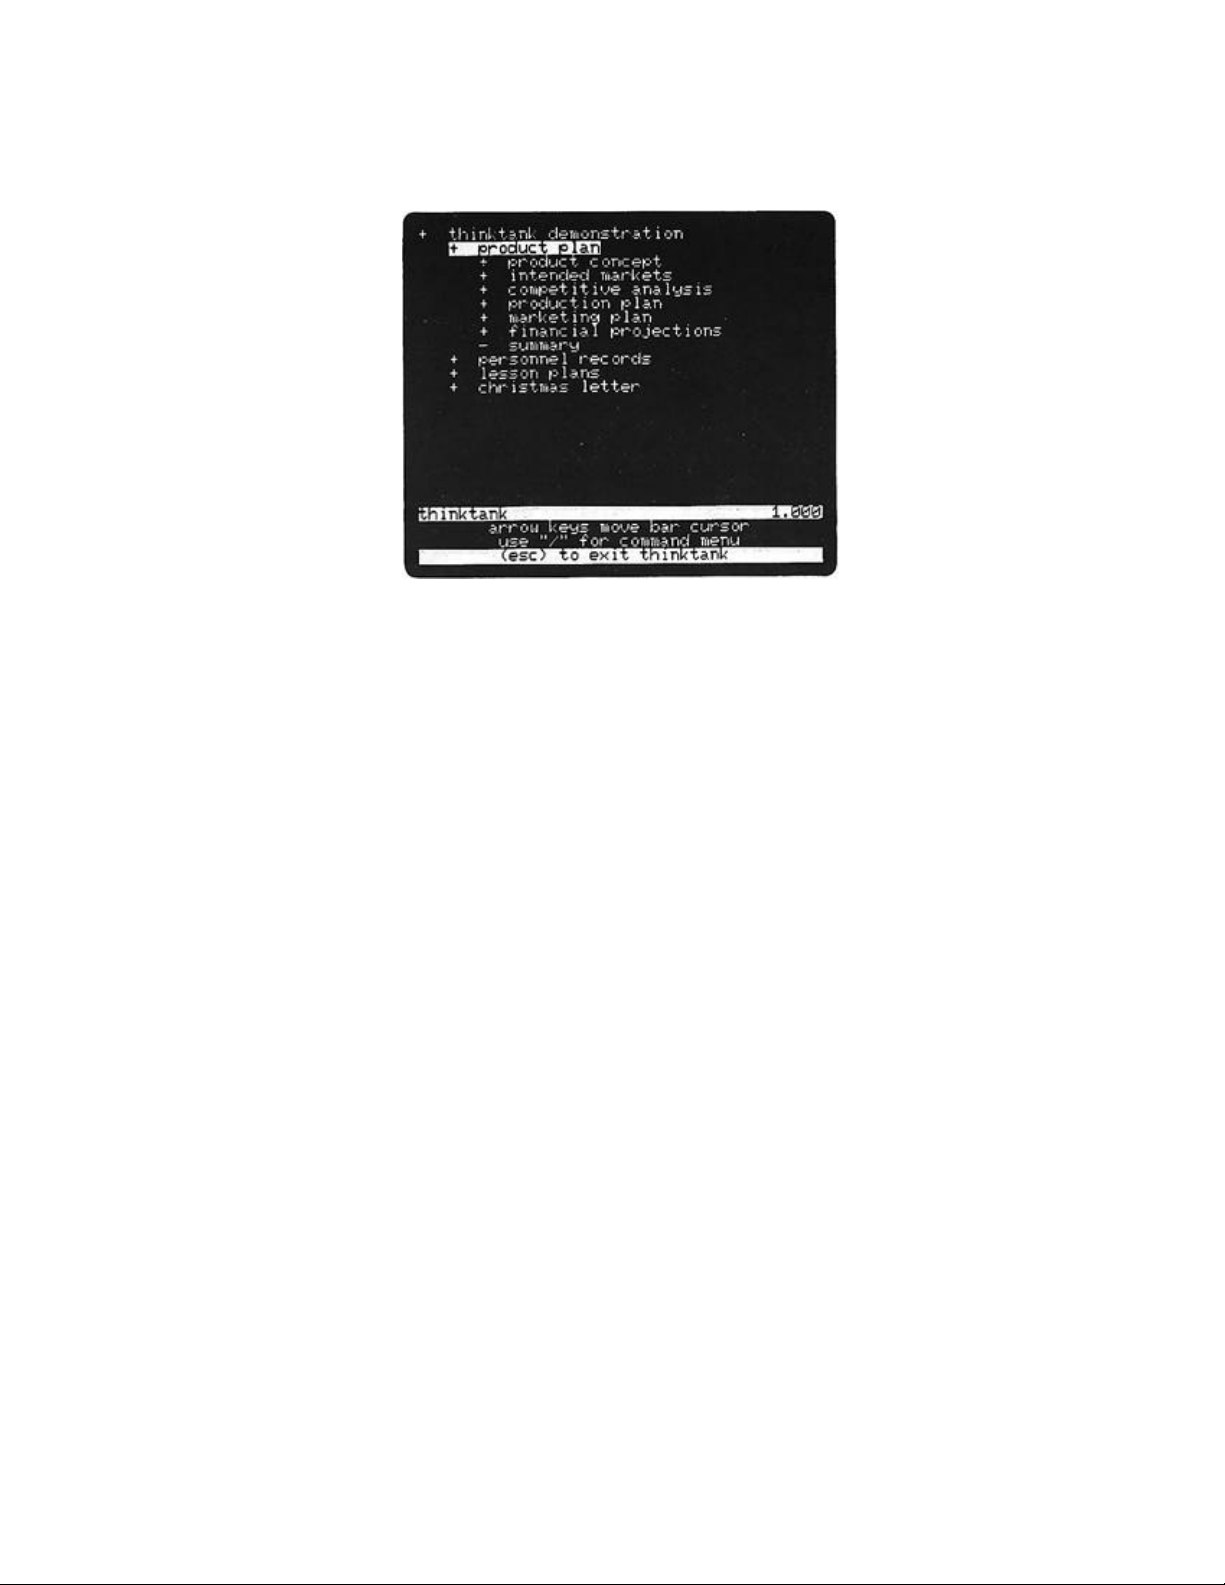
There are actually four sample outlines on the THINKTANK
DATA DISK. You can see their titles —— PRODUCT PLAN, PERSONNEL RECORDS, LESSON PLANS, and CHRISTMAS LETTER in the top
part of your screen. Each represents a typical application of
ThinkTank. For example, the PRODUCT PLAN’~ outline is a hypothetical product plan for a fictional distiller of alcoholic
beverages called Stoned Soul, Inc.
THE THINKTANK SCREEN
While you operate the ThinkTank program, your computer
‘screen is divided into two parts. The upper part, which occupies most of the screen, is the Text Area. The lower four
lines comprise the Command Area. These areas are labelled in
Figure 3—1.
Figure 3—1: ThinkTank Screen
-30-
Page 38

Brief Tour
TEE TEXT AREA
The Text Area is where ThinkTank displays the outline
you’re working on, or as much of it as fits on the screen.
The entries you see are headlines and they are arranged in
outline form, with some indented under others. These headlines may represent the “surface” of a larger outline, with
more information hidden “beneath” them, at lower levels of the
outline. You can tell whether a headline contains additional
information by its leader or leading character. A “+“ leader
means that there is more material beneath the headline, a "-"
leader means there is none.
One line in the Text Area, PRODUCT PLAN, is highlighted.
The highlight is called the bar cursor, and the highlighted
headline is called the bar cursor headline. A cursor is a
pointer; you can move the bar cursor around your outline to
point to different headlines. Notice the message ARROW KEYS
MOVE BAR CURSOR near the bottom of the screen. Experiment
with the up and down (or left and right) arrow keys to see how
to move the bar cursor from one headline to another. When
you’ve finished experimenting, move the bar cursor to PRODUCT
CONCEPT, just below PRODUCT PLAN.
Moving the bar cursor is important because of a key Think—
Tank operating principle:
THE POSITION OF THE BAR CURSOR DETERMINES
WHERE YOUR COHMANDS WILL TAKE EFFECT.
Get in the habit of moving it before selecting commands.
EXPANDING A HEADLINE
You can see the information under a headline by expanding
it. If you press “<“ (or, without shifting, “,“), ThinkTank
displays the next lower level of the outline under the headline you expanded, as shown in Figure 3—2. You can see a new
paragraph and four new headlines under PRODUCT CONCEPT.
A paragraph is simply a block of text under a headline.
It need not literally be a paragraph; it may consist of
several phrases, sentences, or paragraphs up to a maximum of
2048 characters.
—31—
Page 39

ThinkTank Manual
Figure 3—2: Expanding a Headline
We’ve chosen the “<“ key to expand a headline because it
represents the command visually, going from small to
large.
In addition to pressing "<" or “,“, you can also expand a headline by pressing RETURN. Do so several times. Each time,
ThinkTank expands the next headline. We call RETURN a
“reading” key because you can use it to “read through” an
outline.
On most computers, expanding these headlines makes the
visible outline too big to fit on the screen, so ThinkTank
pushes part of it off. Don’t worry about that; it’s still
there, just not visible. You can think of the screen as a
window on your outline, displaying as much of it as fits. For
information about adjusting this window, see the SPACE and
WINDOW commands in the ThinkTank reference guide.
The outline is now fairly cluttered and it’s hard to see
exactly where you are. Press the left arrow key several times
to move the bar cursor back to PRODUCT CONCEPT. Now type “>“
(or, without shifting, “.“). ThinkTank collapses (hides) the
material that you expanded, and the outline is very nearly as
it was when you began.
—32—
Page 40

Brief Tour
THE COMMAND AREA
The Command Area occupies the bottom four lines of the
screen, the first and last of which are highlighted. This
area contains information about ThinkTank commands and about
the status of the program. When you first load an outline into ThinkTank, the top line of the Command Area contains the
name and version number of the program. The remaining lines
suggest actions you can take at this point. As shown in
Figure 3—1, they say that you can use the arrow keys to move
the bar cursor, you can press the slash (“/”) key to display
the “Command Menu”; and you can press ESC to exit from the
program. This represents the Top Level of the program, where
ThinkTank is simply waiting for you to tell it what to do.
COMMAND MENUS
The Main Command Menu
Press the slash (“/”) key. The initial instructions in
the Command Area are replaced by the Main Command Menu shown
in Figure 3—3. This display is called a menu because, like a
menu in a restaurant, it contains a list of choices: EXPAND,
COLLAPSE, NEW, and so on. The menu itself is displayed in the
middle two lines of the Command Area, and one item (in this
case, EXPAND) is highlighted by a pointer —— the menu cursor.
The top line of the Command Area identifies the menu, while
the bottom line (the explanation line) contains a brief explanation of the highlighted option. In this case, it says
that the EXPAND option will REVEAL HIDDEN TEXT under the bar
cursor headline.
When a command menu is displayed, the right and left
arrow keys no longer move the bar cursor; they move the menu
cursor. As you try this, notice how the explanation line
changes to describe each new command. You can use this feature of ThinkTank to teach yourself about almost all of its
commands. (These brief explanations are also included on the
ThinkTank reference card.) The space bar moves the menu cursor from one line of the menu to the other. Once you have
moved the cursor to the command you want, you can press its
command key to execute it.
—33—
Page 41

ThinkTank Manual
Figure 3—3: Main Command Menu
Command Keys
Notice that there is a single character displayed at
either end of the explanation line. This character is the
command key for the highlighted option. For example, the command key for EXPAND (as shown in Figure 3—3) is “<“. That’s
why you could give the EXPAND command earlier by pressing
“C’. You don’t have to display the Main Command Menu to
select the commands on it; you can press their command keys at
Top Level.
Command keys allow you to speed through commands once you
know them. Since ThinkTank’s command keys may be changed,
remember that:
TEE CORRECT COMMAND KEY FOR AN OPTION IS
ALWAYS DISPLAYED ON THE BOTTOM LINE OF THE COMMAND AREA WHEN THE OPTION IS HIGHLIGHTED.
—34—
Page 42

Brief Tour
The Secondary Command Menu
Use the arrow keys to move the cursor to the last selec-
tion on the Main Command Menu, EXTRA. The explanation line
reads MORE THINKTANK COMMANDS. Press the slash key, its command key, and the Secondary Command Menu appears as shown in
Figure 3—4. The options include COPY, ALPHA, REVERSE, and so
on. These “secondary’ commands are used less often than those
on the Main Command Menu.
The last option on the Secondary Command Menu reads
ESCAPE. Its explanation line reads CANCEL THIS COMMAND and
its command key is ESC. When you press ESC, the menu disappears and ThinkTank returns to the Top Level.
It’s important to understand how menus work because most
ThinkTank commands appear on them. Many commands have options
which you can select from submenus. ThinkTank doesn’t actually execute these commands until you’ve progressed down a
“command tree” of options, telling it exactly what you want it
to do. The ThinkTank reference card shows the top levels of
these command trees, and the reference guide contains a complete list of ThinkTank commands in alphabetical order.
Figure 3—4: Secondary Command Menu
—35—
Page 43

ThinkTank Manual
ADDING A NEW HEADLINE
To see how this menu system works, let’s enter a new headline. You can’t just move the bar cursor where you want a new
headline and start typing. That’s because:
UNLESS YOU TELL IT OTHERWISE, THINKTANK INTERPRETS YOUR KEYSTROKES AS COMMANDS, NOT TEXT.
You tell it otherwise by giving the NEW command.
First move the bar cursor to PRODUCT PLAN and then press
N to select NEW. ThinkTank now displays a submenu called the
NEW Command Menu shown in Figure 3—5. From it you can choose
what kind of material to add and where. This menu is described fully in the reference guide; for now simply move the
menu cursor to RIGHT. The explanation line reads MAKE NEW
HEADLINE AT DEEPER LEVEL.
Press R (its command key) to select this option. Think—
Tank opens up a space for the new headline just below PRODUCT
PLAN and to the right, as shown in Figure 3—6. It displays a
“?“ in the leader position indicating that it is ready for
your new headline. In addition, ThinkTank displays a new
Figure 3—5: NEW Command Menu
—36—
Page 44

Brief Tour
pointer called the flashing cursor at the place where the new
headline will start. In the Command Area it tells you to:
TYPE NEW HEADLINE, THEN (RETURN)
(LEFT ARROW) ERASES LAST CHARACTER
Type the words:
This is a new headline
and watch them appear on the empty line. If you make a
mistake,..use the left arrow key to backspace over it. Press
RETURN to tell ThinkTank that you’re finished. ThinkTank
changes the leader to and returns to the Top Level where
no menu is displayed. The bar cursor points to your new headline.
What you’ve just done —— adding a new headline —— is
typical of the way you do most things with ThinkTank. In
general, using ThinkTank is a matter of selecting options from
menus until you specify exactly what you want to do. Think—
Tank always guides you through its menus with prompts and explanations.
Figure 3—6: Adding a New Headline
—37—
Page 45

ThinkTank Manual
DELETING A HEADLINE
You’ve just added a headline that doesn’t belong in this
outline; let’s delete it. First make sure the bar cursor
points to (is highlighting) the headline you want to delete.
Then press “ID” to select the DELETE command from the Main Command Menu. (Note that D, the DELETE command key, works only
within the Main Command Menu, not from Top Level.)
ThinkTank responds by displaying the DELETE Command
Menu. The option you want is OUTLINE and its command key is
0. When you press “0”, ThinkTank removes the new headline
from your screen and returns again to Top Level.
CORRECTING MISTAKES
Errors in Commands: ThinkTank’s Escape Valve
Earlier in this chapter you used the ESC (ESCAPE) key to
exit from the Secondary Command Menu and return to Top Level.
This illustrates an important ThinkTank operating principle:
WHENEVER YOU WANT TO STOP WHAT YOU’RE DOING,
USE THINKTANK’S “ESCAPE VALVE.”
For all practical purposes, you can always use the ESC
(ESCAPE) key to stop your current operation, even when this op-
tion isn’t specifically listed in the Command Area.
As you saw in the last chapter, ThinkTank’s escape valve
also functions to leave the program when you’re finished using
it. To exit from the Top Level of ThinkTank, simply press
ESC. If you are deeper within the program, you may need to
press ESC more than once. For example, from the Main Command
Menu, press ESC once to return to Top Level and once more to
exit from the program.
Errors in Text
There are two basic ways of correcting or revising the
text that makes up the headlines and paragraphs of an outline. First, you can use the left arrow key to backspace to
your mistake, and then retype. This is probably the best way
to correct errors made as you’re typing in new material.
—38—
Page 46

Brief Tour
ThinkTank also has two powerful text editors built into
it, which you can reach through the EDIT option on the Main
Command Menu. These editors, which are described fully in the
reference guide, enable you to insert, append, or delete sections of text; copy them or move them around; and search for
or replace key phrases. They are the best way to revise the
text of an outline once it’s been entered.
LEAVE DISKS IN PLACE
Most personal computers don’t have enough memory to hold
both the ThinkTank program and a typical outline. So Think—
Tank uses your program and data disks as ongoing storage
units. Besides increasing the size of the outlines you can
create, this minimizes data loss in the event of a power
failure or other error.
However, if one of the disks isn’t where the program expects it to be, an error will result. The error will not
damage your computer or your disks, but you may have to reload
the program and reenter some of your outline. Therefore, as a
general rule,
LEAVE BOTH YOUR PROGRAM DISK AND YOUR DATA
DISK IN THEIR DRIVES WHILE USING THINKTANK,
UNLESS THE PROGRAM SPECIFICALLY ALLOWS YOU TO
REMOVE THEM.
There are two times when you may need to take a disk out
of its drive. First, when you’re switching from one outline
to another or creating a new one, you nay need to change data
disks. You can’t just replace one data disk with another. Instead you should use the FILES command to “close” the current
outline and “open” the next. ThinkTank will tell you when
it’s OK to switch data disks. Be careful not to remove the
THINKTANK PROGRAM DISK at this time.
The second instance in which you may need to remove a
disk is when you’re porting (transferring) outline material into or out of a text file. To do this you may temporarily have
to replace the THINKTANK( PROGRAM DISK with a disk to contain
the ported material.. Again, ThinkTank will tell you when to
remove the program disk and when to replace it.
—39—
Page 47

ThinkTank Manual
BACKING UP
Since computer disks are fragile, you should always have
more than one copy of them. The basic rule of thumb for
backing up your disks is:
NEVER GET CAUGHT WITHOUT A BACKUP COPY OF ANY
INFORMATION YOU COULD NOT, OR WOULD NOT WANT
TO, RE—ENTER IF IT WERE LOST.
Backing Up Your ThinkTank Disks
You should make backup copies of your THINKTANK PROGRAM
DISK and THINKTANK DATA DISK as soon as you receive them. If
you haven’t done so already, back them up now. The simple
procedure is described in Appendix C under “Copying Disks.”
Depending on your computer, you may be able to back up your
disks without exiting from ThinkTank; or you may have to exit
and use your system disks.
Since backup procedures themselves occasionally fail, we
recommend that you use your copies of the THINKTANK PROGRAM
DISK and THINKTANK DATA DISK from day to day, storing the
originals in a secure place. That way, if you ever discover
an error in your working disk, you’ll be sure of having an intact copy available.
Both the original and backup copies of the THINKTANK
PROGRAM DISK are restricted to your own personal or business
use. According to the license agreement that you signed when
you purchased ThinkTank, you may not give copies of the program to
anyone else, and you may not resell the program to anyone else.
Backing Up Your Outlines
Once you create your own outlines, you should back them
up whenever you make a substantial change to the material on a
disk. This may mean each day an outline is used, or even more
often if it contains critical information. You may also want
to write—protect your backup disks for extra protection.
—40—
Page 48

Brief Tour
One way to back up a ThinkTank outline is to copy the entire disk, just as you backed up your ThinkTank disks. A better way is to use ThinkTank’s PORT command to transfer your
outline to a text file. The process is described in the
reference guide under PORT. Backing up your program and data
disks is a brief and convenient process, but you must do it
conscientiously. A few minutes spent today can save hours
tomorrow.
SUMMARY
You’ve just finished your brief tour of ThinkTank. It
covered the ThinkTank screen; moving the bar cursor; expanding, adding, and deleting a headline; command menus and command keys; correcting mistakes; and backing up. If you wish,
you can exit from ThinkTank now by pressing ESC at Top Level.
Or you may leave the program running and go on to the Think—
Tank tutorial in Chapter 4.
This chapter has emphasized several ThinkTank operating
rules, including:
1. The position of the bar cursor determines where your
commands will take effect.
2. The correct command key is always displayed on the
bottom line of the Command Area.
3. Unless you are entering text, ThinkTank interprets
your keystrokes as commands.
4. Whenever you want to stop what you’re doing, use
ThinkTank’s escape valve (the ESC key).
5. Leave both your program disk and your data disk in
their drives while using ThinkTank, unless the
program specifically allows you to remove them.
6. Never get caught without a backup copy of any information you could not, or would not want to, re—enter
if it were lost.
—41—
Page 49

ThinkTank Manual
With the material in this chapter, you should be ready to
experiment with ThinkTank. The next chapter, the tutorial,
describes your primary resources for learning about ThinkTank
and introduces you to each of the major things you can do with
it.
—42—
Page 50

Tutorial
Chapter 4
USING THINKTANK: A TUTORIAL
ThinkTank’s extensive prompts, menus, and explanations on
the screen make it virtually self—teaching. This tutorial
will help you begin mastering the program.
We assume you have already spent some time browsing
through command menus, reading explanations of the options,
and selecting options with their command keys. If not, please
look over “Starting Up ThinkTank” and “Exiting from ThinkTank”
in Chapter 2, and the “Brief Tour of ThinkTank” in Chapter 3,
before plunging into this chapter.
This tutorial is meant to be read while sitting at your
computer, trying out the examples. If you are not already
operating ThinkTank, start it up and load in the sample
outline according to the instructions in Chapter 2. Then
restore it to its original condition as shown in Figure 3—1
and described under “Getting Synchronized” in Chapter 3.
At the end of this tutorial you will create a new
outline. You will need a formatted disk to store it; prepare
one now if you don’t have one. Instructions for formatting
disks are contained in Appendix C.
LEARNING MORE ABOUT THINKTANK
There are three important tools for learning about Think—
Tank. First, the reference guide provides a full description
of each command, arranged alphabetically. Second, the
reference card provides a concise summary of the entire Think—
Tank command structure, organized functionally. Third, Think—
Tank’s system of screen prompts, menus, explanations, cursors,
highlights, and keystrokes —— The command system —— allows you
to explore ThinkTank’s command structure directly. Let’s take
a closer look at each of these resources.
—43—
Page 51

ThinkTank Manual
THE THINKTANK REFERENCE GUIDE
Part II of this manual, the reference guide, contains a
full description of each ThinkTank command, including how it
works, where to find it, its command key(s), whether it takes
a command prefix, and cross—references to related entries.
Keep the reference guide handy as you begin to use Think—
Tank. When you want more information about an option than the
brief explanation on the screen provides, the reference guide
is the place to turn. The entries of this “dictionary” are arranged alphabetically.
The reference guide is the only place you will find information about five Top—Level commands that don’t appear on command menus (and whose functions, therefore, are never explained on the screen). These commands are PERCENT, RE—ENTER,
BACKGROUND, SPACE, and READ.
At the end of the reference guide is a list of error
messages that ThinkTank displays to help you when something
goes wrong.
THE THINKTANK REFERENCE CARD
The reference card provides a concise summary of Think—
Tank’s entire command structure, organized by function into
seven broad categories. The brief explanation for each command on the reference card is the same one you see on the
screen when the command is highlighted by the menu cursor.
If the reference guide is like a dictionary of ThinkTank
commands, the reference card is like a map of them. To see
this, press the slash (“/”) key from the Top Level of Think—
Tank to display the Main Command Menu, which is shown in
Figure 3—3. Now look at the reference card and compare the
two.
The NEW command under “Adding Information” on the reference card corresponds to the NEW command on the Main Command
Menu. Note that NEW appears at the leftmost edge of its panel
on the reference card. So do all commands on the Main Command
Menu.
—44—
Page 52

ThinkTank Manual
Figure 4—1: NEW Command Menu After Selecting MODE
As a general rule, there is only one “path” to each Think—
Tank command. The EDIT commands, however, are exceptions. If
you look under “Editing Text” on the reference card, you’ll
see that you can also get to either text editor by selecting
EDIT from the Main Command Menu. Then you can choose HEADLINE
or PARAGRAPH depending on which editor you want. Thus, each
editor is accessible in two different contexts: you may
select EDIT directly from the Main Command Menu or as an option under NEW.
On the back, the reference card includes a “Keystroke Con—
figuration Chart.” Many ThinkTank command keys are
configurable (changeable); this chart shows you how they are
configured in your version of ThinkTank. (See KEYS in the
reference guide for information on reconfiguring command
keys.) This panel also reminds you of several commands you
might otherwise overlook because they do not appear on Think—
Tank menus; they can all be found in the reference guide.
Like most maps, the reference card does not aim to be exhaustive. It is designed to orient you and head you in the
right direction. The reference guide is the place to look for
all the commands.
—46—
Page 53

Tutorial
THINKTANK’ S COMMAND SYSTEM
ThinkTank’s command system gives you “the best of both
worlds”; you can always choose to be prompted and guided or to
take a “fast path” to action. Let’s review the two different
ways to select a command, using NEW (again) for illustration.
We will contrast the most deliberate and the quickest way to
create a new headline.
The position of the bar cursor always determines where
the selected command will take effect. Press the ESC key to
return to Top Level (if necessary) and use the arrow keys to
move the bar cursor to PERSONNEL RECORDS.
The Deliberate Method
From Top Level, press “/” to display the Main Command
Menu and use the right arrow key to move the menu cursor to
NEW. On the bottom line of the Command Area you can see:
* the command key for NEW, N, on either end; and
* its brief explanation, ADD A HEADLINE OR PARAGRAPH,
in the middle
While a menu is displayed, pressing RETURN selects the highlighted option, in this case NEW. Do so; ThinkTank displays
the NEW Command Menu.
Suppose we want to create a new headline below the existing ones. Move the menu cursor to DOWN. Now, since we want
the new headline to be three lines down (rather than immediately below the bar cursor headline), type the command
prefix “3” before selecting the DOWN option. A “3” appears on
the right side of the top line of the Command Area. The command prefix tells ThinkTank how far away it should create the
new headline. (You must enter it just before selecting DOWN;
if you enter it before selecting NEW or moving the menu cursor, ThinkTank will “forget” it before creating the new headline.)
—47—
Page 54

ThinkTank Manual
Press RETURN to select DOWN, the highlighted option. As
it did in Chapter 3, ThinkTank opens up space for a new headline below CHRISTMAS LETTER and waits for you to enter one.
Instead of typing a new headline at this point, press the ESC
key to cancel this command.
The deliberate way to select a ThinkTank command is to (1) select a menu, (2) move the
menu cursor to the desired command, and (3)
press RETURN to select the highlighted option.
With this method, you can see a full range of information
about the command, including its command key, its brief explanation, and any command prefix you enter.
This is the best method to use while you are still learning about commands (or whenever you want to examine your options for any reason). You can also use it to study Think—
Tank’s command structure. You can always use the escape valve
(the ESC key) to interrupt or cancel a command, right up to
the last moment.
The Fast Path
Now let’s repeat this process as efficiently as possible. First move the bar cursor back to PERSONNEL RECORDS
and then type “N3D” (N for NEW, 3 for the command prefix, and
D for DOWN). Voila! ThinkTank is waiting for your new headline. Use ESC again to cancel the command.
The “fast path” to a ThinkTank command is to
bypass the menus and use its command keys.
Here is some general advice about selecting commands:
* Command keys always work “inside” menus. For exam-
ple, if the Main Command Menu is displayed, you can
always press N to select NEW and display the NEW Command Menu. The menu cursor doesn’t have to be on
NEW.
—48—
Page 55

Tutorial
* If a command is on the Main Command Menu, its com-
mand key will also work “outside” the menu —— from
the Top Level of ThinkTank. (Exceptions are DELETE
and EXTRA.) For commands on other menus, you must
display the .menu before you use their command keys.
However, you can use command keys to get to the
menu.
For example, from Top Level, the “fast path” to the
COPY command is “//C”. The first slash displays the
Main Command Menu, the second slash displays the
Secondary Command Menu (EXTRA command), and C is the
command key for COPY. You can press the keys as
quickly as you wish; you don’t have to wait for each
menu to appear before pressing the next command key.
* Command prefixes are helpful but never necessary.
If you don’t enter one, ThinkTank assumes its most
likely value (usually one). For example, if you
don’t precede a NEW option with a command prefix,
ThinkTank will create the new headline one position
away.
* The RETURN key works differently “inside” and “outside”
command menus. While a menu is displayed, the RETURN key
selects the highlighted option. From Top Level, you can use
it as a “reading” key (see READ in the reference guide).
At other times, you may be prompted to use the RETURN key
to tell ThinkTank that an entry is satisfactory.
* Executing EXPAND or COLLAPSE from Top Level bypasses
the command menu which is displayed when you select
either of these commands from the Main Command
Menu. The menu lets you choose whether to expand or
collapse headlines, paragraphs, or both. If you
don’t want both, which is what you get from Top
Level, you must go through the menu.
—49—
Page 56

ThinkTank Manual
The Escape Valve
ThinkTank’s command keys let you speed down a “command
tree”; the escape valve lets you speed back up. To illustrate, look at KEYWORD/SEARCH under “Getting Around” on the
reference card. You can use this command to search f or a
word, phrase, or pattern of characters. Suppose you want to
find the word “salary” in the PERSONNEL RECORDS outline.
First move the bar cursor to PERSONNEL RECORDS and then type
KS for KEYWORD/SEARCH (or proceed deliberately if you
prefer). ThinkTank asks for a:
PATTERN’~ TO SEARCH FOR?
Respond by typing:
salary
but then press ESC. (If you press RETURN before ESC, Think—
Tank will execute the SEARCH command.) This example illustrates two general rules:
* you can ESCAPE any time before the final keystroke;
and
* when you cancel a command, ThinkTank normally
returns you to Top Level.
ThinkTank departs from the second rule, however, when you
might reasonably prefer to back up less than all the way to
Top Level. For example, type KX (for KEYWORD/XCHANGE) from
Top Level. This command allows you to replace one word or
phrase with another. Respond to the prompt for a search pattern with:
salary
and press RETURN. Now ThinkTank asks:
PATTERN TO REPLACE WITH?
but press ESC rather than entering a replacement pattern. Instead of returning to Top Level, ThinkTank returns to the
—50—
Page 57

Tutorial
first prompt; presumably you’ve changed your mind about the
pattern you wanted to SEARCH for. If that’s not the case, it
takes only one more ESC to get back to Top Level.
PUTTING IT ALL TOGETHER
Let’s see how ThinkTank’s reference tools can help you explore its most complex command, PORT. PORT is a facility for
transferring information into and out of a ThinkTank outline.
Like a shipping port, the PORT command is a way station; like
a telephone, it is a communication device. You can use PORT
to print an outline, or to transfer it to a PASCAL text file
where you can edit it with a word processor, send it to
another user, store it as a backup, or incorporate it into
another outline. Since you can’t transfer information
directly from one outline into another, ThinkTank uses text
files as intermediaries.
To PORT an outline, you choose a series of options that
specify where, how, and what you want to transfer. You can
see the major options under “Printing & Porting” on your
reference card. Porting does not disturb the original
outline; ThinkTank always ports a copy of the outline.
The material ported depends on the position of the bar
cursor when you select PORT. Suppose we want to port the LESSON PLANS outline to a text file. Move the bar cursor to LESSON PLANS and press P for PORT from Top Level. ThinkTank
displays the PORT DEVICE Menu which asks you to select a device.
Press T (for TEXTFILE) and ThinkTank displays the PORT
DIRECTION Menu. You can either SEND a ThinkTank outline to a
text file or RECEIVE a text file into an outline.
Press S (for SEND) and ThinkTank displays the PORT STYLE
Menu. You can choose among three standard styles, each suitable
for different purposes. The reference guide describes these styles
—— and all the PORT options —— in detail, while Chapter 5 contains
suggestions for porting as well as capsule instructions for
porting with two floppy disk drives.
—51—
Page 58

ThinkTank Manual
Press F (for FORMATTED) and then Y (for YES) to take a
look at ThinkTank’s formatting options. Although ThinkTank is
not a word processor, it allows you substantial control over
the appearance of your ported outlines. The instructions on
the screen, which are shown in Figure 4—2, tell you how to
move around the 16 format settings and change them if you
wish. You can control your document’s spacing, margins, page
titles —— even tell ThinkTank to construct a table of contents. The format settings are described in detail under
FORMATTED in the reference guide.
Feel free to play around. Even if you press the RETURN
key to indicate that you want to change a setting, you can always leave it as it is, or change it back later.
When you finish exploring, press ESC to stop. If you
made any changes, ThinkTank displays the EXIT SETTINGS Command
Menu. You can now choose whether to SAVE your changes for the
future, use them this time only, or go back and review them
again. Press N (for NOSAVE) this time.
Now ThinkTank asks you to name your text file. The
reference guide tells you how to enter a name, and Appendix B
contains detailed information about PASCAL file names. For
Figure 4—2:Reviewing the Port Format Settings
—52—
Page 59

Tutorial
now, the time has come to ESCAPE out of this exploration.
Pressing ESC when prompted for a text file name returns
you to Top Level. Had you pressed ESC earlier in the PORT
process, however, ThinkTank would have returned you to the
previous menu, not Top Level. To see this, type “PTSF” from
Top Level (the fast path to the format settings). When Think—
Tank asks LOOK AT THE FORMAT SETTINGS? pressing ESC returns
you to the DIRECTION Menu. (So does ESC in response to the
STYLE Menu.) Pressing ESC in response to the DIRECTION Menu
returns you to the DEVICE Menu. And pressing ESC in response
to the DEVICE Menu returns you to Top Level.
You should now be able to explore the rest of ThinkTank’s
command structure on your own. The remainder of this tutorial
is a comprehensive example which touches upon each of the
major things you can do with ThinkTank.
A COMPREHENSIVE EXAMPLE
So far we’ve explored a great deal of ThinkTank’s command
structure -- but we’ve always ESCAPEd back to Top Level before
actually doing anything. In this section, we’ll follow
through and add to, delete from, edit, reorganize, print, and
create a ThinkTank outline.
This part of the tutorial will illustrate how the major
pieces of ThinkTank fit together. It follows the command
groupings on the ThinkTank reference card. Not all the commands are covered, however.
You will find details about all the commands in the
reference guide. We suggest keeping it handy as you follow
this example. In addition, we have collected notes and suggestions about using ThinkTank in Chapter 5, to be digested after
you become familiar with the basic commands.
—53—
Page 60

ThinkTank Manual
GETTING AROUND
Arrow Keys and Direction Commands
Begin at Top Level with the THINKTANK DEMONSTRATION outline restored to its initial condition (Figure 3—1). Use the
arrow keys, as discussed in Chapter 3, to move the bar cursor
up and down the outline. If your keyboard has all four arrow
keys, note that the up and left arrows are identical and the
down and right arrows are identical. ThinkTank “squawks” when
you attempt to move the bar cursor past the last headline.
Now try the four direction commands. The command keys
are U for UP, D for DOWN, L for LEFT, and R for RIGHT. Unlike
the arrow keys, the direction commands follow the structure of
the outline. The “squawks” will help you learn how these commands operate.
Both the arrow keys and the direction commands accept
command prefixes as discussed in the reference guide. Also,
both the arrow keys and the direction commands ignore headlines that are “hidden” (not expanded at the time). If you
want to move the bar cursor to a headline that is hidden, you
must expand it first.
Now move the bar cursor to PRODUCT CONCEPT and press “,“
(comma) to EXPAND it as described in Chapter 3. Try the arrow
keys and direction commands again. Note how they skip over
the paragraph; the bar cursor points only to headlines, not to
paragraphs. Move the bar cursor back to PRODUCT CONCEPT and
press “.“ (period) to COLLAPSE it again.
What is an Outline?
EXPAND the following series of headlines: INTENDED MARKETS, DEMOGRAPHIC SEGMENTS, PSYCHOGRAPHIC SEGMENTS, and
DRINKING HABITS. The screen should look like Figure 4—3 Now
follow this sequence of COLLAPSEs and EXPANDs to see how the
position of the bar cursor affects the “scope” of a command:
1. COLLAPSE DRINKING HABITS and EXPAND it again;
—54—
Page 61
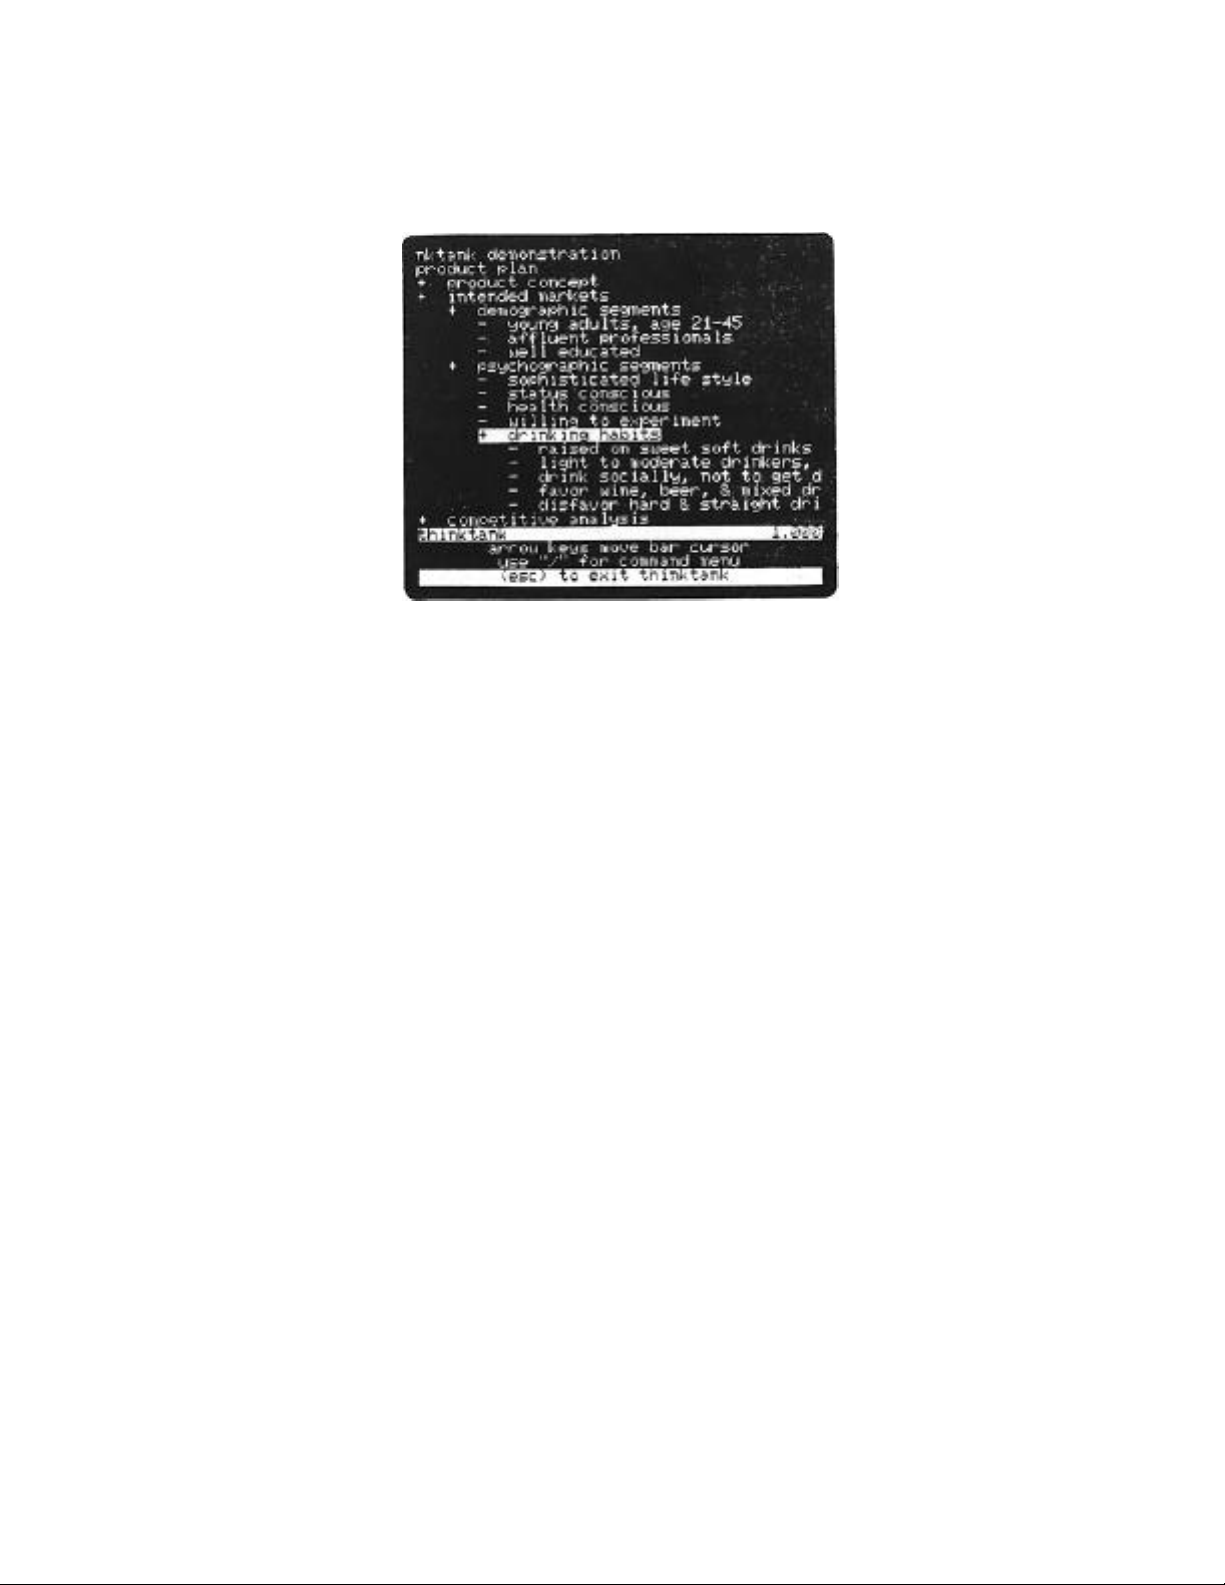
Figure 4—3: Expanding and Collapsing
2. COLLAPSE PSYCHOGRAPHIC SEGMENTS and EXPAND it again;
Tutorial
3. COLLAPSE DEMOGRAPHIC SEGMENTS and EXPAND it again;
and
4. COLLAPSE INTENDED MARKETS and EXPAND it again.
Notice how COLLAPSE hides everything under the bar cursor headline, while EXPAND reveals only the first level under it. You
can set a command prefix to make EXPAND reveal more levels.
This exercise also shows that each ThinkTank headline~
represents an outline in its own right. The entire THINKTANK
DEMONSTRATION is an outline; each of its first subheadings is
the title of an outline; indeed DRINKING HABITS is an outline
of its own. Each outline (except the summit, THINKTANK DEMONSTRATTON) is a part of a larger whole.
The bar cursor headline and the outline it represents is
called the bar cursor outline. Since the commands you select
generally affect either the bar cursor headline or the bar cursor outline, you should develop the habit of moving the bar
cursor to where you want your action to take effect before
giving a command.
—55—
Page 62

ThinkTank Manual
Searching for a Keyword
Suppose you want to find information on salaries in the
PERSONNEL RECORDS outline. Collapse PRODUCT PLAN, move the
bar cursor to PERSONNEL RECORDS, and type “KS” for
KEYWORD/SEARCH. When ThinkTank prompts you for a search
pattern, type:
salary
and press RETURN. Watch the screen (Figure 4—4) as ThinkTank
finds the pattern, expands the outline to show you its
location, highlights it, and asks whether you want to continue
the search. Press Y (for YES) and ThinkTank repeats the
process. When you finally answer N (for NO) to discontinue,
ThinkTank returns you to Top Level with the bar cursor on the
headline where the last match was found. Details on keyword
searches are covered in the reference guide, and Chapter 5 includes notes and suggestions to make best use of them.
Figure 4—4: Searching for a Keyword
—56—
Page 63

Figure 4—5: Entering a New Paragraph
ADDING AND EDITING
Tutorial
Adding New Material
Restore the sample outline to its original condition
(Figure 3—1) again. Suppose you want to add some new material
below what’s already there. Move the bar cursor to the last
headline on the screen and type ND for NEW/DOWN. When Think—
Tank opens up a space for a new headline, type:
Adding and Editing
If you make a mistake, use the left arrow key to backspace to
it. When you’re finished, press RETURN.
Now type NP for NEW/PARAGRAPH. Note the instructions on
the screen as ThinkTank opens up space. Type the following
sentences without typing RETURN when you reach the end of a
line. Watch how ThinkTank 2’wraps” your text to the next line
automatically:
—57—
Page 64
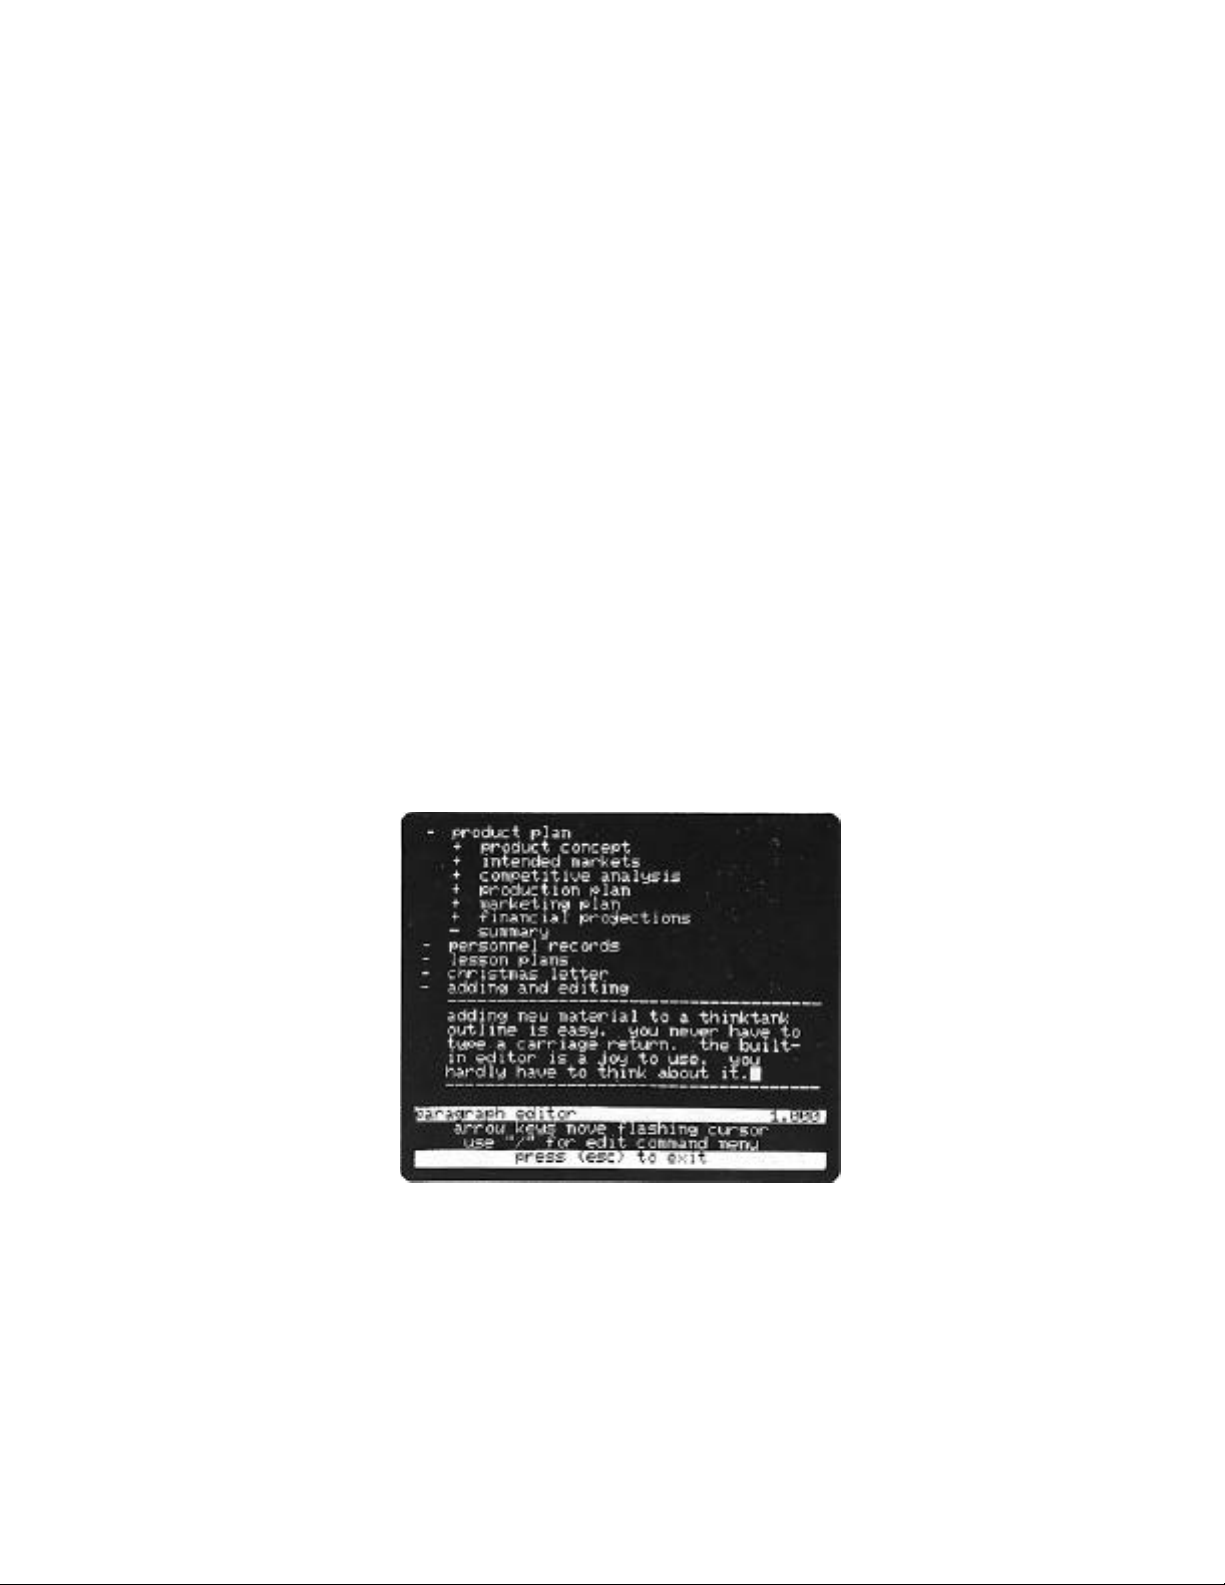
ThinkTank Manual
Adding new material to a ThinkTank outline is
easy. You never have to type a carriage
return.
The screen should look like Figure 4—5. (If your computer can
display only capital letters, Box 4—I at the end of this chapter explains how to use special symbols to tell ThinkTank to
print your paragraphs correctly in both upper— and lowercase
letters.)
Continue with the following two sentences:
The built—in editor is a joy to use. You
hardly have to think about it.
Then press ESC to end the paragraph. ThinkTank asks if you
want to edit it. Type Y (for YES) and ThinkTank places you at
the “Top Level” of the paragraph editor (Figure 4—6). This is
the EDIT option under NEW/PARAGRAPH on your reference card;
you can also reach the paragraph editor by selecting EDIT from
the Main Command Menu.
Figure 4—6: Top Level of the Paragraph Editor
—58—
Page 65
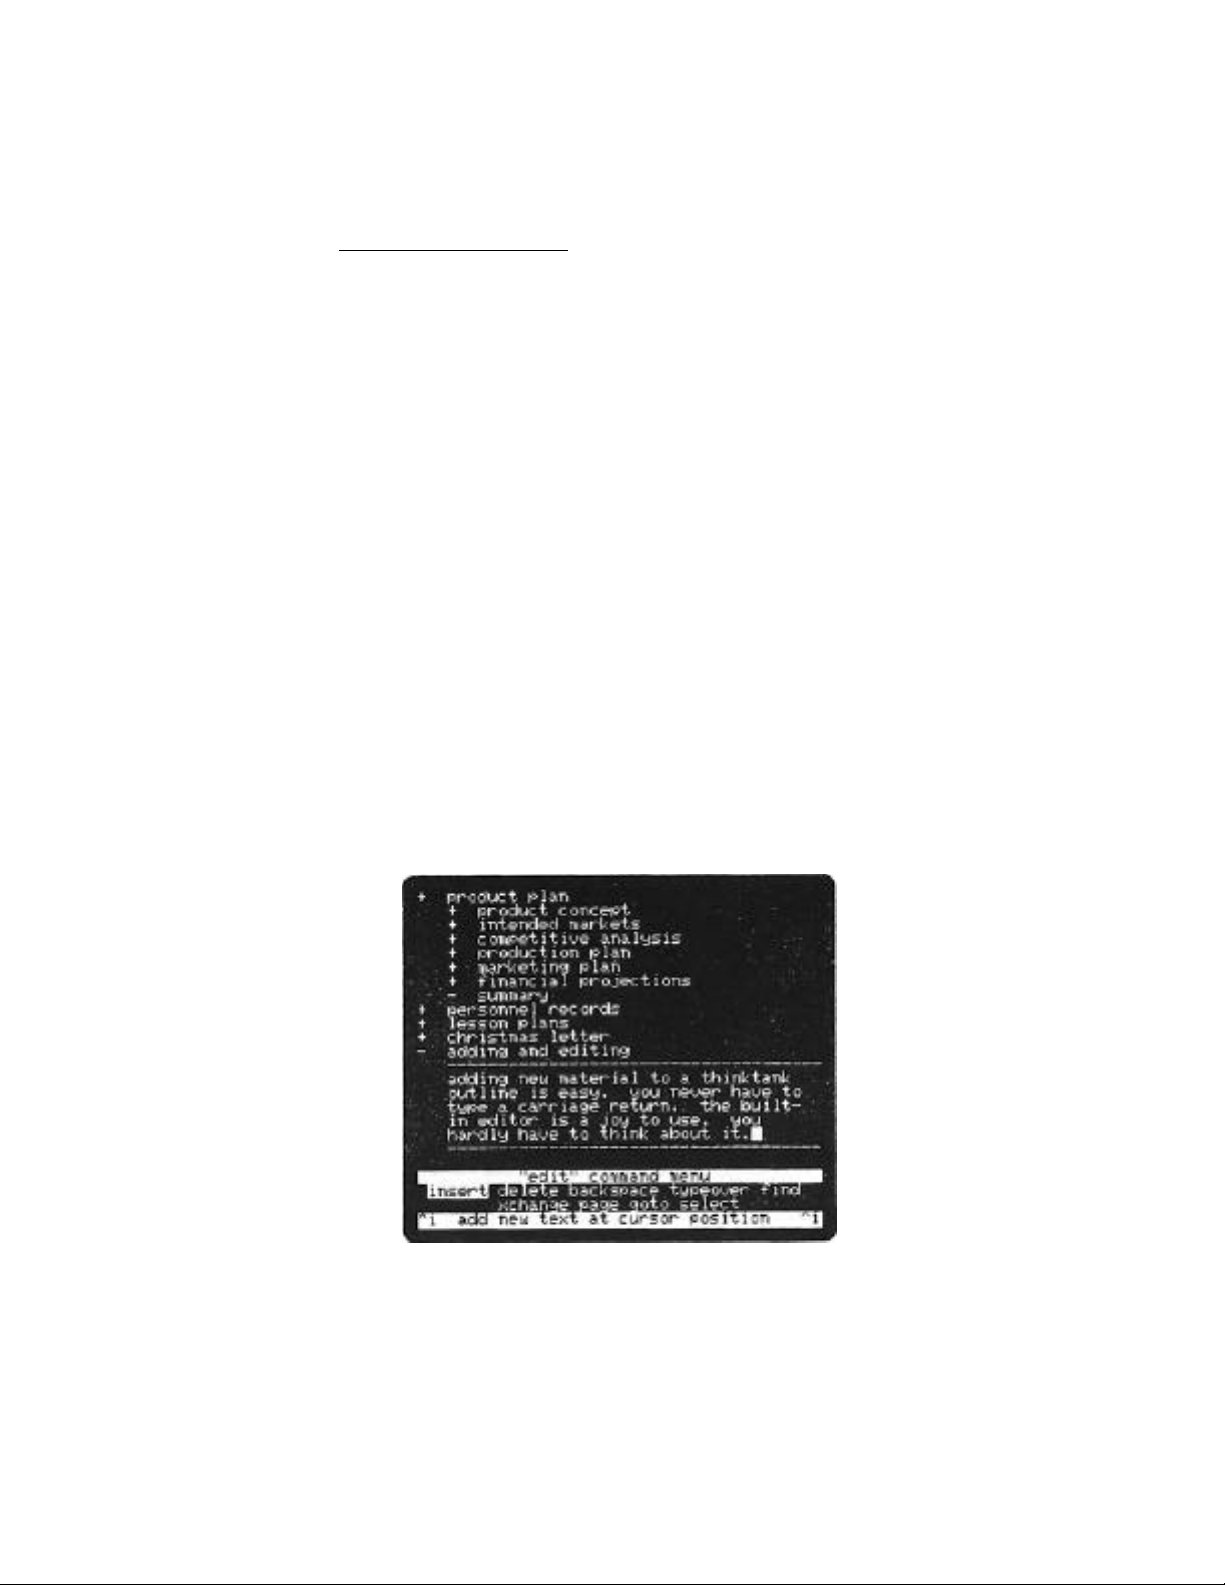
Tutorial
Editing a Paragraph
The Top Level of the paragraph editor strongly resembles
the Top Level of ThinkTank. As the Command Area suggests, you
can press the arrow keys to move the flashing cursor, type "/"
to see the EDIT Command Menu, or press ESC to exit. All of
the editing command keys work from the Top Level of the editor
as well as from their own menus. As a result, once you learn
the editing commands, you can use the “fast path” method to
edit your paragraphs. The editing commands are described in
detail in the reference guide.
Type “/” to see the EDIT Command Menu (Figure 4—7) and
browse through the brief explanations and command keys. All
the editor command keys are preceded by a CTRL character, like
CTRL—D (abbreviated ^D) for DELETE. (You give this command by
holding down the CTRL key and pressing D.) You can refer to
the “Editing Text” section of the reference card for the brief
explanations and the “Keystroke Configuration Chart” for the
command keys. This allows you to edit without looking at the
EDIT Command Menu.
ESCAPE from the EDIT Command Menu and try out the arrow
keys to move the flashing cursor. (If your keyboard has no up
Figure 4—7: EDIT Command Menu
— 59—
Page 66

ThinkTank Manual
and down arrow keys, use CTRL—O, and CTRL—K instead.) The
position of the flashing cursor, like that of the bar cursor,
determines where your commands will take effect. You can hold
the keys down (or hold down your REPT key if you have one) to
move the flashing cursor more quickly.
Now let’s use some editing commands. First let’s change
the structure of the first sentence. Type CTRL—G and press
the left arrow key to GOTO the beginning of your paragraph.
With the cursor on the first “A”, begin typing:
It is easy to
and press the space bar. This illustrates that you are always
ready to insert text unless you are specifically executing
another editor command.
Now move the flashing cursor forward to the “i” in “adding” and press CTRL—D three times (to DELETE the “ing”). Move
to the space after the word “outline” and press CTRL—D eight
times. Deleting the phrase “is easy” completes your revision
of the first sentence. Press the right arrow key once and
watch ThinkTank adjust your text for you (Figure 4—8). (If
your computer displays both upper— and lowercase characters,
you may want to delete the “A” in “Adding” and insert an "a"
in its place.)
Suppose you want to move “The built—in editor is a joy to
use” to the end of the paragraph. You could DELETE it and
retype it, but it’s easier to use the SELECT command, which allows you to work with a whole block of text at a time. First
you have to identify- the block by selecting it. Move the
flashing cursor to the “T” at the beginning of this sentence.
Then type CTRL—S to START the selection. In the Command Area,
ThinkTank announces that you’re in SELECT mode.
Once you’ve started a selection, you move the flashing
cursor to define it. Press the right arrow key to move it forward and watch how ThinkTank highlights your selection. Stop
when the cursor is flashing on the space before the “Y” in
“You hardly”, the first character you do not want to select
(Figure 4—9). Now press CTRL—S to FINISH the selection. It
will no longer follow the flashing cursor.
— 60—
Page 67

Tutorial
Figure 4—8: Editing a Paragraph
Next press CTRL—G and the right arrow key to GOTO the end
of the paragraph. Press the right arrow key twice more to insert two spaces, then press CTRL—C and watch ThinkTank COPY
the selection at the cursor position. Finally, before typing
Figure 4—9: Defining a Selection
—61—
Page 68

ThinkTank Manual
anything else, type CTRL—D to DELETE the original selection.
ThinkTank gives you a chance to reconsider; type Y for YES.
As Figure 4—10 shows, you’ve just seen how to move a block of
text quickly: select it, copy it, and delete the selection.
A ThinkTank “paragraph” is any block of text up to 2048
characters; you can arrange it into as many literal paragraphs
as you like. For a complete picture of ThinkTank’s powerful
text editors, start with EDIT in the reference guide. Consult
the notes and suggestions in Chapter 5 for further infor—
mation.
For mow, press ESC to exit from the paragraph editor and
press S to SAVE your paragraph. We will use it in the next
part of the tutorial. When ThinkTank asks if you’re finished
editing this paragraph, press Y. ThinkTank returns to Top
Level with the bar cursor on the headline from which you
created the paragraph. The paragraph is subordinate to this
headline.
Figure 4—10: Moving a Selection
—62—
Page 69

Tutorial
REORGANIZING AN OUTLINE
Copying
Suppose the boss wants you to reorganize the PRODUCT
PLAN. Let’s make a copy of it first, in case we decide later
that we don’t like it. Collapse your new outline, type “4U”
to move the bar cursor UP to PRODUCT PLAN, and then collapse
it. Now type “//C”, the fast path to COPY, to make a copy of
the PRODUCT PLAN outline. After ThinkTank has copied all 110
headlines, the copy will appear immediately DOWN from the
original. Now type “M4D” and watch as ThinkTank MOVEs the
copy four positions DOWN, below the outline you created.
New Headlines
Let’s start reorganizing by entering some new headlines.
Type NR for NEW/RIGHT and enter the headline, “One Step
Ahead”. Remember to press RETURN when you’re finished. Now
type ND (NEW/DOWN) and enter “Marketing Department”. Type ND
again and enter “Making a Killing”. The screen will look like
Figure 4—11.
Figure 4—11: New Headlines
—63—
Page 70

ThinkTank Manual
Moving
Now let’s move the parts of the PRODUCT PLAN under the
new headlines:
* Move the bar cursor to PRODUCT CONCEPT and type M2U
(MOVE/2 UP) and MR (MOVE/RIGHT) to move it under ONE
STEP AHEAD.
* Move the bar cursor to COMPETITIVE ANALYSIS and type
M3U (MOVE/3 UP) and MR (MOVE/RIGHT) to move it there
also.
* Use the same kinds of keystrokes to move INTENDED
MARKETS and MARKETING PLAN under MARKETING DEPARTMENT.
* Finally, move PRODUCTION PLAN and FINANCIAL PROJEC-
TIONS under MAKING A KILLING.
Your screen should look like Figure 4—12. You’ve used MOVE to
completely reorganize your outline.
Figure 4—12: Reorganizing an Outline
—64—
Page 71

Tutorial
Deleting
Suppose the boss doesn’t like the reorganized PRODUCT
PLAN. Move the bar cursor up to the copy of PRODUCT PLAN and
type “/DO” (slash for the Main Command Menu, D for DELETE, and
O for OUTLINE). The reorganized outline disappears. If the
boss changes his mind again, you can restore it with the
DELETE/RESTORE command —— at least until you delete another
outline.
Merging
Let’s try out one more feature —— merging paragraphs.
You can combine the paragraphs under two distinct headlines if
the second is adjacent to the first and at the same level
(directly DOWN). First move the bar cursor to ADDING AND
EDITING and type “//C” to make a copy of it. Now move the bar
cursor back to the first copy and then type “//M", the fast
path to the MERGE command. On the MERGE Command Menu, press D
to DELETE the copy after merging it, and watch as ThinkTank
merges the second paragraph into the first. The leader of the
second headline changes from “-I-” to “—“ as the paragraph under
it is deleted, as shown in Figure 4—13.
Figure 4—13: Merged Paragraphs
— 65—
Page 72

ThinkTank Manual
PRINTING AN OUTLINE
Next let’s try printing an outline. As you recall, printing is one of the functions of ThinkTank’s PORT command.
Before you start the process, there are two preliminaries:
1. The position of the bar cursor determines what part
of an outline will be ported. To print the whole
outline, move the bar cursor to the summit. In this
case, move it to PRODUCT CONCEPT in the PRODUCT
PLAN.
2. Your printer must be ready —— connected and turned
on —— when ThinkTank sends the outline to it.
There’s no way for ThinkTank to warn you or continue
if it’s not ready.
Now you are ready to print your outline. Press “PPFN”
for PORT/PRINTER/FORMATTED (don’t review the format settings
this time). Then press the space bar to begin printing. You
will see your outline “scroll” through a window on the screen
as ThinkTank prints it. If you have any trouble, you can
ESCAPE at any time during printing. You may wish to look at
the formatting options, which are listed under FORMATTED in
the reference guide, to see how they are reflected in the
printed outline. ThinkTank will signal you when the job is
done.
CREATING A NEW OUTLINE
The last task of this tutorial is to create a new outline
on a new disk. Before doing so, restore this one to its
original condition (Figure 3—1) again. First, with the bar
cursor on the (now empty) copy of ADDING AND EDITING, type
“/DO” to DELETE it; it will take quite a while. Then DELETE
the original ADDING AND EDITING. Finish the process of
restoring the outline as described in Chapter 3.
You will need a formatted disk to store your new outline
(see Appendix C for instructions).
-66-
Page 73

Tutorial
You can’t just replace the THINKTANK DATA DISK with your
new one; you have to use the FILES command. It allows you to
close your current outline (the THINKTANK DEMONSTRATION)
before switching outlines or creating a new one. Examine the
FILES command options under “Getting Started” on the reference
card. The options differ depending on your disk configura—
tion.
Press FC to select FILES/CLOSE. ThinkTank closes the sample outline and displays the FILES Command Menu which lets you
choose whether to open an existing outline or create a new
one. Press N to create a NEW outline. If your system is configured for two floppy disk drives, ThinkTank tells you to insert your formatted disk in drive 2 and press the space bar.
(For other configurations, consult NEW in the reference guide
for details.)
In a few seconds your new outline appears on the screen
as shown in Figure 4—14. It consists of a single “generic”
headline, SUMMIT. If you wish, you can start your first
“real” outline now. Your first step is to replace this headline with your own. To do so, press the “;“ (semicolon) key
to give the RE—ENTER command. Enter whatever you wish; if you
press ESC during BE—ENTER, SUMMIT will reappear. You can now
Figure 4—14: Creating a New Outline
—67—
Page 74

ThinkTank Manual
use the NEW command to begin adding headlines and paragraphs
to your outline.
CONCLUDING NOTE
Now that you ye completed the tutorial, you are well on
your way to mastering ThinkTank. We encourage you to make
good use of the reference guide and reference card and, when
you are familiar with the basic commands, to take a look at
our notes and suggestions in Chapter 5.
ThinkTank is above all a flexible, adaptable program.
Its powerful. commands allow you to customize your outlines and
work easily with your ideas. If our experience is any indication, you will develop your own style of using it, and continue to discover and invent new ways to use it as you get to
know it better. We hope you will enjoy using ThinkTank as
well, and experience the satisfaction of working with a fine
tool.
—68—
Page 75

Notes and Suggestions
------------------------------------------------------------------
Box 4—1
Printing with ‘Uppercase Computers’
ThinkTank prints outlines pretty much as they appear on
your screen. However, if your computer (like the Apple II)
can only display uppercase (capital) letters, ThinkTank will
automatically enhance your paragraphs by printing them in both
upper— and lowercase characters. It follows these rules:
1. The first alphabetic character of a paragraph is
printed uppercase.
2. If a period, question mark, or exclamation mark is
followed by two spaces, the next character is printed uppercase.
3. If a period, question mark, or exclamation mark is
followed by a carriage return, the next character is
printed uppercase.
4. All other characters are printed lowercase.
These rules normally assure that the first letter of each sentence is capitalized.
You may want other letters to be capitalized as well.
When entering or editing a paragraph, you can tell ThinkTank
to capitalize a letter by preceding it with a backslash
(“\“). If your computer has no backslash key, you can enter
one by pressing CTRL—Y.
If you have an “uppercase computer,” take a look at the
LESSON PLANS outline on the THINKTANK DATA DISK. Notice how
we have used backslashes to capitalize the names Alpha Cen—
tauri, Homer, Shakespeare, Dickens, Blurf, and the Tonight Show.
If you have a series of letters to capitalize, like the
acronym UNICEF, it can be tedious to precede each letter with
a backslash (\U\N\I\C\E\F). You can use the caret (“^“)
symbol as a shift—lock mechanism to capitalize a series of
—69—
Page 76

ThinkTank Manual
letters. Enter a “^“ just before and after the word or phrase
to be capitalized, as in ^UNICEF^. (On the Apple II, you enter a caret by pressing SHIFT—N.) Neither caret is printed;
the first is a signal to begin capitalizing and the second is
a signal to end capitalizing. The “^" symbol is called an
alternating (or toggle) command because it works in two directions: it turns capitalization on if it’s off and off if it’s
on.
If you want ThinkTank to print a backslash, without recognizing it as a “shift” symbol, enter two (“\\“). Unfor—
tunately there is no way you can get ThinkTank to print a
caret on a computer that can’t display lowercase letters.
These special symbols are applicable only to “uppercase
computers.” If your computer can display both upper— and
lowercase letters, they have no special significance and Think—
Tank will print them like any other character.
------------------------------------------------------------------
—70—
Page 77

Notes and Suggestions
Chapter 5
USING THINKTANK: NOTES AND SUGGESTIONS
We (Living Videotext, Inc.) didn’t just create ThinkTank;
we use it . . . a lot. This chapter contains notes and suggestions we’ve accumulated through extensive experience with the
program. They will streamline your use of ThinkTank and help
you get the most out of the program.
This chapter doesn’t explain any of ThinkTank’s basic commands; it assumes you are already familiar with them. Instead
it suggests how to best apply them to your own ideas and information. The suggestions will be most valuable to you if
you’ve gained some experience with ThinkTank. Following a
brief section on general advice, the topics are organized
along the same functional lines as the ThinkTank reference
card.
GENERAL ADVICE
Command Prefixes
You can precede many ThinkTank commands with a command
prefix to specify how many times the command will be executed
or how many levels of the outline it applies to. The commands
that accept prefixes are noted in the reference guide.
There is a special command prefix, the number or pound
sign (#), that tells ThinkTank to execute a command as many
tines as it can or to apply it to all levels of the outline.
When you press this key before a command, ThinkTank displays
the word INFINITY on the first line of the Command Area, signifying that it will perform the next command repeatedly. For
example, pressing I and the right arrow key tells ThinkTank to
move down as far as it can —— to the last visible headline of
your outline.
A command prefix only affects the command that follows it
immediately. For example, if you want to MOVIE an outline
three positions UP, type 3 before selecting UP: “M3U.” If
you type 3 (“3MU”) or move the menu cursor before selecting
—71—
Page 78

ThinkTank Manual
MOVE, ThinkTank will forget about it by the time it actually
moves the outline.
GETTING STARTED
Configuring ThinkTank to Your Computer System
You use ThinkTank’s FILES command to create a new outline
or examine an existing one. The procedures, which are
described under FILES, NEW, and EXISTS in the reference guide,
depend on the number and type of disk drives you have. If
ThinkTank is incorrectly configured to your computer system,
you can reconfigure it with the UTILITIES/DISK command.
But you aren’t required to be configured correctly. You
may choose a different configuration so long as you don’t tell
ThinkTank to do something impossible —— like open an outline
on a nonexistent disk drive. For example, suppose you are configured for three floppy disk drives but have to take one in
for service. There’s no need to reconfigure, so long as you
avoid selecting the missing drive.
Choosing the Size of Your Floppy—Disk Outlines
You can also use a fictitious configuration to choose the
size of your floppy disk outlines.
If you have a floppy disk computer system, you know that
you can only store one outline on a floppy disk. ThinkTank
won’t let you store a second outline on a disk without erasing
the first. But what if you have two (or more) small outlines
that you’d like to put on a single disk? You know they’d fit
—— if only ThinkTank would let you do it!
Actually, it will. ThinkTank allows users with hard disk
systems to choose the size of their outline files; it doesn’t
limit the number of outlines they can store on a disk. If you
“fool” ThinkTank into thinking you have a hard disk, you can
choose where to store each outline and how big the file should
be.
—72—
Page 79

Notes and Suggestions
To do this, simply use the UTILITIES/DISK command to tell
ThinkTank that you have a hard disk system. It doesn’t matter
if you don’t have a hard disk —— ThinkTank can’t tell the difference. Now, when you create a new outline, you are free to
set the size of the file and store it wherever you have enough
space.
Of course, there’s a cost to this added power. You will
have to use the more complex hard disk version of the FILES
command, as described in the reference guide.
GETTING AROUND
The Bar Cursor Express
Command prefixes are especially helpful in moving quickly
around an outline. Suppose you’re deep within an outline and
want to move to the summit. If you prefix the up (or left)
arrow key with some large number, like 1000, ThinkTank will
try to move the bar cursor 1000 lines up. Of course it can’t,
but it will move as far as it can —— to the summit. Similarly, typing 1000 and the down (or right) arrow key will move
the bar cursor to the last headline of your outline. You can
also use the infinity prefix (#) to move the bar cursor as far
as it can go.
The direction commands (UP, D(MN, LEFT, and RIGHT) are
also ideal for moving quickly since they follow the structure
of your outline. For example, no matter how many headlines intervene, the DOWN command will get you to the next headline at
the sane level of •the outline. Similarly, the LEFT command,
which moves the bar cursor to a higher level of the outline,
makes it easy to get to the summit.
Searching and Replacing
You can use KEYWORD/SEARCH to search for key words,
phrases, and patterns of characters in an outline, and
KEYWORD/XCHANGE to replace one pattern with another. Here are
some tips on keyword searches and exchanges:
—73—
Page 80

ThinkTank Manual
1. ThinkTank will only search material beneath
(subordinate to) the bar cursor headline. Before you begin a
search, make sure the bar cursor is at the top of the outline
you wish to search.
2. Be as specific as possible when entering a keyword.
The more specific your keyword, the fewer matches it will take
to find the one you want.
3. It’s important to specify the spelling and usage of
your keyword correctly. Remember that KEYWORD/SEARCH disregards the case of the letters in your search pattern, but
KEYWORD/XCHANGE requires an exact match by character and
case. If you’re not sure of the spelling or usage of your keyword, use a general pattern that will match all of the possibilities.
4. ThinkTank will match a keyword even if it’s embedded
inside another word. Suppose that for some reason you want to
change every instance of the word “and” in an outline to the
word “or.” If you enter “and” as your search pattern and “or”
as your replacement pattern, ThinkTank will make the change ——
but it will also change the word England to Englor because it,
too, contains the search pattern. In such cases it is best to
use “ and “ and “ or “ as your search and replacement patterns. The extra spaces ensure that patterns embedded in larger words will not he changed.
Even experienced users can make mistakes like this. At
one stage in the development of ThinkTank, the program’s working title was “FYI” (For Your Information). When we changed
the name to ThinkTank, we used KEYWORD/XCHANGE to substitute
“ThinkTank” for “FYI” in the outline of the manual. It did
so, all right —— but it also changed the word “signifying” to
“signiThinkTankng!” And you thought computers were smart?
ADDING INFORMATION
Use NEW Mode
Whenever you select the NEW command, ThinkTank takes a
brief moment to read instructions from the THINKTANK PROGRAM
DISK. Then, when you’ve finished adding, it takes another
—74—
Page 81

Notes and Suggestions
moment as it returns to Top Level. If you’re adding a Lot of
new material, the disk access mounts up and becomes tedious.
You can streamline this process by consistently using the
NODE option on the NEW Command Menu. In NEW mode, you return
to the NEW Command Menu, not Top Level, when each command is
completed. If you are executing a series of NEW commands,
you’ll save the time and effort of reading from the disk and
selecting NEW each time. NEW mode is especially helpful when
you have just created a new outline and want to add a lot of
new headlines and paragraphs. We suggest selecting the MODE
option routinely whenever you give the NEW command, even when
you don’t plan to execute it more than once. It takes little
extra time and comes in handy when you decide to add more than
one entry.
Use EDIT
You can use ThinkTank’s text editors for more than just
editing. In fact, the more you use ThinkTank, the more we
suspect you’ll rely on the editors for other tasks.
Suppose you’re in NEW mode, adding numerous headlines to
an outline, and the next headline you want to add is not
directly up, down, left, or right from the bar cursor.
There’s no need to exit from NEW mode and move the bar cursor
closer to the new headline. Instead, select the EDIT option
which appears on the NEW Command Menu when you’re in NEW
mode. Don’t use it to edit the headline; just use the up and
down arrow keys (or CTRL—O and CTRL—K) to move the bar cursor
to the new headline position. Then press ESC to exit from the
editor and return to the NEW Command Menu, where you’re ready
to select the location of your new headline.
In addition to using the headline editor when entering
new headlines, we suggest that you use the paragraph editor
when entering new paragraphs. From Top Level, give the command “EP” (EDIT/PARAGRAPH) instead of “NP” (NEW/PARAGRAPH).
Them you’ll be able to use all the editing commands when you
first enter the new text.
—75—
Page 82

ThinkTank Manual
Constraints on Headlines
There are two constraints on ThinkTank headlines. First,
they can’t be blank. To create the effect of a blank headline, select a NEW option and type a space before you press
RETURN.
Second, a headline can’t exceed the width of your
screen. If you want to add a longer headline, put the informa—
tion in a paragraph instead. Or create a series of new head—
lines, each continuing to the next, and treat them as a unit.
Constraints on Paragraphs
There are three constraints on ThinkTank paragraphs.
First, like headlines, they can’t be blank. Type a space to
creat,e the effect of a blank paragraph.
Second, each paragraph is limited to 2048 characters. If
you want to create a longer one, split it into two or more
paragraphs and place them under adjacent headlines. When you
print the outline, suppress the headlines so that the
paragraphs appear to be consecutive, or enter a “blank” headline as described above.
Third, ThinkTank won’t let you enter more than one
“paragraph” for any headline. You can place several literal
paragraphs in a single ThinkTank paragraph by ending each with
a carriage return. Your text will appear as several separate
paragraphs, although ThinkTank will treat them as a single entity.
REORGANIZING
Speeding Up MOVEs
If you are moving material around an outline, there are three
ways to speed up the process:
* Use a command prefix to move several positions at
once.
—76—
Page 83

Notes and Suggestions
* Use the MOVE/MODE option, which allows you to con-
nect a series of MOVE commands without returning to
Top Level each time. In MOVE mode, ThinkTank
displays the MOVE Command Menu after each MOVE,
ready for another MOVE command. If you are executing a series of MOVEs, you’ll save the time and
effort of reading from the disk and selecting MOVE
each time.
* Delete the material with the DELETE/OUTLINE com-
mand. Then move the bar cursor just above where you
want to move the material and restore it with the
DELETE/RESTORE command.
Moving Paragraphs
You can MERGE one paragraph into another even if the
receiving paragraph is”empty” (nonexistent). This allows you
to move a paragraph around an outline without disturbing its
headline structure.
Alphabetizing Subheadings
ThinkTank’s ALPHA command sorts the subheadings of the
bar cursor headline in alphabetical order. Sorting is a complicated process to a computer. It may take several moments,
depending on the number of subheadings to be sorted.
ALPHA will sort numbers as well as letters, but ThinkTank
may not order them correctly unless each number contains the
same number of digits. For example, it will place the headline OPTION 14 before the headline OPTION 7. You can assure a
correct sort by prefixing your numbers with “leading zeros” so
that all have the same number of digits. ThinkTank will correctly place OPTION 07 before OPTION 14.
PRINTING AND PORTING
Use PORT to Back Up Your Outlines
Chapter 3 discussed the importance of backing up your
outlines. One method is to make copies of your outline disks as
described in Appendix C. ThinkTank’s PORT command provides
—77—
Page 84

ThinkTank Manual
an easier, more efficient way —— backing up your outlines in
text files.
You will need one or more disks, formatted for the PASCAL
operating system, to store the backup files. The files should
be arranged in STRUCTURED style, which is more compact than
ThinkTank’s regular file format. You will be able to back up
more than one outline on each backup disk, generally between
two and six depending on the size of your outlines.
Remember the rule discussed in Chapter 3:
Never get caught without a backup copy of any
information you could not, or would not want
to, re—enter if it were lost.
You should back up an outline whenever you make substantial
changes to it. Before you close the file, move the bar cursor
to the top of the outline and press “PTSS” to select
PORT/TEXTFILE/SEND/STRUCTURED. When ThinkTank asks you for
the name of your text file, enter the device number or volume
name of your backup disk and a name describing the outline.
The next time you back up the outline, you can port it to
the same backup disk if you wish. If you use the same file
name, ThinkTank will replace the old copy with the new one.
However, since backups themselves sometimes fail, we recommend
that you keep copies of each outline on two different backup
disks, alternating between them. Don’t take a chance on
destroying an old backup copy until you have successfully
created a new one.
If you conscientiously follow this procedure, you will be
sure of having a recent backup copy if your outline disk
becomes damaged. If you ever need the backup copy, use
PORT/TEXTFILE/RECEIVE to port the file back into ThinkTank.
Use RECALL When Porting Between Outlines
When ThinkTank prompts you for a pattern or file name, it
remembers the last one you entered. You can use the RECALL
ommand to redisplay it. If you’ve just ported an outline to a
text file and want to port it back into another outline,
— 78—
Page 85

Notes and Suggestions
RECALL can help you enter the correct file name. When Think—
Tank asks, NAME OF PASCAL TEXTILE?, press CTRL.—E to RECALL
the last entry.
Text File Ports with Two Floppy Drives
Here are concise instructions for porting between an
outline and a text file for a computer system with two floppy
disk drives. See PORT in the reference guide for other configurations.
(a)Porting from an outline to a text file. You will
need a disk formatted for the PASCAL operating system to store
the file (see Appendix C).
1. Move the bar cursor to the top of the outline you
wish to port.
2. From Top Level, press “PTSS” to select
PORT/TEXTILE/SEND/STRUCTURED.
3. When ThinkTank asks:
NAME OF PASCAL TEXTILE?
type #4: followed by a file name of up to 10 charac—
ters.
4. When ThinkTank asks:
REMOVING THE THINKTANK DISK?
first replace the THINKTANK PROGRAM DISK in Drive 1
with your formatted disk; then press Y.
5. ThinkTank will port your outline to the text file.
When it’s finished, it will tell you to:
REPLACE THINKTANK PROGRAM DISK, THEN
PRESS (SPACEBAR)
Remove the disk that now contains the text file from
Drive 1 and replace it with the THINKTANK PROGRAM
—79—
Page 86

ThinkTank Manual
DISK. Then press the space bar to return to Top
Level.
(b) Porting from a text file to an outline.
1. Move the bar cursor to the headline below which you
want the text to appear.
2. From Top Level, press “PTR” to select
PORT/TEXTILE/RECEIVE.
3. When ThinkTank asks:
NAME OF PASCAL TEXTILE?
type #4: followed by the file name.
4. When ThinkTank asks:
REMOVING THE THINKTANK DISK?
first replace the THINKTANK PROGRAM DISK in Drive 1
with the disk containing your text file; then press
Y.
5. ThinkTank will port the text file into your
outline. When it’s finished, it will tell you to:
REPLACE THINKTANK PROGRAM DISK, THEN
PRESS (SPACEBAR)
Remove the disk containing the text file from Drive
1 and replace it with the THINKTANK PROGRAM DISK.
Then press the space bar to return to Top Level.
EDITING TEXT
Carriage Returns
ThinkTank automatically adjusts your paragraphs to fit
within the margins of your screen. You never need to type a
carriage return to move to the next line.
—80—
Page 87

Notes and Suggestions
You should type a carriage return, however, if you want
to end a line before the right margin. Suppose you want to indent a block of text (like the return address and date in a
letter) 20 spaces. At the beginning of each line, type 20
spaces for the indentation. Then type the line and press
RETURN at the end to prevent ThinkTank from readjusting it
when it displays or prints the paragraph. (Note that when
ThinkTank prints a paragraph, it disregards your screen margins and readjusts the text to fit within your printing margins.)
BACKSPACE and DELETE
There are two deletion commands in the paragraph editor.
When should you use BACKSPACE and when should you use DELETE?
BACKSPACE erases the character directly in front of the
flashing cursor, while DELETE erases the character that the
flashing cursor points to. Use BACKSPACE to correct typing errors that you notice immediately. If you recognize an error
within a few characters of typing it, it is most convenient to
backspace over it, correct the error, and retype any correct
characters that you erased in the process. On the other hand,
if the error is more than a few characters back, move the
flashing cursor directly to the error and erase it with
DELETE.
Selecting Text
An analogy may help you visualize the process of select-
ing text in the paragraph editor. When you START a selection,
you set an anchor point at the flashing cursor. As ~you move
the cursor away from the anchor, the selection expands. As
long as you remain in SELECT mode, the selection is always
defined as the area between the anchor point and the flashing
cursor.
If you move the flashing cursor back toward the anchor
point, the selection contracts. If you continue to move in
that direction, the selection eventually contracts to contain
a single character, then expands again as you move the cursor
away in the other direction.
—81—
Page 88

ThinkTank Manual
Imagine the selection as an extremely flexible rubber
band. When you start the selection, you tack down one end of
the band at the anchor point. The other end is attached to
the flashing cursor. When you move the cursor, the band
stretches or relaxes depending on your direction of movement.
Save Paragraphs Frequently
The changes you make with the paragraph editor are not
saved on your data disk until you say so. If you are making
extensive changes to a paragraph, save them frequently while
editing. To do this, press the ESC key from the Top Level of
the paragraph editor and select SAVE from the EDIT EXIT Menu.
When it has finished saving, ThinkTank asks if you are
finished editing the paragraph. If you respond N (NO), Think—
Tank returns to the Top Level of the text editor where you can
continue to edit the paragraph. In other words, you can save
your changes without leaving the paragraph editor. This makes
it easy to save your changes often. Periodic saving will
minimize your losses in case of a power failure or computer
breakdown.
Editing Headlines
In addition to EDIT/HEADLINE, you can also use the
RE—ENTER (“;“) command to retype a headline. In some cases
this is even easier than using the headline editor.
SPECIAL FEATURES
Monitoring Memory and Disk Space
Your computer has two places to store your outlines: in
its own internal memory and on your data disk. These two
storage areas have the capacity to record large amounts of in—
formation, but they are finite. You may eventually run out of
room.
If you run out of internal memory, ThinkTank will display
the message MEMORY FULL! Use the COLLAPSE command to compress
part of your outline so that it consumes less internal memory.
—82—
Page 89

Notes and Suggestions
If you run out of disk space, ThinkTank will display the
message DISK FULL! See the error messages section for suggested courses of action.
You can avoid these conditions by using the PERCENT com-
mand to monitor your use of internal memory and disk space.
You give this command by pressing the percent C”%”) key at the
Top Level of ThinkTank. ThinkTank responds by displaying the
percentages of memory and disk space still available. If you
are running short, you can take corrective action before it’s
absolutely necessary.
changing ThinkTank’s Command Keys
When you press a key to give a ThinkTank command, it
seems to trigger the command directly. Actually this is an
oversimplification; there’s a great deal of translation going
on, as illustrated in Figure 5—1. For example, suppose you
press CTRL—D to invoke the paragraph editor’s DELETE command.
First your computer translates your keystroke into an electronic code, in this case 004, which is defined by the
American Standard Code for Information Interchange (ASCII,
pronounced ask—key). When ThinkTank receives this code, it
translates it again into the DELETE command that performs the
function you want.
There is nothing magical about either of these translations. Many of the keystroke—to—ASCII conversions are standardized, but some are not. For example, pressing the left
arrow key might generate ASCII code 008 on one computer and
164 on another. Similarly, there is substantial flexibility
in the way ThinkTank translates ASCII codes into commands.
You can’t ordinarily do much about the’ way your computer
translates keystrokes into ASCII codes. But ThinkTank gives
you quite a bit of control over its ASCII—to—command translations, which allows you to customize ThinkTank’s command
keys to your needs, preferences, and computer system. Although we have preconfigured ThinkTank’s command keys to fit
most people’s requirements, there are several reasons why you
might want to modify them. For example, you may be using an
alternate keyboard that contains special keys you want to assign to ThinkTank commands. There nay be special characters
—83—
Page 90

Signifies a translation
Figure 5-1: Translating Your Commands
- 84 -
Page 91

Notes and Suggestions
you want to generate for which your keyboard has no keys. Or
you may want ThinkTank’s text editing commands to be consis—
tent with a word processor you’re accustomed to.
You can reconfigure ThinkTank’s command keys with the
UTILITIES/KEYS command. The procedure is described in the
reference guide.
However, we recommend caution in reconfiguring Think—
Tank’s command keys. When we preconfigured ThinkTank to your
computer, we carefully considered its special features and
characteristics. If you reconfigure them, use the same care.
For example, suppose you have an Apple II computer, which
has no up and down arrow keys. We have configured CTRL—O and
CTRL—K to invoke these commands. You may think: “That
doesn’t make sense; why don’t I reconfigure them to CTRL—U
(for up) and CTRL—D (for down)?” There are problems with this
solution. First, on the Apple II, pressing the right arrow
key also generates the code CTRL—U; thus you would have two
command keys generating the same ASCII code for two different
commands! Second, CTRL-.D is already in use for the editor’s
DELETE command. If you use it for down arrow, you will have
to find some other keystroke for DELETE.
This example illustrates that reconfiguring keystrokes is
more complicated than it may seem. Consider the special features of your computer as well as the other uses of each
keystroke. In particular, never reconfigure CARRIAGE RETURN
or ESCAPE to a keystroke you can’t generate on your keyboard.
(If you do, you won’t be able to load an outline, exit from
ThinkTank, or restore the original configuration.)
To avoid potential problems, we recommend reconfiguring
only your copy of the THINKTANK PROGRAM DISK. Leave the
original, with its preconfigured command keys, intact so that
you’ll always be certain of having a working copy.
Reconfiguring SHOW—MENU in the Paragraph Editor
In the paragraph editor, pressing the slash (“/”) key
displays the EDIT Command Menu. If you want to insert-a slash
in your text, you must enter INSERT mode first. This can be
—85—
Page 92

ThinkTank Manual
cumbersome, and if you type slashes frequently, ye recommend
that you change the command key that displays the command
menu. Use the UTILITIES/KEYS/EDITOR command to reconfigure
SHOW—MENU to CTRL—W or some other unused, uncommon keystroke.
Then you can enter a slash without entering INSERT mode first.
Adding Options to the SPECIALIST Command Menu
Suppose you ye connected a telephone to your computer and
you’ve got a PASCAL program called DIAL that will dial a
telephone number for you. Also, suppose you’ve stored your
personal address book in a ThinkTank outline. Wouldn’t it be
great if you could execute the DIAL program from within Think—
Tank and have it dial the numbers in your address book
automatically?
Well, you can. The process involves extending your DIAL
program to read telephone numbers from ThinkTank and adding it
to the SPECIALIST Command Menu. Once you’ve done this, you
can make a phone call by simply moving ThinkTank/s bar cursor
to the number and selecting DIAL from the SPECIALIST Command
Menu.
Adding a command to the SPECIALIST Command Menu is fairly
easy; you use the UTILITIES/MENU command as described in the
reference guide. Extending a program to “hook into” ThinkTank
may be more complex; details are provided in a ThinkTank
technical note described in Appendix D. The program must run
under the PASCAL operating system, and you must have a hard
disk drive or at least three floppy drives. We recommend that
you add SPECIALIST commands only if you’re an advanced user,
with technical knowledge about PASCAL and your computer.
SUMMARY
This chapter has presented notes and suggestions for experienced ThinkTank users. As you gain experience with Think—
Tank, you will undoubtedly develop your own techniques and
strategies for getting the most out of it. We welcome your
comments and suggestions.
—86—
Page 93

Glossary
Appendix A
GLOSSARY
ASCII: The American Standard Code for Information Inter-
change; a standard method for translating keystrokes into an
electronic code.
Backup: A copy you can use in case the original fails.
Bar cursor; Bar cursor Headline; Bar Cursor Outline: The bar
cursor is a pointer that highlights one headline, the bar
cursor headline, on the screen, and indicates where your
next command will take effect. The bar cursor outline encompasses the bar cursor headline and all information (subheadings and paragraphs) organized beneath it.
Beneath: Subordinate to; at a lower or deeper level in the
outline structure; to the right of.
Close a File: The process of assuring that all your outline
material is properly stored on your disk before you change
to another outline or exit from ThinkTank.
Collapse: To hide the information beneath a headline from
view.
Command; Command Area: A command is an instruction you give
to ThinkTank by selecting it from a menu or pressing its
command key. The Command Area is the lower portion of your
computer screen, where ThinkTank normally displays prompts,
messages, and menus.
Command Key: A key you can press to give a command without
selecting it directly from a menu. The correct command key
for a command on a menu is always displayed on the explanation line when the command is highlighted.
Command Prefix: A number entered before a command specifying
how many times the command should be executed or how many
levels of the outline it should apply to.
—87—
Page 94

ThinkTank Manual
Configure: To adapt ThinkTank to your computer system, needs,
and preferences. You can configure ThinkTank’s disk setup,
command keys, and SPECIALIST commands.
Data Disk: A disk which holds a ThinkTank outline. The THINK—
TANK DATA DISK is the sample data disk supplied with the
ThinkTank program.
Deeper Level:Same as beneath.
Depth: Number of outline (indentation) levels.
Default:Value of an option that is assumed, by default, un-
less you enter another.
Device: In the PASCAL operating system, an all—purpose term
that refers to your computer console (screen and keyboard),
disk drives, printers, and other “peripherals.”
Directly Subordinate: Immediately (one level) beneath.
Down: Below, but at the same level in the outline structure.
Error Message: Displayed to tell you that something happened
unexpectedly.
Escape Valve: Pressing the ESCAPE key. A consistent way to
stop whatever you’re doing and return to where you started.
Exit: To leave, conclude, or terminate a process; to exit
from ThinkTank is to return control of your computer to its
operating system.
Expand: To reveal the information hidden beneath a headline.
Explanation Line: When a menu is displayed, the bottom line
of the Command Area contains an explanation of the highlighted option.
File: Programs, outlines, and text are stored on your disk in
files. Each file is identified by a unique name.
—88—
Page 95

Glossary
Flashing Cursor: When entering or editing a headline or
paragraph, a pointer that indicates where your next action
will take effect.
Format: To draw a nap on a disk so that your computer can ac-
curately record and retrieve each piece of information.
Format Setting: The way in which a printed or ported outline
is arranged.
Reading:Same as headline.
Headline:Main point or subpoint of an outline, expressed in
a single line. Headlines may have subheadings, other headlines which contain more detailed information, arranged
beneath them.
Higher Level:Closer to the top (summit) of the outline;
logically superordinate; to the left of.
Immediately Subordinate:Same as directly subordinate.
Keyword: A word, phrase, or series or characters that you
want ThinkTank to search for or replace.
Leader: The leading character of a headline, which tells you
whether there is more outline material beneath it (+) or not
(—)
Level: Relative position in an outline. Indentation is used
to indicate the level of a headline or paragraph in an
outline; lower levels are indented to the right of higher
levels.
Main Command Menu:The menu, displayed by pressing the slash
(“/”) key from Top Level, that contains ThinkTank’s most important commands.
Menu; Menu Cursor:A menu is a list of commands or options
from which you can select. The menu cursor is a pointer
that highlights one option on a menu.
—89—
Page 96

ThinkTank Manual
Mode: A temporary state devoted to a certain class of
operations. For example, “NEW mode” is designed f or adding
a series of entries to an outline.
Operating System: A program that performs the functions of an
“executive director” for your computer. It receives your
commands, communicates between your computer and your
program, and manages your files. See PASCAL.
Option: A choice that appears on a menu.
Outline:A headline with related information underneath it.
Paragraph: In ThinkTank, a block of text under a headline. A
ThinkTank “paragraph” may contain any number of literal
paragraphs up to a maximum of 2048 characters.
PASCAL: The programming language in which ThinkTank is writ-
ten, and the operating system (also called the p—code or
p—System) under which it runs.
Port: A place to transfer information into and out of Think—
Tank; also, to transfer such information.
Program Disk: The disk that holds the ThinkTank program.
Promote: To move a headline or outline to a higher level.
Prompt: An instruction or message on the screen designed to
catch your attention or draw your response.
replacement Pattern: A word, phrase, or series of characters
that you want substituted for a search pattern.
Reset: A key, set of keys, or button found on many computers
which terminates a program and starts again from the beginning. Do not reset your computer while operating ThinkTank
except in the rare case that your computer “hangs” and will
not respond to your commands.
Search Pattern: A word, phrase, or series of characters that
you want ThinkTank to find or replace.
—90—
Page 97

Glossary
Secondary Command Menu: The menu, displayed by selecting
EXTRA from the Main Command Menu, that contains additional
ThinkTank commands.
Selection: A block of text in a paragraph that you want to
copy, delete, or move.
Serial Number: Each copy of ThinkTank bears a unique number
designed to identify its registered owner. It appears on
the screen each time your start up ThinkTank or change
outlines.
Specialist Command Menu:The menu, displayed by selecting
SPECIAL from the Main Command Menu, that connects ThinkTank
to other programs and commands.
Subheading: A headline which is subordinate to another.
Subordinate:At a lower level; to the right; deeper; beneath.
Summit: The title of an outline; its highest—level headline.
Superordinate: At a higher level; to the left.
Text Area: The upper portion of your computer screen, where
ThinkTank normally displays the text of your outline.
Text File: Outline material in a standard format which can be
ported into or out of ThinkTank, or created or processed by
other programs.
Top Level: The state of ThinkTank when no menu is displayed
and no command is being executed, as when you first start up
the program and load in an outline. ThinkTank’s paragraph
editor also has a Top Level.
Under: Subordinate to; same as beneath.
Underneath: Same as under.
Up: Above, but at the same level in the outline structure.
—91—
Page 98

ThinkTank Manual
Volume: In the PASCAL operating system, the name by which a
floppy disk or section of a hard disk is identified.
Window: A metaphor for the way an outline is displayed on
your screen. Unless an outline is very short, you will not
be able to see all of it at once; you can think of your
screen as a “window” through which you can view part of it.
Write—protect: To protect a floppy disk from inadvertent
erasure by placing a tab over its notch. Since ThinkTank
frequently records information on both your program and data
disks, don’t write—protect your working ThinkTank disks.
However, you may want to write—protect your backup copies.
—92—
Page 99

PASCAL
Appendix B
INTRODUCTION TO TILE PASCAL OPERATING SYSTEM
The ThinkTank program is written in a language called
PASCAL and runs under the PASCAL (or p-code) operating system
(p-System). We have tried to eliminate the need for
specialized technical knowledge about the PASCAL system, but
in using ThinkTank you will sometimes encounter it. This appendix tells you what to expect.
WHAT IS AN OPERATING SYSTEM?
Think of an operating system as the executive director of
your computer. It receives your commands, communicates between your computer and your program, and manages the files in
which your information is stored. When ThinkTank stores an
outline on a disk, it is actually the operating system that
does the work; ThinkTank merely tells it what to do.
FILES
When you want to store information in your office or home
for a long period of time, you probably put it in a file and
put the file in a file cabinet. The same is true of a computer, only the files are magnetically encoded and the cabinet
is called a disk. Like a file cabinet, the capacity of a disk
is large but not unlimited. ThinkTank only alloys you to
store one ThinkTank outline file on a floppy disk. That way
the outline can expand to fill the whole disk if necessary,
much as a paper file might expand to fill an entire cabinet.
On a hard disk you can store as many outline files as will
fit.
Every PASCAL file has a name by which you can refer to
it. If you have a floppy—disk system, you will find that you
don’t have to bother with the names of your outline files;
ThinkTank takes care of them for you. However, you will have
to provide names for your text files (see below). Hard disk
users will be concerned with the names of both outline and
text files.
—93—
Page 100

ThinkTank Manual
PASCAL file names can be up to 15 characters (letters,
numbers, or other symbols) in length. Since PASCAL systems
differ in allowing special characters (like punctuation marks)
in. file names, it is usually best to use only letters, num—
bers, and periods. Select names that describe the contents of
your files so you can tell what they are at a glance. A name
like TASKPLAN is more expressive than FILEI4.
Most PASCAL file names have a suffix that describes their
type. As a ThinkTank user you will be concerned with two
types of files. ThinkTank outlines are generally stored in
outline files which have the suffix .DB (for data base), as in
TASKPLAN.DB. However, outline files cannot be read by most
other programs or incorporated directly in another ThinkTank
outline. For these purposes you can store outline material in
a text file which has the suffix .TEXT, as in TASKPLAN.TEXT.
ThinkTank generally knows what type of file you’re referring to, so you rarely need to enter the suffix. But since
the suffix is part of a file name, your file names are effectively limited to fewer than 15 characters. To leave room for
the suffix, limit your outline file manes to 12 characters,
text file names to 10.
Depending on your computer system, files may be arranged
on your disk in directories which have a separate name. If
so, you may have to precede the name of the file by the name
of its directory when you refer to it.
DISKS AND DEVICES
Files are stored on disks which may be floppy (flexible
plastic disks encased in paper covers) or hard (rigid rings
contained inside your computer or enclosed in a separate
case). PASCAL distinguishes disks by their volume manes, like
PROJECT:, which always end in a colon (“:“). When you refer
to a particular file on a particular disk, you precede the
file name with the volume name, as in PROJECT:TASKPLAN.
Before you use a disk with ThinkTank you must format it
for the PASCAL operating system. Essentially, this means
drawing a map on the disk so that it can accurately record and
find each piece of information. You will find instructions
—94—
 Loading...