Apple Macintosh IIfx Service Manual

K Service Source
Macintosh II/IIx/IIfx
K Service Source
Basics
Macintosh II/IIx/IIfx
Basics |
Overview - 1 |
|
|
|
|
Overview
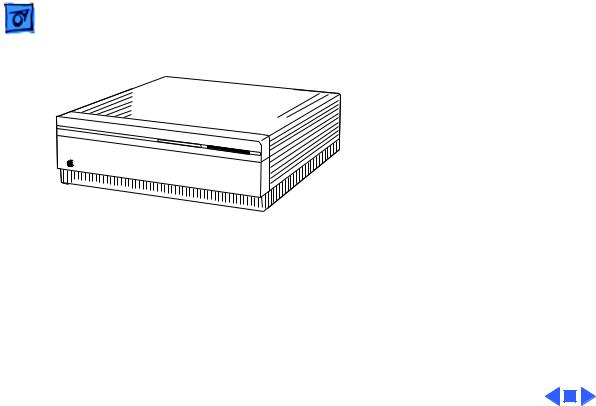
This manual includes complete repair procedures for the Macintosh II, Macintosh IIx, and Macintosh IIfx.
Figure: Macintosh II, IIx, IIfx
K Service Source
Specifications
Macintosh II/IIx/IIfx

Specifications |
Processor - 1 |
|
|
|
|
Processor
CPU
Macintosh II
Macintosh IIx
Macintosh IIfx
Motorola 68020 microprocessor 15.6772 MHz
Optional built-in paged memory management unit (PMMU)
Motorola 68030 microprocessor 15.6772 MHz
Built-in paged memory management unit (PMMU)
Motorola 68030 microprocessor 40 MHz
Built-in paged memory management unit (PMMU)

 Specifications Processor - 2
Coprocessor
Macintosh II |
Motorola 68881 math coprocessor |
|
Macintosh IIx/IIfx |
Motorola 68882 math coprocessor |
|
Addressing |
32-bit registers |
|
|
32-bit address bus |
|
|
32-bit data bus |
|
|
|
|
|
|
|

|
Specifications |
Memory - 3 |
|||
|
|
|
|
||
|
|
Memory |
|||
RAM |
|
|
|
|
|
Macintosh II/IIx |
1 MB, expandable to 8 MB |
||||
Macintosh IIfx |
4 MB standard, expandable to 8 MB |
||||
ROM |
|
|
|
|
|
Macintosh II/IIx |
256K |
||||
Macintosh IIfx |
512K |
||||
|
|
|
|
|
|
|
|
|
|
|
|

Specifications |
Disk Storage - 4 |
|
|
|
|
Disk Storage
Floppy Drive
Macintosh II
Macintosh IIx/IIfx
Hard Drive
Internal 800K floppy drive
Optional second internal 800K floppy drive Optional internal 1.4 MB floppy drive upgrade
Internal 1.4 MB floppy drive
Optional second internal 1.4 MB floppy drive
Optional internal 40, 80, or 160 MB hard drive

Specifications |
I/O Interfaces - 5 |
|
|
|
|
Expansion
SCSI
Apple Desktop Bus
Serial
NuBus
I/O Interfaces
Processor-direct slot (PDS)
5 MB/sec. transfer rate Eight device maximum
Two ADB ports allow daisy-chaining of peripheral devices
Two RS-232/RS-422 serial ports; mini DIN-8 connectors
Six internal NuBus slots support full 32-bit address and data buses

Specifications |
Sound and Video - 6 |
|
|
|
|
Sound and Video
Sound Generator
Apple’s custom digital sound chip provides 8-bit stereo sampling at 44.1 kHz and includes four-voice, wavetable synthesis; capable of driving stereo headphones or other stereo equipment through the sound jack.

Specifications |
Electrical - 7 |
|
|
|
|
Electrical
Line Voltage
Frequency
Maximum Power
100–240 VAC, automatically configured
48–62 Hz, single phase
Macintosh II/IIx |
220 W (not including monitor power) |
|
Macintosh IIfx |
230 W (not including monitor power) |
|
|
|
|
|
|
|

|
Specifications |
Physical - 8 |
|||
|
|
|
|
||
|
|
Physical |
|||
Dimensions |
Height: 5.5 in. (14.0 cm) |
||||
|
|
Width: 18.7 in. (47.4 cm) |
|||
|
|
Depth: 14.4 in. (36.5 cm) |
|||
Weight |
24 lb. (10.9 kg) |
||||
|
|
Weight will be greater with internal hard drive. |
|||
|
|
|
|
|
|
|
|
|
|
|
|
K Service Source
Troubleshooting
Macintosh II/IIx/IIfx

Troubleshooting |
General - 1 |
|
|
General
The Symptom Charts included in this chapter will help you diagnose specific symptoms related to your product. Because cures are listed on the charts in the order of most likely solution, try the first cure first. Verify whether or not the product continues to exhibit the symptom. If the symptom persists, try the next cure. (Note: If you have replaced a module, reinstall the original module before you proceed to the next cure.)
If you are not sure what the problem is, or if the Symptom Charts do not resolve the problem, refer to the Flowchart for the product family.
For additional assistance, contact Apple Technical Support.

 Troubleshooting Symptom Charts/Error Chord - 2
Symptom Charts
Error Chord
Error chord sounds |
1 |
Perform SIMM verification on customer’s logic board. |
||
during startup |
|
Replace Apple-labeled SIMMs manufactured by NEC that have |
||
sequence |
|
date code of 9052 or below. |
||
|
2 |
Replace logic board. Retain customer’s SIMMs. |
||
|
|
|
|
|
|
|
|
|
|

 Troubleshooting Symptom Charts/System - 3
System
Does not power on— |
1 |
Check cables. |
screen is black, fan is |
2 |
Plug monitor directly into wall socket, and verify that |
not running, and LED |
|
monitor has power. |
is not lit |
3 |
Replace power cord. |
|
4 |
Check batteries. Refer to “Battery Verification” in |
|
|
Additional Procedures. |
|
5 |
Replace power supply. |
|
6 |
Replace logic board. Retain customer’s SIMMs. |
Clicking, chirping, |
1 |
Remove additional NuBus cards. |
or thumping |
2 |
Replace power supply. |
|
3 |
Replace logic board. Retain customer’s SIMMs. |

|
|
Troubleshooting |
|
Symptom Charts/System (Continued) - 4 |
|
|
|
|
|
|
|
|
|
|
System (Continued) |
||
|
|
|
|||
System shuts down |
1 |
Make sure air vents on sides and top of case are |
|||
intermittently |
|
unobstructed. Thermal protection circuitry may shut down |
|||
|
|
|
|
system. After 30–40 minutes, system should be OK. |
|
|
|
|
2 |
Replace power cord. |
|
|
|
|
3 |
Check batteries. Refer to “Battery Verification” in |
|
|
|
|
|
Additional Procedures. |
|
|
|
|
4 |
Replace power supply. |
|
|
|
|
5 |
Replace logic board. Retain customer’s SIMMs. |
|
System |
1 |
Make sure system software is correct version. |
|||
intermittently |
2 |
Make sure software is known-good. |
|||
crashes or locks |
3 |
Remove additional RAM and NuBus cards. |
|||
|
|
|
4 |
Replace logic board. Retain customer’s SIMMs. |
|
|
|
|
5 |
Replace SIMMs. |
|
|
|
|
6 |
Replace power supply. |
|

|
Troubleshooting |
Symptom Charts/System (Continued) - 5 |
||
|
|
|
||
|
|
System (Continued) |
||
System doesn’t boot |
Replace Apple-labeled SIMMs manufactured by NEC that have date |
|||
|
|
code of 9052 or below. |
||
|
|
|
|
|
|
|
|
|
|

 Troubleshooting Symptom Charts/Video - 6
Video
Screen is black, audio |
1 |
Adjust brightness on monitor. |
and drive operate, fan |
2 |
Verify monitor works with another Macintosh. |
is running, and LED is |
3 |
Replace monitor. Refer to appropriate monitor manual to |
lit |
|
troubleshoot defective monitor. |
|
4 |
Replace video cable. |
|
5 |
Move video card to different slot. |
|
6 |
Replace video card. Refer to Video Cards manual. |
|
7 |
Replace SIMMs. |
|
8 |
Replace logic board. Retain customer’s SIMMs. |
|
9 |
Replace power supply. |

|
|
Troubleshooting |
|
Symptom Charts/Video (Continued) - 7 |
|
|
|
|
|
|
|
|
|
|
Video (Continued) |
||
|
|
|
|||
Screen is black, audio |
1 |
Replace video cable. |
|||
and drive do not |
2 |
Move video card to different slot. |
|||
operate, but fan is |
3 |
Verify monitor works with another Macintosh. |
|||
running and LED is lit |
4 |
Replace video card. Refer to Video Cards manual. |
|||
|
|
|
5 |
Replace SIMMs. |
|
|
|
|
6 |
Replace logic board. Retain customer’s SIMMs. |
|
|
|
|
7 |
Replace power supply. |
|
|
|
|
8 |
Replace monitor. Refer to appropriate monitor manual to |
|
|
|
|
|
troubleshoot defective monitor. |
|

|
|
Troubleshooting |
|
Symptom Charts/Video (Continued) - 8 |
|
|
|
|
|
|
|
|
|
|
Video (Continued) |
||
|
|
|
|||
Screen is completely |
1 |
Plug monitor directly into wall socket, and verify that |
|||
dark, fan is not |
|
monitor has power. |
|||
running, and LED is |
2 |
Check batteries. Refer to “Battery Verification” in |
|||
not lit |
|
Additional Procedures. |
|||
|
|
|
3 |
Replace power supply. |
|
|
|
|
4 |
Replace logic board. Retain customer’s SIMMs. |
|
Video display |
Replace Apple-labeled SIMMs manufactured by NEC that have date |
||||
exhibits ghosting |
code of 9052 or below. |
||||
System boots and then |
Replace Apple-labeled SIMMs manufactured by NEC that have date |
||||
loses video |
code of 9052 or below. |
||||

|
Troubleshooting |
|
Symptom Charts/Video (Continued) - 9 |
||
|
|
|
|||
|
|
Video (Continued) |
|||
Partial or whole |
1 |
Verify monitor works with another Macintosh. |
|||
screen is bright and |
2 |
Replace monitor. Refer to appropriate monitor manual to |
|||
audio is present, but |
|
troubleshoot defective monitor. |
|||
no video information |
3 |
Replace video cable. |
|||
is visible |
4 |
Move video card to different slot. |
|||
|
|
5 |
Replace video card. Refer to Video Cards manual. |
||
|
|
6 |
Replace logic board. Retain customer’s SIMMs. |
||
|
|
|
|
|
|
|
|
|
|
|
|

 Troubleshooting Symptom Charts/Floppy Drive - 10
Floppy Drive
Internal floppy drive |
1 |
Replace bad disk. |
runs continuously |
2 |
Replace internal floppy drive cable. |
|
3 |
Replace internal floppy drive. |
|
4 |
Replace logic board. Retain customer’s SIMMs. |
Audio and video are |
1 |
Replace bad disk. |
present, but one |
2 |
Verify that all external SCSI devices are disconnected. |
internal floppy drive |
3 |
Replace internal floppy drive cable. |
does not operate |
4 |
Replace internal floppy drive. |
|
5 |
Replace logic board. Retain customer’s SIMMs. |
|
6 |
Replace power supply. |

 Troubleshooting Symptom Charts/Floppy Drive (Continued) - 11
Floppy Drive (Continued)
Audio and video are |
1 |
Replace bad disk. |
present, but neither |
2 |
Verify that all external SCSI devices are disconnected. |
internal floppy drive |
3 |
Replace logic board. Retain customer’s SIMMs. |
operates |
4 |
Replace power supply. |
Disk ejects; display |
1 |
Replace disk with known-good system disk. |
shows icon with |
2 |
Replace internal floppy drive cable. |
blinking “X” |
3 |
Replace internal floppy drive. |
|
4 |
Replace logic board. Retain customer’s SIMMs. |
Will not eject disk |
1 |
Switch power off and hold mouse button down while |
|
|
switching power back on. |
|
2 |
Replace internal floppy drive. |

 Troubleshooting Symptom Charts/Floppy Drive (Continued) - 12
Floppy Drive (Continued)
Attempts to eject disk |
1 |
Reinsert disk. |
|
but doesn’t |
2 |
Reseat top cover so drive slots align correctly. |
|
MS-DOS drive does |
To read and write files with either MS-DOS or 1.4 MB drive, |
|
|
not recognize disk |
format all disks with MS-DOS drive first. |
|
|
formatted on 1.4 MB |
|
|
|
drive |
|
|
|
|
|
|
|
|
|
|
|

|
Troubleshooting |
Symptom Charts/Hard Drive - 13 |
|
|
|
|
|
|
|
|
|
Hard Drive
Internal hard drive will not operate; LED doesn’t light; drive doesn’t spin
Works with internal hard drive or external SCSI device but not with both
1Remove hard drive data cable.
2Replace internal hard drive power cable.
3Verify +5V and 12V lines to hard drive.
4Replace internal hard drive.
5Replace logic board. Retain customer’s SIMMs.
1Verify that SCSI device switch setting on external device isn’t 0 (internal hard drive address) or 7 (computer address).
2Verify proper SCSI termination. Refer to “SCSI Termination” in Additional Procedures.
3Replace SCSI terminator on external device.
4Troubleshoot external SCSI device.

Troubleshooting |
Symptom Charts/Hard Drive (Continued) - 14 |
|
|
|
Hard Drive (Continued) |
Drive icon does not appear on desktop
Data is lost or corrupted
Verify proper SCSI termination. Refer to “SCSI Termination” in Additional Procedures.
Verify proper SCSI termination. Refer to “SCSI Termination” in Additional Procedures.
 Loading...