


 Loading...
PROCOMBI® PLUS
BS836680A
USER MANUAL
EN

2 www.aeg.com
CONTENTS
1. |
SAFETY INFORMATION................................................................................................. |
3 |
|
2. |
CONDITIONS OF USE.................................................................................................... |
4 |
|
3. |
SAFETY INSTRUCTIONS................................................................................................ |
4 |
|
4. |
PRODUCT DESCRIPTION.............................................................................................. |
7 |
|
5. |
CONTROL PANEL........................................................................................................... |
8 |
|
6. |
BEFORE FIRST USE......................................................................................................... |
9 |
|
7. |
QUICK GUIDE................................................................................................................ |
11 |
|
8. |
DAILY USE...................................................................................................................... |
12 |
|
9. |
ASSISTED COOKING................................................................................................... |
23 |
|
10. |
USING THE ACCESSORIES........................................................................................ |
30 |
|
11. |
ADDITIONAL FUNCTIONS........................................................................................ |
33 |
|
12. |
HINTS AND TIPS......................................................................................................... |
33 |
|
13. |
CARE AND CLEANING.............................................................................................. |
60 |
|
14. |
TROUBLESHOOTING................................................................................................. |
64 |
|
15. |
INSTALLATION........................................................................................................... |
66 |
|
16. |
ENERGY EFFICIENCY................................................................................................. |
69 |
|
17. |
WARRANTY ................................................................................................................ |
70 |
|
FOR PERFECT RESULTS
Thank you for choosing this AEG product. We have created it to give you impeccable performance for many years, with innovative technologies that help make life simpler features you might not find on ordinary appliances. Please spend a few minutes reading to get the very best from it.
Visit our website for:
Get usage advice, brochures, trouble shooter, service information: www.aeg.com
Register your product for better service:
www.registeraeg.com
CUSTOMER CARE AND SERVICE
Always use original spare parts.
When contacting our Authorised Service Centre, ensure that you have the following data available: Model, PNC, Serial Number.
The information can be found on the rating plate.
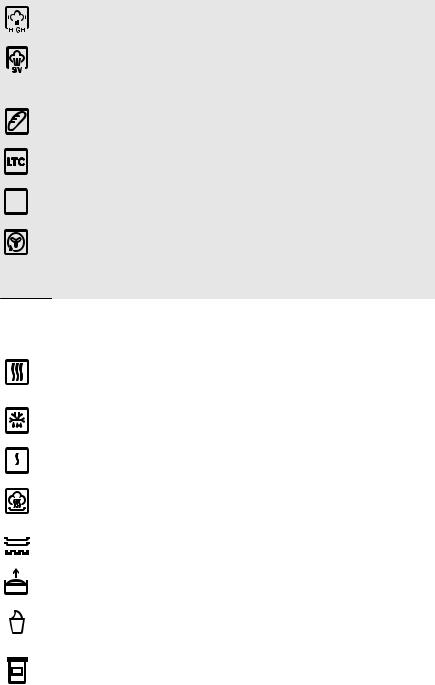
 Warning / Caution-Safety information
 General information and tips
  Environmental information
Subject to change without notice.
ENGLISH 3
1.  SAFETY INFORMATION
Before the installation and use of the appliance, carefully read the supplied instructions. The manufacturer is not responsible if an incorrect installation and use causes injuries and damages. Always keep the instructions with the appliance for future reference.
1.1Children and vulnerable people safety
•This appliance can be used by children aged from 8 years and above and persons with reduced physical, sensory or mental capabilities or lack of experience and knowledge if they have been given supervision or instruction concerning use of the appliance in a safe way and understand the hazards involved.
•Do not let children play with the appliance.
•Keep all packaging away from children.
•Keep children and pets away from the appliance when it operates or when it cools down. Accessible parts are hot.
•If the appliance has a child safety device, we recommend you activate it.
•Cleaning and user maintenance shall not be made by children without supervision.
•Children of less than 3 years should be kept away unless continuously supervised.
1.2General Safety
•Only a qualified person must install this appliance and replace the cable.
•Internally the appliance becomes hot when in operation. Do not touch the heating elements that are in the appliance. Always use oven gloves to remove or put in accessories or ovenware.
•Before maintenance cut the power supply.

4www.aeg.com
•Ensure that the appliance is switched off before replacing the lamp to avoid the possibility of electric shock.
•Do not use a steam cleaner to clean the appliance.
•Do not use harsh abrasive cleaners or sharp metal scrapers to clean the glass door since they can scratch the surface, which may result in shattering of the glass.
•If the supply cord is damaged, it must be replaced by the manufacturer, its Authorised Service Centre or similarly qualified persons in order to avoid a hazard.
•To remove the shelf supports first pull the front of the shelf support and then the rear end away from the side walls. Install the shelf supports in the opposite sequence.
•The means for disconnection must be incorporated in the fixed wiring in accordance with the wiring rules.
•Only use the core temperature sensor recommended for this appliance.
2. CONDITIONS OF USE
This appliance is intended to be used in household and similar applications such as:
•Farm houses
3.SAFETY INSTRUCTIONS
3.1 Installation
WARNING!
Only a qualified person must install this appliance.
•Remove all the packaging.
•Do not install or use a damaged appliance.
•Obey the installation instruction supplied with the appliance.
•Always be careful when you move the appliance because it is heavy. Always wear safety gloves.
•Do not pull the appliance by the handle.
•Keep the minimum distance from the other appliances and units.
•By clients in serviced apartments, holiday apartments and other residential type environments.
•Make sure that the appliance is installed below and adjacent safe structures.
•The sides of the appliance must stay adjacent to appliances or to units with the same height.
3.2 Electrical connection
WARNING!
Risk of fire and electrical shock.
•All electrical connections should be made by a qualified electrician.
•The appliance must be earthed.
•Make sure that the electrical information on the rating plate agrees

with the power supply. If not, contact an electrician.
•Always use a correctly installed shockproof socket.
•Do not use multi-plug adapters and extension cables.
•Make sure not to cause damage to the mains plug and to the mains cable. Should the mains cable need to be replaced, this must be carried out by our Authorised Service Centre.
•Do not let mains cables touch or come near the appliance door, especially when the door is hot.
•The shock protection of live and insulated parts must be fastened in such a way that it cannot be removed without tools.
•Connect the mains plug to the mains socket only at the end of the installation. Make sure that there is access to the mains plug after the installation.
•If the mains socket is loose, do not connect the mains plug.
•Do not pull the mains cable to disconnect the appliance. Always pull the mains plug.
•Use only correct isolation devices: line protecting cut-outs, fuses (screw type fuses removed from the holder), earth leakage trips and contactors.
•The electrical installation must have an isolation device which lets you disconnect the appliance from the mains at all poles. The isolation device must have a contact opening width of minimum 3 mm.
•This appliance complies with the E.E.C. Directives.
3.3 Use
WARNING!
Risk of injury, burns and electrical shock or explosion.
•Use this appliance in a household only.
•Do not change the specification of this appliance.
•Make sure that the ventilation openings are not blocked.
•Do not let the appliance stay unattended during operation.
ENGLISH 5
•Deactivate the appliance after each use.
•Be careful when you open the appliance door while the appliance is in operation. Hot air can release.
•Do not operate the appliance with wet hands or when it has contact with water.
•Do not apply pressure on the open door.
•Do not use the appliance as a work surface or as a storage surface.
•Open the appliance door carefully. The use of ingredients with alcohol can cause a mixture of alcohol and air.
•Do not let sparks or open flames to come in contact with the appliance when you open the door.
•Do not put flammable products or items that are wet with flammable products in, near or on the appliance.
WARNING!
Risk of damage to the appliance.
•To prevent damage or discoloration to the enamel:
–do not put ovenware or other objects in the appliance directly on the bottom.
–do not put aluminium foil directly on the bottom of the appliance.
–do not put water directly into the hot appliance.
–do not keep moist dishes and food in the appliance after you finish the cooking.
–be careful when you remove or install the accessories.
•Discoloration of the enamel has no effect on the performance of the appliance. It is not a defect in the sense of the warranty law.
•Use a deep pan for moist cakes. Fruit juices cause stains that can be permanent.
•This appliance is for cooking purposes only. It must not be used for other purposes, for example room heating.
•Always cook with the oven door closed.
•If the appliance is installed behind a furniture panel (e.g. a door) make sure the door is never closed when the appliance is in operation. Heat and
6 www.aeg.com
moisture can build up behind a closed furniture panel and cause subsequent damage to the appliance, the housing unit or the floor. Do not close the furniture panel until the appliance has cooled down completely after use.
3.4 Steam Cooking
WARNING!
Risk of burns and damage to the appliance.
•Released Steam can cause burns:
–Be careful when you open the appliance door when the function is activated. Steam can release.
–Open the appliance door with care after the steam cooking operation.
3.5 Care and cleaning
WARNING!
Risk of injury, fire, or damage to the appliance.
•Before maintenance, deactivate the appliance and disconnect the mains plug from the mains socket.
•Make sure the appliance is cold. There is the risk that the glass panels can break.
•Replace immediately the door glass panels when they are damaged. Contact the Authorised Service Centre.
•Be careful when you remove the door from the appliance. The door is heavy!
•Clean regularly the appliance to prevent the deterioration of the surface material.
•Remaining fat or food in the appliance can cause fire.
•Clean the appliance with a moist soft cloth. Only use neutral detergents. Do not use abrasive products, abrasive cleaning pads, solvents or metal objects.
•If you use an oven spray, obey the safety instructions on the packaging.
•Do not clean the catalytic enamel (if applicable) with any kind of detergent.
3.6 Internal light
•The type of light bulb or halogen lamp used for this appliance is only for household appliances. Do not use it for house lighting.
WARNING!
Risk of electrical shock.
•Before replacing the lamp, disconnect the appliance from the power supply.
•Only use lamps with the same specifications.
3.7 Disposal
WARNING!
Risk of injury or suffocation.
•Disconnect the appliance from the mains supply.
•Cut off the mains cable and discard it.
•Remove the door catch to prevent children and pets to get closed in the appliance.
3.8Service
•To repair the appliance contact an Authorised Service Centre.
•Use original spare parts only.

ENGLISH 7
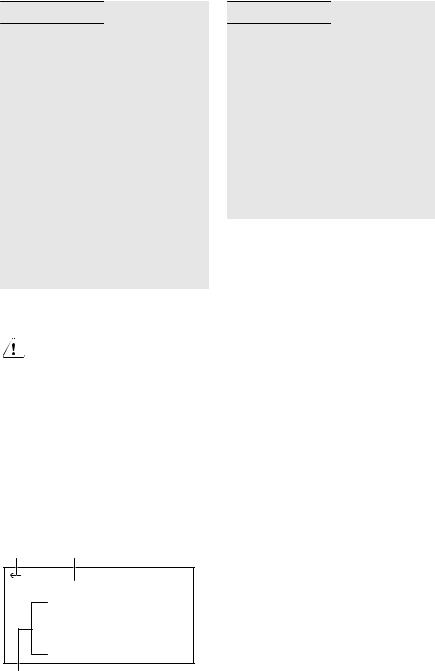
4.PRODUCT DESCRIPTION
4.1General overview
1 |
|
|
2 |
|
|
3 |
||||
|
|
|
|
|
|
|
|
|
|
|
|
|
|
|
|
|
|
|
|
|
|
|
|
4 |
|
|
5 |
|
5 |
|
|
4 |
6 |
|
|
|
10 |
3 |
7 |
|
2 |
8 |
|
|
|
|
1 |
|
9
4.2 Accessories
Wire shelf
For cookware, cake tins, roasts.
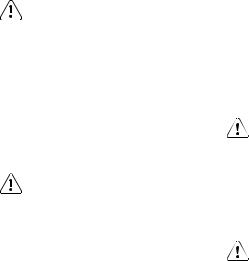
Baking tray
For cakes and biscuits.
Grill- / Roasting pan
Control panel Electronic programmer Water drawer
Socket for the core temperature sensor
Heating element Lamp
Fan
Descaling pipe outlet Shelf support, removable Shelf positions
To bake and roast or as a pan to collect fat.
Patisserie tray
For rolls, brezels and small pastries. Suitable for steam functions. The discolouration of the surface has no effect on the functions.
Core temperature sensor
To measure how far the food is cooked.
8 www.aeg.com
Telescopic runners
For shelves and trays.
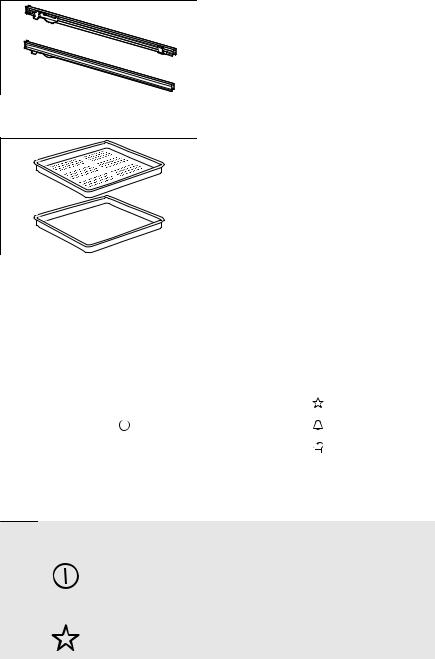
Steam set
One unperforated and one perforated food container.
The steam set drains the condensing water away from the food during steam cooking. Use it to prepare food that should not be in the water during the cooking (e.g. vegetables, pieces of fish, chicken breast). The set is not suitable for food that needs to soak in the water (e.g. rice, polenta, pasta).
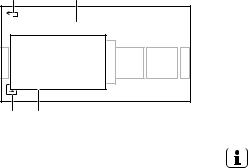
5.CONTROL PANEL
5.1Electronic programmer
|
1 |
|
|
2 |
|
|
3 |
|
4 |
|
5 |
|
||||||
|
|
|
|
|
|
|
|
|
|
|
|
|
|
|
|
|
|
|
|
|
|
|
|
|
|
|
|
|
|
|
|
|
|
|
|
|
|
|
|
|
|
|
|
|
|
|
|
|
|
|
|
|
|
|
|
|
|
|
|
|
|
|
|
|
|
|
|
|
|
|
|
|
|
|
|
|
|
|
|
|
|
|
|
|
|
|
|
|
|
|
|
|
|
|
|
|
|
|
|
|
|
|
|
|
|
|
|
|
|
|
|
|
|
|
|
|
|
|
|
|
|
|
|
|
|
|
|
|
|
|
|
|
|
|
|
|
|
|
|
|
|
|
|
|
|
|
|
|
|
|
|
|
|
|
|
|
|
|
|
|
|
|
|
|
|
|
|
|
|
|
|
|
|
|
|
|
|
|
|
|
|
|
|
|
|
|
|
|
|
Use the sensor fields to operate the appliance.
|
|
Sensor |
Function |
Comment |
|
|
field |
|
|
|
|
|
|
|
|
|
|
ON / OFF |
To activate and deactivate the appliance. |
|
1 |
|
|
|
|
|
|
|
|
|
|
- |
Display |
It shows the current settings of the appliance. |
|
2 |
|||
|
|
|
|
|
|
|
Favourites |
It contains a list of favourite cooking programmes |
|
3 |
|
made by the user. |
|
|
|
|
|
|
|
|
ENGLISH 9
Sensor |
Function |
Comment |
field |
|
|
4
5
Minute Minder |
To set the function: Minute Minder. Straight ac- |
|
cess to the time functions. |
Assisted Cooking |
Straight access to the menus: Cookbook and Vari- |
|
oGuide when the appliance is active. |
The sensor fields for: Favourites, Minute Minder and Assisted Cooking are visible only when the appliance is active.
A |
B C D |
|||||
|
|
|
|
|
|
|
|
|
|
|
|
|
|
|
|
|
|
|
|
|
Menu |
|
11:09 |
||||
|
|
150° |
|
|
|
|
|
|
|
|
|
||
START
E
Other indicators of the display:
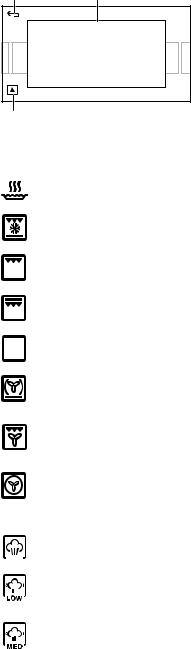
5.2 Display
After activating, the appliance shows a basic heating function mode.
A)Return to menu
B)Current set heating function
C)Current set temperature
D)Clock
E)Start
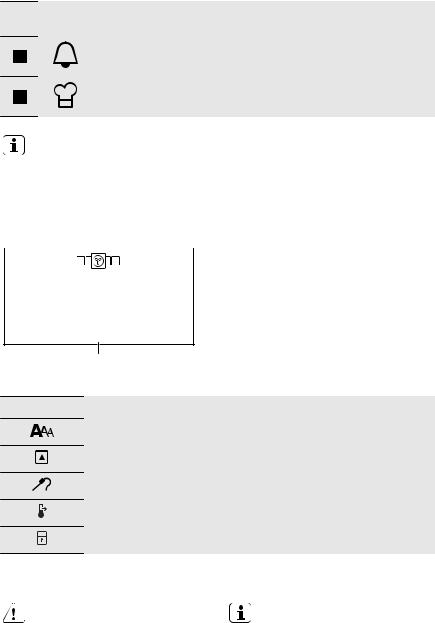
Symbol Function
Change of the text size
More options
Core temperature sensor
Heat + Hold
Lock
6. BEFORE FIRST USE
WARNING!
Refer to Safety chapters.
6.1 Initial Cleaning
Remove all accessories and removable shelf supports from the appliance.
Refer to "Care and cleaning" chapter.
Clean the appliance before first use. Put the accessories and the removable shelf supports back to their initial position.
10www.aeg.com
6.2Software licence
The software included in this product contains copyrighted software that is licensed under the BSD, fontconfig, FTL, GPL-2.0, LGPL-2.0, LGPL-2.1, libJpeg, zLib/ libpng, MIT, OpenSSL / SSLEAY and others.
It is possible to display the complete copy of the licences in the device on the TFT screen display by following through the menu the path: Basic Settings / Service / Licence.
It is possible to download the source code of the open source software used in the product by following the hyperlink present in the web product page.
6.3 First Connection
When you connect the appliance to the mains you have to set:
•the language
•time
•clock format
•date
•fast heat-up
The chosen name or number can be set in two ways. Scroll it to the required position or touch the chosen option. You can change the settings in the menu: Basic Settings.
6.4 Setting the hardness level for the water
When you connect the appliance to the mains, you have to set the water hardness level.
The table below explains the water hardness range with the corresponding Calcium deposit (mmol/l) and the quality of the water.
Water hardness |
|
Calcium deposit |
Calcium deposit |
Water classi- |
||
|
|
|
(mmol/l) |
(mg/l) |
fication |
|
Class |
dH |
|||||
|
|
|
||||
|
|
|
|
|
|
|
I |
0 |
- 7 |
0 - 1.3 |
0 - 50 |
Soft |
|
|
|
|
|
|
|
|
II |
7 |
- 14 |
1.3 - 2.5 |
50 - 100 |
Moderately |
|
|
|
|
|
|
hard |
|
|
|
|
|
|
||
III |
14 - 21 |
2.5 - 3.8 |
100 - 150 |
Hard |
||
|
|
|
|
|
||
IV |
over 21 |
over 3.8 |
over 150 |
Very hard |
||
|
|
|
|
|
|
|
When the water hardness exceeds the values in the table, fill the water drawer with bottled water.
1.Take the four colour change strip supplied with the steam set in the oven.
2.Put all the reaction zones of the strip into the water for approximately 1 second.
Do not put the strip into the running water!
3.Shake the strip to remove the excess of the water.
4.After 1 minute check the hardness of the water according to the table below.
The colours of the reaction zones continue to change after 1 minute.
Do not consider this in the measurement.
5.Set the hardness of the water in the menu: Basic Settings.
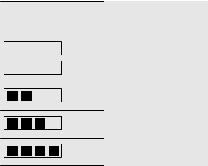
Test strip |
Hardness of the |
||
|
|
|
water |
|
|
|
|
|
|
|
1 |
|
|
|
|
|
|
|
|
|
|
|
|
2
3
4
The black squares in the table correspond to red squares on the test strip.
You can change the hardness level of the water in the menu: Basic Settings / Water hardness.
7. QUICK GUIDE
7.1 Using the touchscreen
•To scroll the menu use a quick gesture or drag your finger across the display.
•The strength of the gesture determines how fast the screen moves.
•The scroll movement can stop by itself or you can stop it immediately if you touch the display.
•The chosen function activates when you release the finger from the display.
•To activate a menu function touch the display on the selected function.
•You can change any parameter shown on the display when you touch it.
•To set the required function, time or temperature you can scroll through the list or touch the option you want to choose.
•When you activate a heating function the Menu does not appear on the display. Touch the display anywhere and the Menu appears again.
•When the appliance is active, and some of the symbols disappear from the display, touch the display anywhere. All the symbols come back on.
•After you set some functions a popup window appears with additional information.
•The temperature can switch places on the display with other functions that are in the bottom right and left corner.
ENGLISH 11
After a power cut you do not have to set the hardness level of the water again.
|
|
|
|
|
Menu |
11:09 |
|
|
|
150° |
|
|
33min |
START 20min |
|
|
|
|
|
|
|
|
|
When you press and hold an option in the menu, a short description of the option appears.
7.2 Quick Guide to the menu
Menu
Functions |
Heating Functions |
|
|
|
Specials |
|
|
|
Cleaning |
|
|
|
Favourites |
|
|
Timers |
Set Minute Minder |
|
|
|
Set Duration |
|
|
|
Set End Time |
|
|
|
Set Start Time |
|
|
|
Elapsed Time |
|
|
12 www.aeg.com
Menu
Options |
Lamp |
|
|
|
Child Lock |
|
|
|
Screen Lock |
|
|
|
Heat + Hold |
|
|
|
Set + Go |
|
|
Assisted Cooking |
Cookbook |
|
|
|
VarioGuide |
|
|
|
SousVide Cook- |
|
book |
|
|
|
SousVide Vario- |
|
Guide |
|
|
Last and most used |
Last used |
|
|
|
Most used |
|
|
8. DAILY USE
WARNING!
Refer to Safety chapters.
8.1 Operating the appliance
To operate the appliance you can use:
•manual mode - to set a heating function, temperature and cooking time manually.
•automatic programmes (Assisted Cooking) - to prepare a dish when you do not have a knowledge or experience in cooking.
8.3 The menu in overview
A B
 MENU
MENU
Functions
Timers
Options
Menu
Basic Settings |
Fast heat-up |
|
|
|
Cleaning Reminder |
|
|
|
Display |
|
|
|
Sound |
|
|
|
Language |
|
|
|
Time and Date |
|
|
|
DEMO mode |
|
|
|
Water hardness |
|
|
|
Service |
|
|
8.2 Operating the menu
1.To activate the appliance touch:  .
.
2.Touch: Menu.
3.Scroll through the menu to find the function that you want to activate.
4.To activate the function just tap it on the display.
5.To return to the previous menu touch:  or Menu.
6.To deactivate the appliance touch:  .
.
A)Return to menu
B)Current menu level
C)List of functions
C
|
ENGLISH 13 |
Main menu |
|
|
|
Menu item |
Description |
|
|
Functions |
It contains a list of the heating functions, specials, |
|
cleaning and favourite programmes. |
|
|
Timers |
It contains a list of clock functions. |
|
|
Options |
It contains a list of other options for Safety func- |
|
tions, Lamp, Heat + Hold, Set + Go. |
|
|
Assisted Cooking |
It contains a list of automatic cooking pro- |
|
grammes. |
|
|
Last and most used |
It shows which function was last used and which |
|
are the most used. |
|
|
Basic Settings |
It contains a list of basic settings. |
|
|
8.4 Submenu for: Functions
A |
B |
|
True Fan Cooking |
Heating Functions |
|
Special |
|
Cleaning |
|
Favourites |
|
D |
C |
A)Return to menu
B)List of heating functions
C)List of available options
D)More options
8.5 Setting a heating function
1.Scroll through the functions to find the one you want and touch it.
2.To change the temperature touch the temperature shown on the display and scroll through the list to find the one you need.
3.Touch the temperature to confirm it.
4.To activate the function touch: Start. An acoustic signal sounds when the appliance is at approximately the set temperature. The signal sounds again at the end of the cooking time.
To go back to the previous menu touch:
Menu.
You can see a description of the heating function or create a default function on a pop-up window. Hold your finger on the selected heating function for longer than 2 seconds. When you set a heating function as default it appears as the first function when you activate the appliance again.
14 www.aeg.com
A |
B |
A) |
Return to menu |
|
B) |
Pop-up window |
|||
|
|
|||
|
|
C) |
More options |
|
|
Au Gratin |
|
|
|
|
Show description |
|
|
|
|
Make shortcut in menu |
|
|
|
C |
|
|
|
8.6 Submenu for: Heating Functions
|
|
Au Gratin |
Brown finish for dishes like lasagna or potato gratin. |
|
|
|
Also for gratinating and browning. |
|
|
|
|
|
|
Frozen Foods |
To prepare convenience food with a golden crunchy |
|
|
|
finish, eg. French Fries, Wedges. |
|
|
|
|
|
|
Grilling |
To grill bigger items of food like Roast Beef. |
|
|
|
|
|
|
Fast Grilling |
To grill flat food and to toast bread. |
|
|
|
|
|
|
Top/Bottom Heat |
Top and bottom heat for baking and roasting on one |
|
|
||
|
|
|
oven level. |
|
|
|
|
|
|
Pizza Setting |
Baking on one oven level for dishes with crispy bases |
|
|
|
like Pizza and Quiche. Set the temperatures 20-40 °C |
|
|
|
lower than when using Top/Bottom Heat. |
|
|
|
|
|
|
Turbo Grilling |
Hot air roasting for larger meat joints or poultry with |
|
|
|
bones on one shelf position. Also for gratinating and |
|
|
|
browning. |
|
|
|
|
|
|
True Fan Cooking |
Hot air for multiple dishes and for baking on up to |
|
|
|
three oven levels at the same time. Set the oven tem- |
|
|
|
peratures 20-40 °C lower than when using Top/Bottom |
|
|
|
Heat. |
|
|
|
|
|
|
Full Steam |
100% steam for preparing vegetables, fish, potatoes, |
|
|
|
rice, pasta or special side-dishes. |
|
|
|
|
|
|
Humidity Low |
Low level of humidity by combining steam and hot air. |
|
|
|
It is suitable for cooking meat, poultry, oven dishes |
|
|
|
and casserols. |
|
|
|
|
|
|
Humidity Medium |
Medium level of humidity. It is combining steam and |
|
|
|
hot air and is suitable for cooking stewed and braised |
|
|
|
meat as well as bread and sweet yeast doughs. |
|
|
|
|
|
|
|
|
|
ENGLISH 15 |
|
|
|
|
|
|
|
|
|
|
Humidity High |
High level of humidity for cooking delicate dishes like |
|
|
|
|
|
custards, flans, terrines and fish. |
|
|
|
|
|
|
|
|
|
|
|
|
|
|
|
|
|
|
|
|
|
|
SousVide Cooking |
Vacuum cooking with steam at a low temperature for |
|
|
|
|
|
meat, fish, seafood, vegetables and fruit. The food |
|
|
|
|
|
needs to be vacuum sealed in plastic pouches before |
|
|
|
|
|
using this function. |
|
|
|
|
|
|
|
|
|
|
Bread Baking |
To bake bread with a steam shot in the beginning for a |
|
|
|
|
|
crusty surface. |
|
|
|
|
|
|
|
|
|
|
Slow Cooking |
Slow roasting to prepare very tender and succulent |
|
|
|
|
|
roasts. |
|
|
|
|
|
|
|
|
|
|
Bottom Heat |
To reheat cakes for a crunchy bottom and to preserve |
|
|
|
|
|
food. |
|
|
|
|
|
|
|
|
|
|
Moist Fan Baking1) |
For energy-saving baking and cooking of mainly dry |
|
|
|
|
|
bakery items as well as for baking in tins on one shelf |
|
|
|
|
|
position. The lamp deactivates after 30 seconds. It |
|
|
|
|
|
switches on again when you activate it via menu or |
|
|
|
|
|
when you open the oven door. |
1) This function is used to define the energy efficiency class acc. EN50304.
8.7 Submenu for: Specials
|
|
Drying |
For drying of sliced fruits like apples, plums, peaches |
|
|
|
and vegetables such as tomatoes, zucchini or mush- |
|
|
|
rooms. |
|
|
|
|
|
|
Defrost |
To defrost frozen food. |
|
|
|
|
|
|
Keep Warm |
To keep food warm. |
|
|
|
|
|
|
|
|
|
|
Steam Regenerating |
Steam re-heating for previously cooked food directly |
|
|
|
on a plate. |
|
|
|
|
|
|
Plate Warming |
To preheat your plate for serving. |
|
|
|
|
|
|
Dough Proving |
For controlled rising of yeast dough before baking. |
|
|
|
|
|
|
Yogurt Function |
This function can be used for preparing yogurt.The |
|
|
|
lamp is switched off during this function to keep the |
|
|
|
temperature low. |
|
|
|
|
|
|
Preserving |
To preserve vegetables e.g. mixed pickles in glasses |
|
|
|
and liquid. |
|
|
|
|
16www.aeg.com
8.8Submenu for: Cleaning
WARNING!
Refer to "Care and cleaning" chapter.
Rinsing |
Procedure for rinsing and cleaning the steam genera- |
|
tion circuit after frequent use of the steam functions. |
|
|
Descaling |
Procedure for cleaning the steam generation circuit |
|
from residual limestone. |
|
|
Steam Cleaning |
Procedure for cleaning the appliance when it is slightly |
|
soiled and not burned. |
|
|
Steam Cleaning Plus |
Procedure for cleaning stubborn dirt with the support |
|
of oven cleaner |
|
|
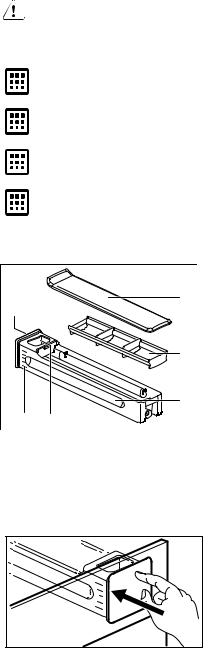
8.9 Water drawer |
|
|
|
|
|
A) |
Lid |
|
|
B) |
Wave-breaker |
|
A |
C) |
Drawer body |
F |
|
D) |
Water-filling hole |
|
|
E) |
Scale |
|
|
F) |
Front button |
XAM |
B |
|
|
|
C |
|
|
E |
D |
|
|
You can remove the water drawer from the appliance. Push it gently on the front button.
After you push the water drawer, it will self-extract from the appliance.
•leave the water drawer inside the appliance and fill it by means of a water jar,
•detatch the water drawer from the appliance and fill it from a water tap.
When you fill the water drawer from the water tap, carry the drawer in the horizontal position in order to avoid water spilling.
You can fill the water drawer in two ways:

MAX |
MAX |
When you fill the water drawer, insert it in the same position. Push the front button until the water drawer is inside the appliance.
Empty the water drawer after each use.
CAUTION!
Keep the water drawer away from hot surfaces.
8.10 Steam cooking
WARNING!
Use only cold tap water. Do not use filtered (demineralised) or distilled water. Do not use other liquids. Do not put flammable or alcoholic liquids into the water drawer.
1.Press the cover of the water drawer to open it and extract it from the appliance.
2.Fill the water drawer with cold water to the maximum level (around 950 ml).
Use the scale on the water drawer. The water supply is sufficient for approximately 50 minutes.
3.Put the water drawer to its initial position.
If the water drawer is wet after you fill it with water, wipe it with a soft cloth before you insert it in the appliance.
4.Activate the appliance.
5.Prepare the food in the correct cookware.
6.Select a steam heating function and the temperature.
7.If necessary, set the function Duration or Set End Time.
ENGLISH 17
The first steam shows after approximately 2 minutes. An acoustic signal sounds when the appliance is at approximately the set temperature.
The signal sounds at the end of the cooking time.
8.Deactivate the appliance.
9.Empty the water drawer after the steam cooking is completed.
CAUTION!
The appliance is hot. There is a risk of burns. Be careful when you empty the water drawer.
When the water drawer is running out of water, an acoustic signal sounds and the water drawer needs to be refilled to continue the steam cooking as described above.
Let the appliance dry fully with the door open.
To speed up the drying you can heat up the appliance with hot air at temperature 150 °C for approximately 15 minutes.
Steam can condensate on the bottom of the cavity and the visibility inside the appliance can be limited. If this occurs, dry the cavity when the appliance is cool.
At the end of a steam cooking cycle, the appliance cooling fan runs at a higher speed to evacuate in a better way the excess of steam. This is normal.
8.11 SousVide Cooking
•With no evaporative losses of flavour volatiles and moisture, food keeps its full aroma
•Tender texture of meat and fish
•Food keeps all minerals and vitamins
•Less spices are necessary as food keeps its natural flavour
•Better workflow as it is not necessary to prepare and serve food at the same time and place
18www.aeg.com
•Low cooking temperature minimizes the risk of overcooking
•Portioning of the food makes it easy to hold
Preparing the food
1.Clean and cut the ingredients.
2.Season the ingredients.
3.Fill the ingredients in suitable vacuum bags.
4.Vacuum seal the bag to make sure that you remove as much air as possible.
5.Cold storage of the bags is mandatory in case the cooking procedure is not done immediately.
6.Continue with the function: SousVide Cooking following applicable cooking table indications for the considered type of food or the assisted cooking recipes.
7.Open the pouch and serve.
8.Optional: finish the food with a final searing or grilling e.g. for meat to
achieve a nice crust and the typical roast flavour.
Cooking with this function causes residual water on the vacuum bags and in the cavity. After the cooking process open the door carefully to avoid the water dropping on the furniture. Use a plate and a towel to take out the vacuum bags. Dry out the door, the water drop collector in the bottom and the cavity with a soft cloth or a sponge. Let the appliance dry fully with the door open. To speed up the drying you can heat up the appliance with hot air at temperature 150 °C for approximately 15 minutes.
8.12 Submenu for: Favourites
A |
B |
A) |
Return to menu |
|||
B) |
Favourite programme |
|||||
|
|
|
|
|||
|
|
|
|
|||
|
|
|
|
C) |
List of functions |
|
|
|
|
|
|||
|
|
Gran’s apple crumble |
|
|
||
RUN
DELETE
RENAME
C
A list of previously saved settings. You can also store the current settings such as: duration, temperature or heating function. You can set up to 20
programmes, which are shown on a list in an alphabetic order.
Menu item |
Description |
|
|
Run |
Run the previously saved favourite. |
|
|
Delete |
Permanently remove this previously saved favour- |
|
ite. |
|
|
Rename |
Change or correct the previously saved name. |
|
|
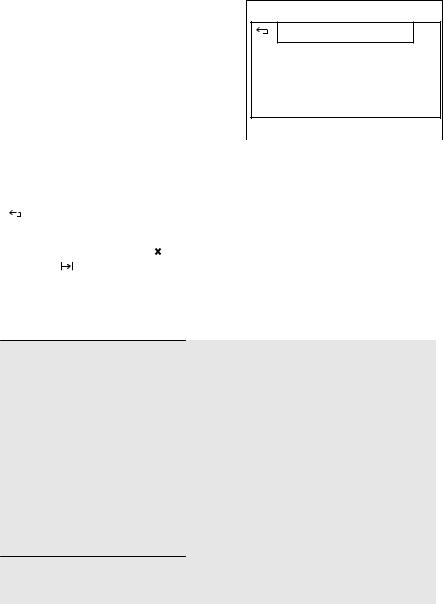
8.13 Saving a favourite programme
1.To save the current settings of a heating function touch  .
.
2.Choose: New from current settings.
3.Enter the name of the favourite programme and touch OK.
ENGLISH 19
True Fan Cooking
Q W E R T Y U I O P A S D F G H J K L
Z X C V B N M - 
 space
space  OK
OK
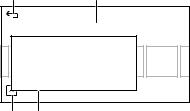
8.14 Submenu for: Timers
A B C
|
|
|
|
|
|
|
|
3 |
31 |
|
|
|
|
|
|
||
|
|
|
|
|
|
|
DURATION |
2H 30MIN |
|
|
|
START |
1 |
29 |
END |
||
09:03 |
|
|
11:33 |
||
|
|
|
|
|
|
|
|
|
|
|
|
E |
|
|
D |
||
A)Return to menu
B)Current set duration time
C)Reset duration time
D)End time
E)Start time
Menu item |
Description |
|
|
Set Minute Minder |
To set and start a countdown, the timer will be |
|
shown on the main screen and an alarm will sound |
|
when the timer has finished counting down. This |
|
timer will not interrupt the cooking and is also |
|
available when the oven is switched off. Scroll to |
|
set, the timer will start automatically. |
|
|
Set Duration |
To set and start a countdown, the timer will be |
|
shown on the main screen and the oven will stop |
|
and an alarm will sound when the timer has finish- |
|
ed counting down. |
|
|
Set End Time |
To set the switch-off time for the current settings. |
|
|
Set Start Time |
To set the switch-on time for the current settings. |
Elapsed Time |
Show, hide or reset the timer that counts up when |
|
pressing the start button. The elapsed time is only |
|
available while the oven is active. |
|
|

20www.aeg.com
8.15Setting the clock functions
When you use the core temperature sensor, the functions Duration and End do not operate.
You can change the time and date when you touch the clock on the display, when the appliance is active.
1.Go to menu: Heating Functions.
2.Set the heating function and the temperature.
3.Touch  or go to the menu: Timers.
4.Choose a clock function.
5.Scroll the list to set the necessary time. Wait a few seconds for the time to set itself automatically or touch to
confirm: h or min. You can delete the settings if you touch: x.
When the clock function ends, an acoustic signal sounds and a message comes on the display. You can stop or extend the cooking process.
8.16 Submenu for: Options
Further individual settings related to safety, convenience and oven lamp.
Menu item |
Description |
|
|
Lamp On / Off |
Switch the oven lamp on or off. |
|
|
Child Lock On / Off |
Once activated it locks the screen and all buttons. |
|
They remain locked both in ON and OFF posi- |
|
tions. To unlock touch the display and follow in- |
|
structions. If unlocked you need to lock it again via |
|
menu. |
|
|
Screen Lock |
Screen lock temporarily 'locks' the touch screen |
|
and all buttons except the power key. To unlock |
|
touch the display and follow instructions. |
|
|
Heat + Hold |
Heat + Hold is only available when a duration is |
|
set. The oven will not completely switch off auto- |
|
matically but keep the food warm for 30 minutes. It |
|
is not available for all programmes. If active, an |
|
icon is shown on the display. |
|
|
Set + Go |
Set+Go lets you set an oven function with duration |
|
to use it later by only touching the screen. The |
|
screen lock is active when the cooking process |
|
starts. |
|
The function is visible in the menu only when the |
|
duration is set. |
|
|
8.17 Heat + Hold
The function keeps prepared food warm at 80 °C for 30 minutes. It activates after the baking or roasting procedure ends.
The function does not work with low temperature cooking, weight automatic programmes, steam automatic programmes, all functions from the menu: Specials, steam functions from the menu: Heating Functions.
Conditions for the function:
•You set the heating function or an automatic programme.
•The set temperature is more than 80 °C.
•You set the function: Set Duration.
•You activated the function: Heat + Hold in the menu: Options.
•The display shows:  .
.
If you use the core temperature sensor, the symbol is not visible in the display.
If you press  , the function deactivates.
8.18 Set + Go
The function lets you set a heating function (or a programme) and use it later with one press of any sensor field or a tap on the message in the display.
The function works with the functions: Set Duration, core temperature sensor.
The function does not work with the cleaning function.
1.Activate the appliance.
2.Set a heating function or an automatic programme.
3.Set the function: Set Duration.
4.Choose: Options / Set + Go. Touch the message in the display or
press a sensor field (except for  ). The set heating function starts.
If you press  before the function operates, the function deactivates.
When the heating function ends, an acoustic signal sounds.
ENGLISH 21
• The function: Child Lock is on when a heating function operates and after the appliance is deactivated. Follow the instructions in the display to deactivate the function.
•The menu: Options lets you activate and deactivate the function: Set + Go.
8.19Child Lock
Menu / Options / Child Lock
The function prevents an accidental operation of the appliance.
Activating the function: Child Lock
1.Set the function to position: On.
2.Deactivate the appliance.
Deactivating the function: Child Lock
1.Activate the appliance.
2.Tap the display.
3.Follow the instructions on the display.
8.20 Screen Lock
Menu / Options / Screen Lock
The function prevents an accidental change of the heating function. You can activate the function only when the appliance operates.
Activating the function: Screen Lock
1.Activate the appliance.
2.Set a heating function or a setting.
3.Go to the: Screen Lock.
4.To activate the function touch: Screen Lock.
The appliance is locked.
When the appliance is deactivated, the function deactivates automatically.
Screen Lock |
display. |
|
1. Tap the display.
8.21 Submenu for: Assisted Cooking |
|
22 www.aeg.com |
|
Deactivating the function: |
2. Follow the instructions on the |
A |
B |
|
Cake and Pastry |
|
Cookbook |
|
VARIOGUIDE |
|
SousVide Cookbook |
|
SousVide VarioGuide |
D |
C |
A)Return to menu
B)Food category
C)Cookbook and VarioGuide
D)More options
A cookbook containing inspiring automatic recipes and a VarioGuide function providing our recommended oven settings for your dishes. The time and temperature of the VarioGuide can be adjusted according to your needs. By touching the chef hat of the dish, our recommended settings are displayed.
8.22 Submenu for: Last and most used
Easily accessible list of last and most used functions, recipes and quickstarts.
Menu item |
Description |
|
|
Last used |
It shows the last used 5 functions. |
|
|
Most used |
It shows the most used 5 functions. |
|
|
8.23 Submenu for: Basic Settings
The set settings stay fixed each time you activate the appliance.
Menu item |
Description |
|
|
Fast heat-up On / Off |
Fast heat-up is activated and is always switched on |
|
for certain heating functions. It is visible on the |
|
screen with >> when active. |
|
|
Cleaning Reminder On / Off |
Choose if you wish the oven to remind you to use |
|
the cleaning cycle. |
|
|

ENGLISH 23
|
Menu item |
Description |
|
|
|
|
Display |
Brightness |
|
Choose the display settings. |
You can select 4 brightness modes. |
|
|
Set the brightness of the display in |
|
|
ON state. Time of day in OFF state |
|
|
is not adjustable. |
|
|
|
|
Sound |
Volume |
|
Sound Settings. |
|
|
Type (Beep / Click / No sound) |
|
|
|
|
|
|
|
|
Language |
Set your preferred language. |
|
|
|
|
Time and Date |
Time |
|
Set the time and date and other op- |
Set or adjust the time. |
|
tions related to how time is shown. |
|
|
Date |
|
|
|
|
|
|
Set or adjust the date. |
|
|
|
|
|
Format |
|
|
Choose your preferred time format, HH:MM or |
|
|
AM/PM. |
|
|
|
|
|
Clock style |
|
|
Define what the clock looks like when the oven is |
|
|
switched off. |
|
|
|
|
DEMO mode |
Activation code: 2468 |
|
For shop usage only. When active, |
|
|
the heating elements are disconnec- |
|
|
ted and DEMO is visible on the |
|
|
screen. |
|
|
|
|
|
Water hardness |
Sets the water hardness level (1 - 4). |
|
|
|
|
Service |
Software Version |
|
Shows the software version and con- |
Shows the software version of the oven. |
|
figuration. |
|
|
Reset all settings |
|
|
|
|
|
|
Resets all settings to factory default. |
|
|
|
|
|
Licence |
|
|
Shows the licence in English language. |
|
|
|
9. ASSISTED COOKING |
|
|
|
WARNING! |
You can choose to use the function: |
|
Cookbook or VarioGuide. |
|
|
Refer to Safety chapters. |
|
|
|
|
9.1 Assisted Cooking
Menu / Assisted Cooking or touch: 
Loading...