


9133I
Table of contents
 Loading...
9133i IP PHONE
RELEASE 1.4
USER GUIDE
41-000113-00 -08

Aastra Telecom will not accept liability for any damages and/or long
distance charges, which result from unauthorized and/or unlawful
use.
While every effort has been made to ensure accuracy, Aastra Telecom
will not be liable for technical or editorial errors or omissions
contained within this documentation. The information contained
in this documentation is subject to change without notice.
Copyright 2005 Aastra Telecom. www.aastra.com
All Rights Reserved.

9133i IP Phone User Guide iii
SOFTWARE LICENSE AGREEMENT
Aastra Telecom Inc., hereinafter known as "Seller", grants to Customer a
personal, worldwide, non-transferable, non-sublicenseable and non-exclu-
sive, restricted use license to use Software in object form solely with the
Equipment for which the Software was intended. This Product may inte-
grate programs, licensed to Aastra by third party Suppliers, for distribution
under the terms of this agreement. These programs are confidential and
proprietary, and are protected as such by copyright law as unpublished
works and by international treaties to the fullest extent under the applica-
ble law of the jurisdiction of the Customer. In addition, these confidential
and proprietary programs are works conforming to the requirements of
Section 401 of title 17 of the United States Code. Customer shall not dis-
close to any third party such confidential and proprietary programs and
information and shall not export licensed Software to any country except in
accordance with United States Export laws and restrictions.
Customer agrees to not reverse engineer, decompile, disassemble or dis-
play Software furnished in object code form. Customer shall not modify,
copy, reproduce, distribute, transcribe, translate or reduce to electronic
medium or machine readable form or language, derive source code with-
out the express written consent of the Seller and its Suppliers, or dissemi-
nate or otherwise disclose the Software to third parties. All Software
furnished hereunder (whether or not part of firmware), including all copies
thereof, are and shall remain the property of Seller and its Suppliers and
are subject to the terms and conditions of this agreement. All rights
reserved.
Customer's use of this software shall be deemed to reflect Customer's
agreement to abide by the terms and conditions contained herein. Removal
or modification of trademarks, copyright notices, logos, etc., or the use of
Software on any Equipment other than that for which it is intended, or any
other material breach of this Agreement, shall automatically terminate this
license. If this Agreement is terminated for breach, Customer shall imme-
diately discontinue use and destroy or return to Seller all licensed software
and other confidential or proprietary information of Seller. In no event
shall Seller or its suppliers or licensors be liable for any damages whatso-
ever (including without limitation, damages for loss of business profits,
business interruption, loss of business information, other pecuniary loss, or
consequential damages) arising out of the use of or inability to use the soft-
ware, even if Seller has been advised of the possibility of such damages.


Table of Contents
v
Table of Contents
About This Guide.........................1
Documentation.............................1
Introduction..................................1
Phone Features ..........................1
Requirements..............................2
Installation and Setup..................2
Getting Started.............................3
When You First Plug in Your
Phone.......................................3
Updating Your Phone..................3
Start up Screens............. ...... ..... .3
Incomplete Config.......................3
No Service ..................................3
Setting Your Options...................4
Aastra Web UI...............................5
Finding Your Phone’ s I P Add res.5
Accessing the Aastra We b UI.....5
User Password.............................6
Using Your Phone........................7
Hard Keys................. ...... ............7
Navigation Arrow Keys................7
Multiple Line an d C al l A ppe aranc-
es .............................................8
Programmable Keys ....................9
Setting a Line Key.......................9
Setting a Speeddial Key..............9
Setting a "Do Not Disturb" (DND)
Key.........................................11
Setting a "Busy Lamp Fiel d" (BLF)
Key.........................................12
Setting a "BLF List Key "............12
Setting a "Flash Key"................14
Setting an "XML" Ke y................14
Setting "Park/Pickup" Key s.......15
Editing a Programmable Key....17
Deleting a Programmabl e Ke y..18
Restarting your phone...............19
Making Calls...............................20
Dialing a Number ......................20
Using Handsfree Spea ke rpho ne...
20
Using a Headset........................20
Incoming Intercom Calls............21
Redial........................................22
Mute..........................................23
Receiving Calls ..........................24
Answering an Incoming Call......24
Sending an Incoming Call to
Voicemail................................24
Handling Calls............................25
Placing a Call on Hold...............25
Transferring Calls......................25
Conferencing Calls....................26
Ending Calls..............................27
Managing Calls...........................28
Directory List.... ............ ........... ..28
Callers List .............................. ..31
Call Forwarding.........................33
Additional Features....................36
Suppress DTMF Playback ........36
Ring Tones and Tone Se ts........37
Stuttered Dial Tone...................39
Call Waiting Tone......................39
Language....................................40
T roubleshooting Solutons.........41
Limited Warranty........................37


9133i IP Phone User Guide 1
About This Guide
About This Guide
This guide explains how to use
your new 9133i phone. Not all
features listed are available by
default. Contact your system
administrator to find out which
features and services are available
on your system. Your system
administrator also has the ability to
customize some features on this
phone.
Documentation
• Aastra 9133i IP Installation
Guide – installation and set-up
instructions, general features
and functions, and basic options
list customization. This guide is
included in the box with your
phone.
• Aastra SIP 9133i IP Phone User
Guide – explains the most
commonly used features and
functions. This guide can be
downloaded from
www.aastra.com.
• Aastra SIP 480i/480i CT/9112i/
9133i IP Phone Administration
Guide – explains how to set the
9133i phone up on the network
and contains advanced configu-
ration instructions for the 9133i.
This is an administrator level
guide. This guide can be down-
loaded from www.aastra.com.
Introduction
This 9133i IP telephone has all the
features of a regular business
phone, allowing you to make and
receive calls, transfer, conference
and more. The 9133i IP telephone
provides communications over an
IP Network using the SIP IP
telephony protocol.
Phone Features
• Three-line adjustable backlit
display screen
• 3 line/call appearance buttons
with corresponding lights
• 7 programmable buttons with
lights that can be programmed
with specific functions
• Full-duplex speakerphone for
handsfree calls
• Built-in-two-port, 10/100
Ethernet switch which lets you
share a connection with your
computer
• Inline power support, which
eliminates power adapters.

2 9133i IP Phone User Guide
Introduction
Requirements
• A SIP-based IP PBX system or
network installed and running
with a number created for the
new 9133i IP phone.
• Adherence to SIP standard
RFC 3261.
• Access to a configuration server
where you can store the firm-
ware image and configuration
files.
The configuration server must
be able to accept connections
anonymously.
• The IP phone must be config-
ured for a specific type of proto-
col to use. (TFTP is enabled by
default). You can configure the
following protocols on the IP
phone:
- TFTP (Trivial File Transfer
Protocol)
- FTP (File Transfer Protocol)
- HTTP (Hypertext Transfer
Protocol)
• A 802.3 Ethernet/Fast Ethernet
LAN
• Category 5/5e straight through
cabling
• Power over Ethernet (PoE)
power supply (optional
accessory that is necessary only
if no inline power is provided on
the network).
Installation and Setup
If your system administrator has
not already setup your 9133i
phone, please refer to the Aastra
9133i Installation Guide for basic
installation and physical setup of
the 9133i. For more advanced
administration and configuration
information, system administrators
should refer to the Aastra SIP 480i/
480i CT/9112i/9133i IP Phone
Administration Guide
9133i IP Phone User Guide 3
Getting Started
Getting Started
The 9133i must be set up and
configured prior to its first use.
This section describes phone
behavior and start up screens you
may see when the phone is first
plugged in, or when it is restarted.
When You First Plug in Your
Phone
The 9133i automatically begins the
start up sequence as soon as it is
connected. The phone goes
through this process the first time
you plug in your phone and every
time you restart your phone. The
first screen the phone displays is
the Aastra splash screen.
Updating Your Phone
After displaying the Aastra splash
screen, the 9133i checks settings
and looks for new configuration
and firmware updates for the
phone from the server. If a new
update is found, the phone
displays the message “Updating
Config” or “New Firmware”. This
may take a few moments while the
phone downloads the latest
updates.
NOTE: New updates to your phone can
be automatically scheduled
from the server. This is set up
on the phone system by your
system administrator and
should be scheduled during
non-business hours or slow call
periods.
Important! Do not unplug or remove
power to the phone while it is checking
or installing firmware.
Start up Screens
After the phone displays the
Aastra splash screen or after
downloading an update, the phone
displays the Idle State screen:
The basic Idle State screen lists
your name, extension, and today's
date and time. This screen is
shown whenever your phone is not
in use.
Incomplete Config.
If your phone displays a
“No Service” message without any
extension or user name at the end
of the start up sequence instead of
the Idle State screen, this means
your system administrator has not
set up your extension correctly.
Contact your system administrator
for assistance.
No Service
The “No Service” or “Network
disconnected” prompt appears on
the display and the telephone
status light turns on when the
phone is not properly connected to
the network, or the account has not
been configured by the
administrator. The phone also
displays the default time and date
of 12:00am Jan. 1st, 2000. Check
that the cables are tightly
connected to the phone and to the
wall jack. The phone should
automatically detect when the
connection is reconnected and will
display the “Network Connected”
prompt temporarily.
Aastra 9133i
Cheking for new
firmware...
John Burns
9054550055
Jun 8 2:55pm
4 9133i IP Phone User Guide
Getting Started
If changes have been made to your
phone settings, you may need to
restart your phone. For more
information on restarting your
phone, see "Restarting your
phone" on page 19.
For more information about
connecting your phone, refer to the
Aastra 9133i Installation Guide
under the section "Connecting to
the Network and to Power". Check
with your system administrator for
assistance.
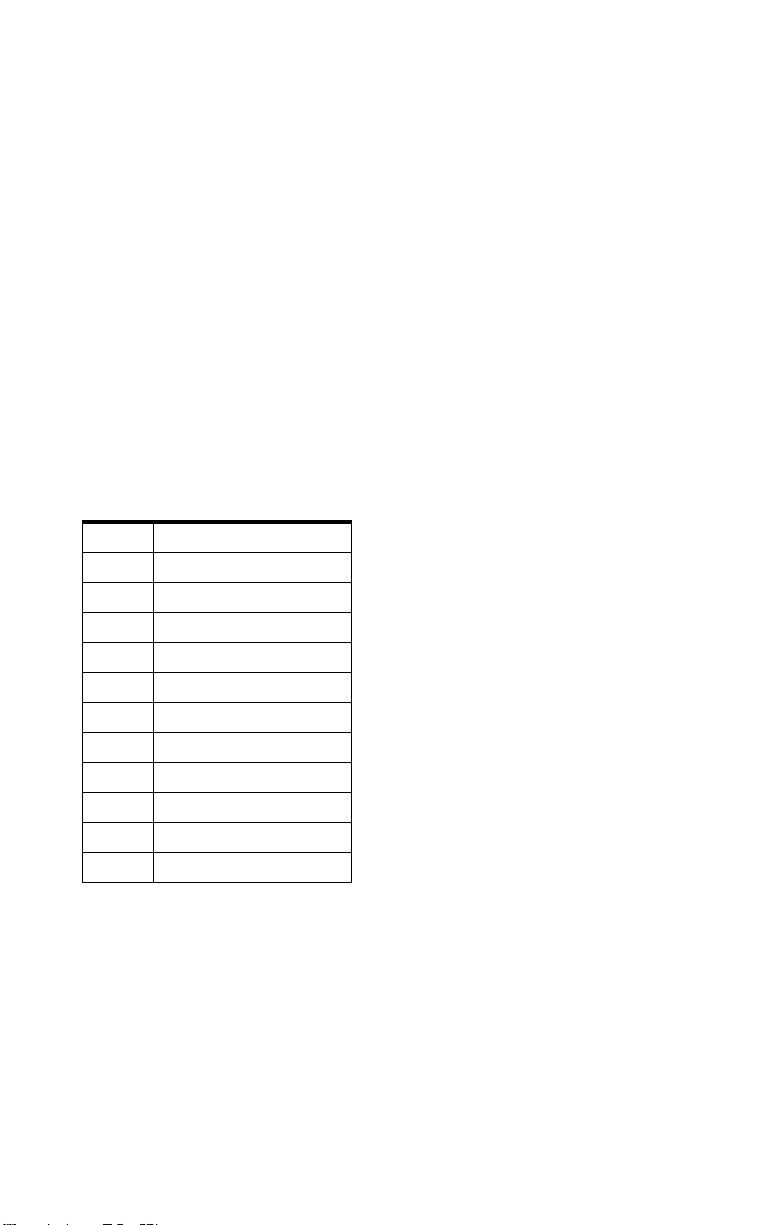
Setting Your Options
Pressing the I button
gives you a list of configurable
options.
These options allow you to
customize your phone settings.
The "Network Settings" and "SIP
Settings" selections are
administrator level options, and
require an administrator password
to access. Setting defaults under
"Phone Status" also requires an
administrator password. These
options should only be set up and
changed by your system
administrator.
For more information about
customizing your phone, see the
section "Customizing Your Phone"
in the Aastra 9133i Installation
Guide.
For more information about
administrator options, contact your
system administrator.
1Language
2Time and Date
3 Set Ring Tone
4 Clear Msg. Wtg.
5 Contrast Level
6Live Dialpad
7 Headset Settings
8 Call Forward
9 Network Settings
10 SIP Settings
11 Phone Status
12 User Password
9133i IP Phone User Guide 5
Aastra Web UI
Aastra Web UI
You can access the 9133i phone’s
options using the Aastra Web UI.
In order to access the Aastra
Web UI, you will need to know the
IP address of your phone.
Finding Your Phone’s IP Addres
1. Press the
I button on
the phone to enter the Option
List.
2. Use the
V key to scroll down
the list of options to
Phone Status and press the
U
key to select.
3. Select "Network Port" and press
the U key.
The IP address of your 9133i IP
phone displays in the "IP
Address" field.
Accessing the Aastra Web UI
1. Open your web browser and
enter the phone’s IP address or
host name into the address field.
2. At the prompt, enter your user-
name and password and click
.
Note: For a user, the default user name
is “user” and the password field
is left blank.
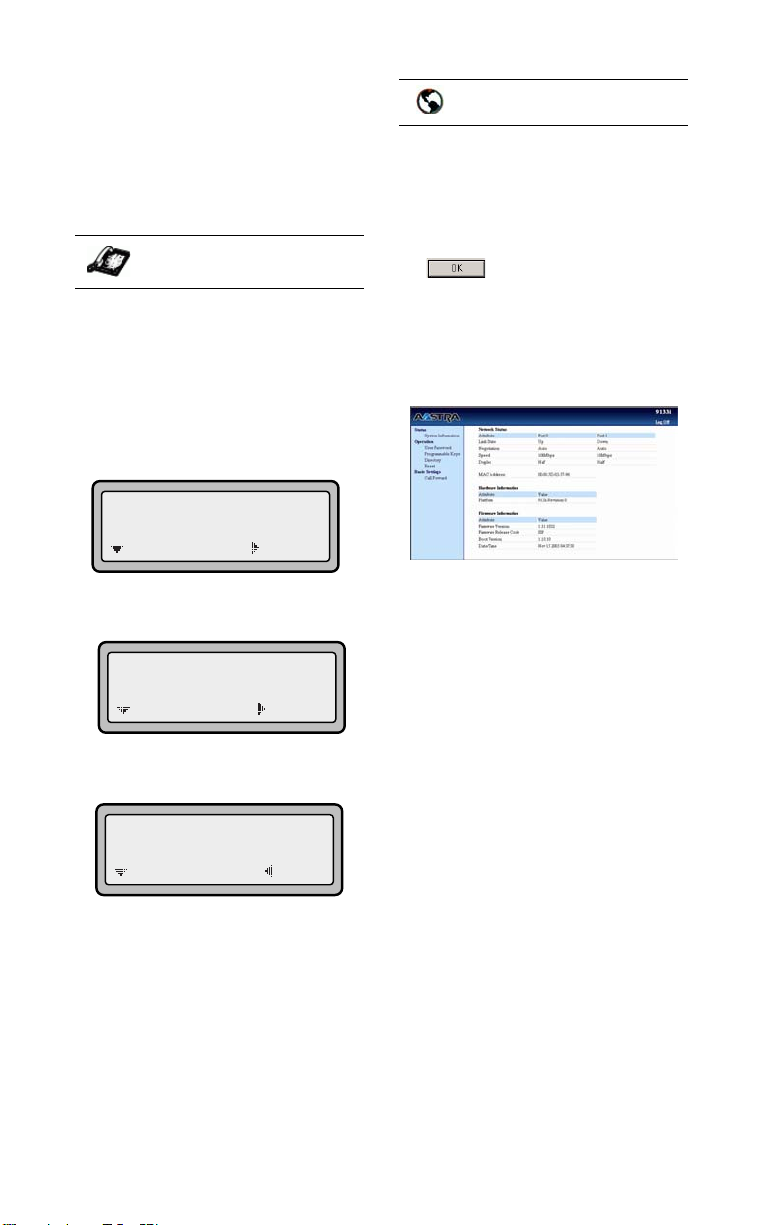
The Network Status window dis-
plays for the IP phone you are
accessing.
3. You can logout of the Aastra
Web UI at any time by clicking
LOGOFF.
The following categories display in
the side menu of the Aastra Web
UI: Status, Operation, Basic
Settings.
Status
The Status section displays the
network status and the MAC
address of the IP phone. It also
displays hardware and firmware
information about the IP phone.
The information in the Network
Status window is read-only.
IP Phone UI
11 Phone Status
=Enter
=Next
1 Network Port
=Enter
=Next
IP Address:
10.40.50.112
=Exit
=Next
Aastra Web UI
6 9133i IP Phone User Guide
User Password
Operation
The Operation section provides the
following options:
- User Password - Allows you to
change user password
- Programmable Keys - Allows
you to configure up to 7
programmable keys for a
specific function (line,
speeddial, do not disturb
(DND), Busy Lamp Field (BLF),
BLF list, flash, Extensible
Markup Lanaguage (XML),
Park, and Pickup.)
- Directory - Allows you to copy
the Callers List and Directory
List from your IP phone to
your PC.
- Reset - Allows you to restart
the IP phone when required.
Basic Settings
The Basic Settings section provides
the following options:
- Preferences - Allows you to set
suppression of DTMF
playback, incoming intercom
call settings, ring tones (global
and per-line basis), and ring
tone sets.
- Call Forward - Allows you to
set a phone number
destination for where you want
calls forwarded.
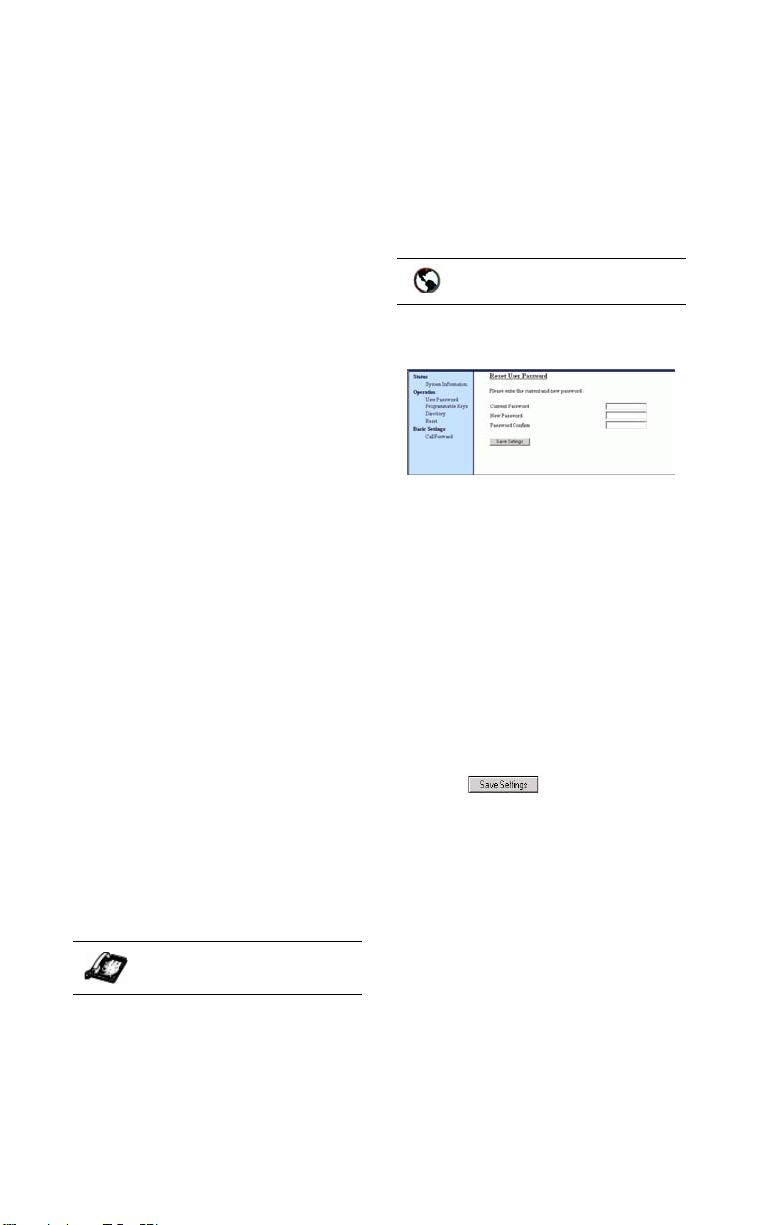
User Password
This category allows you to change
the web-access password for your
phone. Changing your password
ensures that only you can alter
your phone settings, and helps
keep your system secure. You can
change your user password using
the IP phone UI or the Aastra Web
UI.
1. Press
I on the phone to
enter the Options List.
2. Select User Password and
press
U.
3. Enter the current user password
and press
U.
4. Enter the new user password
and press
U.
5. Re-enter the new user password
and press
U.
A message, "Password
Changed" displays on the
screen.
1. Click on Operation->User
Password.
2. In the "Current Password" field,
enter the current user password.
Note: By default, the user name is
“user” (all lowercase) and the
password field is left blank. If
you have forgotten your pass-
word, contact your system
administrator for assistance.
3. In the "New Password" field,
enter the new user password.
4. In the "Password Confirm"
field, enter the new user pass-
word again.
5. Click to save your
changes.
IP Phone UI
Aastra Web UI

9133i IP Phone User Guide 7
Using Your Phone
Using Your Phone
The following sections describe the
various 9133i phone key functions,
and how they help you make and
manage your calls and caller
information.
Hard Keys
The following hard keys labeled on
your phone are configured for the
call handling features:
• Callers
n
•Conference l
• Transfer k
• Redial m
These keys are static and cannot be
programmed or changed. They are
located to the right of the dial pad.
There are also 3 line keys
(
f,g,
h), located below the
hard keys. See the section 9.
The following keys are configured
for managing phone features and
settings:
•Options I
•Directory J
• Save K
• Delete L
These keys are static and cannot be
programmed or changed. They are
located to the far upper right of the
dial pad.
Navigation Arrow Keys
The arrow keys located below the
display are navigation keys that
allow you to scroll through and
select various options.
Xfer
Conf
L2
L3
L1
Options
Save
Delete
Directory
8 9133i IP Phone User Guide
Using Your Phone
Multiple Line and Call
Appearances
The 9133i has 3 hard line/call
appearance buttons each with a
corresponding status light.
These line/call appearance buttons
and lights can represent physical
lines, calls for your extension or
calls from a group that your
extension is part of. By pressing a
line/call appearance button, you
connect to the line or a call it
represents. The line/call
appearance light indicates the
status of that line or call. When the
phone is taken off-hook, the phone
automatically selects a line for you.
Line/Call
Appearance
Light Behavior
Line/Call
Appearance
Status
Off Idle line or no
call activity
Light flashes
quickly
Ringing
Light is solid Connected
Light flashes
slowly
Hold
9133i IP Phone User Guide 9
Programmable Keys
Programmable Keys
There are 7programmable keys on
the 9133i phone, located beneath
the Delete key, to the far right of
the dial pad.
You can set the programmable
keys with any of the following
functions:
•line
• speeddial
• DND (do not disturb)
• BLF (busy lamp field)
• BLF list
•flash
• XML (Extensible Markup Lan-
guage)
•Park
•Pickup
These keys can also be set up to
quickly access features such as Call
return (*69) or Voicemail.
Note: Quick access features like Call
return and Voicemail must first be
configured on your PBX in order to
work on your phone. See your sys-
tem administrator for more infor-
mation.
Setting a Line Key
You can set a programmable key as
an additional line on the 9133i. The
programmable key acts as a line
that behaves the same as a hard
line key. For more information
about the behavior of line keys, see
"Multiple Line and Call
Appearances" on page 8.
You can use the Aastra Web UI
only to set a programmable key as
a line.
Note: Your system administrator can
also set a programmable key as a
line using the configuration files.
Use the following procedure to set
a programmable key to function as
a line.
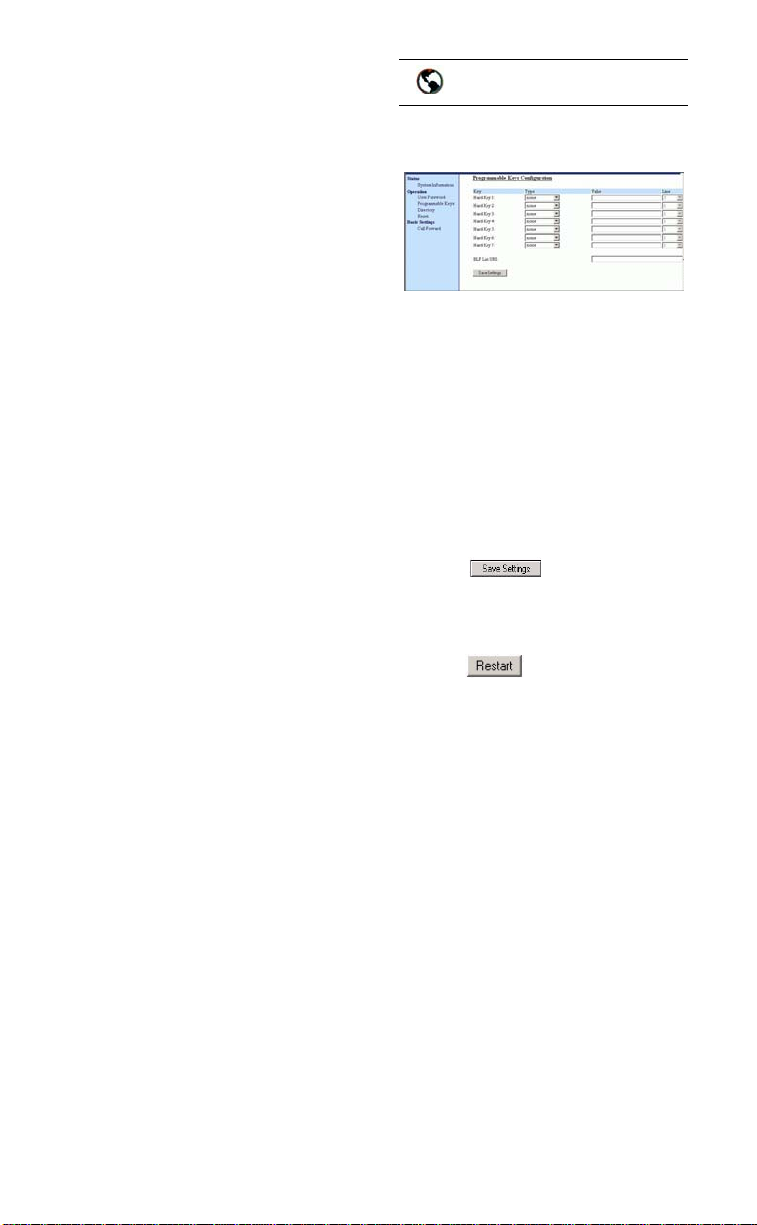
1. Click on Operation->
Programmable Keys.
2. Select from "Hard Key 1"
through "Hard Key 7".
3. In the "Type" field, select line to
apply to the programmable key.
4. Entering a value in the "Value"
field is optional. For example,
you could enter L4.
5. In the "Line" field, select a line
for which to apply this pro-
gramed hard key. Valid values
are 1 through 9.
6. Click to save your
changes.
7. Click on Operation->Reset.
8. In the "Restart Phone" field
click to restart the IP
phone.
Setting a Speeddial Key
The speeddial function can be set
using the IP phone UI or the Aastra
Web UI. DND and XML can only
be set using the Aastra Web UI.
Note: Your system administrator can
also set speeddial using the
configuration files.
You can save up to 7 speed dial
numbers and names on the 9133i.
These can be programmed to dial
directly to another person’s line or
extension, or set up to quickly
access features such as Caller ID
(*69), Voicemail.
Use the following procedures to set
speeddial on the 9133i IP phone.
Aastra Web UI
10 9133i IP Phone User Guide
Programmable Keys
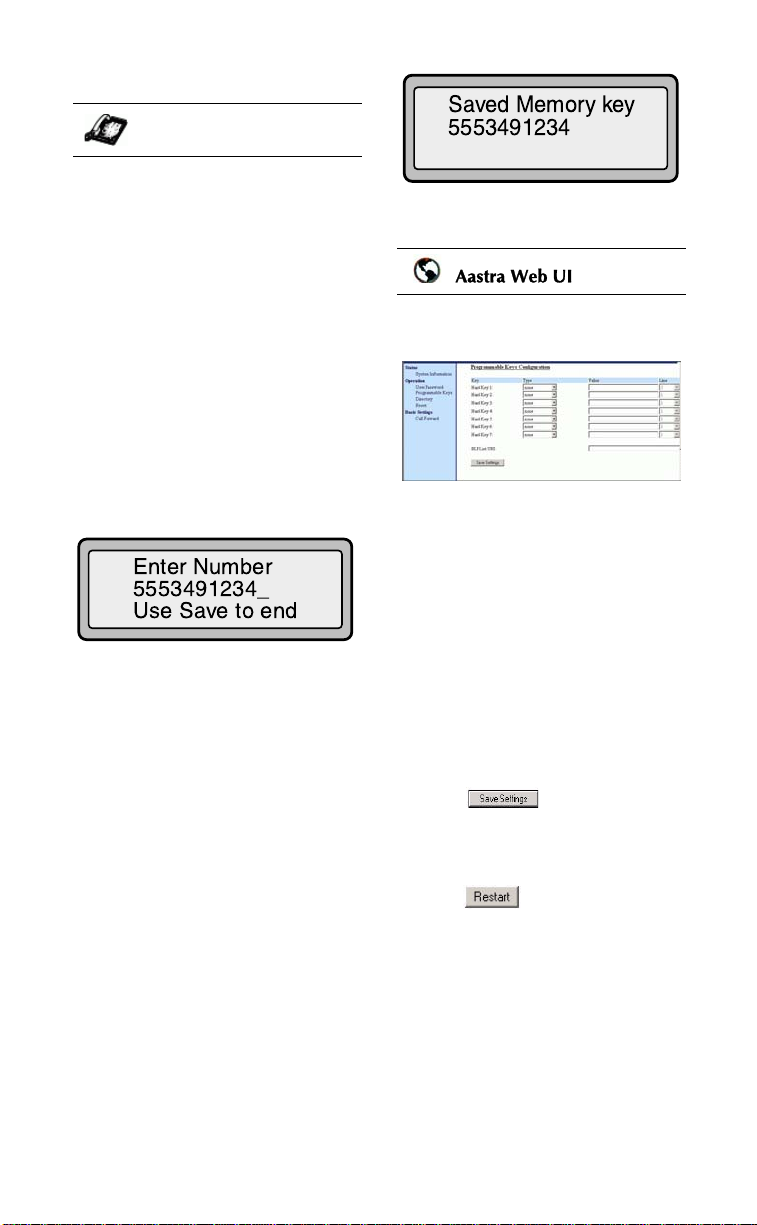
Entering a Name/Number for
Speeddial Key
To enter a number and name in a
programmable key:
1. Press
K.
The screen displays "Save to?"
2. Select a Programmable Key
M
you want to save to.
3. At the "Enter Number" prompt,
use the dial pad key to enter the
number.
4. Press K.
Note: To add a one second pause dur-
ing number editing press
O.
5. At the "Enter Name" prompt, use
the dial pad keys to select the
letters. Continue to press the
number key to access the next
letter for that key (i.e. press 2
three times to access C). Press
U to move to the next space, or
wait a moment and the cursor
automatically advances. To
insert a space between letters,
press
U. To backspace and
erase a mistake, press
T or
L. You can save up to 16
letters and numbers on each
programmable key entry.
6. Press K to finish.
1. Click on Operation->
Programmable Keys.
2. Select from "Hard Key 1"
through "Hard Key 7".
3. In the "Type" field, select
speeddial to apply to the pro-
grammable key.
4. In the "Value" field, enter the
phone number or extension to
apply to this hard key for speed-
dialing .
5. In the "Line" field, select a line
for which to apply this pro-
gramed hard key. Valid values
are 1 through 9.
6. Click to save your
changes.
7. Click on Operation->Reset.
8. In the "Restart Phone" field
click to restart the IP
phone.
IP Phone UI
Aastra Web UI
Loading...