


MODEL
UX-P710 UX-A760
FACSIMILE
OPERATION MANUAL
(EU Only)
To urządzenie spełnia wymagania dyrektywy 1999/5/EC.
Η συσκευή αυτή ανταποκρίνεται στις απαιτήσεις των οδηγια 1999/5/ΕK.
Acest echipament este în conformitate cu cerinţele impuse prin Directiva 1999/5/EC.
Това оборудване отговаря на изискванията на Директива 1999/5/EО.
This equipment complies with the requirements of Directive 1999/5/EC.
To urządzenie pracuje w publicznej sieci telefonicznej zgodnie ze standartami ES203021.
Αυτή είναι µια συσκευή φαξ που λειτουργεί σύµφωνα µε τα αναλογικά δηµόσια τηλεφωνικά δίκτυα µεταγωγής που ακολουθούν το Πρότυπο ES203021.
Acesta este un fax care operează în reţelele telefonice analogice comutate publice care respectă standardul ES203021.
Това е факсова машина, която работи по аналоговите публични комутируеми телефонни мрежи, следващи стандарта ES203021.
This is a facsimile product operating in analogue public switched telephone networks which follow the ES203021 Standard.
Deklaracja Zgodności jest dostępna pod adresem.
Προβολή της ∆ήλωσης Συµµόρφωσης µπορεί να γίνει στην ακόλουθη διεύθυνση URL. Declaraţia de conformitate poate fi vizualizată la următoarea adresă URL.
Декларацията за съвместимост можете да видите на следния URL адрес.
The Declaration of Conformity can be viewed at the following URL address.
http://www.sharp.de/doc/UX-P710.pdf
http://www.sharp.de/doc/UX-A760.pdf
Autoryzowany przedstawiciel odpowiedzialny za rynek Unii Europejskiej
Υπεύθυνος εξουσιοδοτηµένος αντιπρόσωπος για την Κοινοτική Αγορά της Ευρωπαϊκής Ένωσης
Reprezentantul autorizat pentru Uniunea Europeană
Упълномощен представител, отговарящ за Общия пазар на EC
Authorized representative responsible for the European Union Community Market
SHARP ELECTRONICS (Europe) GmbH
Sonninstraße 3, D-20097 Hamburg
Datalight is a registered trademark of Datalight, Inc.
FlashFXTM is a trademark of Datalight, Inc.
Copyright 1993 - 2004 Datalight, Inc. All Rights Reserved.
U.S. Patent Office 5.860.082/6.260.156

English
Table of Contents
Introduction |
2 |
4. |
Answering System (UX-A760 |
|
|
|
|
only) |
32 |
A Look at the Operation Panel |
5 |
Recording an OGM |
32 |
|
|
|
|||
|
|
Using the Answering System . . . . . . |
32 |
|
1. Installation |
8 |
Answering System Settings . . . . . . . |
34 |
|
Unpacking Checklist |
8 |
Override Ringing . . . . . . . . . . . . . . . . |
35 |
|
Remote Operations. . . . . . . . . . . . . . |
36 |
|||
Setup . . . . . . . . . . . . . . . . . . . . . . . . . |
8 |
5. |
Making Copies |
39 |
Imaging Film. . . . . . . . . . . . . . . . . . . . |
9 |
|||
Loading Paper . . . . . . . . . . . . . . . . . |
12 |
|
|
|
Initial Settings. . . . . . . . . . . . . . . . . . |
13 |
6. |
Caller ID (Requires Service) |
40 |
Setting the Reception Mode. . . . . . . |
14 |
|
|
|
Volume Adjustment . . . . . . . . . . . . . |
15 |
Activating Caller ID . . . . . . . . . . . . . . |
40 |
|
Flash Select Setting For PBX. . . . . . |
16 |
Caller ID List . . . . . . . . . . . . . . . . . . . |
40 |
|
Language Select Setting . . . . . . . . . |
16 |
Blocking Calls . . . . . . . . . . . . . . . . . . |
42 |
|
2. Sending Faxes |
17 |
7. |
Key Lock Function |
44 |
Transmittable Documents . . . . . . . . 17
Loading the Document . . . . . . . . . . . 17
Resolution and Contrast. . . . . . . . . . 18
Sending a Fax: Normal Dialling . . . . 19
Storing Numbers . . . . . . . . . . . . . . . 20
Sending a Fax: Auto Dialling . . . . . . 23
Making Phone Calls . . . . . . . . . . . . . 25
3. Receiving Faxes |
26 |
Using TEL/FAX (T/F) Mode . . . . . . . 26 Using FAX Mode . . . . . . . . . . . . . . . 27 Using TEL Mode . . . . . . . . . . . . . . . 27 Using A.M. Mode (UX-A760) . . . . . . 30 Reception to Memory . . . . . . . . . . . . 30
8. Maintenance |
46 |
Cleaning the Machine . . . . . . . . . . . . |
46 |
Cleaning the Print Head and Rollers. 47 |
|
9. Troubleshooting |
50 |
Problems and Solutions . . . . . . . . . . |
50 |
Messages and Signals . . . . . . . . . . . |
54 |
Clearing Paper Jams . . . . . . . . . . . . |
57 |
Quick Reference Guide |
60 |
Index |
61 |
1

Introduction
Specifications
Imaging film |
Initial sample roll (included with machine): |
|
Yields approx. 20 A4 pages |
|
Replacement roll (not included): |
|
UX-71CR (30 m x one roll) |
|
UX-72CR (30 m x two rolls) |
|
(one roll yields approx. 90 A4 pages) |
Paper tray capacity
Recording system Effective printing width Memory capacity
Approx. 10 A4 sheets (80 g/m2) (at room temperature)
Thermal transfer recording
205 mm max.
UX-P710: Approximately 40 average pages
UX-A760: Approximately 50 average pages with no voice messages recorded, or 15 minutes of voice messages (including OGMs) with no documents in memory (maximum of 30 voice messages).
Modem speed |
14,400 bps with auto fallback to lower speeds. |
Transmission time* |
Approx. 9 seconds |
Compatibility |
ITU-T (CCITT) G3 mode |
Compression scheme |
MH, H2, MMR |
Automatic dialling |
100 numbers; 3 Rapid Keys |
Effective scanning width |
205 mm max. |
Scanning resolution |
Horizontal: 8 pels/mm |
|
Vertical: |
|
Standard: 3.85 lines/mm |
|
Fine /Halftone: 7.7 lines/mm |
|
Super fine: 15.4 lines/mm |
Halftone (greyscale) |
64 levels |
*Based on Sharp Standard Chart at standard resolution, excluding time for protocol signals (i.e.,
ITU-T phase C time only)
2
Applicable telephone line |
Analog public switched telephone network (ES203021) / |
|
PBX |
Reception modes |
TEL/FAX,TEL, FAX, A.M. |
|
(A.M. mode is only available on the UX-A760) |
Automatic document |
A4: 10 sheets max. (80 g/m2) |
feeder |
|
Contrast control |
Automatic/Dark selectable |
Copy function |
Yes |
Display |
16-digit LCD display |
Power requirements |
220-230 V AC, 50 Hz |
Noise emission |
Less than 70 dBA (measured according to EN ISO |
|
7779) |
Power consumption |
Standby: 1.5 W (only when CID and fax remote |
|
reception are set to NO) |
|
Maximum: 90 W |
Operating temperature |
5 - 35°C |
Humidity |
30 - 85% RH |
Dimensions (without |
Width: 296 mm |
attachments) |
Depth: 180 mm |
|
Height: 86 mm |
Weight (without |
Approx. 2.3 kg |
attachments) |
|
As a part of our policy of continuous improvement, SHARP reserves the right to make design and specification changes for product improvement without prior notice. The performance specification figures indicated are nominal values of production units. There may be some deviations from these values in individual units.
Important: This machine is not designed for use on a line which has call waiting, call forwarding, or certain other special services offered by your telephone company (errors may occur during transmission and reception of faxes).
This machine is not compatible with digital telephone systems.
3
Important safety information
Do not disassemble this machine or attempt any procedures not described in this manual. Refer all servicing to qualified service personnel.
Do not install or use the machine near water, or when you are wet. For example, do not use the machine near a bath tub, wash bowl, kitchen sink or laundry tub, in a wet basement, or near a swimming pool. Do not spill any liquids on the machine.
Unplug the machine from the power outlet and telephone socket and consult a qualified service representative if any of the following situations occur:
-Liquid has been spilled into the machine or the machine has been exposed to rain or water.
-The machine produces odors, smoke, or unusual noises.
-The power cord is frayed or damaged.
-The machine has been dropped or the housing damaged.
Do not allow anything to rest on the power cord, and do not install the machine where people may walk on the power cord.
This machine must only be connected to a 220-230 V AC, 50 Hz, earthed outlet. Connecting it to any other kind of outlet will damage the machine.
Never insert objects of any kind into slots or openings on the machine. This could create a risk of fire or electric shock. If an object falls into the machine that you cannot remove, unplug the machine and consult a qualified service representative.
Do not place this machine on an unstable cart, stand or table. The machine could be seriously damaged if it falls.
Never install telephone wiring during a lightning storm.
Never install telephone sockets in wet locations unless the socket is specifically designed for wet locations.
Never touch bare telephone wires or terminals unless the telephone line has been disconnected at the network interface.
Use caution when installing or modifying telephone lines.
Avoid using a telephone (other than a cordless type) during an electrical storm. There may be a remote risk of electric shock from lightning.
Do not use a telephone to report a gas leak in the vicinity of the leak.
The power outlet must be installed near the equipment and must be easily accessible.
The machine does not have a power on/off switch, so the power is turned on and off by simply plugging in or unplugging the power cord.
4
A Look at the Operation Panel
|
|
1 |
|
|
|
2 |
3 |
4 |
|
5 |
6 |
|
|
|
|
|
|
|
F |
|
|
R |
|
|
|
|
|
|
|
|
START |
|
|
|
|
|
|
|
|
|
|
COPY/ |
|
|
|
|
|
|
|
|
|
|
|
HELP ? |
|
|
|
|
|
7 |
8 |
9 |
10 |
11 |
12 |
13 |
14 |
15 |
16 |
17 |
18 |
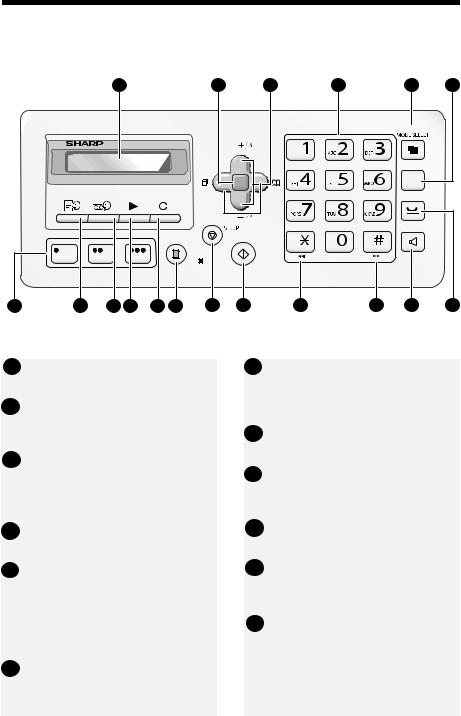
Note: The above illustration shows the operation panel of the UX-A760.
1Display: This displays messages to help you operate the machine.
2Function key: Press this key followed by the arrow keys to select special functions and settings.
3Arrow keys: Use to scroll through and select settings, and to search for numbers in the phonebook (p. 23).
4Number keys: Use to dial fax numbers.
5MODE SELECT key
When a document is in the feeder, press to adjust the scanning resolution (p. 18). At any other time, press to select the reception mode (p. 14).
6R key: If you are on a Flash-type PBX, use this key to dial out (page 19).
7Rapid Keys: Numbers stored in the phonebook can be assigned to these keys for one-touch dialing (p. 23).
8MEMO key: Press to record a memo (UX-A760 only).
9ANNOUNCE key: Press to record a greeting (outgoing message) (UXA760 only).
10PLAY key: Press to play messages (UX-A760 only).
11DELETE key: Press to delete various data from the machine (UXA760 only).
12COPY/HELP key: When a document is in the feeder, press to make a copy of the document (p. 39). At any other time, press to print out the Help List, a quick reference guide to the operation the machine.
5

13STOP key: Press to cancel an operation before it is completed.
14START key: Press after dialling to send a fax (p. 19).
15REPEAT key: Press while listening to a message to repeat it (UX-A760 only).
16SKIP key: Press while listening to a message to skip it (UX-A760 only).
17SPEAKER key: Press before dialing to listen to the line and fax tones through the speaker when faxing (Normal Dialling, p. 19). Note: This is not a speakerphone.
It cannot be used for speaking.
18HOLD key (UX-A760) HOLD/DELETE key (UX-P710):
Press during a call to put the call on hold.
On the UX-P710, this key is also used to delete various data from the machine.
Monitoring phone conversations
When speaking through the handset, you can press  to allow a third person to
listen to the conversation through the speaker. (To turn off the speaker, press the key again.)
To adjust the volume of the speaker when monitoring a conversation, press |
F |
||
|
|
|
|
or |
F |
(the volume reverts to the lowest setting each time the handset is |
|
|
|
||
replaced).
Note that the speaker cannot be used for speaking; it is only for listening.
To avoid feedback (a loud howling sound), be sure to turn off the speaker (press  once again) before you replace the handset.
6
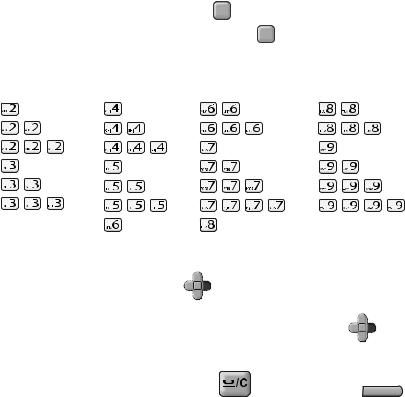
Entering letters
When the display prompts you to enter a name or other text, press the number keys for each letter as shown below.
Note: To enter a number in a name, press F and then press the desired
number. To switch back to letter entry mode, press |
F again. (“ABC” appears at |
||||||
the right of the display when letter entry mode is selected, and “123” appears |
|||||||
when number entry mode is selected. ) |
|
|
|
|
|
||
A = |
G = |
N = |
|
U = |
TUV 8 |
|
|
B = |
H = |
O = |
|
V = |
TUV 8 |
|
|
C = |
I = |
P = |
|
W = |
|
|
|
D = |
J = |
Q = |
|
X = |
|
|
|
E = |
K = |
R = |
|
Y = |
|
|
|
F = |
L = |
S = |
|
Z = |
|
|
|
|
M = |
T = TUV 8 |
|
|
|
|
|
Example: SHARP = 7777 44 2 777 |
F |
7 |
|
|
|
|
|
|
|
|
|
|
|||
♦ To enter two letters in succession that require the same key, press |
F |
after |
|||||
|
|||||||
|
entering the first letter to move the cursor to the right. |
|
|
|
|||
♦ To backspace and clear a mistake, press |
|
on the UX-P710, or |
|
C |
|||
|
|
|
|||||
on the UX-A760.
♦To enter a lower case letter, continue pressing the key for the letter until the lower case letter appears.
♦Press  repeatedly to enter , : ! ? & / ( ) [ ] (space) Press
  repeatedly to enter @ . / - _
Note: When  is pressed repeatedly, national characters may also appear after the above symbols. This depends on the language that is selected (see page 16). National characters are not available for all languages.
7
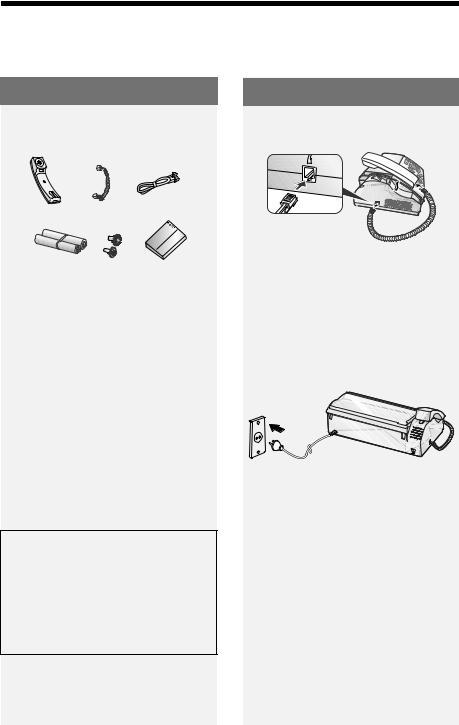
Unpacking Checklist
1. Installation
Unpacking Checklist
Handset Handset |
Phone |
cord |
line cord |
Sample roll of |
Manual |
imaging film (already |
|
loaded in machine) |
|
Points to keep in mind when setting up
♦Do not place the machine in direct sunlight.
♦Do not place the machine near heaters or air conditioners.
♦Keep dust away from the machine.
♦Keep the area around the machine clear.
About condensation
If the machine is moved from a cold to a warm place, condensation may form on the scanning glass, preventing proper document scanning. To remove the condensation, turn on the power and wait approximately two hours before using the machine.
Setup
Connecting the handset
Connecting the power cord
Plug the power cord into a 220-230 V, 50 Hz, earthed AC outlet.
♦The power outlet must be installed near the equipment and must be easily accessible.
♦It is recommended that you install surge protectors for the power and telephone lines. Surge protectors can be purchased at most telephone specialty stores.
8
Connecting the phone line
TEL.LINE
TEL. LINE |
Standard wall |
|
socket |
||
socket |
||
|
Imaging Film
Imaging Film
Checking the pre-loaded sample roll
A sample roll of imaging film has been pre-loaded in the machine. Perform steps 1 to 2 and 8 to 10 of Replacing the imaging film below to check the film and make sure it is taut.
♦The sample roll of imaging film can print about 20 pages.
If [FILM END] appears
If [FILM END] appears in the display for longer than 10 seconds, open the machine (see Steps 1 and 2 of
Replacing the imaging film below) and check the film. If the film has completely wound onto the front spool, replace the film. Otherwise, perform Steps 8 to 10 of Replacing the imaging film to remove slack.
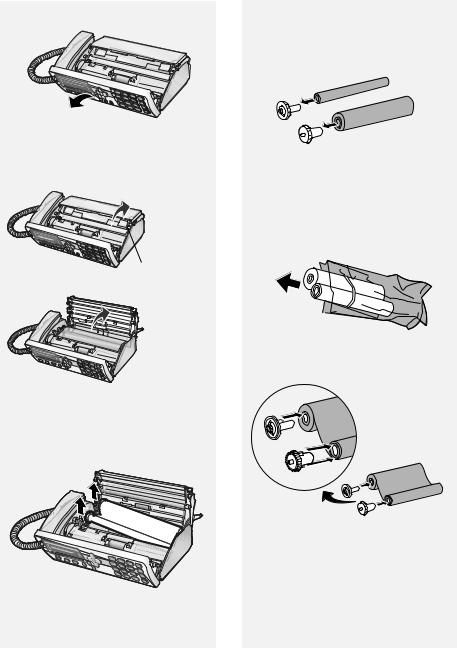
Replacing the imaging film
Replacement film
When replacing the imaging film, use the following imaging film:
SHARP UX-71CR (one roll) or
SHARP UX-72CR (two rolls)
Follow the steps below to replace the imaging film.
Note: Before replacing the imaging film, remove any paper from the paper tray and push in the tray extension.
1. Installation
9
Imaging Film
1 Open the operation panel.
2Press the release and open the print compartment cover.
Press green release
3Remove the used roll from the compartment, lifting the left ends of the spools first.
4Remove the two green gears from the spools.
DO NOT DISCARD THE TWO GREEN GEARS!
5Remove the new roll of imaging film from its packaging.
•Cut the band that holds the rolls together.
6 Insert the green gears.
1 Slot
2 Slots
Make sure the gears fit into the slots in the ends of the rolls.
10

7Insert the new roll of film into the print compartment:
a. Fit the right ends of the spools onto the pins.
b. Place the left ends so that the shafts of the gears fit into the holders.
Imaging Film
8Turn the front gear in the direction shown until the film is taut.
•If there is a label on the film, continue to turn the gear until the label is no longer visible.
9Close the print compartment cover.
•Press down on the  marks on both sides of the cover to make sure it clicks into place.
10 Close the operation panel.
1. Installation
11
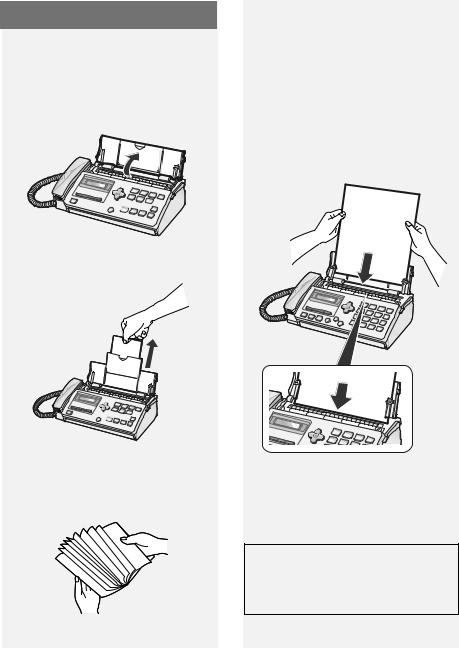
Loading Paper
Loading Paper
Approximately 10 sheets of A4-size
paper (80 g/m2) can be loaded in the paper tray (at room temperature).
1 If the paper tray is closed, open it.


2 Pull out the tray extension.
4Insert the stack of paper into the tray, print side down.
•If paper remains in the tray, take it out and combine it into a single stack with the new paper.
•Printing on the reverse side of the paper may result in poor print quality.
•Do not use paper that has already been printed on or is curled.


3Fan the paper, and then tap the edges against a flat surface to even the stack.
Note: If paper is left in the tray a long time, it will become curled. Curled paper will not feed properly and may cause a paper jam.
When not using the machine:
When not using the machine, keep the paper tray closed.
12

Initial Settings
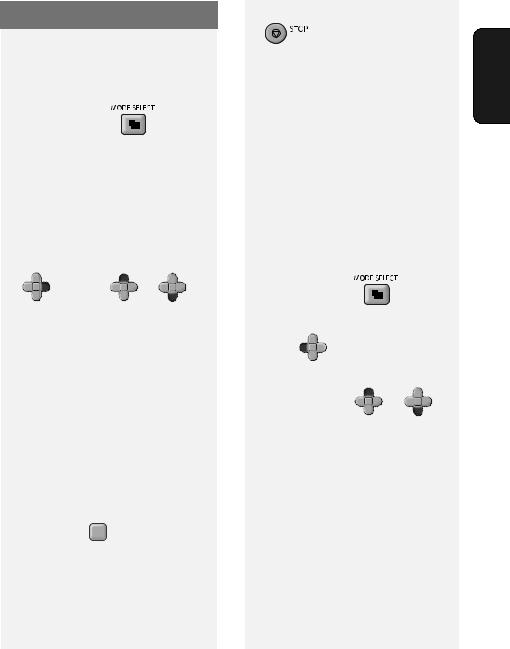
Setting the date and time
Set the date and time in the machine.
♦The date and time will be printed automatically at the top of all fax pages you send. The date and time also appear in the display.
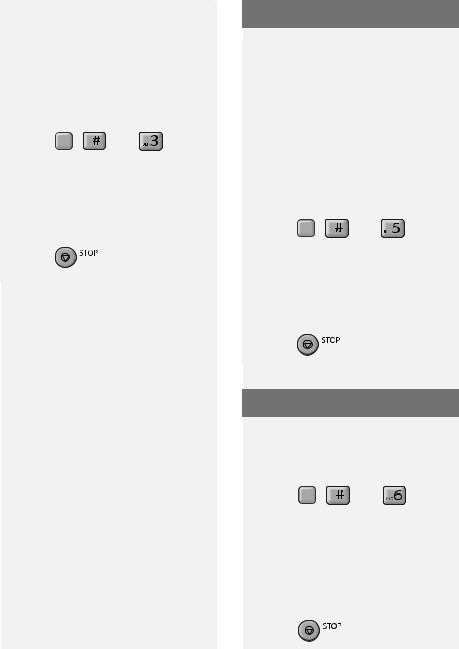
1 Press F , |
, |
. |
•The currently set date appears (example): [DATE 15-08-2008]
2Enter a two-digit number for the day ("01" to "31").
Example: the 5th 
 [DATE 05-08-2008]
•To backspace and clear a mistake,
press  on the UX-P710, or
C
on the UX-A760.
3Enter a two-digit number for the month ("01" for January, "02" for February, "12" for December, etc.).
Example: January 
 [DATE 05-01-2008]
4Enter the year (4 digits). Example: 


•The currently set time appears (example): [TIME 12:19]
5Enter a two-digit number for the hour ("00" to "23") and a two-digit number for the minute ("00" to "59").
Example: 9:25 


Initial Settings
6 Press  START .
Display: [OWN NUMBER SET]
7 Press |
to exit. |
Note: The time setting will change automatically at the beginning and end of summertime.
Entering your fax number
Enter your fax number in the machine.
♦Your entered fax number will be printed automatically at the top of all fax pages you send.
1 Press F ,  ,
, 
2Press  to select SET.
(To clear your number, press  twice and go to Step 5.)
3Enter your fax number with the number keys (max. 20 digits).
•To insert a space, press  . To enter “+”, press
•To backspace and clear a mistake,
press  on the UX-P710, or
C
on the UX-A760.
4 Press  START .
Display: [OWN NAME SET]
5 Press |
to exit. |
1. Installation
13
Setting the Reception Mode
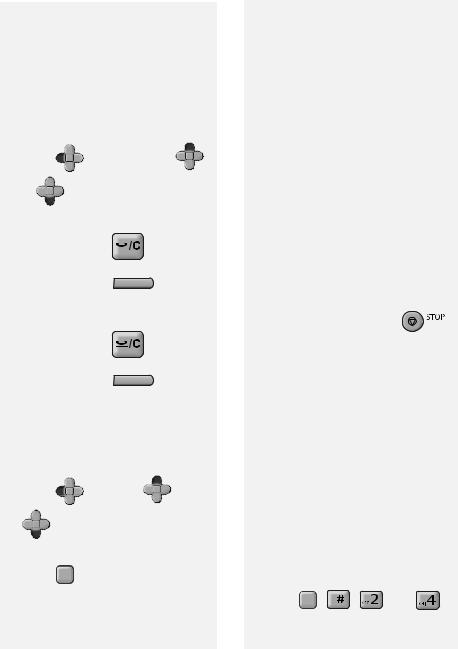
Entering your name
Enter your name in the machine.
♦Your entered name will be printed automatically at the top of all fax pages you send.
1Press F ,  ,
,  .
.
2Press  to select SET.
(To clear your name, press  twice and go to Step 5.)
3Enter your name by pressing number keys for each letter as shown in the chart on page 7. Up to 24 characters can be entered.
•To backspace and clear a mistake,
press  on the UX-P710, or
C
on the UX-A760.
4Press  START .
Display: [DATE&TIME SET]
5 Press |
to exit. |
Setting the Reception Mode
The machine has the following modes for receiving incoming faxes:
FAX mode:
Select this mode when you only want to receive faxes on your line. The machine automatically answers all calls and receives incoming faxes.
TEL mode:
This mode is the most convenient for receiving phone calls. Faxes can also be received; however, all calls must first be answered by picking up the machine's handset or an extension phone connected to the same line.
TEL/FAX (T/F) mode:
This mode is convenient for receiving both faxes and voice calls. The machine answers all calls on a preset number of rings. If the machine detects that a call is a voice call (including a manually dialled fax), it will make a special ringing sound to alert you to answer. If the machine detects that the call is an automatically dialled fax, it will begin reception.
A.M. ( 


 ) mode (UX-A760 only):
Select this mode when you go out and want the machine’s answering system to answer all calls. Voice messages will be recorded, and fax messages will be received automatically.
14
Setting the reception mode
To set the reception mode, make sure a document is not loaded in the feeder,
and then press |
until the |
desired mode appears in the display.
♦For more information on receiving faxes, see Chapter 3.
Volume Adjustment
Volume Adjustment
Speaker volume
1 Press  .
.
2 |
Press |
F |
or |
F |
to select the |
|
|
desired level.
•Press  again to turn off the speaker.
Ringer volume
1 |
Press |
F |
or |
F |
to select |
|
|
HIGH, MIDDLE, LOW, or OFF.
(Make sure  has not been pressed.)
•The ringer will ring once at the selected level.
2If you selected “OFF OK?” to turn off the ringer, press  START .
Note: When the reception mode is set to TEL, the ringer will still ring at LOW if turned off.
1. Installation
15
Flash Select Setting For PBX
Key Tone setting
The machine normally sounds a beep each time you press a key on the operation panel. This confirms that the key has been correctly pressed.
If desired, you can turn off the beep sound. Follow the steps below.
1 Press F , |
, and |
. |
2Press  (YES) to turn on the beep sound.
Press  (NO). to turn off the beep sound.
3 Press |
to exit. |
Flash Select Setting For PBX
Note: This setting is normally only used in Germany. In other countries, you can try changing the setting if you encounter difficulty with the default setting.
If the machine is connected to a PBX and the PBX uses the “Flash” method to connect to an outside line, you must select the appropriate Flash Select setting depending on whether your PBX line is a normal telephone line or a highspeed line.
1 Press F , |
, and |
. |
2Press  (SHORT TIME) if your PBX line is a normal telephone line.
Press  (LONG TIME) if your PBX line is a high-speed line.
3 Press |
to exit. |
Language Select Setting
This setting is used to change the language used in the display, reports and lists.
1 Press F , |
, and |
. |
2Press  to select English. Press
  to select Polish. Press
  to select Turkish. Press
  to select Romanian.
3 Press |
to exit. |
16

2. Sending Faxes
Transmittable Documents
Minimum document size/weight
148 x 140 mm
52 g/m2
Maximum document size/weight:
Loading up to 10 sheets at once:
A4 (210 x 297 mm)
80 g/m2
Loading 1 sheet at a time:
210 x 356 mm
157 g/m2
The maximum scanning width is
205 mm, and the top and bottom 5 mm of a document cannot be scanned.
Other restrictions
♦The scanner cannot recognise yellow, greenish yellow, or light blue ink.
♦Remove all clips, staples, and pins before loading documents in the feeder (these will damage the machine).
♦Ink, glue, or correcting fluid on a document must be dry before scanning.
Transmittable Documents
♦ Documents which are taped, torn, |
|
|
|
smaller than the minimum size, |
|
|
|
carbon backed, easily smudged, or |
Sending |
Faxes |
|
have a slick, coated surface should be |
|||
|
|
||
photocopied, and the copy loaded in |
|
|
|
the feeder. |
|
|
|
♦ Documents that are curled or have a |
2. |
|
|
|
|
||
wave-like pattern must be flattened. |
|
|
Loading the Document
Up to 10 A4-size sheets can be placed in the feeder at once. The sheets will feed automatically starting from the bottom sheet.
♦To send or copy more than the maximum number of sheets, place the additional sheets gently in the feeder just before the last sheet is scanned. Do not force the sheets in, as this may cause double-feeding or jamming.
♦For large or thick sheets that must be loaded one at a time, insert each sheet into the feeder as the previous sheet is being scanned. Insert gently to avoid double-feeding.
1Adjust the document guides to the width of your document.
17
Resolution and Contrast
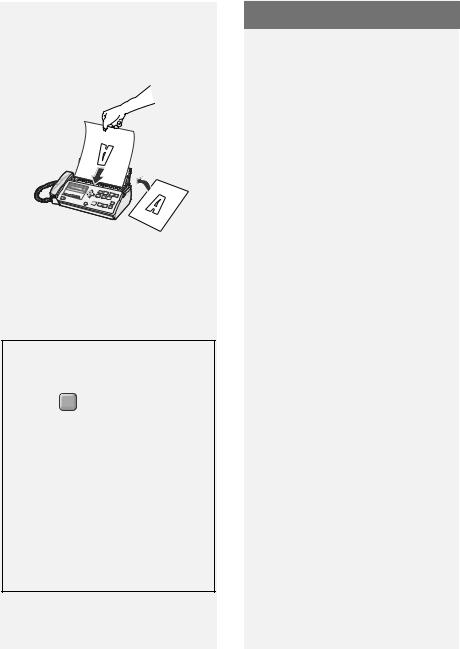
2Place the document face down with the top edge going in first, and insert it all the way into the feeder. Make sure that the roller draws the document in.


• Display: [READY TO SEND].
3Adjust the resolution and/or contrast settings (p. 18), and then dial the receiving machine (p. 19).
Removing a document from the feeder
1 Press F then  . The document will feed out.
2If the document is jammed and does not feed out, open the cover and remove the document (see
Clearing a jammed document on page 57).
•Caution: Attempting to remove a jammed document without opening the cover may damage the feeder mechanism.
Resolution and Contrast
You can adjust the resolution and contrast before sending a document.
♦The default resolution setting is STANDARD. The default contrast setting is AUTO.
♦Adjust the settings each time you don't want to use the default settings.
Note: The resolution and contrast settings are only effective for sending; not for receiving.
Resolution settings
STANDARD |
Use STANDARD for |
|
ordinary documents. |
|
This provides the fastest |
|
transmission. |
FINE |
Use FINE for documents |
|
containing small letters |
|
or fine drawings. |
SUPER FINE Use SUPER FINE for documents containing very small letters or very fine drawings.
HALF TONE Use HALF TONE for photographs and illustrations. The original will be reproduced in 64 shades of gray.
18
Contrast settings
AUTO |
Use AUTO for normal |
|
documents. |
DARK |
Use DARK for faint |
|
documents. |
1Load the document(s).
•The resolution/contrast cannot be adjusted unless the document is loaded.
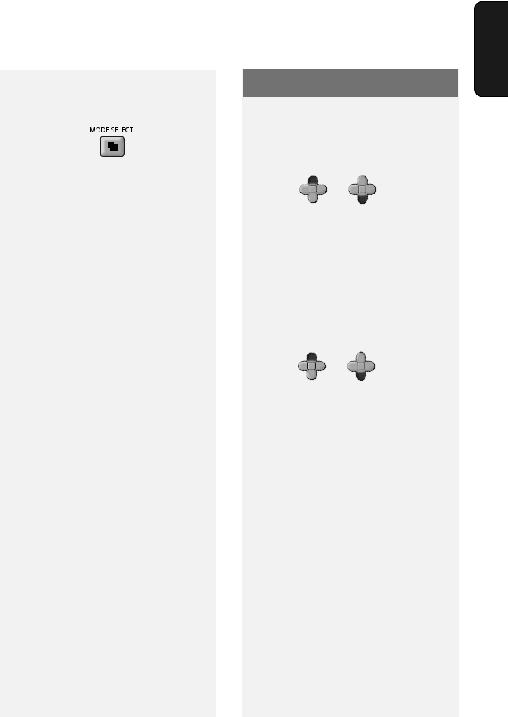
2 Press |
one or more times |
until the desired resolution and contrast settings appear in the display.
•The first time you move through the list of resolution settings, the contrast setting AUTO will appear next to each resolution setting. The second time you move through the list, the contrast setting DARK will appear.
Note: In order to transmit in SUPER FINE resolution, the receiving machine must also have that resolution. If not, your machine will automatically step down to FINE.
Sending a Fax: Normal Dialling
Sending a Fax: Normal Dialling
With Normal Dialling, you pick up the
handset (or press  ) and dial by pressing the number keys.
♦If a person answers, you can talk with them through the handset before sending the fax. (If you pressed
 , you must pick up the handset to talk.)
♦ Normal Dialling allows you to listen to the line and make sure the other fax machine is responding.
1 Load the document(s).
• If desired, press |
to set the |
resolution and/or contrast. |
|
2Pick up the handset or press  . Listen for the dial tone.
3Dial the fax number of the receiving machine by pressing the number keys.
•If you are on a Flash-type PBX and
are dialing out, press R , wait for
the connection to the outside line, and then dial the number.
4Wait for the connection. Depending on the setting of the receiving machine, you will either hear a fax tone or the other person will answer.
Sending |
Faxes |
2. |
|
19

Storing Numbers
•If the other person answers, ask them to press their Start key (if you
pressed  , pick up the handset to speak with them). This causes the receiving machine to issue a fax tone.
5When you hear the fax tone, press
 START . Replace the handset.
•If the transmission is completed successfully, the machine will beep once.
•If an error occurs, the machine will beep three times.
Note: If the transmission is unsuccessful and the display shows [DOCUMENT JAMMED], remove the document as explained on page 57.
Storing Numbers
Storing fax and phone numbers in the phonebook
You can store fax and phone numbers in the machine’s phonebook for automatic dialling. Up to 100 numbers can be stored.
Follow the steps below to store a fax or phone number.
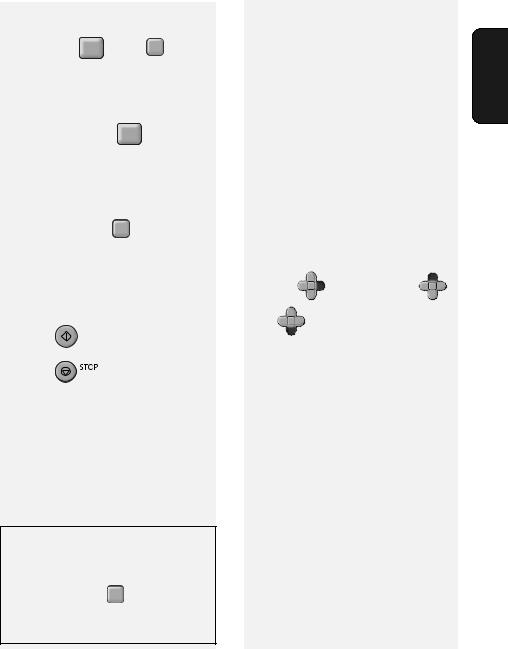
1 Press F , |
. |
2Enter the name of the destination or other party by pressing number keys for each letter as shown in the chart on page 7. Up to 20 characters can be entered.
•To backspace and clear a mistake,
press  on the UX-P710, or
C
on the UX-A760.
3Press  START .
4Enter the fax number with the number keys (max. of 32 digits). (Note: A space cannot be entered.)
•If a pause is required between any of
the digits, press F . The pause appears as a hyphen. Several pauses can be entered in a row.
20
•If you are on a Flash-type PBX and are storing a number for an outside
line, press R , press F to insert
a pause, and then enter the fax or voice number. (When you dial the auto-dial number, you will automatically dial out without the
need to press the R key.)
• If you are storing a fax/phone number for an outside line and are on a PBX that requires dialing a number to dial out, enter the number
to dial out, press F to insert a pause, and then enter the fax/phone number. (When you dial the auto-dial number, you will automatically dial out without the need to dial the number for an outside line.)
5 |
Press |
START . |
6 |
Press |
to exit. |
Printing the TEL # LIST
To print a list showing the fax and phone numbers stored in the
phonebook, press F ,  ,
,  , and then
  to select YES.
Storing Numbers
Assigning a number in the phonebook to a Rapid Key
You can assign your most frequently |
Sending |
Faxes |
|
dialled numbers to the Rapid Keys. |
|||
|
|
||
Three Rapid Keys are available. |
|
|
|
♦ When a number is assigned to a |
2. |
|
|
|
|
||
Rapid Key, it can be dialled by simply |
|
|
|
pressing the Rapid Key. |
|
|
|
♦ To assign a number to a Rapid Key, |
|
|
|
the number must first be stored in the |
|
|
|
phonebook (page 20). |
|
|
Follow the steps below to assign a number in the phonebook to a Rapid Key.
1 Press |
F |
, and then press |
F |
|
|
|
|||
or |
F |
until the number you wish |
||
|
||||
to assign to a Rapid Key appears.
2Press the Rapid Key that you wish to assign the number to. Example: 
Changing the number assigned to a Rapid Key: To change the number assigned to a Rapid Key, simply repeat the steps above to assign the new number to the Rapid Key. The new number will replace the old number.
Clearing a Rapid Key: To clear a number from a Rapid Key, hold down the Rapid Key until [CLEARED] appears in the display.
21
Storing Numbers
Editing numbers in the phonebook
To make changes to a number stored in the phonebook, follow these steps:
1 |
Press |
F |
, press |
F |
or |
F |
|
|
|
||||
|
until the number you wish to edit |
|||||
|
appears, and press |
F . |
|
|
||
2Make the desired changes to the name.
• To move the cursor, press |
F |
or |
|
F |
. To backspace and clear a |
mistake, press  on the UX-
C
P710, or  on the UX-A760.
To enter letters, see the chart on page 7.
•If you do not wish to change the name, go directly to Step 3.
3 Press  START .
4Make the desired changes to the number.
•To backspace and clear a mistake,
press  on the UX-P710, or
C
 on the UX-A760.
•If you do not wish to change the number, go directly to Step 5.
5 Press  START .
6 Press |
to exit. |
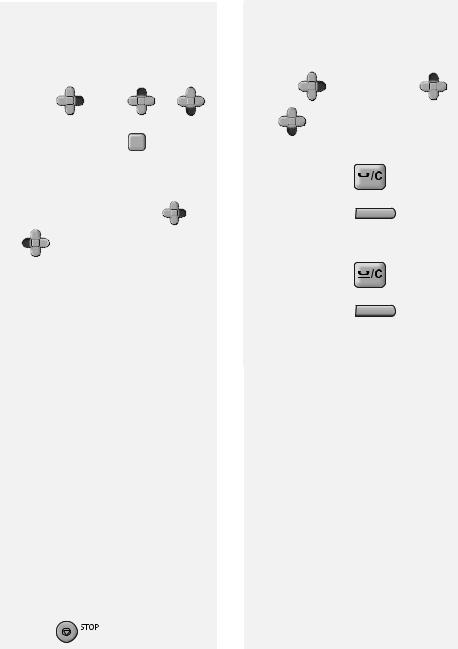
Deleting numbers from the phonebook
Deleting a single number:
1 Press |
F |
, and then press |
F |
|
|
|
|||
or |
F |
until the number you wish |
||
|
||||
to delete appears. |
|
|
|
2 UX-P710: Press |
|
C |
twice. |
|
|||
UX-A760: Press |
|
twice. |
|
|
|
Deleting all numbers:
1 UX-P710: Press |
|
. |
UX-A760: Press |
C |
. |
|
2 Press  ,
,  .
.
22
Sending a Fax: Auto Dialling
Using an auto-dial number to send a fax
1 Load the document(s).
If desired, press |
to set the |
resolution and/or contrast.
2Dial the fax number using one of the methods below:
•Rapid Key Dialling: If the number is assigned to a Rapid Key, press the Rapid Key.
•Using the phonebook: Press
F |
, and then |
F |
or |
F |
until |
|
|
|
the name or number of the other party appears in the display (names will appear in alphabetical order). To go directly to names that begin with a particular letter, press the appropriate number key one or more times to enter that letter (see page 7).
When the desired destination appears, press  START .
•Direct keypad dialling: Press the number keys to enter a full fax number (to insert a pause between
digits, press F ). When finished, press  START .
3Dialling and transmission will take place automatically.
Sending a Fax: Auto Dialling
• To cancel transmission, press |
|
|
|
. |
Sending |
Faxes |
|
• If the transmission is completed |
|||
|
|
||
successfully, the machine will beep |
|
|
|
once. |
2. |
|
|
• If an error occurs, the machine will |
|
||
|
|
||
beep three times. |
|
|
Redial
The machine retains the most recent 20 numbers that have been dialled. You can automatically redial any of these numbers.
1 Load the document(s).
• If desired, press |
to set the |
resolution and/or contrast. |
|
2 Press F .
Display: [<REDIAL>]
3 |
If needed, press |
F |
or |
F |
|
|
until the desired number appears in the display.
4 Press  START . Dialling begins.
• Make sure the desired number
appears before pressing  START , or
redialling will not take place (sometimes it takes several seconds for the number to appear).
23
Sending a Fax: Auto Dialling
Note: If the transmission is unsuccessful and [DOCUMENT JAMMED] appears in the display, remove the document as explained on page 18.
Deleting redial numbers
Deleting a single redial number:
1 Press |
F |
, and then press |
F |
|
or |
F |
until the number you wish |
||
|
||||
to delete appears. |
|
|
|
2 UX-P710: Press |
|
C |
twice. |
|
|||
UX-A760: Press |
|
twice. |
|
|
|
Deleting all redial numbers:
1 UX-P710: Press |
|
. |
UX-A760: Press |
C |
. |
|
2 Press  ,
,  .
.
Storing a redial number in the phonebook
1 |
Press |
F |
, and then |
F |
or |
|
F |
as needed until the number |
|||
|
|
||||
|
you wish to store appears. |
|
|||
2 |
Press |
F . |
|
|
|
3Enter a name for the number (see page 7).
4Press  START .
5The number will appear. Press
 START again to store it.
Automatic redialling
If you use the phonebook or a Rapid Key to send a fax and the line is busy, the machine will automatically make three redial attempts at intervals of five minutes.
During this time, [RECALLING] will appear in the display, followed by the attempt number. You will not be able to dial any other locations while the message appears.
♦ To clear the message and stop
automatic redialling, press |
. |
♦Under certain conditions, automatic redialling may stop before three redialling attempts are made.
Dial Tone Check
This setting determines whether or not the machine checks for the presence of a dial on the line before automatic dialing.
Initial setting: NO
Note: If you set this setting to YES and find that the machine is unable to dial, change the setting to NO.
1 Press F , |
, |
, and |
. |
24
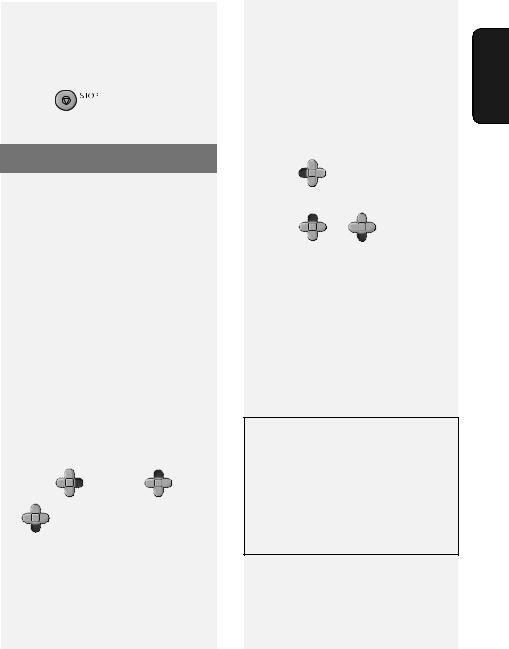
2Press  (YES) to have the machine check for a dial tone.
Press  (NO) to have the machine not check for a dial tone.
3 Press |
to exit. |
Making Phone Calls
Dialing using the keypad
1Lift the machine’s handset.
2Press the number keys to dial the phone number.
Dialling using a Rapid Key
1Lift the machine’s handset.
2Press the Rapid Key to which the number is assigned.
•You can also press the Rapid Key first (the speaker will turn on and dialing will begin), and then pick up the handset.
Dialling using the phonebook
1 Press |
F |
, and then |
F |
or |
|
|
F |
until the name or number of |
|
the other party appears in the display (names will appear in alphabetical order).
Making Phone Calls
|
To go directly to names that begin |
|
||||
|
with a particular letter, press the |
|
||||
2 |
appropriate number key one or |
Sending Faxes |
||||
Lift the machine’s handset. |
||||||
|
more times to enter that letter (see |
|
||||
|
page 7). |
|
|
|
|
|
|
|
|
|
|
|
2. |
Redialling |
|
|
|
|
|
|
1 |
Press |
F |
. |
|
|
|
|
Display: [<REDIAL>] |
|
|
|||
2 |
Press |
F |
or |
F |
until the |
|
|
|
|
||||
desired number appears in the display.
3Lift the machine’s handset.
•Make sure the desired number appears before lifting the handset, or redialling will not take place (sometimes it takes several seconds for the number to appear).
Communication time display
While a fax is being sent or received, and while you are using the handset for a phone call, the amount of time the line has been in use will appear in the display. This can be used as a general guideline to the length of the call.
25
Using TEL/FAX (T/F) Mode
3. Receiving Faxes
Using TEL/FAX (T/F) Mode
To select TEL/FAX mode, press
(with no document in the
feeder) until [T/F] appears in the display.
When the reception mode is set to TEL/ FAX, the machine automatically answers all calls on 2 rings (the number of rings can be changed by changing the Number of Rings setting on page 27). After answering, the machine monitors the line for about five seconds to see if a fax tone is being sent.
♦If the machine detects a fax tone (this means that the call is an automatically dialed fax), it will automatically receive the fax.
♦If your machine doesn't detect a fax tone (this means that the call is a voice call or manually dialed fax), it will make a special ringing sound (called “pseudo ringing”) for 15 seconds to alert you to pick up the machine’s handset. If you don't answer within this time, the machine will send a fax tone to the other machine to allow the calling party to send a fax manually.
Note: Only the machine will make the special ringing sound. Another phone connected to the same line will not ring after the machine initially answers the call.
Silent fax reception
To have the machine receive faxes silently and signal voice calls only by pseudo ringing (not regular ringing), set the reception mode to TEL/FAX and turn the ringer off as explained on page 15.
Pseudo ring duration
If desired, you can change the duration of pseudo ringing in Tel/Fax mode.
Initial setting: 15 seconds
1 Press F , |
, |
, and |
. |
2Press a number to select the desired duration:
 15 seconds
 30 seconds
 60 seconds
 120 seconds
3 Press |
to exit. |
26
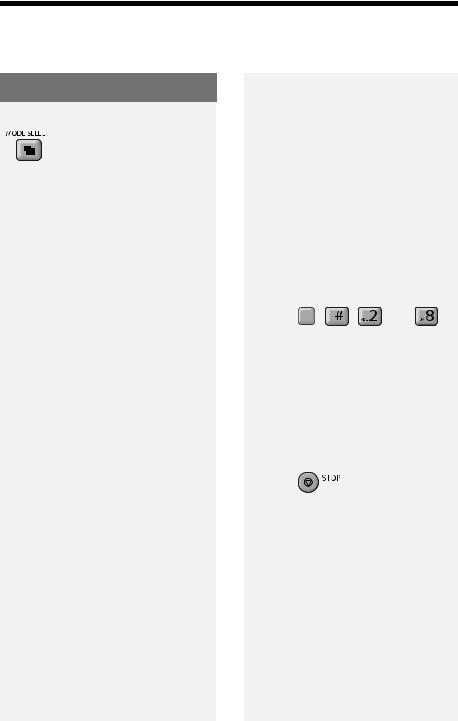
Using FAX Mode
To select FAX mode, press
(with no document in the feeder) until [FAX] appears in the display.
In FAX mode, the machine automatically answers all calls on two rings and receives incoming faxes.
♦If you pick up a phone connected to the same line before the machine answers, you can talk to the other party and receive a fax as explained in
Using TEL Mode on page 27.
Number of Rings setting
To change the number of rings on which the machine answers calls in TEL/FAX mode and FAX mode, follow the steps below. Any number from 2 to 5 can be selected.
Initial setting: 2 rings
1 Press F , |
, |
, and |
. |
2Enter the desired number of rings (any number from 2 to 5). Example:  (4 rings)
3 Press |
to exit. |
Using FAX Mode
Using TEL Mode
To select TEL mode, press
(with no document in the feeder) until
[TEL] appears in the display.
In TEL mode, you must answer all calls (even faxes) by picking up the machine’s handset or an extension phone connected to the same line.
Important: If a document is loaded in the machine’s feeder, remove it before performing either procedure below.
Answering with the machine’s handset
1When the machine rings, pick up the handset.
2If you hear a fax tone, wait until the display shows [RECEIVING] and then replace the handset.
•If [RECEIVING] does not appear,
press  START to begin reception. (This is necessary if you have set the Fax Signal Receive setting to NO (page 29).)
3If the other party first speaks with you and then wants to send a fax,
press  START after speaking. (Press before the sender presses their Start key.)
•When [RECEIVING] appears in the display, hang up.
Receiving |
Faxes |
3. |
|
27
Using TEL Mode
Answering a call on a phone connected to the same line
Note: To ensure correct operation of this feature, the Fax Remote Reception setting must be set to YES (see page 28).
1Answer the phone when it rings.
2If you hear a soft fax tone, wait until the machine responds (the phone will go dead), then hang up.
3If the machine doesn't respond, or if the other party first talks to you and then wants to send a fax, press
 once and
  twice on the phone (only on a tone dial phone). This signals the machine to begin reception. Hang up.
(You can also start fax reception by setting down the phone without hanging up, walking over to the
machine, and pressing  START .)
•Step 3 is necessary if you have set the Fax Signal Receive setting to NO (page 29).
Putting a call on hold
To put the other party on hold during a
phone call, press  (
( on the
UX-A760). When this is done, they cannot hear you. You can put the handset back in the cradle without breaking the connection. When you are ready to speak with the other party again, pick up the handset. If you did not put the handset back in the cradle,
press  again to resume conversation.
Fax Remote Reception setting
If you want ensure that the machine is always able to start fax reception when
you press  ,
,  ,
,  on an extension phone, set this function to YES (this keeps the machine from entering sleep mode).
Initial setting: NO
1 Press F , |
, |
, and |
. |
2Press  (YES) to turn on fax remote reception (disable sleep mode).
Press  (NO) to turn off fax remote reception.
3 Press |
to exit. |
28
 Loading...