


R-242M
MICROWAVE OVEN
OPERATION MANUAL WITH COOKBOOK
800 W (IEC 705)


 CONTENTS


OVEN AND ACCESSORIES . . . . . . . . . . . . . . . . . . . . . . . . . . . . . . . . . .2
CONTROL PANEL . . . . . . . . . . . . . . . . . . . . . . . . . . . . . . . . . . . . . . . . .3
Important
IMPORTANT SAFETY INSTRUCTIONS . . . . . . . . . . . . . . . . . . . . . . . . . . .4 INSTALLATION . . . . . . . . . . . . . . . . . . . . . . . . . . . . . . . . . . . . . . . . .4 - 5 BEFORE OPERATION . . . . . . . . . . . . . . . . . . . . . . . . . . . . . . . . . . . . . . .5 SETTING THE CLOCK . . . . . . . . . . . . . . . . . . . . . . . . . . . . . . . . . . . . . .6 MAFF HEATING CATEGORY . . . . . . . . . . . . . . . . . . . . . . . . . . . . . . . . .7 MICROWAVE POWER LEVELS . . . . . . . . . . . . . . . . . . . . . . . . . . . . . . . .7 MICROWAVING . . . . . . . . . . . . . . . . . . . . . . . . . . . . . . . . . . . . . . . . . 8 HOW TO OPERATE THE OVEN . . . . . . . . . . . . . . . . . . . . . . . . . . . . . . .8 MULTIPLE SEQUENCE COOKING . . . . . . . . . . . . . . . . . . . . . . . . . . . . . .9 AUTO MINUTE . . . . . . . . . . . . . . . . . . . . . . . . . . . . . . . . . . . . . . . . . . .9 AUTO COOK /DEFROST . . . . . . . . . . . . . . . . . . . . . . . . . . . . . . . . . . .10 AUTO COOK/DEFROST CHART . . . . . . . . . . . . . . . . . . . . . . . . . ..10 - 11 COOKING ADVICE . . . . . . . . . . . . . . . . . . . . . . . . . . . . . . . . . . . . . . 11 SUITABLE COOKWARE . . . . . . . . . . . . . . . . . . . . . . . . . . . . . . . . .12 - 13 FOOD HANDLING AND PREPARATION . . . . . . . . . . . . . . . . . . . . .13 - 14 ADVICE FOR DEFROSTING . . . . . . . . . . . . . . . . . . . . . . . . . . . . . . . . .15 ADVICE FOR REHEATING . . . . . . . . . . . . . . . . . . . . . . . . . . . . . . . . . .16 CLEANING & MAINTENANCE . . . . . . . . . . . . . . . . . . . . . . . . . . . . . . .17 TROUBLESHOOTING . . . . . . . . . . . . . . . . . . . . . . . . . . . . . . . . . .17 - 18 TO REPLACE THE MAINS PLUG . . . . . . . . . . . . . . . . . . . . . . . . . . . . . .18 COOKBOOK . . . . . . . . . . . . . . . . . . . . . . . . . . . . . . . . . . . . . . . . . . .19 CALLING FOR SERVICE . . . . . . . . . . . . . . . . . . . . . . . . . . . . . . . . . . . .33 GUARANTEE . . . . . . . . . . . . . . . . . . . . . . . . . . . . . . . . . . . . . . . . . . .33 SPECIFICATIONS . . . . . . . . . . . . . . . . . . . . . . . . . . . . . . . . . .Back Cover
OPERATION MANUAL
This operation manual contains important information which you should read carefully before using your microwave oven.
IMPORTANT: There may be a serious risk to health if this operation manual is not followed or if the oven is modified so that it operates with the door open.
1


 OVEN
OVEN AND ACCESSORIES


1
2
3
8 |
7 |
6 |
5 |
4 |
1Control panel
2Oven lamp
3 |
Door opening handle |
|
4 |
Waveguide cover |
|
5 |
Seal packing |
|
6 |
Oven cavity |
|
7 |
Door seals and sealing surfaces |
|
8 |
Door latches |
11 |
9 |
Ventilation openings |
10Outer cabinet
11Power cord
ACCESSORIES:
Check to make sure the following accessories are provided:
(12) Turntable (13) Roller stay (14) Seal Packing Place the roller stay in the seal packing on the floor of the cavity.
Then place the turntable on to the roller stay.
To avoid damage to the turntable, when removing dishes/containers from the microwave oven, please ensure that you lift them clear of the turntable rim. NOTE: When you order accessories, please mention two details: part name and model name to your dealer or SHARP authorised service agent.
9
10
12
13
14
2


 CONTROL PANEL


1
2
4
5
6
3
7
8
1.DIGITAL DISPLAY
2.AUTO COOK Menu
3.AUTO DEFROST Menu
4.AUTO COOK/AUTO DEFROST Pad
5.POWER LEVEL/WEIGHT Pad
6.STOP/CLEAR Pad
7.START/AUTO MINUTE Pad
8.TIME Pads
3


 IMPORTANT SAFETY INSTRUCTIONS


IMPORTANT: PLEASE READ CAREFULLY AND KEEP FOR FUTURE REFERENCE
Oven Use:
•The oven is for domestic food preparation only. Never operate when empty.
•Do not leave or store anything inside the oven when not in use.
•Never attempt to use the oven with the door open. It is important not to force or tamper with the door safety latches. This may result in exposure to microwave energy.
•Never operate the oven with any object caught in the door sealing surfaces, this again may cause microwave leakage.
•Do not insert fingers or objects in the holes of the door latches or air-vent openings as this may damage the oven and cause an electric shock.
•If water or food drops inside the air vent openings switch off the oven immediately, unplug it and call a Service Technician appointed by SHARP.
•Never attempt to move the oven while it is operating.
WARNING: Only allow children to use the oven without supervision when adequate instructions have been given so that the child is able to use the oven in a safe way and understands the hazards of improper use.
Do not allow anyone to play with the oven, or lean or swing on the oven door.
Pacemaker: If you have a heart pacemaker, consult your doctor or the pacemaker manufacturer prior to oven use.
Fire: If food overheats, starts to smoke or burn: Keep oven door closed; Turn oven off; Switch off the power at the socket and disconnect the plug from the socket. Failure to follow this procedure may result in fire and oven damage.
Liquids: Take care when microwaving liquids and beverages. To prevent delayed eruptive boiling of liquid and possible scalding:
Stir liquid prior to and during heating/reheating, let liquid stand in the oven at the end of cooking.


 INSTALLATION


 WARNING!
Inspect the Oven:
Check the oven carefully for damage before and regularly after installation.
•Make sure the door closes properly, that it is not misaligned or warped.
•Check the hinges and door safety latches are not broken or loose.
•Ensure the door seal and sealing surfaces are not damaged.
•Inspect the oven interior and door for dents.
Important:
If any damage is apparent, do not operate the oven in any way, until it has been repaired by a competent person.
1.Remove all packing materials including the feature sticker. Do not remove the plastic film from the inside of the oven window as this protects it from dirt.
2.Place oven on a secure, level surface, strong enough to take the oven weight, plus the heaviest item likely to be cooked in the oven.
3.Do not place the oven where heat, moisture or high humidity are generated, (for example, near or above a conventional oven) or near combustible materials (for example, curtains). Do not block or obstruct air vent openings, as obstructions may ignite due to the emission of hot air.
4.Make sure the power supply cord is undamaged (See Installation next page) and that it does not run under the oven or over any hot or sharp surfaces.
5.The socket must be readily accessible so that it can be easily unplugged in an emergency.
6.Do not use the oven outdoors.
7. The minimum height of free space necessary above the top surface of the oven is 15cm.
4


 INSTALLATION


BUILDING-IN-KIT.
This oven is not designed to be built into a kitchen unit.
IMPORTANT! ELECTRICAL CONNECTION.
•Do not allow water to come into contact with the power supply cord or plug.
•Insert the plug properly into the socket as the plug may otherwise overheat and catch fire.
•Do not connect other appliances to the same socket using an adaptor plug as it may cause the house wiring to overheat and catch fire.
•If the plug or socket is loose or the power supply cord is damaged, it must be replaced with a special cord. The exchange must be made by an authorised SHARP service agent.
A defective plug, power supply cord or socket may overheat and catch fire during operation or cause an electrical shock.
•When removing the plug from the socket always grip the plug, never the mains lead as this may damage the power supply cord and the connections inside the plug.
•This product is fitted with a re-wireable plug. Should it not be suitable for the socket outlet in your home, remove the plug and fit an appropriate type, observing the wiring code given in “To replace the mains plug” on page 18.
If you wish to remove or replace the plug supplied, ensure the plug is removed properly and not cut off. When replacing the plug please ensure that you use a BSI or ASTA approved plug to BS1363, this should be fitted with a brown coloured 13 amp fuse approved by BSI or ASTA to BS1362. If you have any doubt about electrical connection seek the help of a qualified electrician.
WARNING
THIS APPLIANCE MUST BE EARTHED
To wire an appropriate plug, follow the wiring code on page 18 “To replace the mains plug”.
.


 BEFORE OPERATION


Plug in the oven.
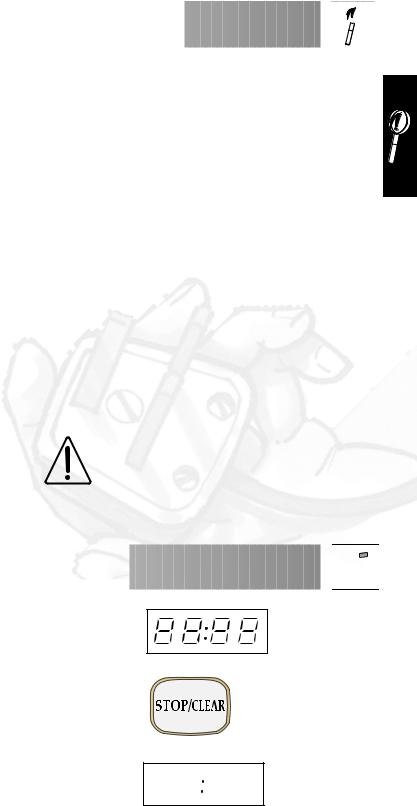
1.The oven display will flash:
2.Press the STOP/CLEAR button the display will show:
To set the clock, see page 6
1.
2.
x1
5


 SETTING
 THE CLOCK


There are two setting modes: 12 hour clock and 24 hour clock.
1. To set the 12 hour-clock, hold the POWER LEVEL /WEIGHT pad down for 3 seconds.


 will appear in the display.
2. To set the 24 hour-clock, press the POWER LEVEL /WEIGHT pad once more after Step 1, 


 will appear in the display.
Example:
To set the 24 hour clock to 23:35
x1 for 3 seconds
x1
Select the clock |
Select the |
function. |
24 hour clock. |
(12 hour clock) |
|
for 3 secs.
To change from hours to mins press the POWER LEVEL /WEIGHT pad once.
x1
x1
To set the minutes press the 10 MIN pad 3 times, then...
x3
Check the display.
NOTE:
To set the hours press the 10 MIN pad twice,
x2
the 1 MIN pad 5 times.
x5
and then the 1 MIN pad 3 times.
x3
To start the clock press the POWER LEVEL/ WEIGHT pad once.
x1
1.If you press any of the time pads too many times, continue to press until the desired time appears.
2.Press the STOP/CLEAR pad if you make a mistake during programming.
3.If the electrical power supply to your microwave oven is interrupted, the
display will intermittently show |
|
after the power is reinstated. |
If this occurs during cooking, the programme will be erased. The time of day will also be erased.
4. When you want to reset the time of day, follow the above example again.
6


 MAFF HEATING CATEGORY


800W
E
Microwave
Symbol.
Microwave output power in watts (based on international (IEC 705) standard.)
Letter representing the oven heating category.
OVEN |
Less heating time required |
||||||||
|
|
|
|
|
|
|
|
||
OUTPUT |
600 700 800 900 1000 Watts |
||||||||
POWER |
|
|
|
|
|
|
|
|
|
More heating time required |
|||||||||
|
|||||||||
|
|
|
|
|
|
|
|
|
|
|
|
|
|
|
|
||||
OVEN |
Less heating time required |
||||||||
|
|
|
|
|
|
|
|
||
OUTPUT |
A B C D E |
||||||||
CATEGORY |
|
|
|
|
|
|
|
|
|
More heating time required |
|||||||||
|
|||||||||
|
|
|
|
|
|
|
|
|
|
The heating category (a letter A to E) developed by MAFF (Ministry of Agriculture, Fisheries and Food) with microwave oven and food manufacturers indicates the ability of the oven to heat small quantities of food (up to 500g [1lb 2oz]). It does not represent the general performance of the oven.
Food packs carry cooking instructions for heating categories A to E. Follow instructions for the letter corresponding to the oven’s heating category. The higher the output power and heating category of the oven the less heating time is required. As shown opposite.


 MICROWAVE
 POWER
POWER LEVELS


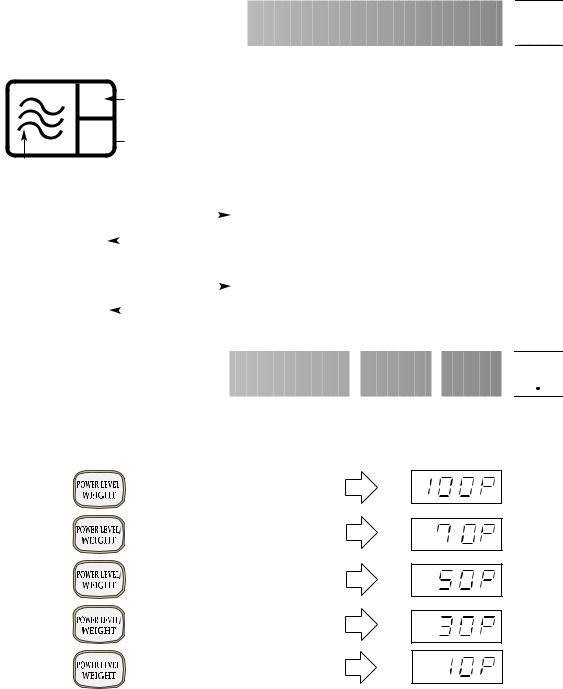
Enter required time and select the power level:
There are 5 microwave power levels (eg. cooking time is 1 minute):
x1 |
HIGH (100P) |
x2 |
MEDIUM HIGH (70P) |
x3 |
MEDIUM (50P) |
x4 |
MEDIUM LOW (30P) |
x5 LOW(10P)
IMPORTANT: The microwave power level will default to HIGH (100P) unless you press the POWER LEVEL/WEIGHT pad to the desired setting. To help you decide which power level is suitable, follow the advice given in the charts; for defrosting see page 20, for cooking see pages 21-23, for reheating see page 24.
Power level: The microwave power level is varied by the microwave energy switching on and off.
When using power levels other than HIGH (100P) you will be able to hear the microwave energy pulsing on and off as the food cooks or defrosts.
Stopping the oven: If you wish to stop the oven during cooking press the STOP/CLEAR pad or open the oven door. To start the oven, close the door and press the START/AUTO MINUTE pad. If you wish to cancel the cooking programme, press the
STOP/CLEAR pad twice.
7


 MICROWAVING


Introduction:
Water, sugar and fat in food absorbs microwaves and causes them to vibrate. This creates heat by friction, in the same way your hands get warm when you rub them together.
Outer areas of food are heated by microwave energy, and remaining portions by conduction. It is, therefore, important to turn, rearrange or stir food to ensure even heating. Where recommended, allow food to stand. This is not optional but necessary to ensure
thorough cooking and is particularly important for dense food, such as joints of meat.
Microwaves pass through non-metallic dishes and utensils and heat the food inside the dishes. Microwaves are reflected my metal. The oven is lined with metal and has a fine metallic mesh in the door to prevent microwave leakage. Metallic dishes are not suitable for microwaving.
(See suitable cookware, page 12-13)


 HOW
HOW TO
TO OPERATE
 THE OVEN


Opening and closing the door:
To open the oven door, press the door opening button.
Stopping the oven:
If you wish to stop the oven during cooking press STOP/CLEAR or open the oven door. To start the oven, close the door and press START/AUTO MINUTE. If you wish to cancel the cooking programme, press STOP/CLEAR twice.
Prepare and place food in a suitable container on to the turntable or place directly onto the turntable. Close the door.
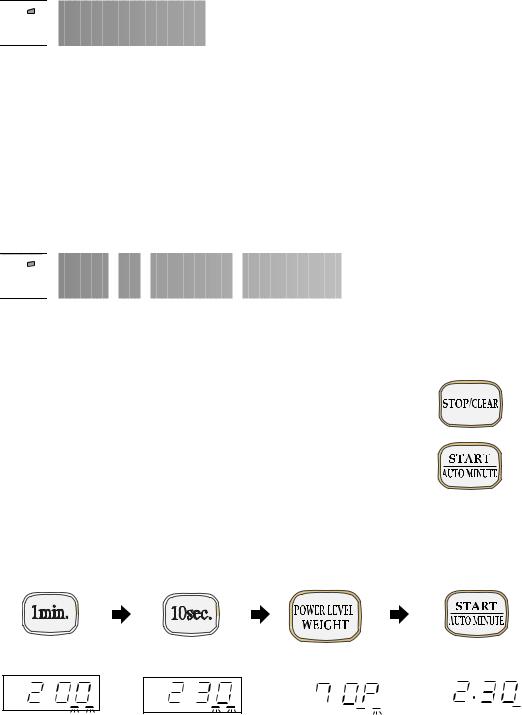
Example:
To cook for 2 minutes and 30 seconds on 70P microwave power.
To select the time |
Press the 10 sec pad |
press the 1min |
3 times. |
pad twice. |
|
x2 |
x3 |
Display.
STIR TURN KG PCS MICRO COOK |
STIR TURN KG PCS MICRO COOK |
NOTE:
1.When the door is opened during the cooking process, the cooking time on the digital display stops automatically. The cooking time starts to count down again when the door is closed and the START/AUTO MINUTE pad is pressed .
To input the Power |
|
Level press the |
Press the |
POWER |
|
LEVEL/WEIGHT |
START/AUTO |
pad twice. |
MINUTE pad once. |
x2 |
|
x1 |
|
|
|
|
|
|
|
|
|
STIR TURN KG PCS MICRO COOK |
STIR TURN KG PCS MICRO COOK |
The display will count down through the set heating time.
2.If you wish to know the power level during cooking, press the POWER LEVEL/WEIGHT pad. As long as your finger is touching this pad, the power level will be displayed
8


 MULTIPLE SEQUENCE COOKING


A maximum of 3 stages are possible, combining manual or automatic programmes in a sequence.
Example: |
|
|
|
|
To cook for: 5 minutes on 100P power |
(Stage 1) followed by:- |
|
||
16 minutes on 30P power |
(Stage 2) |
|
|
|
STAGE 1 |
To input the power |
STAGE 2 |
Then press the 1 MIN |
|
To input the time, press |
level press the |
|
To input the time |
|
the 1 MIN pad 5 |
POWER LEVEL/ |
press the 10 MIN |
pad 6 times. |
|
times. |
WEIGHT pad once. |
pad once. |
|
|
x5 |
x1 |
x1 |
|
x6 |
||
Display. |
|
|
|
|
|
|
|
|
|
|
|
|
|
|
|
|
|
|
|
|
STIR TURN KG PCS MICRO COOK |
STIR TURN KG PCS MICRO COOK |
STIR TURN KG PCS MICRO COOK |
|
STIR TURN KG PCS MICRO COOK |
||
To input the power level |
|
|
|
|
|
|
press the POWER |
Press the START/AUTO |
|
|
|
||
LEVEL/ WEIGHT pad |
MINUTE pad once to |
|
|
|
||
4 times. |
start. |
|
|
|
||
x4 |
|
x1 |
||
Display. |
|
|
||
|
|
|
|
|
|
|
|
|
|
STIR TURN KG PCS MICRO COOK |
|
|
||
STIR TURN KG |
PCS MICRO COOK |
|||
|
|
|||
The oven will begin to cook for 5 minutes at 100P, and then 16 minutes at 30P.
NOTE:
If 100P is selected as the final power level, it is not necessary to press POWER LEVEL/WEIGHT pad.


 AUTO
AUTO MINUTE


AUTO MINUTE enables you:
•To cook on 100P microwave power in multiples of 1 minute (direct start).
•To extend cooking time in multiples of 1 minute.
Example:
To cook on 100P for 2 minutes, press the START/AUTO MINUTE pad twice
NOTE: The AUTO MINUTE function for direct start can only be used within 1 minute after cooking completion, closing the door or pressing the STOP/CLEAR key. The cooking time may be extended to a maximum of 99 minutes.
9
 Loading...