


 Wireless network setup
Machines without a display screen
Connecting in PBC mode
1Press and hold the  (WPS) button on the control panel for about 2 - 4 seconds until the status LED blinks quickly.
The machine starts connecting to the wireless network. The LED blinks slowly for up to two minutes until you press the PBC button on the access point (or wireless router).
2Press the WPS (PBC) button on the access point (or wireless router).
aThe light blinks fast on the WPS LED. The machine is connecting to the access point (or wireless router).
bWhen the machine is successfully connected to the wireless network, the WPS LED light stays on.
3You need to enter the eight-digit PIN within two minutes on the computer that is connected to the access point (or wireless router).
The LED blinks slowly for up to two minutes until you enter the eightdigit PIN.
The WPS LED blinks in the order below:
aThe light blinks fast on the WPS LED. The machine is connecting to the access point (or wireless router).
bWhen the machine is successfully connected to the wireless network, the WPS LED light stays on.
Re-connecting to a network
When the wireless function is off, the machine automatically tries to re-connect to the access point (or wireless router) with the previously used wireless connection settings and address.
Connecting in PIN mode
1The network configuration report, including PIN, must be printed (see "Printing a network configuration report" on page 141).
In ready mode, press and hold the  (Cancel or Stop/Clear) button on the control panel for about 5 seconds. You can find your machine’s PIN.
2Press and hold the  (WPS) button on the control panel for more than 4 seconds until the status LED stays on.
The machine starts connecting to the access point (or wireless router).
In the following cases, the machine automatically re-connects to the wireless network:
•The machine is turned off and on again.
•The access point (or wireless router) is turned off and on again.
2. Using a Network-Connected Machine 161

 Wireless network setup
Canceling the connection process
To cancel the wireless network connection when the machine is connecting to
the wireless network, press and release the  (Cancel or Stop/Clear) on the control panel. You need to wait 2 minutes to re-connect to the wireless network.
Disconnecting from a network
To disconnect the wireless network connection, press the  (WPS) button on the control panel for more than two seconds.
•When the Wi-Fi network is in idle mode: The machine is immediately disconnected from the wireless network and the WPS LED turns off.
•When the Wi-Fi network is being used: While the machine waits until the current job is finished, the light blinks fast on the WPS LED. Then, the wireless network connection is automatically disconnected and the WPS LED turns off.
15
Using the menu button
Some menus may not appear in the display depending on options or models. If so, it is not applicable to your machine (see "Menu overview" on page 33).
Before starting, you will need to know the network name (SSID) of your wireless network and the network key if it is encrypted. This information was set when the access point (or wireless router) was installed. If you do not know about your wireless environment, please ask the person who set up your network.
After completing the wireless network connection, you need to install a machine driver to print from an application (see "Installing driver over the network" on page 144).
1Press the  (Menu) button on the control panel.
2Press Network > Wireless > WLAN Settings.
2. Using a Network-Connected Machine 162

 Wireless network setup
3Press the OK to select the setup method you want.
•Wizard (recommended): In this mode, the setup is automatic. The machine will display a list of available networks from which to choose. After a network is chosen then printer will prompt for the corresponding security key.
•Custom: In this mode, users can give or edit manually their own SSID , or choose the security option in detail.
16
Setup using Windows
Shortcut to the Wireless Setting program without the CD: If you have installed the printer driver once, you can access the Wireless Setting program without the CD. From the Start menu, select Programs or All Programs > Samsung Printers > your printer driver name > Wireless Setting Program.
Access point via USB cable
Items to prepare
•Access point
•Network-connected computer
•Software CD that was provided with your machine
•A machine installed with a wireless network interface
•USB cable
Creating the infrastructure network
1Check whether the USB cable is connected to the machine.
2Turn on your computer, access point, and machine.
3Insert the supplied software CD into your CD-ROM drive.
4Select the Wireless Setting and Installation option.
5Read the License Agreement, and select I accept the terms of the License Agreement. Then, click Next.
6The software searches the wireless network.
If the software has failed to search the network, check if the USB cable is connected properly between the computer and machine, and follow the instructions in the window.
2. Using a Network-Connected Machine 163

 Wireless network setup
7 Select the method to use from the wireless set up method window.
• If wireless network set up has been set before, the Wireless Network
Setting Information window appears.
If you want to reset the wireless settings, check the check box and click
Next.
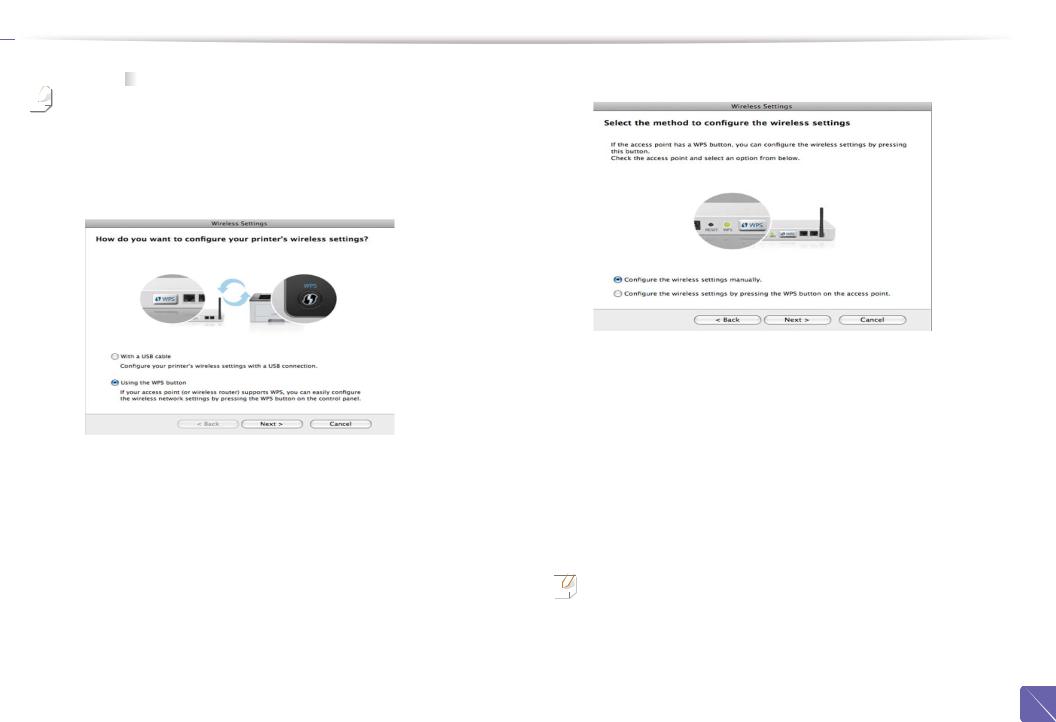
•For models that support the WPS button (without a USB cable connection), the window shown below will appear.
-With a USB Cable: Connect the USB cable and click Next, then go to step 7.
-Using the WPS button: See "Access point via WPS button (without a USB cable connection)" on page 167.
•Configure the wireless settings manually.: Go to step 8.
•Configure the wireless settings by pressing the WPS button on the access point.: Connect to the wireless network by press the WPS button on the access point (or wireless router).
-Follow the instructions in the window. When you are done configuring the wireless network settings, go to step 11.
8After searching, the window shows the wireless network devices. Select the name (SSID) of the access point you are using and click Next.
2. Using a Network-Connected Machine 164

 Wireless network setup
If you cannot find the network name you want to choose, or if you want to set the wireless configuration manually, click Advanced Setting.
•Enter the wireless Network Name: Enter the SSID of the access point (SSID is case-sensitive).
•Operation Mode: Select Infrastructure.
•Authentication: Select an authentication type.
Open System: Authentication is not used, and encryption may or may not be used, depending on the need for data security.
Shared Key: Authentication is used. A device that has a proper WEP key can access the network.
WPA Personal or WPA2 Personal: Select this option to authenticate the print server based on a WPA Pre-Shared Key. This uses a shared secret key (generally called Pre Shared Key pass phrase), which is manually configured on the access point and each of its clients.
•Encryption: Select the encryption (None, WEP64, WEP128, TKIP, AES, TKIP AES).
•Network Key: Enter the encryption network key value.
•Confirm Network Key: Confirm the encryption network key value.
•WEP Key Index: If you are using WEP Encryption, select the appropriate
WEP Key Index.
The wireless network security window appears when the access point has security settings.
The wireless network security window appears. The window may differ according to its security mode: WEP or WPA.
•WEP
Select Open System or Shared Key for authentication and enter the WEP security key. Click Next.
WEP (Wired Equivalent Privacy) is a security protocol preventing unauthorized access to your wireless network. WEP encrypts the data portion of each packet exchanged on a wireless network using a 64-bit or 128-bit WEP encryption key.
•WPA
Enter the WPA shared key and click Next.
WPA authorizes and identifies users based on a secret key that changes automatically at regular intervals. WPA also uses TKIP (Temporal Key Integrity Protocol) and AES (Advanced Encryption Standard) for data encryption.
2. Using a Network-Connected Machine 165
 Wireless network setup
9The window shows the wireless network settings and checks if the settings are correct. Click Next.
•For the DHCP method
If the IP address assignment method is DHCP, check if DHCP is shown in the window. If it shows Static, click Change TCP/IP to change the assignment method to DHCP.
•For the Static method
If the IP address assignment method is Static, check if Static is shown in the window. If it shows DHCP, click Change TCP/IP to enter the IP address and other network configuration values for the machine.
Before entering the IP address for the machine, you must know the computer’s network configuration information. If the computer is set to DHCP, you must contact the network administrator to get the static IP address.
For example,
If the computer’s network information is as shown below,
-IP address: 169.254.133.42
-Subnet Mask: 255.255.0.0
Then, the machine’s network information should be as follows:
-IP address: 169.254.133.43
-Subnet Mask: 255.255.0.0 (Use the computer’s subnet mask.)
-Gateway: 169.254.133.1
10 |
When the window that tells you that the network cable connection is |
|
confirmed appears, disconnect the network cable and click Next. |
|
If the network cable is connected, it may have trouble finding the |
|
machine when configuring the wireless network. |
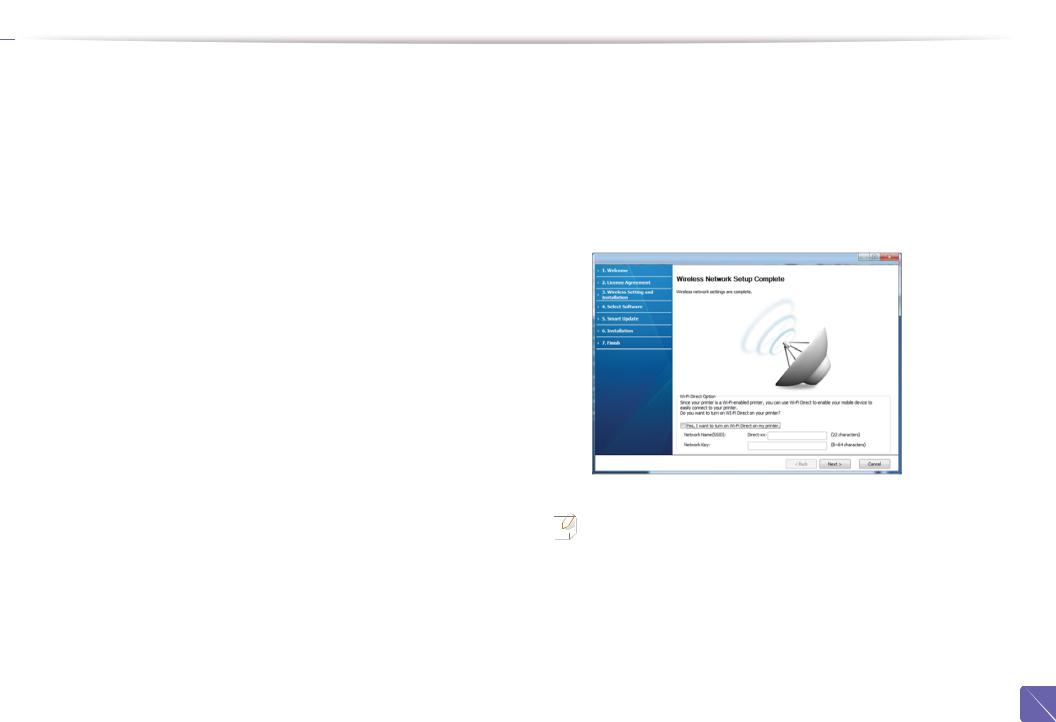
11 |
Wireless network setting is completed. To print from a Wi-Fi Direct |
|
supported mobile device, set the Wi-Fi Direct Option (see "Setting up Wi- |
Fi Direct" on page 183).
Wi-Fi Direct Option:
•Wi-Fi Direct option appears on the screen only if your printer supports this feature.
•Can start to build Wi-Fi Direct by using Samsung Easy Printer Manager (see "Setting up Wi-Fi Direct" on page 183).
2. Using a Network-Connected Machine 166

 Wireless network setup
•Network Name(SSID): The default Network Name is the model name and the maximum length is 22 characters (not including "Direct-xx-").
•Network Key is the numeric string, and the size is 8 ~ 64 characters.
12 |
When the wireless network set up is completed, disconnect the USB |
|
cable between the computer and machine. Click Next. |
13 |
Click Next when the Confirm Printer Connection window appears. |
14 |
Select the components to be installed. Click Next. |
15 |
After selecting the components, you can also change the machine name, |
|
set the machine to be shared on the network, set the machine as the |
|
default machine, and change the port name of each machine. Click Next. |
16 |
After installation is finished, a window asking you to print a test page |
|
appears. If you want to print a test page, click Print a test page. |
|
Otherwise, just click Next and go to step 18. |
17 |
If the test page prints out correctly, click Yes. |
|
If not, click No to reprint it. |
18 |
If you want to register your machine with the Samusng web site and |
|
receive useful information, click On-line Registration. If not, click |
Finish.
Access point via WPS button (without a USB cable connection)
For models that have a WPS button, you can set the wireless network using the WPS button (without a USB connection) and access point (or a router) WPS button.
Items to prepare
•Access point (or wireless router)
•Network-connected computer
•Software CD that was provided with your machine
•The machine installed with a wireless network interface
Creating the infrastructure network
1Turn on your computer, access point, and machine.
2Insert the supplied software CD into your CD-ROM drive.
3Select the Wireless Setting and Installation option.
4Read the License Agreement, and select I accept the terms of the License Agreement. Then, click Next.
2. Using a Network-Connected Machine 167

 Wireless network setup
5 Select Using the WPS button and click Next. |
7 Follow the instructions on the window to set up the wireless network. |
|
|
• For models with a display screen, follow the steps below. |
|
|
a Press and hold the |
(WPS) button on the control panel for |
|
about 2-4 seconds. |
|
The machine waits up to 2 minutes for the WPS button on the access point (or a router) to be pressed.
b Press the WPS (PBC) button on the access point (or wireless router).
The messages are displayed on the display screen in the order below:
•For models that support WPS button, the above window appears.
•If your machine is connected with a USB cable, the above window does not appear. Disconnect the USB cable if you want to set up the wireless network using the WPS button.
•If you want to set up the wireless network using the USB cable, refer to "Access point via USB cable" on page 163.
-Connecting: The machine is connecting to the access point (or wireless router).
-Connected: When the machine is successfully connected to the wireless network, the WPS LED light stays on.
6The next window asks you to check if your access point (or wireless router) supports WPS or not.
If the access point (or wireless router) has a WPS button, select Yes and click Next.
2. Using a Network-Connected Machine 168

 Wireless network setup
-SSID Type: After completing the wireless network connection process, the AP’s SSID information appears on the display.
•For models without a display screen, follow the steps below.
aPress and hold the  (WPS) button on the control panel for about 2 - 4 seconds until the status LED blinks quickly.
The machine starts connecting to the wireless network. The LED blinks slowly for up to two minutes until you press the PBC button on the access point (or wireless router).
bPress the WPS (PBC) button on the access point (or wireless router).
-The light blinks fast on the WPS LED while it is connecting to the access point (or wireless router).
-When the machine is successfully connected to the wireless network, the WPS LED light stays on.
8The Wireless Network Setting Complete window appears. Click Next.
9Click Next when the Confirm Printer Connection window appears.
10 |
Select the components to be installed. Click Next. |
11 |
After selecting the components, you can also change the machine name, |
|
set the machine to be shared on the network, set the machine as the |
default machine, and change the port name of each machine. Click Next.
12 After the installation is finished, a window asking you to print a test page appears. If you want to print a test page, click Print a test page.
Otherwise, just click Next and go to step 14.
13 If the test page prints out correctly, click Yes. If not, click No to reprint it.
14 If you want to register your machine with the Samusng web site and receive useful information, click On-line Registration. If not, click
Finish.
Ad hoc via USB cable
If you do not have an access point (AP), you may still connect the machine wirelessly to your computer by setting up an ad-hoc wireless network by following the simple steps below.
Items to prepare
•Network-connected computer
•Software CD that was provided with your machine
•A machine installed with a wireless network interface
•USB cable
2. Using a Network-Connected Machine 169

 Wireless network setup
Creating the ad hoc network in Windows
1Check whether the USB cable is connected to the machine.
2Turn on your computer and the wireless network machine.
3Insert the supplied software CD into your CD-ROM drive.
4Select the Wireless Setting and Installation option.
5Read the License Agreement, and select I accept the terms of the License Agreement. Then, click Next.
6The software searches the wireless network.
If the software has failed to search the network, check if the USB cable is connected properly between the computer and machine, and follow the instructions in the window.
7After searching the wireless networks, a list of wireless networks your machine has searched appears.
If you want to use the Samsung default ad hoc setting, select the last wireless network on the list, Network Name(SSID) is Portthru and
Signal is Printer Self Network. Then, click Next.
If you want to change the ad hoc settings, click the Advanced Setting button.
•Enter the wireless Network Name: Enter the SSID name you want (SSID is case-sensitive).
•Operation Mode: Select ad hoc.
•Channel: Select the channel. (Auto Setting or 2412 MHz to 2467 MHz).
•Authentication: Select an authentication type.
Open System: Authentication is not used, and encryption may or may not be used, depending on the need for data security.
Shared Key: Authentication is used. A device that has a proper WEP key can access the network.
•Encryption: Select the encryption (None, WEP64, WEP128).
•Network Key: Enter the encryption network key value.
•Confirm Network Key: Confirm the encryption network key value.
•WEP Key Index: If you are using WEP Encryption, select the appropriate
WEP Key Index.
The wireless network security window appears when the ad hoc network has security enabled.
Select Open System or Shared Key for the authentication and click Next.
•WEP (Wired Equivalent Privacy) is a security protocol preventing unauthorized access to your wireless network. WEP encrypts the data portion of each packet exchanged on a wireless network using a 64-bit or 128-bit WEP encryption key.
If you want to use other ad hoc settings, select another wireless network |
8 The window showing the wireless network setting appears. Check the |
from the list. |
|
|
settings and click Next. |
2. Using a Network-Connected Machine 170
 Wireless network setup
Before entering the IP address for the machine, you must know the computer’s network configuration information. If the computer’s network
configuration is set to DHCP, the wireless network setting should also be DHCP. Likewise, if the computer’s network configuration is set to Static, the wireless network setting should also be Static.
If your computer is set to DHCP and you want to use the Static wireless network setting, you must contact the network administrator to get the static IP address.
•For the DHCP method
If the IP address assignment method is DHCP, check if DHCP is shown in the Wireless Network Setting Confirm window. If it shows Static, click Change TCP/IP to change the assignment method to Receive IP address automatically (DHCP).
•For the Static method
If the IP address assignment method is Static, check if Static is shown in the Wireless Network Setting Confirm window. If it shows DHCP, click Change TCP/IP to enter the IP address and other network configuration values for the machine.
For example,
If the computer’s network information is as shown follows:
-IP address: 169.254.133.42
-Subnet Mask: 255.255.0.0
Then, the machine’s network information should be as below:
-IP address: 169.254.133.43
-Subnet Mask: 255.255.0.0 (Use the computer’s subnet mask.)
-Gateway: 169.254.133.1
9The Wireless Network Setting Complete window appears. Click Next.
10 When the wireless network settings are completed, disconnect the USB cable between the computer and machine. Click Next.
|
|
|
If the Change PC Network Setting window appears, follow the steps in the |
|
window. |
|
Click Next if you are finished with the computer’s wireless network settings. |
|
If you set the computer’s wireless network to DHCP, it will take several |
|
minutes to receive the IP address. |
11 |
Click Next when the Confirm Printer Connection window appears. |
12 |
Select the components to be installed. Click Next. |
13 |
After selecting the components, you can also change the machine name, |
|
set the machine to be shared on the network, set the machine as the |
|
default machine, and change the port name of each machine. Click Next. |
14 |
After the installation is finished, a window asking you to print a test page |
|
appears. If you want to print a test page, click Print a test page. |
|
Otherwise, just click Next and go to step 16. |
15 |
If the test page prints out correctly, click Yes. |
|
If not, click No to reprint it. |
2. Using a Network-Connected Machine 171

 Wireless network setup
16 If you want to register your machine with the Samusng web site and receive useful information, click On-line Registration. If not, click
Finish.
17
Setup using Macintosh
Items to prepare
•Access point
•Network-connected computer
•Software CD that was provided with your machine
•A machine installed with a wireless network interface
•USB cable
Access point via USB cable
1Check whether the USB cable is connected to the machine.
2Turn on your computer, access point, and machine.
3Insert the supplied software CD into your CD-ROM drive.
4Double-click the CD-ROM icon that appears on your Macintosh desktop.
5
6
7
8
9
10
11
Double-click the MAC_Installer folder > Installer OS X icon.
Click Continue.
Read the license agreement and click Continue.
Click Agree to agree to the license agreement.
When the message that warns that all applications will close on your computer appears, click Continue.
Click Wireless Network Setting button on the User Options Pane.
The software searches the wireless network.
If the software has failed to search the network, check if the USB cable is connected properly between the computer and machine, and follow the instructions in the window.
2. Using a Network-Connected Machine 172
 Wireless network setup
12 Select the method to use from the wireless set up method window.
• If wireless network setting has been set before, Wireless Network
Setting Information window appears.
If you want to reset the wireless settings, check the check box and click
Next.
•For models that support the WPS button (without a USB cable connection), the window shown below will appear.
-With a USB Cable: Connect the USB cable and click Next, then go to step 7.
-Using the WPS Button: See "Access point via WPS button (without a USB cable connection)" on page 167.
•Configure the wireless settings manually.: Go to step 13.
•Configure the wireless settings by pressing the WPS button on the access point.: Connect to the wireless network by press the WPS button on the access point (or a wireless router).
-Follow the instructions in the window. When you are done setting the wireless network settings, go to step 16.
13 After searching, the window shows the wireless network devices. Select the name (SSID) of the access point you are using and click Next.
When you set the wireless configuration manually, click Advanced Setting.
•Enter the wireless Network Name: Enter the SSID of the access point (SSID is case-sensitive).
•Operation Mode: Select Infrastructure.
2. Using a Network-Connected Machine 173

 Wireless network setup
•Authentication: Select an authentication type.
Open System: Authentication is not used, and encryption may or may not be used, depending on the need for data security.
Shared Key: Authentication is used. A device that has a proper WEP key can access the network.
WPA Personal or WPA2 Personal: Select this option to authenticate the print server based on the WPA Pre-Shared Key. This uses a shared secret key (generally called Pre Shared Key pass phrase) that is manually configured on the access point and each of its clients.
•Encryption: Select the encryption. (None, WEP64, WEP128, TKIP, AES, TKIP, AES)
•Network Key: Enter the encryption network key value.
•Confirm Network Key: Confirm the encryption network key value.
•WEP Key Index: If you are using WEP Encryption, select the appropriate
WEP Key Index.
The wireless network security window appears when the access point has security enabled.
The wireless network security window appears. The window may differ according to its security mode: WEP or WPA.
•WEP
Select Open System or Shared Key for the authentication and enter the WEP security key. Click Next.
WEP (Wired Equivalent Privacy) is a security protocol preventing unauthorized access to your wireless network. WEP encrypts the data portion of each packet exchanged on a wireless network using a 64-bit or 128-bit WEP encryption key.
•WPA
Enter the WPA shared key and click Next.
WPA authorizes and identifies users based on a secret key that changes automatically at regular intervals. WPA also uses TKIP (Temporal Key Integrity Protocol) and AES (Advanced Encryption Standard) for data encryption.
2. Using a Network-Connected Machine 174
 Wireless network setup
14 The window shows the wireless network settings and check if settings are right. Click Next.
•For the DHCP method
If the IP address assignment method is DHCP, check if DHCP is shown in the window. If it shows Static, click Change TCP/IP to change the assignment method to DHCP.
•For the Static method
If the IP address assignment method is Static, check if Static is shown in the window. If it shows DHCP, click Change TCP/IP to enter the IP address and other network configuration values for the machine.
Before entering the IP address for the machine, you must know the computer’s network configuration information. If the computer is set to DHCP, you must contact the network administrator to get the static IP address.
For example:
If the computer’s network information is shown as follows:
-IP address: 169.254.133.42
-Subnet Mask: 255.255.0.0
Then, the machine’s network information should be as shown below:
-IP address: 169.254.133.43
-Subnet Mask: 255.255.0.0 (Use the computer’s subnet mask.)
-Gateway: 169.254.133.1
15 |
When the window that tells you that the network cable connection is |
|
confirmed appears, disconnect the network cable and click Next. |
|
If the network cable is connected, it may have trouble finding the |
|
machine when configuring the wireless network. |
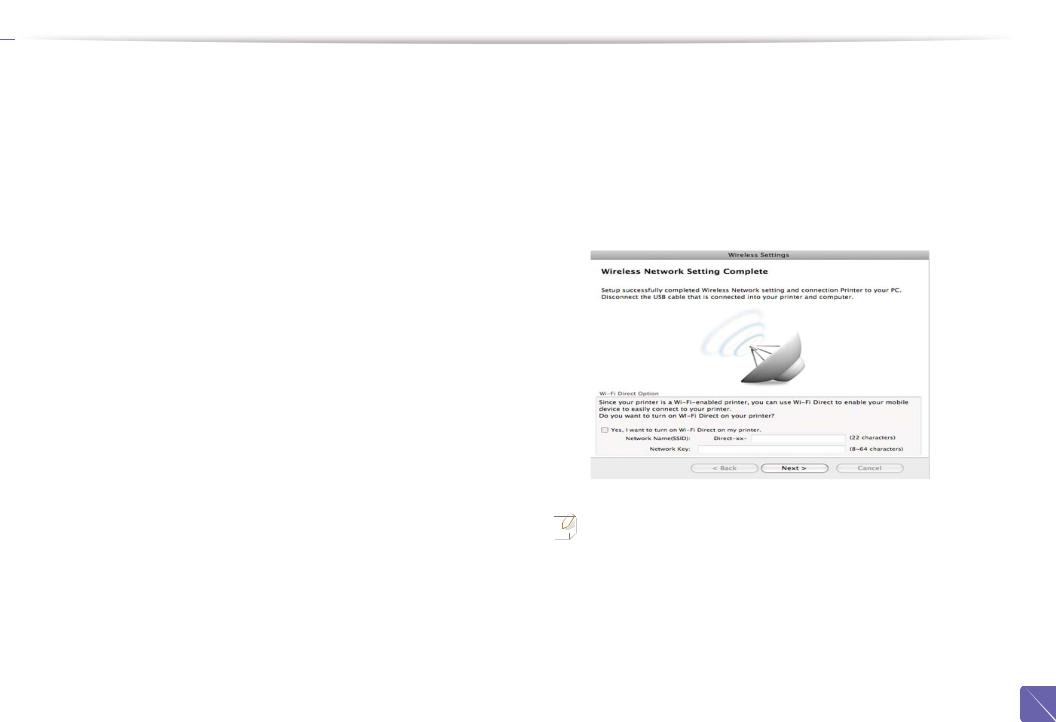
16 |
Wireless network setting is completed. To print from a Wi-Fi Direct |
|
supported mobile device, set the Wi-Fi Direct Option (see "Setting up Wi- |
Fi Direct" on page 183).
Wi-Fi Direct Option:
•Wi-Fi Direct Option appears on the screen only if your printer supports this feature.
•Can start to build Wi-Fi Direct by using Samsung Easy Printer Manager (see "Setting up Wi-Fi Direct" on page 183).
2. Using a Network-Connected Machine 175

 Wireless network setup
•Network Name(SSID): The default Network Name is the model name and the maximum length is 22 characters (not including "Direct-xx-").
•Network Key is the numeric string, and the size is 8 ~ 64 characters.
•Software CD that was provided with your machine
•A machine installed with a wireless network interface
17 |
When the wireless network settings are completed, disconnect the USB |
|
cable between the computer and machine. |
18 |
Wireless network set up is completed. After the installation is finished, |
|
click Quit. |
|
|
|
|
After completing the wireless network connection, you need to install a machine driver to print from an application (see "Installation for Macintosh" on page 134).
Setting the access point using the WPS button
For models that have a WPS button, you can set the wireless network using the WPS button (without a USB connection) and access point (or a router) WPS button.
Items to prepare
•Access point (or wireless router)
•Network-connected computer
Creating the infrastructure network
1Turn on your computer, access point, and machine.
2Insert the supplied software CD into your CD-ROM drive.
3Double-click the CD-ROM icon that appears on your Macintosh desktop.
4Double-click the MAC_Installer folder > Installer OS X icon.
5Click Continue.
6Read the license agreement and click Continue.
7Click Agree to agree to the license agreement.
8When the message that warns that all applications will close on your computer appears, click Continue.
9Click the Wireless Network Setting button on the User Options Pane.
2. Using a Network-Connected Machine 176
 Wireless network setup
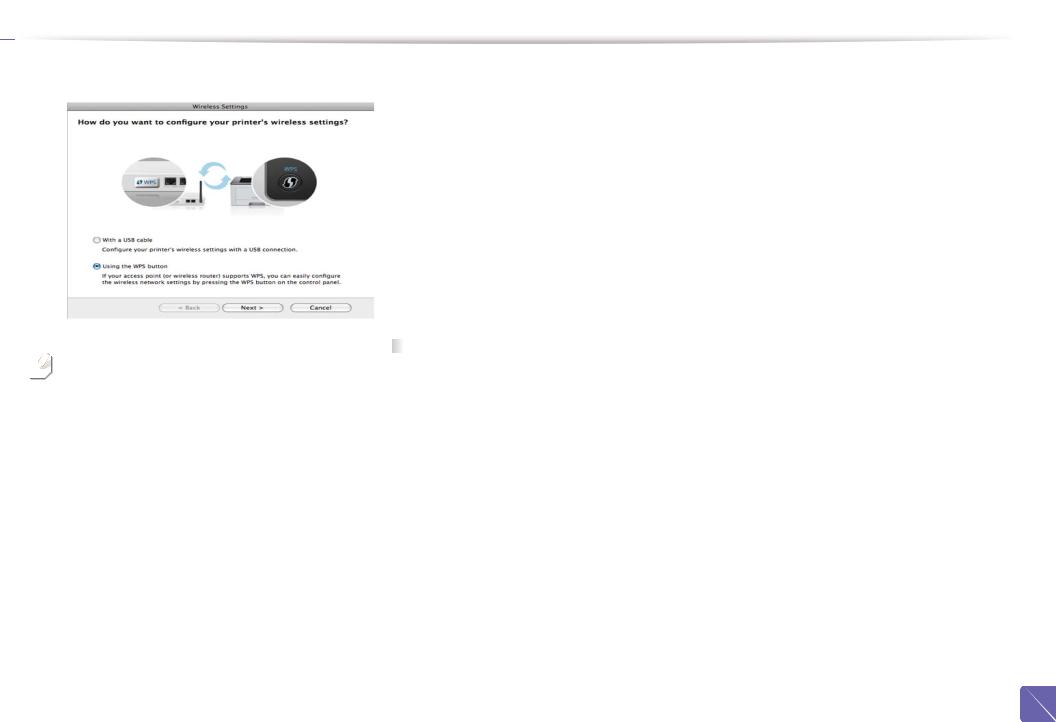
10 Select Using the WPS button and click Next. |
12 Follow the instructions in the window to set up the wireless network. |
•For models that support the WPS button, the above window appears.
•If your machine is connected with a USB cable, the above window does not appear. Disconnect the USB cable if you want to set up the wireless network using the WPS button.
•For models with a display screen, follow the steps below:
aPress and hold the  (WPS) button on the control panel for about 2-4 seconds.
The machine waits up to 2 minutes for the WPS button on the access point (or a router) to be pressed.
bPress the WPS (PBC) button on the access point (or wireless router).
The messages are displayed on the display screen in the order below:
-Connecting: The machine is connecting to the access point (or wireless router).
-Connected: When the machine is successfully connected to the wireless network, the WPS LED light stays on.
•If you want to set up the wireless network using the USB cable, refer to "Access point via USB cable" on page 172.
11 The next window asks you to check if your access point (or wireless router) supports WPS or not.
If the access point (or wireless router) has a WPS button, select Yes and click Next.
2. Using a Network-Connected Machine 177

 Wireless network setup
-SSID Type: After completing the wireless network connection process, the AP’s SSID information appears on the display.
•For models without a display screen, follow the steps below:
aPress and hold the  (WPS) button on the control panel for about 2 - 4 seconds until the status LED blinks quickly.
The machine starts connecting to the wireless network. The LED blinks slowly for up to two minutes until you press the PBC button on the access point (or wireless router).
bPress the WPS (PBC) button on the access point (or wireless router).
-The light blinks fast on the WPS LED. The machine is connecting to the access point (or wireless router).
-When the machine is successfully connected to the wireless network, the WPS LED light stays on.
13 Wireless network set up is completed. After installation is finished, click
Quit.
After completing the wireless network connection, you need to install a machine driver to print from an application (see "Installation for Macintosh" on page 134).
Ad hoc via USB cable
If you do not have an access point (AP), you may still connect the machine wirelessly to your computer by setting up an ad hoc wireless network by following these simple directions.
Items to prepare
•Network-connected computer
•Software CD that was provided with your machine
•A machine installed with a wireless network interface
•USB cable
Creating the ad hoc network in Macintosh
1Check whether the USB cable is connected to the machine.
2Turn on your computer and the wireless network machine.
3Insert the supplied software CD into your CD-ROM drive.
4Double-click the CD-ROM icon that appears on your Macintosh desktop.
5Double-click the MAC_Installer folder > Installer OS X icon.
6Click Continue.
7Read the license agreement and click Continue.
2. Using a Network-Connected Machine 178

 Wireless network setup
8Click Agree to agree to the license agreement.
9When the message that warns that all applications will close on your computer appears, click Continue.
10 |
Click Wireless Network Setting button on the User Options Pane. |
11 |
The software searches for wireless network devices. |
|
|
|
|
If the search has failed, check if the USB cable is connected between the computer and machine properly, and follow the instructions in the window.
•Authentication: Select an authentication type.
Open System: Authentication is not used, and encryption may or may not be used, depending on the need for data security.
Shared Key: Authentication is used. A device that has a proper WEP key can access the network.
•Encryption: Select the encryption (None, WEP64, WEP128).
•Network Key: Enter the encryption network key value.
•Confirm Network Key: Confirm the encryption network key value.
•WEP Key Index: If you are using WEP Encryption, select the appropriate
WEP Key Index.
The wireless network security window appears when the ad hoc network has security setting.
12 After searching the wireless networks, a list of wireless networks your |
Select Open System or Shared Key for the authentication and click Next. |
|
|
||
machine has searched appears. |
• WEP (Wired Equivalent Privacy) is a security protocol preventing |
|
If you want to use the Samsung default ad hoc setting, select the last |
unauthorized access to your wireless network. WEP encrypts the data |
|
portion of each packet exchanged on a wireless network using a 64-bit |
||
wireless network on the list, which Network Name(SSID) is Portthru |
||
or 128-bit WEP encryption key. |
||
and Signal is Printer Self Network. |
||
|
||
Then, click Next. |
13 The window showing the wireless network settings appears. Check the |
|
If you want to use other ad hoc settings, select another wireless network |
||
from the list. |
settings and click Next. |
|
|
||
|
|
|
|
|
If you want to change ad hoc settings, click the Advanced Setting button.
•Enter the wireless Network Name: Enter the SSID name (SSID is casesensitive).
•Operation Mode: Select ad hoc.
•Channel: Select the channel (Auto Setting or 2412 MHz to 2467 MHz).
2. Using a Network-Connected Machine 179

 Wireless network setup
Before entering the IP address for the machine, you must know the computer’s network configuration information. If the computer’s network configuration is set to DHCP, the wireless network setting should also be DHCP. Likewise, if the computer’s network configuration is set to Static, the wireless network setting should also be Static.
If your computer is set to DHCP and you want to use Static wireless network setting, you must contact the network administrator to get the static IP address.
•For the DHCP method
If the IP address assignment method is DHCP, check if DHCP is shown in the Wireless Network Setting Confirm window. If it shows Static, click Change TCP/IP to change the assignment method to Receive IP address automatically (DHCP).
•For the Static method
If the IP address assignment method is Static, check if Static is shown in the Wireless Network Setting Confirm window. If it shows DHCP, click Change TCP/IP to enter the IP address and other network configuration values for the machine.
For example,
If the computer’s network information is shown as follows:
-IP address: 169.254.133.42
-Subnet Mask: 255.255.0.0
Then, the machine’s network information should be as shown below:
-IP address: 169.254.133.43
-Subnet Mask: 255.255.0.0 (Use the computer’s subnet mask.)
-Gateway: 169.254.133.1
14 |
When the window that tells you that the network cable connection is |
|
confirmed appears, disconnect the network cable and click Next. |
|
If the network cable is connected, it may have trouble finding the |
|
machine when configuring the wireless network. |
15 |
The wireless network connects according to the network configuration. |
16 |
Wireless network set up is completed. After installation is finished, click |
|
Quit. |
|
|
|
|
After completing the wireless network connection, you need to install a machine driver to print from an application (see "Installation for Macintosh" on page 134).
18
Using a network cable
Machines that do not support the network port will not be able to use this feature (see "Rear view" on page 23).
Your machine is a network compatible machine. To enable your machine to work with your network, you will need to perform some configuration procedures.
2. Using a Network-Connected Machine 180
 Wireless network setup
• After completing the wireless network connection, you need to install a machine driver to print from an application (see "Installing driver over the network" on page 144).
•See your network administrator, or the person that set up your wireless network, for information about your network configuration.
Items to prepare
•Access point
•Network-connected computer
•Software CD that was provided with your machine
•A machine installed with a wireless network interface
•Network cable
IP setting using SetIP Program (Windows)
This program is used to manually set the network IP address of your machine using its MAC address to communicate with the machine. The MAC address is the hardware serial number of the network interface and can be found in the
Network Configuration Report.
See "Setting IP address" on page 141.
Configuring the machine’s wireless network
Before starting you will need to know the network name (SSID) of your wireless network and the network key if it is encrypted. This information was set when the access point (or wireless router) was installed. If you do not know about your wireless environment, please ask the person who set up your network.
To configure wireless parameters, you can use SyncThru™ Web Service.
Printing a network configuration report
You can identify the network settings of your machine by printing a network configuration report.
See "Printing a network configuration report" on page 141.
Using SyncThru™ Web Service
Before starting wireless parameter configuration, check the cable connection status.
2. Using a Network-Connected Machine 181
 Wireless network setup
1 |
Check whether or not the network cable is connected to the machine. If |
7 Select the one Network Name(SSID) in the list. |
|
not, connect the machine with a standard network cable. |
• SSID: SSID (Service Set Identifier) is a name that identifies a wireless |
|
|
|
2 |
Start a web browser such as Internet Explorer, Safari, or Firefox and enter |
network, access points, and wireless devices attempting to connect |
to a specific wireless network must use the same SSID. The SSID is |
||
|
your machine’s new IP address in the browser window. |
case sensitive. |
|
|
For example,
• Operation Mode: Operation Mode refers to the type of wireless connections (see "Wireless network name and network key" on page 156).
3
4
Click Login on the upper right of the SyncThru™ Web Service website.
Type in the ID and Password then click Login.
•ID: admin
•Password: sec00000
-Ad-hoc: Allows wireless devices to communicate directly with each other in a peer-to-peer environment.
-Infrastructure: Allows wireless devices to communicate with each other through an access point.
5 |
When the SyncThru™ Web Service window opens, click Network |
If your network’s Operation Mode is Infrastructure, select the SSID of the |
|
access point. If the Operation Mode is Ad-hoc, select the machine’s SSID. |
|||
|
Settings. |
Note that “portthru” is the default SSID of your machine. |
|
|
|
|
|
6 |
Click Wireless > Wizard. |
|
|
|
|
8 |
Click Next. |
|
|
||
|
Wizard will help you setup the wireless network configuration. However, if |
If the wireless security setting window appears, enter the registered |
|
|
you want to set the wireless network directly, select Custom. |
password (network key) and click Next. |
|
|
9 |
The confirmation window appears, please check your wireless setup. If |
|
|
|
|
the setup is right, click Apply. |
2. Using a Network-Connected Machine 182

 Wireless network setup
5
Disconnect the network cable (standard or network). Your machine should |
|
then start communicating wirelessly with the network. In case of Ad-hoc |
6 |
mode, you can use a wireless LAN and wired LAN simultaneously. |
|
|
When the SyncThru™ Web Service window opens, click Network Settings.
Click Wireless > Custom.
You can also turn the Wi-Fi network on/off.
19
Turning the Wi-Fi network on/off |
20 |
|
|
|
|
|
Setting the Wi-Fi Direct for mobile printing |
|
|
|
|
|
|
|
If your machine has a display, you can also turn on/off the Wi-Fi from the machine’s control panel using the Network menu.
1Check whether the network cable is connected to the machine. If not, connect the machine with a standard network cable.
2Start a web browser such as Internet Explorer, Safari, or Firefox and enter your machine’s new IP address in the browser window.
For example,
3Click Login on the upper right of the SyncThru™ Web Service website.
4Type in the ID and Password, then click Login.
•ID: admin
•Password: sec00000
Wi-Fi Direct is an easy-to-setup peer-to-peer connecting between method for your printer and a mobile device that provides a secure connection and better throughput than ad hoc mode.
With Wi-Fi Direct, you can connect your printer to a Wi-Fi Direct network while concurrently connecting to an access point, You can also use a wired network and a Wi-Fi Direct network simultaneously so multiple users can access and print documents both from Wi-Fi Direct and from a wired network.
• You cannot connect to the internet through the printer’s Wi-Fi Direct.
•The supported protocol list may differ from your model, Wi-Fi Direct networks do NOT support IPv6, network filtering, IPSec, WINS, and SLP services.
Setting up Wi-Fi Direct
You can enable Wi-Fi Direct feature by one of the following methods.
2. Using a Network-Connected Machine 183

 Wireless network setup
From the USB cable-connected computer(recommended)
•When setting from the supplied software CD, see the access point via USB cable.
-Windows user, see "Access point via USB cable" on page 163.
-Macintosh user, see "Access point via USB cable" on page 172.
•After the driver installation is complete, Samsung Easy Printer Manager can be set and changes in the Wi-Fi Direct can be made.
Samsung Easy Printer Manager is Available for Windows
and Macintosh OS users only.
-From the Start menu, select Programs or All Programs > Samsung Printers > Samsung Easy Printer Manager > Device Settings >
Network.
Wi-Fi Direct On/Off: Select On to enable.
Device Name: Enter the printer’s name for searching for your printer on a wireless network. By default, the device name is the model name.
IP Address: Enter the IP address of the printer. This IP address is used only for the local network and not for the infrastructure wired or wireless network. We recommend using the default local IP address (the default local IP address of the printer for Wi-Fi Direct is 192.168.3.1 )
Group Owner: Activate this option to assign the printer the Wi-Fi Direct group’s owner. The Group Owner acts similar to a wireless access point. We recommend activating this option.
Network Key: If your printer is a Group Owner, a Network Key is required for other mobile devices to connect to your printer. You can configure a network key yourself, or can remember the given Network Key that is randomly generated by default.
From the machine (Machines with a display screen)
•Select Network > Wireless > Wi-Fi Direct from the control panel.
•Enable Wi-Fi Direct.
From the network-connected computer
If your printer is using a network cable or a wireless access point, you can enable and configure Wi-Fi Direct from SyncThru™ Web Service.
•Access SyncThru™ Web Service, select Settings > Network Settings > Wireless > Wi-Fi Direct.
•Enable or disable Wi-Fi Direct and set other options.
• For Linux OS users,
-Print an IP network configuration report to check the output (see "Printing a network configuration report" on page 141).
2. Using a Network-Connected Machine 184

 Wireless network setup
-Access SyncThru Web Service, select Settings > Network Settings > Wireless > Wi-Fi Direct.
-Enable or disable Wi-Fi Direct.
Setting up the mobile device
•After setting up Wi-Fi Direct from the printer, refer to the user manual of the mobile device you are using to set its Wi-Fi Direct.
•After setting up Wi-Fi Direct, you need to download the mobile printing application (For example: Samsung Mobile printer) to print from your smartphone.
• When you have found the printer you want to connect to from your mobile device, select the printer and the printer's LED will blink. Press the WPS button on the printer and it will be connected to your mobile device.
• If your mobile device does not support WPS, you need to enter the "Network Key" of a printer instead of pushing the WPS button.
21
Troubleshooting
Problems during setup or driver installation
Printers Not Found
•Your machine may not be turned on. Turn on your computer and the machine.
•USB cable is not connected between your computer and machine. Connect the machine to your computer using the USB cable.
•The machine does not support wireless networking. Check the machine's user's guide included on the software CD supplied with your machine and prepare a wireless network machine.
Connecting Failure - SSID Not Found
•The machine is unable to find the network name (SSID) you have selected or entered. Check the network name (SSID) on your access point and try connecting again.
•Your access point is not turned on. Turn on your access point.
2. Using a Network-Connected Machine 185

 Wireless network setup
Connecting Failure - Invalid Security
•Security is not configured correctly. Check the configured security on your access point and machine.
Connecting Failure - General Connection Error
•Your computer is not receiving a signal from your machine. Check the USB cable and your machine’s power.
Connecting Failure - Connected Wired Network
•Your machine is connected with a wired network cable. Remove the wired network cable from your machine.
PC Connection Error
•The configured network address is unable to connect between your computer and machine.
-For a DHCP network environment
The receives the IP address automatically (DHCP) when computer is configured to DHCP.
-For a Static network environment
The machine uses the static address when the computer is configured to static address.
For example,
If the computer’s network information is as shown below:
IP address: 169.254.133.42
Subnet Mask: 255.255.0.0
Then the machine’s network information should be as below:
IP address: 169.254.133.43
Subnet Mask: 255.255.0.0 (Use the computer’s subnet mask.)
Gateway: 169.254.133.1
Other problems
If problems occur while using the machine on a network, check the following:
For information on the access point (or wireless router), refer to its own user's guide.
•Your computer, access point (or wireless router), or machine may not be turned on.
•Check the wireless reception around the machine. If the router is far from the machine or there is an obstacle, you might have difficulty receiving the signal.
•Cycle the power for the access point (or wireless router), machine, and computer. Sometimes cycling the power can recover network communication.
2. Using a Network-Connected Machine 186

 Wireless network setup
•Check whether firewall software (V3 or Norton) is blocking the communication.
If the computer and the machine are connected on the same network and it cannot be found when searching, firewall software might be blocking the communication. Refer to the user's guide for the software to turn it off and try searching for the machine again.
•Check whether the machine's IP address is allocated correctly. You can check the IP address by printing the network configuration report.
•Check whether the access point (or wireless router) has a configured security (password). If it has a password, refer to the access point (or wireless router) administrator.
•Check the machine's IP address. Reinstall the machine driver and change the settings to connect to the machine on the network. Due to the characteristics of DHCP, the allocated IP address could change if the machine is not used for a long time or if the access point has been reset.
Register the product's MAC address when you confogure the DHCP server on the access point (or wireless router). Then you can always use the IP address that is set with the MAC address. You can identify the Mac address of your machine by printing a network configuration report (see "Printing a network configuration report" on page 141).
•Check the wireless environment. You might not be able to connect to the network in the infrastructure environment where you need to type in a user's information before connecting to the access point (or wireless router).
•This machine only supports IEEE 802.11 b/g/n and Wi-Fi. Other wireless communication types (e.g., Bluetooth) are not supported.
•When using the ad hoc mode, in operating systems such as Windows Vista, you might need to set the wireless connection setting every time you use the wireless machine.
•You cannot use infrastructure mode and ad hoc mode at the same time for Samsung wireless network machines.
•The machine is within the range of the wireless network.
•The machine is located away from obstacles that could block the wireless signal.
Remove any large metal objects between the access point (or wireless router) and the machine.
Make sure the machine and wireless access point (or wireless router) are not separated by poles, walls, or support columns containing metal or concrete.
•The machine is located away from other electronic devices that may interfere with the wireless signal.
Many devices can interfere with the wireless signal, including a microwave oven and some Bluetooth devices.
•Whenever the configuration of your access point (or wireless router) changes, you must do the product's wireless network setup again.
2. Using a Network-Connected Machine 187

3. Useful Setting Menus
This chapter explains how to browse the current status of your machine, and the method of setting for advanced machine setup.
• Before you begin reading |
a chapter |
189 |
|
• |
Print menu |
|
190 |
• |
Copy menu |
|
191 |
• |
Fax menu |
|
198 |
• |
Scan menu |
|
202 |
• |
System setup |
|
204 |
• |
Admin setup |
|
216 |
• |
Custom setup |
|
217 |
|
|
|
|

 Before you begin reading a chapter
This chapter explains all the features available for this series' models to help users easily understand the features.
You can check the features available for each model in the Basic Guide (see "Menu overview" on page 33).
The following are tips for using this chapter
•The control panel provides access to various menus to set up the machine or use the machine’s functions. These menus can be accessed by pressing  (Menu).
•Some menus may not appear on the display depending on options or models. If so, it is not applicable to your machine.
•For models that do not have the  (Menu) on the control panel, this feature is not applicable (see "Control panel overview" on page 24).
•Some menu names may differ from your machine depending on its options or the models.
3. Useful Setting Menus 189

 Print menu
Some menus may not appear in the display depending on options or models. If so, it is not applicable to your machine (see "Menu overview" on page 33).
To change the menu options:
•Press  (Menu) > Print Setup on the control panel.
•Or press Setup > Machine Setup > Print Setup on the touch screen.
Item |
Description |
|
|
|
|
Orientation |
Selects the direction in which information is printed on a |
|
page. |
||
|
||
|
|
|
Copies |
You can enter the number of copies using the number |
|
keypad. |
||
|
||
|
|
|
|
Specifies the number of dots printed per inch (dpi). The |
|
Resolution |
higher the setting, the sharper printed characters and |
|
|
graphics. |
|
|
|
|
|
Lightens or darkens the print on the page. The Normal |
|
Darkness |
setting usually produces the best result. Use the Light |
|
|
toner density setting to save toner. |
|
|
|
|
Darken Text |
Prints text darker than on a normal document. |
|
|
|
|
Emulation |
Sets the emulation type and option. |
|
|
|
3. Useful Setting Menus 190
 Loading...