


 Loading...
r®
Owner’s Manual

WARNING – To reduce the risk of fire or electric shock, do not expose this device to rain or moisture.
For EU Countries
This product complies with the requirements of European Directive EMC 89/336/EEC.
Dieses Produkt entspricht der europäischen Richtlinie EMC 89/336/EEC.
Ce produit est conforme aux exigences de la directive européenne EMC 89/336/EEC.
Questo prodotto è conforme alle esigenze della direttiva europea EMC 89/336/EEC.
Este producto cumple con la directrice EMC 89/336/EEC de la CE.
Dit product beantwoordt aan de richtlijn EMC 89/336/EEC van de Europese Unie.
For the USA
FEDERAL COMMUNICATIONS COMMISSION RADIO FREQUENCY INTERFERENCE STATEMENT
This equipment has been tested and found to comply with the limits for a Class B digital device, pursuant to Part 15 of the FCC Rules. These limits are designed to provide reasonable protection against harmful interference in a residential installation. This equipment generates, uses, and can radiate radio frequency energy and, if not installed and used in accordance with the instructions, may cause harmful interference to radio communications. However, there is no guarantee that interference will not occur in a particular installation. If this equipment does cause harmful interference to radio or television reception, which can be determined by turning the equipment off and on, the user is encouraged to try to correct the interference by one or more of the following measures:
–Reorient or relocate the receiving antenna.
–Increase the separation between the equipment and receiver.
–Connect the equipment into an outlet on a circuit different from that to which the receiver is connected.
–Consult the dealer or an experienced radio/TV technician for help.
This device complies with Part 15 of the FCC Rules. Operation is subject to the following two conditions:
(1)This device may not cause harmful interference, and
(2)This device must accept any interference received, including interference that may cause undesired operation.
Unauthorized changes or modification to this system can void the users authority to operate this equipment. This equipment requires shielded interface cables in order to meet FCC class B Limit.
For Canada
NOTICE
This Class B digital apparatus meets all requirements of the Canadian Interference-Causing Equipment Regulations.
AVIS
Cet appareil numérique de la classe B respecte toutes les exigences du Règlement sur le matériel brouilleur du Canada.
For the U.K.
IMPORTANT: THE WIRES IN THIS MAINS LEAD ARE COLOURED IN ACCORDANCE WITH THE FOLLOWING CODE.
BLUE: NEUTRAL
BROWN: LIVE
As the colours of the wires in the mains lead of this apparatus may not correspond with the coloured markings identifying the terminals in your plug, proceed as follows:
The wire which is coloured BLUE must be connected to the terminal which is marked with the letter N or coloured BLACK. The wire which is coloured BROWN must be connected to the terminal which is marked with the letter L or coloured RED. Under no circumstances must either of the above wires be connected to the earth terminal of a three pin plug.
This product must be disposed of separately at your local waste recycling centre.
Do not dispose of in household waste bin.
The technology used in the FR-3s, FR-3sb, FR-3 and FR-3b is covered by U.S. Patent No. 6.946.594.

r
Owner’s Manual
Thank you for purchasing the Roland FR-3 V-Accordion. The FR-3 is an amazingly versatile electronic instrument that can emulate the sounds of a vast array of accordions. You may know that the term “accordion” refers to a portable musical instrument of the free reed family, that its sound is controlled by air flow from the bellows, and that there are almost as many types as there are countries. The accordion family indeed includes instruments called “Aeloine”, “Aerophone”, “Bayan”, “Buzika”, “Concertina”, “Drängkammarorgel”, “Fisarmonica”, “Hanuri”, “Melodeon”, “Pedalowka”, “Schwyzerorgeli”, “Squeeze Box”, “Sun Fin Chin”, and many others.
The major advantage of the FR-3 is that it allows you to change sounds without changing instruments. Apart from the financial benefit (the FR-3 costs far less than what you have to pay for the emulated originals), this also means that you can use your familiar playing style and techniques while covering a host of different musical genres.
To get the most out of the FR-3 and to ensure many years of trouble-free service, we urge you to read through this Owner’s Manual thoroughly.
Before using this instrument, carefully read the “Important notes” (p. 9). They provide information concerning the proper operation of the FR-3. Be sure to keep this manual in a safe place for future reference.
This manual applies to four instruments: |
|
FR-3s & FR-3 (the keyboard versions) |
FR-3sb & FR-3b (the button versions) |
For reasons of space, we will use the term “FR-3” to refer to all four of them, and only use “FR-3s” and “FR-3sb” functions that are only available on the versions with speakers.
Copyright © 2006 ROLAND EUROPE. All rights reserved. No part of this publication may be reproduced in any form without the written permission of Roland Europe S.p.a.

FR-3 V-Accordion
|
r
4

V-Accordion r
 Contents
1. Features . . . . . . . . . . . . . . . . . . . . . . . . . . . . . . . . . . . . . . . . . . . . . . . . . . . . . . . . . . . . . . . . . . . . . . . . . . . . . 6
2. Important notes . . . . . . . . . . . . . . . . . . . . . . . . . . . . . . . . . . . . . . . . . . . . . . . . . . . . . . . . . . . . . . . . . . . . . . 9
3. Panel descriptions . . . . . . . . . . . . . . . . . . . . . . . . . . . . . . . . . . . . . . . . . . . . . . . . . . . . . . . . . . . . . . . . . . . . 11
Treble control panel . . . . . . . . . . . . . . . . . . . . . . . . . . . . . . . . . . . . . . . . . . . . . . . . . . . . . . . . . . . . . . . . . . 11 Bass control panel. . . . . . . . . . . . . . . . . . . . . . . . . . . . . . . . . . . . . . . . . . . . . . . . . . . . . . . . . . . . . . . . . . . . 12 Connection panel . . . . . . . . . . . . . . . . . . . . . . . . . . . . . . . . . . . . . . . . . . . . . . . . . . . . . . . . . . . . . . . . . . . . 13
4. Setting up . . . . . . . . . . . . . . . . . . . . . . . . . . . . . . . . . . . . . . . . . . . . . . . . . . . . . . . . . . . . . . . . . . . . . . . . . . 14
Connections . . . . . . . . . . . . . . . . . . . . . . . . . . . . . . . . . . . . . . . . . . . . . . . . . . . . . . . . . . . . . . . . . . . . . . . . . 14 Securing the adapter and/or MIDI cable . . . . . . . . . . . . . . . . . . . . . . . . . . . . . . . . . . . . . . . . . . . . . . . . . 14 Attaching the straps . . . . . . . . . . . . . . . . . . . . . . . . . . . . . . . . . . . . . . . . . . . . . . . . . . . . . . . . . . . . . . . . . . 15 Switching the power on and off . . . . . . . . . . . . . . . . . . . . . . . . . . . . . . . . . . . . . . . . . . . . . . . . . . . . . . . 16 Listening to the demo songs . . . . . . . . . . . . . . . . . . . . . . . . . . . . . . . . . . . . . . . . . . . . . . . . . . . . . . . . . . . 18 First steps . . . . . . . . . . . . . . . . . . . . . . . . . . . . . . . . . . . . . . . . . . . . . . . . . . . . . . . . . . . . . . . . . . . . . . . . . . . 19 Touring the FR-3’s sections . . . . . . . . . . . . . . . . . . . . . . . . . . . . . . . . . . . . . . . . . . . . . . . . . . . . . . . . . . . . 21 Using the orchestral sounds . . . . . . . . . . . . . . . . . . . . . . . . . . . . . . . . . . . . . . . . . . . . . . . . . . . . . . . . . . . 25
5. Other practical functions . . . . . . . . . . . . . . . . . . . . . . . . . . . . . . . . . . . . . . . . . . . . . . . . . . . . . . . . . . . . . . 31
Switching off sections you don’t need . . . . . . . . . . . . . . . . . . . . . . . . . . . . . . . . . . . . . . . . . . . . . . . . . . 31 Using the metronome . . . . . . . . . . . . . . . . . . . . . . . . . . . . . . . . . . . . . . . . . . . . . . . . . . . . . . . . . . . . . . . . 31 Pitch-related functions . . . . . . . . . . . . . . . . . . . . . . . . . . . . . . . . . . . . . . . . . . . . . . . . . . . . . . . . . . . . . . . 34
6. Editing settings . . . . . . . . . . . . . . . . . . . . . . . . . . . . . . . . . . . . . . . . . . . . . . . . . . . . . . . . . . . . . . . . . . . . . . 36
Selecting the desired function . . . . . . . . . . . . . . . . . . . . . . . . . . . . . . . . . . . . . . . . . . . . . . . . . . . . . . . . . 37 PARAM LIST parameters. . . . . . . . . . . . . . . . . . . . . . . . . . . . . . . . . . . . . . . . . . . . . . . . . . . . . . . . . . . . . . . 37 MIDI parameters . . . . . . . . . . . . . . . . . . . . . . . . . . . . . . . . . . . . . . . . . . . . . . . . . . . . . . . . . . . . . . . . . . . . . 45
7. Restoring the factory defaults. . . . . . . . . . . . . . . . . . . . . . . . . . . . . . . . . . . . . . . . . . . . . . . . . . . . . . . . . . 53
8. Using optional batteries . . . . . . . . . . . . . . . . . . . . . . . . . . . . . . . . . . . . . . . . . . . . . . . . . . . . . . . . . . . . . . . 54
What can you do with batteries? . . . . . . . . . . . . . . . . . . . . . . . . . . . . . . . . . . . . . . . . . . . . . . . . . . . . . . . 54 Installing and removing batteries. . . . . . . . . . . . . . . . . . . . . . . . . . . . . . . . . . . . . . . . . . . . . . . . . . . . . . . 54
9. Troubleshooting . . . . . . . . . . . . . . . . . . . . . . . . . . . . . . . . . . . . . . . . . . . . . . . . . . . . . . . . . . . . . . . . . . . . . 56
10. Specifications . . . . . . . . . . . . . . . . . . . . . . . . . . . . . . . . . . . . . . . . . . . . . . . . . . . . . . . . . . . . . . . . . . . . . . . 57
11. Appendix . . . . . . . . . . . . . . . . . . . . . . . . . . . . . . . . . . . . . . . . . . . . . . . . . . . . . . . . . . . . . . . . . . . . . . . . . . . 58
Factory Sets . . . . . . . . . . . . . . . . . . . . . . . . . . . . . . . . . . . . . . . . . . . . . . . . . . . . . . . . . . . . . . . . . . . . . . . . . 58 Demo Songs . . . . . . . . . . . . . . . . . . . . . . . . . . . . . . . . . . . . . . . . . . . . . . . . . . . . . . . . . . . . . . . . . . . . . . . . . 58 MIDI implementation . . . . . . . . . . . . . . . . . . . . . . . . . . . . . . . . . . . . . . . . . . . . . . . . . . . . . . . . . . . . . . . . . 59 MIDI Implementation Chart . . . . . . . . . . . . . . . . . . . . . . . . . . . . . . . . . . . . . . . . . . . . . . . . . . . . . . . . . . . 61
12. Information . . . . . . . . . . . . . . . . . . . . . . . . . . . . . . . . . . . . . . . . . . . . . . . . . . . . . . . . . . . . . . . . . . . . . . . . . 62
13. Index. . . . . . . . . . . . . . . . . . . . . . . . . . . . . . . . . . . . . . . . . . . . . . . . . . . . . . . . . . . . . . . . . . . . . . . . . . . . . . . 63
5

FR-3s/FR-3/FR-3sb/FR-3b V-Accordion
Features | Features
1. Features
Stand-alone electronic instrument
Though the FR-3 is a fully electronic instrument, you do not need to connect the FR-3s/FR-3sb to an amplifier in order to produce sounds. Its onboard amplification system is powerful enough for small venues, restaurants, etc. (The FR-3/FR-3b has no internal amplification.)
Sophisticated MIDI control
The FR-3 is the most versatile and “musical” MIDI controller to date, going far beyond the control possibilities of a MIDI keyboard with optional performance functions or of MIDIfied wind instruments.
PBM (Physical Behavior Modeling)
The FR-3 V-Accordion is based on Roland’s sound generation technology called “PBM” (Physical Behavior Modeling) whose sonic result is very close to the sound of traditional accordions.
Super realistic accordion simulations
The FR-3 provides 10 memories called “Sets”, with 10 treble registers, 7 bass & chord registers, and 7 Free Bass registers. All sounds it produces were obtained by sampling popular traditional acoustic accordions. Different tuning systems are also available.
This V-Accordion allows you to switch from an Italian jazz accordion to German folk, French musette or a historic bandoneon sound – without changing your technique.
Orchestral sounds
10 orchestral sounds can be used in combination with traditional accordion sounds – complete with full bellows articulation (something like breath control for accordions, but much more refined) and unique keyboard modes (Solo, Dual, High and Low).
Orchestral bass and chord sounds
The FR-3 also provides 7 orchestral bass and chord sounds for the Bass and Chord sections as well as the Free Bass section.
The digital advantage
The V-Accordion includes all functions and sounds of a traditional accordion, thus conveying a truly natural feel and sound. Yet it also provides the advantages only an electronic musical instrument can give you:
•reduced overall weight;
•possibility to choose among a wide variety of sounds;
•tuning stability over time and wear resistance of all mechanical parts;
•you can sound in a different key than the one you are playing in (transpose function);
•you can play with headphones, i.e. without disturbing your neighbors or family.
Superb performance flexibility
The V-Accordion allows you to control external MIDIcompatible instruments. The Treble keyboard and chord/bass buttons are velocity-sensitive, while the bellows controller provides more articulation possibilities than any other MIDI keyboard, MIDI wind instrument, etc., you may know.
In High or Low mode (see p. 25), you can control up to 4 parts simultaneously (two sounds in the right hand/ two sounds in the left).
Useful accessory
The FR-3 has a compartment for optional AA-type batteries. Consider purchasing such batteries (you will need 10) when performing on stage, or to use the FR-3s/FR-3sb as a stand-alone instrument (taking advantage of its internal speakers).
r
•All product names mentioned in this document are trademarks or registered trademarks of their respective owners.
6
V-Accordion r
Using the unit safely
Using the unit safely
Used for instructions intended to alert the user to the risk of death or severe injury should the unit be used improperly.
Used for instructions intended to alert the user to the risk of injury or material damage should the unit be used improperly.
* Material damage refers to damage or other adverse effects caused with respect to the home and all its furnishings, as well to domestic animals or pets.
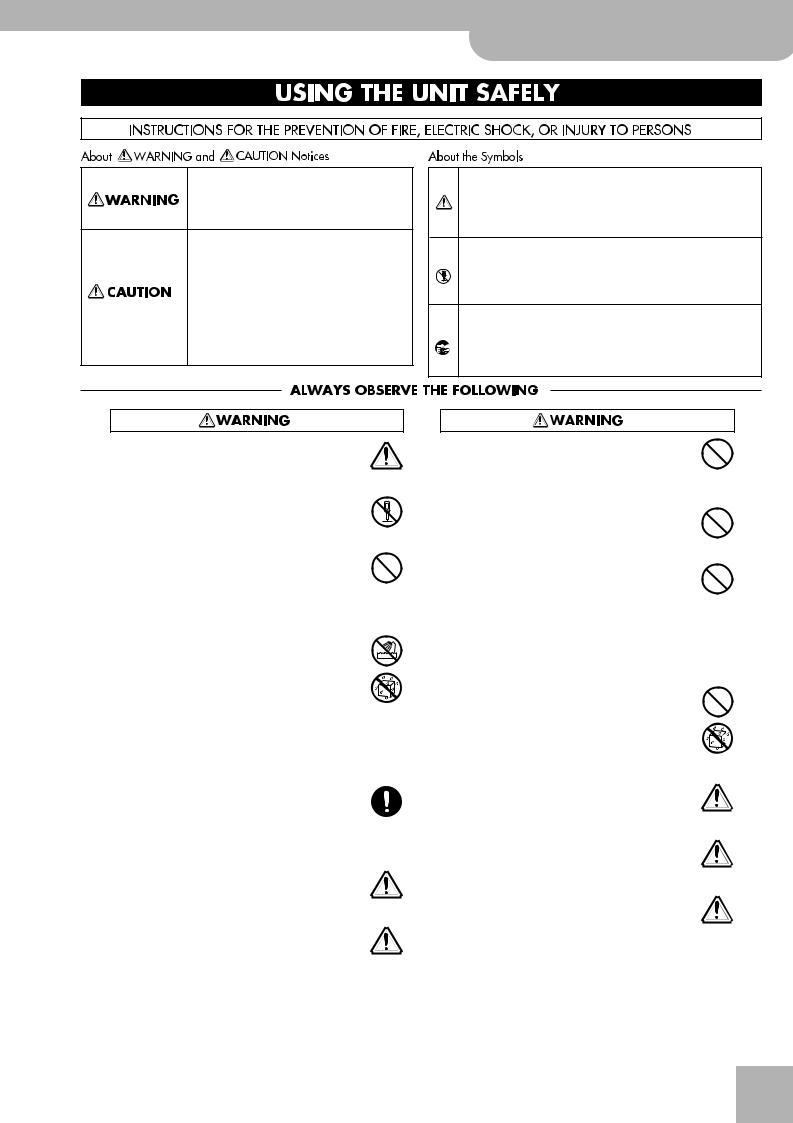
The symbol alerts the user to important instructions or warnings.The specific meaning of the symbol is determined by the design contained within the triangle. In the case of the symbol at left, it is used for general cautions, warnings, or alerts to danger.
The  symbol alerts the user to items that must never be carried out (are forbidden). The specific thing that must not be done is indicated by the design contained within the circle. In the case of the symbol at left, it means that the unit must never be disassembled.
The ● symbol alerts the user to things that must be carried out. The specific thing that must be done is indicated by the design contained within the circle. In the case of the symbol at left, it means that the powercord plug must be unplugged from the outlet.
• Before using this instrument, read the instructions below and the Owner’s Manual.
...................................................................................................................................
•Do not open (or modify in any way) the unit or its AC adapter.
...................................................................................................................................
•Do not attempt to repair the FR-3 or replace parts within it (except when this manual provides specific instructions directing you to do so). Refer all servicing to your retailer, the nearest Roland Service Center or an authorized Roland distributor, as listed on the “Information” page.
...................................................................................................................................
• Never use or store the FR-3 in places that are:
• Subject to temperature extremes (e.g., direct sunlight in an enclosed vehicle, near a heating duct, on top of heat-generating equipment); or are
• Damp (e.g., baths, washrooms, on wet floors); or are
•Humid; or are
•Exposed to rain; or are
•Dusty; or are
•Subject to high levels of vibration.
...................................................................................................................................
•When not in use, do not place the FR-3/FR-3b or FR-3s/ FR-3sb vertically due to instability. If placed in the vertical position on the floor/stage, ensure that it leans against a stable vertical surface e.g. a wall or a heavy musical instrument.
...................................................................................................................................
•The FR-3’s adapter should only be connected to a power supply of the type described in the operating instructions or as marked on the adapter’s label.
...................................................................................................................................
•Be sure to use only the AC adaptor supplied with the unit. Also, make sure the line voltage at the installation matches the input voltage specified on the AC adaptor's
body. Other AC adaptors may use a different polarity, or be designed for a different voltage, so their use could result in damage, malfunction, or electric shock.
...................................................................................................................................
•Do not excessively twist or bend the adapter cord, nor place heavy objects on it. Doing so can damage the cord, producing severed elements and short circuits. Damaged cords are fire and shock hazards!
....................................................................................................................................
•Use only the attached power-supply cord. Also, the supplied power cord must not be used with any other device.
....................................................................................................................................
•This instrument, either alone or in combination with an amplifier and headphones or speakers, may be capable of producing sound levels that could cause permanent hearing loss. Do not operate for a long period of time at a high volume level or at a level that is uncomfortable. If you experience any hearing loss or ringing in the ears, you should immediately stop using the FR-3 and consult an audiologist.
....................................................................................................................................
•Do not allow any objects (e.g., flammable material, coins, pins); or liquids of any kind (water, soft drinks, etc.) to penetrate the FR-3.
....................................................................................................................................
•Batteries must never be recharged, heated, taken apart, or thrown into fire or water.
....................................................................................................................................
•In households with small children, an adult should provide supervision until the child is capable of following all rules essential for the safe operation of the FR-3.
....................................................................................................................................
•Protect the FR-3 from strong impact. (Do not drop it!)
....................................................................................................................................
7
FR-3s/FR-3/FR-3sb/FR-3b V-Accordion
Features | Using the unit safely
•Immediately turn the power off, remove the adapter from the outlet and request servicing by your retailer, the nearest Roland Service Center or an authorized Roland distributor, as listed on the “Information” page when:
•The adapter’s cord or the plug has been damaged; or
•Objects have fallen into or liquid has been spilled onto the FR-3; or
•The unit has been exposed to rain (or otherwise has become wet); or
•The unit does not appear to operate normally or exhibits a marked change in performance.
•Do not force the adapter to share an outlet with an unreasonable number of other devices. Be especially careful when using extension cords—the total power used by all devices you have connected to the extension cord’s outlet must never exceed the power rating (watts/ amperes) for the extension cord. Excessive loads can cause the insulation on the cord to heat up and eventually melt through.
•Before using the FR-3 in a foreign country, consult with
your retailer, the nearest Roland Service Center or an authorized Roland distributor, as listed on the “Information” page.
• The FR-3 should be located so that its location or position does not interfere with its proper ventilation.
...................................................................................................................................
• Always grasp only the plug on the power-supply cord
when plugging into or unplugging from, an outlet or this unit.
...................................................................................................................................
•At regular intervals, you should unplug the AC adaptor and clean it by using a dry cloth to wipe all dust and other accumulations away from its prongs. Also, disconnect the power plug from the power outlet whenever the FR-3 is to remain unused for an extended period of time. Any accumulation of dust between the power plug and the power outlet can result in poor insulation and lead to fire.
...................................................................................................................................
•If used improperly, batteries may explode or leak and cause damage or injury. In the interest of safety, please read and observe the following precautions.
•Carefully follow the installation instructions for batteries, and make sure you observe the correct polarity.
•Avoid using new batteries together with used ones. In addition, avoid mixing different types of batteries.
•Remove the batteries whenever the unit is to remain unused for an extended period of time.
...................................................................................................................................
|
• Used batteries must be disposed of in compliance with |
|
r |
whatever regulations for their safe disposal that may be |
|
observed in the region in which you live. |
||
|
||
|
................................................................................................................................... |
|
|
• Try to prevent cords and cables from becoming entan- |
|
|
gled. Also, all cords and cables should be placed out of |
|
|
the reach of children. |
|
|
................................................................................................................................... |
|
|
• Never climb on top of, nor place heavy objects on the |
|
|
FR-3. |
|
|
................................................................................................................................... |
• Never handle the adapter or its plugs with wet hands
when plugging into or unplugging from, an outlet or this unit.
....................................................................................................................................
•If you need to move the FR-3, take note of the precautions listed below. Make sure to have a firm grip, to protect yourself from injury and the instrument from damage.
•Disconnect the adapter.
•Disconnect all cords coming from external devices.
....................................................................................................................................
•Before cleaning the FR-3, turn off the power and unplug
the power cord from the outlet.
....................................................................................................................................
• Whenever you suspect the possibility of lightning in your area, disconnect the adapter from the outlet.
....................................................................................................................................
•Should you remove screws, make sure to put them in a safe place out of children’s reach, so there is no chance of them being swallowed accidentally.
....................................................................................................................................
8

V-Accordion r
Important notes
2. Important notes
In addition to the items listed under “Using the unit safely” on p. 7, please read and observe the following:
Power supply
•Do not connect the FR-3 to same electrical outlet that is being used by an electrical appliance that is controlled by an inverter (such as a refrigerator, washing machine, microwave oven, or air conditioner), or that contains a motor. Depending on the way in which the electrical appliance is used, power supply noise may cause this unit to malfunction or may produce audible noise. If it is not practical to use a separate electrical outlet, connect a power supply noise filter between this unit and the electrical outlet.
•Do not use this instrument on the same power circuit with any device that will generate line noise (such as an electric motor or variable lighting system).
•Before connecting the FR-3 to other devices, turn off the power to all units. This will help prevent malfunctions and/or damage to speakers or other devices.
•The AC adaptor will begin to generate heat after long hours of consecutive use. This is normal, and is not a cause for concern.
•Although the display and LEDs are dark when the POWER switch is off, this does not mean that the unit has been completely disconnected from the power source. To turn off the power completely, first turn off the POWER switch, then unplug the power cord from the wall outlet. For this reason, the outlet to which you connect the power cord’s plug should be one that is within easy reach.
Placement
•Using the FR-3 near power amplifiers (or other equipment containing large power transformers) may induce hum. To alleviate the problem, change the orientation of this unit; or move it farther away from the source of interference.
•This device may interfere with radio and television reception. Do not use this device in the vicinity of such receivers.
•Do not place the FR-3 near devices that produce a strong magnetic field (e.g., loudspeakers).
•Install the FR-3 on a solid, level surface.
•Noise may be produced if wireless communications devices, such as cell phones, are operated in the vicinity of this unit. Such noise could occur when receiving or initiating a call or while conversing. Should you experience such problems, relocate such wireless devices so they are at a greater distance from this unit or switch them off.
•Do not expose the unit to direct sunlight, place it near devices that radiate heat, leave it inside an enclosed vehicle or otherwise subject it to temperature extremes. Also, do not allow lighting devices that normally are used while their light source is very close to the unit (such as a piano light) or powerful spotlights to shine upon the same area of the unit for extended periods of time. Excessive heat can deform or discolor the unit.
•To avoid possible breakdown, do not use the unit in a wet area, such as an area exposed to rain or other moisture.
•Do not allow rubber, vinyl or similar materials to remain on the instrument for long periods of time. Such objects can discolor or otherwise harmfully affect the finish.
•Do not put anything that contains water (e.g., flower vases) on the instrument. Also, avoid the use of insecticides, perfumes, alcohol, nail polish, spray cans, etc., near the unit. Swiftly wipe away any liquid that spills on the unit using a dry, soft cloth.
•Do not allow objects to remain on top of the keyboard or buttons. This can be the cause of malfunction, such as keys or buttons ceasing to produce sound.
•Do not paste stickers, decals or the like on this instrument. Peeling these off, particularly when strong adhesives have been used, can damage the instrument’s exterior finish (the stickers provided with this instrument feature a weak adhesive).
Maintenance
•For everyday cleaning wipe the FR-3 with a soft, dry cloth or one that has been slightly dampened with water. To remove stubborn dirt, use a mild, non-abrasive detergent. Afterwards, be sure to wipe the instrument thoroughly with a soft, dry cloth.
•Never use benzene, thinner, alcohol or solvents of any kind, to avoid the possibility of discoloration and/or deformation.
Repairs and data
•Please be aware that all data contained in the instrument’s memory may be lost when it is sent for repairs. In certain cases (such as when circuitry related to memory itself is out of order), we regret that it may not be possible to restore the data. Roland assumes no liability concerning such loss of data.
Additional precautions
•When moved from one location to another where the temperature and/or humidity is very different, water droplets (condensation) may form inside the FR-3. Damage or malfunction may result if you attempt to use the FR-3 in this condition. Therefore, before using the FR-3, you must allow it to stand for several hours, until the condensation has completely evaporated.
•Please be aware that the memory contents can be irretrievably lost as a result of a malfunction or the improper operation of the instrument. Therefore, be sure to archive important settings using the FR-3’s Bulk Dump function (see p. 52).
•Use a reasonable amount of care when using the instrument’s buttons, other controls and jacks/connectors. Rough handling can lead to malfunctions.
•Never strike or apply strong pressure to the display.
•When connecting/disconnecting cables, grasp the connector itself—never pull on the cable. This way you will avoid causing shorts or damage to the cable’s internal elements.
•A small amount of heat will radiate from the instrument during normal operation. This is perfectly normal.
•To avoid disturbing your neighbors, try to keep the instrument’s volume at reasonable levels. You may prefer to use headphones, so you do not need to be concerned about those around you (especially late at night).
•When you need to transport the instrument, package it in the box (including padding) that it came in. Otherwise, you will need to use equivalent packaging materials or a flightcase.
•Use Roland cables to make audio connections. If using some other make of connection cable, please note the following precautions. Some connection cables contain resistors. Do not use cables that incorporate resistors for connecting to this unit. The use of such cables can cause the sound level to be extremely low or impossible to hear. For information on cable specifications, contact the manufacturer of the cable.
9

FR-3s/FR-3/FR-3sb/FR-3b V-Accordion
Important notes | Important notes
Precautions for optional batteries
•The temperature range for use of the batteries depends on the battery type being used. Please see the documentation that came with the batteries.
•Do not use or store batteries at high temperature, such as in strong direct sunlight, in cars during hot weather or directly in front of heaters. This may cause battery fluid leakage, impaired performance and shorten the batteries’ service life.
•Do not splash fresh or saltwater on a battery or allow the terminals to become damp. This may cause heat generation and formation of rust on the battery and its terminals.
•If newly purchased batteries exhibit rust, generate heat or seem abnormal in any other way, do not use them. Take them back to your dealer.
•Keep the batteries out of reach of babies or small children.
•Be sure to carefully instruct any person on the proper way of handling a battery.
•Never dispose of the battery in a fire. Never heat it. Doing so may melt the insulation, damage the gas release vents or protective devices, cause combustion through chemical reaction with generated hydrogen, ejection of battery fluid, bursting or fire.
•Do not use batteries with the positive (+) and negative (–) terminals reversed, as this may drain the batteries or cause abnormal chemical reactions.
•Do no strike or drop the batteries. Strong impact can cause leakage of battery fluid, heat generation, bursting or fire.
•Never try to connect several batteries in parallel as this may cause leakage of battery fluid, heat generation, bursting or fire.
•Do not alter or remove protective mechanisms or other parts. Never disassemble the batteries.
•If any fluid from a battery comes in contact with the eyes, flush the eyes immediately, washing them thoroughly with clean water from a tap or other source and consult a doctor. Strong alkaline fluid can damage the eyes and lead to permanent loss of eyesight.
•If skin or clothing comes in contact with any fluid from the battery, wash the area immediately with clean water from a tap. Battery fluid can cause skin damage.
•When a battery is no longer usable, dispose of it in accordance with all applicable local laws and regulations.
•If a battery leaks fluid, changes color or shape or changes in any other way, do not use it, otherwise it may cause heat generation, bursting or fire.
Strap holder precaution
•Never unscrew the strap holder rings to avoid damaging the FR-3’s plastic housing, which eventually compromises overall stability and safety.
r
10
V-Accordion r
Panel descriptions
3. Panel descriptions
Treble control panel
APOWER button
Press this button to switch the V-Accordion on (the button lights) and off (button dark).
BSORDINA switch
This MELLOW/BRIGHT switch allows you to switch the simulation of the wooden resonance chamber on (“BRIGHT”) and off (“MELLOW”).
CVOL knob
This knob allows you to set the V-Accordion’s overall volume.
DBAL knob
This knob allows you to set the balance between the Bass and the Treble sections. Turn it towards “BASS” to decrease the Treble section’s volume. Turn it towards “TREBLE” to decrease the Bass section’s volume.
ESET register
This register has three functions: if you press and then release it, you can select the desired Set (from among 10 available Sets).
After pressing [SET], you can use the Treble registers to select one of the following Sets:
1 |
CLASSIC |
6 |
SP FOLK |
2 |
JAZZ |
7 |
BANDONEON |
|
|
|
|
3 |
I FOLK |
8 |
ALPINE |
|
|
|
|
4 |
D FOLK |
9 |
CAJUN |
|
|
|
|
5 |
F FOLK |
0 |
TEX MEX |
|
|
|
|
By pressing and holding it, you gain access to the parameter and MIDI functions printed below the remaining registers that allow you to change several settings.
Press it together with register [1÷–] or [2÷+] to change octaves.
FTreble registers
The Treble section provides the following 10 switches (“registers”) that allow you to select various footages (see p. 21).
Treble registers
1 |
Bassoon |
6 |
Musette |
2 |
Bandon |
7 |
Violin |
3 |
Harmon |
8 |
Oboe |
4 |
Organ |
9 |
Clarinet |
5 |
Master |
0 |
Piccolo |
If you hold down [SET] or [ORCHESTRA], the Treble registers can also be used to select and/or set various parameters.
Note: The Treble register assignments change when you select Set 5 “F FOLK”. See page 22 for details.
GORCHESTRA register
The [ORCHESTRA] register serves three purposes: after pressing it, you can use the Treble registers to select one of the 10 on-board orchestral sounds for the Treble section. Activate it, then press one of the registers 1~0 to select the desired sound (“TROMBONE”, “TRUMPET”, “T SAX”, “A SAX”). See the red legends below the registers. Press it again to assign registers 1~0 to the Treble section.
Press and hold this register to activate the demo song function (see p. 18) and select a demo song using registers [1÷–] (previous) or [2÷+] (next).
Press and hold it while pressing register [7], [8], [9] or [0] to select an Orchestra mode (see p. 25).
11

FR-3s/FR-3/FR-3sb/FR-3b V-Accordion
Panel descriptions | Bass control panel
H METRONOME button |
I CHORUS knob |
Press this button to switch the metronome on and |
Use this knob to set the level of the chorus effect (see |
off (see p. 31). It can also be used to transmit Start/ |
p. 22). |
Stop messages to external MIDI devices. |
J REVERB knob |
|
Use this knob to set the level of the reverb effect (see |
|
p. 22). |
Bass control panel
K
|
|
|
|
|
|
|
|
|
|
|
|
|
|
|
|
|
|
|
|
|
|
|
|
|
|
|
|
|
|
|
|
|
|
|
|
|
|
|
|
|
|
|
|
|
|
|
|
|
|
|
|
|
|
|
|
|
|
|
|
|
|
|
|
|
|
|
|
|
|
|
|
|
|
|
|
|
|
|
|
|
|
|
|
|
|
|
|
|
|
|
|
|
|
|
|
|
|
|
|
|
|
|
|
|
|
|
|
|
|
|
|
|
|
|
|
|
|
|
|
|
|
|
|
|
|
|
|
|
|
|
|
|
|
|
|
|
|
|
|
|
|
|
|
|
|
|
|
|
|
|
|
|
|
|
|
|
|
|
|
|
|
|
|
|
|
|
|
|
|
|
|
|
|
|
|
|
|
|
|
|
|
|
|
|
|
L |
M |
|
|
|
N |
||||||||||||
K Bass registers |
|
|
|
|
|
|
|
|
|
|
|
|
|
|
|
M ORCH FREE BS/ORCH CHORD registers |
|||||||||||||||||
These switches allow you to select the desired bass |
|
|
By pressing these three registers, you activate (or |
||||||||||||||||||||||||||||||
mix. They include the following footages: |
|
|
switch off) one of two Orchestra sections: ORCH |
||||||||||||||||||||||||||||||
|
|
|
|
|
|
|
|
|
|
|
|
|
|
|
|
|
|
|
|
|
|
|
CHORD (if the Free Bass section is off) or ORCH FREE |
||||||||||
|
|
|
|
|
|
|
|
Bass registers |
|
|
|
|
|
|
|
|
|
|
|||||||||||||||
|
|
|
|
|
|
|
|
|
|
|
|
|
|
|
|
|
|
BS (if the Free Bass section is on). “ORCH CHORD” |
|||||||||||||||
|
|
|
|
|
|
|
|
|
|
|
|
|
|
|
|
|
|
|
|
|
|
|
|||||||||||
1 |
|
|
|
|
|
2’ |
5 |
|
|
|
|
|
8’/4’/2’ |
|
|
allows you to assign an orchestral sound to the chord |
|||||||||||||||||
|
|
|
|
|
|
|
|
||||||||||||||||||||||||||
|
|
|
|
|
|
|
|
||||||||||||||||||||||||||
|
|
|
|
|
|
|
|
|
|
|
|
|
|
|
|
|
|
|
|
|
|
|
buttons. “ORCH FREE BS” can be used to select an |
||||||||||
2 |
|
|
|
|
|
4’ |
6 |
|
|
|
|
|
16’/8’/8-4’ |
|
|
||||||||||||||||||
|
|
|
|
|
|
|
|
|
|
|
|
orchestral bass sound for the Free Bass section. See |
|||||||||||||||||||||
|
|
|
|
|
|
|
|
|
|
|
|
||||||||||||||||||||||
|
|
|
|
|
|
|
|
|
|
|
|
||||||||||||||||||||||
|
|
|
|
|
|
|
|
|
|
|
|
||||||||||||||||||||||
|
|
|
|
|
|
|
|
|
|
|
|
|
|
|
|
|
|
|
|
|
|
|
p. 28 for details. |
||||||||||
|
|
|
|
|
|
|
|
|
|
|
|
|
|
|
|
|
|
|
|
|
|
|
|||||||||||
3 |
8-4’ |
7 |
16’/2’ |
4 16’/8’/8-4’/4’/2’
LORCH BASS registers
Press the last three (“ORCH BASS”) registers (viewed from the top) simultaneously to enter Orchestra Bass mode (see p. 27). Doing so switches off the accordion bass sound and selects an orchestral sound. Press the last three registers again to return to normal bass mode.
NFREE BASS registers
Press the first three (“FREE BASS”) registers (viewed from the top) simultaneously to enter Free Bass mode. Press the first three registers again to return to normal bass mode.
Free Bass registers
1 |
Low |
5 |
Low Low + High |
2 |
High |
6 |
High Low + High |
3 |
Low + High |
7 |
Low High |
r
ODisplay
The display keeps you informed about the FR-3’s status and helps you locate the functions you may wish to set.
4 Low + High Low
O D/ORCH SBSSREEFLEREBT |
ORCHESTRA |
BA |
|
12

Connection panel
P Q
PDC IN socket
This is where you need to connect the supplied power adapter (PSB-4U). Note that you can also purchase 10 optional batteries and use the FR-3 without the adapter.
QMIDI OUT/IN socket
This socket can be used to receive or transmit MIDI data. Its function depends on the setting of the “MId” parameter (see p. 48).
ROUTPUT L/MONO (TREBLE) & R/MONO (BASS) sockets
These sockets can be connected to an amplifier, a mixing console or a wireless system. If you use both connectors, the FR-3’s output is stereo. In that case the signals of the Treble section is transmitted to the L/MONO socket, while the R/MONO socket transmits the bass (and chord) signal. If you only use one jack (connected to the “L” or “R” socket), the FR-3’s output is mono.
Note: On the FR-3s/FR-3sb, connecting jacks to these sockets does not mute the internal speakers.
V-Accordion r
Connection panel
R S
SPHONES socket
This is where you can connect stereo headphones (Roland RH-25, RH-50 or RH-200). On the FR-3s/ FR-3sb, connecting a pair of headphones mutes the internal speakers.
Important remark
After connecting any cable to the FR-3, be sure to never place it on the side when not using it.
•Always stand the V-Accordion on its rubber feet (and in the corresponding direction) to avoid damaging the plugs.
•Always handle and move the FR-3 with care and pay special attention to the cable slack to avoid damaging or bending the cables.
•If you place the FR-3 on your lap, ensure that the audio and adapter cables run between your legs (not sideways) to avoid damaging or bending the cables.
13
FR-3s/FR-3/FR-3sb/FR-3b V-Accordion
Setting up | Setting up
4. Setting up
r
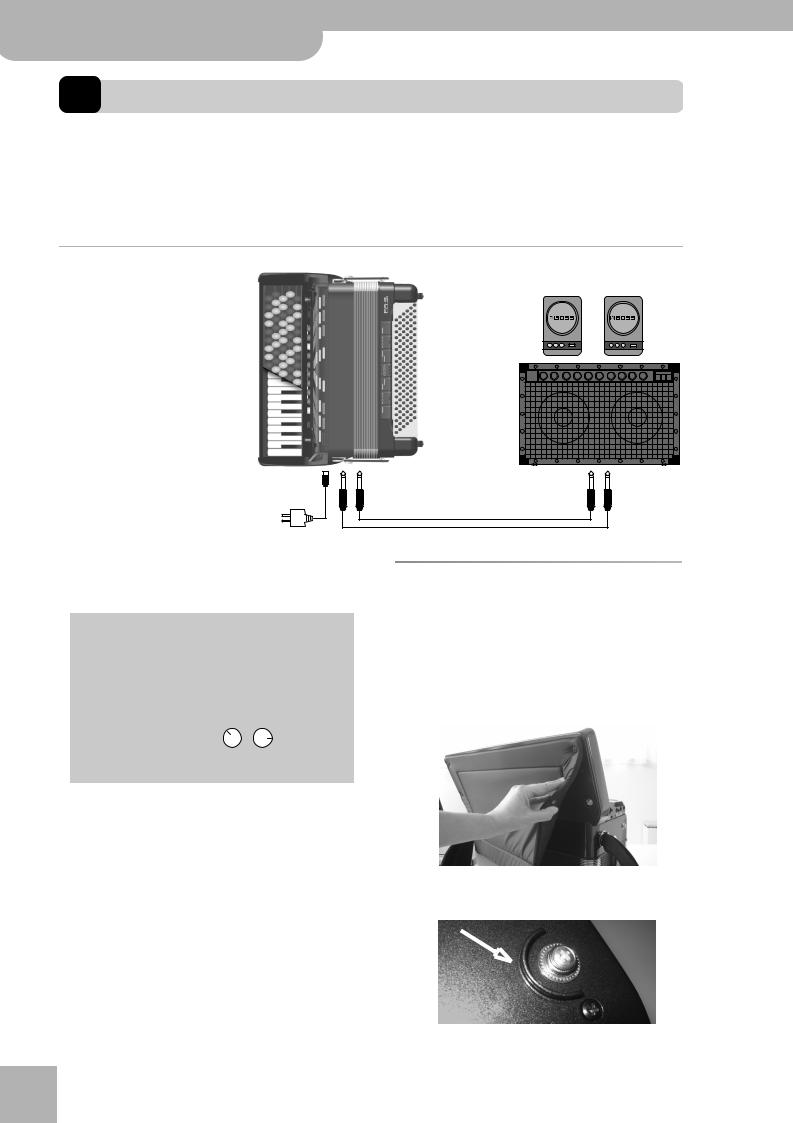
Connections
The FR-3 has a compartment for 10 optional AA-type batteries. Consider purchasing such batteries when performing on stage, or to use the FR-3s/FR-3sb as a stand-alone instrument (taking advantage of its internal speakers). An FR-3/FR-3b with optional batteries still needs to be connected to an amplifier.
Using the OUTPUT sockets |
|
|
|
If you are using optional batteries |
|
Note: The same connections apply to the FR-3sb and FR-3b. |
|
and need to connect the FR-3 to a |
|
||
|
|
|
|
PA system or mixer, we recom- |
|
|
|
mend using a wireless system to |
|
|
|
avoid having to use excessively |
|
|
|
long signal cables. |
|
|
|
The FR-3s/FR-3sb is equipped with |
|
|
|
an internal speaker system and |
|
|
|
thus does not need to be con- |
|
|
|
nected to an amplifier at all. The |
|
|
|
FR-3/FR-3b, on the other hand, |
|
|
|
does require an audio connection. |
|
|
|
You can also use a pair of head- |
|
|
|
phones (Roland RH-25, RH-50, |
|
OUTPUT |
INPUT |
RH-200 or RH-300). In the case of |
To a wall outlet |
L/MONO + R/MONO |
L + R |
|
|
||
the FR-3s/FR-3sb, connecting |
|
|
|
headphones switches off the inter- |
|
Use either a long signal cable (10m or more) or an optional wireless system (recommended). |
|
nal speakers. |
|
|
|
Note: To prevent malfunction and/or damage to speakers or other devices, always turn down the volume, and turn off the power on all devices before making any connections.
The FR-3’s sounds have been arranged in such a way as to provide a natural stereo image. If you connect the V-Accordion to a mixing console, set the PAN parameter of the input to which the OUTPUT L socket (Treble section) is connected to “3 o’clock” and the PAN control of the channel to which the OUTPUT R socket (Bass section) is connected to “11 o’clock” to preserve this balance. Something like this: T B/C . This setting can be changed, however (see “Stereo Width” on
p. 41).
Securing the adapter and/or MIDI cable
Proceed as follows to ensure that the adapter cable –or a MIDI cable– doesn’t come loose while you are playing.
(1)Remove the padding at the back of the FR-3.
The padding is attached with several clips and can be removed simply by unclipping it.
Note the guide next to the right clip closest to the connection panel.
14

(2)Connect the small plug of the adapter cable to the DC IN socket and wind the cable around the guide:
You can also connect the MIDI cable to the MIDI OUT/ IN socket and wind it around the guide like the adapter cable.
Attaching the straps
Proceed as follows to attach the straps to your FR-3:
(1)Unpack the straps.
(2)Put the FR-3 on a stable surface.
The connection panel must face down.
(3)Slide the upper end of one strap through the holder ring (see the illustration).
The upper end is the part with the velcro portions and the clip.
(4)Fasten the strap’s upper part to the velcro layer below it.
V-Accordion r
Attaching the straps
(3)Reinstall the padding, taking care to secure the adapter cable and/or MIDI cable you have just installed.
When finished, the FR-3 should look as follows:
(4)Reverse these steps to remove and disconnect the adapter when you want to stop playing.
(5)Close the security clip to ensure that the strap cannot come loose.
(6)Repeat steps (3)~(5) for the other strap.
The upper strap ends should look as follows:
(7)Turn the FR-3 around (with the connection panel on the left side, see below).
15

FR-3s/FR-3/FR-3sb/FR-3b V-Accordion
Setting up | Switching the power on and off
(8)Slide the lower end of one strap through the holder ring as shown.
(10)Turn the strap end around and insert it into the lower eyelet, then pull it tight.
(9)Slide the strap end through the upper eyelet of its plastic buckle (see the illustration).
(11)Slide the plastic clip over the loose and long lower strap ends to secure the strap.
r
Switching the power on and off
The power-on procedure depends on whether or not you are using optional batteries.
Note: If you decide to use rechargeable AA batteries, be aware that they cannot be recharged simply by leaving them in the FR-3’s compartment and connecting the adapter. You will need an external charging unit.
Note: Once the connections have been completed, turn on power to your various devices in the order specified. By turning on devices in the wrong order, you risk causing malfunction and/or damage to speakers and other devices.
If you are using the supplied adapter
If the FR-3 is powered by the supplied adapter, proceed as follows:
(1)Connect the supplied adapter to the FR-3’s DC IN socket.
Note: You may want to adjust the length first to suit your preference.
(12)Repeat steps (8)~(11) for the other lower strap end.
(2)Connect the FR-3’s DC INLET socket to a wall outlet that meets the specifications (see p. 57).
To a wall outlet
The adapter should only be connected to a power source of the type marked on its label. For details on the power consumption, please refer to page 57.
(3)Turn down the output volume of the receiving audio device.
You can also simply switch it off.
(4)Connect the FR-3’s OUTPUT sockets to the external audio device (amplifier, mixing console, etc.).
16
(5)Press the FR-3’s [POWER] button to switch it on.
(6)Switch on the receiving audio device.
(7)Start playing (see “First steps” on page 19).
Note: This unit is equipped with a protection circuit. A brief interval (a few seconds) after power up is required before the unit will operate normally.
—To switch off you system—
(8)Turn down the output volume of the receiving audio device or switch it off.
(9)Press the FR-3’s [POWER] button again so that its indicator goes dark.
Using batteries and no external amplification (FR-3s/FR-3sb only)
Note: See page 54 for how to work with batteries.
(1)Press the FR-3s/FR-3sb’s [POWER] button (it lights) to switch it on.
Note: You can also connect headphones.
(2)Start playing (see “First steps” on page 19).
(3)Press the [POWER] button again so that it goes dark when you are finished.
V-Accordion r
Using batteries and no external amplification (FR-3s/FR-3sb only)
If you are using batteries and an audio connection to an external device
The FR-3/FR-3b needs to be connected to an amplification system of some sort (unless you want to use headphones).
Note: You can also purchase a wireless transmitter from thirdparty suppliers and connect it to the FR-3’s OUTPUT sockets.
(1)Turn down the output volume of the receiving audio device.
You can also simply switch it off.
(2)Connect the FR-3’s OUTPUT sockets to the external
audio device using two 1/4” guitar cables.
Note: You can also connect headphones to the PHONES socket, in which case you do not need to establish an audio connection.
(3)Press the FR-3’s [POWER] button (it lights) to switch it on.
(4)Switch on the receiving audio device.
(5)Start playing (see “First steps” on page 19).
—To switch off your system—
(6)Turn down the output volume of the receiving audio device, or switch it off.
(7)Press the FR-3’s [POWER] button again so that it goes dark.
17

FR-3s/FR-3/FR-3sb/FR-3b V-Accordion
Setting up | Switching the power on and off
Listening to the demo songs
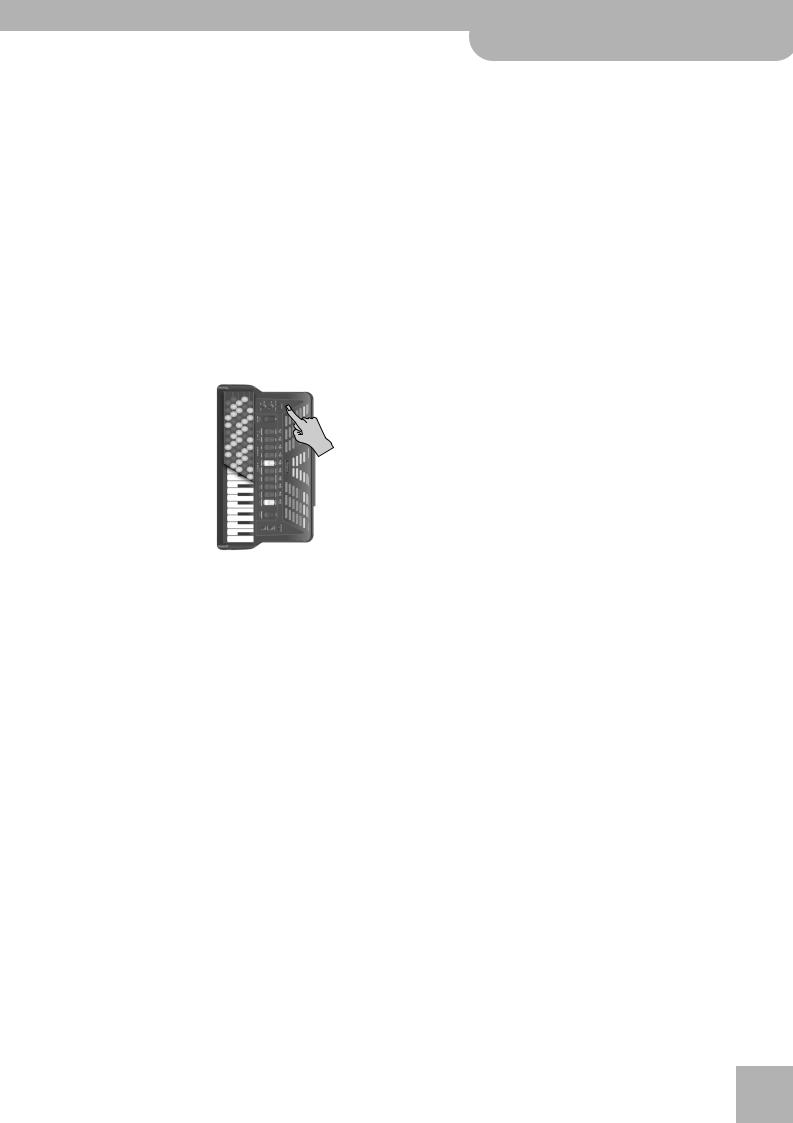
One of the most striking aspects of your V-Accordion may be that it can play all by itself! It contains a series of demo songs that illustrate its wide variety of sounds and applications. Here is how to listen to the demo songs:
(1)Switch on the FR-3.
See “Switching the power on and off” on p. 16.
(2)Press and hold the [ORCHESTRA] register until the display looks as follows:
CHORD/
BASS FREE BS TREBLE
_ 1
ORCHESTRA
Playback starts automatically with the first demo song (there are 25 demo songs in all). At the end of the first song, the FR-3 starts playing songs “2”, “3” etc. You can also directly jump to the song you’re interested in:
(3)Use registers [1] and [2] (“VALUE –/+”) to select the demo song you want to listen to.
TROMBONE
DOWN
VALUE
(4) Use the [VOL] knob to change the volume if it is too loud or too soft.
Note: All demo songs are copyright ©2006 by Roland Europe. Public performance or recording of these songs is prohibited.
(5)Press [ORCHESTRA] again to leave the demo song mode.
r
18

V-Accordion r
First steps
First steps
The sections of your FR-3
Before showing you how to use the FR-3, let’s briefly look at the various “sections” of your instrument, as that will help you understand how your V-Accordion works.
The FR-3 is a “virtual” accordion. That term was borrowed from synthesizers that recreate the sounds of other synthesizers using a different technology (hence the term “virtual analog synthesizer”, for example).
The FR-3 recreates the sounds of various accordion instruments (the “virtual” part) and can even generate orchestral sounds, like trumpet, flute, etc. (the synthesizer part).
The sections outlined in the illustration to the right contain several functions you can set. Let us agree to call those functions “parameters”.
Treble section Orchestra section
Bass, Chord,
Free Bass,
Orchestra Bass,
Orchestra Chord,
Orchestra Free
Bass section
Registers of the bass, chord, Free Bass and Orchestra Bass/Chord/Free Bass sections
The parameters allow you to change certain aspects of the FR-3’s sound: you can set the Musette detuning system, the levels of various sections, add digital effects, and more. Your settings can be saved. There is thus no need to set the parameters time and again. Note, however, that they always apply to all Sets.
The accordion sections are combined into “Sets”. Those Sets have been programmed at the factory and cannot be changed. The FR-3’s internal structure looks as follows:
|
Set 10 |
GLOBAL |
Orchestral |
|
1~10 |
||
|
|
Metronome |
|
|
|
Reverb |
Orch. Bass |
|
Set 3 |
Chorus |
1~7 |
|
Level |
||
|
Set 2 |
Touch |
Orch. Chord |
|
Set 1 |
:: |
|
|
|
1~7 |
|
|
|
Most of these set- |
|
|
|
|
|
|
|
tings can be saved. |
Orch FB |
|
|
|
1~7 |
Treble |
Bass |
Free Bass |
|
1~10 |
1~7 |
1~7 |
|
There are 10 Treble registers, 7 Bass, and 7 Free Bass registers. In addition, each section can play an orchestral sound (piano, guitar, etc.): Orchestra (10 sounds), Orchestra Bass (7), Orchestra Chord (7), and Orchestra Free Bass.
The (accordion) registers behave like on an acoustic accordion, i.e. they allow you to change the footage combinations. Those registers also double as sound selection buttons when one of the sections (Treble, Bass, Chord or Free Bass) plays an orchestral sound. Oh, and… the Sets can be selected by pressing the [SET] register and a numbered register ([1]~[0]).
As stated above, the Sets have been programmed at the factory and cannot be changed.
There are 10 Set memories that contain useful settings right out of the box. You cannot replace them with your own settings. They are influenced, however, by certain GLOBAL settings. The GLOBAL parameters apply to all Sets and all sections.
Sets are like the trunk of a car that contains several instruments (bandoneon, musette, etc.). The instruments themselves can be recalled via the registers.
19
FR-3s/FR-3/FR-3sb/FR-3b V-Accordion
Setting up | First steps
r
How to read the display
With the exception of the display and the additional buttons and knobs, the FR-3 looks like a conventional accordion. The display contains important clues about the settings that are currently in effect.
What’s shown in the display depends on how you are |
The above applies to situations where no orchestral |
using your FR-3 and what your are doing. |
sound is used. |
■Sets |
■Orchestral sections |
After pressing the [SET] register, the display looks |
If you do select an orchestral sound, the display looks |
more or less as follows: |
as follows: |
CHORD/
BASS FREE BS TREBLE
St1
ORCHESTRA
“St” flashes to signal that you need to press a register ([1]~[0]) to select a Set memory. “0” (TEX MEX), by the way, refers to Set number “10”.
Each Set represents one accordion type whose sound can be modified by switching the desired registers on and off. This is identical to the behavior of an acoustic accordion. Unlike an acoustic accordion, however, your FR-3 can simulate different instrument types.
Note: If you don’t select a Set, the “St” message stops flashing. If you then press a Treble register, only the sound of the right hand (Treble) changes.
■Accordion sections
Once you have selected a Set, the display indication changes to something like this (after a few seconds):
AB C
CHORD/
BASS FREE BS TREBLE
440
ORCHESTRA
Carefully look at what is printed above the display:
BASS |
The digit in this column refers to the Bass reg- |
|
(A) |
ister you selected last. (It is also displayed in |
|
|
Free Bass mode to remind you of the Bass reg- |
|
|
ister you will return to when you leave Free |
|
|
Bass mode.) |
|
|
|
|
CHORD |
The digit in this column refers to: |
|
FREE BS |
• |
The selected chord register (when Free Bass |
(B) |
|
mode is off) –OR– |
|
• |
The selected Free Bass register (the middle |
|
|
digit flashes to signal that you are in Free |
|
|
Bass mode) |
|
The chord register is always identical to the |
|
|
bass register. The first two digits are therefore |
|
|
usually the same. When Free Bass mode is |
|
|
active, however, the digit in the middle may |
|
|
differ from the left one (and it flashes). |
|
|
|
|
TREBLE |
The digit in this column refers to the selected |
|
(C) |
Treble register. |
|
|
|
|
|
CHORD/ |
|
|
BASS FREE BS TREBLE |
|
A dot (see “2.”) means |
240. |
|
that the section in |
|
|
question plays an |
|
|
|
|
|
orchestral sound. |
ORCHESTRA |
|
|
||
|
|
|
|
|
|
D
As printed below the display (D), a dot to the right of a figure means that the section in question (BASS in the example above) does not play an accordion but an orchestral sound.
Our example therefore means:
•You have assigned orchestral sound “2” (“Bowed”) to the Bass section.
•The chord buttons are assigned to accordion register “4”.
•The Treble section plays register “10” (which is called “0”).
Both the chord buttons and the Treble keyboard play accordion sounds, while the 2 bass rows of the button keyboard play an orchestral sound.
If the middle digit flashes and is followed by a dot, the bass buttons play an orchestral sound that is assigned to the Free Bass section.
|
CHORD/ |
|
|
BASS FREE BS TREBLE |
|
The middle digit flashes |
430. |
|
when the ORCH FREE BS |
||
section is active. |
|
|
ORCHESTRA |
||
|
||
|
|
See also “Using two different orchestral sounds for the Bass button keyboard” on p. 29 for details about the left and middle dots.
20
Loading...