


 Loading...

 Introduction
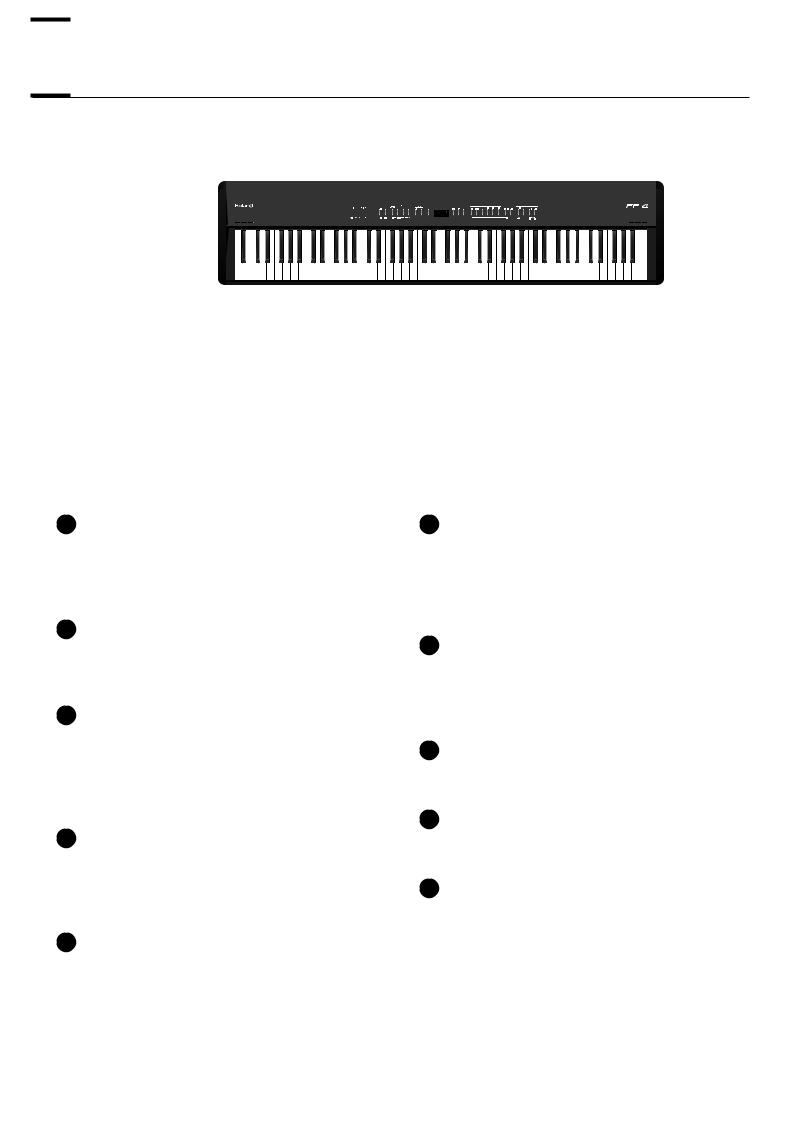
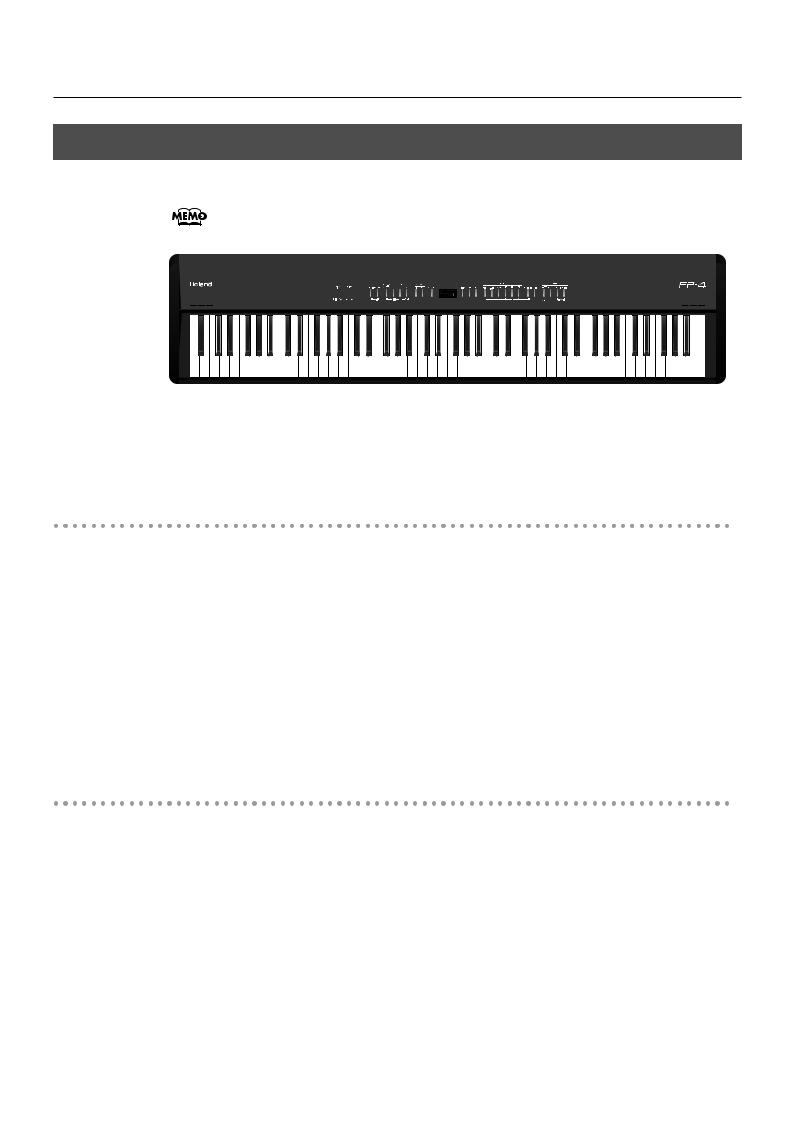
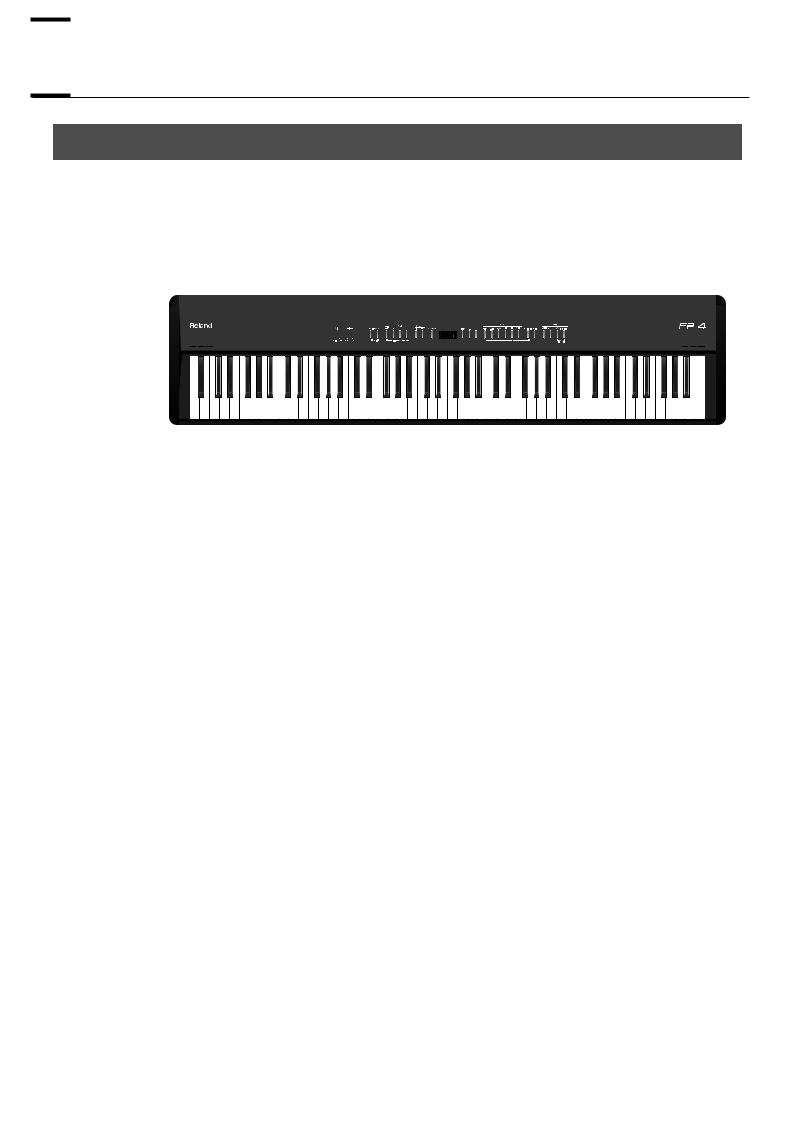
Thank you, and congratulations on your choice of the FP-4. To ensure that you obtain the maximum enjoyment and take full advantage of the FP-4’s functionality, please read this owner’s manual carefully.
About the Manual
You should first read the “Before You Play” (p. 15) section of the owner’s manual (this document). This explains how to connect the AC adaptor and turn on the power.
The owner’s manual explains basic operations you’ll need to know in order to master the FP-4’s performance functions, as well as more advanced operations, such as using the FP-4 to record a song.
Conventions in this Manual
In order to explain the operations as clearly as possible, this manual uses the following conventions.
•Text enclosed in square brackets [ ] indicates the name of a button or a knob, such as the [Display] button.
• Lines that begin with NOTE or an asterisk * are cautionary statements that you must be sure to read.
•The numbers of pages that you can turn to for additional, related information are given like this: (p. **).
•This document uses screen shots for explanatory purposes. Please be aware that the settings in these explanatory screen shots may not match the actual factory settings (Tone names, etc.).
Before using this unit, carefully read the sections entitled: “USING THE UNIT SAFELY” (p. 7), and “Important Notes” (p. 10). These sections provide important information concerning the proper operation of the unit. Additionally, in order to feel assured that you have gained a good grasp of every feature provided by your new unit, owner’s manual should be read in its entirety. The manual should be saved and kept on hand as a convenient reference.
Copyright © 2006 ROLAND CORPORATION
All rights reserved. No part of this publication may be reproduced in any form without the written permission of ROLAND CORPORATION.
3

Main Features
Serious piano performance
The FP-4 provides the sounds of a high-quality concert grand piano coupled with the PHA alpha II keyboard, which delivers a more piano-like touch, where the low range is heavier and the high range is lighter.
It provides three pedal jacks, and is shipped with a pedal that supports half-damper operation, allowing you to adjust the depth of the lingering resonances so that you can enjoy the subtle nuances of serious piano performance.
High-quality speakers and piano sounds
The FP-4 features 88-key multi-sampled piano sounds.
Every note of an 88-key grand piano has been sampled to faithfully reproduce its tonal character and allow for dynamic expression of the full range of sonic nuances, from delicate pianissimo to powerful fortissimo.
The rich resonances and lifelike presence of these sounds are faithfully reproduced through the highquality speakers of the FP-4.
“Session Partner” lets you enjoy session-style playing
You can play the piano along with realistic “rhythms” to enjoy session-style performances. Since suitable chord progressions are assigned to each rhythm, simply selecting a rhythm will automatically choose the appropriate chord progression.
“Registrations” let you store favorite performance settings
Your performance settings such as sound selections, settings for Session Partner, and keyboard touch settings can be stored as a “registration” for instant recall when desired.
Sounds that cover a wide range of styles, plus high-quality effects
In addition to piano sounds, the FP-4 contains more than 300 different sounds that can be used in a wide range of musical genres. You can also use the keyboard to play drum sets.
You can also apply sixty-two types of high-quality effects for even greater expressive potential.
4


 Contents
Introduction ................................................ |
3 |
About the Manual....................................................... |
3 |
Conventions in this Manual...................................... |
3 |
Main Features ............................................. |
4 |
USING THE UNIT SAFELY ............................. |
7 |
Important Notes ........................................ |
10 |
Names of Things and What They Do .......... |
12 |
Before You Play ........................................ |
15 |
Getting Ready to Play ............................................... |
15 |
Connecting the AC Adaptor................................... |
15 |
Turning the Power On/Off..................................... |
16 |
Adjusting the Volume ............................................ |
17 |
Attaching the Music Rest........................................ |
17 |
Connecting the Pedals............................................... |
18 |
Listening through Headphones.................................... |
19 |
Listening to Songs ..................................... |
20 |
Listening to Demo Songs............................................ |
20 |
Listening to Internal Songs.......................................... |
22 |
Changing the Volume of the Song .......................... |
23 |
Playing Back All Songs Continuously (All Song Play) .24 |
|
Listening to Each Part Separately (Track Mute).......... |
25 |
Determining the Volume of a Muted Track ............... |
26 |
Listening to Songs Saved in Internal Memory................ |
27 |
Performing................................................ |
28 |
Performing with a Variety of Sounds ........................... |
28 |
Performing with Two Layered Tones (Dual Play) ............ |
29 |
Changing the Tone Variations ................................ |
30 |
Performing with Different Tones in the Left and |
|
Right Sides of the Keyboard (Split Play) ....................... |
31 |
Switching Tone Groups and Tone Variations............ |
32 |
Changing the Keyboard’s Split Point ....................... |
33 |
Changing the Volume Balance for Dual Play and |
|
Split Play ................................................................. |
34 |
Adjusting the Keyboard Sensitivity (Key Touch)............. |
35 |
Adding Reverberation to Sounds (Reverb Effect) ........... |
36 |
Changing the Depth of Reverb Effect....................... |
36 |
Adding a Variety Effects to the Sound (Effects).............. |
37 |
Adding a Spinning Sound to Organ Tones |
|
(Rotary Effect)........................................................... |
38 |
Transposing the Key of the Keyboard (Key Transpose) |
.. 39 |
Performing with the Metronome.................................. |
40 |
Changing the Tempo ............................................ |
41 |
Changing the Volume ........................................... |
41 |
Adding Liveliness to the Sound (Sound Control) ............ |
42 |
Changing the Tonal Quality (Equalizer)....................... |
43 |
Changing the Equalizer Type................................. |
43 |
Playing Along with Rhythms....................... |
44 |
What is Session Partner? ........................................... |
44 |
Performing Along with Session Partner ........................ |
45 |
Changing the Volume of the Session Partner |
|
Performance ........................................................ |
47 |
Selecting Parts ..................................................... |
47 |
Selecting a Rhythm ................................................... |
48 |
Changing a Rhythm’s Tempo ..................................... |
49 |
Selecting a Rhythm’s Chord Progression ...................... |
50 |
Performing with the Chord Progression Specified |
|
in the Left Hand (Chord Progression Off) ..................... |
51 |
Changing the Rhythm Pattern (Original/Variation)........ |
53 |
Recording the Chord Progression ............................... |
54 |
Changing the Number of Measures of the Chord |
|
Progression You Record ........................................ |
55 |
Saving Your Favorite Performance Settings . 56 |
|
About the Performance Settings (Registration)............... |
56 |
Storing Your Performance Settings (Registration) ........... |
57 |
Recalling a Registration............................................. |
59 |
Saving a Registration Set........................................... |
60 |
Loading a Registration Set You Saved ......................... |
62 |
Deleting a Registration Set You Saved......................... |
63 |
Using a Pedal to Switch Registrations.......................... |
64 |
Recording.................................................. |
65 |
Recording a New Song............................................. |
66 |
Recording Your Playing Along with a Song ................. |
68 |
Recording Your Performance with Session Partner ........ |
70 |
Recording Selected Track Buttons ............................... |
72 |
Erasing Recorded Performances ................................. |
75 |
Saving a Performance................................ |
76 |
Saving the Songs You Record .................................... |
76 |
Deleting a Saved Song ............................................. |
77 |
5

Contents
Settings .................................................... |
78 |
Tuning Settings ......................................................... |
79 |
Matching the Pitch with Other Instruments |
|
(Master Tuning) .................................................... |
79 |
Adjusting the Tuning (Temperament)........................ |
80 |
Pedal Settings .......................................................... |
81 |
Changing How the Pedal Effects Are Applied .......... |
81 |
Changing How the Pedals Work ............................ |
82 |
Effect Settings........................................................... |
83 |
Changing the Effect Type....................................... |
83 |
Setting the Part to Which Effects Are Added............. |
84 |
System Settings......................................................... |
84 |
Specifying the Sound Control Setting at Power-on..... |
84 |
Specifying the Equalizer Setting at Power-on............ |
84 |
Adjusting the Volume (Master Gain)........................ |
85 |
Equalizer Settings ..................................................... |
85 |
Changing the Equalizer Settings ............................. |
85 |
Keyboard Settings .................................................... |
86 |
Changing the Keyboard Touch (Key Touch) ............. |
86 |
Changing the Velocity When the Key Touch is Set to |
|
“OFF” ................................................................. |
87 |
Changing the Pitch of the Lower Tone in Octave Steps |
|
(Octave Shift) ....................................................... |
87 |
Session Partner Settings ............................................. |
88 |
Setting the Intro and Ending On or Off .................... |
88 |
Selecting a Chord Progression Pattern ..................... |
88 |
Selecting the Root Note of the Chord Progression ..... |
89 |
Fixing a Set Chord Progression .............................. |
89 |
Setting the Chord Display On or Off ....................... |
90 |
Initializing (Formatting) Memory ................................. |
90 |
Initializing Internal Memory ................................... |
90 |
Metronome Setting.................................................... |
91 |
Changing the Beat of Metronome ........................... |
91 |
Other Settings .......................................................... |
91 |
Restoring the Factory-set Condition (Factory Reset) .... |
91 |
Disabling the Buttons (Panel Lock) ........................... |
92 |
Using the V-LINK Function...................................... |
92 |
Connecting to a Computer......................................... |
98 |
Connecting to a Computer via the USB (MIDI) |
|
Connector ........................................................... |
98 |
Connecting to MIDI Devices....................................... |
99 |
What’s MIDI? ...................................................... |
99 |
Making the Connections........................................ |
99 |
Using the FP-4 to Play Another MIDI Sound Module .. |
100 |
MIDI Settings ..................................................... |
100 |
Appendices |
|
Troubleshooting...................................................... |
106 |
Error Messages ...................................................... |
110 |
Tone List ................................................................ |
111 |
Rhythm List............................................................. |
116 |
Chord Progression Pattern List .................................. |
117 |
Chord Fingering List................................................ |
120 |
Internal Song List .................................................... |
124 |
Registration List ...................................................... |
125 |
Effects List .............................................................. |
126 |
Stored Settings ....................................................... |
128 |
MIDI Implementation Chart ...................................... |
129 |
Specifications ........................................................ |
130 |
Index .................................................................... |
132 |
Connecting Other Equipment ..................... |
93 |
Connecting Audio Equipment ..................................... |
94 |
Sending the Sound to External Speakers.................. |
94 |
Listening to a CD from the FP-4’s Speakers............... |
95 |
Recording an FP-4 Performance to an External Device ... |
96 |
Recording an FP-4 Performance to a CD or Cassette |
|
Tape, etc. ............................................................ |
96 |
Using Your Computer to Create a CD ..................... |
97 |
6

Used for instructions intended to alert the user to the risk of death or severe injury should the unit be used improperly.
Used for instructions intended to alert the user to the risk of injury or material damage should the unit be used improperly.
* Material damage refers to damage or other adverse effects caused with respect to the home and all its furnishings, as well to domestic animals or pets.
The symbol alerts the user to important instructions or warnings.The specific meaning of the symbol is determined by the design contained within the triangle. In the case of the symbol at left, it is used for general cautions, warnings, or alerts to danger.
The  symbol alerts the user to items that must never be carried out (are forbidden). The specific thing that must not be done is indicated by the design contained within the circle. In the case of the symbol at left, it means that the unit must never be disassembled.
The ● symbol alerts the user to things that must be carried out. The specific thing that must be done is indicated by the design contained within the circle. In the case of the symbol at left, it means that the powercord plug must be unplugged from the outlet.
Do not disassemble or modify
Do not open (or modify in any way) the unit or its AC adaptor.
......................................................................................
Do not repair or replace parts
Never attempt to repair this device or replace parts. If repair or part replacement should become necessary, you must contact your dealer or a Roland service center.
......................................................................................
Do not use or store in the following types of locations
• Locations of extremely high temperature (such as in direct sunlight, near heating equipment, or on a device that generates heat)
• Near moisture (such as in a bathroom, near a sink, or on a wet floor) or in locations of high humidity
•Locations exposed to rain
•Locations of excessive dust
•Locations subject to heavy vibration
......................................................................................
Use only a stand that is recommended
This unit should be used only with a stand that is recommended by Roland.
......................................................................................
Do not place in an unstable location
When using the unit with a stand recommended by Roland, the stand must be carefully placed so it is level and sure to remain stable. If not using a stand, you still need to make sure that any location you choose for placing the unit provides a level surface that will properly support the unit, and keep it from wobbling.
......................................................................................
Connect the AC adaptor to an outlet of the correct voltage
Be sure to use only the AC adaptor supplied with the unit. Also, make sure the line voltage at the installation matches the input voltage specified on the AC adaptor’s body. Other AC adaptors may use a different polarity, or be designed for a different voltage, so their use could result in damage, malfunction, or electric shock
......................................................................................
Use only the included power cord
You must use only the power cord included with the device. Do not use the included power cord with any other device.
......................................................................................
Do not bend the power cord or place heavy objects on it
Do not bend the power cord excessively, or place heavy objects on the power cord. Doing so will damage the power cord, and may cause short circuits or faulty connections, possibly resulting in fire or electrical shock.
......................................................................................
Do not share an outlet with an unreasonable number of other devices
Do not connect excessive numbers of electrical devices to a single power outlet. In particular, when using a power strip, exceeding the rated capacity (watts/amps) of the power strip may cause heat to be generated, possibly melting the cable.
......................................................................................
7
USING THE UNIT SAFELY
Avoid extended use at high volume
This device, either by itself or used in conjunction with headphones, amps, and/or speakers, is capable of producing volume levels that can cause permanent hearing damage. If you experience impaired hearing or ringing in your ears, immediately stop using the device and consult a medical specialist.
......................................................................................
Do not insert foreign objects
Never allow foreign objects (flammable objects, coins, wires, etc.) to enter this device.
This can cause short circuits or other malfunctions.
......................................................................................
Turn off the power if an abnormality or malfunction occurs
Immediately turn the power off, remove the AC adaptor from the outlet, and contact your dealer or a service center to have the device serviced.
•The AC adaptor, the power-supply cord, or the plug has been damaged
•The device produces smoke or an unusual smell
•A foreign object enters the device, or liquid spills into the device
•The device becomes wet (by rain, etc.)
•An abnormality or malfunction occurs in the device
......................................................................................
Do not allow children to use without supervision
In households with children, take particular care against tampering. If children are to use this device, they must be supervised or guided by an adult.
......................................................................................
Do not drop or subject to strong impact
Do not drop this device or subject it to strong impact.
......................................................................................
Do not use overseas
If you wish to use this device overseas, please contact your dealer or a service center.
......................................................................................
Do not place containers of water on the device
Do not place containers of water (such as a flower vase) or drinks on the device. Nor should you place containers of insecticide, perfume, alcoholic liquids, nail polish, or spray cans on the device. Liquids that spill into the device may cause it to malfunction, and may cause short circuits or faulty operation.
......................................................................................
Place in a well ventilated location
When using this device and AC adaptor, ensure that it is placed in a well ventilated location.
..........................................................................................................
Grasp the plug when connecting or disconnecting the power cord
Always grasp only the plug on the AC adaptor
cord when plugging into, or unplugging from, an outlet or this unit.
..........................................................................................................
Periodically wipe the dust off the AC adaptor plug
At regular intervals, you should unplug the AC adaptor and clean it by using a dry cloth to wipe all dust and other accumulations away from its prongs. Also, disconnect the power plug from the power outlet whenever the unit is to remain unused for an extended period of time. Any accumulation of dust between the power plug and the power outlet can result in poor insulation and lead to fire.
..........................................................................................................
Manage cables for safety
Ensure that the connected cables are organized and managed in a safe manner. In particular, place the cables out of reach of children.
..........................................................................................................
Do not stand or place heavy objects on this device
Do not stand on this device, or place heavy objects on it.
..........................................................................................................
Do not connect or disconnect the AC adaptor with wet hands
Never handle the AC adaptor or its plugs with wet
hands when plugging into, or unplugging from, an outlet or this unit.
..........................................................................................................
Cautions when moving this device
When moving this device, please check the following cautions. Then, make sure that at least two persons work together in lifting and carrying the device, all the while making sure to keep it level. When doing so, be careful not to pinch your hands or drop the device on your feet.
•Check whether the knob bolts fastening the device to its stand have become loose. If they are loose, tighten them firmly.
•Disconnect the power cord.
•Disconnect external devices.
•Remove the music rest.
......................................................................................
8
USING THE UNIT SAFELY
Unplug the AC adaptor from the AC outlet before cleaning
Before cleaning the unit, turn off the power and unplug the AC adaptor from the outlet (p. 15).
..........................................................................................................
If there is a possibility of lightning strike, disconnect the AC adaptor from the AC outlet
Whenever you suspect the possibility of lightning in
your area, disconnect the AC adaptor from the outlet.
..........................................................................................................
Keep small items out of the reach of children
To prevent small items such as the following from being swallowed accidentally, keep them out of the reach of children.
•Included items
•Music rest attachment screws
..........................................................................................................
Don’t touch parts that get hot
The area near the power switch may become hot; be careful to avoid burns.
..........................................................................................................
9


 Important Notes
In addition to the “USING THE UNIT SAFELY” listed on page 7, please observe the following cautions.
Power Supply
•Do not connect this device to the same electrical outlet as an inverter-controlled device such as a refrigerator, microwave oven, or air conditioner, or a device that contains an electric motor. Depending on how the other device is used, power supply noise could cause this device to malfunction or produce noise. If it is not practical to use a separate electrical outlet, please connect this device via a power supply noise filter.
•The AC adaptor will begin to generate heat after long hours of consecutive use. This is normal, and is not a cause for concern.
•Before you make connections, you must switch off the power on all devices to prevent malfunction and/or speaker damage.
Location
•If this device is placed near devices that contain large transformers, such as power amps, hum may be induced in this device. If this occurs, move this device farther away or change its orientation.
•If this device is operated near a television or radio, color distortion may be seen in the television screen or noise may be heard from the radio. If this occurs, move this device farther away.
•Keep your cell phone powered off or at a sufficient distance from this device. If a cell phone is nearby, noise may be heard when a call is received or initiated, or during conversation.
•Do not leave this device in direct sunlight, near devices that produce heat, or in a closed-up automobile. Do not allow illumination devices operated in close proximity (such as a piano light) or powerful spotlights to shine on the same location on this device for an extended time. This can cause deformation or color change.
•If you move this device between locations of radically different temperature or humidity, water droplets (condensation) may form inside the device. Using the device in this condition will cause malfunctions, so please allow several hours for the condensation to disappear before you use the device.
•Do not allow items made of rubber or vinyl to remain on top of this device for an extended time. This can cause deformation or color change.
•Do not leave objects on top of the keyboard. This can cause malfunctions such as failure to sound.
•Do not affix adhesive labels to this device. The exterior finish may be damaged when you remove the labels.
•Depending on the material and temperature of the surface on which you place the unit, its rubber feet may discolor or mar the surface.
You can place a piece of felt or cloth under the rubber feet to prevent this from happening. If you do so, please make sure that the unit will not slip or move accidentally.
Care
•For everyday care, wipe with a soft dry cloth, or remove stubborn dirt using a tightly wrung-out cloth. If this device contains wooden components, wipe the entire area following the direction of the grain. The finish may be damaged if you continue strongly rubbing a single location.
•If water droplets should adhere to this device, immediately wipe them off using a soft dry cloth.
•Do not use solvents such as benzene, thinner, or alcohol, since these can cause deformation or color change.
Servicing
•Please be aware that all data contained in the unit’s memory may be lost when the unit is sent for repairs. Important data should always be backed up in another MIDI device (e.g., a sequencer), or written down on paper (when possible). During repairs, due care is taken to avoid the loss of data. However, in certain cases (such as when circuitry related to memory itself is out of order), we regret that it may not be possible to restore the data, and Roland assumes no liability concerning such loss of data.
Other Cautions
•Stored content may be lost due to a malfunction of the device or because of inadvertent operation. You should back up important content on another MIDI device (e.g., a sequencer) as a safeguard against such loss.
•We cannot accept responsibility for the recovery of any content lost from internal memory, or for the consequences of such loss.
•Do not apply excessive force to the buttons, knobs, or input/output jacks, since this may cause malfunctions.
•When connecting or disconnecting cables, grasp the plug (not the cable) to prevent short circuits or broken connections.
•This device may produce a certain amount of heat, but this is not a malfunction.
10
Important Notes
•Please enjoy your music in ways that do not inconvenience other people nearby, and pay particular attention to the volume at nighttime. Using headphones will allow you to enjoy music without having to be concerned about others.
•When you need to transport the unit, package it in the box (including padding) that it came in, if possible. Otherwise, you will need to use equivalent packaging materials.
•If using the music rest, do not apply excessive force to it.
•Use only the specified expression pedal (EV-5; available separately). Connecting a pedal made by a different manufacturer may cause this device to malfunction.
•Some connection cables contain a resistor. Do not connect such cables to this device. Doing so may make the volume extremely low or inaudible. Please use connection cables not containing a resistor.
*GS ( ) is a registered trademark of Roland Corporation.
*XG lite ( ) is a registered trademark of Yamaha Corporation.
*Microsoft and Windows are registered trademarks of Microsoft Corporation.
*Windows® is known officially as: ”Microsoft® Windows® operating system.”
*Apple and Macintosh are registered trademarks of Apple Computer, Inc.
*Mac OS is a trademark of Apple Computer, Inc.
*All product names mentioned in this document are trademarks or registered trademarks of their respective owners.
11

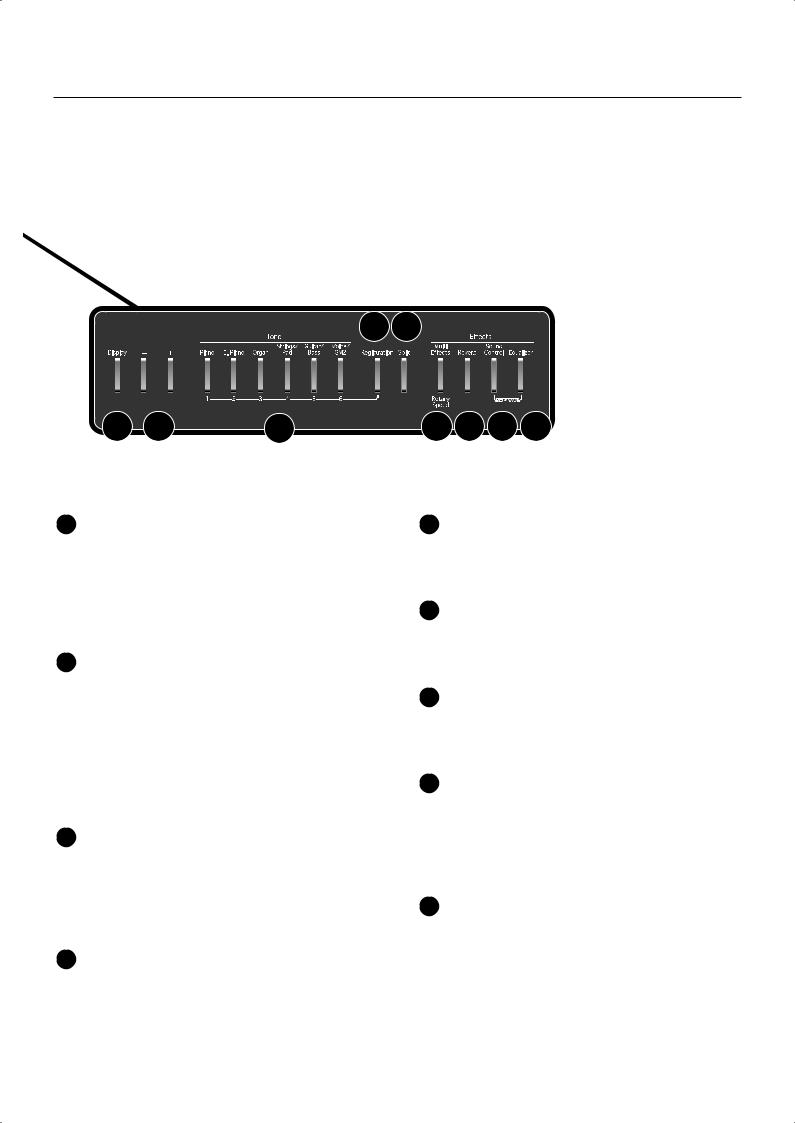
 Names of Things and What They Do
Front Panel
1 |
2 |
3 |
4 |
5 |
6 |
7 |
8 |
9 |
10 |
1 [Volume] Knob |
6 Track Buttons |
Adjusts the overall volume of the FP-4 (p. 17). If headphones are connected, this adjusts the headphone volume (p. 19).
These buttons switch the performance part when playing a song (p. 25). These buttons also switch Session Partner’s performance parts, chord progression patterns, and rhythm patterns (p. 47, p. 50, p. 53).
2 [Balance] Knob
Adjusts the volume balance of the Upper and Lower Tones in Dual Play and Split Play (p. 34).
3 [Function] Button
This button lets you make various settings.
By holding down this button and pressing the [Transpose] button, you can listen to the demo song (p. 20).
4 [Transpose] Button
This button lets you transpose the keyboard or (p. 39).By holding down this button and pressing the [Function] button, you can listen to the demo song (p. 20).
5 [Session Partner] Button
This button switches on/off the Session Partner function (p. 45). By switching Session Partner on, you can produce an rhythm in a variety of styles.
7 [Play] Button
Starts and stops playback of internal songs and recorded performances (p. 22).
Used for starting recording of performances (p. 65).
8 [Rec] Button
You can record your own playing into the FP-4 (p. 65).
9 [Metronome] Button
Turns the internal metronome on and off (p. 40).
10 Display
This shows information such as tone numbers, song numbers, rhythm numbers, tempo, and the values of various settings.
12
Names of Things and What They Do
14 15
11 |
12 |
13 |
16 17 18 |
19 |
11 [Display] Button
Press this button when you want to change the tone, the song to play back, the rhythm, or the tempo. Each time you press this button, the display will alternate between showing the tone number, song number, rhythm number, and tempo.
12 [-] [+] Buttons
15 [Split] Button
Allows you to play different tones in the left and right sides of the keyboard (p. 31).
16 [Multi Effects] Button
This button lets you apply various effects to the sound (p. 37).
These two buttons are used to modify the values of a variety of settings. Pressing both the [-] and [+] buttons simultaneously returns the setting of a particular item or function to its original value.
If you’re playing the song while the song select screen is displayed, you can hold down these buttons to rewind or fast-forward.
13 Tone Buttons
They are used to choose the kinds of sounds (Tone Groups) played by the keyboard (p. 28).
While the [Registration] button is lit, Tone buttons [1]–[6] can be used to select registrations.
14 [Registration] Button
This button lets you store your favorite performance settings, such as those for the selection of tones, Session Partner (p. 56).
17 [Reverb] Button
You can use this to add the characteristic reverberation of a concert hall to what you play (p. 36).
18 [Sound Control] Button
This button gives the sound more expressive range (p. 42).
By holding down this button and pressing the [Equalizer] button, you can turn V-LINK on and off (p. 92).
19 [Equalizer] Button
Switches the equalizer on or off (p. 43). You can use the equalizer to adjust the tonal character by boosting or cutting just the low or high frequency regions.
By holding down this button and pressing the [Sound Control] button, you can turn V-LINK on and off (p. 92).
13
Names of Things and What They Do
29
|
|
|
|
|
|
|
|
|
|
|
|
|
|
|
|
|
|
|
|
|
|
|
|
|
|
|
|
|
|
|
|
|
|
|
|
|
|
20 |
21 |
22 |
23 |
|
24 |
25 |
26 |
27 |
28 |
|||||||||
|
||||||||||||||||||
Rear Panel
These connectors are located at the rear panel.
20 USB (MIDI) Connector |
25 Speaker Switch |
You can connect this to your computer for transferring performance data (p. 98).
This switch turns the internal speaker on/off (p. 94).
21 MIDI Connector
You can connect these to external MIDI devices to transfer performance data (p. 99).
22 Pedal Jacks
Accepts connection of the supplied pedal (DP Series), or other suitable pedals (p. 18).
23 Input Jacks
Here you can connect an audio device or another electronic musical instrument, and listen to the connected device through the FP-4’s speakers (p. 95).
26 [Power] Switch
Turns the power on/off (p. 16).
27 DC In Jack
Connect the supplied AC adaptor here (p. 15).
28 Cord Hook
Use this to fix in place the cord from the supplied AC adaptor (p. 15).
29 Phones Jacks
Here you can connect headphones. The FP-4 lets you use two sets of headphones simultaneously (p. 19).
24 Output Jacks
You can connect external speakers here to reproduce the FP-4’s sound (p. 94, p. 96).
14


 Before You Play
Getting Ready to Play
Connecting the AC Adaptor
1.Make sure that the [Power] switch located at the rear of the keyboard is off (in the upper position).
Upper
Position
Off
2.Turn the [Volume] knob all the way toward the left to minimize the volume.
3.Connect the supplied Power Cord to the supplied AC adaptor.
AC Adaptor |
|
Power Cord |
||
|
|
|
|
|
|
|
|
|
|
|
|
|
|
|
AC Outlet
4.Connect the AC adaptor to the FP-4’s DC In jack, and plug the power cord into an electrical outlet.
5.Loop the AC adaptor cord around the cord hook to fasten it in place.
Ground Terminal |
Cord Hook |
(AC Adaptor)
Power Cord
To prevent the inadvertent disruption of power to your unit (should the plug be pulled out accidentally), and to avoid applying undue stress to the AC adaptor jack, anchor the power cord using the cord hook, as shown in the illustration.
Even if the cord is fastened, strong tension applied to the cord may cause it to be damaged or broken. Be careful not to pull the cord accidentally, or to apply strong pressure to it.
Depending on the circumstances of a particular setup, you may experience a discomforting sensation, or perceive that the surface feels gritty to the touch when you touch this device. This is due to an infinitesimal electrical charge, which is absolutely harmless. However, if you are concerned about this, connect the ground terminal (see figure) with an external ground. When the unit is grounded, a slight hum may occur, depending on the particulars of your installation. If you are unsure of the connection method, contact the nearest Roland Service Center, or an authorized Roland distributor, as listed on the “Information” page.
Unsuitable places for connection
•Water pipes (may result in shock or electrocution)
•Gas pipes (may result in fire or explosion)
•Telephone-line ground or lightning rod (may be dangerous in the event of lightning)
15

Before You Play
Turning the Power Off
Turning the Power On/Off
Once you’ve got everything connected properly, you
NOTE
can turn on the power using the following procedure. If you fail to perform these steps in the correct order, you risk causing a malfunction or damaging the speakers.
Turning the Power On
1.Turn the [Volume] knob all the way toward the left to minimize the volume.
2. Press the [Power] switch.
Lower
Position
On
The power will turn on, and the [Piano] and other buttons will light.
1.Turn the [Volume] knob all the way toward the left to minimize the volume.
2. Press the [Power] switch.
The screen goes blank and the power is turned off.
Upper
Position
Off
3. Use the [Volume] knob to adjust the volume (p. 17).
The unit becomes operable and playing the keyboard produces sound.
Due to a circuitry protection feature, this unit requires
NOTE
a few moments after power is turned on before it is ready for normal operation.
16

Before You Play
Adjusting the Volume
Here’s how to adjust the volume when you’re playing the keyboard, or when you’re playing back internal preset songs or internal memory songs.
If headphones are connected, use the [Volume] knob to adjust the headphone volume.
1. Turn the [Volume] knob to adjust the overall volume.
Adjust the volume while you play the keyboard to produce sound.
Rotating the knob clockwise increases the volume; counterclockwise rotation decreases it.
Attaching the Music Rest
Here’s how to attach the included music rest.
1.Install the included screws into the back of the instrument (two locations) as shown in the illustration.
2.Place the music rest between the screws and the chassis.
3.While using one hand to support the music rest, tighten the screws (two locations) to fasten the music rest firmly in place.
When attaching the music rest, you must use your hand to support it firmly so that it does not fall. Be careful not to pinch your hand.
To remove the music rest, support it with one hand while you loosen the screws. Remove the music rest, and then securely retighten the screws.
Don’t apply excessive force to the installed music
NOTE
rest.
You must use the included screws to attach the music
NOTE
rest.
17

Before You Play
Connecting the Pedals
Connect the included pedal to one of the Pedal jacks.
The operation of the pedal will differ depending on the jack to which it’s connected.
Pedal
Connected jack |
Operation |
|
|
|
|
Damper jack |
The pedal will operate as a damper |
|
pedal. |
||
|
||
|
|
|
|
The pedal will operate as a sostenuto |
|
Sostenuto / (FC1) |
pedal. |
|
jack |
Alternatively, you can assign a |
|
|
different function (p. 64, p. 82). |
|
|
|
|
|
The pedal will operate as a soft pedal. |
|
Soft / (FC2) jack |
Alternatively, you can assign a |
|
|
different function (p. 64, p. 82). |
|
|
|
Unplugging a pedal cord from the unit while the
NOTE
power is on may cause the pedal’s effect to be applied without stopping. The power of the FP-4 must be turned off before inserting or removing a pedal cord.
By obtaining a second and third pedal, you can then use three pedals simultaneously. If you wish to purchase the optional pedal (DP series), please contact the dealer where you purchased the FP-4.
You can connect an expression pedal to the
NOTE
Sostenuto (FC 1) jack or Soft (FC 2) jack and use it to adjust the FP-4’s volume.
Use only the specified expression pedal (EV-5; sold separately). By connecting any other expression pedals, you risk causing malfunction and/or damage to the unit.
Damper Pedal
Use this pedal to sustain the sound.
While this pedal is held down, notes will be sustained for an extended time even if you release your fingers from the keyboard.
The pedal included with the FP-4 functions as a half-damper pedal, which allows you to adjust the amount of resonance.
On an acoustic piano, holding down the damper pedal will cause the strings for notes other than the ones you actually play to vibrate in sympathy with what you’ve played, producing a rich resonance. The FP-4 simulates this sympathetic vibration (damper resonance).
Set the switch on the included pedal to “Continuous” when the pedal is connected.
Sostenuto Pedal
The notes you are pressing when this pedal is depressed will be sustained.
With the pedal connected to the Sostenuto / (FC1) jack, it can be assigned other functions as well. Refer to “Changing How the Pedals Work” (p. 82), “Using a Pedal to Switch Registrations” (p. 64).
Soft Pedal
This pedal is used to make the sound softer.
Playing with the soft pedal depressed produces a sound that is not as strong as when otherwise played with the equivalent strength. This is the same function as the left pedal of an acoustic piano.
The softness of the tone can be varied subtly by the depth to which you press the pedal.
With the pedal connected to the Soft / (FC2) jack, it can be assigned other functions as well. Refer to “Changing How the Pedals Work” (p. 82), “Using a Pedal to Switch Registrations” (p. 64).
18

Before You Play
Listening through Headphones
You can use headphones to enjoy the FP-4 without disturbing those around you, such as at night. Since the FP-4 has two headphone jacks, two people can also use headphones simultaneously.
If you’re using only one set of headphones, you may connect them to either of the two headphone jacks.
Headphones
1. Plug the headphones into the Phones jack.
If headphones are connected, no sound will be output from the FP-4’s speakers.
2.Use the FP-4’s [Volume] knob (p. 17) to adjust the headphone volume.
Cautions when Using Headphones
•To prevent damage to the cord’s internal conductors, avoid rough handling. When using headphones, mainly try to handle either the plug or the headset.
•Your headphones may be damaged if the volume of a device is already turned up when you plug them in. Minimize the volume before you plug in the headphones.
•Excessive input will not only damage your hearing, but may also strain the headphones. Please enjoy music at an appropriate volume.
•Use headphones that have a stereo 1/4” phone plug.
19


 Listening to Songs
Listening to Demo Songs
Now, try listening to demo songs.
The FP-4 comes with eight demo songs.
The six Tone buttons, the [Session Partner] button, and the [Play] button are each assigned one demo song.
Button |
Indication |
Composer/Copyright |
||
|
|
|
|
|
Piano |
|
|
|
Masasi & Kazuko Hirashita / © 2006 Roland Corporation |
|
|
|
||
|
|
|
|
|
|
|
|
|
|
E.Piano |
|
|
|
Masasi & Kazuko Hirashita / © 2006 Roland Corporation |
|
|
|
||
|
|
|
|
|
|
|
|
|
|
Organ |
|
|
|
Masasi & Kazuko Hirashita / © 2006 Roland Corporation |
|
|
|
||
|
|
|
|
|
|
|
|
|
|
Strings/Pad |
|
|
|
Masasi & Kazuko Hirashita / © 2006 Roland Corporation |
|
|
|
||
|
|
|
|
|
|
|
|
|
|
Guitar/Bass |
|
|
|
Masasi & Kazuko Hirashita / © 2006 Roland Corporation |
|
|
|
||
|
|
|
|
|
|
|
|
|
|
Voice/GM2 |
|
|
|
Masasi & Kazuko Hirashita / © 2006 Roland Corporation |
|
|
|
||
|
|
|
|
|
|
|
|
|
|
Session Partner |
|
|
|
© 2006 Roland Corporation |
|
|
|
||
|
|
|
|
|
|
|
|
|
|
Play |
|
|
|
Masasi & Kazuko Hirashita / © 2006 Roland Corporation |
|
|
|
||
|
|
|
|
|
|
|
|
|
|
NOTE |
All rights reserved. Unauthorized use of this material for purposes other than private, |
|
personal enjoyment is a violation of applicable laws. |
||
|
NOTE No MIDI data for the music that is played will be output.
20
Listening to Songs
1. Hold down the [Function] button and press the [Transpose] button.
The indicators for the six Tone and [Function], [Transpose], [Session Partner] and [Play] buttons flash.
The following appears in the display.
NOTE |
You can’t play back the demo songs if your recorded performance has not been saved. |
|
Either erase your performance (p. 26), or save your recorded performance (p. 76). |
||
|
2. Press one of the six Tone buttons, the [Session Partner] button, or the [Play] button.
The songs will play consecutively, starting with the demo song you selected. The button for the song currently being played back flashes on and off.
When playback of the last song is reached, playback continues by returning to the first song and playing that again.
The display will show the name of the currently playing demo song.
3.
4.
To stop playback, press the flashing button.
Press the [Function] button or the [Transpose] button to exit Demo mode.
The indicators return to their previous state.
A demo song will not play if you press an unlit button.
21

Listening to Songs
Listening to Internal Songs
The FP-4 contains 65 built-in songs. Here’s how to select and play back one of these songs.
About the name of the internal song, refer to “Internal Song List” (p. 124).
Selecting a Song
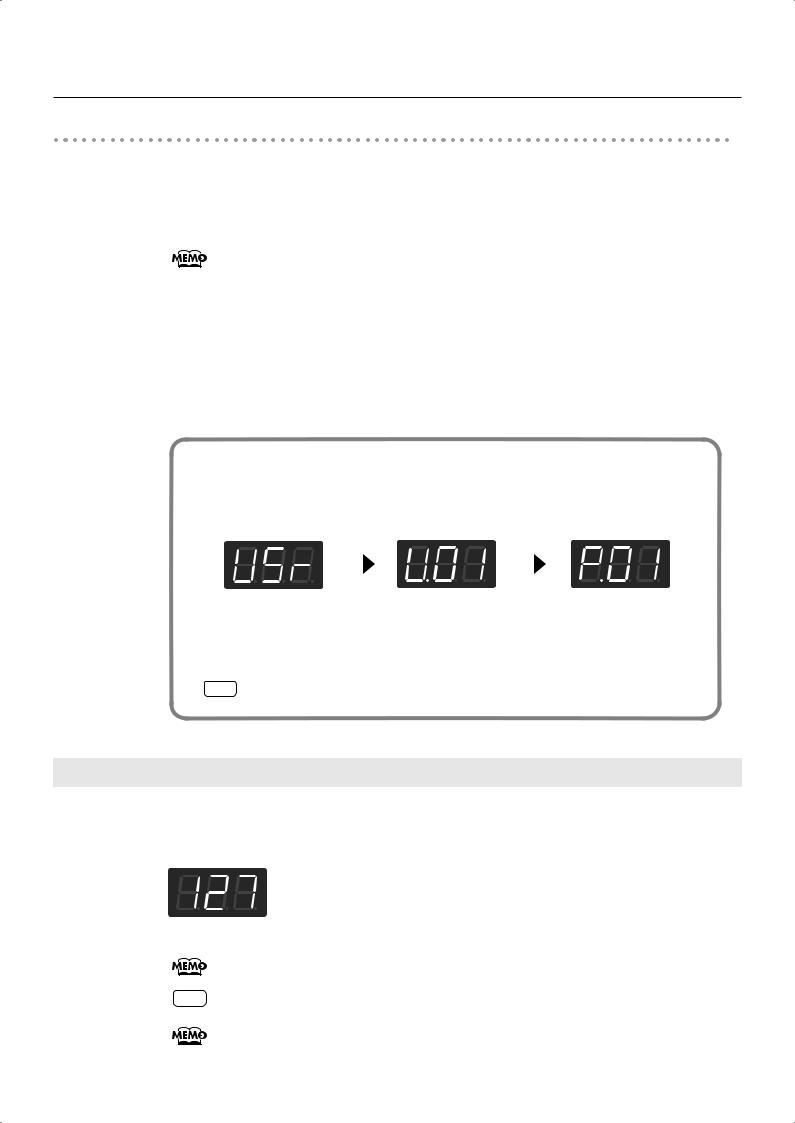
1. Press the [Display] button several times so it’s lit in green.
The following appears in the display.
Each time you press the [Display] button, the display will alternate between showing the currently selected tone number, the currently selected song number (a “U” or “P” is shown before the number), the currently selected rhythm number (an “r” is shown before the number), and tempo. If you press the [Display] button while using Session Partner, the rhythm number, tempo, and tone number will be alternately shown.
Button |
Display |
|
|
Unlit |
Tone Number |
|
|
Green |
Song Number |
|
|
Red |
Rhythm Number |
|
|
Orange |
Tempo |
|
|
2. Press the [-] or [+] button to select the song.
The character “P” is shown before internal (preset) song numbers.
22
Listening to Songs
Playing the Song
3. Press the [Play] button.
The selected song will play.
The selected song is played to the end, and then playback stops.
If a song is playing while the song select screen is displayed, you can rewind the song by holding down the [-] button, or fast-forward the song by holding down the [+] button. The display will indicate the measure number during fast-forward or rewind.
To stop playback, press the [Play] button once more.
The next time you press the [Play] button, playback will resume from the point at which you stopped.
If playback has stopped at the end of the song, playback will start from the beginning of the song. If the song select screen is displayed, pressing the [-] button will return you to the beginning of the song. Pressing the [-] button once again will return you to the preceding song.
About the Song Select Display
The song select display will change as follows.
fig.SongDisplay-e.eps
The song you’re |
|
Song of the |
|
Internal Song |
newly recording |
|
Internal memory |
|
|
|
|
|
|
|
|
|
|
|
|
|
|
|
|
|
By holding down the [Display] button and pressing the [-] [+] buttons, you can quickly select the first song in the song group (i.e., “first song in internal memory,” or “first builtin preset song”).
NOTE “U.**” will not appear if there is no song in internal memory.
Changing the Volume of the Song
Here’s how to adjust the volume when song is playing back.
1. While holding down the [Play] button, press the [-] or [+] button.
The song volume can be set to any value from 0 to 127.
While you hold down the [Play] button, the display will show the volume of the song.
NOTE You can not change the volume of the demo song.
You can also adjust the volume of the song by turning the [Balance] knob while you hold down the [Play] button.
23

Listening to Songs
Playing Back All Songs Continuously (All Song Play)
The internal songs and the songs in internal memory can be played repeatedly in succession. This function is called “All Song Play.”
Specifying the First Song
1. Press the [Display] button several times so it’s lit in green.
2. Press the [-] or [+] button to select the song.
Playing Back the Songs Successively
3. While holding down the [Display] button, press the [Play] button.
The [Play] button will blink.
The songs will play back successively, starting with the selected song.
When the last song finishes playing, the instrument will return to the first song and playback will continue. If you selected an internal song, it will return to internal song number 1. If you selected an internal memory song, it will return to internal memory number 1.
To Stop Playback
4. Press the [Play] button so its illumination is turned off.
All Song Play is exited when the performance is stopped.
The next time you press the [Play] button, playback will resume from the point at which you stopped.
24
Listening to Songs
Listening to Each Part Separately (Track Mute)
With the internal songs, you can select the performance part that is to be played back. You can also practice each hand separately while playing along with the song.
The performance data is assigned to the Track buttons as shown below.
fig.TrackButtons-e.eps
In the internal songs, the left-hand performance is assigned to the Track [1] button and the right-hand performance is assigned to the Track [2] button. Other performance is assigned to the Track [R] button. “Tracks” are areas in which music data is held, and buttons [1], [2], and [R] are referred to as the “track buttons.”
Accompaniment/ Right-hand Part |
|
Rhythm Part |
Left-hand Part |
|
|
1.
2.
3.
Select the song that you want to play (p. 22, p. 27).
Press the [Play] button to play the song.
Select the part that you don’t want to play back.
Press the Track [1] button, the Track [2] button, or the [R] button.
The button you pressed will go out, and the corresponding part will no longer be heard. Temporarily silencing a specific part in this way is called “muting.”
For example, if you want to practice the right-hand part, press the Track [2] button so its illumination is turned off. When you play back the song, the right-hand part will not play.
If you again press the button you selected in step 3, so the button is lit, the sound of that part will be heard.
Even while the song is stopped, you can press the track buttons to mute or un-mute the sound.
4. Press the [Play] button to stop playback.
NOTE Mute settings will be cleared when you switch songs.
25

Listening to Songs
NOTE |
Internal songs 6–65 do not contain a performance in the rhythm/accompaniment part |
|
(Track [R] button). If you press a track button that does not contain a performance, it |
||
|
||
|
will not light. |
When the following appears in the display
If there is the performance you recorded but have not yet saved, the following display will appear if you attempt to select a song.
fig.d-dEL.eps
You cannot play back an internal preset song if memory contains an unsaved song.
If you want to delete your performance and play back the internal preset song, press the [Rec] button. If you don’t want to delete your performance, press the [Play] button. If you want to save your recorded performance, refer to “Saving the Songs You Record” (p. 76).
Determining the Volume of a Muted Track
Here’s how to adjust the volume that a part will have after you’ve pressed a track button to mute the playback while playing back a song.
The FP-4 lets you play back a specific part at a reduced volume so you can use that part as a “guide” for your own playing.
1. Select the song that you want to play (p. 22, p. 27).
2. Hold down a track button and use the [-] [+] buttons to specify the volume that the track will have when its playback is muted.
The volume for when the playback is muted will be shown while you hold down the track button.
The track mute volume can be set to any value from 0 to 80.
NOTE When you turn off the power, the track mute volume setting will return to “0.”
You can also adjust the track mute volume by turning the [Balance] knob while you hold down the track button.
26
Listening to Songs
Listening to Songs Saved in Internal Memory
Here’s how to play back songs that you’ve saved in internal memory.
You can save the internal (built-in) songs and the songs (user songs) you’ve recorded to internal memory. For details, refer to “Saving the Songs You Record” (p. 76).
Selecting a Song
1.
2.
Press the [Display] button several times so it’s lit in green.
Press the [-] or [+] button to select the song.
If a song you’ve saved in internal memory is selected, the display will indicate “U.**” (user).
NOTE |
If you have not saved any songs in internal memory, the “U.**” indication will not |
|
appear. |
||
|
Playing the Song
3. Press the [Play] button.
The selected song will play.
The selected song is played to the end, and then playback stops.
To stop playback, press the [Play] button once more. The next time you press the [Play] button, playback will resume from the point at which you stopped.
If playback has stopped at the end of the song, playback will start from the beginning of the song. If the song select screen is displayed, pressing the [-] button will return you to the beginning of the song. Pressing the [-] button once again will return you to the preceding song.
If a song is playing while the song select screen is displayed, you can rewind the song by holding down the [-] button, or fast-forward the song by holding down the [+] button. The display will indicate the measure number during fast-forward or rewind.
27

 Performing
Performing with a Variety of Sounds
The FP-4 features over 300 different internal sounds, allowing you to enjoy performing with sounds suitable for many different types of music.
These onboard sounds are called “Tones.” The Tones are divided into six different groups, each of which is assigned to a different Tone button.
The Tone “Grand Piano 1” is selected when the instrument’s power is turned on.
When the [Registration] button is lit, Tone buttons ([1]–[6]) can be pressed to select registrations. If you want to select a tone, press the [Registration] button to turn off its light.
1.
2.
Press a Tone button to select a tone group.
Try fingering the keyboard. You’ll hear a tone of the selected tone group. The display will indicate the number of the currently selected tone.
Use the [-] [+] buttons to select a variation tone from the tone group.
The Tone you’ve selected is heard when you finger the keyboard.
The next time you select this Tone button, you’ll hear the tone you selected here.
About the Tone name, refer to “Tone List” (p. 111).
28

Performing
Performing with Two Layered Tones (Dual Play)
You can play two different tones from a single key at the same time. This method of performance is called “Dual Play.”
As an example, let’s try layering piano and strings sounds.
When the [Registration] button is lit, Tone buttons ([1]–[6]) can be pressed to select registrations. If you want to select a tone, press the [Registration] button to turn off its light.
1. Hold down the [Piano] button and press the [Strings/Pad] button.
The indicators for both buttons light.
Try fingering the keyboard. Both the piano and strings sounds play.
Pressing two Tone buttons at the same time in this manner activates Dual Play.
Of these two selected tones, the one for the Tone button you pressed first is called the “Upper Tone,” and the one for the Tone button you pressed after that is called the “Lower Tone.”
The display will show the tone number of the upper tone.
Here, the piano tone is the Upper Tone and the strings tone is the Lower Tone.
Turning Off Dual Play
1. Press any one of the Tone buttons.
Now you’ll hear only the tone of the button you pressed.
You can change the pitch of the Lower Tone an octave at a time. Refer to “Changing the Pitch of the Lower Tone in Octave Steps (Octave Shift)” (p. 87).
You can vary the volume-level balance of the two tones. Take a look at “Changing the
Volume Balance for Dual Play and Split Play” (p. 34).
You can select the part that will take priority for effects if the Upper tone and Lower tone have different effect settings when you’re using Dual play. Refer to “Setting the Part to Which Effects Are Added” (p. 84).
29

Performing
You can change the part to which the function assigned to the pedal will apply. Refer to “Changing How the Pedal Effects Are Applied” (p. 81).
If you’re using Split play, pressing two Tone buttons won’t switch you to Dual play.
Changing the Tone Variations
Changing the Upper Tone
1. Press the [-] or [+] button.
Changing the Lower Tone
1. Hold down the Tone button for the Lower Tone, and press the [-] or [+] button.
The display will show the tone number of the lower tone.
30
Loading...