

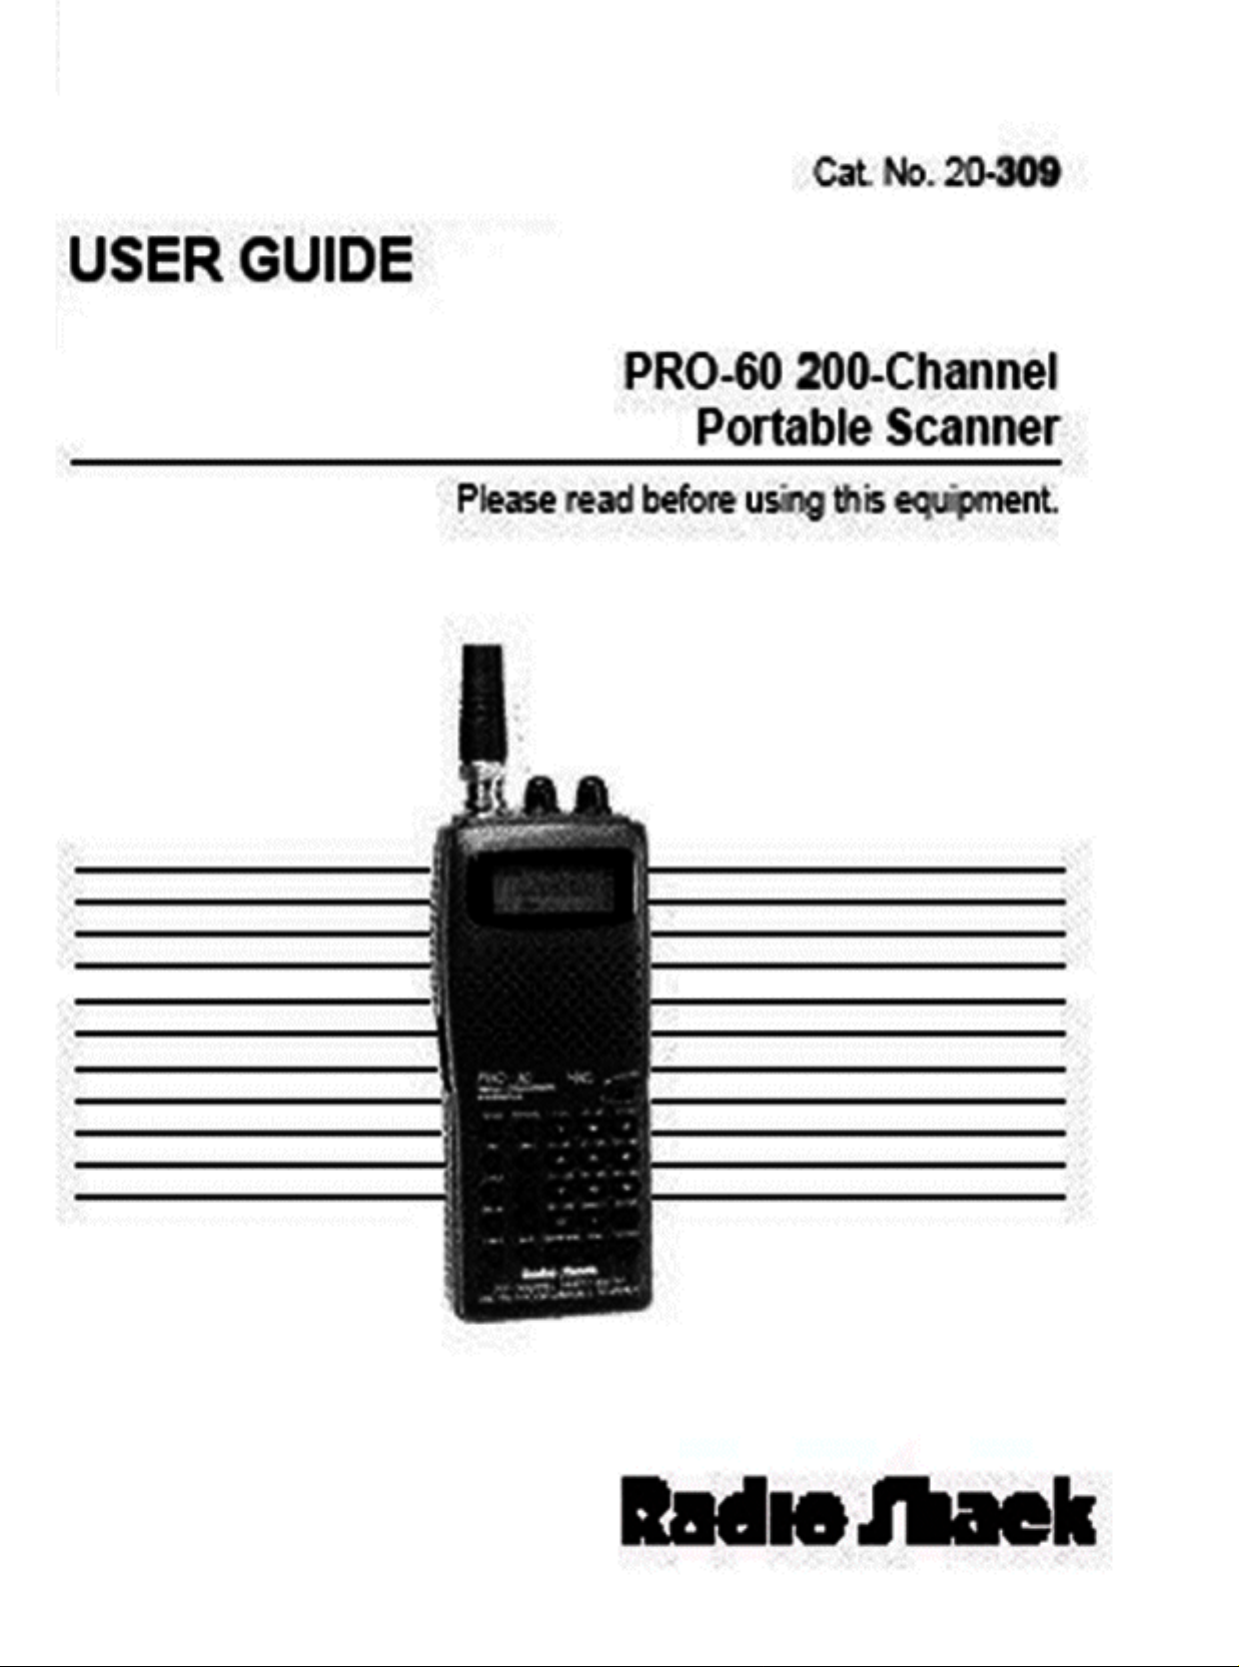
Page 1
Page 2

Features
The Radio Shack PRO-60 Programmable Scanner lets you in on all the action!
This scanner gives you direct access to more than 68,000 frequencies
including police, ambulance, ham radio, and transportation services. You
can select up to 200 channels to scan, and change your selection at any
time. The secret to your scanner's ability to scan so many frequencies is
its custom-designed microprocessor - a tiny, built-in computer.
Your scanner includes these special features:
Triple Conversion Superheterodyne - Virtually eliminates any interference
Receiver from IF (Intermediate Frequency)
images, so you hear only the selected
frequency.
Hyperscan - Searches through frequencies at 50
steps per second or scans stored
channels at 25 channels per second.
Monitor Memory - Lets you temporarily save up to 10
frequencies you find during a frequency
search so you can decide later if you
want to store any of them into
permanent channels.
Direct Frequency Search - Gives you direct access to every
available frequency so you can find
interesting broadcasts.
Two-Second Scan Delay - Delays scanning for about 2 seconds
before moving to another channel, so
you can hear more replies.
Ten Channel Storage Banks - Lets you store 20 channels in each of
10 storage banks to group frequencies
so you can easily identify calls.
Liquid-Crystal Display - Shows the selected channel and
frequency and the selected functions.
Memory Backup - Keeps the frequencies stored in memory
even when you remove the batteries.
Lockout Function - Lets you set your scanner to skip over
specified channels.
Keylock - Prevents you from accidentally changing
the scanner's programming.
Priority Channel - Lets you designate a channel to be
scanned every 2 seconds, so you do
not miss important calls.
AM/FM/WFM Mode - Automatically selects the most common
reception type for the band you are
scanning, and lets you override that
selection.
Battery-Saving Circuit - Draws only 40 percent of the normal
operating power.
Optional Power Sources - Lets you power the scanner from
Page 3

internal batteries, standard AC power
(with an optional AC adapter), or from
your vehicle's battery (with an
optional DC auto adapter).
Ni-Cd Battery Charging Circuit - Lets you recharge nickel-cadmium
batteries while they are inside the
battery compartment.
Bands and Frequencies
Your PRO-60 scanner can receive all of these bands:
Frequencies Bands
(MHz)
30.00-50.00 VHF Low
50.00-54.00 6-Meter Amateur Radio
54.00-72.00 FM-TV Audio Broadcast, Wide Band
72.00-76.00 Land Mobile Service Band
76.00-87.495 FM-TV Audio Broadcast, Wide Band
87.50-107.95 FM-TV Audio/Radio Broadcast, Wide Band
108-136.975 Aircraft
137-144 U.S. Government
144-148 2-Meter Amateur Radio
148-174 VHF High
174-216 FM/TV Audio broadcast, VHF Wide Band
216-224.995 VHF Hi, 1 1/4 Meter Amateur Radio
225-399.9875 Military Aircraft
400-450 UHF Lo, 70-Centimeter Amateur Radio,
Government
450-470 UHF Low
470-512 FM-TV Audio Broadcast, UHF Wide
760-806 UHF-T Band
806-824 Conventional Systems
849-865.9875 Conventional/Trunked
866-869.000 Public Safety
894-999.9875 Trunked
IMPORTANT: In some areas, the mobile use of a scanner might be unlawful or
require a permit. Check the laws in your area. Radio Shack
assumes no responsibility for the improper use of this scanner.
FCC NOTICE
Your scanner might cause radio or TV interference even when it is operating
properly. To determine whether your scanner is causing the interference,
turn off your scanner. If the interference goes away, your scanner is
causing it.
Try to eliminate the interference by:
Moving your scanner away from the receiver
Connecting your scanner to an outlet that is on a different electrical
circuit from the receiver
Contacting your local Radio store for help
If you cannot eliminate the interference, the FCC requires that you stop
Page 4

using your scanner.
This device complies with Part 15 of FCC Rules. Operation is subject to
the following conditions:
1. This device may not cause harmful interference.
2. This device must accept any interference that may cause undesired
operation.
Power Sources
You can power your scanner from any of the following:
Internal batteries (not supplied)
Standard AC power (using an optional AC adapter [273-1665])
Your vehicle's battery (using an optional DC auto adapter [270-1560])
Using Internal Battery Power
You can power your scanner from six AA batteries (not supplied). For the
longest battery life, we recommend alkaline batteries (such as Cat. No.
23-552). Or, you can use rechargeable nickel-cadmium batteries (such as
Cat. No. 23-125).
1. If the scanner is on, turn VOLUME OFF/MAX counterclockwise to turn it
off.
2. Press down OPEN on the center of the battery compartment cover and
slide the cover off in the direction of the arrow.
3. Remove the battery holder from the battery compartment.
4. Install six fresh batteries as indicated by the polarity symbols
(+ and -) marked on the battery holder and inside the battery
compartment.
CAUTION: Never mix rechargeable and non-rechargeable batteries.
Use only fresh batteries of the required size and type. Always
remove old or weak batteries. Batteries can leak chemicals that
can destroy electronic circuits.
5. Replace the battery holder in the compartment.
NOTE: The battery holder fits only one way in the compartment.
6. Replace the battery compartment cover.
When the batteries are low, the display flashes and the scanner beeps.
When this happens, replace all six non-rechargeable batteries or recharge
all six rechargeable nickel-cadmium batteries (see "Charging NickelCadmium Batteries").
Important Information about the External Power Jacks
The PWR jack lets you connect an external AC or DC adapter to operate the
scanner. Connecting an adapter to the PWR jack disconnects the internal
Page 5

batteries.
NOTE: You can use the PWR jack when either chargeable or non-rechargeable
batteries are installed.
The CHG jack lets you connect an external AC or DC adapter to
operate the scanner. When you connect an adapter to the CHG jack,
the internal batteries remain connected and get recharged.
WARNING: Never use the CHG jack when non-chargeable batteries are
installed. If you try to recharge non-rechargeable batteries,
they could get very hot and might explode or leak acid.
CHARGING NICKEL-CADMIUM BATTERIES
The scanner has a built-in charging circuit that lets you recharge nickelcadmium batteries while they are in the scanner.
To recharge the batteries while they are in the scanner, simply connect
an AC or DC adapter into the scanner's CHG jack (see "Using Standard AC
Power" or "Using Vehicle Battery Power").
Charging Tips
It takes about 10 to 18 hours to recharge batteries that are fully
discharged. You can operate the scanner while recharging nickel-cadmium
batteries, but the charging time is lengthened.
Nickel-cadmium batteries last longer and deliver more power if you
regularly let them fully discharge. To do this, simply use the scanner
until the low battery indicator appears on the display. Then fully
charge the batteries.
IMPORTANT: This product is capable of using rechargeable nickel-cadmium
batteries. At the end of the batteries' useful life, they
must be recycled or disposed of properly. Contact your local,
county, or state hazardous waste management authorities for
information on recycling or disposal programs in your area.
Some options that might be available are: municipal curb-side
collection, drop-off boxes at retailers, recycling collection
centers, and mail-back programs.
Using Standard AC Power
You can power your scanner from a standard AC outlet using an optional
AC adapter, such as Cat. No. 273-1665 (not supplied).
WARNING: Do not use an AC adapter's polarized plug with an extension cord,
receptacle, or other outlet unless the blades can be fully
inserted to prevent blade exposure.
CAUTIONS: The recommended AC adapter supplies 9 volts and delivers at
least 300 milliamps. Also, its center tip is set to negative
and its plug properly fits the scanner's PWR and CHR jack.
Using an adapter that does not meet these specifications could
damage the scanner or the adapter.
Be sure you connect the AC adapter to the scanner before you
connect it to a standard AC outlet. Then disconnect the adapter
from the AC outlet before you disconnect it from the scanner.
1. Plug the adapter's barrel plug into PWR.
Page 6

NOTE: If you installed rechargeable nickel-cadmium batteries in the
scanner, remove the cap from the CHG jack and connect the AC adapter
to the jack. This powers the scanner and recharges the batteries at
the same time (see "Charging Nickel-Cadmium Batteries").
2. Connect the adapter's power module to a standard AC outlet.
Using Vehicle Battery Power
You can power your scanner from your vehicle's battery power using an
optional DC auto adapter, such as Cat. No. 270-1560 (not supplied).
CAUTIONS: The scanner is designed to work in a vehicle that has a 12-volt
DC, negative-ground electrical system. If you are not sure
about your vehicle, check with your vehicle's dealer.
The recommended DC auto adapter supplies 9 volts and delivers
at least 300 milliamps. Also, its center tip is set to negative
and its plug properly fits the scanner's PWR and CHR jack.
Using an adapter that does not meet these specifications could
damage the scanner or the adapter.
To protect your vehicle's electrical system, be sure you connect
the adapter to the scanner before you connect it to the
cigarette-lighter socket. Then disconnect the adapter from the
cigarette-socket before you disconnect it from the scanner.
1. Set the adapter's voltage switch to 9V.
2. Connect the adapter's orange barrel plug to the adapter's cable with
the tip set to - (negative).
3. Plug the adapter's barrel plug into PWR.
NOTE: If you installed rechargeable nickel-cadmium batteries in the
scanner, remove the cap from the CHG jack and connect the DC auto
adapter to the jack. This powers the scanner and recharges the
batteries at the same time (see "Charging Nickel-Cadmium
Batteries").
4. Plug the other end of the adapter into your vehicle's cigarette lighter socket.
NOTE: If the scanner does not operate properly with a DC auto adapter
connected to your vehicle's cigarette-lighter socket, you might
need to unplug the adapter and clean the socket to remove ashes and
other debris.
Preparation
CONNECTING THE SUPPLIED ANTENNA
1. Connect the supplied flexible antenna's BNC connector to ANT on top
of the scanner.
2. Press down and rotate the base of the antenna clockwise until the
antenna locks into place.
CONNECTING AN OPTIONAL ANTENNA
Page 7

The supplied antenna is usually adequate for strong local signals.
However, for the best results, you can attach a multi-band outdoor antenna
(such as Cat. No. 20-013) to the scanner. If the coaxial cable's connector
does not fit the ANT jack, you might also need an adapter. Your local
Radio Shack store sells a complete line of outdoor antennas, adapters, and
connectors.
For the best performance, consider the following when deciding on an
outdoor base antenna and its location:
The location of the antenna should be as high as possible.
The antenna and antenna cable should be as far away as possible from
sources of electrical noise (appliances, other radios, and so on).
The antenna should be vertical.
Mount the antenna following the instructions supplied with the antenna
and its mounting hardware. Then route the antenna cable to the scanner,
and connect it to ANT on top of the scanner.
CAUTION: Do not route the cable over sharp edges or moving objects.
NOTE: Always use 50-ohm coaxial cable to connect an outdoor antenna.
For lengths under 50 feet, use RG58 (Cat. No. 278-1314) or RG8/M
(Cat. No. 278-1313).
For lengths over 50 feet, use RG-8, low-loss coaxial cable (Cat. No.
278-1312).
RESETTING THE SCANNER
When you first install the scanner's batteries, or when they are removed
for an extended period of time, the scanner's display might lock-up. If
this happens, try resetting the scanner.
CAUTION: Since this procedure clears all the information programmed into
the scanner, use it only when you are sure the scanner is not
working properly.
Follow these steps to reset the scanner.
1. If the scanner is on, turn VOLUME OFF/MAX counterclockwise until it
clicks to turn it off.
2. While you hold down both CLEAR and 0, turn VOLUME OFF/MAX clockwise
until it clicks to turn on the scanner.
CONNECTING AN EARPHONE
For private listening, you can plug an optional earphone (such as Cat.
No. 33-175) into the headphone jack on top of your scanner. Connecting an
earphone automatically disconnects the internal speaker.
NOTE: In a noisy area, monaural headphones (such as Cat. No. 20-210)
might provide more comfortable listening.
Listening Safely
To protect your hearing, follow these guidelines when you use an earphone.
Set the volume to the lowest setting before you begin listening. After
Page 8

you begin listening, adjust the volume to a comfortable level.
Do not listen at extremely high volume levels. Extended high-volume
can lead to permanent hearing loss.
Once you set the volume, do not increase it. Over time, your ears
adapt to the volume level, so a volume level that does not cause
discomfort might still damage your hearing.
Traffic Safety
Do not wear an earphone while operating a motor vehicle or riding a
bicycle. This can create a traffic hazard and is illegal in some areas.
Even though some earphones are designed to let you hear some outside sounds
when listening at normal volume levels, they still present a traffic
hazard.
CONNECTING AN EXTERNAL SPEAKER
In a noisy area, a properly placed external speaker (such as Cat. No.
21-549) or an amplified speaker (such as Cat. No. 21-541) might make
listening easier. Plug the speaker cable's 1/8-inch mini-plug into the
scanner's headphone jack.
USING THE BELT CLIP
You can use the belt clip for hands-free carrying when you are on the go.
Slide the belt clip over your belt or waistband.
UNDERSTANDING YOUR SCANNER
A LOOK AT THE KEYPAD
A quick look at the scanner's keypad will help you understand each key's
function.
Control Function
KEYLOCK Disables the keypad (except for the SCAN, MANUAL, and
LIGHT keys) to prevent accidental program changes.
SCAN Starts scanning through the stored channels.
PRI Turns the priority function on and off.
L/OUT Turns the selected channel's lockout function on and
off.
DELAY Turns the selected channel's delay function on and
off.
LIGHT Turns the display back light on and off.
MANUAL Stops scanning and lets you manually enter a channel
number or frequency.
LIMIT Turns on the limit search mode and sets the
frequency range.
Up, Down Selects the direction in the search, program, scan,
or manual modes.
Page 9

MON Accesses the 10 monitor memories.
Number Each key has a single-digit label and a range of
Keys numbers.
Use the digits on the keys to enter the number for a
channel or a frequency.
Use the range of numbers above the key (for example
81-100) to select the channels in a channel-storage
bank (see "Understanding Channel Storage Banks").
ENTER Stores a frequency in a channel.
DIRECT/. Turns on the direct search mode or enters a decimal
point (necessary when programming frequencies).
AM/FM/ Switches the scanner between the AM, FM, or WFM
WFM modes.
PGM Sets the scanner so you can store frequencies into
channels.
CLEAR Clears an incorrect entry and is used when resetting
the scanner.
A LOOK AT THE DISPLAY
A look at the scanner's display will help you understand what each
indicator means.
Symbol Appears When
P The scanner is tuned to a priority channel.
MON The scanner is tuned to a monitor memory.
BANK The scanner's memory banks are turned on during
the scan mode.
CH The scanner is tuned to one of the 200 available
channels.
FM, AM, The scanner is set to the selected mode.
or WFM
NOTE: The symbol blinks when you manually select the mode.
Up or Down Shows the search direction in the search mode and
the scanning direction in the scan, program, and
manual modes.
-L- The scanner is searching using a limit search.
-d- The scanner is searching using a direct frequency
search.
SRCH The scanner is searching up or down the frequency
bands.
SCAN The scanner is scanning up or down the channels.
MAN You manually selected a channel.
Page 10

PGM You are storing frequencies into the scanner's
channels.
PRI The priority channel function is on.
DLY The scanner is monitoring a channel you pre programmed with the delay function.
L/O The scanner is monitoring a channel you locked
out of the scan mode.
Lo You are programming the lowest frequency for a
limit search.
Hi You are programming the highest frequency for
a limit search.
BATTERY-SAVING CIRCUIT
If the scanner does not detect a signal within 5 seconds any time after
you manually select a channel or frequency, the scanner enters the
battery-saving standby mode.
In the standby mode, the scanner rests for 1 second then checks for a
signal for 1/2 second, using only 40 percent of the normal power
consumption. The scanner continues this until you press any button or
if receives a signal.
UNDERSTANDING MEMORY
You can store up to 210 frequencies into your scanner's memory. You can
store each frequency into either a permanent memory, called a channel, or
a temporary memory, called a monitor memory. Your scanner has 200 channel
memories and 10 monitor memories.
CHANNEL MEMORIES
To make it easier to group and select channels, they are divided into
10 channel-storage banks of 20 channels each.
You can use each channel-storage bank to group frequencies by similar
organizations (see "Guide to the Action Bands"). For example:
Channels Organization
1-20 Police Department
21-40 Fire Department
41-60 Ambulance Service
61-80 Aircraft
You can also group channels by city or by local area.
MONITOR MEMORIES
The scanner also has 10 monitor memories. Use these memories to
temporarily store frequencies while you decide whether or not to save
them in channels. This is handy for quickly storing an active frequency
when you search through an entire frequency band. You can manually select
these memories, but you cannot scan them (see "Searching for and
Page 11

Temporarily Storing Active Frequencies").
Operation
SETTING THE VOLUME AND SQUELCH
1. Turn SQUELCH fully clockwise.
2. Turn VOLUME OFF/MAX clockwise to about half way. The scanner turns
off.
3. Turn SQUELCH counterclockwise until you hear a hissing noise.
4. Adjust VOLUME OFF/MAX to a comfortable level.
5. Slowly turn SQUELCH clockwise until the hissing noise stops.
NOTES: If squelch is set too low, the scanner can pick up unwanted or weak
transmissions. When this happens, slightly turn SQUELCH clockwise
to decrease the scanner's sensitivity to weaker signals.
If squelch is set too high, the scanner might not pick up any
transmissions. When this happens, slightly turn SQUELCH counter clockwise to increase the scanner's sensitivity.
SEARCHING FOR AND TEMPORARILY STORING ACTIVE FREQUENCIES
You can set your scanner to search for:
Transmissions within a limited range of specified frequencies
(limit search).
Transmissions starting from a designated frequency (direct search).
When the scanner finds an active frequency, you can quickly store it in
one of the 10 monitor memories.
NOTE: Your scanner rounds down the entered frequency to the nearest valid
frequency. For example, if you try to enter 151.473, the scanner
accepts it as 151.470.
During a limit search, the scanner searches upward starting from a selected
lower frequency limit, or downward starting from a selected upper frequency
limit.
1. Press PGM, then LIMIT. Lo appears on the display.
2. Enter the lowest frequency in the desired frequency search range, then
press ENTER.
3. Press LIMIT, Hi appears on the display.
4. Enter the highest frequency in the desired frequency search range,
then press ENTER.
5. To search up or down:
One step (5, 12.5, or 50 kHz) at a time - quickly press and release up
or down.
Page 12

Continuously, until the scanner finds an active frequency - press and
hold up or down for about a second.
- L - and SRCH appear on the display, an indicator flashes under the
next available monitor memory, and the scanner searches through the
specified frequency range either upward (from the lowest selected
frequency), or downward (from the highest selected frequency).
NOTE: While searching either upward or downward, when the scanner
reaches a specified limit (either upper or lower), it
automatically skips to the starting frequency and continues
searching.
6. When the scanner stops on an active frequency, you can either:
Press MON to store it in the next available monitor memory, or
Press and hold UP or DOWN for about a second to continue the search.
7. To stop continuous searching, while UP or DOWN SRCH appears on the
display, press UP or DOWN until the UP or DOWN symbol disappears.
DIRECT SEARCH
During a direct search, the scanner searches upward or downward, starting
from a specified frequency or stored channel.
NOTE: "PRIORITY" must be turned OFF in order to start a "Direct Search".
1. To start a direct search from a specified frequency:
a. Press PGM.
b. Enter the desired frequency.
NOTE: Do not omit digits (except the last zeros) after the decimal
point. The frequency must be fully entered for the scanner to
start the direct search.
c. Press DIRECT.
To start a direct search from a stored channel:
a. Press MANUAL or PGM.
b. Enter the desired channel number.
c. Press MANUAL or PGM again.
d. Press DIRECT.
2. To search up or down:
One step (5, 12.5, 25, or 50 kHz) at a time starting from the specified
frequency or channel - quickly press and release up or down.
Continuously until the scanner finds an active frequency - press
and hold up or down for about a second.
- d - and SRCH appear on the display, an indicator flashes under the
next available monitor memory, and the scanner searches either upward
or downward starting from the selected frequency.
Page 13

NOTES: While searching either upward or downward, when the scanner:
Reaches the end of a band, it automatically skips to the
beginning of the next available band.
Reaches the end of the last available band, it automatically
skips to the beginning of the first.
3. When the scanner stops on an active frequency, you can:
Press MON to store it in the next available monitor memory, or
Press and hold UP or DOWN for about a second to continue the search.
4. To stop continuous searching, while UP or DOWN SRCH appears on the
display, press UP or DOWN until UP or DOWN disappears.
LISTENING TO A MONITOR MEMORY
To listen to a monitor memory, press MANUAL, MON, then the number key of
the desired monitor memory.
NOTE: You cannot scan monitor memories.
STORING FREQUENCIES INTO CHANNELS
Your scanner has 10 channel storage banks, each with 20 storage areas
called channels, where you can permanently store a total of 200
frequencies. You can either move a monitor memory to a channel, or you
can manually enter a frequency to store it.
Moving a Frequency from a Monitor Memory to a Channel
Follow these steps to move a monitor memory to a channel.
1. Press MANUAL, enter the channel number you want to store frequency in,
then press PGM.
2. Press MON, then enter the number of the monitor memory that has the
frequency you want to store into the channel.
3. Press ENTER. The scanner stores the frequency into the selected
channel.
Manually Storing Frequencies into Channels
Good reference for active frequencies are Radio Shack's "Police Call Radio
Guide Including Fire and Emergency Services," "Official Aeronautical
Frequency Directory," and "Maritime Frequency Directory." We update these
directories every year, so be sure to get a current copy. See also "Guide
to the Action Bands" in the manual.
Follow these steps to manually store a frequency into a channel.
1. Press MANUAL. MAN appears on the display.
2. Enter a channel number then press PGM. The selected channel number
and PGM appear on the display.
3. To enter a frequency, enter the first digits (up to 3), press symbol,
enter the last digits (up to 4) then ENTER.
For example, to enter the frequency 166 MHz:
Page 14

You Press You See
MANUAL (NN)CH 000.0000 MAN
8 (NN)CH 8
PGM 8CH 000,0000
166 8CH 166
[.] 8CH 166.
000 8CH 166.000
ENTER 8CH 166.0000 FM
NOTES: The scanner continuously monitors the most recently stored channel.
ERROR appears on the display when you enter a frequency not with in the scanner's bands (see "Specifications"). To erase an error,
press CLEAR then repeat Step 3.
4. To program the next channel in sequence, press PGM and repeat Step 3.
NOTE: To change the direction it sequences in, press UP or DOWN before
you press PGM.
To program more channels in any sequence, repeat Steps 2 and 3.
SCANNING THE STORED CHANNELS
1. Press UP or DOWN to select the scan direction.
NOTE: When you first turn on the scanner, the scan direction is always
UP.
2. Press SCAN.
The scanner scans through all non-locked channels in the activated banks
(see "Turning Channel-Storage Banks On and Off" and "Locking Out a
Channel").
NOTE: If the scanner does not scan, re-adjust SQUELCH.
TURNING CHANNEL-STORAGE BANKS ON AND OFF
A more efficient way to scan is to turn off storage banks you do not want
to scan. For example, if you wanted to scan only current police activity,
you would not want the scanner to scan, find, and waste time monitoring
channels in other banks that did not include police frequencies, Instead,
you can turn off the other nine channel-storage banks.
While scanning, press the number key for the bank you want to turn on or
off. The bank indicator turns on or off.
If the bank indicator is on, the scanner scans all channels within that
bank that are not individually locked out (see "Locking Out a Channel").
If the indicator is off, the scanner does not scan any of the 20 channels
within that bank.
NOTES: You can manually select any channel in a bank, even if the bank is
turned off.
Page 15

You cannot turn off all banks. At least one bank must always
be active.
MANUALLY SELECTING A CHANNEL/FREQUENCY
Selecting a Channel
You can continuously monitor a specific channel without scanning. This is
useful if you want to hear a broadcast on a channel and do not want to miss
any details (even though there might be periods of silence) or if you want
to monitor a locked-out channel (see "Locking Out a Channel").
If the scanner is stopped at a channel you want to continue listening to,
quickly press MANUAL once before it continues scanning again.
NOTES: Pressing MANUAL additional times makes the scanner step through
the channels.
To change the channel step direction, press UP or DOWN before you
press MANUAL additional times.
If the scanner is scanning:
1. Press MANUAL to stop the scanning.
2. Enter the desired channel number
3. Press MANUAL again.
If the scanner is not scanning, enter the desired channel number then
press MANUAL.
Selecting a Frequency
You can manually select a desired frequency. This is useful if you want
to monitor a frequency you have not stored, or a frequency stored in a
locked-out channel (see "Locking Out a Channel").
1. If the scanner is scanning, press MANUAL to stop the scanning.
2. Enter the desired frequency.
3. Press DIRECT. The scanner continuously monitors the selected
frequency.
USING PRIORITY
The priority feature lets you scan through the programmed channels, and
still not miss an important or interesting call on a designated channel.
To use the priority feature, you need to designate a stored channel first
and then turn the priority feature on.
Designating a Channel
1. Press PGM.
2. Enter the desired channel number.
NOTES: You can designate any stored channel as the priority channel, but
you can have only one priority channel at a time.
To "undesignate" a priority channel, either designate another
Page 16

channel or turn the priority feature off.
3. Press PRI.
Turning the Priority Feature On/Off
To turn on the priority feature, press PRI during scanning. PRI appears
on the display. The scanner checks the priority channel every 2 seconds
and stays on the channel if there is activity. P appears to the left
of the display whenever the scanner monitors the priority channel.
To turn off the priority feature, press PRI. PRI disappears from the
display.
USING DELAY
Many agencies use a two-way radio system that might have a pause between a
query and a reply. To avoid missing a reply, you can program a 2-second
delay into a channel or a frequency. When your scanner stops on a channel
or frequency with a programmed delay, it continues to monitor it for 2
seconds after every transmission before the scanner resumes scanning or
searching.
To program a 2-second delay:
If the scanner is in the scan mode and stopped on the desired channel,
quickly press DELAY before it continues scanning again. DLY appears on
the display.
If the scanner is not stopped on the desired channel, manually select the
desired channel, then press DELAY, DLY appears on the display.
If the scanner is in the search mode, press DELAY. DLY appears on the
display and the scanner programs a 2-second delay into all the frequencies
it finds.
To turn off the 2-second delay on any channel or frequency, press DELAY
while the scanner is monitoring the channel or frequency. DLY disappears
from the display.
LOCKING OUT A CHANNEL
You can scan channels faster by locking out specific channels you do not
want to monitor, such as a continuously active weather channel.
1. Press MANUAL. MAN appears on the display.
2. Enter the desired channel number.
3. Press MANUAL again.
4. Press L/OUT so L/O appears on the display.
When it scans, the scanner skips the locked out channel.
NOTES: There must be at least one active channel in each bank. You
cannot lock out all channels.
You can still manually select locked-out channels.
To unlock a channel, manually select the channel then press L/OUT so
L/O disappears from the display.
Page 17

USING THE LIGHT
While the scanner is on, press LIGHT to light the display for 5 seconds.
Press any key other than LIGHT while the backlight is on to keep the
display lit for another 5 seconds. To turn off the backlight before it
automatically turns off, press LIGHT.
TURNING THE KEY TONE ON/OFF
Each time you press any of the scanner's keys a tone sounds to verify that
the scanner has correctly accepted your entry.
To turn the scanner's key tone on or off, first turn off the scanner. Then
while you press and hold 2 and ENTER, turn VOLUME OFF/MAX clockwise until
the display appears.
USING THE KEYLOCK
Once you program your scanner, you can protect it from accidental program
changes by sliding KEYLOCK to the right.
The only controls that operate in the keylock mode are SCAN, MANUAL, LIGHT,
VOLUME, and SQUELCH. When you want to change the scanner's programming,
slide KEYLOCK to the left.
CHANGING THE AM/FM/WFM RECEIVE MODE
The scanner scans in the following modes:
AM (amplitude modulation) - Used in aircraft bands and
amateur radio band.
FM (narrowband frequency modulation) - Used in action bands such as
police, fire, ambulance, amateur
radio, etc.
WFM (wideband frequency modulation) - Used in commercial FM broadcasts
and television sound.
The scanner is preset to the most common AM/FM/WFM receive mode for each
frequency range. The preset modes are:
FREQUENCY BAND (MHz) RECEIVE MODE
30.0000 - 87.4950 FM
87.50000 - 107.9500 WFM
108.0000 - 136.9750 AM
137.0000 - 224.9950 FM
225.0000 - 399.9875 AM
400.0000 - 512.000 FM
760.0000 - 999.9875 FM
The preset mode is correct in most cases. However, some ham radio and
military aircraft broadcasts do not operate in the preset mode. If you try
to listen to a broadcast when the scanner is not set to the correct receive
mode, the broadcast might sound weak or distorted.
Page 18

To change the mode, press AM/FM/WFM. AM, FM, or WFM blinks on the display
to indicate that the displayed receive mode has been changed from the
preset mode.
NOTES: If you change any frequency band's receive mode during a limit or
direct search, the scanner no longer uses any of the preset receive
modes. Instead, the scanner searches for frequencies in all the
bands in the selected mode.
If you change the band mode to WFM during frequency search, your
scanner automatically searches frequencies at 50 kHz steps.
To return to the default settings, press and hold down CLEAR then press
AM/FM/WFM.
For more information, see "Specified Intervals" under "A General Guide to
Scanning."
A GENERAL GUIDE TO SCANNING
Reception of the frequencies covered by your scanner is mainly "line-ofsight." This means you usually cannot hear stations that are beyond the
horizon.
During the summer months, you might be able to hear stations in the 30-50
MHz range located several hundred or even thousands of miles away. This
is because of summer atmosphere conditions. This type of reception is
unpredictable but often very interesting!
Frequency Guide
National Weather Frequencies
161.650 162.425 162.500 162.550
161.775 162.450 162.525 163.275
162.400 162.475
Birdie Frequencies
Birdie are operating frequencies generated and used inside the scanner's
receiver. These operating frequencies could interfere with broadcasts
on the same frequencies and make them difficult or impossible to receive.
If you program one of these frequencies, you hear only noise on that
frequency. If the interference is not severe, you might be able to turn
SQUELCH clockwise to cut out the birdie. The most common birdies to
watch for are:
44.5450 178.1800 267.2750 473.3000 781.2000
84.8800 190.0000 284.1750 474.9000 801.8000
89.1000 214.1400 311.8125 486.1000 908.6250
102.9000 215.2000 317.2000 487.7000 910.6250
127.7500 222.725 356.3625 495.7500 912.6250
128.5500 225.900 400.9000 497.3500
133.6500 244.800 445.4500 504.3000
151.0250 259.075 460.5000 505.9000
158.2500 267.2625 462.1000 512.0000
To find your specific scanner's birdies, begin by disconnecting the antenna
Page 19

and moving it away from the receiver. Make sure that no other nearby radio
or TV sets are tuned on. Use the search function and scan every frequency
band from its lowest frequency to the highest. Occasionally, the searching
will stop as if it has found a signal, often without any sound. That is a
birdie. Make a list of all the birdies in your particular scanner for
future reference.
GUIDE TO THE ACTION BANDS
United States Broadcast Bands
In the United States, there are several broadcast bands. The standard AM
and FM bands are probably the most well known. There are also four
television audio broadcasts bands - the lower three transmit on the VHF
band and the fourth transmits on the UHF band.
Typical Band Usage
VHF Band (30.0-300.0 MHz)
Low Range 30.00-50.00 MHz
6-Meter Amateur 50.00-54.00 MHz
FM-TV 54.00-72.00 MHz
Land Mobile 72.00-76.00 MHz
FM-TV 76.00-88.00 MHz
FM Radio 88.00-108.00 MHz
Aircraft 108.00-136.975 MHz
U. S. Government 137.00-144.000 MHz
2-Meter Amateur 144.00-148.000 MHz
High Range 148.00-174.000 MHz
FM-TV, VHF Wide 174.00-216.000 MHz
New Mobile, 1 1/4 Meter Amateur 216.00-224.000 MHz
UHF Band (300.00 MHz-3.0 GHz)
Military Aircraft 319.00-384.000 MHz
U. S. Government 406.00-420.000 MHz
70 cm Amateur 450.00-470.000 MHz
Low Range 450.00-470.000 MHz
FM-TV Audio
Broadcast, Wide Band 470.00-512.000 MHz
800 Band Law Enforcement 806.00-824.000 MHz
Conventional Systems 851.00-856.000 MHz
Trunked Systems 856.00-866.000 MHz
Page 20

Public Safety 866.00-869.000 MHz
Trunked Private/General 894.00-999.9875 MHz
Primary Usage
As a general rule, most of the radio activity is concentrated on the
following frequencies:
VHF Band
Activities Frequencies
Government, Police, and Fire 153.785-155.980 MHz
Emergency Services 158.730-159.460 MHz
Railroad 160.000-161.900 MHz
UHF Band
Activities Frequencies
Land-Mobile Paired 450.000-470.000 MHz
Frequencies
Base Station 451.025-459.950 MHz
Mobile Units 456.025-459.950 MHz
Relay/Repeater Units 460.025-464.975 MHz
Remote/Control Station 465.025-469.975 MHz
NOTE: Base stations and repeater units operate at 5 MHz lower than their
associated mobile units and control stations.
Specified Intervals
Frequencies in different bands are accessible only at specific intervals.
For example:
Band Type Specified Interval
VHF (Lo and Hi), HAM,
and Government 5.0 or 50.0 kHz steps
All Others 12.5 kHz steps
Aircraft 25.0 kHz steps
FM Broadcast 50.0 kHz steps
NOTE: Your scanner rounds down the entered frequency to the nearest
valid frequency. For example, if you try to enter 151.473, the
scanner accepts it as 151.470.
Band Allocation
To help decide which frequency ranges to scan, use the following listing
of the typical services that use the frequencies your scanner receives.
These frequencies are subject to change, and might vary from area to area.
Page 21

For a more complete listing, refer to the "Police Call Guide Including
Fire and Emergency Services," available at your local Radio Shack store.
Abbreviations
AIR............................................................Aircraft
BIFC.............................................Boise (ID) Interagency
Fire Cache
BUS............................................................Business
CAP....................................................Civil Air Patrol
CB........................................................Citizens Band
CSB................................................Conventional Systems
CTSB........................................Conventional/Trunked System
FIRE....................................................Fire Department
HAM.................................................Amateur (Ham) Radio
GOVT.................................................Federal Government
GMR................................................General Mobile Radio
GTR.....................................................General Trunked
IND.................................................Industrial Services
(Manufacturing, Constructions,
Farming, Forest Products)
MAR..............................................Military Amateur Radio
MARI.............................................Maritime Limited Coast
(Coast Guard, Marine telephone,
Shipboard Radio, Private stations)
MARS.................................................Military Affiliate
Radio System
MED..........................................Emergency/Medical Services
MIL.......................................................U.S. Military
MOV.......................................Motion Picture/Video Industry
NEW...................................................New Mobile Narrow
NEWS........................................................Relay Press
(Newspaper reporters)
OIL..............................................Oil/Petroleum Industry
POL...................................................Police Department
PUB.....................................................Public Services
(Public Safety, Local Government
Forestry Conservation
PSB.......................................................Public Safety
Page 22

PTR.....................................................Private Trunked
ROAD.....................................................Road & Highway
Maintenance
RTV.....................................................Radio/TV Remote
Broadcast Pickup
TAXI......................................................Taxi Services
TELB...................................................Mobile Telephone
(Aircraft, Radio Common Carrier,
Landline Companies
TELC....................................................Cordless Phones
TELM..............................................Telephone Maintenance
TOW..........................................................Tow Trucks
TRAN............................................Transportation Services
(Trucks, Tow Trucks, Buses,
Railroad, Other)
TSB.....................................................Trunked Systems
TV................................................FM-TV Audio Broadcast
USXX..............................................Government Classified
UTIL............................................Power & Water Utilities
WTHR............................................................Weather
Very High Frequency (VHF)(30 MHz-300 MHz)
Low Band - (30-50 MHz - in 5 kHz steps)
30.000-30.550..................................................GOVT, MIL
30.580-31.980...................................................IND, PUB
32.000-32.990..................................................GOVT, MIL
33.020-33.980..............................................BUS, IND, PUB
34.010-34.990..................................................GOVT, MIL
35.020-35.980..................................................BUS, PUB,
IND, ELM
36.000-36.230..................................................GOVT, MIL
36.250.................................................Oil Spill Cleanup
36.270-36.990..................................................GOVT, MIL
37.020-37.980...................................................PUB, IND
38.000-39.000..................................................GOVT, MIL
Page 23

39.020-39.980........................................................PUB
40.000-42.000............................................GOVT, MIL, MARI
42.020-42.940........................................................POL
42.960-43.180........................................................IND
43.220-43.680.............................................TELM, IND, PUB
43.700-44.600.......................................................TRAN
44.620-46.580...................................................POL, PUB
46.600-46.990.................................................GOVT, TELC
47.020-47.400........................................................PUB
47.420................................................American Red Cross
47.440-49.580...................................................IND, PUB
49.610-49.990..................................................MIL, TELC
6-Meter Amateur Band(50-54 MHz)
50.00-54.00..........................................................HAM
Aircraft Band (108-136 MHz)
108.000-121.490......................................................AIR
121.500....................................................Air Emergency
121.510-136.975......................................................AIR
U.S. Government Band
(137-144 MHz)
137.000-144.000................................................GOVT, MIL
2-Meter Amateur Band
(144-148 MHz)
144.000-148.000......................................................HAM
VHF-Hi BAND (148-174 MHz)
148.050-150.345............................................CAP, MAR, MIL
150.775-150.790......................................................MED
150.815-150.965......................................................TOW
150.980................................................Oil Spill Cleanup
150.995-151.130.....................................................ROAD
151.145-151.475......................................................POL
151.490-151.955.................................................IND, BUS
Page 24

151.985.............................................................TELM
152.0075.............................................................MED
152.030-152.240.....................................................TELB
152.270-152.465................................................IND. TAXI
152.480..............................................................BUS
152.510-152.840.....................................................TELB
152.870-153.020.................................................IND, MOV
153.035-153.725...........................................IND, OIL, UTIL
153.740-154.445................................................PUB, FIRE
154.490-154.570.................................................IND, BUS
154.585................................................Oil Spill Cleanup
154.600-154.624......................................................BUS
154.655-156.240................................................MED, ROAD
POL, PUB
156.255..............................................................OIL
156.275-157.425.....................................................MARI
157.450..............................................................MED
157.470-157.515......................................................TOW
157.530-157.725................................................IND, TAXI
157.740..............................................................BUS
157.770-158.100.....................................................TELB
158.130-158.460.............................................BUS, IND OIL
TELM, UTIL
158.490-158.700.....................................................TELB
158.730-159.465................................................POL, PUB,
ROAD
159.480..............................................................OIL
159.495-161.565.....................................................TRAN
161.580..............................................................OIL
161.600-162.000................................................MARI, RTV
162.0125-162.35..........................................GOVT, MIL, USXX
162.400-162.550.....................................................WTHR
162.5625-162.6375.............................................GOVT, MIL,
USXX
Page 25

162.6625.............................................................MED
162.6875-163.225..............................................GOVT, MIL,
USXX
163.250..............................................................MED
163.275-166.225...............................................GOVT, MIL,
USXXS
166.250..................................................GOVT, RTV, FIRE
166.275-169.400...............................................GOVT, BIFC
169.445...................................................Wireless Mikes
169.500.............................................................GOVT
169.505...................................................Wireless Mikes
169.55-169.9875...............................................GOVT, RTV,
USXX
170.000.............................................................BIFC
170.025-170.150...............................................GOVT, RTV,
FIRE
170.175-170.225.....................................................GOVT
170.245-170.305...........................................Wireless Mikes
170.350-170.400................................................GOVT, MIL
170.425-170.450.....................................................BIFC
170.475..............................................................PUB
170.4875-173.175...............................................GOVT, PUB
Wireless Mikes
173.225-173.375...............................................MOV, NEWS,
UTIL
173.3875-173.5375....................................................MIL
173.5625-173.5875....................................................MIL
Medical/Crash Crews
173.60-173.9875.....................................................GOVT
Ultra High Frequency (UHF)(300 MHz-3 GHz)
Military Aircraft Band
(319.1-383.9 MHz)
380.000-383.900..............................................Coast Guard
U.S. Government Band
(406-450 MHz)
Page 26

406.125-419.975...............................................GOVT, USXX
70-cm Amateur Band (420-450 MHz)
420.000 - 450.000....................................................HAM
Low Band (450-470 MHz)
450.050-450.925......................................................RTV
451.025-452.025.................................................IND, OIL
TELM, UTIL
452.0375-453.00............................................ ...IND, TAXI
TRAN TOW, NEWS
453.0125-453.9875....................................................PUB
454.000..............................................................OIL
454.025-454.975.....................................................TELB
455.050-455.925......................................................RTV
457.525-457.600......................................................BUS
458.025-458.175......................................................MED
460.0125-460.6375.............................................FIRE, POL,
PUB
460.650-462.175......................................................BUS
462.1875-462.450................................................BUS, IND
462.4625-462.525...............................................IND, OIL,
TELM, UTIL
462.550-462.725......................................................GMR
462.750-462.925......................................................BUS
462.9375-463.1875....................................................MED
463.200-467.925......................................................BUS
FM-TV Audio Broadcast, UHF Wide Band (470-512 MHz)
(Channels 14 through 69 MHz steps)
475.750......................................................Channels 14
481.750......................................................Channels 15
487.750......................................................Channels 16
493.750......................................................Channels 17
499.750......................................................Channels 18
505.750......................................................Channels 19
511.750......................................................Channels 20
NOTE: Some cities use the 470-512 MHz band for land/mobil service.
Conventional Systems BandLocally Assigned
Page 27

806.0000-855.9875....................................................CSB
Conventional/Trunked Systems BandLocally Assigned
856.0125-860.9875...................................................CTSB
Trunked Systems Band Locally Assigned
861.0125-865.9875....................................................TSB
Public Safety Band Locally Assigned
866.0125-868.9875....................................................PSB
Private Trunked
894.0000-934.9875....................................................PTR
935.0000-939.9875....................................................PTR
General Trunked
940.0125-940.9875....................................................GTR
FREQUENCY CONVERSION
The tuning location of a station can be expressed in frequency (kHz or
MHz) or in wavelength (meters). The following information can help
you make the necessary conversions.
1 MHz (million) = 1,000 kHz (thousand)
To convert MHz to kHz, multiply by 1,000:
30.62 MHz x 1000 = 30620 kHz
To convert from kHz to MHz, divide by 1,000.
127,800 kHz
----------- = 127.8 MHz
1000
To convert MHz to meters, divide 300 by the number of megahertz.
300
----- = 1.75 meter
171 MHz
(LB/all-05/24/95)
Pro-60 (200-0309) Troubleshooting Faxback Doc. # 15356
Your PRO-60 Programmable Scanner should require very little maintenance.
If you have problems, refer to this chart for possible solutions. If you
cannot solve the problem, contact your local Radio Shack store for
assistance.
Problem Probable Cause Solution
Scanner is totally The batteries are Replace the
inoperative. dead. batteries with
Page 28

fresh ones or
recharge them.
The optional AC or Be sure the
DC power adapter is adapter is fully
not connected. inserted into
the PWR (or CHG)
jack.
The scanner's The batteries are weak. Replace the
display blinks batteries with
and the scanner fresh ones or
sounds a tone. recharge them.
The AC or DC adapter Be sure the
used does not provide adapter is set
the required 9 Volts to provide no
DC. less than 9 VDC.
Poor or no Improperly connected antenna. Be sure the
reception. antenna is
properly
connected.
Programmed frequencies are Avoid
the same as Birdie programming
frequencies. frequencies
listed under
"Birdie
Frequencies,"
or only select
them manually.
ERROR appears Programming error. Reprogram the
on the display. frequency
correctly.
Keypad does The keylock function Set KEYLOCK to
not work. is activated. the left
(unlock
position).
Keys do not Undetermined error. Reset the
work or display scanner (see
changes at "Resetting the
random. Scanner").
Scanner is on The SQUELCH control is Adjust the
but will not not correctly adjusted. SQUELCH control
scan. clock-wise (see
"Setting the
Volume and
Squelch").
Care and Maintenance
The Radio Shack PRO-60 Programming Scanner is an example of superior design
and craftsmanship. The following suggestions will help you care for your
scanner so you can enjoy it for years.
Page 29

Keep the scanner dry. If it gets wet, wipe it dry immediately.
Liquids can contain minerals that can corrode the electronic circuits.
Use only fresh batteries of the required size and type. Always remove
old or weak batteries. They can leak chemicals that destroy electronic
circuits.
Handle the scanner gently and carefully. Dropping it can damage
circuit boards and cases and can cause the scanner to work improperly.
Use and store the scanner only in normal temperature environments.
Temperature extremes can shorten the life of electronic devices,
damage batteries, and distort or melt plastic parts.
Keep the scanner away from dust and dirt, which can cause premature
wear of parts.
Wipe the scanner with a damp cloth occasionally to keep it looking new.
Do not use a harsh chemicals, cleaning solvents, or strong detergents
to clean the scanner.
Modifying or tampering with your scanner's internal components can cause a
malfunction and might invalidate the scanner's warranty and void your FCC
authorization to operate it. If your scanner is not operating as it
should, take it to your local Radio Shack store for assistance.
Specifications
Frequency Coverage:
30.0-87.4950 MHz (in 5 kHz steps)
87.5-107.9500 MHz (in 50 kHz steps)
108.0-136.9750 MHz (in 25 kHz steps)
137.0-224.9950 MHz (in 5 kHz steps)
225.0-399.9875 MHz (in 12.5 kHz steps)
400.0-512.0000 MHz (in 12.5 kHz steps)
760.0-824.0000 MHz (in 12.5 MHz steps)
849.0-869.0000 MHz (in 12.5 kHz steps)
894.0-999.9875 MHz (in 12.5 kHz steps)
Total Channels:................................210 (20 channels x 10 banks)
(10 monitor channels)
Sensitivity:
(FM 20 dB (S+N)/N at 3 kHz deviation):
30-512 MHz:......................................................1 microV
760-999.9875 MHz:................................................1 microV
(AM 20 dB (S+N)/N at 60 % modulation):
30-512 MHz:......................................................2 microV
760-999.9875 MHz:................................................2 microV
(WFM 30 dB (S+N)/N at 45 kHz deviation):
30-512 MHz:......................................................3 microV
760-999.9875 MHz:................................................3 microV
Spurious Rejection: (FM at 328 MHz):..................................40 dB
Page 30

Selectivity:
(FM/AM):
+/-10 kHz,..........................................................-6 dB
+/-15 kHz,.........................................................-30 dB
(WFM):
+/-100 kHz,.........................................................-6 dB
+/-200 kHz,........................................................-50 dB
IF Rejection Ratio:
611.2 MHz at 512 MHz:...............................................50 dB
Scanning Rate:.............................................25 channels/sec.
Search Rate:..................................................50 steps/sec.
Priority Sampling:................................................2 seconds
Delay Time:.......................................................2 seconds
Audio Output Power:..........................................10% THD 180 mW
IF Frequencies:
1st:....................................................608.005-611.2 MHz
2nd:...............................................................45 MHz
3rd (WFM):.......................................................10.7 MHz
3rd (FM/AM):......................................................455 kHz
Squelch Sensitivity:
Threshold (FM/AM):...................................Less than 0.5 microV
Threshold (WFM):.......................................Less than 3 microV
Tight (FM/AM):..............................................(S+N)/N 25 dB
Tight (WFM):................................................(S+N)/N 40 dB
Antenna Impedance:..................................................50 ohms
Built-in Speaker:.............................1 3/8" (36 mm) 8 ohm, dynamic
Power Requirement:....................................+9 VDC, 6AA Batteries
or a suitable adapter (negative ground only)
Current Drain (Squelched):...........................................100 mA
Operating Temperature:....................+ 14 degrees F to + 140 degrees F
(-10 degrees C to +60 degrees C)
Residual Noise:.........................Volume control, set to its minimum,
squelched 3 - 5 mV
Channels of Operation:.............Any 200 channels in any band combination
Channels, frequency, and mode display:...............Liquid Crystal Display
Receiving System:..............Direct key entry digital-control synthesizer
1st IF: 608.005 - 611.2 MHz
2nd IF: 45 MHz
3rd IF: 10.7 MHz (WFM), 455 KHz (NFM/AM)
Power Source:.....................................9VDC negative ground only
6 AA batteries or a suitable adapter
Jacks:.........................Antenna, earphone, external power and charge
Receiving System:..............Direct key entry digital-control synthesizer
1st IF: 608.005-611.2 MHz
2nd IF: 45 MHz
3rd IF: 10.7 MHz (WFM), 455 kHz (NFM/AM)
Dimensions:............................6 5/16 x 2 7/16 x 2 1/8 inches (HWD)
(160 x 62 x 54 mm)
Weight (without antenna and batteries):.....................Approx. 8.8 oz.
(250 g)
Specifications are typical; individual units might vary. Specifications
are subject to change and improvement without notice.
Page 31

PRO-Series Direct Entry Programmable Scanners
General Guide To Scanning
Birdies
Birdies are frequencies your scanner uses when it operates. These
operating frequencies might interfere with broadcasts on the same
frequencies. If you program one of these frequencies, you hear only noise
on that frequency.
If the interference is not severe, you might be able to turn SQUELCH
clockwise to cut out the birdie. The most common birdies to watch for are
listed below.
Birdie Frequencies:
31.05 MHz 124.20 MHz
41.40 MHz 134.55 MHz
51.75 MHz 144.90 MHz
113.85 MHz 155.25 MHz
Reception Notes
Reception of the frequencies covered by your scanner is mainly "line of
sight". That means you usually cannot hear stations that are beyond the
horizon. During the summer months you may be able to hear stations in the
30-50 MHz range located several hundred or even thousand of miles away.
This is because of summer atmospheric conditions. This type of reception
is unpredictable but often very interesting!
One very useful service is the National Weather Service's continuous
weather broadcast. These broadcasts contain weather forecasts and data
for the areas around the station, plus bulletins on any threatening
weather conditions. These stations use three frequencies - 162.40,
162.475 or 162.55 MHz. In most areas of the country, you can receive one
of these frequencies.
A Guide To The Action Bands
With the right frequencies programmed into your PRO-Series Scanner, you
can monitor exciting events. With a little investigation, you can find
active frequencies in your community. We can give you some general
pointers, and you can take it from there. Please use caution and common
sense when you hear an emergency call. Never go to the scene of an
emergency. It could be very dangerous.
Find out if there is a local club that monitors your community's
frequencies. Perhaps a local electronics repair shop that works on
equipment similar to your scanner can give you frequencies used by local
radio services.
A volunteer police department or fire department can also be a good source
for this information.
As a general rule on VHF, most activity is concentrated between 153.785
and 155.98 MHz and then again from 158.73 to 159.46 MHz. Here you find
local government, police, fire and most such emergency services. If you
are near a railroad yard or major railroad tracks, look around 160.0 to
161.9 MHz for signals.
In some larger cities, there has been a move to the UHF bands for
Page 32

emergency service. Here, most of the activity is between 453.025 and
453.95 MHz and between 456.025 and 467.925 MHz.
In the UHF band, frequencies between 456.025 and 459.95 MHz and between
465.025 and 469.975 MHz are used by mobile units and control stations
associated with base and repeater units that operate 5 MHz lower (that is,
451.025 to 454.950 and 460.025 to 464.975 MHz). This means that if you
find an active frequency inside one of these spreads, you can look 5 MHz
lower (or higher) to find the base station/repeater for that service.
Typical Band Usage
The following is a brief listing of the typical services that use the
bands you scanner can receive. This listing helps you decide which ranges
you would like to scan.
These frequencies are subject to change, and might vary from area to area.
For a more complete listing refer to the Police Call Radio Guide available
at you local RadioShack store.
Abbreviations:
Affiliate Radio System: ............................................. Mars
Amateur: ............................................................. Ham
Automobile Emergency: ......................................... Auto Emer.
Broadcast Remote: ................................................... BC.R
Bureau of Reclamation: ......................................... Bur.Recl.
Civil Air Patrol: .................................................... CAP
Department of Agriculture and Forestry: .................... Agr. And For.
Fire Department: .................................................... F.D.
Forest Products: ............................................... For.Prod.
Forestry Conservation: ........................................ Fors.Cons.
Government: ........................................................ Govt.
Highway Maintenance: ................................................ Hwy.
Land Transportation: ............................................ Land Tr.
Local Government: ................................................ L.Govt.
Manufacturers: ...................................................... Mfg.
Military: ............................................................ MIL
Mobile Telephone : .............................................. Mob.Tel.
Motion Picture: ................................................... Mot.P.
Motor Carrier: .............................................. Buses.Trucks
National Parks: ................................................. Nat.Park
Petroleum: .......................................................... Pet.
Police: ............................................................. P.D.
Power Utilities: ................................................... Power
Radio Paging: ....................................................... Page
Railroad: ........................................................... R.R.
Relay Press: ....................................................... Press
State Police: .................................................... St.P.D.
Special Emergency: .............................................. Sp.Emer.
Special Industry: ................................................ Sp.Ind.
Taxicab Radio: ...................................................... Taxi
Telephone Maintenance: ........................................ Tel.Maint.
U.S. Coastal and Geodetic Survey: ............................. U.S.C.G.S.
U.S. Navy: ........................................................... USN
U.S. Weather Bureau: ............................................ U.S.W.B.
ATTENTION: Your scanner may not be able to receive all frequencies and/or
modes of reception that are contained within this document.
For complete information of your scanner's capabilities, be
sure to read your owner's manual completely.
Guide To Frequencies
Page 33

National Weather Frequencies:
1) 161.650 5) 162.440 9) 162.525
2) 161.775 6) 162.450 10) 162.550
3) 162.400 7) 162.475 11) 163.275
4) 162.425 8) 162.500
Ham Radio Frequencies
Ham operators often transmit emergency information when other
communication methods break down. The following chart shows some of the
frequencies that Hams use.
Wavelength Frequency
(Meters) (MHz)
10-meter 28.000-29.700
6-meter 50.000-54.000
2-meter 144.000-148.000
70-cm 420.000-450.000
The following are the channels and frequencies of the Citizens Band:
1) 26.965 21) 27.215
2) 26.975 22) 27.225
3) 26.985 23) 27.255
4) 27.005 24) 27.235
5) 27.015 25) 27.245
6) 27.025 26) 27.265
7) 27.035 27) 27.275
8) 27.055 28) 27.285
9) 27.065 29) 27.295
10) 27.075 30) 27.305
11) 27.085 31) 27.315
12) 27.105 32) 27.325
13) 27.115 33) 27.335
14) 27.125 34) 27.345
15) 27.135 35) 27.355
16) 27.155 36) 27.365
17) 27.165 37) 27.375
18) 27.175 38) 27.385
19) 27.185 39) 27.395
20) 27.205 40) 27.405
Guide To The Action Bands
United States Broadcast Bands
In the United States, there are several broadcast bands. The standard AM
and FM bands are probably the most well known. There are also four
television audio broadcast bands-the lower three transmit on the VHF band
and the fourth transmits on the UHF band.
Frequency Range Allocation
54.0 - 72.0 MHz ........................................... VHF Television
76.0 - 88.0 MHz ........................................... VHF Television
88.0 - 108.0 MHz ............................................. Standard FM
174.0 - 216.0 MHz ......................................... VHF Television
470.0 - 805.75 MHz ........................................ UHF Television
International Broadcast Bands
Page 34

Several short-wave bands are allocated for international broadcasting
because of the nature of propagation of high frequencies. The bands are
sometimes identified according to the approximate wavelength of the
signals in meters. Your scanner may receive the 11-meter band, from
25.6 - 26.10 MHz.
Typical Band Usage
HF Band (3.0 - 30.0 MHz):
Mid Range: ............................................. 25.00 - 28.63 MHz
10-Meter Amateur Band: ................................. 28.00 - 29.70 MHz
High Range: ............................................ 29.70 - 29.90 MHz
VHF Band (30.00 - 300.0 MHz):
Low range: ............................................. 30.00 - 50.00 MHz
6-Meter Amateur: ....................................... 50.00 - 54.00 MHz
FM-TV Audio Broadcast, Wide Band: ...................... 54.00 - 72.00 MHz
FM Radio Broadcast, Wide Band: ........................ 88.00 - 108.00 MHz
Aircraft: ............................................ 108.00 - 136.00 MHz
U.S. Government: ..................................... 138.00 - 144.00 MHz
2-Meter Amateur: ..................................... 144.00 - 148.00 MHz
High Range: .......................................... 148.00 - 174.00 MHz
New Mobile Narrow Band: .............................. 220.00 - 222.00 MHz
1.3-Meter Amateur: ................................... 222.00 - 225.00 MHz
Military Aircraft: ................................... 225.00 - 287.80 MHz
UHF Band (300.00 MHz - 3.0 GHz):
Military Aircraft: ................................... 311.00 - 384.00 MHz
U.S. Government: ..................................... 406.00 - 470.00 MHz
0.6-Meter Amateur: ................................... 420.00 - 450.00 MHz
Low Range: ........................................... 450.00 - 470.00 MHz
FM-TV Audio Broadcast, Wide Band: .................... 470.00 - 806.00 MHz
Conventional Systems: ................................ 851.00 - 856.00 MHz
Conventional/Trunked Systems: ........................ 856.00 - 861.00 MHz
Trunked Systems: ..................................... 861.00 - 866.00 MHz
Public Safety: ....................................... 866.00 - 869.00 MHz
Common Carrier: ...................................... 869.00 - 894.00 MHz
Private Trunked: ..................................... 935.00 - 940.00 MHz
General Trunked: ..................................... 940.00 - 941.00 MHz
Primary Usage:
As a general rule, most of the radio activity is concentrated on the
following frequencies:
VHF Band:
2-Meter Amateur Band: .............................. 144.000 - 148.000 MHz
Government, police, and Fire: ...................... 153.785 - 155.980 MHz
Emergency Services: ................................ 158.730 - 159.460 MHz
Railroad: .......................................... 160.000 - 161.900 MHz
UHF Band:
.6 cm Amateur Band FM Repeaters: ................... 440.000 - 450.000 MHz
Land Mobile "Paired" Frequencies: .................. 450.000 - 470.000 MHz
Base Stations: ..................................... 451.025 - 454.950 MHz
Mobile Units: ...................................... 456.025 - 459.950 MHz
Repeater Units: .................................... 460.025 - 464.975 MHz
Page 35

Control Stations: .................................. 465.025 - 469.975 MHz
NOTE: UHF remote control stations and mobile units typically operate at 5
MHz higher than their associated base and relay repeater units.
Specified Intervals
Frequencies in different bands are accessible only at specific intervals.
For Example:
VHF, HAM, and Government: .................................. 5.0 kHz steps
All Others: ............................................... 12.5 kHz steps
Aircraft: ................................................. 25.0 kHz steps
Note: Your scanner rounds the entered frequency to the nearest valid
frequency. For example, if you try to enter 151.473, the scanner
might accept this as 151.470.
Band Allocation
To help you decide which frequency ranges to search, use the following
listing of the typical services that use the frequencies your scanner
receives. These frequencies are subject to change, and might vary from
area to area. For a more complete listing, refer to the "Police-Call Radio
Guide including Fire and Emergency Services", as well as "Beyond Police
Call", "Aeronautical Directory", "Nautical Directory" and "Now you're
Talking" texts available at your local RadioShack store.
Abbreviations
AIR: ............................................................ Aircraft
BIFC: .................................. Boise (ID) Interagency Fire Cache
BUS: ............................................................ Business
CAP: .................................................... Civil Air Patrol
CB: ........................................................ Citizens Band
CCA: ...................................................... Common Carrier
CSB: ................................................ Conventional Systems
CTSB: ....................................... Conventional/Trunked Systems
FIRE: .................................................... Fire Department
HAM: ................................................. Amateur (HAM) Radio
GOVT: ................................................. Federal Government
GMR: ................................................ General Mobile Radio
GTR: ..................................................... General Trunked
IND: ................................................. Industrial Services
MARI: ............................................. Maritime Limited Coast
MARS: .................................... Military Affiliate Radio System
MED: .......................................... Emergency/Medical Services
MIL: ....................................................... U.S. Military
MOV: ....................................... Motion Picture/Video Industry
NEW: ................................................... New Mobile Narrow
NEWS: ........................................................ Relay Press
OIL: .............................................. Oil/Petroleum Industry
POL: ................................................... Police Department
PUB: ..................................................... Public Services
PSB: ....................................................... Public Safety
PTR: ..................................................... Private Trunked
ROAD: ......................................... Road & Highway Maintenance
RTV: .................................... Radio/TV Remote Broadcast Pickup
TAXI: ...................................................... Taxi Services
TELBL: .................................................. Mobile Telephone
TELC: ................................................ Cordless Telephones
TELM: .............................................. Telephone Maintenance
Page 36

TOW: .......................................................... Tow Trucks
TRAN: ............................................ Transportation Services
TSB: ..................................................... Trunked Systems
TVn: ............................................... FM-TV Audio Broadcast
USXX: .............................................. Government Classified
UTIL: ............................................ Power & Water Utilities
WTHR: ............................................................ Weather
High Frequency (HF)-(3 - 30 MHz):
High Band - (25.00 - 27.36 MHz):
25.020 - 25.320: ..................................................... IND
25.870 - 26.470: ..................................................... RTV
26.62: ............................................................... CAP
26.966 - 27.405: ...................................................... CB
27.430 - 27.630: ..................................................... BUS
10-Meter Amateur Band - (28.0 - 29.7 MHz):
28.000 - 29.700: ..................................................... HAM
Very High Frequency (VHF) - (30 - 300 MHz):
Low Band - (29.7 - 50 MHz - in 5 kHz steps):
29.700 - 29.790: ..................................................... IND
29.900 - 30.550: ............................................... GOVT, MIL
30.580 - 31.980: ................................................ IND, PUB
32.000 - 32.990: ............................................... GOVT, MIL
33.020 - 33.980: ........................................... BUS, IND, PUB
34.010 - 34.990: ............................................... GOVT, MIL
35.020 - 35.980: ..................................... BUS, PUB, IND, TELM
36.000 - 36.230: ............................................... GOVT, MIL
36.250: ............................................... Oil spill clean up
36.270 - 36.990: ............................................... GOVT, MIL
37.020 - 37.980: ................................................ PUB, IND
38.000 - 39.000: ............................................... GOVT, MIL
39.020 - 39.980: ..................................................... PUB
40.000 - 42.000: ......................................... GOVT, MIL, MARI
42.020 - 42.940: ..................................................... POL
42.960 - 43.180: ..................................................... IND
43.220 - 43.680: .......................................... TELM, IND, PUB
43.700 - 44.600: .................................................... TRAN
44.620 - 46.580: ................................................ POL, PUB
46.600 - 46.990: .............................................. GOVT, TELC
47.020 - 47.400: ..................................................... PUB
47.420: ............................................... American Red Cross
47.440 - 49.580: ................................................ IND, PUB
49.610 - 49.990: ............................................... MIL, TELC
6-METER Amateur Band (50-54 MHz):
50.00 - 54.00: ....................................................... HAM
FM-TV Audio Broadcast, Wide Band (54-72 MHz):
59.750: .............................................................. TV2
65.750: .............................................................. TV3
71.750: .............................................................. TV4
Land Mobile Service Band (72-76 MHz):
FM-TV Audio Broadcast, Wide Band (76-88 MHz):
Page 37

81.750: .............................................................. TV5
87.750: .............................................................. TV6
FM Radio Broadcast, Wide Band (88-108 MHz):
Aircraft Band (108-136 MHz):
108.000 - 121.490: ................................................... AIR
121.500: ................................................... AIR emergency
121.510 - 136.000: ................................................... AIR
U.S. GOVERNMENT BAND (138-144 MHz):
137.000 - 144.000: ............................................. GOVT, MIL
VHF-Hi BAND (148-174 MHz):
148.050 - 150.345: ........................................ CAP, MARS, MIL
150.775 - 150.790: ................................................... MED
150.815 - 150.965: ................................................... TOW
150.980: .............................................. Oil spill clean up
150.995 - 151.130: .................................................. ROAD
151.145 - 151.475: ................................................... POL
151.490 - 151.955: .............................................. IND, BUS
151.985: ............................................................ TELM
152.030 - 152.240: .................................................. TELB
152.270 - 152.465: ............................................. IND, TAXI
152.480: ............................................................. BUS
152.510 - 152.840: .................................................. TELB
152.870 - 153.020: .............................................. IND, MOV
153.035 - 153.175: ........................................ IND, OIL, UTIL
153.740 - 154.445: ............................................. PUB, FIRE
154.490 - 154.570: .............................................. IND, BUS
154.585: .............................................. Oil spill clean up
154.600 - 154.625: ................................................... BUS
154.665 - 156.240: ................................... MED, ROAD, POL, PUB
165.255: ............................................................. OIL
156.275 - 157.425: .................................................. MARI
157.450: ............................................................. MED
157.470 - 157.515: ................................................... TOW
157.530 - 157.725: ............................................. IND, TAXI
157.740: ............................................................. BUS
157.770 - 158.100: .................................................. TELB
158.130 - 158.460: ............................. BUS, IND, OIL, TELM, UTIL
158.490 - 158.700: .. ............................................... TELB
158.730 - 159.465: ........................................ POL, PUB, ROAD
159.480: ............................................................. OIL
159.495 - 161.565: .................................................. TRAN
161.580: ............................................................. OIL
161.600 - 162.000: ............................................. MARI, RTV
162.0125 - 162.35: ....................................... GOVT, MIL, USXX
162.400 - 162.550: .................................................. WTHR
162.5625 - 162.6375: ..................................... GOVT, MIL, USXX
162.6625: ............................................................ MED
162.6875 - 163.225: ...................................... GOVT, MIL, USXX
163.250: ............................................................. MED
163.275 - 166.225: ....................................... GOVT, MIL, USXX
166.250: ................................................. GOVT, RTV, FIRE
166.275 - 169.400: ............................................ GOVT, BIFC
169.445: .................................................. WIRELESS MIKES
169.500: ............................................................ GOVT
169.505: .................................................. WIRELESS MIKES
Page 38

169.55 - 169.9875: ....................................... GOVT, MIL, USXX
170.000: ............................................................ BIFC
170.025 - 170.150: ....................................... GOVT, RTV, FIRE
170.175 - 170.225: .................................................. GOVT
170.245 - 170.305: ........................................ WIRELESS MIKES
170.350 - 170.400: ............................................. GOVT, MIL
170.425 - 170.450: .................................................. BIFC
170.475: ............................................................. PUB
170.4875 - 173.175: ............................ GOVT, PUB, WIRELESS MIKES
173.225 - 173.375: ....................................... MOV, NEWS, UTIL
173.3875 - 178.5375: ................................................. MIL
173.5625 - 173.5875: ............................. MIL Medical/Crash Crews
173.60 - 173.9875: .................................................. GOVT
FM-TV Audio Broadcast, VHF Wide Band (174-216 MHz):
179.750: ............................................................. TV7
185.750: ............................................................. TV8
191.750: ............................................................. TV9
197.750: ............................................................ TV10
203.750: ............................................................ TV11
209.750: ............................................................ TV12
215.750: ............................................................ TV13
New Mobil Narrow Band (220-222 MHz):
220.000 - 222.000: ................................................... NEW
1.3-Meter Amateur Band (222-225 MHz):
222.000 - 225.000: ................................................... HAM
MILITARY AIRCRAFT BAND (237.9-287.8 MHz):
237.900: ..................................... Coast Guard Search & Rescue
239.800: ..................................................... FAA Weather
241.000: ............................................................ ARMY
243.000: ....................................................... EMERGENCY
255.400: .............................................. FAA FLIGHT SERVICE
257.800: ................................................. CIVILIAN TOWERS
287.800: ............................................. Coast Guard Air/Sea
Rescue
Ultra High Frequency (UHF)-(300 MHz-3 GHz)
Military Aircraft Band (319.1 - 383.9 MHz):
319.100: ............................................. FAA Traffic Control
321.000 - 336.600: ............................................. Air Force
342.500 - 344.600: ........................................... FAA Weather
346.400 - 364.200: ............................. Air Force Traffic Control
381.800 - 383.900: ........................................... Coast Guard
U.S. Government Band (406-420 MHz):
406.125 - 419.975: ............................................ GOVT, USXX
70-cm Amateur Band (420-450 MHz):
420.000 - 450.000: ................................................... HAM
Low Band (450-470 MHz):
Page 39

450.050 - 450.925: ................................................... RTV
451.025 - 452.025: .................................. IND, OIL, TELM, UTIL
452.0375 - 453.00: ............................ IND, TAXI, TRAN, TOW, NEWS
453.0125 - 453.9875: ................................................. PUB
454.000: ............................................................. OIL
454.025 - 454.975: .................................................. TELB
455.050 - 455.925: ................................................... RTV
457.525 - 457.600: ................................................... BUS
458.025 - 458.175: ................................................... MED
460.0125 - 460.6375: ...................................... FIRE, POL, PUB
460.650 - 462.175: ................................................... BUS
462.1875 - 462.450: ............................................. BUS, IND
462.4625 - 462.525: ................................. IND, OIL, TELM, UTIL
462.550 - 462.725: ................................................... GMR
462.750 - 462.925: ................................................... BUS
462.9375 - 463.1875: ................................................. MED
463.200 - 467.925: ................................................... BUS
FM-TV Audio Broadcast, UHF Wide Band (470-512 MHz):
(Channels 14-69 in 6 MHz steps):
475.750: ...................................................... Channel 14
481.750: ...................................................... Channel 15
487.750: ...................................................... Channel 16
805.750: ...................................................... Channel 69
Note: Some cities use the 470-512 MHz band for land/mobile service.
Conventional Systems Band - Locally Assigned
851.0125 - 855.9875: ................................................. CSB
Conventional/Trunked Systems Band - Locally Assigned
856.0125 - 860.9875: ................................................ CTSB
Trunked Systems Band - Locally Assigned
861.0125 - 865.9875: ................................................. TSB
Public Safety Band - Locally Assigned
866.0125 - 868.9875: ................................................. PSB
Common Carrier
869.010 - 894.000: ................................................... CCA
Private Trunked
935.0125 - 939.9875: ................................................. PTR
General Trunked
940.0125 - 940.9875: ................................................. GTR
Frequency Conversion
The tuning of a station can be expressed in frequency (kHz or MHz) or in
wavelength (meters). The following information can help you make the
necessary conversions.
1 MHz (million)=1,000 kHz (thousand)
Page 40

To convert MHz to kHz, multiply by 1,000:
9.62 MHz x 1000 = 9620 kHz
To convert from kHz to MHz, divide by 1,000
2780 kHz / 1000 = 2.780 MHz
To convert MHz to meters, divide 300 by the number of megahertz
300 / 7.1 MHz = 42.25 meters
A Note on Image Reception
Radios work by simple mathematics. For example, most tune to a frequency
by mixing that frequency with another (local oscillator) frequency which
is slightly different. This mixing process primarily gives us the two
original frequencies, their sum, and their difference. Well, the radio's
Intermediate Frequency (I.F.) filter normally passes either the sum or
difference frequency, and this is then processed into the sound we hear.
Because nothing is perfect, certain "harmonics" will also get through if
they are strong enough. For example, if a radio's I.F. is 10.7 MHz, we
might be able to tune to a frequency 21.4 MHz (2 x I.F.) above (or below,
depending on the radio's design) a strong signal and hear it! This is more
evident in a double-conversion radio than a triple-conversion radio,
because the triple-conversion radio's 1st intermediate frequency is quite
high. This causes the image to be so far off frequency that it is easy to
effectively filter it out.
So remember that just because a radio doesn't receive something which
another does is not necessarily an indication of a problem. The one radio
may simply not be "tricked" into picking up an image! This rejection of
undesired signals is one reason that a triple-conversion receiver costs
more than a similar dual-conversion model.
You might be interested in finding more out about radio. One good
location to start looking is your local public library. You might also
wish to contact the A.R.R.L., as they are an excellent source of
informative texts on the subject.
Contact:
Amateur Radio Relay League
225 Main St.,
Newington, CT 06111-1494
USA
PRO60 200CH PORT SCANNER
To order parts call 1-800-843-7422 or visit your local RadioShack store.
Reference # Cat.No. Description NP Part #
----------------------------------------------------------------------- 11318532 DIODE 1N4002 RECT 600V.1A 1N4002
Q115 10511228 XSTR 2SC2712 SI NPN LO PW 1TD0011
Q305 10513117 XSTR 2SC4215(0) SI HI FRE 1TD0432
10513117 CASE STYLE SC70 1TD0432
Q116 10514107 XSTR 2SK209GR FET N-CH 1TD0553
Page 41

10514107 FIELD EFFECT TRANSISTOR 1TD0553
Q104 Q105 Q106 Q107 10514404 XSTR 2SC4226(R24) SI NPN 1TD0585
Q108 Q109 Q110 Q112 10514404 1TD0585
Q308 Q309 Q310 10516847 XSTR DTC363EK PRE-BIASED 1TD0832
10516847 CASE STYLE SC-70 1TD0832
Q304 Q101 10516854 XSTR DTA143ZUA PNP 1TD0833
10516854 CASE STYLE SC70 1TD0833
Q114 10516870 XSTR DTC114YUA SI PRE-BIA 1TD0835
Q302 Q303 Q306 Q1 Q111 10516870 CASE STYLE SC70 1TD0835
Q102 Q103 11271541 XSTR UMA9N MARKED A9 PNP 1TD0858
Q307 Q311 11449626 XSTR 2SC4116 SI LO PWR AM 1TD0885
11449626 CASE STYLE SC70 1TD0885
Q301 11451762 XSTR 2SC4116Y SI LO PWR A 1TD0886
11451762 NPN SC70 CASE STYLE 1TD0886
10539476 ANTENNA,RUBBER 15.8CM A0337
USE B2300873PK B2300557PK
IC304 11433455 IC,BA10358FT1 8 PIN BA10358FT1
11433455 MOUNT BIPOLAR BA10358FT1
TC101 10554343 CAP,TRIMMER 6PF C0083
TC102 10554392 CAP,TRIMMER 30PF C0106
L119 L125 10559532 COIL,BAND PASS FILTER CA1219
L303 10562445 COIL,CHOKE 5 PIN 100UH CA3134
L304 L129 L130 10562544 COIL,CHOKE/EMISUPPRESSION CA3167
L116 L126 10563625 COIL,BAND PASS FILTER CA3683
L301 L101 10563633 COIL,CHOKE 1UH CA3684
L120 10563658 COIL,RADIO FREQUENCY CA3691
T102 T103 10563666 COIL,INTERMEDIATE CA3692
10563666 FREQUENCY CA3692
T101 10563674 COIL,FILTER HELICAL CA3693
XF301 11272325 FILTER,CRYSTAL 45MHZ CB0512
L1 10569903 FILTER,ELECTROMAGNETIC CB0543
10569903 CB0543
CF301 10570166 FILTER,CERAMIC 455KHZ CB0600
X301 11272739 CRYSTAL,44.545MHZ CX0299
11272739 SMALL CX0299
X302 11272747 CRYSTAL,34.3MHZ CX0318
11272747 34.300 LARGE CX0318
X101 11272754 CRYSTAL,12.8MHZ CX0319
CX1 10596146 RESONATOR,CERAMIC 4.19MHZ CX1198
10873859 CASE STYLE 24 PIN SMD CX20111
10610822 COVER,BATTERY DB1011
10617611 DIODE MA121 SI 6 PIN DD0118
D116 D117 D118 D119 10617728 DIODE HVU306A5 SI DD0170
D121 10617736 DIODE HVU308-1 VAR SI DD0171
D3 10617744 DIODE SC 1SS272 4 PIN DD0173
D1 D2 10617983 USE DD0118 DD0206
10617983 CASE STYLE S06 SILICON DD0206
D101 D106 D113 D114 10618445 DIODE HSM2693A SI DD0255
D115 10618627 DIODE SK BARRIER SI DD0274
10618627 DD0274
D120 10619260 DIODE VAR HVU12-3 SILICON DD0340
10619286 USE DX0114 DD0342
D103 D104 D105 D107 11273612 DIODE HSU277TRF SI FAST R DX0114
D108 D109 D110 D111 11273612 DX0114
D112 D302 D303 D306 11273612 DX0114
D102 11273612 DX0114
10622298 REPLACED BY 1N4002 DX0206
D301 D304 D305 10625317 DIODE DA227 MULTI ARRAY DX1385
10625317 ARRAY DX1385
10657013 HOLDER,BATTERY CASE HB1081
11274453 REFLECTOR,LCD HC1101
11454378 CAP,CHARGE JACK RUBBER HC2026
12 11840253 INTERCONNECTOR,LCD HJ90042
Page 42

11274966 CLIP,BELT (FOR SCREWS 117 HL0256
11275179 SCREW 3X5 BH QTY 2 HW2000309
10720209 JACK,ANTENNA J0085
J301 10729432 JACK,3.5MM HEADPHONE J1304
10729432 J1304
J302 J303 10731495 JACK,POWER/CHARGE J1811
10734796 TERMINAL,BATTERY +/- JA0186
CN301 10746808 CONNECTOR,5 PIN MALE JE2124
CN302 10746816 CONNECTOR,10 PIN FEMALE JE2125
CN3 10746824 CONNECTOR,10 PIN MALE JE2126
CN103 10746832 CONNECTOR,5 PIN FEMALE JE2127
CN101 10747418 CONNECTOR,(6 PIN MALE) JE2193
CN303 10747426 CONNECTOR,(2 PIN FEMALE) JE2194
CN4 CN3 10747442 CONNECTOR, (2 PIN MALE) JE2196
11275773 KEYTOP,RUBBER KEYPAD K2452
10773398 KNOB,KEY LOCK K3453
10784635 KNOB,VOLUME/SQUELCH K4676
LED1 LED2 10793933 LED L0467
LCD1 11276219 LCD L0509
11276722 MANUAL SERVICE 20-309 MS2000309
11277647 XEROX COPY MU2000309
10873859 SURFACE MOUNT MX0839
IC304 10879575 USE BA10358FT1 MX1750
10879575 REPLACED BY BA10358FT1 MX1750
IC305 11279809 IC,TC7W139F BIPOLAR SO 8 MX2010
11279809 MOUNT MX2010
IC1 11279817 IC,GRE-9409 8 BIT 80 PIN MX2011
11279817 STYLE SURFACE MOUNT MX2011
IC2 IC3 11279825 IC,XL93LC66RF CMOS MEMO S MX2041
11279825 8 PIN MX2041
IC5 11279833 IC,S80746AL-EA LOW-BATT MX2050
11279833 SO T 89/SC62 (S) MX2050
IC307 10891836 IC,S-81250HG-RD-T MX3525
10891836 VOLTAGE REGULATOR MX3525
10894061 MX3907
IC301 10905263 IC TA31136FN SO16 S IFAMP MX6227
10905263 TYPE 16 PIN MX6227
IC308 10912517 IC,TK11806M BIPOL DC-DC C MX7813
10912517 CASE STYLE SURFACE MOUNT MX7813
IC309 10914752 IC MX8048
10914752 SURFACE MOUNT MX8048
IC4 10914786 IC,S80737AL-A1 CMOS MX8051
10914786 SURFACE MOUNT MX8051
IC5 10914794 IC,S80744AL-A8 CMOS MX8052
10914794 AFTER DATE CODE 3A5 MX8052
IC101 10914802 IC,CXA1356N BIPOLAR MX8053
10914802 SURFACE MOUNT MX8053
IC102 10914810 IC,MB1512PFV-G CMOS MX8054
10914810 SURFACE MOUNT MX8054
IC303 12107181 IC TC74HC4066AFS MX90643
12107181 SWITCHING/ZEROMATIC MX90643
RA1 RA2 RA3 RA6 RA7 10958916 RES,ARRAY 1KX4 1/16W +-5 NY0667
RA8 RA9 RA10 10958916 NY0667
RA5 10958973 RES,ARRAY 470X4 1/16W +-5 NY0673
VR301 10967917 POT ASSY SQUELCH 10KC ROT P1210
10967917 NUT 7M/M P1210
VR302 10983344 POT ASSY,W/SWITCH VOLUME PC0019
10983344 NUT 7M/M 50KOHM PC0019
SW1 11070794 SWITCH,SLIDE KEY LOCK SA0481
11083383 SPEAKER,8 OHM 300MW SP0228
11085594 USE SP0228 SP0486
12235875 8ohm 500mw SP90240
270-1560 W0000X
Page 43

BOARDS. XB0000X
11282522 DISCRIMINATOR XB0966
11283645 HIMELON Z1682
11283652 LABEL MODEL Z1683
11283660 ESCUTCHEON,TOP Z1684
 Loading...