


Kenwood Limited, New Lane, Havant, Hampshire PO9 2NH, UK |
|
www.kenwoodworld.com |
19123/2 |
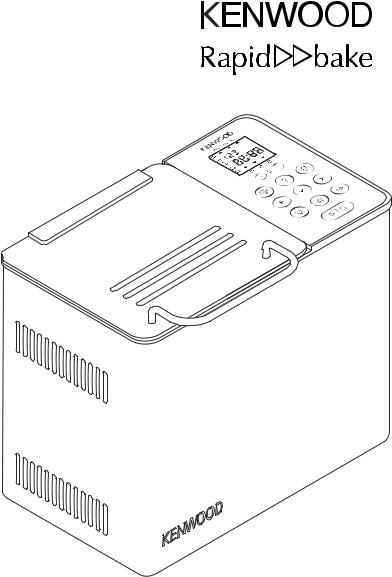
BM450

|
|
|
|
|
|
|
|
|
|
|
|
27 |
|
|
|
|
|
|
|
|
|
|
|
26 |
|
|
25 |
|
|
|
|
|
|
|
21 |
|
|
|
24 |
|
22 |
|
23

1 |
2 |
7 |
8 |
3 |
9 |
13 |
14 |
15 |
19 |
20 |
4 |
5 |
10 |
11 |
6 |
12 |
1 14
500g 750g 1kg
16 |
17 |
18 |
before using your Kenwood appliance
●Read these instructions carefully and retain for future reference.
●Remove all packaging and any labels.
safety
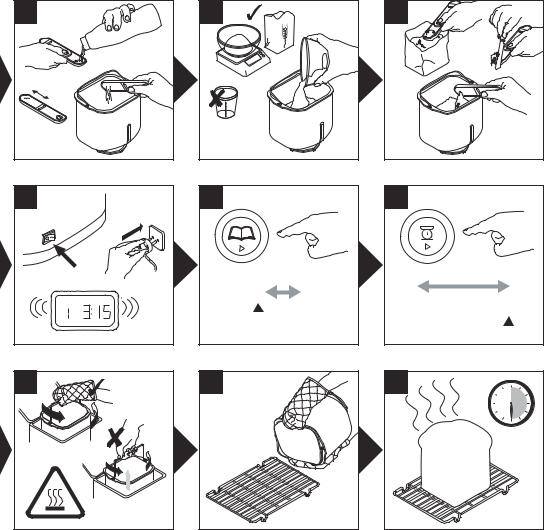
●Do not touch hot surfaces. Accessible surfaces are liable to get hot during use. Always use oven gloves to remove the hot bread pan.
●To prevent spillages inside the oven chamber, always remove the bread pan from the machine before adding the ingredients. Ingredients that splash onto the heating element can burn and cause smoke.
●Do not use this appliance if there is any visible sign of damage to the supply cord or if it has been accidentally dropped.
●Do not immerse this appliance, the supply cord or the plug in water or any other liquid.
●Always unplug this appliance after use, before fitting or removing parts or before cleaning.
●Do not let the electrical supply cord hang over the edge of a work surface or allow it to touch hot surfaces such as a gas or electric hob.
●This appliance should only be used on a flat heat resistant surface.
●Do not place your hand inside the oven chamber after the bread pan has been removed as it will be very hot.
●Do not touch moving parts within the Bread Maker.
●Do not exceed the maximum flour and raising agent quantities specified in the recipes supplied.
●Do not place the Bread Maker in direct sun light, near hot appliances or in a draught. All these things can affect the internal temperature of the oven, which could spoil the results.
●Do not use this appliance outdoors.
●Do not operate the Bread Maker when it is empty as this could cause it serious damage.
●Do not use the oven chamber for any type of storage.
●Do not cover the vents on the side of the machine and ensure there is adequate ventilation around the bread maker during operation.
●This appliance is not intended to be operated by means of an external timer or separate remote-control system.
●This appliance is not intended for use by persons (including children) with reduced physical, sensory or mental capabilities, or lack of experience and knowledge, unless they have been given supervision or instruction concerning use of the appliance by a person responsible for their safety.
●Children should be supervised to ensure that they do not play with the appliance.
●Only use the appliance for its intended domestic use. Kenwood will not accept any liability if the appliance is subject to improper use, or failure to comply with these instructions.
before plugging in
●Make sure your electricity supply is the same as the one shown on the underside of your Bread Maker.
● IMPORTANT: UK only – The wires in the cord are coloured as follows:
Green & Yellow = Earth Blue = Neutral
Brown = Live
●This appliance conforms to EC directive 2004/108/EC on Electromagnetic Compatibility and EC regulation no. 1935/2004 of 27/10/2004 on materials intended for contact with food.
before using your bread maker for the first time
●Wash all parts (see care and cleaning).
●Fit the lid (see care & cleaning).
●Fit the automatic dispenser to the underside of the lid (see automatic dispenser).
2

key
lid handle
viewing window
automatic dispenserheating element
bread pan handlekneader
drive shaft
drive coupling on/off switch
measuring cup
dual measuring spoon 1tsp & 1tbsp
control paneldisplay window
program status indicator
crust colour indicators (light, medium, dark)delay timer buttons
menu buttonloaf size buttonprogram buttonconfirm button  viewing light
favourite button
start/stop button
rapid bake button
cancel button
crust colour button loaf size indicators
how to measure ingredients (refer to illustrations 3 to 7)
It is extremely important to use the exact measure of ingredients for best results.
●Always measure liquid ingredients in the see-through measuring cup with graduated markings provided. Liquid should just reach marking on cup at eye level, not above or below (see 3).
●Always use liquids at room temperature, 20ºC/68ºF, unless making bread using the rapid 1 hour cycle. Follow the instructions given in the recipe section.
●Always use the measuring spoon provided to measure smaller quantities of dry and liquid ingredients. Use the slider to select between the following measure - 1⁄2 tsp, 1 tsp, 1⁄2 tbsp or 1 tbsp. Fill to the top and level off the spoon (see 6).
on/off switch
Your Kenwood breadmaker is fitted with an ON/OFF switch and will not operate until the “on” switch is pressed.
● Plug in and press the ON/OFF switch situated at the back of the breadmaker - the unit will beep and 1 (3:15) will appear in the display window.
●Always switch off and unplug your breadmaker after use.
program status indicator
The program status indicator is situated in the display window and the indicator arrow will point to the stage of the cycle the breadmaker has reached as follows: -
Pre-heat 
 – The pre-heat feature only operates at the start of the wholewheat (30 minutes), wholewheat rapid (5 minutes) and gluten free (8 minutes) settings to warm the ingredients before the first kneading stage begins.
There is no kneader action during this period.
Knead  – The dough is either in the first or 2nd kneading stage or being knocked back between the rising cycles. During the last 20 minutes of the 2nd Kneading cycle on setting (1), (2), (3). (4). (5). (6). (9), (10), (11) and (13) the automatic dispenser will operate and an alert will sound to tell you to add any additional ingredients manually.
Rise  – the dough is in either the 1st, 2nd or 3rd rising cycle.
Bake  – The loaf is in the final baking cycle.
Keep Warm  – The bread maker automatically goes into the Keep warm mode at the end of the baking cycle. It will stay on the keep warm mode for up to 1hour or until the machine is turned off, which ever is soonest. Please note: the heating element will switch on and off and will glow intermittently during the keep warm cycle.
3
 Loading...