


 Loading...
LCD TV
LT-32A4 LT-32G4 LT-32G40 LT-40Z40
INSTRUCTIONS
LT-32G4 |
LT-32G40 |
|
LT-32G40 |
||
LT-40Z40 |
||
|
Safety precautions
Thank you for buying this JVC LCD panel television.
To make sure you understand how to use your new TV, please read this manual thoroughly before you begin.
•Follow this manual regarding setup!
-Connect only to a 110-240 V, 50/60Hz AC outlet.
•Make enough room for inserting and removing the power plug!
•Place the TV as close to the outlet as possible!
-The main power supply for this TV is controlled by inserting or removing the power plug.
•Never cut or damage the power cord!
-If the AC plug is not the right
shape, or the power cord 


 is not long enough, use an
appropriate plug adapter or
extension cable. (Consult  your retailer)
•Unplug the power cord when going out!
-The power buttons on the remote control and the TV unit cannot completely turn off the TV. (Make appropriate arrangements for bedridden people.)
•Do not allow the TV to fall!
-Do not rest your elbows on, or allow children to hang from the TV.
-There is a risk that the TV will fall and cause injuries.
-Make use of the hole on the back of the stand to prevent the TV from falling easily.
•If the TV is damaged or behaving strangely, stop using it at once!
-Unplug the power cord and contact 


 your retailer.


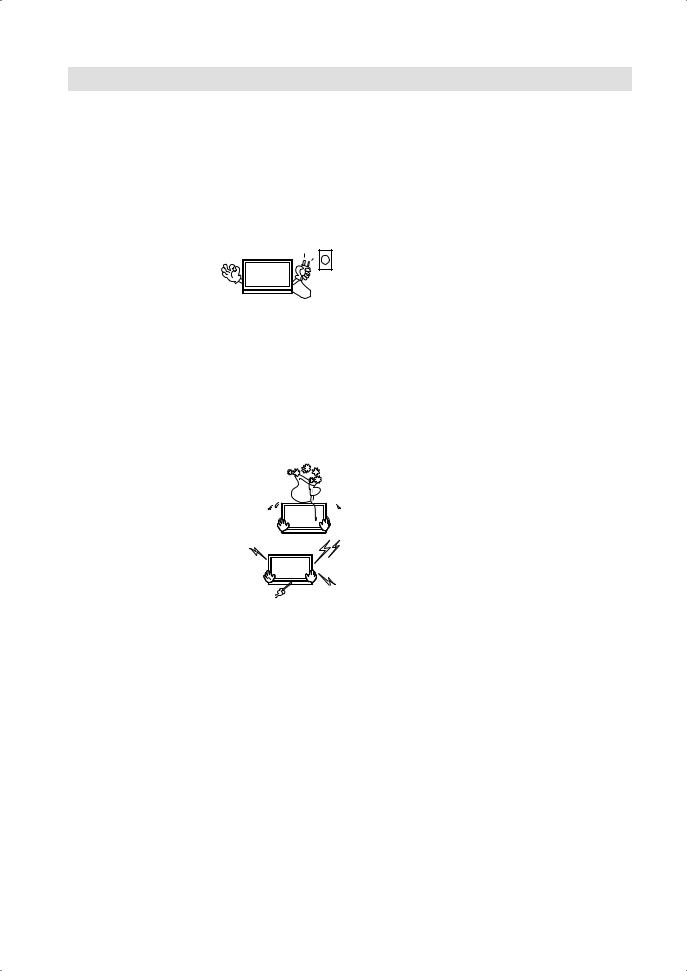
•Never place anything on the TV! 
-Placing liquid, naked flames, cloths,  paper, etc. on the TV may cause a fire.
•Never expose to rain or moisture! 

-To prevent fire or electric shock,  never allow liquids to enter the unit.
•Never insert objects into the
cabinet openings! 
-It may cause a fatal electric shock. 
-Take care when children are near. 

•Hold the TV so as not to scratch the screen!
-Do not touch the screen when carrying the TV.
•Do not carry the TV on your own!
-In order to prevent accidents, ensure that the TV is carried by two or more people.
•Never insert the power cord by wet hand!
-It may cause a fatal electric shock.
•Keep the TV set away from direct sunlight!
-TV set can be damaged.
•Place the TV set in a neat and dry place. Do not place the product close to source of steam, heat, moisture or oil. Because it may cause a fire hazard or electric shock hazard!
•For more details on installation, usage and safety  Consult your retailer.
•Don’t touch an external metal part of the TV set!
-It may cause an electrocuted.
•The unit becomes warm when in operation. Do not place any covers or blankets on the unit in order to prevent overheating. The ventilation holes are not to be blocked. Do not set up near radiators. Do not place in direct sunshine. Leave at least 10cm around the product and 30cm from the top of the product to the wall for ventilation.
•Never dismantle the rear panel!
-It may cause an electric shock.
•Never obstruct the ventilation holes!
-It may cause overheating or a fire.
•Handle LCD panel with care!
-Use a soft, dry cloth when cleaning.
•Never try repair the TV yourself!
-If the problem cannot be solved in “Troubleshooting” unplug the power cord and contact your retailer.
2

Safety precautions
•If a television is not positioned in a sufficiently stable location, it can be potentially hazardous due to falling. Many injuries, particularly to children, can be avoided by taking simple precautions such as:
-Using cabinets or stands recommended by the manufacturer of the television.
-Only using furniture that can safely support the television.
-Ensuring the television is not overhanging the edge of the supporting furniture.
-Not placing the television on tall furniture (for example, cupboards or bookcases) without anchoring both the furniture and the television to a suitable support.
-Not standing the television on cloth or other materials placed between the television and supporting furniture.
-Educating children about the dangers of climbing on furniture to reach the television or its controls.
•Keep away from rodents. Rodents (and also cockatiels) enjoy biting into electric flexes.
•The animal can cause a short cut (fire hazard!) and receive a fatal electric shock.
•Headphone Warning
-Loud music can damage your hearing irreversibly, therefore do not set the volume to a high level when listening through headphones, particularly for extended listening periods.
•If the unit is mounted on the wall, contact the shop where you purchased the unit for advice, and leave the installation work to experts. Incomplete installation work can cause you injuries.
Possible Adverse Effects on LCD Screen: If a fixed (non-moving) pattern remains on the LCD screen for long periods of time, the image can become permanently engrained in the LCD TV panel and cause subtle but permanent ghost images. This type of damage is NOT COVERED BY YOUR WARRANTY. Never leave your TV on for long periods of time while it is displaying the following formats or images:
• Fixed Images, such as stock tickers, video game patterns, TV station logos, and websites.
• Special Formats that do not use the entire screen. For example, viewing letterbox style (16:9) media on a normal (4:3) display (Black bars at top and bottom of screen); or viewing normal style (4:3) media on a widescreen (16:9) display (Black bars on left and right sides of screen).
Saving electricity
The backlight’s brightness (power) can be set manually to match the surrounding illumination. At bright daylight the backlight’s full power is required to perform a brillant result. During lower illumination, e.g. at night, you set a lower backlight-brightness (see p. 13). Figures lower than 100 reduce the brightness, save energy and offer dazzle-free, fatigueless watching at night.
Contents |
|
Safety precautions ................................................. |
2 |
Contents ................................................................ |
3 |
How to attach the stand ......................................... |
4 |
Location of controls................................................ |
5 |
Remote Control...................................................... |
6 |
Connections........................................................... |
8 |
Auto setup.............................................................. |
9 |
Quick guide for Menu operation............................. |
9 |
Selecting the input source...................................... |
9 |
On-screen Language Selection ........................... |
10 |
Channel Setup..................................................... |
10 |
Programme Edit................................................... |
10 |
Basic Operation ................................................... |
11 |
Teletext ................................................................ |
11 |
Stereo reception in analogue cable TV channel |
|
mode ................................................................... |
12 |
Picture Format ..................................................... |
12 |
Other convenience functions ............................... |
13 |
Media Operation .................................................. |
15 |
Media Browser..................................................... |
15 |
Playback files....................................................... |
15 |
Operation Window ............................................... |
16 |
Playable File Types .............................................. |
16 |
PC connection ..................................................... |
17 |
Connecting an HDMI or a DVI device to |
|
the HDMI input..................................................... |
17 |
Connection to other equipment............................ |
18 |
Troubleshooting table........................................... |
20 |
License information.............................................. |
20 |
Specifications ...................................................... |
21 |
3

How to attach the stand
NOTE:
• Unplug the AC cord from the AC INPUT terminal.
• Before beginning this process, assure that TV is laid on a clean, safe, and cushioned space to avoid any damage to the unit.
• Do not touch or press the TV-screen, glass might break under pressure.
• Be sure to follow the instructions. Insufficient tightening or incorrect installation of the stand will not support your unit correctly, and could result in damage or injury from tip-over.
1)Place the TV on its front onto a table.
2)Align the stand’s bottom-plate (supplied) as seen here. It will fit in only one direction.
3)Hold the unit and attach the stand and frame stand (LT-32A4/LT-40Z40) slowly. Finally secure the bottom-plate with screws (included).
LT-32A4 |
LT-40Z40 |
LT-32G4/LT-32G40
NOTE:
• To detach the stand, perform these steps in reverse order.
Dismantling the base
For wall mounting, the base must be dismantled. To do this, remove screws (J, see page 8) from the back. Take off the stand and frame stand entirely.
Warning (LT-32A4/LT-32G4/LT-32G40)
To prevent injury, which could be expected due to an eventual fall, the TV must be fixed to the ground according to instruction (see right image).
Fix to the appropriate ground with the supplied screw.
NOTE:
• There is no liability for any damage to the ground.
• Certain models have two fixing lugs at the rear of the stand. Rotate them out and fasten them to the support surface with supplied screws.
LT-32A4 |
LT-32G4/LT-32G40
4

Location of controls
2 |
|
3 |
4 |
4 |
3 |
5 |
5 |
6 |
6 |
|
2 |
(LT-40Z40)
1 7
(LT-40Z40)
LT-32A4
6
5


 3
3


 4
4
2
(LT-32G4/LT-32G40)
7 |
1 |
8 |
1 |
7 |
(LT-32G4/LT-32G40) |
|
Description of Indicators and Controls
1.Remote sensor
2.(Power)-button: Preparation: Connect AC Cord to AC110~240V, 50/60Hz.
a)If standby-LED is red, you may power-off. To power-off, press power-button 1x and release. For confirmation, standby-LED will change to dark. Power-on by remote control is not available.
b)If standby-LED is off, you may power-on. To power-on, press power-button 1x and release. For confirmation, standby-LED will change to green (LT-32G4/LT-32G40:blue).
3. CH / /▲/▼ buttons: Press to change to a higher numbered channel set into memory. Press to change to a lower numbered channel set into memory. In Menu: Setting.
4.VOL+/–/ / buttons: To control volume / In Menu: Setting.
5.MENU button: To display the menu screen.
6.INPUT/ENTER button: Select input mode. Press INPUT/ENTER. Then press ▲/▼ to select input source. In Menu : Using as ENTER button.
7.Power indicator: The LED indicator lights up red in standby mode, and green (LT-32G4/LT-32G40: blue) in the power ON mode.
8.Loudspeakers
For complete disconnection from the network, remove the supplied AC Cord from the socket.
5

Remote Control
|
Function |
Page |
1 |
Enter standby mode or turn on the power |
9 |
2 |
Display program position number |
11 |
3 |
Select an input source |
9 |
4 |
Select picture format |
12 |
5 |
Select channel |
11 |
Select Teletext page |
11 |
|
6 |
Select between the available broadcast audio |
12 |
7 |
To enter Media Browser |
15 |
8 |
Activate the menu / In menu, return 1 step |
9 |
9 |
Exit menu / In Media browser, return 1 step |
|
0 |
Cursor buttons |
|
! |
Memorize |
11 |
Channel List |
||
@ |
Turn the sound on/off |
11 |
# |
Teletext ON / Text mix / OFF |
11 |
$ |
Volume |
11 |
% |
Still picture |
11 |
Hold the text page |
11 |
|
|
Switches between the present channel and |
11 |
^ |
the last selected channel |
11 |
|
Sub page selection |
|
& |
Change the TV channel or Teletext page up |
11 |
or down |
|
|
* |
Reveal quiz page answers |
11 |
( |
Teletext enlargement |
11 |
) |
Control buttons for USB-playback |
15 |
q |
Fastext/TOPtext buttons |
11 |
6

Remote Control
Install the batteries |
|
|
|
|||
Use batteries type UM4 (AAA-Size). |
|
|
|
|||
Do not use old or weak batteries. The remote control may not work properly with a weak voltage from such |
||||||
batteries. Replace exhausted batteries with new ones. Never try to recharge normal batteries - this could |
||||||
cause an explosion. |
|
|
|
|||
Note: |
|
|
|
|||
• |
Exhausted batteries can leak corrosive electrolyte, which may cause damage to the remote |
|||||
|
control - therefore remove exhausted batteries immediately. |
|
|
|||
• Batteries should not be exposed to excessive heat such as sunshine, fire or the like. |
||||||
|
Open the battery |
|
|
Install the batteries as shown |
|
Close the battery |
|
|
|
||||
|
1 compartment. |
|
|
2 below, ensuring the correct |
|
3 compartment. |
|
|
|
|
polarity. |
|
|
|
|
|
|
|
|
|
Distance of Remote Control Operation
Remote sensor
Maximum distance approx. 5m |
|
Point the remote control |
|
|
directly at the remote sensor. |
||
30 |
30 |
||
|
Transmitter window
The remote control handset will not work properly in the following cases:
a) If bright sunlight directly beams onto the unit front. b) If an obstacle is placed between the unit and the handset.
Z
Z |
|
Z |
|
Z |
Z |
|
|
Z |
|
c)If the batteries have not been installed according to their polarities.
If this symbol is shown, it is only valid in the European union.
d) If the batteries are weak.
7
Loading...