


Replacing the Solo 9500 Keyboard
This package includes a replacement keyboard for your Solo 9500 notebook
computer and these printed instructions.
Tools you need
You will need a small Phillips and a small flat blade screwdriver to replace
the keyboard.
Preventing static electricity discharge
The components inside your notebook are extremely sensitive to static
electricity, also known as electrostatic discharge (ESD).
Caution ESD can permanently damage electrostatic discharge
sensitive components in the notebook. Prevent ESD
damage by following ESD guidelines every time you open
the notebook case.
Before opening the notebook case, follow these guidelines:
■ Turn off the notebook power.
■ Wear a grounding wrist strap (available at most electronics stores) and
attach it to a bare metal part on the back of the notebook.
■ Touch a bare metal surface on the back of the notebook.
■ Unplug the AC adapter and modem cable.
■ Remove the battery.
Before working with notebook components, follow these guidelines:
■ Avoid static-causing surfaces such as carpeted floors, plastic, and packing
foam.
■ Remove the keyboard from its antistatic bag only when you are ready to
use it. Do not lay the keyboard on the outside of the antistatic bag because
only the inside of the bag provides electrostatic protection.
www.gateway.com

Please check out our eBay auctions for more great
deals on Factory Service Manuals:
Removing the keyboard
To remove the keyboard:
1 Follow the guidelines under “Preventing static electricity discharge” on
page 1.
2 Shut down your notebook, then remove the battery and unplug the AC
adapter.
Warning To avoid injury, disconnect the AC adapter and modem
cable before removing the keyboard. Replace the
keyboard before reconnecting power.
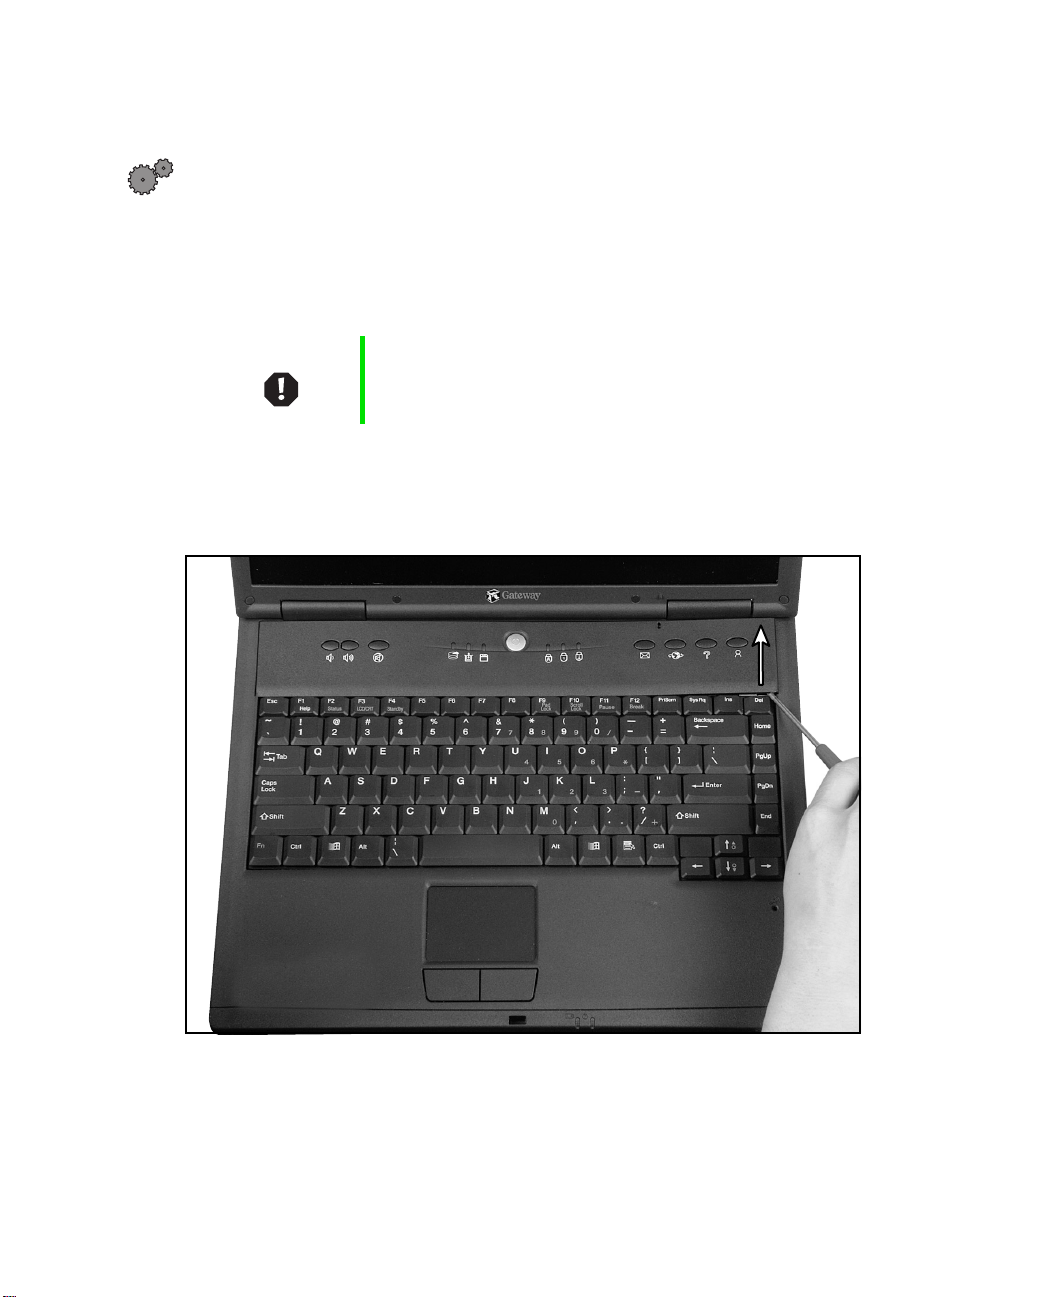
3 Open the LCD panel to the normal viewing position.
4 Insert the small flat blade screwdriver under the bottom right corner of
the keyboard bezel and pry it up.
2
www.gateway.com
Replacing the Solo 9500 Keyboard
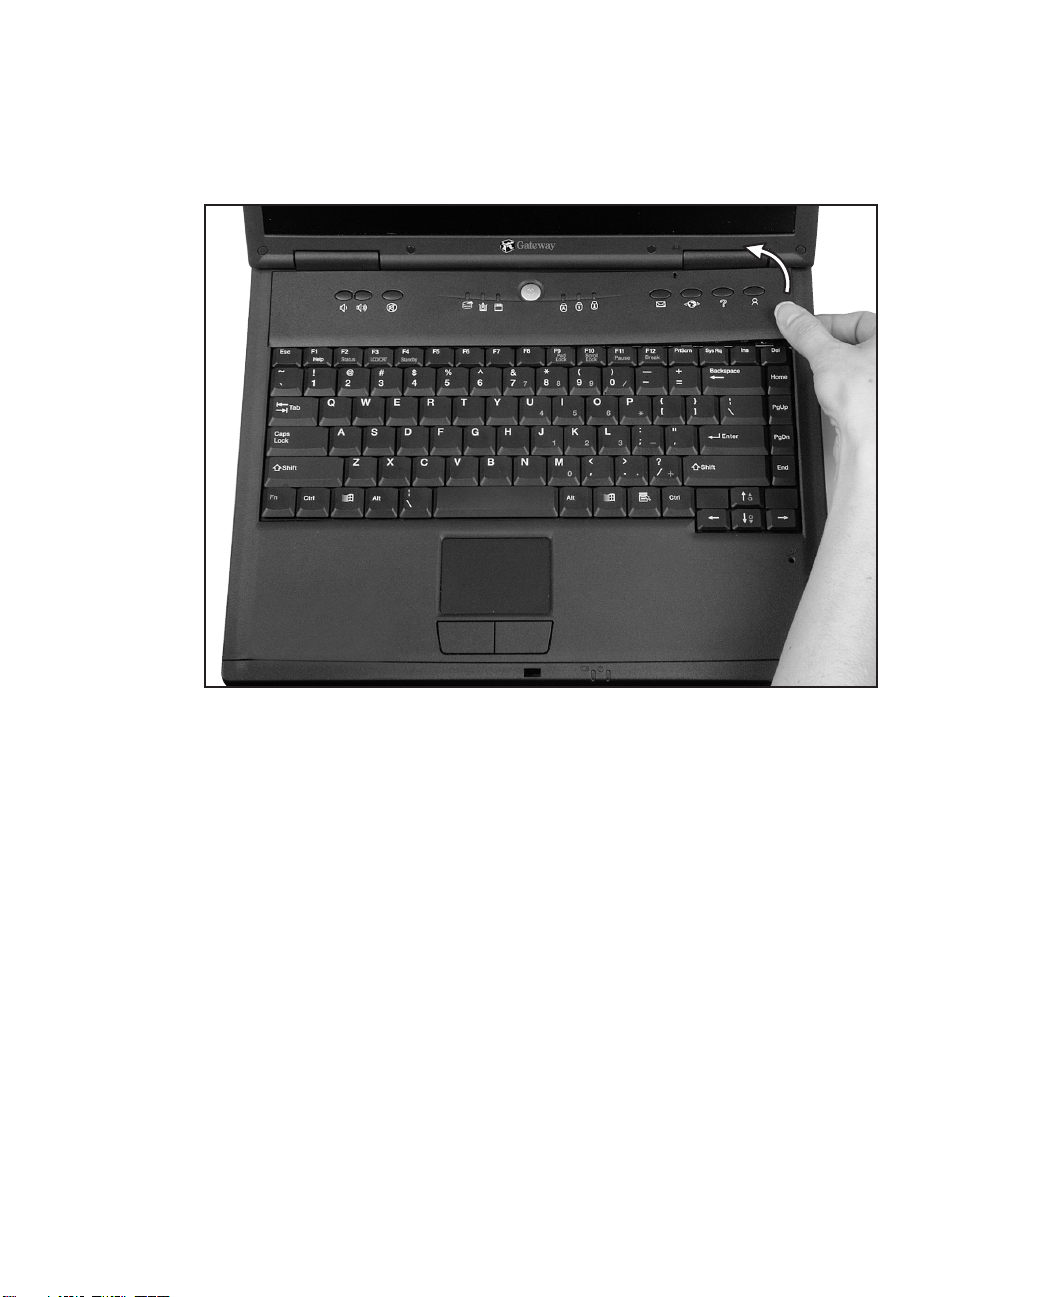
5 Pull the bezel off the notebook. You will hear small snapping sounds as
the bezel comes away from the notebook. Be careful to not break off the
tabs found on the left end of the bezel.
www.gateway.com
3

6 Push the slide tab, found above the ESC key, to the right.
7 With a small Phillips screwdriver, remove the two keyboard screws (found
above the F8 and D
EL keys) and place them in a safe place.
4
www.gateway.com

Replacing the Solo 9500 Keyboard
8 Remove the keyboard by raising the back edge, then slowly rotating it
toward you so it lies keys-down on top of the notebook. Be careful to
not damage the LCD panel.
www.gateway.com
5

9 Disconnect the keyboard by lifting the keyboard connector using two
fingers. Be careful to not touch or damage any other components.
6
www.gateway.com

Installing the keyboard
To install the new keyboard:
1 Place the new keyboard keys-down on the notebook with the space bar
away from you.
2 Insert the keyboard plug, found on the end of the keyboard cable, onto
the keyboard connector.
Important The outside of the keyboard plug goes around the
keyboard connector. The plug is correctly oriented if the
cable is not twisted.
Replacing the Solo 9500 Keyboard
3 Rotate the keyboard toward the LCD panel until the keyboard is almost
face-up.
www.gateway.com
7

4 Insert the front of the keyboard under the palm rest.
5 Gently press the keyboard down until it is flat all the way across. The
keyboard should easily fall into place. Be careful to not damage the LCD
panel.
8
www.gateway.com

Replacing the Solo 9500 Keyboard
6 Replace the two keyboard screws (above the F8 and DEL keys).
7 Push the slide tab, found above the ESC key, to the left.
www.gateway.com
9

8 Slide the two tabs found on the left end of the bezel under the notebook
frame.
10
www.gateway.com

Replacing the Solo 9500 Keyboard
9 Press down on the bezel in several places until it clicks in place.
The bezel is correctly mounted when you can run you finger along the
bezel and find no loose spots. The bezel should be flat all the way across.
If the bezel is mounted incorrectly, complete the instructions under
“Replacing the bezel” on page 12.
Warning If the bezel is not correctly replaced, your notebook could
be damaged when you try to close the LCD panel.
10 Replace the battery and plug in the AC adapter.
11 Turn on the notebook.
www.gateway.com
11

Replacing the bezel
If the bezel was mounted incorrectly, complete the following procedure.
Warning If the bezel is not correctly replaced, your notebook could
be damaged when you try to close the LCD panel.
To replace the bezel:
1 Insert the small flat blade screwdriver under the bottom right corner of
the keyboard bezel and pry up.
2 Pull the bezel off the notebook. You will hear small snapping sounds as
the bezel comes away from the notebook. Be careful to not break off the
tabs found on the left end of the bezel.
3 Slide the two tabs found on the left end of the bezel under the notebook
frame and press down on the bezel in several places until it clicks in place.
12
MAN SYS US SL9500 KB UPD R0
www.gateway.com
 Loading...