


CX501A

Owner’s manual
CX501A
2-DIN Bluetooth CD/USB/MP3/WMA RECEIVER
UNIT PENERIMA CD/USB/MP3/WMA Bluetooth 2-DIN
CD/USB/MP3/WMA 2-DIN Bluetooth
®
®
®

2 CX501A

Thank you for purchasing this Clarion product.
∗ Please read this owner’s manual in its entirety before operating this equipment.
Contents
1. FEATURES...................................................................................................................................... 3
2. PRECAUTIONS ............................................................................................................................... 4
3. CONTROLS ..................................................................................................................................... 5
Names of the Buttons and Their Main Functions ............................................................................. 5
4. REMOTE CONTROL ....................................................................................................................... 6
Functions of Remote Control Unit Buttons....................................................................................... 6
Inserting the Battery ......................................................................................................................... 7
5. OPERATIONS.................................................................................................................................. 8
Basic Operations.............................................................................................................................. 8
Radio Operations ........................................................................................................................... 11
CD/MP3/WMA Operations ............................................................................................................. 12
Bluetooth Operations...................................................................................................................... 15
Operations Common to Each Mode............................................................................................... 19
6. ACCESSORIES ............................................................................................................................. 22
USB Operations ............................................................................................................................. 22
®
iPod
/iPhone® Operations ............................................................................................................. 24
7. TROUBLESHOOTING................................................................................................................... 27
8. ERROR DISPLAYS ....................................................................................................................... 29
9. SPECIFICATIONS ......................................................................................................................... 30
English
1. FEATURES
• Built in Bluetooth
• 2V/4ch RCA Output with HPF/LPF and BEAT-EQ with 3 Band Parametric Equalizer
• 728-variable colour display and illuminated key
®
Handsfree (HFP) and Audio Streaming (A2DP & AVRCP)
3 CX501A
English
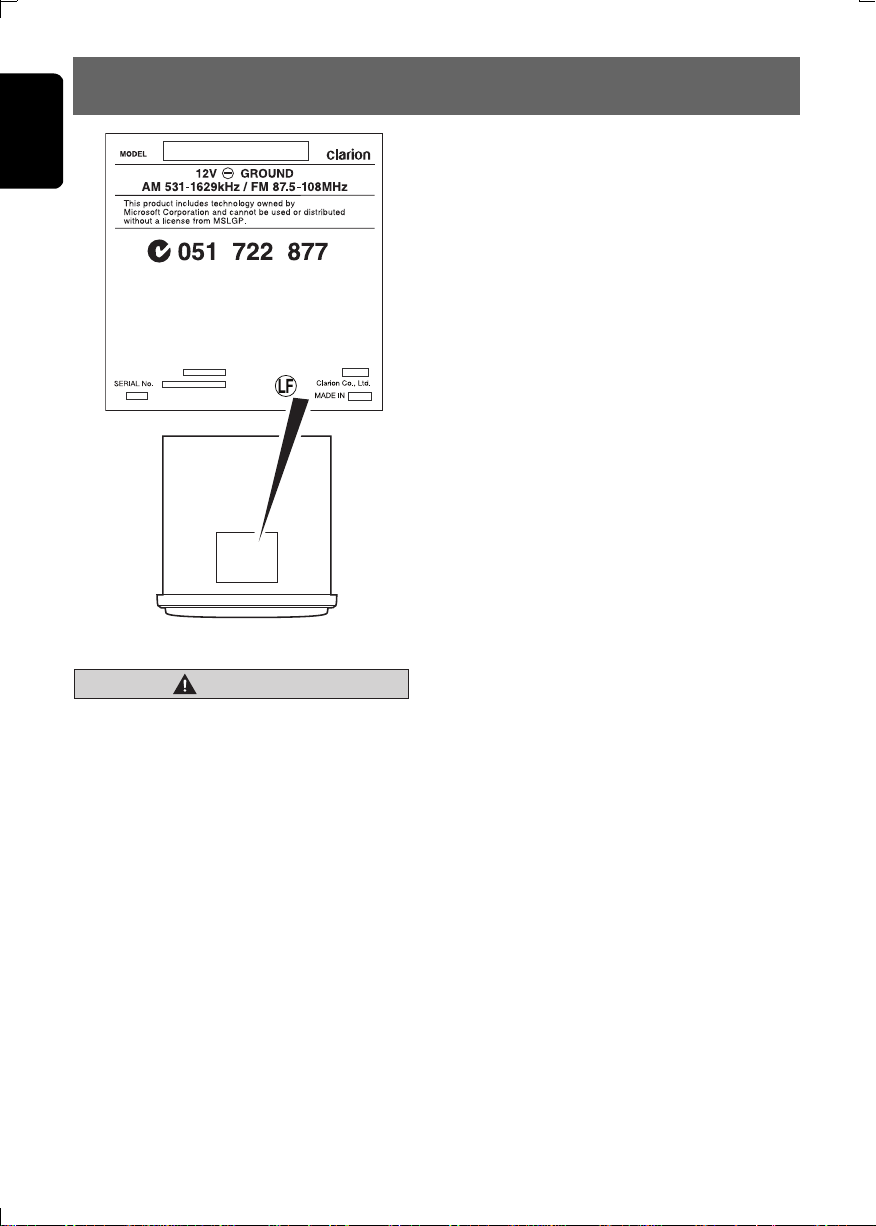
2. PRECAUTIONS
Bluetooth QD ID :
PE-
Bottom View of Source Unit
CAUTION
USE OF CONTROLS, ADJUSTMENTS, OR
PERFORMANCE OF PROCEDURES OTHER
THAN THOSE SPECIFIED HEREIN, MAY
RESULT IN HAZARDOUS RADIATION
EXPOSURE.
THE COMPACT DISC PLAYER SHOULD NOT
BE ADJUSTED OR REPAIRED BY ANYONE
EXCEPT PROPERLY QUALIFIED SERVICE
PERSONNEL.
CHANGES OR MODIFICATIONS NOT
EXPRESSLY APPROVED BY THE
MANUFACTURER FOR COMPLIANCE
COULD VOID THE USER’S AUTHORITY TO
OPERATE THE EQUIPMENT.
Handling Compact Discs
• Compared to ordinary music CDs, CD-R and
CD-RW discs are both easily affected by high
temperature and humidity and some of CD-R
and CD-RW discs may not be played.
Therefore, do not leave them for a long time
in the car.
• Never stick labels on the surface of the
compact disc or mark the surface with a
pencil or pen.
Display Screen
276-
In extremely cold, the screen movement may
slow down and the screen may darken, but this
is normal.
The screen will recover when it returns to
normal temperature.
About the registered marks, etc.
• “Made for iPod,” and “Made for iPhone” mean
that an electronic accessory has been
designed to connect specifically to iPod, or
iPhone, respectively, and has been certified
by the developer to meet Apple performance
standards.
Apple is not responsible for the operation of
this device or its compliance with safety and
regulatory standards.
Please note that the use of this accessory
with iPod or iPhone may affect wireless
performance.
iPhone and iPod are trademarks of Apple
Inc., registered in the U.S. and other
countries.
• The Bluetooth
owned by the Bluetooth
use of such marks by Clarion Co.,Ltd. is
under license. Other trademarks and trade
names are those of their respective owners.
®
word mark and logos are
®
SIG, Inc. and any
4 CX501A

3. CONTROLS
x
RESET
Names of the Buttons and Their Main Functions
[CD SLOT]
[MICRO
PHONE
]
[DIRECT]
[SCN]
CX501A
English
[ ]
[DIRECT]
[RPT]
[RDM]
[IR
RECEIVER]
[SOURCE ]
[
]
[]
[SOUND]
[DISP]
[MICROPHONE]
• Built-in microphone for Bluetooth telephone.
[DIRECT] buttons
• Store radio stations in memory or recall it
directly while in radio mode.
[SCN] button
• Perform scan play for 10 seconds of each
track while in CD/MP3/WMA/USB mode.
[RPT] button
• Perform repeat play while in CD/MP3/WMA/
USB/iPod mode.
[RDM] button
• Perform random play while in CD/MP3/WMA/
USB/iPod mode.
[IR RECEIVER]
• Receiver for remote control unit.
(Operating range: 30° in all directions)
[SOURCE] button
• Turn the power on/off.
• Press to switch the source.
[x], [v] buttons
• Commence fast-forward or fast-reverse mode.
• Press to seek up/down.
[ ] button
• Perform preset scan while in the radio mode.
• Play or pause a track while in CD/MP3/WMA/
USB/iPod mode.
[ROTARY]
[ISR ]
[USB]
• Receive a call.
[SOUND] button
• Press to switch to the sound adjust mode.
• Ending a call.
[DISP] button
• Switch display mode.
[ROTARY] knob
• Rotate to adjust the volume.
• Rotate to select the desired item.
• Press to ensure the selected item.
[ISR] button
• Recall ISR radio station in memory.
• Press and hold the button (2 sec.) to store
current station into ISR memory (radio mode
only).
[AUX], [USB] input jack
• Input jack for connecting external device.
[BAND] button
• Change bands.
[F-UP], [F-DN] buttons
• Select folders while in MP3/WMA/USB mode.
[Q] (EJECT) button
• Eject a disc when it is loaded into the unit.
[CD SLOT]
• CD insertion slot.
[F-UP]
[F-DN]
[BAND]
[v]
[RESET
[AUX]
]
5 CX501A
English
4. REMOTE CONTROL
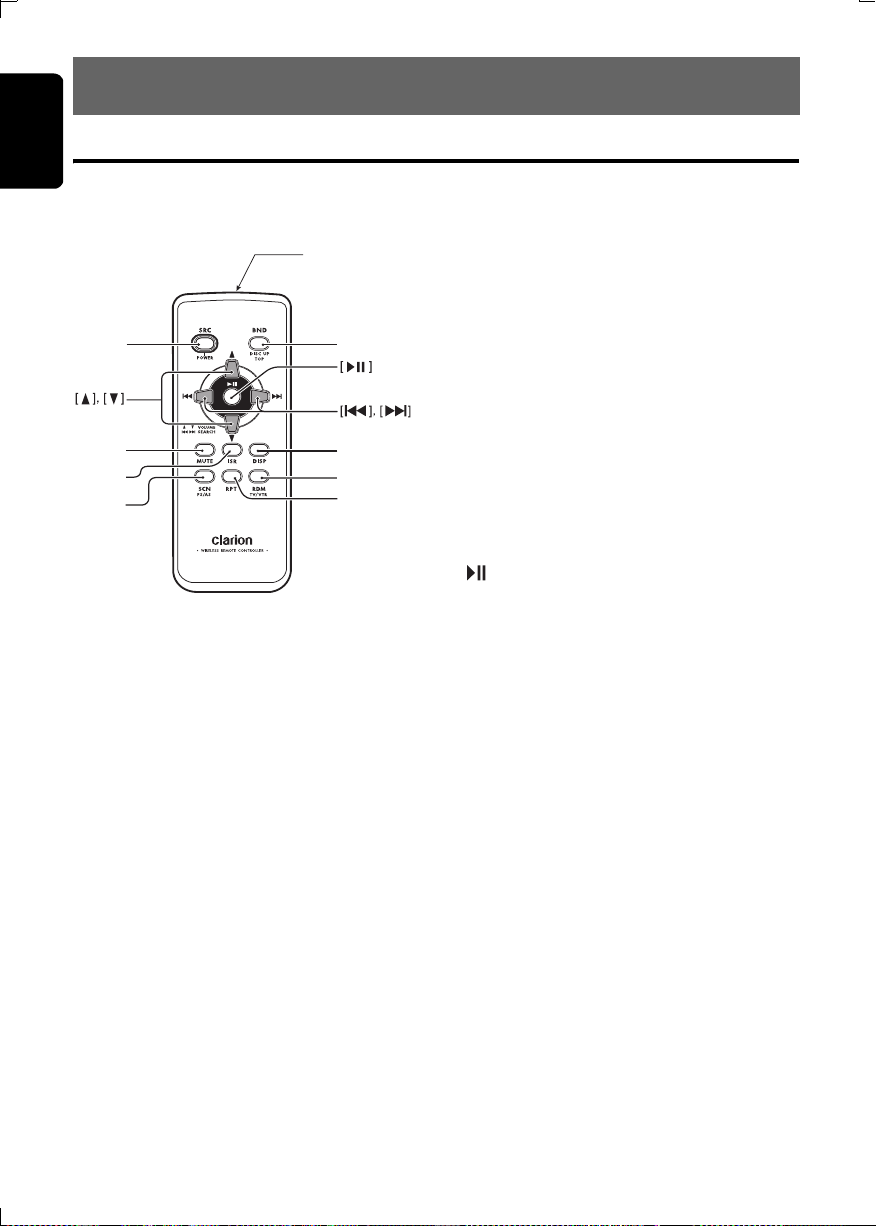
Functions of Remote Control Unit Buttons
If you buy the RCB-176-200 sold separately, you can enjoy the use of the Remote Control function.
∗ Some buttons on the remote control unit have different functions from the corresponding buttons on the main
unit.
Signal transmitter
[
SRC
[
MUTE
[
[
SCN
ISR
]
]
]
]
[
BND
[
DISP
[
RDM
[
RPT
]
]
]
]
● Shared modes
[SRC] button
• Press the button to turn on the power.
Press and hold the button (1 sec.) to turn off
the power.
• Use to alternate operation mode among the
various modes.
[
w], [z] buttons
• Increases and decreases volume.
[MUTE] button
• Turns mute function on and off.
[ISR] button
• Recalls ISR radio station stored in memory.
• Press and hold the button (2 sec.) to store
current station in ISR memory (radio mode
only).
[DISP] button
• Press to select the desired display.
● Radio mode
[BND] button
• Switches reception band.
[x], [v] buttons
• Moves preset channels up and down.
[SCN] button
• Press to perform preset scan.
• Press and hold the button (2 sec.) to perform
auto store.
● CD/MP3/WMA and USB modes
[x], [v] buttons
• Press to select tracks.
• Press and hold the button (1 sec.) to perform
fast-forward/fast-reverse (Except DRM file).
[ ] button
• Switches between playback and pause.
[SCN] button
• Press to perform scan play.
• When in MP3/WMA and USB modes, press
and hold the button (1 sec.) to perform folder
scan play.
[RPT] button
• Press to perform repeat play.
• When in MP3/WMA and USB modes, press
and hold the button (1 sec.) to perform folder
repeat play.
[RDM] button
• Press to perform random play.
• When in MP3/WMA and USB modes, press
and hold the button (1 sec.) to perform folder
random play.
6 CX501A

Functions of Remote Control Unit Buttons
● iPod mode
[x], [v] buttons
• Press to move the tracks up and down.
• Press and hold the button (1 sec.) to perform
fast-forward/fast-reverse.
[ ] button
• Switches between playback and pause.
[RPT] button
• Press to perform repeat play.
Inserting the Battery
English
[RDM] button
• Press to perform random play.
• Press and hold the button (1 sec.) to perform
all random play.
● Bluetooth mode
[x], [v] buttons
• Press to move the tracks up and down.
[ ] button
• Switches between playback and pause.
1 Turn over the remote control unit and slide
the cover in the direction indicated by the
arrow in the illustration.
2 Insert the battery (CR2025) into the insertion
guides, with the printed side (+) facing
upwards.
3 Press the battery in the direction indicated by
the arrow so that it slides into the
compartment.
4 Replace the cover and slide in until it clicks
into place.
Insertion guide
R
2
C
0
2
5
Notes:
Misuse may result in rupture of the battery,
producing leakage of fluid and resulting in
personal injury or damage to surrounding
materials. Always follow these safety precautions:
• Use only the designated battery.
• When replacing the battery, insert properly, with
+/– polarities oriented correctly.
• Do not subject battery to heat, or dispose of in
fire or water. Do not attempt to disassemble the
battery.
• Dispose of used batteries properly.
7 CX501A

English
5. OPERATIONS
Note:
• Be sure to read this chapter referring to the front diagrams of chapter “3. CONTROLS” on page 5.
Basic Operations
CAUTION
Be sure to lower the volume before
switching off the unit power or the ignition
key. The unit remembers its last volume
setting.
Turning on/off the power
1. Press the [SOURCE] button to turn on the
power.
2. Press and hold the [SOURCE] button
(1 sec.) to turn off the power for the unit.
Selecting a mode
1. Press the [SOURCE] button to change the
operation mode.
2. Each time you press the [SOURCE] button,
the operation mode changes in the following
order:
Tuner ➜ CD/MP3 ➜ USB/iPod ➜
BLUETOOTH ➜ AUX ➜ Tuner...
∗ iPod can connect to this unit via USB cable.
∗ iPhone can also be connected to this system
and “iPod” appearing in this manual should be
referred to as “iPod/iPhone”.
Adjusting the volume
1. Turning the [ROTARY] knob clockwise
increases the volume; turning it
counterclockwise decreases the volume.
∗ The volume level is from 0 (minimum) to 33
(maximum).
Switching the display
Press the [DISP] button to select the desired
display.
Sound Adjustment
You can adjust a sound effect or tone quality to
your preference.
To change sound setting
1. Press the [SOUND] button to switch to the
sound adjustment selection display.
∗ The factory default sound setting is
“BEAT EQ”.
2. Then press the [x] or [v] button to
select the sound adjustment mode.
Each time you press the [x] or [v]
button, the sound adjustment mode
changes as following order:
“BEAT EQ” ↔ “M-B EX” ↔ “BALANCE” ↔
“FADER” ↔ “LPF” ↔ “S-W VOL” ↔
“PHASE” ↔ “HPF”
∗ In the case of display blinking “ENT”, you
can press the
setting value.
3. Turn the [ROTARY] knob to adjust the
selected sound mode.
4. After completing settings, press the
[SOUND] button to return to the previous
mode.
● Setting the BEAT EQ
This unit is provided with 4 types of sound tone
effects stored in memory.
Select the one you prefer.
∗ The factory default setting is “OFF”.
2-1. Select “BEAT EQ”.
[ROTARY] knob to adjust the
8 CX501A

Basic Operations
3-1. Each time you turn the [ROTARY] knob,
the tone effect changes in the following
order:
“CUSTOM” ↔ “EXCITE” ↔ “IMPACT” ↔
“B-BOOST” ↔ “OFF”
CUSTOM : user custom
EXCITE : bass and treble emphasized
IMPACT : bass and treble emphasized
B-BOOST : bass emphasized
OFF : no sound effect
When “CUSTOM” is set:
3-1. Press the [ROTARY] knob.
3-2. Press the [x] or [v] button to select the
“BASS”, “MID” or “TREBLE” mode to
adjust.
3-3. If you want to set the flat, press the
[ROTARY] knob to return to the “CUSTOM”
mode, then press and hold the [ROTARY]
knob (1 sec.), bass/mid/treble
characteristics become flat and switch to
the “CUSTOM” mode.
When “EXCITE/IMPACT/B-BOOST” is set:
3-1. Press the [ROTARY] knob.
3-2. Turn the [ROTARY] knob to adjust the
setting in the range of -3 to +3.
∗ The factory default setting is “0”.
3-3. Press the [ROTARY] knob to return to the
previous mode.
● Adjusting the BASS/MID/TREBLE
This adjustment can be performed only when
the BEAT EQ is set to “CUSTOM”.
Note:
• While connected with the external amplifiers,
please do not set the “BASS/MID/TREBLE” in
the maximum level. Otherwise the speakers may
be damaged.
3-1. Press the [ROTARY] knob.
3-2. Press the [x] or [v] button to select as
following order:
“BASS<G>” ↔ “BASS<F>” ↔
“BASS<Q>” ↔ “MID<G>” ↔ “MID<F>” ↔
“MID<Q>” ↔ “TREBLE<G>” ↔
“TREBLE<F>” ↔ “TREBLE<Q>”
∗ The factory default setting is “BASS<G>”.
3-3. Turn the [ROTARY] knob to select the
setting.
BASS<G>
mid emphasized
:The factory default setting is “0”.
(Adjustment range: +7 to –7)
BASS<F>:
BASS<Q>
MID<G> : The factory default setting is “0”.
MID<F> :
MID<Q> :
TREBLE<G>:The factory default setting is “0”.
TREBLE<F>:
TREBLE<Q>:The factory default setting is “1”.
3-4. Press the [ROTARY] knob to return to the
previous mode.
The factory default setting is “50”.
(Adjustment range: 50/100/200)
:The factory default setting is “1”.
(Adjustment range: 0.7/1/1.4/2)
(Adjustment range: +7 to -7)
The factory default setting is “
(Adjustment range: 500/1K/2K)
The factory default setting is
(Adjustment range: 0.7/1/1.4/2)
(Adjustment range: +7 to -7)
The factory default setting is
“
10K
”.
(Adjustment range: 5K/10K/15K)
(Adjustment range: 0.7/1/1.4/2)
500
“1”
.
● Setting the MAGNA BASS EXTEND
The MAGNA BASS EXTEND does not adjust
the low frequencies like the normal sound
adjustment function, but emphasizes the deep
bass frequencies to provide you with a dynamic
sound.
∗ The factory default setting is “OFF” (off).
2-1. Select “M-B EX”.
3-1. Turn the [ROTARY] knob to select “ON” or
“OFF”.
● Adjusting the balance
2-1. Select “BALANCE”.
3-1. Turn the [ROTARY] knob to adjust the
balance of the right and left speakers.
∗ The factory default setting is “CENTER”
(center). (Adjustment range: RIGHT12 to
LEFT12 (right 12 to left 12))
● Adjusting the fader
2-1. Select “FADER”.
3-1. Turn the [ROTARY] knob to adjust the
balance of the rear and front speakers.
∗ The factory default setting is “CENTER”
(center). (Adjustment range: FRONT12 to
REAR12 (front 12 to rear 12))
● Setting the subwoofer
You can set the low pass filter of subwoofer.
This adjustment can be performed only when
the “REAR/S-W” is set to “S-WOOFER”.
2-1. Select “LPF”.
English
”.
9 CX501A

Basic Operations
English
3-1. Each time you turn the [ROTARY] knob to
select the setting, the setting changes in
the following order:
“THROUGH” ↔ “60” ↔ “90” ↔ “120”
∗ The factory default setting is “THROUGH”.
● Adjusting the subwoofer output
volume
You can adjust the volume output from the unit’s
subwoofer output terminal.
This adjustment can be performed only when
the “REAR/S-W” is set to “S-WOOFER”.
2-1. Select “S-W VOL”.
3-1. Turn the [ROTARY] knob to increase or
decrease the subwoofer volume.
∗ The factory default setting is “0”.
(Adjustment range: +6 to –6)
● Setting the phase
This set can be performed only when the
“REAR/S-W” is set to “S-WOOFER”.
2-1. Select “PHASE”.
3-1. Turn the [ROTARY] knob to select as
following order:
“NORMAL” ↔ “REVERSE”
∗ The factory default setting is “NORMAL”.
● Adjusting the high pass filter
2-1. Select “HPF”.
3-1. Each time you turn the [ROTARY] knob to
select the setting, the setting changes in
the following order:
“THROUGH” ↔ “60” ↔ “90” ↔ “120”
∗ The factory default setting is “THROUGH”
(through).
Note:
• During SOUND adjustment mode, if no operation
is performed for more than 10 seconds, this
mode can be cancelled and return to previous
mode.
10 CX501A
 Loading...