


 Loading...
Getting Started with
Timbuktu for Windows, version 9.0
Copyright © 2002-2010 Motorola, Inc. All Rights Reserved. Last Modified August, 2010
Copyright notice
Copyright © 2002-2010 Motorola, Inc. v. 08.2010 All rights reserved.
This manual and any associated artwork, software, product designs or design concepts are copyrighted with all rights reserved. Under the copyright laws this manual or designs may not be copied, in whole or part, without the written consent of Motorola. Under the law, copying includes translation to another language or format.
Motorola, Inc.
1101 Marina Village Parkway, Suite 200 Alameda, CA 94501
USA
Part Number
This manual is Motorola part number 578135-001-00 (released August, 2010).
Contents
Chapter 1: Introduction and Feature Overview ...................................................................... |
5 |
What Timbuktu Can Do for You....................................................................................... |
5 |
Timbuktu Features ..................................................................................................... |
6 |
New in Timbuktu for Windows, Version 9: The Timbuktu Host and Timbuktu Guest............... |
6 |
Timbuktu Services ............................................................................................ |
6 |
Connecting with Timbuktu ........................................................................................... |
7 |
Timbuktu Security...................................................................................................... |
7 |
Timbuktu System Requirements...................................................................................... |
7 |
Minimum Hardware Requirements ......................................................................... |
7 |
Minimum Software Requirements .......................................................................... |
8 |
Compatibility.................................................................................................. |
8 |
Chapter 2: Installing and Starting Timbuktu .......................................................................... |
9 |
Installing Timbuktu..................................................................................................... |
9 |
Starting and Shutting Down Timbuktu ............................................................................. |
10 |
Starting the Timbuktu Host ................................................................................ |
10 |
Starting the Timbuktu Guest............................................................................... |
10 |
Shutting Down the Timbuktu Host ........................................................................ |
10 |
Shutting Down the Timbuktu Guest....................................................................... |
10 |
Removing Timbuktu ................................................................................................... |
11 |
Chapter 3: Configuring the Timbuktu Guest ........................................................................ |
13 |
Configuration Options ................................................................................................ |
13 |
Setting Timbuktu Guest Preferences ............................................................................... |
13 |
The General Tab ............................................................................................. |
14 |
The Observe/Control Tab................................................................................... |
15 |
The LDAP Tab................................................................................................. |
16 |
The Logging Tab.............................................................................................. |
17 |
Configuring Incoming Access ........................................................................................ |
18 |
Making Connections ................................................................................................... |
18 |
Chapter 4: Configuring the Timbuktu Host .......................................................................... |
19 |
Configuration Requirements and Options.......................................................................... |
19 |
Setting Timbuktu Host Preferences................................................................................. |
19 |
The General Tab ............................................................................................. |
21 |
The Guest User Tab.......................................................................................... |
22 |
The NT Users Tab ............................................................................................ |
23 |
The Registered Users Tab................................................................................... |
24 |
The Remote Control Tab.................................................................................... |
25 |
The Send Tab ................................................................................................. |
27 |
The Notify Tab ............................................................................................... |
28 |
The LDAP Tab................................................................................................. |
29 |
The Logging Tab.............................................................................................. |
30 |
The Sitekey Tab .............................................................................................. |
30 |
| iii
iv | |
Contents |
|
|
Managing User Accounts.............................................................................................. |
31 |
|
Before You Create User Accounts ......................................................................... |
31 |
|
Guest Users, NT Users, and Registered Users ........................................................... |
31 |
|
Working with the Timbuktu Host.................................................................................... |
32 |
|
Chapter 5: Making Connections ....................................................................................... |
33 |
|
The Timbuktu Guest Window ........................................................................................ |
33 |
|
Timbuktu Menus ............................................................................................. |
34 |
|
Timbuktu Service Toolbar .................................................................................. |
34 |
|
Connection Tabs ............................................................................................. |
34 |
|
Status Bar..................................................................................................... |
34 |
|
The Timbuktu Connection Process .................................................................................. |
34 |
|
Step 1: Selecting the Remote Computer................................................................. |
35 |
|
Step 2: Selecting the Timbuktu Service.................................................................. |
39 |
|
Step 3: Entering Access Credentials and Completing the Connection............................... |
39 |
|
Chapter 6: Timbuktu Services ......................................................................................... |
41 |
|
The Control and Observe Services: Controlling or Observing Another Computer ........................... |
41 |
|
The Screen-Sharing Window ............................................................................... |
41 |
|
User Account Control, Fast User Switching, and the Secure Desktop ............................... |
42 |
|
Using the Capture Frame................................................................................... |
42 |
|
Controlling a Macintosh Computer........................................................................ |
43 |
|
The Exchange Service: Copying and Moving Files Between Computers ....................................... |
43 |
|
The Send Service: Sending Messages and Files to Another Computer......................................... |
44 |
|
The Notify Service: Requesting Notification When Another User is Active................................... |
45 |
|
Chapter 7: Managing the Timbuktu Host ............................................................................ |
47 |
|
Using Timbuktu Services as a Host.................................................................................. |
47 |
|
Responding to Ask for Permission Requests.............................................................. |
47 |
|
Using Screen-Sharing Services ............................................................................. |
48 |
|
Receiving Messages.......................................................................................... |
48 |
|
Responding to Notify Requests ............................................................................ |
49 |
|
Controlling and Monitoring Incoming Access ...................................................................... |
49 |
|
Monitoring Remote Connections........................................................................... |
49 |
|
Logging ........................................................................................................ |
49 |
|
Chapter 8: Getting Help ................................................................................................. |
51 |
|
Getting Help with Timbuktu ......................................................................................... |
51 |
|
Opening Timbuktu’s Online Help .......................................................................... |
51 |
|
Contacting Motorola .................................................................................................. |
51 |
|
Appendix A: Key Mapping and Service Icons ........................................................................ |
53 |
|
Timbuktu Keyboard Mapping......................................................................................... |
53 |
|
Icon Legend ............................................................................................................ |
53 |
|
Index ........................................................................................................................ |
55 |
Chapter 1: Introduction and Feature Overview
Welcome to Timbuktu for Windows™, version 9.0!
Timbuktu gives you total access to your network. Computers across the country and around the world— Windows and Macintosh—are now as accessible to you as the computer sitting on your desk! You can use Timbuktu to control and observe other computers, transfer files, and send instant messages.
What Timbuktu Can Do for You
When you’re at the office, Timbuktu runs over your organization’s local network for easy conferencing and information sharing. When you’re home or traveling, you can use Timbuktu to take direct control of your office computer.
Once you connect to a remote computer with Timbuktu, you can run software at its normal speed, dramatically decreasing network-related delays of applications such as relational databases and electronic mail. Timbuktu gives you full access to remote resources, but transfers only screen, keyboard, and mouse information—you don’t have to move large amounts of data over slow network connections.
With Timbuktu, you can
•Save technical support time and money by taking control of a remote user’s computer and solving the problem without leaving your desk.
•Train employees and customers alike for a fraction of the usual time and cost. Demonstrate the latest applications or products while a remote user watches. Then observe and help as the user practices. Provide individual attention for all remote trainees, and save the time and expense of travel.
•Work remotely from wherever you are. Harness the power of remote control to share information, transfer files, access databases, and send messages across your network. You’ll discover many ways to work easier and smarter.
•Collaborate with remote colleagues in real time. Share screens, documents, and information with both Windows and Macintosh computers, and use text-based conferencing to confer with your colleagues as you work.
•Run “LAN-locked” network applications such as databases without the frustration of slow run-time over remote links. Applications run on the remote computer, not across your network, reducing processing time dramatically.
•Protect your own computer from unauthorized access. You can grant custom combinations of Timbuktu services to individual NT User and Registered User accounts, allow access only when you approve it, or prevent all incoming Timbuktu connections.
| 5
6 | |
Chapter 1: Introduction and Feature Overview |
Timbuktu Features
New in Timbuktu for Windows, Version 9: The Timbuktu Host and Timbuktu Guest
Timbuktu for Windows, version 9 has been entirely rebuilt to provide native Timbuktu support on Windows Vista and Windows 7.
Windows Vista introduced several architectural changes that conflicted with Timbuktu’s implementation of screen sharing and user management. Microsoft provided a compatibility shim that mitigated some of the Vista-related changes, but Timbuktu was unable to interact correctly with the User Account Control or Windows secure desktop. True compatibility required significant changes to the Timbuktu architecture. In particular, session-0 Isolation, User Account Control restrictions, and always-on and domain-aware Fast User Switching required an entirely new implementation of Timbuktu’s screen sharing and user management.
Timbuktu for Windows, version 9 addresses these issues through one significant change: the single Timbuktu application is now two separate components, the Timbuktu Guest and the Timbuktu Host. The Timbuktu Host listens for and accepts incoming Timbuktu connections, and the Timbuktu Guest establishes outgoing connections to other Timbuktu computers.
The separation of the Timbuktu Host and the Timbuktu Guest has several important ramifications. The Timbuktu Guest can run with the permissions of the current Windows user, allowing it to sidestep many problematic architectural issues. The Timbuktu Host is comprised of several different executables, which resolves other architectural issues. Together, the Timbuktu Host and Timbuktu Guest provide a more secure, robust, and reliable system.
You will configure the Timbuktu Guest with the Preferences dialog box. Because the Timbuktu Host has no main application window, its settings are managed with the new Timbuktu Host Configuration Utility.
When you install Timbuktu, you will have the option to install the Timbuktu Host, the Timbuktu Guest, or both.
Timbuktu Services
The simple, powerful Timbuktu application includes multiple services. Each service provides you with a different way to access a remote computer, collaborate with its user, or enable incoming access to your own computer. Together, they help you make the most of your network.
•With the Control and Observe services, you can view another Timbuktu computer’s desktop in the screen-sharing window on your computer. The window is continually updated as the other computer’s desktop changes.
•With the Exchange service, you can copy and move files and folders in both directions between your computer and another Timbuktu computer.
•With the Send service, you can send text-based messages and attachments, similar to electronic mail, to other Timbuktu computers.
•With the Notify service, you can query another computer to determine whether its user is present.
Connecting with Timbuktu |
| 7 |
Connecting with Timbuktu
Timbuktu communicates with other Timbuktu computers over TCP/IP networks using the same protocol as any basic Internet or intranet connection. If you have a wired or WiFi connection to the Internet, you can use Timbuktu services to collaborate with other Timbuktu users around the world.
Timbuktu Security
Timbuktu offers multiple levels of security that help you restrict access to the different Timbuktu services on your computer.
•Other Timbuktu user can connect to your computer with several different levels of user access privileges: Guest Users, Ask For Permission Users, NT Users, and Registered Users. You can grant different levels of access to each type of user. Whether you create user accounts that grant specific privileges or allow incoming access only when you actively approve it, no other Timbuktu user can access your computer without your permission.
•The Timbuktu Host and Timbuktu Guest applications can be installed separately. Install only the Timbuktu Host to allow the computer to receive Timbuktu connections, but not establish them. Install only the Timbuktu Guest to allow the computer to make Timbuktu connections, but not accept them.
•Timbuktu makes it easy for you to monitor and track the Timbuktu users who access your computer and the services they use. When remote users access your computer, the Timbuktu icon in the system tray on the taskbar alternates with a service icon indicating the presence of a remote user. You can disconnect remote users at any time. The activity log keeps a record of all remote computers that access your computer, along with the services used.
Timbuktu System Requirements
To run Timbuktu for Windows, your computer must meet the following hardware, software, and compatibility requirements.
Minimum Hardware Requirements
Timbuktu requires the same minimum hardware that is required by your Windows OS. In addition, you’ll need
•20 MB of available disk space; 50MB are required for the network installation process.
•To make Timbuktu connections, a TCP/IP network or WiFi connection to the Internet or the local network.
8 | |
Chapter 1: Introduction and Feature Overview |
Minimum Software Requirements
•Windows 7, Windows Server 2008, Windows Vista, Windows Server 2003, Windows Server 2003 R2, and Windows XP SP2 or later.
If you install Timbuktu on Windows Server 2008 or Windows Server 2003 with DEP enabled, you must disable DEP or set an exception for Timbuktu.
•Timbuktu is not fully supported on 64-bit operating systems, including Windows Server 2008 R2. If you wish to install Timbuktu on Windows Server 2008 R2, disable DEP or set an exception before you install Timbuktu.
•One copy of Timbuktu software on each computer that is to make or receive Timbuktu connections.
Compatibility
Timbuktu for Windows, version 9 is compatible with Timbuktu for Windows 8.0 and later, and Timbuktu for Macintosh 8.0 and later. Older versions of Timbuktu are not officially supported.
Chapter 2: Installing and Starting Timbuktu
This chapter will guide you as you install or remove Timbuktu on a local computer.
Installing Timbuktu
The MSI installer included in your distribution package will install, modify, and remove Timbuktu. When you have completed the installation, save the MSI installer in a safe location in case you need to modify or remove Timbuktu later.
To install Timbuktu on Windows XP, or on a Windows 7 or Windows Vista computer with UAC disabled, you must be logged on to Windows with Administrator privileges.
To install Timbuktu
1.Run the Timbuktu.msi file included in your distribution package.
2.In the Timbuktu Setup Wizard, click Next. Then accept the license agreement and click Next again.
3.On the Custom Setup screen, select the features to install. Note that you may install the Timbuktu Host, the Timbuktu Guest, or both.
The Timbuktu Host and Timbuktu Guest are two separate applications that replace the single application that comprised previous versions of Timbuktu. The Timbuktu Host listens for and accepts incoming Timbuktu connections, and the Timbuktu Guest establishes outgoing connections to other Timbuktu computers.
4.When you have made your selections, click Next.
5.On the Ready to Install screen, click Install.
The installation will proceed automatically. When it is complete, the Timbuktu Setup Wizard will notify you that the installation was successful. Click Finish to close the Setup Wizard.
Once you have completed the installation process,
•The Timbuktu Host application will start automatically.
By default, the Timbuktu Host will not allow incoming connections. To configure the Timbuktu Host for incoming access, see chapter 4, “Configuring the Timbuktu Host.”
•To establish Timbuktu connections to other computers, you must start the Timbuktu Guest applica-
tion. From the Windows Start menu, choose Programs Timbuktu for Windows Timbuktu Guest.
| 9
10 | |
Chapter 2: Installing and Starting Timbuktu |
Starting and Shutting Down Timbuktu
The Timbuktu Host will start automatically when you start Windows. Its icon is placed in the system tray on the taskbar. You will start the Timbuktu Guest yourself when you wish to make an outgoing Timbuktu connection.
When you wish to prevent all incoming connections or are finished working with Timbuktu, shut down the Timbuktu Host or Timbuktu Guest. The Timbuktu Host and Timbuktu Guest can run separately; you may shut down one or both.
Starting the Timbuktu Host
If the Timbuktu Host is shut down, you can manually start it at any time. From the Windows Start menu, choose Programs Timbuktu for Windows Start Timbuktu Host.
Starting the Timbuktu Guest
The Timbuktu Guest is not launched automatically when you start Windows. When you wish to make a Timbuktu connection, you will start the Timbuktu Guest as you would start any other application. From the Windows Start menu, choose Programs Timbuktu for Windows Timbuktu Guest. The Timbuktu Guest window opens.
Shutting Down the Timbuktu Host
When the Timbuktu Host is running, it listens for and accepts incoming Timbuktu connections. To prevent all incoming connections, shut down the Timbuktu Host. When you shut down the Timbuktu Host, it no longer runs in the background and users can no longer connect to your computer.
To shut down the Timbuktu Host, click the Timbuktu icon in the system tray on the taskbar. From the shortcut menu, choose Shutdown Timbuktu Host. Or, from the Windows Start menu, choose Programs Timbuktu for Windows Shutdown Timbuktu Host.
Shutting Down the Timbuktu Guest
The Timbuktu Guest functions as any other Windows application, and you do not need to leave it running when you are finished working with other computers. To shut down the Timbuktu Guest, open the File menu and click Exit.
Removing Timbuktu |
| 11 |
Removing Timbuktu
Should you wish to remove Timbuktu from your computer, it is important to follow the correct removal procedure.
To remove Timbuktu
1.Run the Timbuktu.msi file included in your distribution package.
2.In the Timbuktu Setup Wizard, click Next.
3.On the Change, Repair, or Remove Installation screen, click Remove.
4.On the Ready to Remove Timbuktu screen, click Remove.
The removal will proceed automatically. When it is complete, the Timbuktu Setup Wizard will notify you that the removal was successful. Click Finish to close the Setup Wizard.
12 | |
Chapter 2: Installing and Starting Timbuktu |
Chapter 3: Configuring the Timbuktu Guest
Once you have installed Timbuktu, you can review and change your configuration settings. This chapter describes configuration options for the Timbuktu Guest. Timbuktu Host configuration is discussed in the following chapter, “Configuring the Timbuktu Host.”
Configuration Options
The Timbuktu Guest establishes outgoing Timbuktu connections. In most cases, you can begin working with the Timbuktu Guest immediately, using its default settings. To best customize the Timbuktu Guest for your needs, however, you may wish to configure
•The appearance and behavior of the screen-sharing window, which you use when you establish a Control or Observe connection to a host computer. You can set options that may affect screensharing performance and security, as well as manage your personal preferences.
•Settings and access credentials for the LDAP (Lightweight Directory Access Protocol) server, which can allow you to locate other Timbuktu computers by searching their user information.
•Options for logging your Timbuktu activity locally or to a central server.
Setting Timbuktu Guest Preferences
The Preferences dialog box lets you specify a number of configuration options for the Timbuktu Guest. To open the Preferences dialog box, click the Setup menu and choose Preferences. The tabs in the Preferences dialog box are as follows:
•General—Sets the Timbuktu computer name. See page 14.
•Remote Control—Sets screen-sharing window preferences for when your computer acts as the guest computer for an outgoing Control or Observe connection. See page 15.
Note that you may also set Timbuktu Host preferences for the Control and Observe connections you receive. Timbuktu Host preferences are managed with the Timbuktu Host Configuration Utility. See “The Remote Control Tab” on page 25.
•LDAP—Enables the LDAP integration and manages LDAP server connection settings. See page 16.
•Logging—Manages logging options. See page 17.
The following sections describe each of these tabs.
| 13
14 | |
Chapter 3: Configuring the Timbuktu Guest |
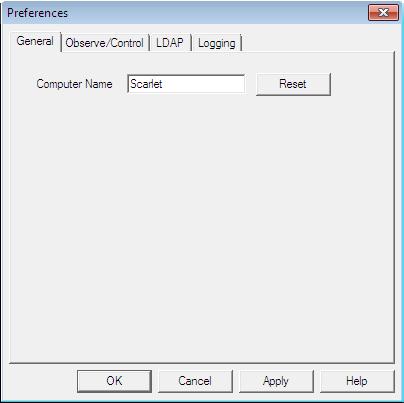
The General Tab
On the General tab, you can set the Timbuktu computer name. By default, Timbuktu uses your computer’s Windows name as its computer name. However, you may set the computer name to anything that will help identify your computer to other Timbuktu users.

Setting Timbuktu Guest Preferences |
| 15 |
The Observe/Control Tab
Timbuktu Control and Observe sessions take place in a screen-sharing window, which displays the host computer’s desktop on your screen. The Observe/Control Guest tab in the Preferences dialog box lets you control the appearance and behavior of the screen-sharing window. You can also specify options that may improve screen-sharing performance and security during screen-sharing sessions.
•In the Window area, you can specify a number of options for the screen-sharing window, including scrolling behavior and the size of the image of the remote desktop.
•Timbuktu supports secure screen blanking, which prevents unauthorized viewing of a computer’s screen while it is being controlled by a remote Timbuktu user. Secure screen blanking is usually controlled by the host computer settings, but the Blank the Screen option allows you to request it (but not force it to occur) as the guest user.
For more information about the security provided by secure screen blanking, see “Secure Screen Blanking” on page 25.
•The Keyboard Handling area includes options for how your keystrokes are translated by the host computer.
•Screen-sharing performance can be affected by the options you select in the Capture Technique and Presentation lists.
16 | |
Chapter 3: Configuring the Timbuktu Guest |
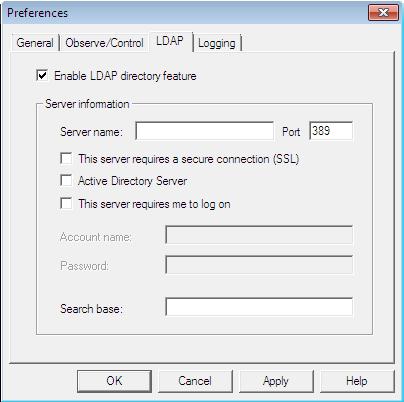
The LDAP Tab
Timbuktu’s LDAP support allows Timbuktu users to find other Timbuktu computers without knowing their IP addresses. You can search for other LDAP-enabled Timbuktu computers by their user information, including the computer name, user name, email address, and location.
To use the LDAP server’s search functionality, you must configure options on the LDAP tab. You can enable the LDAP functionality and specify LDAP server information.
Note: If you wish to provide your own user information to the search tools on the server, you can do so with the Timbuktu Host Configuration Utility. See “The LDAP Tab” on page 29.
Setting Timbuktu Guest Preferences |
| 17 |
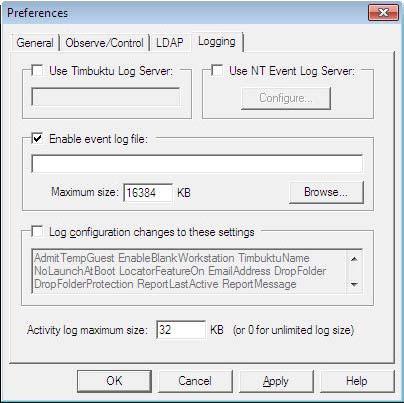
The Logging Tab
Timbuktu supports multiple options for local and centralized event logging.
Among other options, you may specify the maximum size for your log files. When the maximum size for a log file is reached, its contents are copied to a backup file and removed from the primary file. This allows the primary file to remain small, which may improve performance if you use centralized logging.
For information about logging options, see “Logging” on page 49.
18 | |
Chapter 3: Configuring the Timbuktu Guest |
Configuring Incoming Access
Because the Timbuktu Host is a separate application from the Timbuktu Guest, the Timbuktu Host settings are not available in the Timbuktu Guest application. Instead, Timbuktu Host settings are managed with the Timbuktu Host Configuration Utility. See chapter 4, “Configuring the Timbuktu Host.”
Making Connections
When you have finished configuring the Timbuktu Guest or confirmed its default settings meet your needs, you are ready to make connections to other Timbuktu computers. For information about making connections and the Timbuktu services you can use, see chapter 5, “Making Connections,” and chapter 6, “Timbuktu Services.”
Loading...