


 Loading...
Service Source
Apple Cinema Display (20-inch)
Updated 13 September 2004
© 2003 Apple Computer, Inc. All rights reserved.

Service Source
Take Apart
Apple Cinema Display (20-inch)
© 2003 Apple Computer, Inc. All rights reserved.

Tools
The following tools are recommended for the take apart procedures.
•2 mm hex key
•2.5 mm hex key
•jeweler’s #1 Phillips screwdriver (for backlight bulb tray removal)
•#2 Phillips screwdriver
•black stick (nylon probe tool 922-5065)
•white cotton gloves (922-1592) (to prevent fingerprints on cosmetic surfaces)
•ESD wrist strap and mat or soft cloth
Important: The display plastics, inside and out, retain fingerprints and can scratch easily. Be very careful with tools, lay the display and plastic parts only on a clean soft surface, and wear clean white cotton gloves when handling and servicing the display.
Tools |
Apple Cinema Display (20-inch) Take Apart - 1 |
Foot Assembly
Tools
This procedure requires the following tools:
•2 mm hex key
•white cotton gloves (922-1592) (to prevent fingerprints on cosmetic surfaces)
•ESD mat or soft cloth
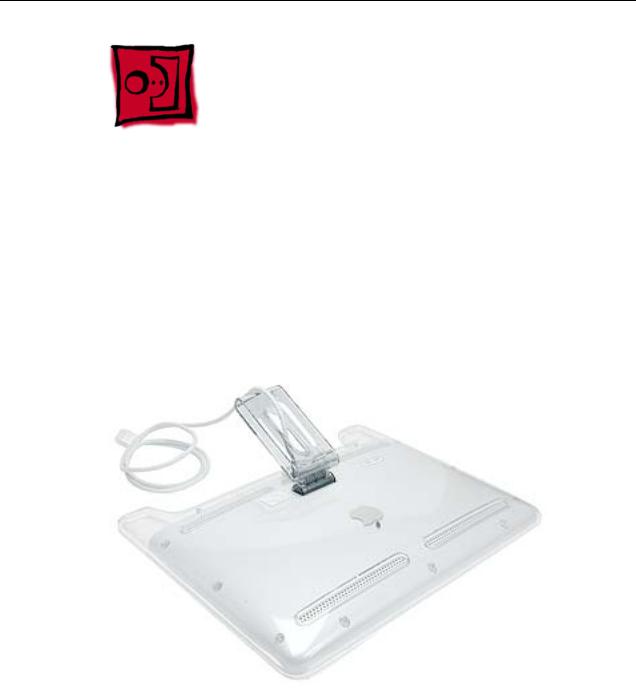
Part Location
Preliminary Steps
Before you begin, do the following:
• Place the display face down on an ESD mat or soft cloth
Note: Use care to prevent damage to plastics and wear white cotton gloves to prevent fingerprints.
2 - Apple Cinema Display (20-inch) Take Apart |
Foot Assembly |
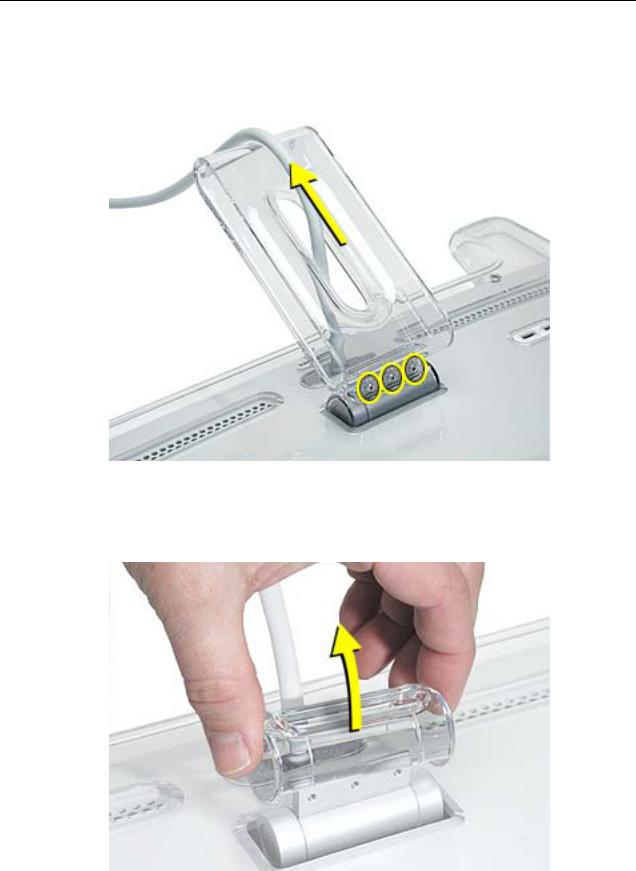
Procedure
1.Remove three hex screws.
2.Lift the foot off the hinge.
3.Pull the ADC (Apple Display Connector) cable through the opening in the foot to separate the foot and the cable.
4.Remove the clear hinge cap.
Replacement Note: If the plastic “break-off” is noticeable, install it facing down.
Foot Assembly |
Apple Cinema Display (20-inch) Take Apart - 3 |

Rear Cover and
Rear Cosmetic Shield
Tools
This procedure requires the following tools:
•2.5 mm hex key
•white cotton gloves (922-1592) (to prevent fingerprints on cosmetic surfaces)
•ESD mat or soft cloth
Note: Use care to prevent damage to plastics and wear white cotton gloves to prevent fingerprints.
Preliminary Steps
Before you begin, do the following:
•Place the display face down on an ESD mat or soft cloth
•Remove foot assembly and hinge cover
4 - Apple Cinema Display (20-inch) Take Apart |
Rear Cover and Rear Cosmetic Shield |
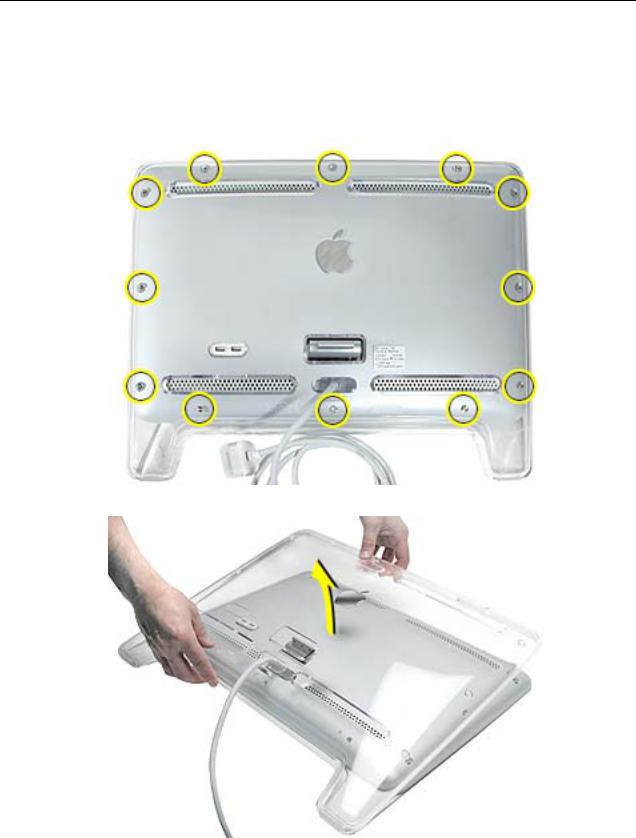
Procedure
1.Remove twelve hex screws on the rear cover.
Replacement Note: The three “shoulder” screws install along the bottom.
Replacement Note: Screws are easily stripped; do not overtighten.
2. Lift the rear cover from the top to help disengage it from the tabs on the front legs.
Replacement Note: Verify that the USB socket cover is in place, and that the arrowheads on the USB icon point up.
Rear Cover and Rear Cosmetic Shield |
Apple Cinema Display (20-inch) Take Apart - 5 |
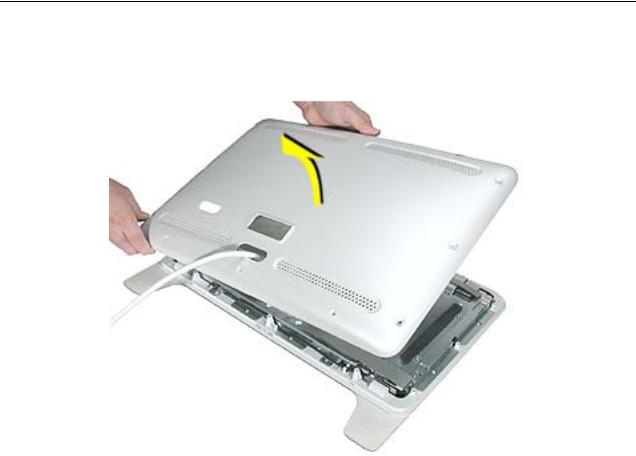
Replacement Note: Install the legs of the rear cover over the legs of the bezel first, then ensure that the seam of the rear cover and bezel seat flush and smooth all around.
3. Remove the cosmetic shield.
Replacement Note: Verify that the rear cosmetic shield and the clear plastic rear cover are free of dust, fingerprints and foreign matter before reassembling.
6 - Apple Cinema Display (20-inch) Take Apart |
Rear Cover and Rear Cosmetic Shield |
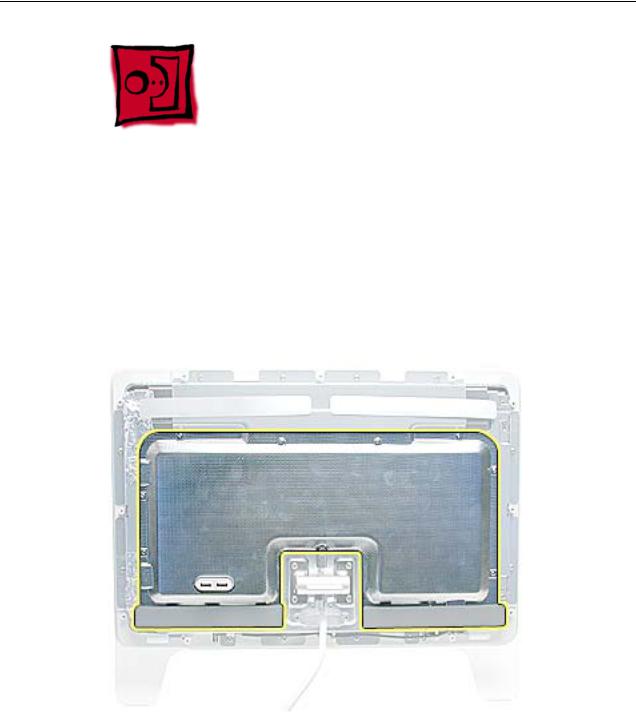
EMI Shield
Tools
This procedure requires the following tools:
•#2 Phillips screwdriver
•black stick (nylon probe tool 922-5065)
Part Location
Preliminary Steps
Before you begin, do the following:
•Remove foot assembly and hinge cover
•Remove rear cover and rear cosmetic shield
EMI Shield |
Apple Cinema Display (20-inch) Take Apart - 7 |

Procedure
1.Remove the USB socket cover.
Replacement Note: Verify that the clear plastic USB cover is in place over the USB socket, and that the arrowheads on the USB icon point up.
2. Remove ten Phillips screws on the EMI shield.
8 - Apple Cinema Display (20-inch) Take Apart |
EMI Shield |
Note: Two screws are hidden under the edge of the vent labels along the bottom edge of the EMI shield. A black stick may help to raise the labels slightly for access.
3. Remove the EMI shield.
EMI Shield |
Apple Cinema Display (20-inch) Take Apart - 9 |
Replacement Note: Verify that the EMI gaskets are on the replacement shield. If not, transfer them to the replacement shield from the shield being replaced.
Replacement Note: If replacing the EMI shield, install new vent label adhesive sponges and vent labels. The labels may be transferable if in good condition.
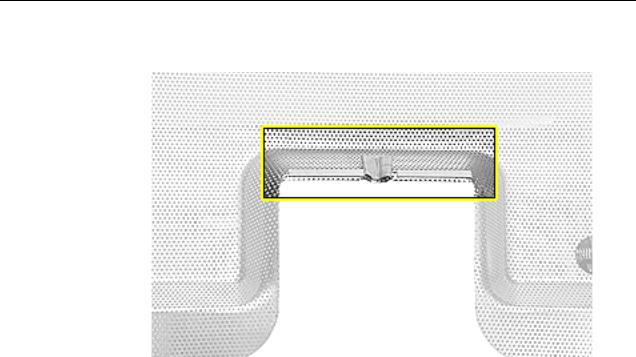
Replacement Note: Verify that the ferrite bead around the ADC cable assembly, just above the hinge, is slid down so it does not interfere with the shield placement.
10 - Apple Cinema Display (20-inch) Take Apart |
EMI Shield |

USB Cable Assembly
Note: The USB cable assembly comes with the USB socket.
Tools
This procedure requires the following tools:
• #2 Phillips screwdriver
Preliminary Steps
Before you begin, do the following:
•Remove foot assembly and hinge cover
•Remove rear cover and rear cosmetic shield
•Remove USB socket cover
•Remove EMI shield
USB Cable Assembly |
Apple Cinema Display (20-inch) Take Apart - 11 |
Loading...