


 Loading...
Sony NEX-3, NEX-3A, NEX-3A B, NEX-3A R, NEX-3A S Handbook
...4-183-855-12(1)
Interchangeable |
Table of contents |
|
Lens Digital Camera |
|
|
Sample photo search |
||
|
|
|
|
|
Menu search |
α Handbook |
|
|
|
|
Index |
|
|
|
© 2010 Sony Corporation GB
NEX-3/NEX-3C/NEX-5/NEX-5C
How to use this handbook
Click on a button at upper right on the cover and each page to jump to the corresponding page.
This is convenient when searching for a function you want to use.
Search for information by function.
Search for information by sample photos.
Search for information in a listing of menu items.
Search for information by keyword.
You can jump to the pages by clicking on the page numbers mentioned in the book.
Marks and notations used in this handbook
In this handbook, the sequence of operations is shown by arrows (t). Operate the camera in the order indicated.
 The default setting is indicated by
  .
.
 Indicates cautions and limitations relevant to the correct operation of the camera.
 zIndicates information that is useful to know.
contents |
of Table |
search |
photo Sample |
|
search Menu |
Index |
|
2GB

Table of contents
Notes on using the camera
How to use this handbook ·····································2
Sample photo search ············································5
Identifying parts ···················································11
List of icons on the screen···································15
Basic operations
Using the control wheel and soft keys·················17
Menu search························································19
Shooting images··················································23
Playing back images ···········································26
Deleting images···················································28
Using functions with the control wheel
DISP (Display Contents) ·····································29
 (Flash Mode)·····················································31
 (Exposure Comp.) ··········································32

 (Drive Mode) ··············································33
 (Image Index) ·················································40
contents |
of Table |
search |
photo Sample |
|
search Menu |
Index |
|
Using functions in the menu
Shoot Mode ·························································19
Camera································································20
Image Size ··························································20
Brightness/Color··················································20
Playback······························································21
Setup ···································································21
3GB
Continued r

Connecting with other equipment
Viewing images on a TV····································123
Using with your computer··································125
Using the software·············································127
Connecting the camera to the computer ···········130
Creating a movie disc (NEX-5/5C) ····················132
Printing still images ···········································136
Troubleshooting
Troubleshooting·················································137
Warning messages············································143
Others
Using the camera abroad ··································146
Memory card ·····················································147
“InfoLITHIUM” battery pack ·······························149
Battery charger··················································151 Mount Adaptor···················································152 AVCHD format (NEX-5/5C) ·······························153
Cleaning ····························································154
Index
Index··································································155
contents |
of Table |
search |
photo Sample |
|
search Menu |
Index |
|
4GB

Sample photo search
“This is the scene I want to capture in a photo, but how can I do?”
You may find the answer by going through the sample photos listed here. Click the desired sample photo.
Shooting people (page 6)
Shooting macro photos (page 7)
Shooting landscapes (page 8)
Shooting sunset/night views (page 9)
Shooting fast moving subjects (page 10)
If you click on a photo, the screen will jump to the page describing the function recommended for shooting that kind of photo.
Refer to those descriptions in addition to the shooting tips displayed on the screen of the camera.
Click!
contents |
of Table |
search |
photo Sample |
|
search Menu |
Index |
|
5GB
Continued r
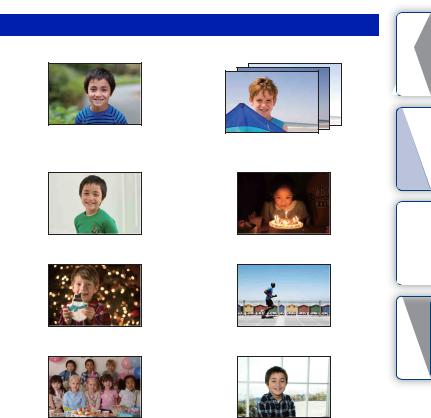
Shooting people
Only the main subject is in focus by defocusing the background (24)
A happy smile (59)
A person in front of night view (72)
The same scene with different brightness (38)
In candle light (45)
A moving person (68)
A group photo (36, 37) |
A person lit from behind (31) |
contents |
of Table |
search |
photo Sample |
|
search Menu |
Index |
|
6GB
Continued r
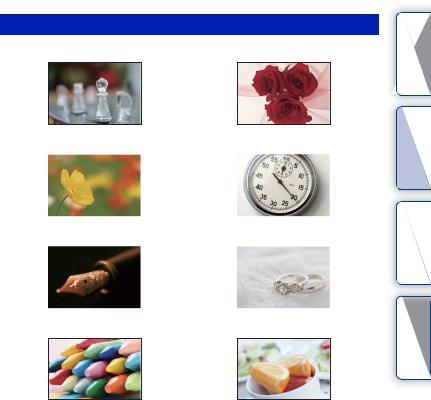
Shooting macro photos
Defocusing the background (24) |
Adjusting the color to indoor light (69) |
||||
|
|
|
|
|
|
|
|
|
|
|
|
Flowers (43) |
Lowering the amount of flash light (72) |
||
|
|
|
|
|
|
|
|
contents |
of Table |
search |
photo Sample |
|
search Menu |
Focusing manually (53) |
In better brightness (32) |
Index
Preventing camera shake for indoor shots |
Making food look appealing (32) |
(68) |
|
7GB
Continued r

Shooting landscapes
The sky in vivid colors (32) |
Running water (50) |
||
|
|
|
|
|
|
|
|
Vivid green colors (75) |
Colored leaves (75) |
|
|
|
|
Panoramic photos (46)
contents |
of Table |
search |
photo Sample |
|
search Menu |
Index |
|
Scenery with a wide range of brightness |
Light outdoors shot from a dark interior (73) |
||||
(73) |
|
|
|
|
|
|
|
|
|
|
|
|
|
|
|
|
|
Defocusing the background (24) |
Keeping your shot level (90) |
8GB
Continued r

Shooting sunset/night views
Holding the camera by hand (43) |
Trail of light (31) |
||
|
|
|
|
|
|
|
|
Fireworks (49) |
Defocusing the background (24) |
||
|
|
|
|
|
|
|
|
Preventing camera shake (36)
The same scene in different brightness (38)
Shooting the red of the sunset beautifully (43)
contents |
of Table |
search |
photo Sample |
|
search Menu |
Index |
|
9GB
Continued r

Shooting fast moving subjects
Following a moving subject (56) |
Expressing vigorous action (50) |
||||
|
|
|
|
|
|
|
|
|
|
|
|
With the subject approaching the camera |
Capturing the best moment (35) |
(53) |
|
contents |
of Table |
search |
photo Sample |
|
search Menu |
Index |
|
10GB
Identifying parts
NEX-5/5C
NEX-3/3C
See the pages in parentheses for details of operation.
A (Playback) button (26)
BON/OFF (Power) switch
CShutter button (23)
DRemote sensor (39)
EAF illuminator/Self-timer lamp/Smile Shutter lamp
FSpeaker
GMicrophone
HSmart Accessory Terminal
ILens
JLens release button
KMount
LImage sensor*
MLens contacts*
* Do not touch this part directly.
contents |
of Table |
search |
photo Sample |
|
search Menu |
Index |
|
When the lens is removed (NEX-5/5C/3/3C)
11GB
Continued r

NEX-5/5C
NEX-3/3C
A (USB) terminal (130)
BHook for shoulder strap
CHDMI terminal (123)
DLight sensor
ELCD monitor
FMOVIE button (23)
GControl wheel (17)
HSoft keys (18)
I Image sensor position mark (53)
contents |
of Table |
search |
photo Sample |
|
search Menu |
Index |
|
12GB
Continued r

NEX-5/5C
NEX-3/3C
Flash
ABattery/memory card cover |
|
|
BTripod receptacle |
ofTable contents |
|
• Use a tripod with a screw length of less than |
||
|
||
5.5 mm (7/32 inch). You will be unable to |
|
|
firmly secure the camera to tripods having |
|
|
screws longer than 5.5 mm (7/32 inch), and |
|
|
may damage the camera. |
|
C  Image sensor position mark (53)
DConnection plate cover |
search |
photoSample |
|
Use this when using an AC-PW20 AC |
|||
Adaptor (sold separately). Insert the |
|
|
|
connection plate into the battery |
|
|
|
compartment, then pass the cord through the |
|
|
|
connection plate cover as shown below. |
|
|
|
NEX-5/5C |
NEX-3/3C |
|
|
|
|
|
Menu |
• Make sure that the cord is not pinched when |
|
search |
|
|
|
||
you close the cover. |
|
|
|
EAccess lamp |
|
|
|
FMemory card insertion slot |
|
|
|
GBattery compartment |
|
Index |
|
|
|
||
AScrew
BFlash
CConnector*
* Do not touch this part directly.
13GB
Continued r
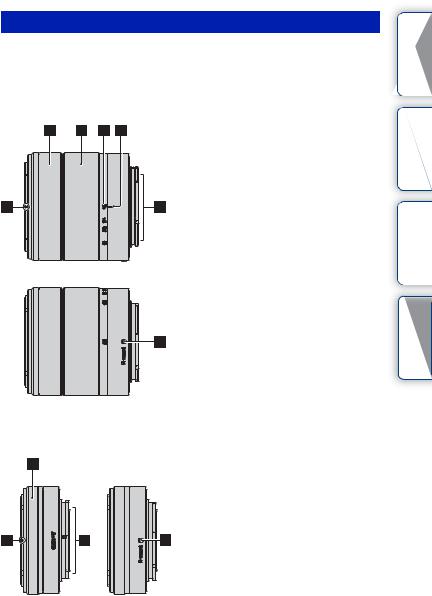
Lens
On the E18 – 200 mm lens, refer to the instruction manual of the E18 – 200 mm lens (supplied).
E18 – 55 mm F3.5-5.6 OSS (supplied with NEX-5D/5CD/5K/5CK/3D/ 3CD/3K/3CK)
AHood index
BFocusing ring
CZoom ring
DFocal-length scale
EFocal-length index
FLens contacts*
GMounting index
* Do not touch this part directly.
contents |
of Table |
search |
photo Sample |
|
search Menu |
Index |
|
E16 mm F2.8 (supplied with NEX-5A/5CA/3A/3CA)
AConverter index*
BFocusing ring
CLens contacts**
DMounting index
* A converter is sold separately. ** Do not touch this part directly.
14GB

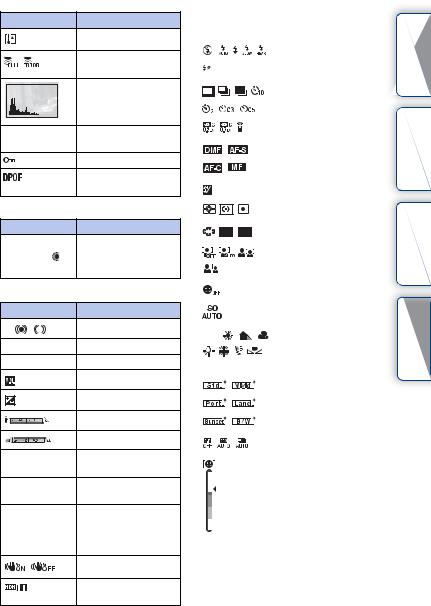
List of icons on the screen
Icons are displayed on the screen to indicate the camera status.
You can change the screen display using DISP (Display Contents) on the control wheel (page 29).
Shooting standby |
A |
Display Indication
|
Shoot Mode |
P A S M |
|
|
Scene Selection |
|
Image size/Aspect ratio |
|
of still images |
Graphic display |
|
RAW RAW+J |
Image quality of still |
FINE STD |
images |
100 |
Number of recordable |
|
still images |
Movie recording |
Image size of movies |
|
|
|
|
|
|
|
|
|
|
Memory card/Upload |
|
|
|
|
|
|
|
|
|
|
|
|
|
|
|
|
|
|
|
|
|
|
|
|
|
|
|
|
|
|
|
|
|
|
|
|
|
|
|
|
|
|
|
|
|
|
|
|
|
|
|
|
|
|
|
|
|
123min |
Recordable time of |
|
|
|
|
|
|
|
|
|
|
movies |
Playback |
|
|
|
|
|||||
100% |
Remaining battery |
||||||||
|
|
|
|
|
|
|
|
|
|
|
|
|
|
|
|
|
|
|
Scene Recognition icons |
|
|
|
|
|
|
|
|
|
|
|
|
|
|
|
|
|
|
|
|
|
|
|
|
|
|
|
|
|
Flash charge in progress |
|
|
|
|
|
|
|
|
|
|
|
|
|
|
|
|
|
|
|
|
|
|
|
|
|
|
|
|
|
AF illuminator |
|
|
|
|
|
|
|
|
|
|
|
|
|
|
|
|
|
|
|
Does not record sound |
|
|
|
|
|
|
|
|
|
|
|
|
|
|
|
|
|
|
|
during movie recording |
|
|
|
|
|
|
|
|
|
|
|
|
|
|
|
|
|
|
|
|
|
|
|
|
|
|
|
|
|
Camera shake warning |
contents |
of Table |
search |
photo Sample |
|
search Menu |
Index |
|
15GB
Continued r
Display |
Indication |
|
Overheating warning |
|
Database file full/ |
|
Database file error |
|
Histogram |
101-0012 |
Playback folder – File |
|
number |
|
Protect |
1 |
Print order and number |
|
of copies |
B |
|
Display |
Indication |
Menu z |
Soft keys |
Shoot Mode |
|
Shoot. Tips z |
|
C |
|
Display |
Indication |
z |
Focus status |
|
|
1/125 |
Shutter speed |
F3.5 |
Aperture value |
±0.0 |
Metered manual |
|
|
±0.0 |
Exposure compensation |
|
|
|
Shutter speed indicator |
|
Aperture indicator |
REC 0:12 |
Recording time of the |
|
movie (m:s) |
2010-1-1 9:30AM Recorded date/time of |
|
|
the image |
12/12 |
Image number/Number |
|
of images recorded in |
|
the date or selected |
|
folder |
|
SteadyShot |
|
Appears when HDR did |
|
not work on the image. |
D
Display |
Indication |
||
|
|
|
Flash Mode/Red Eye |
|
|
|
Reduction |
|
|
|
|
|
|
|
Drive Mode |
|
|
|
|
|
|
|
Focus mode |
|
|
|
|
±0.0 |
Flash compensation |
||
|
|
|
|
|
|
|
Metering Mode |
|
|
|
|
|
|
|
|
|
|
|
|
|
|
|
Focus area mode |
|
|
|
|
|
|
|
|
|
|
|
Face Detection |
|
|
|
|
|
|
|
Smile Shutter |
|
|
|
|
|
|
|
ISO |
|
|
|
|
|
|
|
|
|
|
|
|
AWB |
White Balance |
||
|
|||
7500K G9 |
|
||
|
|
|
|
|
|
|
Creative Style |
|
|
|
|
|
|
|
DRO/Auto HDR |
|
|
|
|
|
|
|
Smile detection |
|
|
|
sensitivity indicator |
|
|
|
|
contents |
of Table |
search |
photo Sample |
|
search Menu |
Index |
|
16GB
Using the control wheel and soft keys
The control wheel and soft keys allow you to use various functions of the camera.
|
|
Soft keys |
Control wheel |
Control wheel
When shooting, DISP (Display Contents),  (Flash Mode),
  (Exposure Comp.) and
 (Drive Mode) functions are assigned to the control wheel. When playing back, DISP (Display Contents) and
 (Image Index) functions are assigned to the control wheel.
When you turn or press the right/left/top/bottom parts of the control wheel following the on-screen display, you can select setting items. Your selection is determined when you press the center of the control wheel.
The arrow means you can turn the control wheel.
When options are displayed on the screen, you can browse through them by turning or pressing the top/bottom/left/right parts of the control wheel. Press the center to make your choice.
contents |
of Table |
search |
photo Sample |
|
search Menu |
Index |
|
17GB
Continued r
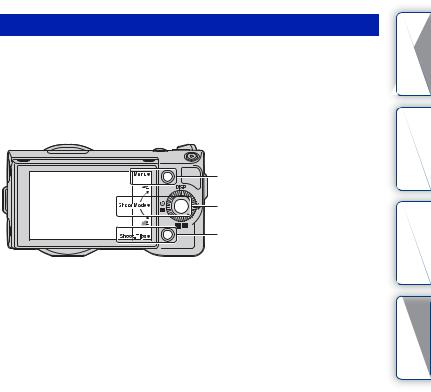
Soft keys
The soft keys have different roles, depending on the context.
The assigned role (function) of each soft key is shown on the screen.
To use the function shown at the upper right corner of the screen, press soft key A. To use the function shown at the lower right corner of the screen, press soft key B. To use the function shown at the center, press the center of the control wheel (soft key C).
In this handbook, the soft keys are indicated by the icon or the function shown on the screen.
A
In this case, soft key A works as the [Menu] button, and soft key B
C as the [Shoot. Tips] button. Soft key C works as the [Shoot Mode] button.
B
contents |
of Table |
search |
photo Sample |
|
search Menu |
Index |
|
18GB
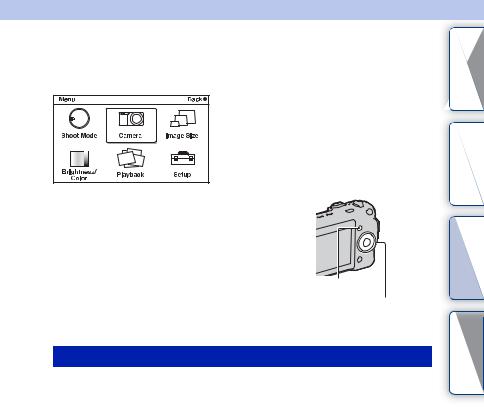
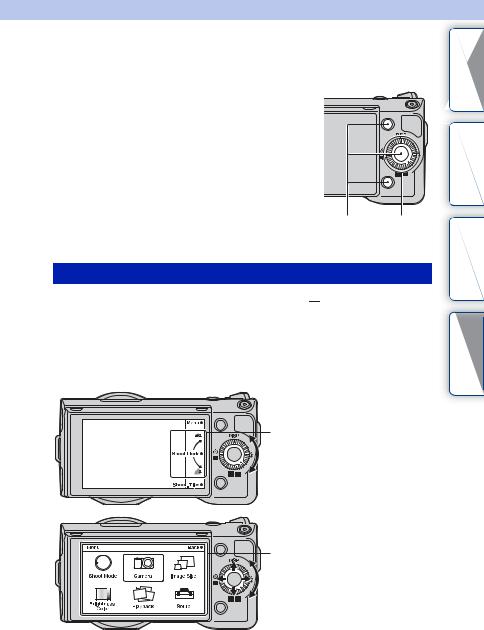
Menu search
You can set up the basic settings for the camera as a whole, or execute functions such as
shooting, playback, or other operations.
1Press [Menu].
2Select the desired item by pressing the top/bottom/left/right parts of the control wheel, and then press the center.
3Following the instructions on the screen, select the desired item and press the center of the control wheel to make your choice.
[Menu]
Control wheel
Shoot Mode
Allows you to select a shooting mode, such as exposure mode, panoramic, Scene Selection.
Intelligent Auto |
The camera evaluates the subject and makes the proper |
|
settings. You can enjoy automatic shooting with the |
|
appropriate settings. |
|
|
Scene Selection |
Shoots with preset settings according to the subject or |
|
condition. |
|
|
Anti Motion Blur |
Reduces the camera shake when shooting a slightly dark |
|
indoor scene or a telephoto. |
|
|
Sweep Panorama |
Shoots with panoramic size. |
|
|
Manual Exposure |
Adjusts the aperture and shutter speed. |
|
|
Shutter Priority |
Adjusts the shutter speed to express the movement of the |
|
subject. |
|
|
Aperture Priority |
Adjusts the range in focus, or defocuses the background. |
|
|
Program Auto |
Automatic shooting that allows you to customize settings, |
|
except for the exposure (shutter speed and aperture). |
|
|
contents |
of Table |
search |
photo Sample |
|
search Menu |
Index |
|
19GB
Continued r

Camera
Allows you to set shooting functions, such as continuous shooting, self-timer, and flash.
Drive Mode |
Selects the drive mode, such as continuous shooting, |
|
self-timer, or bracket shooting. |
|
|
Flash Mode |
Selects the method used to fire the flash. |
|
|
AF/MF Select |
Selects auto focusing or manual focusing. |
|
|
Autofocus Area |
Selects the area to be focused on. |
|
|
Autofocus Mode |
Selects the autofocus method. |
|
|
Precision Dig. Zoom |
Sets the digital zoom when a single focus lens is used. |
|
|
Face Detection |
Detects people’s faces automatically, and adjusts focus and |
|
exposure to suit the faces. |
|
|
Smile Shutter |
Each time the camera detects a smile, the camera releases |
|
the shutter automatically. |
|
|
Smile Detection |
Sets the sensitivity of the Smile Shutter function for |
|
detecting smiles. |
|
|
Panorama Direction |
Selects the direction to pan the camera when shooting |
|
panoramic images. |
|
|
Shooting Tip List |
Allows you to access all shooting tips. |
|
|
Display Contents |
Switches the information to be displayed on the shooting |
|
screen. |
|
|
Image Size
Allows you to set the image size and aspect ratio.
Still
Image Size |
Selects the image size. |
|
|
Aspect Ratio |
Selects the aspect ratio. |
|
|
Quality |
Selects the compression format. |
|
|
Panorama |
|
Image Size |
Selects the image size. |
|
|
Movie |
|
File Format (NEX-5/5C) |
Selects the movie recording format, AVCHD or MP4. |
|
|
Image Size |
Selects the image size. |
|
|
contents |
of Table |
search |
photo Sample |
|
search Menu |
Index |
|
Brightness/Color
Allows you to make brightness settings such as metering mode, and color settings such as white balance.
Exposure Comp. |
Compensates for the brightness of the entire image. |
|
|
ISO |
Sets the ISO sensitivity. |
|
|
20GB
Continued r
White Balance |
Adjusts the color tones according to the ambient light |
|
conditions. |
|
|
Metering Mode |
Selects the method used for measuring the brightness. |
|
|
Flash Compensation |
Adjusts the amount of flash light. |
|
|
DRO/Auto HDR |
Corrects the brightness or contrast automatically. |
|
|
Creative Style |
Selects the image processing method. |
|
|
Playback
Allows you to set playback functions.
Delete |
Deletes images. |
|
|
Slide Show |
Plays back images automatically. |
|
|
Still/Movie Select |
Selects a still image or movie to play back. |
|
|
Image Index |
Selects the number of images to be displayed on the index |
|
screen. |
|
|
Select Folder |
Selects the folder of still images to play back. |
|
|
Select Date |
Selects the date of movies to play back. |
|
|
Rotate |
Rotates images. |
|
|
Protect |
Protects images, or cancels the protection. |
|
|
Enlarge Image |
Enlarges the image. |
|
|
Volume Settings |
Sets the sound volume of movies. |
|
|
Specify Printing |
Selects the images to print, or makes printing settings. |
|
|
Display Contents |
Switches the information to be displayed on the playback |
|
screen. |
|
|
Setup
contents |
of Table |
search |
photo Sample |
|
search Menu |
Index |
|
Allows you to make more detailed shooting settings, or change the camera settings.
Shooting Settings |
|
|
AF Illuminator |
Sets the AF illuminator to assist auto-focusing in dim |
|
|
places. |
|
|
|
|
Red Eye Reduction |
Provides pre-flash before shooting when using the flash, to |
|
|
prevent eyes from being shot in red. |
|
|
|
|
Auto Review |
Sets the display time of the image right after shooting. |
|
|
|
|
Grid Line |
Turns on the grid line that helps you to adjust the |
|
|
composition of images. |
|
|
|
|
Histogram |
Displays the histogram of the luminance distribution. |
|
|
|
|
MF Assist |
Displays an enlarged image when focusing manually. |
|
|
|
|
Color Space |
Changes the range of color reproduction. |
|
|
|
|
SteadyShot |
Sets camera shake compensation. |
|
|
|
|
Release w/oLens |
Sets whether or not to release the shutter when there is no |
|
|
lens. |
21GB |
|
|
|
|
|
Continued r

Long Exposure NR |
Sets the noise reduction processing for long exposure |
|
shootings. |
|
|
High ISO NR |
Sets the noise reduction processing for high ISO sensitivity |
|
shootings. |
|
|
Movie Audio Rec |
Sets the sound for movie recording. |
|
|
Main Settings |
|
Beep |
Selects the sound produced when you operate the camera. |
|
|
Language |
Selects the language used on the screen. |
|
|
Date/Time Setup |
Sets the date and time. |
|
|
Area Setting |
Selects the area where you are using the camera. |
|
|
Help Guide Display |
Turns the Help Guide on or off. |
|
|
Power Save |
Sets the time to turn the camera to the power save mode. |
|
|
LCD Brightness |
Sets the brightness of the LCD monitor. |
|
|
Display Color |
Selects the color of the LCD monitor. |
|
|
Wide Image |
Selects a method to display wide images. |
|
|
Playback Display |
Selects the method used to play back portrait images. |
|
|
CTRL FOR HDMI |
Sets whether or not to operate the camera with a “BRAVIA” |
|
Sync compatible TV’s Remote Control. |
|
|
USB Connection |
Selects the method used for a USB connection. |
|
|
Cleaning Mode |
Allows you to clean the image sensor. |
|
|
Version |
Displays the version of the camera and the lens. |
|
|
Demo Mode |
Sets whether or not to display the demonstration with |
|
movies. |
|
|
Reset Default |
Resets the camera to the factory-settings. |
|
|
Memory Card Tool |
|
Format |
Formats the memory card. |
|
|
File Number |
Selects the method used for assigning file numbers to |
|
images. |
|
|
Folder Name |
Selects the folder name format. |
|
|
Select Shoot. Folder |
Selects the recording folder. |
|
|
New Folder |
Creates a new folder. |
|
|
Recover Image DB |
Repairs the image database file of movies when |
|
inconsistencies are found. |
|
|
Display Card Space* |
Displays the remaining recording time of movies and the |
|
recordable number of still images on the memory card. |
|
|
Eye-Fi Setup** |
|
Upload Settings |
Sets the upload function of the camera when an Eye-Fi card |
|
is used. |
|
|
*Appears when a memory card (sold separately) is inserted in the camera.
**Appears when an Eye-Fi card (sold separately) is inserted in the camera. NEX-5C/3C do not have this function.
contents |
of Table |
search |
photo Sample |
|
search Menu |
Index |
|
22GB

Shooting images
Shooting images with the settings in effect when you bought the camera is explained here.
The camera makes decisions appropriate to the situation, and adjusts the settings.
1Adjust the LCD monitor angle, and hold the camera.
The Scene Recognition function begins to work.
2To take still images, press the shutter button.
To record movies, press the MOVIE button to start recording. Press the MOVIE button again to stop recording.
Note
•The angle of view of movies is narrower than that of still images. After you press the MOVIE button, the camera shows the actual range to be recorded by displaying an empty frame on the screen. You can check the frame for movies by selecting [Menu] t [Setup] t [Grid Line] t [On].
z On Scene Recognition
The Scene Recognition function lets the camera automatically recognize the shooting conditions and allows you to shoot the image with appropriate settings.
Scene Recognition icon and guide
• The camera recognizes (Night View),
 (Tripod Night View),
 (Night Portrait),
  (Backlight),
 (Backlight Portrait),
 (Portrait),
 (Landscape), or
 (Macro), and displays the corresponding icon and guide on the LCD monitor when the scene is
recognized.
contents |
of Table |
search |
photo Sample |
|
search Menu |
Index |
|
23GB
Continued r

zIf you shoot a still image of a subject that is difficult to focus on
When the camera cannot focus on the subject automaticaly, the focus indicator blinks. Either recompose the shot or change the focus setting.
|
Focus indicator |
|
|
Focus indicator |
Status |
z lit |
Focus locked. Ready to shoot. |
|
|
lit |
Focus is confirmed. Focal point moves following a moving |
|
subject. Ready to shoot. |
|
|
lit |
Still focusing. |
|
|
z flashing |
Cannot focus. |
|
|
•Focusing may be difficult in the following situations:
–It is dark and the subject is distant.
–The contrast between the subject and the background is poor.
–The subject is seen through glass.
–The subject is moving quickly.
–The subject reflects light such as mirror, or has shiny surfaces.
–The subject is flashing.
–The subject is backlit.
Background Defocus Control
 (Intelligent Auto) allows you to defocus the background easily to make the subject stand out.
You can check the defocusing effect on the LCD monitor.
1Press the center of the control wheel.
2Defocus the background by turning the control wheel.
 : Turn up to focus
 : Turn down to defocus
Press [Back] to restore to the original status.
contents |
of Table |
search |
photo Sample |
|
search Menu |
Index |
|
24GB
Continued r

Notes
•When the Scene Recognition function is enabled, the camera analyzes the scene when you press the center of the control wheel, and uses it as the Recognized Scene.
•The defocusing range available depends on the lens used.
•The defocusing effect may not be noticeable, depending on the distance from the subject or the lens used.
•The Background Defocus Control function does not operate when an A-mount lens is attached.
z For a better result of Background Defocus
•Move closer to the subject.
•Lengthen the distance between the subject and the background.
contents |
of Table |
search |
photo Sample |
|
search Menu |
Index |
|
25GB

Playing back images
Plays back the recorded images. Still images and movies are displayed on separate screens. You cannot display still images and movies on the same screen.
1Press the  (Playback) button.
2Select the image with the control wheel.
3To play back panoramic images or movies, press the center of the control wheel.
During movie playback |
Control wheel operation |
To pause/resume |
Press the center. |
|
|
To fast-forward |
Press the right, or turn it right. |
|
|
To fast-rewind |
Press the left, or turn it left. |
|
|
To slow-forward (NEX-5/5C only) |
Turn it right during pause. |
|
|
To slow-reverse (NEX-5/5C only) |
Turn it left during pause. |
|
|
To adjust sound volume |
Press the bottom t top/bottom. |
|
|
Note
• Panoramic images shot on other cameras may not be played back properly.
z Switching between the still image and movie
On the image index screen, you can switch the image type by selecting (still image) or
  (movie) on the left of the screen followed by pressing the center of the control wheel.
contents |
of Table |
search |
photo Sample |
|
search Menu |
Index |
|
Enlarged playback
A portion of a still image can be enlarged for closer examination during playback. This is convenient to check the focus condition of a recorded still image. You can enlarge playback images from the Menu (page 84).
1Display the image you want to enlarge, then press the center of the control wheel to confirm [Enlarge].
2Adjust the scaling by turning the control wheel.
3Select the portion you want to enlarge by pressing the top/bottom/right/ left of the control wheel.
4To cancel the enlarged playback, press [Exit].
26GB
Continued r

Notes
•You cannot use the enlarged playback function with movies.
•To enlarge panoramic images, pause the playback first, and then press [Option].
z Scaling range
The scaling range is as follows.
Image size |
Scaling range |
L |
Approx. ×1.1 – ×13 |
|
|
M |
Approx. ×1.1 – ×10 |
|
|
S |
Approx. ×1.1 – ×6.7 |
|
|
contents |
of Table |
search |
photo Sample |
|
search Menu |
Index |
|
27GB

Deleting images
You can delete the image displayed.
1 Display the image you want to delete, and
press [Delete].
[Cancel]
2 Press the center of the control wheel to confirm [OK].
Press [Cancel] to quit the operation.
[OK]
[Delete]
Note
• You cannot delete protected images.
z To delete several images
Select [Menu] t [Playback] t [Delete] to select and delete specific images at the same time.
contents |
of Table |
search |
photo Sample |
|
search Menu |
Index |
|
28GB

DISP (Display Contents)
Using the control wheel:
1Press DISP (Display Contents) on the control wheel repeatedly to select the desired mode.
Using the Menu:
1During shooting, [Menu] t [Camera] t [Display Contents]. During playback, [Menu] t [Playback] t [Display Contents].
2Select the desired mode by turning the control wheel.
During shooting
Disp. Basic Info Shows basic shooting information. Graphically shows the shutter speed and aperture value, except for when [Shoot Mode] is set to [Intelligent Auto] or [Sweep Panorama].
Display Info. Shows recording information.
No Disp. Info. Does not show recording information.
contents |
of Table |
search |
photo Sample |
|
search Menu |
Index |
|
29GB
Continued r
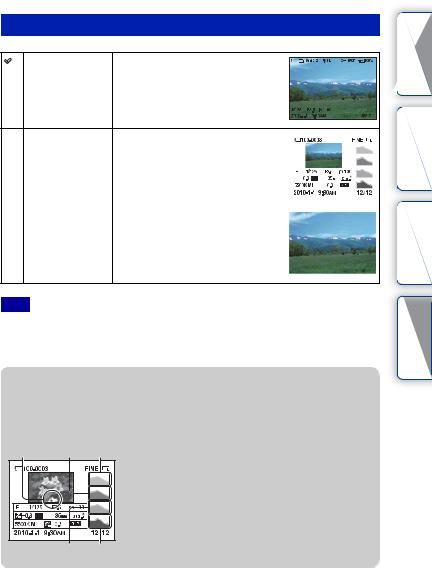
During playback
Display Info. Shows recording information.
Histogram |
Displays the luminance distribution |
|
|
|
|
|
|
|
|
|
|
|
|
|
|
|
|
|
|||
|
graphically, in addition to recording |
|
|
|
|
|
|
|
|
|
|
information. |
|
|
|
|
|
|
|
|
|
|
|
|
|
|
|
|
|
|
|
|
|
|
|
|
|
|
|
|
|
|
|
|
|
|
|
|
|
|
|
|
|
|
|
|
|
|
|
|
|
|
|
|
|
|
|
|
|
|
|
|
|
|
|
|
|
|
|
|
|
|
|
|
|
|
|
|
|
|
|
|
|
|
|
|
|
|
No Disp. Info. |
Does not show recording information. |
|
|
|||||||
|
|
|
|
|
|
|
|
|
||
|
|
|
|
|
|
|
|
|
|
|
Note
•Histogram is not displayed during following playback modes.
–Movie
–Panorama
–Slide Show
z What is histogram ?
The histogram displays the luminance distribution that shows how many pixels of a particular brightness exist in the picture. Brighter image will make the entire histogram shift to the right side, and darker image to the left side.
Flash |
R (red) |
Luminance |
G (green) B (blue)
•If the image has a high-key or low-key portion, that portion flashes on the histogram display during playback (Luminance limit warning).
contents |
of Table |
search |
photo Sample |
|
search Menu |
Index |
|
30GB
Loading...