


 Loading...
Sharp PN-L851H, PN-L751H, PN-L651H, PN-75TH1, PN-85TH1 User Manual
...PN-85TH1 PN-75TH1 PN-65TH1 PN-L851H PN-L751H PN-L651H
LCD MONITOR
SOFTWARE GUIDE

Contents |
|
Introduction................................................................................................................................................................... |
3 |
Change this monitor to APPLICATION mode............................................................................................................ |
4 |
USB port / microSD card slot..................................................................................................................................... |
6 |
Direct Drawing for Android........................................................................................................................................... |
7 |
Drawing...................................................................................................................................................................... |
9 |
Erasing a drawn line.................................................................................................................................................. |
9 |
Actions using your finger (gesture).......................................................................................................................... |
10 |
Opening a PDF or image on the current sheet........................................................................................................ |
10 |
Opening a file........................................................................................................................................................... |
10 |
Saving a sheet.......................................................................................................................................................... |
11 |
Erasing all lines drawn on the current sheet............................................................................................................. |
11 |
Clearing a PDF or an image opened on the current sheet....................................................................................... |
11 |
Deleting a sheet........................................................................................................................................................ |
11 |
Settings.................................................................................................................................................................... |
12 |
SHARP Wireless Display............................................................................................................................................ |
13 |
Setup............................................................................................................................................................................ |
15 |
Updating the Software (Update)................................................................................................................................. |
17 |
Intellectual Property Rights and Other Matters........................................................................................................ |
18 |
Important Information
•This product has been shipped after strict quality control and product inspection. If, however, you find any failure or malfunction, contact your product dealer.
•Please understand that SHARP CORPORATION bears no responsibility for errors made during use by the customer or a third party, nor for any other malfunctions or damage to this product arising during use, except where indemnity liability is recognized under law.
•If you or a third party uses the product incorrectly, or if the product is subjected to the effects of static electricity or electrical noise, or if the product malfunctions or is repaired, there is a risk that saved data will be corrupted or lost.
•Always back up important data to a USB flash drive or microSD memory card.
•We bear no responsibility for protection of internal memory recorded content or related damages.
•Transcribing or duplicating part or all of this manual and/or this software without permission from our company is not permitted.
•As a part of our policy of continuous improvement, SHARP reserves the right to make design and specification changes for product improvement without prior notice.
•Language of OSD menu used in this manual is English by way of example.
•This manual does not contain basic operating instructions for Android.
Trademarks
•Google and Android are trademarks or registered trademarks of Google LLC.
•Miracast is a trademark or a registered trademark of Wi-Fi Alliance.
•Bluetooth is a registered trademark of Bluetooth SIG, Inc.
•All other brand and product names are trademarks or registered trademarks of their respective holders.
E 2

Introduction
By changing the input mode of this monitor to “APPLICATION”, you can use Android applications. The following applications can be used with the monitor. (Factory default)
Direct Drawing for Android |
You can write letters or draw lines on the screen as a whiteboard. |
|
(see page 7) |
You can display an image or PDF file, and write/draw letters and lines on the image. |
|
SHARP Wireless Display |
You can display images from other devices on this monitor using wireless LAN. |
|
(see page 13) |
|
|
File Explorer |
Manage a file or a folder. |
|
|
Plug-in application that lets you use a SHARP multifunction machine connected to the |
|
|
same network to print. |
|
SHARP Print Service Plugin |
You can print to an applicable multifunction machine from an applicable application in |
|
APPLICATION mode. |
||
|
||
|
For details, visit the following Web page. |
|
|
http://www.sharp-world.com/products/copier/docu_solutions/mobile/Sharp_Print_Service_Plugin/ |
We only guarantee the operation of the home screen and the applications indicated above.
We do not guarantee the operation of any other applications.
Use APPLICATION mode in a landscape orientation.
We do not guarantee the use of APPLICATION mode in a portrait orientation.
3 E
Introduction
Change this monitor to APPLICATION mode
1.Turn on this monitor power.
2.Change the input mode to “APPLICATION”.
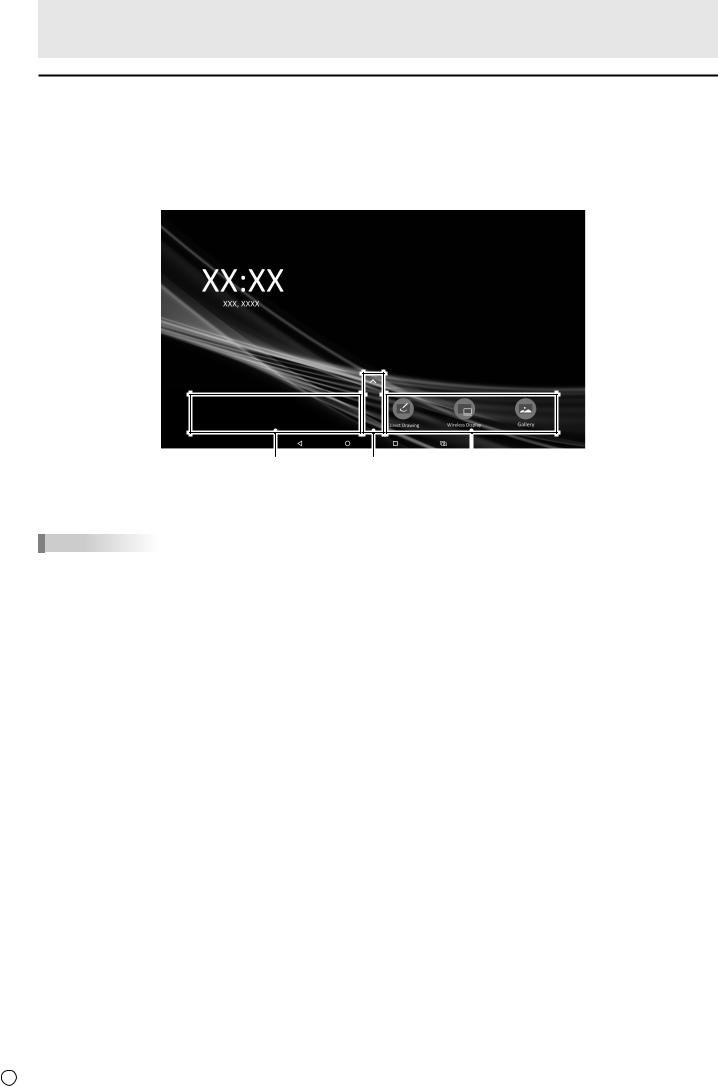
Home screen of APPLICATION mode
•In APPLICATION mode, you can also press the CONTENT MENU button on the remote control unit to show the home screen.
(2) |
(1) |
(2) |
(1)The installed applications list appears.
(2)Any application can be placed here.
TIPS
• When you use “Settings”, a password is required. (Factory setting) (See page 15.)
E 4

n Remote control unit operation
1
4
2
5
3
Introduction
1.Numeric input buttons
Use to enter numbers.
2.ENTER
Confirm the selected item.
3.CONTENT MENU
Display the home screen.
4.Cursor
These buttons are used to perform operations such as selecting applications or items, and moving the cursor.
5. RETURN
Returns to the previous screen.
TIPS
• Buttons used vary by application.
5 E

Introduction
USB port / microSD card slot
USB devices (memory device, keyboard, mouse) and a microSD memory card can be used in APPLICATION mode.
 * 1
* 1
2
1. USB port
•Connect USB devices (memory device, keyboard, mouse) that you want to use in APPLICATION mode.
•Connect a USB flash drive to be used with Direct Drawing for Android to one of the USB ports indicated by “*” above.
Supported USB flash drives
File System |
FAT32/NTFS (Read only) |
|
Capacity |
Up to 64 GB |
|
(For FAT32, the maximum file size is 4 GB) |
||
|
•A USB flash drive that is encrypted or has a security function cannot be used.
•Use a USB flash drive with a shape that can be inserted in the USB port. Some USB flash drives with special shapes cannot be inserted. Do not forcibly insert a USB flash drive. This may damage the connector or cause failure.
2. microSD card slot
•Insert a microSD memory card.
Pay attention to the orientation of the memory card, and slowly push in until you hear a “click” sound.
Supported microSD memory cards
File System |
FAT32/NTFS (Read only) |
|
|
• microSD memory card: Up to 2 GB |
|
Capacity |
• microSDHC memory card: Up to 32 GB |
|
• microSDXC memory card: Up to 64 GB |
||
|
||
|
• Maximum file size for FAT 32: 4 GB |
• Encrypted files and folders cannot be used.
• exFAT format is not supported.
TIPS
• You can prohibit the use of USB devices and a microSD memory card. (See page 15.)
n How to remove a USB flash drive or a microSD memory card
1.Display the applications list on the home screen of APPLICATION mode and select “File Explorer”.
2.Select  of the device you want to remove.
E 6
Loading...