


Связывайтесь с SAMSUNG по всему миру
Если у вас есть предложения или вопросы по продуктам Samsung, связывайтесь с информационным центром Samsung.
Страна |
Цeнтр пoддeржки пoкупaтeлeй |
Веб-узел |
RUSSIA |
8-800-555-55-55 |
www.samsung.com |
|
|
|
GEORGIA |
0-800-555-555 |
www.samsung.com |
|
|
|
ARMENIA |
0-800-05-555 |
www.samsung.com |
AZERBAIJAN |
088-55-55-555 |
www.samsung.com |
KAZAKHSTAN |
8-10-800-500-55-500(GSM: 7799) |
www.samsung.com |
UZBEKISTAN |
8-10-800-500-55-500 |
www.samsung.com |
KYRGYZSTAN |
00-800-500-55-500 |
www.samsung.com |
TADJIKISTAN |
8-10-800-500-55-500 |
www.samsung.com |
|
|
|
Mongolia |
+7-800-555-55-55 |
www.samsung.com |
|
|
|
UKRAINE |
0-800-502-000 |
www.samsung.com/ua (Ukrainian) |
|
|
www.samsung.com/ua_ru (Russian) |
BELARUS |
810-800-500-55-500 |
www.samsung.com |
MOLDOVA |
0-800-614-40 |
www.samsung.com |
Производитель:
ООО «Самсунг Электроникс Рус Калуга», 249002, Калужская обл., Боровский р-н, д. Коряково, Первый Северный проезд, владение 1
© 2013 Samsung Electronics Co., Ltd. All rights reserved. |
BN68-04898A-02 |
|
телевизорПлазменный |
PS43F4000AW |
|
Плазменный телевизор
пользователяруководство |
руководство пользователя |
|
Благодарим за приобретение продукта компании Samsung. Для получения более полного обслуживания зарегистрируйте свое
устройство по адресу:
www.samsung.com/register
Модель____Серийный номер._____________
[PF4000-RU]BN68-04898A-Cover.indd 1 |
2013-02-20 3:06:44 |
 Warning! Important Safety Instructions
(Please read the safety instructions below before installing and using the product.)
CAUTION
RISK OF ELECTRIC SHOCK. DO NOT OPEN.
CAUTION: TO REDUCE THE RISK OF ELECTRIC SHOCK, DO NOT REMOVE COVER (OR BACK). THERE ARE NO USER SERVICEABLE PARTS INSIDE. REFER ALL SERVICING TO QUALIFIED PERSONNEL.
This symbol indicates that high voltage is present inside. It is dangerous to make any kind of contact with any internal part of this product.
This symbol indicates that important literature concerning operation and maintenance has been included with this product.
•The slots and openings in the cabinet and in the back or bottom are provided for necessary ventilation. To ensure reliable operation of this apparatus, and to protect it from overheating, these slots and openings must never be blocked or covered.
-Do not cover the slots and openings with a cloth or other materials.
-Do not block the slots and openings by placing this apparatus on a bed, sofa, rug or other similar surface.
-Do not place this apparatus in a confined space, such as a bookcase or built-in cabinet, unless proper ventilation is provided.
•Do not place this apparatus near or over a radiator or heat register, or where it is exposed to direct sunlight.
•Do not place a vessel containing water (vases etc.) on this apparatus, as this can result in a risk of fire or electric shock.
•Do not expose this apparatus to rain or place it near water (near a bathtub, washbowl, kitchen sink, or laundry tub, in a wet basement, or near a swimming pool etc.). If this appratus accidentally gets wet, unplug it and contact an authorized dealer immediately.
•Make sure to pull out the power cord from the outlet before cleaning.
•This apparatus use batteries. In your community, there might be regulations that require you to dispose of these batteries properly to protect the environment. Please contact your local authorities for disposal or recycling information.
•Do not overload wall outlets, extension cords, or adaptors beyond their capacity, since this can result in fire or electric shock.
•Power-supply cords should be routed so that they are not likely to be walked on or pinched by items placed upon or against them. Pay particular attention to cords at the plug end, where connected to adaptors, and at the point where they exit from the apparatus.
•To protect this apparatus from a lightning storm, or when it is left unattended and unused for long periods of time, unplug it from the wall outlet and disconnect the antenna or cable system. This will prevent damage to the set due to lightning and power line surges.
•Before connecting the AC power cord to the DC adaptor outlet, make sure the voltage designation of the DC adaptor corresponds to the local electrical supply. (depending on the model)
•Never insert anything metallic into the open parts of this apparatus. Doing so may create a danger of electric shock.
•To avoid electric shock, never touch the inside of this apparatus. Only a qualified technician should open this apparatus.
•Make sure to plug the power cord in until it is firmly inserted. Pull on the plug, not the cord, when removing the power cord from the outlet. Do not touch the power cord with wet hands.
•If this appratus does not operate normally - in particular, if there are any unusual sounds or smells coming from it - unplug it immediately and contact an authorized dealer or service center.
•Be sure to pull the power plug out of the outlet if the TV is to remain unused or if you are to leave the house for an extended period of time (especially when children, elderly or disabled people will be left alone in the house).
-Accumulated dust can cause an electric shock, an electric leakage, or a fire by causing the power cord to generate sparks and heat, or cause the insulation to deteriorate.
•Be sure to contact an authorized service center, when installing your set in a location with heavy dust, high or low temperatures, high humidity, chemical substances or where it will operate for 24 hours a day such as in an airport, a train station, etc. Failure to do so may cause serious damage to your set.
•Use only a properly grounded plug and receptacle.
-An improper ground may cause electric shock or equipment damage. (Class l Equipment only.)
•To turn off the apparatus completely, you must pull the power plug out of the wall socket. Consequently, the power plug should be readily accessible at all times.
•Do not allow children to hang onto the product.
•Store the accessories (batteries, etc.) in a location safely out of the reach of children.
•Do not install the product in an unstable location such as a shaky self, a slanted floor, or a location exposed to vibration.
•Do not drop or impart a shock to the product. If the product is damaged, disconnect the power cord and contact a service center.
•To clean the product, unplug the power cord from the power outlet and wipe the product using a soft cloth dipped in a small amount of water. Do not use any chemicals such as wax, benzene, alcohol, thinners, insecticide, air freshener, lubricant or detergent. This may damage the appearance or erase the printing on the product.
•Do not expose the apparatus to dripping or splashing.
•Do not dispose of batteries in a fire.
•Do not short circuit, disassemble, or overheat the batteries.
•not short circuit, disassemble, or overheat the batteries.
•There is a danger of explosion if you replace the batteries with the wrong type of battery. Replace only with the same or equivalent type.
•WARNING - TO PREVENT THE SPREAD OF FIRE, KEEP CANDLES OR OTHER OPEN FLAMES AWAY FROM THIS PRODUCT AT ALL TIMES.
2 English
PF4000-RU_ENG.indd 2 |
2013-02-20 3:09:21 |

Figures and illustrations in this User Manual are provided for reference only and may differ from actual product appearance.
Product design and specifications may be changed without notice.
Digital TV notice
1.Functionalities related to Digital TV (DVB) are only available in countries/areas where DVB-T (MPEG2 and MPEG4 AVC) digital terrestrial signals are broadcasted or where you are able to access to a compatible DVB-C (MPEG2 and MPEG4 AAC) cable-TV service. Please check with your local dealer the possibility to receive DVB-T or DVB-C signal.
2.DVB-T is the DVB European consortium standard for the broadcast transmission of digital terrestrial television and DVB-C is that for the broadcast transmission of digital TV over cable. However, some differentiated features like EPG (Electric Programme Guide), VOD (Video On Demand) and so on, are not included in this specification. So, they cannot be workable at this moment.
3.Although this TV set meets the latest DVB-T and DVB-C standards, as of [August, 2008], the compatibility with future DVB-T digital terrestrial and DVB-C digital cable broadcasts cannot be guaranteed.
4.Depending on the countries/areas where this TV set is used some cable-TV providers may charge an additional fee for such a service and you may be required to agree to terms and conditions of their business.
5.Some Digital TV functions might be unavailable in some countries or regions and DVB-C might not work correctly with some cable service providers.
6.For more information, please contact your local Samsung customer care centre.
The reception quality of TV may be affected due to differences in broadcasting method between the countries. Please check the TV performance in the local SAMSUNGAuthorized Dealer, or the Samsung Call Centre whether it can be improved by reconfiguring TV setting or not.
User Instructions
• Screen Image retention
Do not display a still image (such as on a video game) on the plasma display panel for more than several minutes as it can cause screen image retention.
This image retention is also known as “screen burn”. To avoid such image retention, reduce the degree of brightness and contrast of the screen when displaying a still image.
• Heat on the top of the Plasma TV
The top side of the product may be hot after long periods of use as heat dissipates from the panel through the vent hole in the upper part of the product.
This is normal and does not indicate any defect or operation failure of the product.
However, children should be prevented from touching the upper part of the product.
• The product is making a “cracking” noise.
A“cracking” noise may occur when the product contracts or expands due to a change in the surrounding environment such as temperature or humidity.
This is normal and not a defect of the unit.
• Cell Defects
The PDP uses a panel consisting of 2,360,000(HD-level) to 6,221,000(FHD-level) pixels which require sophisticated technology to produce. However, there may be a few bright or dark pixels on the screen. These pixels will have no impact on the performance of the product.
•Avoid operating the TV at temperatures below 41°F (5°C)
•A still image displayed too long may cause permanent damage to the PDP Panel.
 Watching the Plasma TV in 4:3 format for a long period of time may leave traces of borders displayed on the left, right and centre of the screen caused by the difference of light emission on the screen. Playing a DVD or a game console may cause similar effects to the screen.
 Damages caused by the above effect are not covered by the Warranty.
• After-images on the Screen.
Displaying still images from Video games for longer than a certain period of time may produce partial after-images. To prevent this effect, reduce the “brightness” and “contrast” when displaying still images for a long time.
• Warranty
Warranty does not cover any damage caused by image retention. Burn-in is not covered by the warranty.
Correct Disposal of This Product (Waste Electrical & Electronic Equipment)
(Applicable in the European Union and other European countries with separate collection systems)
This marking on the product, accessories or literature indicates that the product and its electronic accessories (e.g. charger, headset, USB cable) should not be disposed of with other household waste at the end of their working life. To prevent possible harm to the environment or human health from uncontrolled waste disposal, please separate these items from other types of waste and recycle them responsibly to promote the sustainable reuse of material resources. Household users should contact either the retailer where they purchased this product, or their local government office, for details of where and how they can take these items for environmentally safe recycling. Business users should contact their supplier and check the terms and conditions of the purchase contract. This product and its electronic accessories should not be mixed with other commercial wastes for disposal.
Correct disposal of batteries in this product
(Applicable in the European Union and other European countries with separate battery return systems)
This marking on the battery, manual or packaging indicates that the batteries in this product should not be disposed of with other household waste at the end of their working life. Where marked, the chemical symbols Hg, Cd or Pb indicate that the battery contains mercury, cadmium or lead above the reference levels in EC Directive 2006/66. If batteries are not properly disposed of, these substances can cause harm to human health or the environment. To protect natural resources and to promote material reuse, please separate batteries from other types of waste and recycle them through your local, free battery return system.
English 3
PF4000-RU_ENG.indd 3 |
2013-02-20 3:09:22 |

Contents
Getting Started
6
Basic Features
10
Preference Features
19
Advanced Features
22
Other Information
29
6Using the TV’s Controller (Panel Key)
6Initial Setup
7Viewing the Remote Control
8Connections
9Connecting to a COMMON INTERFACE slot (Your TV viewing Card Slot)
9 Changing the Input Source
9Source
10Using the INFO button (Now & Next guide)
10Memorizing channels
10Using the Channel menu
13Locking Programme
13Other Features
15Changing the Preset Picture Mode
15Adjusting Picture Settings
16Changing the Picture Options
17Changing the Preset Sound Mode
17Adjusting Sound Settings
18Selecting the Sound Mode
19Executing initial setup
19Setting the Time
19Using the Sleep Timer
19Setting the On / OffTimer
20Economical Solutions
20Other Features
22 Using the Source List
22Connecting a USB Device
23Using the Media Contents
24Playing the Photos / Videos / Music
27Using the Self Diagnosis
27Updating the Software
28Changing the Use Mode
28Viewing the Contact Samsung
28Using the Sports Mode
29Teletext Feature
30Installing the Wall Mount
31Securing the TV to the Wall
31Anti-theft Kensington Lock
32Troubleshooting
35 Licence
35Storage and Maintenance
36Specifications
37Index
Check the Symbol!
|
t |
|
O |
|
|
|
|
|
This function can be used by pressing the |
NOTE |
One-Touch Button |
|
TOOLS button on the remote control. |
||
|
|
|
|
4 |
English |
|
|
PF4000-RU_ENG.indd 4 |
2013-02-20 3:09:23 |
Accessories
Please make sure the following items are included with your TV. If any items are missing, contact your dealer.
The items’ colours and shapes may vary depending on the models.
Cables not included in the package contents can be purchased separately.
• Remote Control & Batteries |
(AAAx 2) |
• |
Power Cord |
|
• |
Regulatory Guide |
|
||
|
• |
Cleaning Cloth |
||
• |
Owner’s Instructions |
|
||
|
|
|
||
|
|
|
|
|
Started Getting 01
• Holder-Wire Stand |
Assembling the Holder-Wire stand |
||
|
|
|
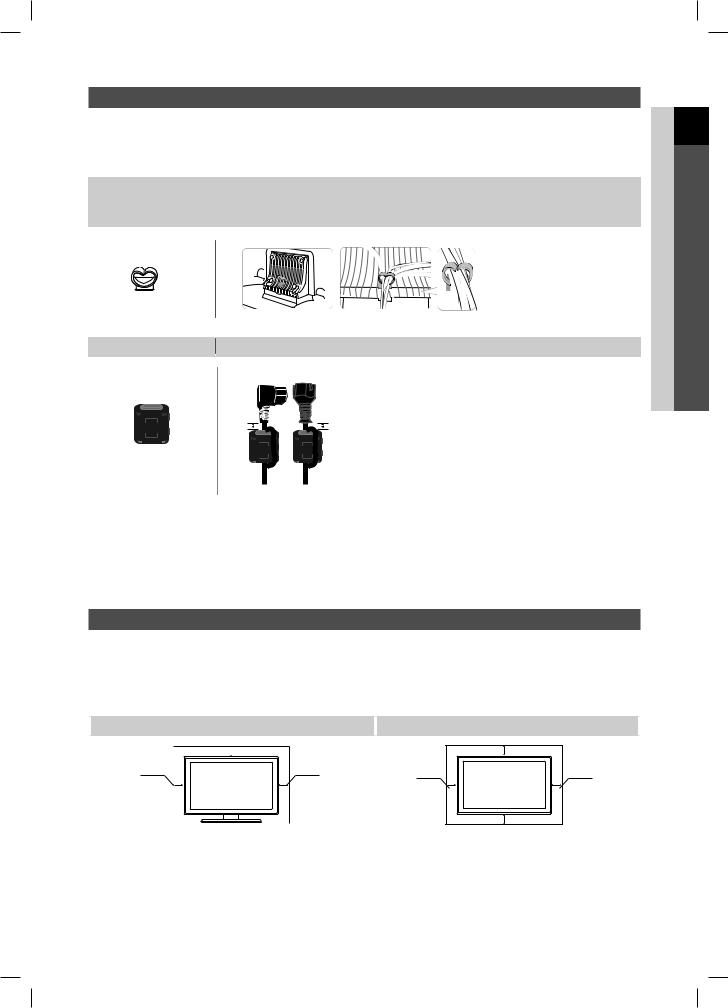
Ferrite Core for Power Cord: The ferrite cores are used |
|
|
|
to shield the cables from interference. When connecting |
|
|
|
a cable, open the ferrite core and clip it around the cable |
|
A |
B |
near the plug as shown in the figure. |
|
• A Maximum distance between the ferrite core and |
||
|
|
|
|
|
|
|
the end of the cord inserted in the TV: 3/4 inches |
Ferrite Core (2EA) |
|
|
• B Maximum distance between the ferrite core and |
|
|
|
the other end of the cord inserted in theAC outlet: |
|
|
|
3/4 inches |
An administration fee may be charged if either
(a)an engineer is called out at your request and there is no defect in the product
(i.e. where you have failed to read this user manual)
(b)you bring the unit to a repair centre and there is no defect in the product
(i.e. where you have failed to read this user manual)
The amount of such administration charge will be advised to you before any work or home visit is carried out.
Securing the Installation Space
Keep the required distances between the product and other objects (e.g. walls) to ensure proper ventilation.
Failing to do so may result in fire or a problem with the product due to an increase in the internal temperature of the product.
When using a stand or wall-mount, use parts provided by Samsung Electronics only.
• If you use parts provided by another manufacturer, it may result in a problem with the product or an injury due to the product falling.
The appearance may differ depending on the product.
Be careful when you contact the TV because some parts can be somewhat hot.
Installation with a stand. |
Installation with a wall-mount. |
 10 cm
10 cm
10 cm |
10 cm |
|
10 cm |
10 cm |
10 cm |
|
10 cm |
English 5
PF4000-RU_ENG.indd 5 |
2013-02-20 3:09:24 |

Getting Started
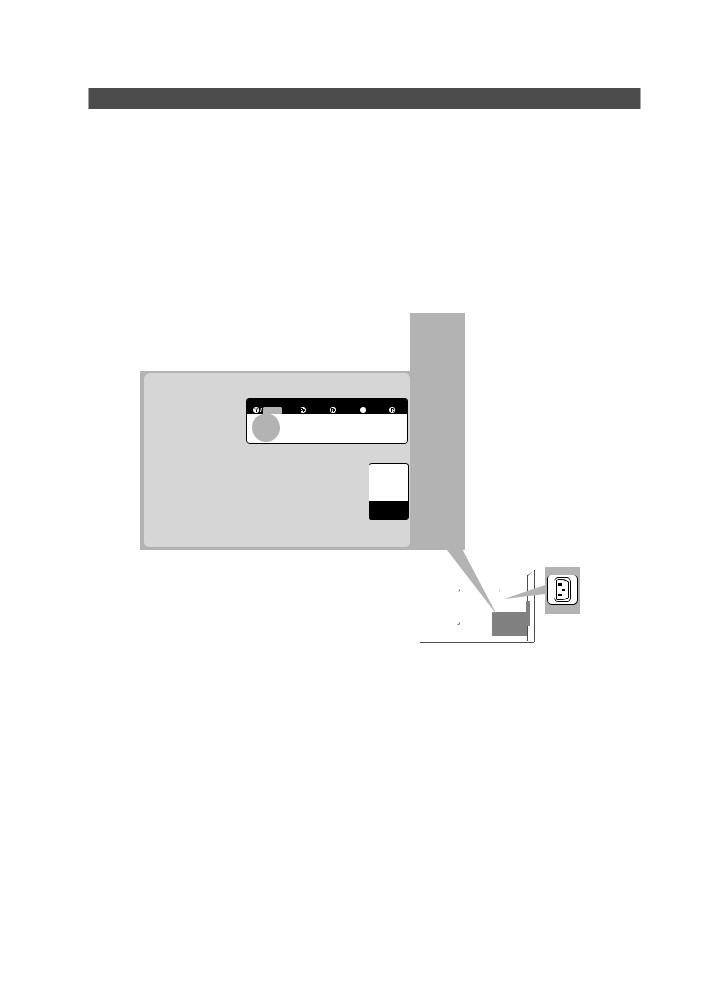
Using the TV’s Controller (Panel Key)
The TV's Controller, a small joy stick like button on the rear left side of the TV, lets you control the TV without the remote control.
Some functions which require a PIN code may not be available.
The product colour and shape may vary depending on the model.
Exits the menu when pressing the controller more than 1 second.
When using the controller in the up/down/left/right directions, make sure you do not push the controller in first. If you push the controller in first it will not move in the up/down/left right directions.
Selecting the Media Play
Selecting the Menu 


 Selecting a Source
Return
TV Controller
The image is drawn by facing the front side of the TV.
Power off
Function menu
Remote control sensor
Standby mode
Do not leave your TV in standby mode for long periods of time (when you are away on a holiday, for example).Asmall amount of electric power is still consumed even when the power button is turned off. It is best to unplug the power cord.
Initial Setup
When the TV is initially powered on, a sequence of on-screen prompts will assist in configuring basic settings. Press the
POWERPbutton. Setup is available only when the source is set to TV.
If you connect any device to HDMI IN 1(STB) before starting the installation,Channel Source will be changed toSet-top box automatically. If you do not want to select Set-top box, please selectAerial.
If You Want to Reset This Feature...
Select System - Setup (Initial Setup). Enter your 4 digit PIN number. The default PIN number is “0-0-0-0”. If you want to change the PIN number, use the Change PIN function.
You should do Setup (MENU → System) again at home even though you did in shop already.
If you forget the PIN code, press the remote control buttons in the following sequence in Standby mode, which resets the
PIN to “0-0-0-0”:MUTE → 8 → 2 → 4 →POWER (on)
6 English
PF4000-RU_ENG.indd 6 |
2013-02-20 3:09:24 |

Viewing the Remote Control
This is a special remote control for the visually impaired persons and has Braille points on the Power, Channel, and Volume buttons.
Turns the TV on and off.
Alternately select Teletext ON, Double, Mix or OFF.
Adjusts the volume. 
Displays the main on-screen menu.
Displays Media Play.
Quickly select frequently used functions. 
Selects the on-screen menu items and changes the  values seen on the menu.
Returns to the previous menu. 
P.SIZE: Selects the picture size.  SRS: Selects the TruSurround HD mode.
SRS TS HD and DTS TS HD are the same function.
AD/SUBT.:Audio Description selection. (Not available in some locations) / Displays digital subtitles.
 Displays and selects the available video sources.
Press to directly access to channels.

 Returns to the previous channel.
 Cuts off the sound temporarily.
 Changes channels.
Displays channel lists on the screen.
Displays the EPG (Electronic Programme Guide).
MEDIA.P
 Displays information on the TV screen.
|
|
|
|
Exits the menu. |
A |
B |
C |
D |
Use these buttons according to the direction on |
|
|
|
|
screen. |
P.SIZE |
SRS |
AD/SUBT. |
|
|
|
|
|
|
Use these buttons in a specific feature. |
Started Getting 01
Installing batteries (Battery size: AAA)
English 7
PF4000-RU_ENG.indd 7 |
2013-02-20 3:09:25 |
Getting Started
AV connection
BD Player
AUDIO OUT VIDEO OUT
R-AUDIO-L
R W Y
R W Y
It supports both Component andAV connection in one port.
Connections
|
Component connection |
|
HDMI connection |
|||||
|
|
BD Player |
|
|
Set top Box / BD Player |
|||
COMPONENT OUT |
AUDIO OUT |
HDMI OUT |
||||||
|
|
|
|
|
|
|||
PR |
PB |
Y |
R-AUDIO-L |
|
|
|
||
|
|
|
||||||
|
|
|
|
|
|
|||
R |
B |
G |
R |
W |
|
|
|
|
G |
B |
R |
W |
R TV Side Panel |
|
|
HDMI 2IN
HDMI(STB) 1IN
USB0.5A)(5V


USB
EXT (RGB)
AIR/CABLE
ANT IN
COMMON INTERFACE
VHF/UHFAntenna 
|
|
|
|
or |
TV Rear Panel |
|
|
|
|
The position of port may differ depending |
|
|
|
|
|
|
|
|
|
|
|
|
on the model. |
|
|
|
|
|
The PDP device may interfere with an amateur radio orAM radio. |
|
|
EXT |
|
|
When using two-way radio mobile and portable units or amateur |
|
|
|
|
|
|
|
|
|
|
|
radio orAM radio near by your TV, this may cause the TV to |
|
|
|
|
|
|
|
|
|
|
|
malfunction. |
|
|
|
|
|
Cable
VCR or DVD
SCART connection
For set-top box connection using HDMI cable, we highly recommend you to connect theHDMI IN 1(STB) port.
8 English
PF4000-RU_ENG.indd 8 |
2013-02-20 3:09:26 |

¦¦ Connecting to a COMMON INTERFACE slot (Your TV viewing Card Slot)
To watch paid channels, the “CI or CI+ CARD” must be inserted. |
|
• If you do not insert the “CI or CI+ CARD”, some channels will |
|
display the message “Scrambled Signal”. |
|
• The pairing information containing a telephone number, the |
|
“CI or CI+ CARD” ID the Host ID and other information will |
|
be displayed in about 2~3 minutes. If an error message is |
|
displayed, please contact your service provider. |
|
• When the configuration of channel information has finished, |
|
the message “Updating Completed” is displayed, indicating the |
• The image may differ depending on the model. |
channel list is updated. |
|
NOTE
•You must obtain a “CI or CI+ CARD” from a local cable service provider.
•When removing the “CI or CI+ CARD”, carefully pull it out with your hands since dropping the “CI or CI+ CARD” may cause damage to it.
•Insert the “CI or CI+ CARD” in the direction marked on the card.
•The location of the COMMON INTERFACE slot may be different depending on the model.
•“CI or CI+ CARD” is not supported in some countries and regions; check with your authorized dealer.
•If you have any problems, please contact a service provider.
•Insert the “CI or CI+ CARD” that supports the current aerial settings. The screen will be distorted or will not be seen.
Changing the Input Source
¦¦ Source
TV / Ext. / HDMI1 / HDMI2 / AV / Component
Use to select TV or other external input sources such as DVD / Blu-ray players / cable box / STB satellite receiver connected to the TV.
Press the SOURCE button. In the displayed Source list, connected inputs will be highlighted.Ext. always stays activated.
Press the TOOLS button.
•Edit Name
You can set an external input source name you want.
•Information
You can see detailed information about the connected external device.
The TV model is not allowed for PC connection (distortion or incorrect picture displaying can appear).
English 9
Started Getting 01
PF4000-RU_ENG.indd 9 |
2013-02-22 10:39:30 |

Basic Features
Channel Menu
¦¦ Using the INFO button (Now & Next guide)
The display identifies the current channel and the status of certain audio-video settings.
The Now & Next guide shows daily TV programme information for each channel according to the broadcasting time.
When you press the INFO button, a channel information banner will appear on the top of the screen. And then press the ENTEREbutton, you can see the details of the programme.
•Scroll ◄, ► to view information for a desired programme while watching the current channel.
•Scroll ▲, ▼ to view information for other channels.
¦¦ Memorizing channels
Aerial
OO MENUm→ Broadcasting → Aerial → ENTERE
Before your television can begin memorising the available channels, you must specify the type of signal source that is connected to the TV.
Auto Tuning
(depending on the country)
OO MENUm→ Broadcasting → Auto Tuning →
ENTERE
Automatically allocated programme numbers may not correspond to actual or desired programme numbers. If a channel is locked, the PIN input window appears.
•Auto Tuning
Aerial (Air / Cable): Select the aerial source to memorise.
When selecting Air, scans for a channel automatically and stores in the TV.
Channel Type (Digital & Analogue / Digital / Analogue):
Select the channel source to memorise.
When selecting Cable → Digital & Analogue, Digital or
Analogue
–– |
Operator Selection (depending on the country): |
|
Selects a provider of cable services. |
–– |
Search Mode: Scans for all channels with active |
|
broadcast stations and stores them in the TV. |
|
If you select Quick, you can set up the Network, |
|
Network ID, Frequency, Modulation and |
|
Symbol Rate manually by pressing the button |
|
on the remote control. |
–– Network: Selects the Network ID setting mode among Auto or Manual.
•Network ID: When Network is Manual, you can set up Network ID using the numeric buttons.
•Frequency: Displays the frequency for the channel
(differs in each country).
•Modulation: Displays available modulation values.
•Symbol Rate: Displays available symbol rates.
•Cable Search Option
(depending on the country & cable channels only)
Sets additional search options such as the frequency and symbol rate for a cable network search.
Start Frequency / Stop Frequency: Set the start or stop frequency (differs in each country).
Symbol Rate: Displays available symbol rates.
Modulation: Displays available modulation values.
¦¦ Using the Channel menu
OO MENUm→ Broadcasting → Channel List →
ENTERE
Channel List
The Channel List contains the channels your TV displays when you press the channel button. You can view channel information, All, TV, Radio, Data/Other, Analogue or Favourites 1-5.
Press ► (Mode) button to change the channel mode, or press
◄ (Sorting) button to change the channel order according to channel number or name on the list.
When you press the CH LIST button on the remote control, Channel List screen will be displayed at once.
Channel Sorting
•Number / Name:Arranges the channel order according to channel number or name on the list.
10 English
PF4000-RU_ENG.indd 10 |
2013-02-20 3:09:28 |
Channel Mode
•Air / Cable: Switches to Air or Cable.
•Edit Favourites: Set channels you watch frequently as favourites.
For detailed information about usingEdit Favourites, refer to “Edit Favourites”.
•Favourites 1-5: Shows all favourite channels, arranged in up to five groups. Each group has a separate screen.
The TV displays Favourites 1-5 only if you have added favourites using Edit Favourites.
•All: Shows all currently available channels.
•TV: Shows all currently available TV channels.
•Radio: Shows all currently radio channels.
•Data/Other: Shows all currently available MHP or other channels.
•Analogue: Shows all currently available analogue channels.
Guide
OO MENUm→ Broadcasting → Guide → ENTERE
The EPG (Electronic Programme Guide) information is provided by broadcasters. Using programme schedules provided by broadcasters, you can specify programmes you want to watch in advance so that the channel automatically changes to the selected programme channel at the specified time. Programme entries may appear blank or out of date depending on a channel status.
•aRed (Quick Nav): Viewing the TV programmes on the list quickly using ▲/▼/◄/► buttons.
•bGreen (Channel Category): Select the type of channels you want to display.
•{Yellow (Schedule Manager): Moves to the reserved programmes in Schedule Manager.
Schedule Manager
OO MENUm→ Broadcasting → Schedule Manager →
ENTERE
You can set a desired channel to be displayed automatically at the intended time. In addition, you can view, modify or delete a channel you have reserved to watch.
You must set the current time first using the Time → Clock function in the System menu to use this function.
1. Press the Schedule on the Schedule Manager screen.
The Schedule Viewing menu appears.
2. Press the ▲/▼/◄/► buttons to set each option menu.
• Aerial: Select the desired broadcasting signal.
• Channel: Select the desired channel.
• Repeat: Select Once, Manual, Sat~Sun, Mon~Fri or Everyday to set at your convenience. If you select
Manual, you can set the day you want.
The (c) mark indicates the day you’ve selected.
• Date: You can set the desired date.
It is available when you selectOnce in Repeat.
•Start Time: You can set the start time you want.
If you want to edit or cancel a reserved schedule, select the reserved schedule on Schedule Manager. Then press the ENTEREbutton and select theEdit or
Delete.
 Features Basic 02
English 11
PF4000-RU_ENG.indd 11 |
2013-02-20 3:09:28 |

Basic Features
Edit Channel
OO MENUm→ Broadcasting → Edit Channel →
ENTERE
You can edit or delete channels.
1.Go to Edit Channel screen.
2.Press the ▲/▼ buttons to select the desired channel, then press the ENTEREbutton. The (c) mark indicates the channel you’ve selected.
You can select more than one channel.
Press the ENTEREagain to deselect the channel.
Using the coloured and function buttons with the Edit Channel.
• aRed (Change Number): Changes channel order on the channel list.
• bGreen (Lock / Unlock): Lock a channel so that the channel cannot be selected and viewed. / Unlock the channel that you locked.
This function is available only when theChannel Lock is set to On.
The PIN input screen appears. Enter your 4-digit PIN. Change the PIN using the Change PIN option.
•{Yellow (Delete): Deletes a channel from the channel list.
•}Blue (Select All / Deselect All): Selects or deselects all channels at once.
• (Go To): Goes to channel directly by pressing numbers (0~9).
•k(Page): Move to previous or next page.
•E(Done): Completes changing the channel order.
•T(Tools): Displays the option menu. The option menu items that appear may differ depending on the channel status and type.
–– Sorting (digital channels only): Changes the list ordered by channel number or channel name.
–– Aerial: Select the desired broadcasting signal.
–– Category: Change the channel mode toAll, TV,
Radio, Data/Other,Analogue, Recently Viewed,
Most Viewed. The selected channel mode is displayed.
–– Edit Favourites: Go toEdit Favourites screen directly.
–– Rename channel (analogue channels only):
Assign a name of up to five characters to a channel. For example, Food, Golf, etc. This makes it easier to find and select the channel.
–– Channel Info: Display details of the selected channel.
–– Information: Display details of the selected programme.
12 English
Edit Favourites t
OO MENUm→ Broadcasting → Edit Favourites →
ENTERE
You can add, edit or delete favourite channels.
1.Go to Edit Favourites screen.
2.Press the ▲/▼ buttons to select the desired channel, and then press ENTEREbutton.
3.Choose a specific favourite list amongFavourites 1-5 using b(Change Fav.) button, and then press the {
(Add) button. The selected channel has been added in
Favourites 1-5.
One favourite channel can be added in several of favourites among Favourites 1-5.
Using the coloured and function buttons with the Edit Favourites.
•aRed (Category / Change order)
–– Category: Changes the channel mode toAll, TV,
Radio, Analogue, Data/Other, Recently Viewed,
Most Viewed. The selected channel mode is displayed.
–– Change order: Changes the favourite channel order.
–– E(Done): Completes changing the channel order.
•bGreen (Change Fav.): Changes favourite list among Favourites 1-5.
•{Yellow (Add / Delete)
–– Add:Adds selected channels to Favourites 1-5.
–– Delete: Deletes the favourite channel from
Favourites 1-5.
•}Blue (Select All / Deselect All): Selects or deselects all channels at once.
• (Go To): Goes to channel directly by pressing numbers (0~9).
•k(Page): Move to previous or next page.
•T(Tools): Displays the option menu. The option menu items that appear may differ depending on the channel status and type.
–– Copy to favourites: Edit the selected favourite channel in Favourites 1-5. You can add or delete from favourite list.
–– Rename Favourites:Assign your own favourite channel name.
–– Aerial: Select the desired broadcasting signal.
–– Edit Channel: Go toEdit Channel screen directly.
–– Information: Display details of the selected programme.
PF4000-RU_ENG.indd 12 |
2013-02-20 3:09:30 |

¦¦ Locking Programme
Programme Rating Lock
(depending on the country)
OO MENUm→ Broadcasting → Programme Rating Lock → ENTERE
Prevent unauthorized users, such as children, from watching unsuitable programme with a user-defined 4-digit PIN code. If the selected channel is locked, the “\” symbol will be displayed.
The items of Programme Rating Lock differs depending on the country.
Channel Lock
OO MENUm→ Broadcasting → Channel Lock →
ENTERE
Lock channels in Channel menu to prevent unauthorized users, such as children, from watching unsuitable programme.
Available only when theSource is set to TV.
¦¦ Other Features
Channel Settings
OO MENUm→ Broadcasting → Channel Settings →
ENTERE
•Country (Area)
(depending on the country)
The PIN input screen appears. Enter your 4 digit PIN number.
Digital Channel: Change the country for digital channels.
Analogue Channel: Change the country for analogue channels.
•Manual Tuning
Scans for a channel manually and stores in the TV.
If a channel is locked, the PIN input window appears.
According to the channel source,Manual Tuning may be supported.
•Digital Channel Tuning: Scans for a digital channel manually and stores in the TV. Press the New button to search the digital channels. When scanning has finished, a channel is updated in the channel list.
––When selecting Aerial → Air: Channel, Frequency, Bandwidth
––When selecting Aerial →Cable: Frequency, Modulation, Symbol Rate
• Analogue Channel Tuning: Scans for an analogue channel. Press the New button to search the channels by adjusting the Programme,Colour System, Sound System, Channel, Search.
Channel mode
––P (programme mode): When tuning is complete, the broadcasting stations in your area have been assigned to the position numbers from P0 to P99. You can select a channel by entering the position number in this mode.
––C (aerial channel mode) /S (cable channel mode): These two modes allow you to select a channel by entering the assigned number for each aerial broadcasting station or cable channel.
•Fine Tune
(analogue channels only)
If the signal is weak or distorted, fine tune the channel manually.
Fine tuned channels are marked with an asterisk “*”.To reset the fine-tuning, selectReset.
•Transfer Channel List
(depending on the country)
Imports or exports the channel map. You should connect a
USB storage to use this function.
The PIN number input screen appears. Enter your 4 digit PIN number.
Supported file systems are FAT and exFAT.
•Delete CAM Operator Profile: Selects the CAM operator to delete.
 Features Basic 02
English 13
PF4000-RU_ENG.indd 13 |
2013-02-20 3:09:31 |

Basic Features
Subtitle t
OO MENUm→ Broadcasting → Subtitle→ ENTERE
Use this menu to set the Subtitle mode.
•Subtitle: Switches subtitles on or off.
•Subtitle Mode: Sets the subtitle mode.
•Subtitle Language: Sets the subtitle language.
If the programme you are watching does not support the Hearing Impaired function,Normal automatically activates even if the Hearing Impaired mode is selected.
English is the default in cases where the selected language is unavailable in the broadcast.
•Primary Subtitle: Sets the primary subtitle.
•Secondary Subtitle: Sets the secondary subtitle.
Audio Options
(digital channels only)
OO MENUm→ Broadcasting → Audio Options →
ENTERE
•Audio Language t
Change the default value for audio languages.
Primary Audio / Secondary Audio: You can set the primary or secondary audio.
The available language may differ depending on the broadcast.
•Audio Format
When sound is emitted from both the main speaker and the audio receiver, a sound echo may occur due to the decoding speed difference between the main speaker and the audio receiver. In this case, use the TV Speaker function.
Audio Format option may differ depending on the broadcast. 5.1ch Dolby digital sound is only available when connecting an external speaker through an optical cable.
•Audio Description (not available in all locations)
This function handles theAudio Stream for theAD (Audio Description) which is sent along with the Main audio from the broadcaster.
Audio Description: Turn the audio description function on or off.
Volume:Adjust the audio description volume.
Teletext Language
(depending on the country)
OO MENUm→ Broadcasting → Teletext Language →
ENTERE
•Teletext Language
English is the default in cases where the selected language is unavailable in the broadcast.
•Primary Teletext / Secondary Teletext
Primary Teletext and Secondary Teletext may not be supported in some locations.
Digital Text
(UK only)
OO MENUm→ Broadcasting → Digital Text→ ENTERE
If the programme broadcasts with digital text, this feature is enabled.
MHEG (Multimedia and Hypermedia Information Coding Experts Group) An International standard for data encoding systems used in multimedia and hypermedia. This is at a higher level than the MPEG system which includes data-linking hypermedia such as still images, character service, animation, graphic and video files as well as multimedia data. MHEG is
user runtime interaction technology and is being applied to various fields including VOD (Video-On-Demand), ITV (Interactive TV), EC (Electronic Commerce), tele education, teleconferencing, digital libraries and network games.
14 English
PF4000-RU_ENG.indd 14 |
2013-02-20 3:09:32 |

Common Interface
OO MENUm→ Broadcasting → Common Interface→
ENTERE
•CI Menu: This enables the user to select from the CAMprovided menu. Select the CI Menu based on the menu
PC Card.
•CAM video transcoding: You can configure the setting to transcode the video codec from the CAM automatically. Turn it Off if you do not want to use it.
You must use a CAM that supports transcoding the video codec.
•Application Info: View information on the CAM inserted into the CI slot and on the “CI or CI+ CARD” which is inserted into the CAM. You can install the CAM anytime whether the TV is on or off.
1.Purchase a CI CAM module at your nearest dealer or by phone.
2.Firmly insert the “CI or CI+ CARD” into the CAM in the direction of the arrow.
3.Insert the CAM with the “CI or CI+ CARD” into the common interface slot, in the direction of the arrow so that it aligns parallel with the slot.
4.Check if you can see a picture on a scrambled signal channel.
Picture Menu
¦¦ Changing the Preset Picture Mode
Picture Mode t
OO MENUm→ Picture → Picture Mode → ENTERE
Select your preferred picture type.
•Dynamic: Suitable for a bright room.
•Standard: Suitable for a normal environment.
•Movie: Suitable for watching movies in a dark room.
¦¦ Adjusting Picture Settings
Cell Light / Contrast / Brightness / Sharpness / Colour / Tint (G/R)
Your television has several setting options for picture quality control.
NOTE
•In analogueTV, Ext., AV modes of the PALsystem, the Tint (G/R) function is not available.
•Settings can be adjusted and stored for each external device connected to the TV.
•Lowering picture brightness reduces power consumption.
Picture Size
OO MENUm→ Picture → Picture Size → ENTERE
Set the various picture options such as picture size and aspect ratio.
The available items may differ depending on the selected mode.
Depending on the input source, the picture size options may vary.
•Picture Size t: Your cable box/satellite receiver may have its own set of screen sizes as well. However, we highly recommend you use 16:9 mode most of the time.
Auto Wide:Automatically adjusts the picture size to the
16:9 aspect ratio.
16:9: Sets the picture to 16:9 wide mode.
Wide Zoom: Magnifies the picture size more than 4:3.
Adjusts thePosition by using ▲, ▼ buttons.
Zoom: Magnifies the 16:9 wide pictures vertically to fit the screen size.
Adjusts theZoom or Position by using ▲, ▼ button. 4:3: Sets the picture to basic (4:3) mode.
Do not watch in 4:3 format for a long time. Traces of borders displayed on the left, right and centre of the screen may cause image retention (screen burn) which are not covered by the warranty.
Screen Fit: Displays the full image without any cut-off when HDMI (720p / 1080i / 1080p) or Component (1080i / 1080p) signals are inputted.
 Features Basic 02
English 15
PF4000-RU_ENG.indd 15 |
2013-02-20 3:09:32 |

Basic Features
•Zoom/Position:Adjust the picture size and position. It is only available inZoom.
•Position:Adjust the picture position. It is only available in
Screen Fit or Wide Zoom.
NOTE
•After selecting Screen Fit in HDMI (1080i / 1080p) or
Component (1080i / 1080p) mode, you may need to centre the picture:
1.Select thePosition. Press the ENTEREbutton.
2.Press the ▲, ▼, ◄ or ► button to move the picture.
•If you want to reset the position you adjusted, select
Reset in the Position screen. The picture will be set to its default position.
•If you use the Screen Fit function with HDMI 720p input, 1 line will be cut at the top, bottom, left and right as in the overscan function.
•4:3 Screen Size:Available only when picture size is set to Auto Wide. You can determine the desired picture size at the 4:3 WSS (Wide Screen Service) size or the original size. Each European country requires different picture size.
PIP
OO MENUm→ Picture → PIP → ENTERE
You can watch the TV tuner and one external video source simultaneously. For example, if you have a cable box connected to the Cable In jack, you can usePIP to watch programs from the cable box and watch a movie from a Bluray player attached to the HDMI In jack.
NOTE
•If you turn the TV off while watching in PIP mode, the PIP window will disappear.
•You may notice that the picture in the PIP window becomes slightly unnatural when you use the main screen to view a game or karaoke.
•PIP settings
Main picture |
Sub picture |
Component, HDMI |
TV |
•PIP:Activate or deactivate the PIP function.
•Aerial: Select either Air or Cable as the input source for the sub-screen.
•Channel: Select the channel for the sub-screen.
•Size: Select a size for the sub-picture.
•Position: Select a position for the sub-picture.
•Sound Select: You can choose the desired sound in
PIP mode.
16 English
¦¦ Changing the Picture Options
Advanced Settings
OO MENUm→ Picture → Advanced Settings →
ENTERE
(available inStandard /Movie mode)
You can adjust the detailed setting for the screen including colour and contrast.
•Dynamic Contrast:Adjust the screen contrast.
•Black Tone: Select the black level to adjust the screen depth.
•Flesh Tone:Adjust the flesh tone colour.
•RGB Only Mode: Displays the Red, Green and Blue colour for making fine adjustments to the hue and saturation.
•Colour Space:Adjust the range of colours available to create the image.
•White Balance:Adjust the colour temperature for a more natural picture.
R-Offset / G-Offset / B-Offset:Adjust each colour’s (red, green, blue) darkness.
R-Gain / G-Gain / B-Gain:Adjust each colour’s (red, green, blue) brightness.
Reset: Resets the White Balance to its default settings.
•Gamma:Adjust the primary colour intensity.
•Motion Lighting: Reduce power consumption by brightness control adapted motion.
Only available in Standard mode.
When changing a setting value of Cell Light,
Brightness or Contrast, Motion Lighting will be set to Off.
PF4000-RU_ENG.indd 16 |
2013-02-20 3:09:33 |

Picture Options
OO MENUm→ Picture → Picture Options → ENTERE
•Colour Tone
Warm1 or Warm2 will be deactivated when the picture mode is Dynamic.
Settings can be adjusted and stored for each external device connected to an input on the TV.
•Digital Clean View: If the broadcast signal received by your TV is weak, you can activate theDigital Clean View feature to reduce any static and ghosting that may appear on the screen.
When the signal is weak, try other options until the best picture is displayed.
•MPEG Noise Filter: Reduces MPEG noise to provide improved picture quality.
•HDMI Black Level: Selects the black level on the screen to adjust the screen depth.
Available only in HDMI mode (RGB signals).
•Film Mode: Sets the TV to automatically sense and process film signals from all sources and adjust the picture for optimum quality.
Available in TV mode and external input mode which supports SD (480i / 576i) and HD (1080i).
If the screen does not seem natural, change its option to Off / Auto1 / Auto2 in Film Mode.
•Analog Clean View (analogue channels only): Reduces diagonal noise in picture caused by the crosstalk of signals.
Picture Off
OO MENUm→ Picture → Picture Off → ENTERE
The screen is turned off but the sound remains on. Press any button except volume button to turn on the screen.
Reset Picture
OO MENUm→ Picture → Reset Picture → ENTERE
Resets your current picture mode to its default settings.
Sound Menu
¦¦ Changing the Preset Sound Mode
Sound Mode
OO MENUm→ Sound → Sound Mode → ENTERE
•Standard: Selects the normal sound mode.
•Music: Emphasizes music over voices.
•Movie: Provides the best sound for movies.
•Clear Voice: Emphasizes voices over other sounds.
•Amplify: Increase the intensity of high-frequency sound to allow a better listening experience for the hearing impaired.
¦¦ Adjusting Sound Settings
Sound Effect
(standard sound mode only)
OO MENUm→ Sound → Sound Effect → ENTERE
•DTS TruSurround
This function provides a virtual 5.1 channel surround sound experience through a pair of speakers using HRTF (Head Related Transfer Function) technology.
•DTS TruDialog
This function allows you to increase the intensity of a voice over background music or sound effects so that dialogue can be heard more clearly.
•Equaliser
Use Equaliser to customize sound setting for each speaker.
Balance:Adjusts the balance between the right and left speaker.
100Hz / 300Hz / 1kHz / 3kHz / 10kHz (Bandwidth
Adjustment):Adjusts the level of specific bandwidth frequencies.
Reset: Resets the equaliser to its default settings.
 Features Basic 02
English 17
PF4000-RU_ENG.indd 17 |
2013-02-20 3:09:34 |

Basic Features
Speaker Settings
OO MENUm→ Sound → Speaker Settings → ENTERE
•Auto Volume
To equalize the volume level on each channel, set to
Normal.
Night: This mode provides an improved sound experience compared to Normal mode, making almost no noise. It is useful at night.
To use the volume control on the source device connected to the TV, set Auto Volumeto Off on the
TV. Otherwise, a change to the volume control of the source device may not be applied.
Additional Settings
OO MENUm→ Sound → Additional Settings →
ENTERE
•DTV Audio Level (digital channels only): This function allows you to reduce the disparity of a voice signal (which is one of the signals received during a digital TV broadcast) to a desired level.
According to the type of broadcast signal,MPEG / HE-AAC can be adjusted between -10dB and 0dB.
To increase or decrease the volume, adjust between the range 0 and -10 respectively.
•Dolby Digital Comp: This function minimizes signal disparity between a dolby digital signal and a voice signal (i.e. MPEGAudio, HE-AAC,ATV Sound).
Select Line to obtain dynamic sound, and RFto reduce the difference between loud and soft sounds at night time.
Line: Set the output level for signals greater or less than -31dB (reference) to either -20dB or -31dB.
RF: Set the output level for signals greater or less than -20dB (reference) to either -10dB or -20dB.
Reset Sound
OO MENUm→ Sound → Reset Sound → ENTERE
Reset all sound settings to the factory defaults.
¦¦ Selecting the Sound Mode t
When you set to Dual I-II, the current sound mode is displayed on the screen.
|
Audio |
Dual I-II |
Default |
|
Type |
||
|
|
|
|
|
Mono |
Mono |
Automatic |
|
|
|
|
A2 Stereo |
Stereo |
Stereo ↔ Mono |
change |
|
|||
|
|
|
|
|
Dual |
Dual I ↔ Dual II |
Dual I |
|
|
|
|
|
Mono |
Mono |
Automatic |
|
|
|
|
NICAM |
Stereo |
Mono ↔ Stereo |
change |
Stereo |
|
||
|
|
|
|
|
Dual |
Mono → Dual I |
Dual I |
|
Dual II |
||
|
|
|
If the stereo signal is weak and an automatic switching, occurs, then switch to the mono.
Only activated in stereo sound signal.
Only available when theSource is set to TV.
18 English
PF4000-RU_ENG.indd 18 |
2013-02-20 3:09:35 |

•System Menu
¦¦ Executing initial setup
Setup
OO MENUm→ System → Setup → ENTERE
Configure the channels and the time when setting up the TV for the first time or when resetting the unit.
Execute the initial setup following instructions that the TV guides.
¦¦ Setting the Time
Time
OO MENUm→ System → Time → ENTERE
The current time will appear every time you press theINFO button.
•Clock: Setting the clock is for using various timer features of the TV.
If you disconnect the power cord, you have to set the clock again.
Clock Mode: Set up the current time manually or automatically.
––
The aerial must be connected in order to set the time automatically.
–– Manual: Set the current time manually.
Depending on the broadcast station and signal, the auto time set up may not be correct. In this case, set the time manually.
Clock Set: Set the Date and Time.
Available only whenClock Mode is set to Manual.
You can set the Date and Time directly by pressing the number buttons on the remote control.
Time Zone (depending on the country): Select your time zone.
This function is only available when theClock Mode is set to Auto.
When selecting Manual in Time Zone, GMT and
DST will be activated.
¦¦ Using the Sleep Timer
OO MENUm→ System → Time → Sleep Timer →
ENTERE
•Sleep Timer t:Automatically shuts off the TV after a preset period of time. (30, 60, 90, 120, 150 and 180 minutes)
Use the ▲/▼ buttons to select a period of time, and then press ENTERE. To cancel the Sleep Timer, select Off.
¦¦ Setting the On / Off Timer
OO MENUm→ System → Time → On Timer<or> Off Timer → ENTERE
•On Timer: You can set up three separate On Timer configurations. (On Timer 1, On Timer 2, On Timer 3)
Setup: Select Off,Once, Everyday, Mon~Fri, Mon~Sat,
Sat~Sun or Manual to set at your convenience. If you select Manual, you can set up the day you want to activate the timer.
The cmark indicates the day you’ve selected. Time: Set the hour and minute.
Volume: Set the desired volume level.
Source: To select the source of the content that will play when the TV turns on. You can:
–– |
Select TV and have the TV display a specific air or |
|
cable channel. |
–– |
Select USB and have the TV play back photo or |
|
audio files from a USB device. |
–– |
Select a source on your TV that you have connected |
|
a set-top box to, and have the TV display a channel |
|
from the set-top box. |
The USB device must be connected to your TV before you can selectUSB.
If you select a source other thanTV or USB, you must:
•Have a cable or satellite set-top box attached to that source
•Set the set-top box to the channel you want to watch when the TV goes on
•Leave the set-top box turned on.
When you select a source other than TV or USB, the
Aerial and Channel options will disappear.
 Features Preference 03
English 19
PF4000-RU_ENG.indd 19 |
2013-02-20 3:09:36 |

Preference Features
•Aerial (when the Source is set to TV): Select ATVor DTV.
Channel (when the Source is set to TV): Select the desired channel.
Music / Photo (when the Source is set to USB): Select a folder in the USB device containing music or photo files to be played when the TV is turned on automatically.
–– |
If there is no music file on the USB device or the |
|
folder containing a music file is not selected, the timer |
|
function does not operate correctly. |
–– |
When there is only one photo file in the USB device, |
|
the slide show will not play. |
–– |
If a folder name is too long, the folder cannot be |
|
selected. |
–– |
Each USB you use is assigned its own folder. When |
|
using more than one of the same type of USB, make |
|
sure the folders assigned to each USB have different |
|
names. |
–– |
It is recommended that you use a USB memory stick |
|
and a multi card reader when usingOn Timer. |
–– |
The On Timer function may not work with USB |
|
devices with a built-in battery, MP3 players, or PMPs |
|
made by some manufacturers because these devices |
|
take a long time to be recognized. |
•Off Timer: You can set up three separate Off Timer configurations. (Off Timer 1, Off Timer 2, Off Timer 3)
Setup: Select Off,Once, Everyday, Mon~Fri, Mon~Sat,
Sat~Sun or Manual to set at your convenience. If you select Manual, you can set up the day you want to activate the timer.
The cmark indicates the day you’ve selected. Time: Set the hour and minute.
¦¦ Economical Solutions
Eco Solution
OO MENUm→ System → Eco Solution → ENTERE
•Energy Saving: This adjusts the brightness of the TV in order to reduce power consumption.
•No Signal Power Off: To avoid unnecessary energy consumption, set how long you want the TV to remain on if it’s not receiving a signal.
•Auto Power Off: The TV will be automatically turned off when no user operation is received for 4 hours.
If the Auto Power Off option is set to Off, the TV will stay on even if no operations are performed on the TV.
¦¦ Other Features
Menu Language
OO MENUm→ System → Menu Language→ ENTERE
Set the menu language.
Screen Burn Protection
OO MENUm→ System → Screen Burn Protection→
ENTERE
To reduce the possibility of screen burn, this unit is equipped with Pixel Shift screen burn prevention technology. Pixel Shift moves the picture slightly on the screen. The Time function setting allows you to programme the time between movement of the picture in minutes.
Your TV also has the following additional screen burn protection functions:
•Pixel Shift
•Auto Protection Time
•Scrolling
•Side Grey
•Pixel Shift: Using this function, you can set the TV to move pixels minutely on the PDP screen in a horizontal or vertical direction to minimize after images on the screen.
Available Pixel Shift Settings and Optimum Settings
|
Item |
TV / HDMI |
|
|
|
Horizontal |
0~4 |
4 |
Vertical |
0~4 |
4 |
Time (minute) |
1~4 min |
4 min |
The Pixel Shift value may differ depending on the monitor size (inches) and mode.
This function is not available in theScreen Fit mode.
20 English
PF4000-RU_ENG.indd 20 |
2013-02-20 3:09:37 |
•Auto Protection Time: If the screen displays a still image for a certain period of time you define, the TV activates the screen saver to prevent the formation of burnt in ghost images on the screen.
•Scrolling: This function removes after-images on the screen by illuminating all the pixels on the PDP according to a pattern. Use this function when there are after images or symbols on the screen, especially when you displayed a still image on the screen for a long time.
The after-image removal function has to be executed for a long time (approximately 1 hour) to effectively remove after-images on the screen. If the afterimage is not removed after you apply the function, repeat the function again.
Press any key on the remote control to cancel this feature.
•Side Grey: When you watch TV with the screen ratio set to
4:3, using the Side Grey function can prevent damage to the edges of the screen by adjusting the white balance on the extreme left and right sides.
Change PIN
OO MENUm→ System → Change PIN → ENTERE
Change your password required to set up the TV.
The PIN input screen appears before the setup screen.
Enter your 4-digit PIN. Change the PIN using the
Change PIN option.
DivX® Video On Demand
OO MENUm→ System → DivX® Video On Demand→
ENTERE
Shows the registration code authorized for the TV. If you connect to the DivX web site and register with 10-digit registration code, you can download the VOD activation file.
Once you play it usingVideos, the registration is completed.
For more information on DivX® VOD, visit http://vod.divx. com.
General
OO MENUm→ System → General→ ENTERE
•Game Mode: When connecting to a game console such as PlayStation™ or Xbox™, you can enjoy a more realistic gaming experience by selecting game mode.
NOTE
• Precautions and limitations for game mode
––To disconnect the game console and connect another external device, setGame Mode to
Off in the setup menu.
––If you display the TV menu in Game Mode, the screen shakes slightly.
•Game Mode is not available inTV mode.
•After connecting the game console, setGame Mode to On. Unfortunately, you may notice reduced picture quality.
•If Game Mode is On:
––Picture Mode is set to Standard and Sound Mode is set to Movie.
•Panel Lock: Lock or unlock all the keys on the panel.
•Boot Logo: Display Samsung logo when the TV is turned on.
English 21
 Features Preference 03
PF4000-RU_ENG.indd 21 |
2013-02-20 3:09:38 |

Advanced Features
Applications Menu
¦¦ Using the Source List
Source List
OO MENUm→ Applications → Source List → ENTERE
When you press the SOURCE button, Source screen will be displayed at once.
You can only choose external devices that are connected to the TV. In Source, connected inputs are highlighted.
¦¦ Connecting a USB Device
1.Turn on your TV.
2.Connect a USB device containing photo, music and movie files to the USB port on the side of the TV.
3.When USB is connected to the TV, popup window appears. You can select thePhotos, Videos or Music directly.
It might not work properly with unlicenced multimedia files.Need-to-Know List before using Media Contents
•MTP (Media Transfer Protocol) is not supported.
•Supported file systems are FAT and exFAT.
•Certain types of USB Digital camera and audio devices may not be compatible with this TV.
•Media Contents only supports sequential jpeg format.
•Media Contents only supports USB Mass Storage Class (MSC) devices. MSC is a Mass Storage Class Bulk-Only
Transport device. Examples of MSC are Thumb drives, Flash Card Readers (USB HUB are not supported). Devices should be connected directly to the TV’s USB port.
•Before connecting your device to the TV, please back up your files to prevent them from damage or loss of data. SAMSUNG is not responsible for any data file damage or data loss.
•The HDD (Hard Disk Drive) connected to USB is not supported.
•Do not disconnect the USB device while it is loading.
•The higher the resolution of the image, the longer it takes to display on the screen.
•The maximum supported JPEG resolution is 15360 x 8640 pixels.
•For unsupported or corrupted files, the “Not Supported File Format” message is displayed.
•The scene search and thumbnail functions are not supported in theVideos.
•MP3 files with DRM that have been downloaded from a non-free site cannot be played. Digital Rights Management
(DRM) is a technology that supports the creation, distribution and management of the content in an integrated and comprehensive way, including the protection of the rights and interests of the content providers, the prevention of the illegal copying of contents, as well as managing billings and settlements.
•PTP connection mode is fully available only with digital cameras. When connecting a smartphone or tablet to the TV using
PTP mode, it may not be recognized.
•AUSB device that requires high power (more than 500mAor 5V) may not be supported.
•If the TV has been no input during time set in Auto Protection Time, the screen saver will run.
22 English
PF4000-RU_ENG.indd 22 |
2013-02-20 3:09:38 |

•The power-saving mode of some external hard disk drives may be released automatically when connected to the TV.
•If a USB extension cable is used, the USB device may not be recognized or the files on the device may not be read.
•If a USB device connected to the TV is not recognized, the list of files on the device is corrupted or a file in the list is not played, connect the USB device to the PC, format the device and check the connection.
•If a file deleted from the PC is still found when Media Contents is run, use the “Empty the Recycle Bin” function on the PC to permanently delete the file.
•If the number of files and folders saved on a USB storage device is approximately over 4000, the files and folders may not appear and some folders may not be opened.
Disconnecting a USB Device
1.Press the SOURCE button.
2.Select a desired USB device, and then press theTOOLS button. The Tools menu appears.
3.Select Disconnect USB Device, and then wait until the selected USB device is disconnected. You can remove a USB device from the TV.
To remove a USB device from the TV, we recommend useDisconnect USB Device function.
¦¦ Using the Media Contents
OO MENUm→ Applications → Media Play → ENTERE
Enjoy photos, music and movie files saved on a USB Mass Storage Class (MSC) device.
1.Press the MEDIA.P button.
2.Press ◄/► button to select desired menu (Photos, Videos, Music), then press the ENTEREbutton.
3.Press ◄/► button to select desired device, then press the ENTEREbutton again.
4.Press the ▲/▼/◄/► button to select the desired file in the list, then press theENTEREbutton or ∂(Play) button.
Playing the selected files
1.Press the ▲ button to select Optionsat the top of each main screen and select Play Selected.
2.Select the desired files.
The check box appears to the left of the selected files.
Press ENTEREbutton again to deselect the file.
3.Press the ▲ button to select Play.
You can select or deselect all files pressing the Select All / Deselect All.
 Features Advanced 04
English 23
PF4000-RU_ENG.indd 23 |
2013-02-20 3:09:39 |
Advanced Features
¦¦ Playing the Photos / Videos / Music
During playing a file, press the ▲/▼/◄/► button to select the desired menu.
When the option menu is not displayed, press theTOOLS button or ENTEREbutton.You can also use ∂/∑/∫/π/µbuttons on the remote control during playback.
If you press the INFO button during playback, you can view the playback information.
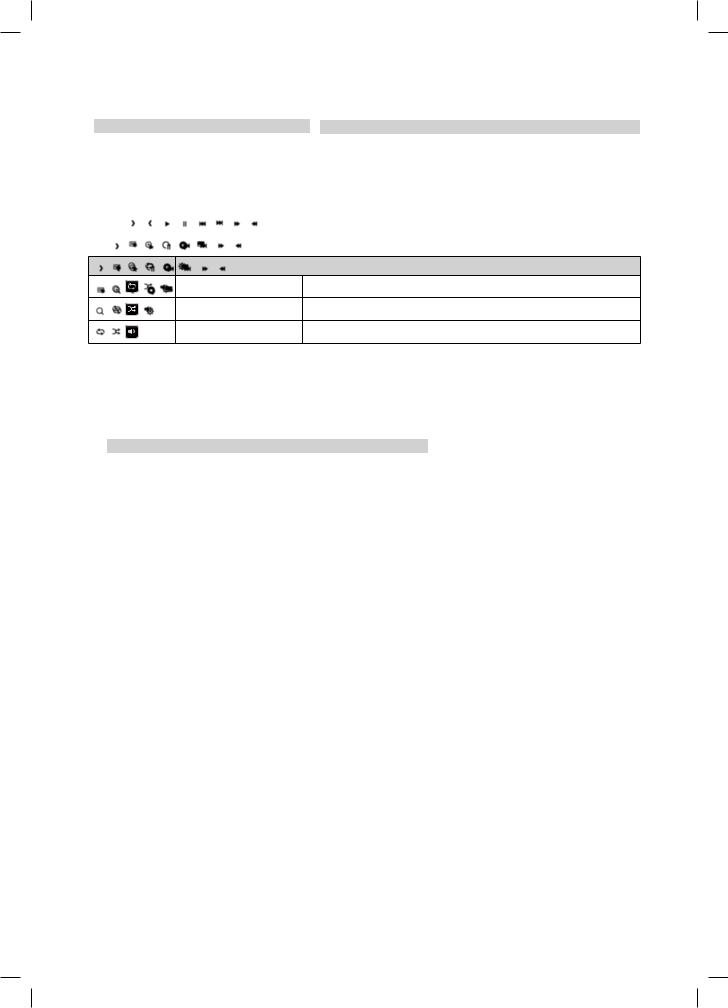
Playback menu
Button |
Operation |
Photos |
Videos |
Music |
/ |
Previous / Next |
● |
|
|
|
Start Slide Show / Stop Slide Show |
● |
|
|
/ |
Play / Pause |
Mini Player* |
● |
● |
|
||||
/ |
Previous / Next |
Mini Player* |
● |
● |
/ |
Rewind / Fast forward |
|
● |
● |


 * When setting the Background Music to Mini Player in Photos, these buttons appear.
 Setting menu
• Photos
Button |
Operation |
Slideshow Settings |
You can set the Speed and Effects during the slide show. |
Zoom |
You can zoom into images in full screen mode. |
Rotate |
You can rotate images in full screen mode. |
Background Music / Mini Player You can set background music when watching a slide show. |
|
|
Picture Mode / Sound Mode: You can adjust the picture or sound |
Settings |
setting. |
|
Information: You can see detailed information about the played file. |
During the slide show, all files in the file list will be displayed in order.
When you press the ∂ (Play) button (or ▲ button →Options → Slide Show) in the file list, slide show will be started immediately.
During the slide show, you can adjust the slide show speed usingπ (REW) orμ(FF) button.Supported Photo Formats
File Extension |
Type |
Resolution |
|
*.jpg |
JPEG |
15360 X 8640 |
|
*.jpeg |
|||
|
|
||
*.bmp |
BMP |
4096 X 4096 |
|
*.mpo |
MPO |
15360 X 8640 |
• The MPO type file does not support Zoom, Rotate and Slide Show Effect functions.
24 English
PF4000-RU_ENG.indd 24 |
2013-02-20 3:09:42 |

• Videos
Button |
|
Operation |
|
Search |
Search Titles: You can move the other file directly. |
|
|
Search Time Bar: You can search the video using ◄ and ► button at one minute |
|
|
interval or entering the number directly. |
|
|
It may not be supported depending on the input source. |
|
Repeat Mode |
You can play movie files repeatedly. |
|
|
|
|
Picture Size |
You can adjust the picture size to your preference. |
|
|
|
|
Settings |
Subtitle Settings: You can play the video with subtitles. This function only works if |
|
|
the subtitles are the same file name as the video. |
|
|
Picture Mode / Sound Mode: You can adjust the picture or sound setting. |
|
|
Audio Language: You can change the audio language if the video has more than |
|
|
one language. |
|
|
Information: You can see detailed information about the played file. |
If video time information is unknown, play time and progress bar are not displayed.
In this mode, you can enjoy movie clips contained on a Game, but you cannot play the Game itself.Supported Video Formats
File Extention |
Container |
Video Codec |
Resolution |
Frame rate (fps) |
Bit rate (Mbps) |
Audio Codec |
|
AVI |
DivX 3.11/4.x/5.x/6.x |
|
|
|
AC3 |
*.avi / *.mkv |
|
|
|
|
LPCM |
|
MKV |
MPEG4 SP/ASP |
1920 x 1080 |
|
30 |
||
|
ADPCM |
|||||
*.asf / *.wmv |
ASF |
|
|
|
|
(IMA, MS) |
*.mp4 / *.3gp |
MP4 |
H.264 BP/MP/HP |
|
|
|
|
|
|
|
AAC |
|||
*.vro / *.mpg |
3GP |
|
|
|
|
|
|
|
|
|
|||
Motion JPEG |
640 x 480 |
|
8 |
HE-AAC |
||
*.mpeg / *.ts |
MOV |
|
||||
|
|
6~30 |
|
WMA |
||
*.tp / *.trp |
FLV |
Window Media Video v9 |
|
|
||
|
|
DD+ |
||||
*.mov / *.flv |
VRO |
|
|
|
||
|
|
|
|
MPEG (MP3) |
||
*.vob / *.svi |
VOB |
MPEG2 |
|
|
30 |
|
|
|
DTS (Core) |
||||
*.divx |
PS |
|
1920 x 1080 |
|
||
MPEG1 |
|
|
G.711(A-Law, |
|||
|
TS |
|
|
|
μ-Law) |
|
|
|
|
|
|
|
|
|
|
|
|
|
|
|
*.webm |
WebM |
VP8 |
|
|
20 |
Vorbis |
Other Restrictions
•Video content will not play, or not play correctly, if there is an error in the content or the container.
•Sound or video may not work if the contents have a standard bit rate/frame rate above the compatible Frame/sec listed in the table.
•If the Index Table is in error, the Seek (Jump) function is not supported.
•Some USB/digital camera devices may not be compatible with the player.
•The menu can be displayed late if the video is over 10Mbps(bit rate).
Video decoder |
Audio decoder |
|
• Supports up to H.264, Level 4.1 (FMO/ASO/RS are not supported.) |
• WMA10 Pro supports up to 5.1 channel and M2 profile. |
|
• frame rate : |
• WMAlossless audio is not supported. |
|
- Below 1280 x 720: 60 frame max |
• Vorbis supports up to 2ch. |
|
-Above 1280 x 720: 30 frame max |
• DD+ supports up to 5.1 channel. |
|
• VC1AP L4 is not supported. |
||
|
||
• GMC 2 or higher is not supported. |
|
|
|
|
 Features Advanced 04
English 25
PF4000-RU_ENG.indd 25 |
2013-02-20 3:09:44 |
Advanced Features
Supported Subtitle Formats
• External
Name |
File extension |
MPEG-4 timed text |
.ttxt |
|
|
SAMI |
.smi |
SubRip |
.srt |
SubViewer |
.sub |
Micro DVD |
.sub or .txt |
SubStationAlpha |
.ssa |
Advanced SubStationAlpha |
.ass |
Powerdivx |
.psb |
|
|
• Internal
Name |
Container |
Format |
Xsub |
AVI |
Picture Format |
|
|
|
SubStationAlpha |
MKV |
Text Format |
Advanced SubStationAlpha |
MKV |
Text Format |
SubRip |
MKV |
Text Format |
MPEG-4 Timed text |
MP4 |
Text Format |
• Music
Button |
Operation |
Repeat |
You can play music files repeatedly. |
Shuffle |
You can play the music randomly. |
Sound Mode |
You can adjust the sound setting. |
Only displays the files with supported music file extension. Other file extensions are not displayed, even if they are saved on the same USB device.
If the sound is abnormal when playing music files, adjust theEqualiser in the Sound menu. (An over-modulated music file may cause a sound problem.)
Supported Music Formats
File Extension |
Type |
Codec |
Remark |
|
*.mp3 |
MPEG |
MPEG1Audio Layer 3 |
|
|
*.m4a |
|
|
|
|
*.mpa |
MPEG4 |
AAC |
|
|
*.aac |
|
|
|
|
*.flac |
FLAC |
FLAC |
Supports up to 2ch. |
|
|
|
|
|
|
*.ogg |
OGG |
Vorbis |
Supports up to 2ch. |
|
|
|
|
|
|
|
|
|
WMA10 Pro supports up to 5.1 channel |
|
*.wma |
WMA |
WMA |
and M2 profile. (WMAlossless audio is |
|
|
|
|
not supported.) |
|
*.wav |
wav |
wav |
|
|
*.mid |
midi |
midi |
type 0 and type 1 |
|
*.midi |
||||
|
|
|
Setting the Encoding language
Set the encoding language if the text is not supported.
1.Press the ▲ button to select Optionsat the top of music main screen and select Encoding.
2.Select the desired encoding language.
26 English
PF4000-RU_ENG.indd 26 |
2013-02-20 3:09:46 |

Support Menu
¦¦ Using the Self Diagnosis
Self Diagnosis
OO MENUm→ Support → Self Diagnosis → ENTERE
•Self Diagnosis might take few seconds, this is part of the normal operation of the TV.
•Picture Test: Use to check for picture problems.
•Sound Test: Use the built-in melody sound to check for sound problems.
•Signal Information (digital channels only): HDTV channel’s reception quality is either perfect or the channels are unavailable. Adjust your aerial to increase signal strength.
•Reset: Reset all settings to the factory defaults except network settings.
The PIN input screen appears before the setup screen.
Enter your 4-digit PIN. Change the PIN using theChange PIN option.
¦¦ Updating the Software
Software Update
OO MENUm→ Support → Software Update → ENTERE
The Software Update menu lets you upgrade your TV’s software to the latest version. Current version: This is the software version already installed in the TV.
When software is upgraded, video and audio settings you have made will return to their default settings. We advise you to write down your settings so that you can easily reset them after the upgrade.
•Update now
–– |
By USB: Insert a USB drive containing the firmware upgrade file, downloaded from “www.samsung.com” into the TV. |
|
Please be careful not to disconnect the power or remove the USB drive until upgrades are complete. The TV will be |
|
turned off and on automatically after completing the firmware upgrade. |
–– |
By Channel: Upgrade the software using the broadcasting signal. |
|
If the function is selected during the software transmission period, software will be automatically searched and |
|
downloaded. |
|
The time required to download the software is determined by the signal status. |
•Auto update:Amanual upgrade will be automatically performed at selected time. Since the power of the unit is turned on internally, the screen may be turned on slightly for the product. This phenomenon may continue for more than 1 hour until the software upgrade is complete.
 Features Advanced 04
English 27
PF4000-RU_ENG.indd 27 |
2013-02-20 3:09:46 |

Advanced Features
¦¦ Changing the Use Mode
Use Mode
OO MENUm→ Support → Use Mode → ENTERE
Select the Use Mode suitable for your place. We strongly recommend you selectHome Use.
•Home Use: Home Use is the default setting.
•Store Demo: Store Demo is for retail environments only. If you select Store Demo, some functions will not work, and the picture settings will be reset every 30 minutes.
¦¦ Viewing the Contact Samsung
Contact Samsung
OO MENUm→ Support → Contact Samsung → ENTERE
View this information when your TV does not work properly or when you want to upgrade the software. You can find information regarding our call centres, and how to download products and software.
¦¦ Using the Sports Mode
Sports Mode t
OO MENUm→ Applications → Sports Mode → ENTERE
This mode provides optimized condition for watching sports games.
When the sports mode is on, the picture and sound modes are set toStadium automatically.
If you turn the TV off while watchingSports Mode, the Sports Mode will be disable.
28 English
PF4000-RU_ENG.indd 28 |
2013-02-20 3:09:47 |
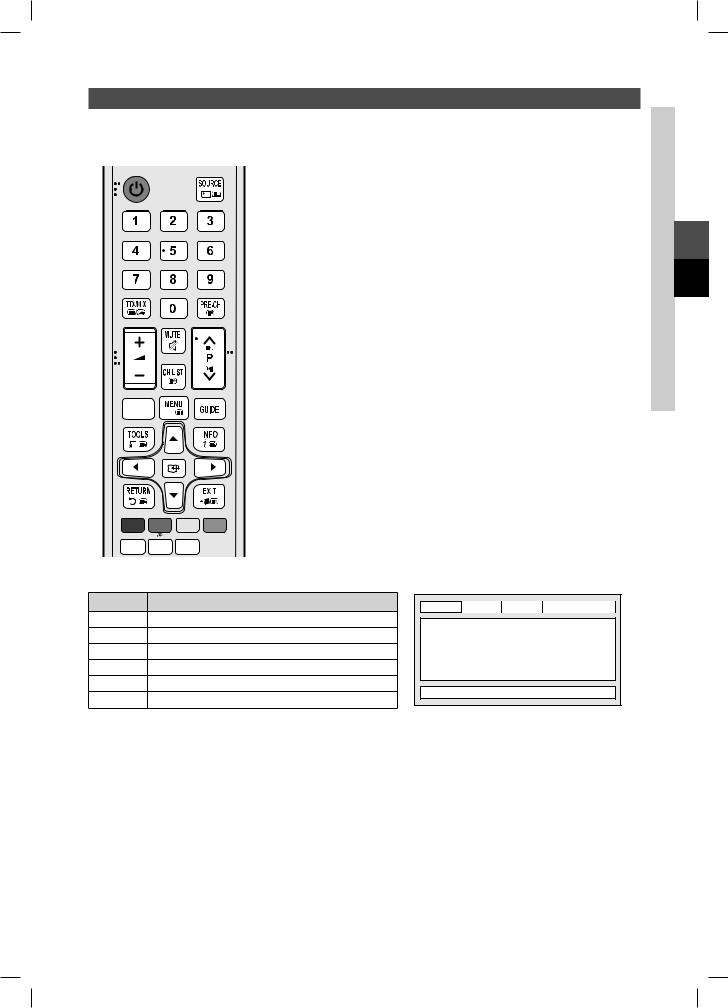
Teletext Feature
The index page of the Teletext service gives you information on how to use the service. For Teletext information to be displayed correctly, channel reception must be stable. Otherwise, information may be missing or some pages may not be displayed.
You can change Teletext pages by pressing the numeric buttons on the remote control.
MEDIA.P
A B C D
P.SIZE SRS AD/SUBT. 
10(mode): Selects the Teletext mode (LIST/FLOF). If pressed during LIST mode, switches the mode to List save mode. In List save mode, you can save a Teletext page into a list using the 8(store) button.
2/(Teletext on/mix/off):Activates the Teletext mode for the current channel.
Press the button twice to overlap the Teletext mode with the current broadcasting screen. Press it one more time to exit teletext.
31(sub-page): Displays the available sub-page.
48(store): Stores the Teletext pages.
56(index): Displays the index (contents) page at any time while you are viewing
Teletext.
64(size): Displays the teletext on the upper half of the screen in double-size. To move the text to the lower half of the screen, press it again. For normal display, press it once again.
79(hold): Holds the display at the current page, in the case that there are several secondary pages that follow automatically. To undo, press it again.
82(page up): Displays the next Teletext page.
93(page down): Displays the previous Teletext page.
05(reveal): Displays the hidden text (answers to quiz games, for example). To display the normal screen, press it again.
!7(cancel): Shrinks the Teletext display to overlap with the current broadcast.
@Colour buttons (red, green, yellow, blue): If the FASTEXT system is used by the broadcasting company, the different topics on a Teletext page are colour-coded and can be selected by pressing the coloured buttons. Press the colour corresponding to the topic of your choice.Anew colour coded page is displayed. Items can
be selected in the same way. To display the previous or next page, press the corresponding coloured button.
The Teletext pages are organized according to six categories
Part |
Contents |
ASelected page number.
B Broadcasting channel identity.
C Current page number or search indications.
DDate and time.
EText.
FStatus information. FASTEXT information.
A |
B |
C |
D |
E
F
 Information Other 05
English 29
PF4000-RU_ENG.indd 29 |
2013-02-20 3:09:47 |
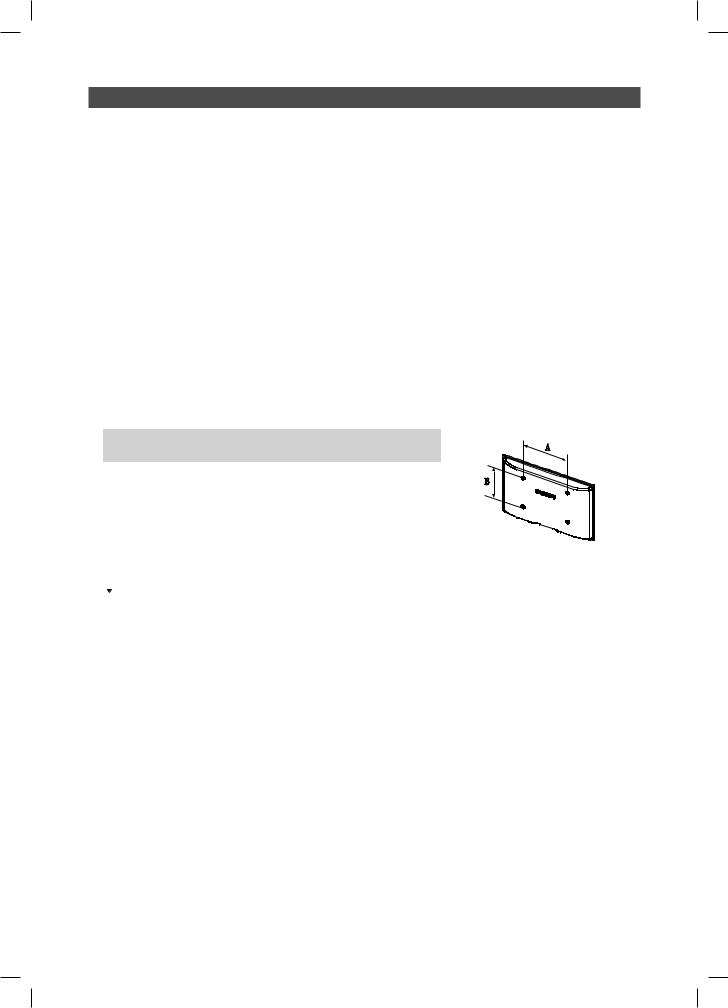
Other Information
Installing the Wall Mount
The wall mount kit (sold separately) allows you to mount the TV on the wall. For detailed information on installing the wall mount, see the instructions provided with the wall mount. Contact a technician for assistance when installing the wall mount bracket. We do not advice you to do it yourself.
Samsung Electronics is not responsible for any damage to the product or injury to yourself or others if you select to install the TV on your own.
Wall Mount Kit Specifications (VESA)
Wall mount kit is not supplied but sold separately.
Install your wall mount on a solid wall perpendicular to the floor. When attaching to other building materials, please contact your nearest dealer. If installed on a ceiling or slanted wall, it may fall and result in severe personal injury.
NOTE
•Standard dimensions for wall mount kits are shown in the table below.
•When purchasing our wall mount kit, a detailed installation manual and all parts necessary for assembly are provided.
•Do not use screws that do not comply with the VESAstandard screw specifications.
•Do not use screws longer than the standard dimension, as they may cause damage to the inside of the TV set.
•For wall mounts that do not comply with the VESAstandard screw specifications, the length of the screws may differ depending on their specifications.
•Do not fasten the screws too strongly, this may damage the product or cause the product to fall, leading to personal injury. Samsung is not liable for these kinds of accidents.
•Samsung is not liable for product damage or personal injury when a non-VESAor non-specified wall mount is used or the consumer fails to follow the product installation instructions.
•Do not exceed 15 degrees tilt when mounting this TV.
inches |
VESA Spec. (A * B) |
Standard |
Quantity |
|
Screw |
||||
|
|
|
||
43~51 |
400 X 400 |
|
|
|
|
|
M8 |
4 |
|
60~64 |
600 X 400 |
|||
|
|
|||
|
|
|
|
 Do not install your Wall Mount Kit while your TV is turned on. It may result in personal injury due to electric shock.
30 English
PF4000-RU_ENG.indd 30 |
2013-02-20 3:09:48 |
 Loading...