

Radio Shack Race Scanner, PRO-74 20-513 Owner's Manual
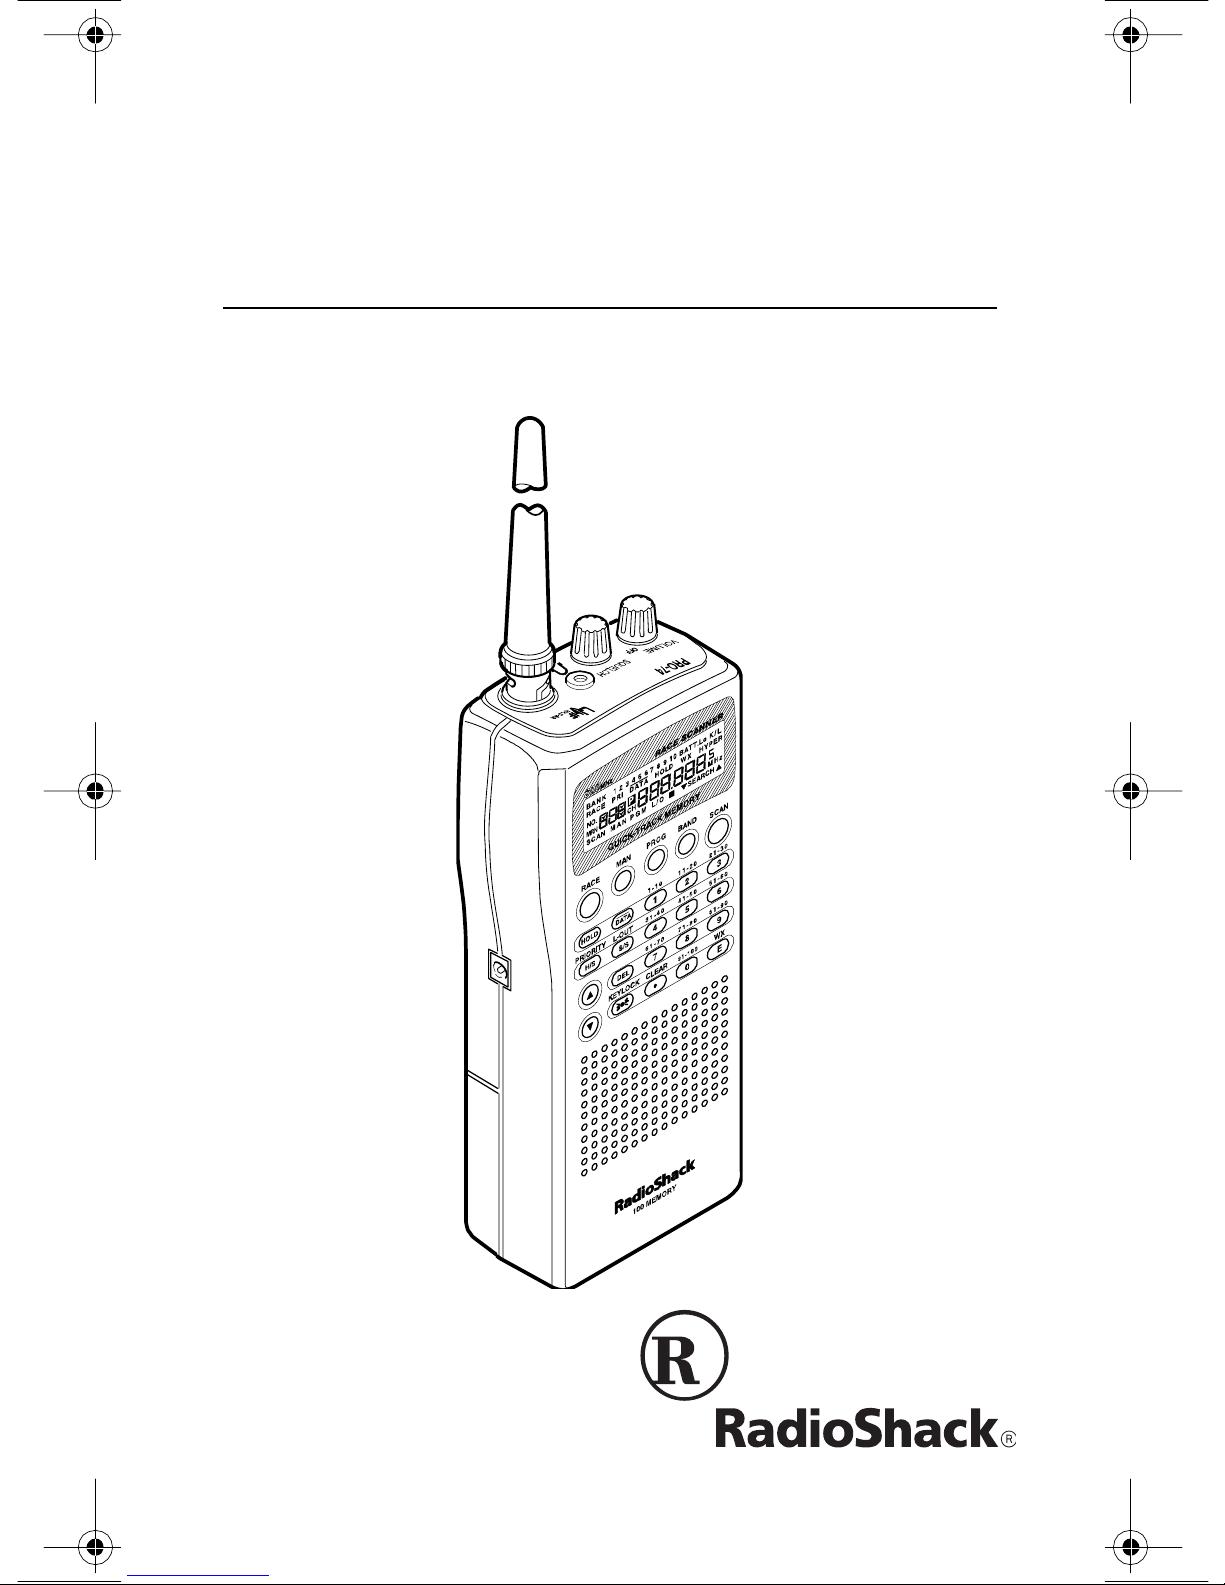
Owner’s Manual
PRO-74 100-Channel
VHF/UHF/Air/800 MHz
Please read befo re using this equi pm ent.
Cat. No. 20-513
Race Scanner

FEATURES
Your new RadioShack PRO-74 100-Channel VHF/UHF/Air/800 MHz
Race Scanner lets you in on the action in the pits at the big race or on
the streets of your home town. This scanner gives you direct access to
more than 30,000 frequencies, including those used by participants
and staff at aut o races and air shows, by government agencies, police
and fire departments, ambulance and transportation services, and amateur radio. You can select up to 100 channels for your scanner to
scan, and you can change any of those selections at any tim e.
We have included a frequency guide with your PRO-74 that includes
listings by state for many of the frequencies you can listen to.
Your scanner has these special features:
Quick-Track Memory
— lets you store a car’s number and any frequencies used by the driver’s team into the scanner’s channels. You
can recal l any of those frequencies by entering the car’s number.
Two Supplied Antennas
— let you select the antenna that best meets
your needs. The supplied stub antenna helps your scanner receive
strong local signal s and makes the scanner easy to carr y and use at
events, while the supplied flexible anten na provides excellen t r eception
and is design ed to help prevent antenna breakage .
Twelve Service Banks
— lets you search preset frequencies in separate auto racing, marine, VHF, aircraft, military, ham radio, government, UHF, TV, and 800 MHz banks, to make it easy to locate specific
types of cal ls.
Weather Search
— lets you easily search the scanner’s 7 prepro-
grammed weat her frequencies.
Ten Memory Banks
— let you store 10 channels in each of 10 banks
to group channels so you can more easily id entify cal ls.
Priority Channels
in all ) and then have t he scanner check it every 2 seconds so you don't
miss transmissio ns on that channel .
RadioShack is a registered trademark used by Tandy Corporation.
Hypersearch is a trademark used by Tandy Corporation.
2
— lets you program one channel in each bank (10
1998 Tandy Corporation.
©
All Rights Reserved.

Hypersearch — lets you set the scanner to s earch at up to 300 steps
per second, to help you quickly find interesting broadcasts. (The normal search sp eed is 100 steps per second).
Two-Second Scan Delay — automaticall y delays sca nning for about 2
seconds before moving to another channel, so you can hear more replies.
Lock-Out Function — lets you set your scanner to skip over specified
channels.
Direct Frequency Search — lets you search all frequencies, starting
directly f rom a specified frequency.
Data Signal Skip — lets you set the scanner to skip non-mo dulated or
data signals during searches. This lets the scanner avoid non-voice
signals, making a search faster.
Search Skip — lets you set the sc anner to skip up to 20 frequencies
you select during searches. This lets the scanner avoid unwanted signals.
Three Power Options — let you power the scanner using alkaline
or re cha rge able nic ke l-cad mi um b att eri es, e xte rnal AC pow er us ing
an optional AC adapter/charger, or DC power usi ng an optional DC
adapter.
Memory Backup — keeps the frequencies stored in memory for up to
3 days if the PRO-74 loses power.
Key Confirmation Tones — the scanner sounds a tone when y ou perform an operation correctly, and an error tone if you make an invalid
entry. You can turn the key confirmation tones on or off .
Display Backlight — makes the scanner eas y to r ead in low-light situations.
Battery Low Alert — warns you when battery power get s low.
Battery Save — saves battery power when the scanner does not de-
tect any transmissions for more than 5 seconds while a channel is
manually sel ected or while you are pr ogramming the scanner.
Key Lock — lets you lock the scanner's keys to help prevent accidental changes to the scanner's programming.
3

Resume Start — the scanner saves its settings when you turn the
power off. This returns you t o the function you were usi ng if you accidentall y turn the scanner of f or t he batteries are weak.
Triple-Conversion Circuitry — virtually eliminates any interference
from IF (i ntermedia te f requency) images, so you hear only the selected
frequency.
Your scanner can receive these bands:
Frequency Range
(MHz)
Step
(kHz)
Transmission
29–29.7 5 10-Meter Ham Band
29.7–50 5 VHF Lo
50–54 5 6-Meter Ham Band
108–136.975 12.5 Aircraft/Air Shows
137–144 5 Auto Racing, Aircraft/Air
Shows, Government, Motion
Picture /Video Industry, Pro
Sports Teams, Radio/TV
Remote Broadcast
Pickup, St adiums/Venues
144–148 5 2-Meter Ham Band
148–174 5 VHF Hi
406–450 12.5 70-cm Ham Band and
Federal Government
450–470 12.5 UHF Standard Band
470–512 12.5 UHF “T” Band
806–823.9375 12.5 Public Service “800” Band,
851–868.9375 12.5 UHF Hi
896.1125–956.000 12.5 UHF Hi
We recommend you record your scanner’s serial number here. The
number is on the back panel.
Serial Number: ___________________________
4
except cellular band

FCC NOTICE
Your scanner might cause radio or TV interference even when it is operating properly. To determine whether your scanner is causing the interference, tu r n off y ou r sc anner. If t h e interference go es aw ay, your s canner
is causing it. Try the following methods to eliminate the interference:
• Move your scann er away from the receiver
• Connect your scanner to an outlet that is on a different electrical
circuit from the receiver
• Contact your l ocal RadioShack store for help
Note:
some areas. Check t he laws in your area.
Mobile use of this scanner is unlawful or requires a permit in
SCANNING LEGALLY
Your scanner covers frequencies used by many different groups including police and fire depar tments, ambulance services, government
agencies, private companies, amateur radio services, military operations, pager services, and wireline (telephone and telegraph) service
providers . It is legal to listen t o almost every transmission your scanner
can receive. However, there are some transmissi ons you should never
intentionally listen to. These include:
• Telephone conversations (cellular, cordless, or other private
means of telephone signal transmission)
• Pager transmissions
• Any scrambl ed or encrypted transmissions
According to the Electronic Communications Privacy Act (ECPA), you
are subject to fines and p ossible imprisonment for intentionally listening
to, using, or divulging the contents of such a transmission unless you
have the consent of a party to the communication (unless such act ivity
is otherwise illegal).
This scanner has been designed to prevent reception of illegal transmissions. This is done to comply with the legal requirement that scanners be m anufactured so as to not be easily mod ifiable to pick up those
transmissions. Do not open your scanner's case to make any modifications tha t could allow it to pi ck up transmissions that it i s not legal to listen to. Doing so could subject you to legal penalties. We encourage
responsible, legal scanner use.
5

CONTENTS
Prep a ration ..... .. ... ....... ... ....... .. ... ....... .. ........ .. ... ....... .. ............... .. ....... 9
Power Sources ............................................................................ 9
Using Internal Batteries ........................................................ 9
Charging Nickel-Cadmium Batteries .................................. 11
Using Standard AC Pow er ................................................. 12
Using Vehicle Battery Power .............................................. 13
Connecting an Antenna ............................................................ 14
Connecting an Optional Ant enna ....................................... 15
Connecting an Extension Speaker ............................................ 16
Connecting an Earphone/Headphones ..................................... 16
Listening Safely ................................................................. 17
Traffic Safety ...................................................................... 17
Attaching the Belt Clip ............................................................... 17
Understanding Your Scanner ........................................................ 18
A Look at the Keypad .......... ......... .. ............. ......... ............... .. .... 18
A Look at the Display ................. .. .. ................ .. ....... .. ...... .......... 20
Understanding Banks ................................................................ 22
Memory Banks ................................................................... 22
Service Banks .................................................................... 22
Operation ........................................................................................ 24
T urning On the Scanner and Sett ing Squelch ......... ....... ........... 24
Storing Know n Frequencies into Channels .......... ..................... 25
Finding and Storing Active Frequencies ................... ...... .......... 26
Searching the Service Banks ............................................. 26
Searching from a Selected Frequency .... .............. .. ........... 27
Storing Active Frequencies .............................. .. ................ 28
Search Skip Memory ................................................................. 28
Manually Sel ecting a Channel .............. ..................... ...... .. ....... . 29
Scanning Channels ............ ............... ...................... .. ............. ... 30
Deleting a Frequency from a Channel ...................................... 30
Listeni ng to Weather Br oadcasts .............. .. ....... .. ........... .......... 31
Using the PRO-74 at the Races ..................................................... 32
Storing a Car Number and Frequency ............. .. ....... ...... .. ....... . 32
Adding Frequencies to a Car Number ............................. .. 33
Viewing Frequencies Associated with a Car Number ........ 34
Deleti ng a Frequency from a Car Number ....... .. ................ 34
Scanning by Car Number ...... ......... ............... ............... ......... .... 34
Finding What Car Numbers are in What Channels ................... 35
6

Special Features ............................................................................. 36
Turning Memory Banks On and Off ........................................... 36
Locking Out Ch annels ................... ....... ................. .................... 36
Priority ....................................................................................... 36
Using the Keylock ...................................................................... 38
Using the Display Backlight ....................................................... 38
Changing Search Speeds ..... .. ....... .. ........... .............. .. ............... 38
Turning the Key Tone Off/ On ..................... ............. .............. .. ... 39
Turning the Battery Save Function Off/On ................................. 39
Skipping Data Signal s ...................... .. ....... ............. .............. .. ... 40
A General Guide to Scanning ........................................................ 41
Guide to Frequencies ............... .. ........... .............. .. .................... 41
National Weather Frequencies ........................................... 41
Canadian We ather Frequencies ......... ............. .............. .. ... 41
VHF FM Marine Frequencies ......... .............. .. .................... 41
Birdie Frequencies ......................... .............. .. .................... 42
Guide to the Action Bands .......... ............... ............... ......... ........ 43
T ypical Band Usage ....................... ....... .. ........................... 43
Primary Usage ................. ......... ............. ......... ...... .. ......... ... 44
Band Allocation ................... ............... ...................... .. ....... ........ 44
Frequency Conversion ................. ............................................. 48
T roubleshooting .. ............... .. ............. ......... ............. ......... ............... 49
Resetting the Scanner ............................................................... 50
Care and Maintenance .................................................................... 51
Specifications ................................................................................. 52
7
PREPARATION
POWER SOURCES
You can power your scanner from any of three sources:
• Internal batteries (not supplied)
• Standard AC power using an optional AC adapter
• Ve hicle battery power usi ng an optional DC adapter
Using Internal Batteries
You can power your scanner using four AA batteries. For the longest
operation and best performance, we recommend you use alkaline batteries (such as RadioShack Cat. No. 23-552).
You can also use four recharg eable nicke l- cadmium batteries (Cat. No.
23-125). Before you use nickel-cadmium batteries, you must charge
them (see “Charging Nickel-Cadmium Batt eries” on Page 10).
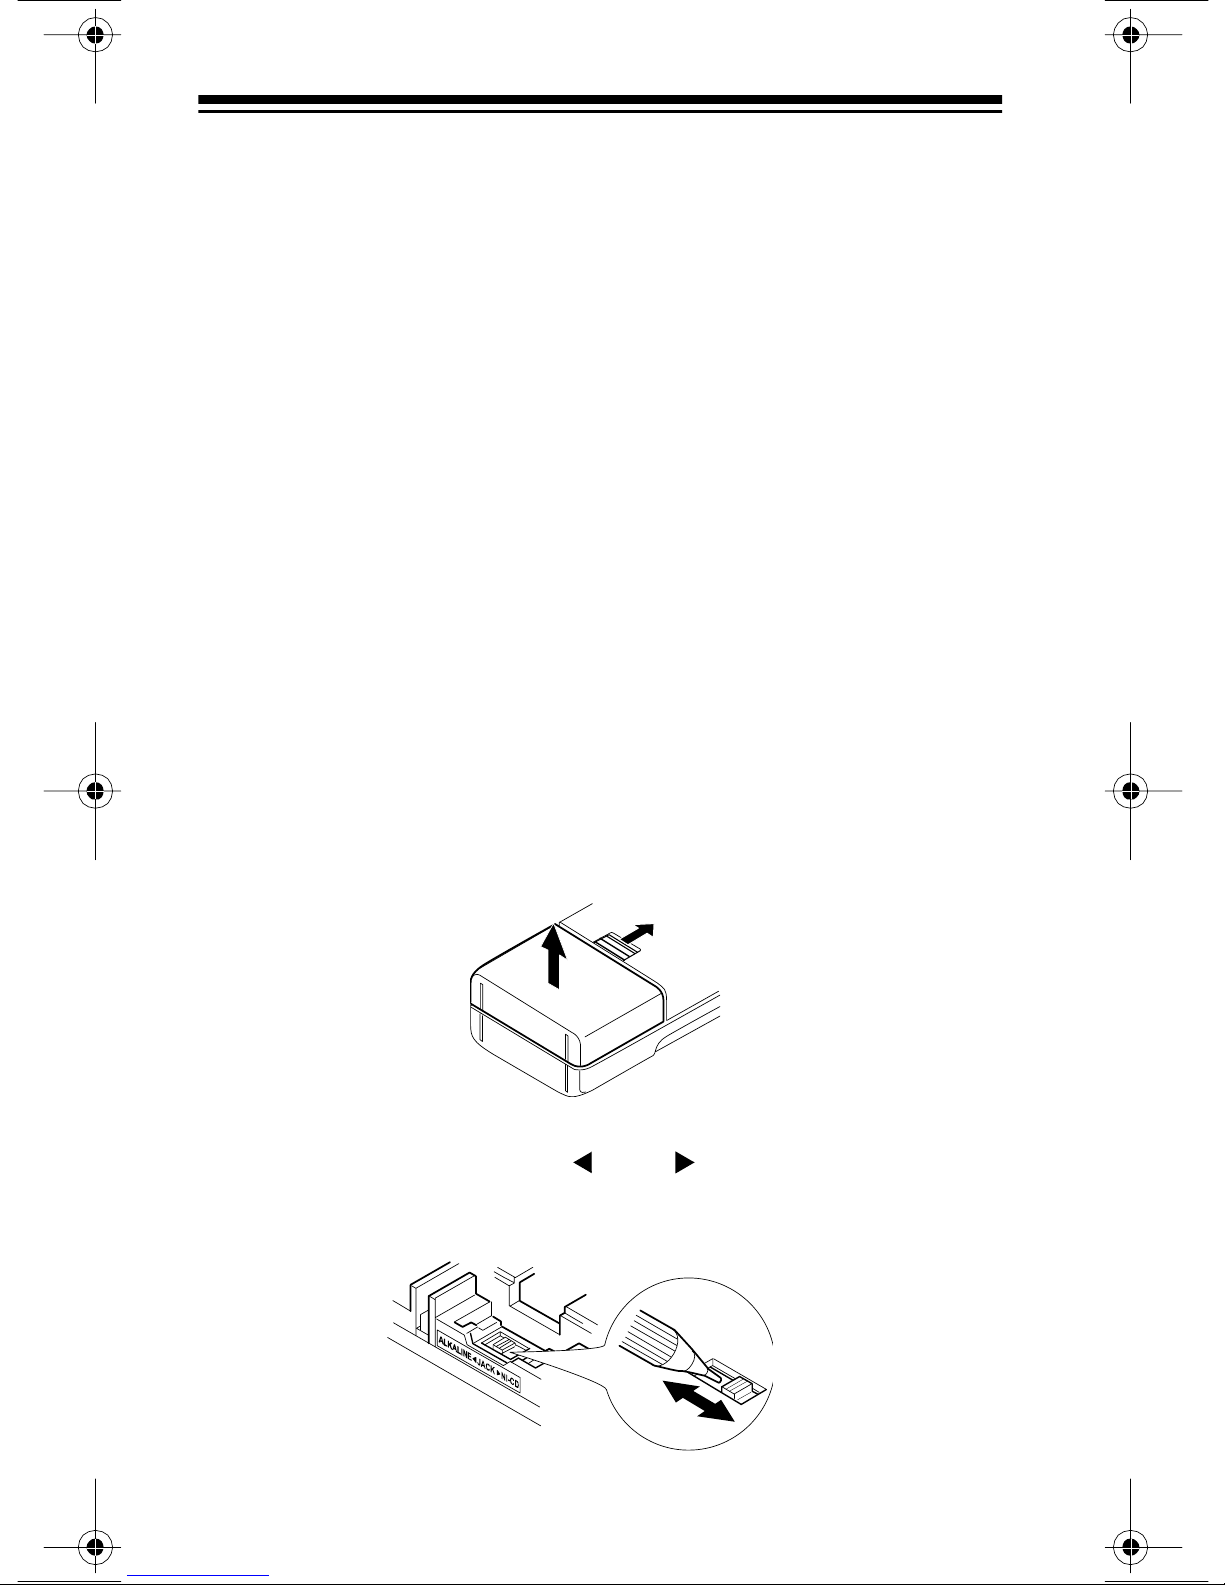
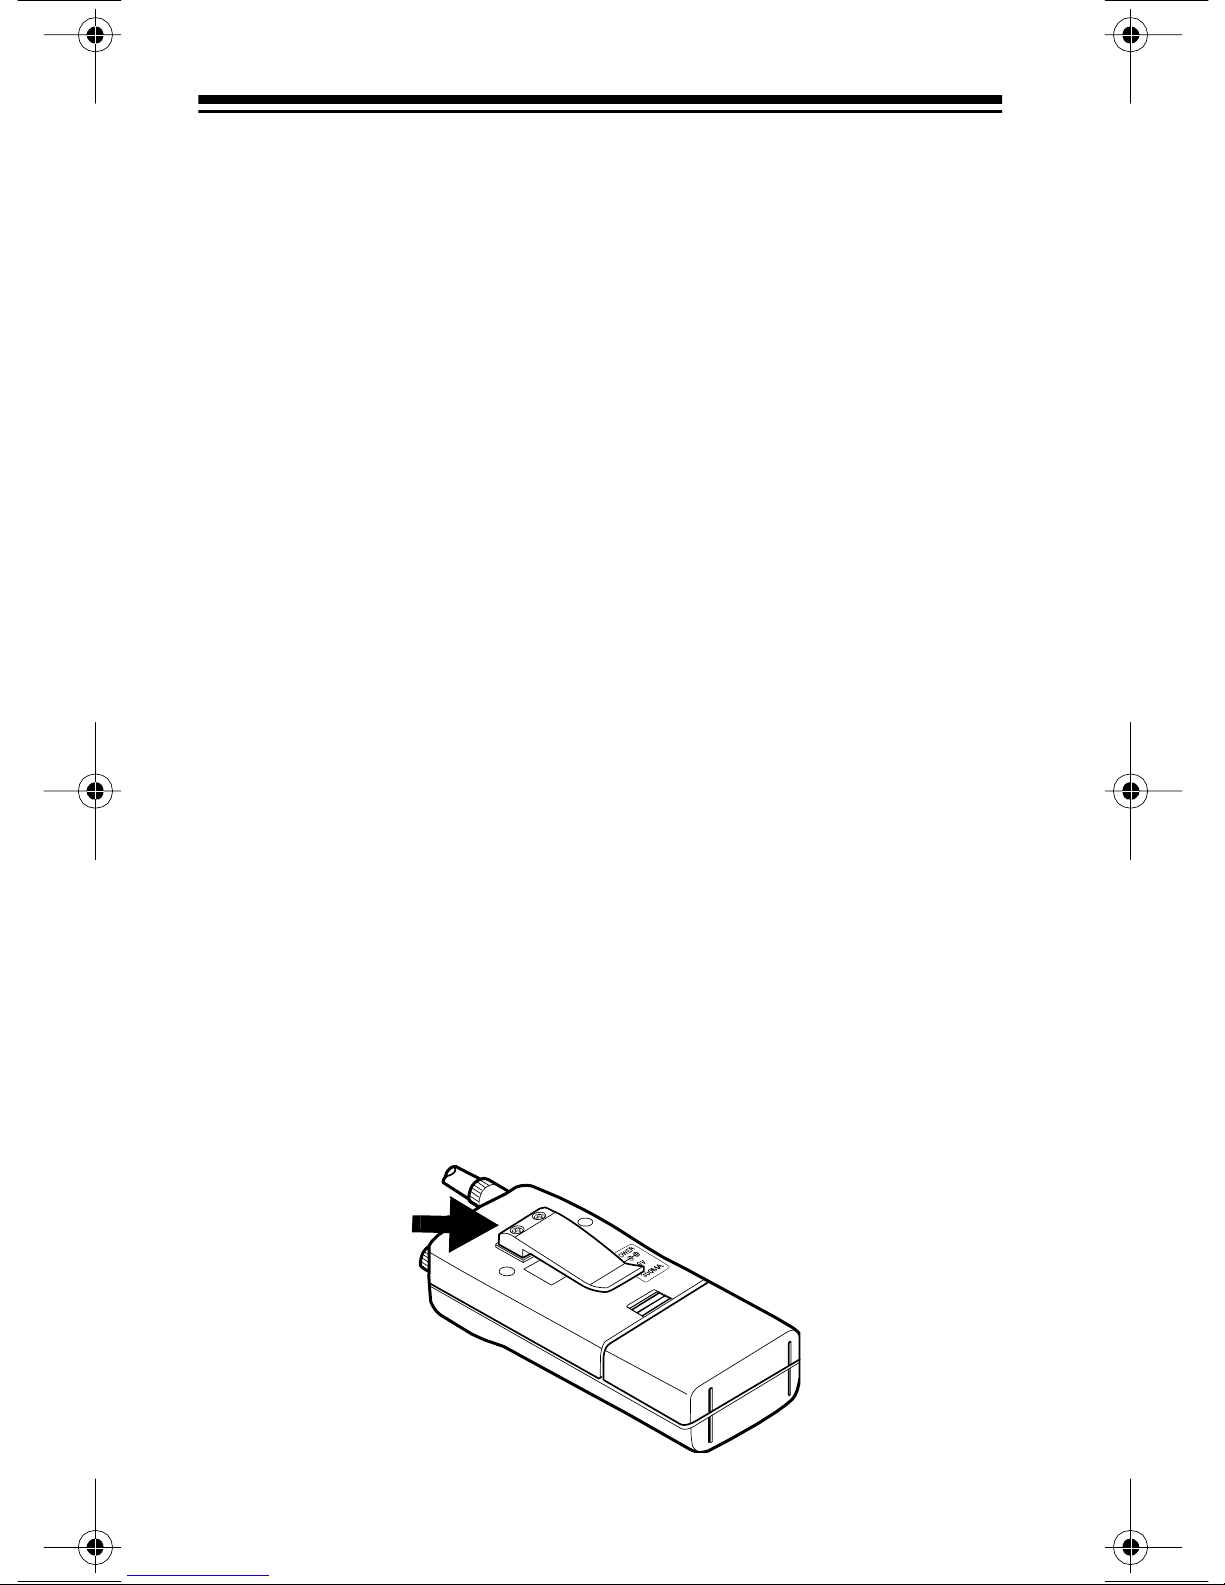
Follow the se steps to instal l batteries.
1. While pushing up the tab above the battery compartment cover on
the back of the scanner, lift open the battery compartment cover to
remove it.
2. If you are installing alkaline batteries, use a pointed object such
as a pen to set
ment to
teries, s et it to
ALKA LINE
ALKALINE JACK NI-CD
. Or, if you are installing nickel-cadm ium bat-
NI-CD
.
inside the compart-
8

Warning: Never set
ALKALINE JACK NI-CD
to
NI-CD
if you are
installing non-rechargeable batteries. Non-rechargeable batteries
can get hot or explode if you try t o recharge them.
3. Install two batteries in the compartment and two in the cover as
indicated by the polarity symbols (+ and –) marked inside those
locations.
Cautions:
• Use only fresh batteries of the requi red size and recommended
type.
• Always remove old or weak batteries. Batteries can leak chemi-
cals that dest roy electronic circuits.
• Do not mix old and new batteries, different types of batteries
(alkaline or rechargeable), or rechargeable batteries of different
capacities.
4. Replace the cover.
If
BATT.Lo
flashes and the scanner beeps every 15 seconds, replace
(alkaline) or recharge (rechargeable ni ckel-cadmi um ) the batterie s.
Caution: Always dispose of old batteries prompt ly and pr operly. Do not
bury or burn them.
9

Charging Nickel-Cadmium Batteries
The scanner has a buil t-in ci rcuit that lets you rec har ge nickel-c admiu m
batteries while t hey are in the sc anner. To charge the batter ies, set
KALINE JACK NI-CD
to
NI-CD
, install the nickel-cadmium batteries
in the scanner, and connect an external AC or DC adapter to the scanner’s
POWER
jack (see “Using Standard A C Power” on Page 11 or “Us-
ing Vehicl e Batt ery Power” on Page 12).
AL-
Warning:
Do not connect either adapter to the scanner if you have
non-rechargeable batteries (such as al kaline batteries) installed in the
scanner and
ALKALINE JACK NI-CD
is set to
NI-CD
, or you are unsure of the switch’s position. Non-rechargeable batteries will get hot
and can even explode if you try to recharge them.
Before you use nickel-cadmium batteries f or the first ti m e, charge them
at least 24 hours t o bring them to a full charge.
Discharged batteries take about 10 to 18 hours to fully recharge. It
takes longer to fully charge them if you operate the scanner while you
recharge them.
Notes:
• Nickel-cadmi um batter ies las t longer and deliv er more power i f you
occasionally let them fully discharge. To do this, simply use the
scanner until it begins beeping every 15 seconds and
BATT.Lo
flashes.
• To prevent damaging nickel-cadmium batteries, never charge
them in an ar ea wher e the temperature is above 113°F or below
40°F.
Important:
At the end of a recha rgeable battery’s useful li fe, it must be
recycled or disposed of properly. Contact your local, county, or state
hazardous waste management authorities f or information on recycl ing
or disposal programs in your area. Some options that might be available are: municipal curb-s ide coll ecti on, drop- off box es at reta ilers such
as your local RadioShack store, recycling collection centers, and mailback programs.
10
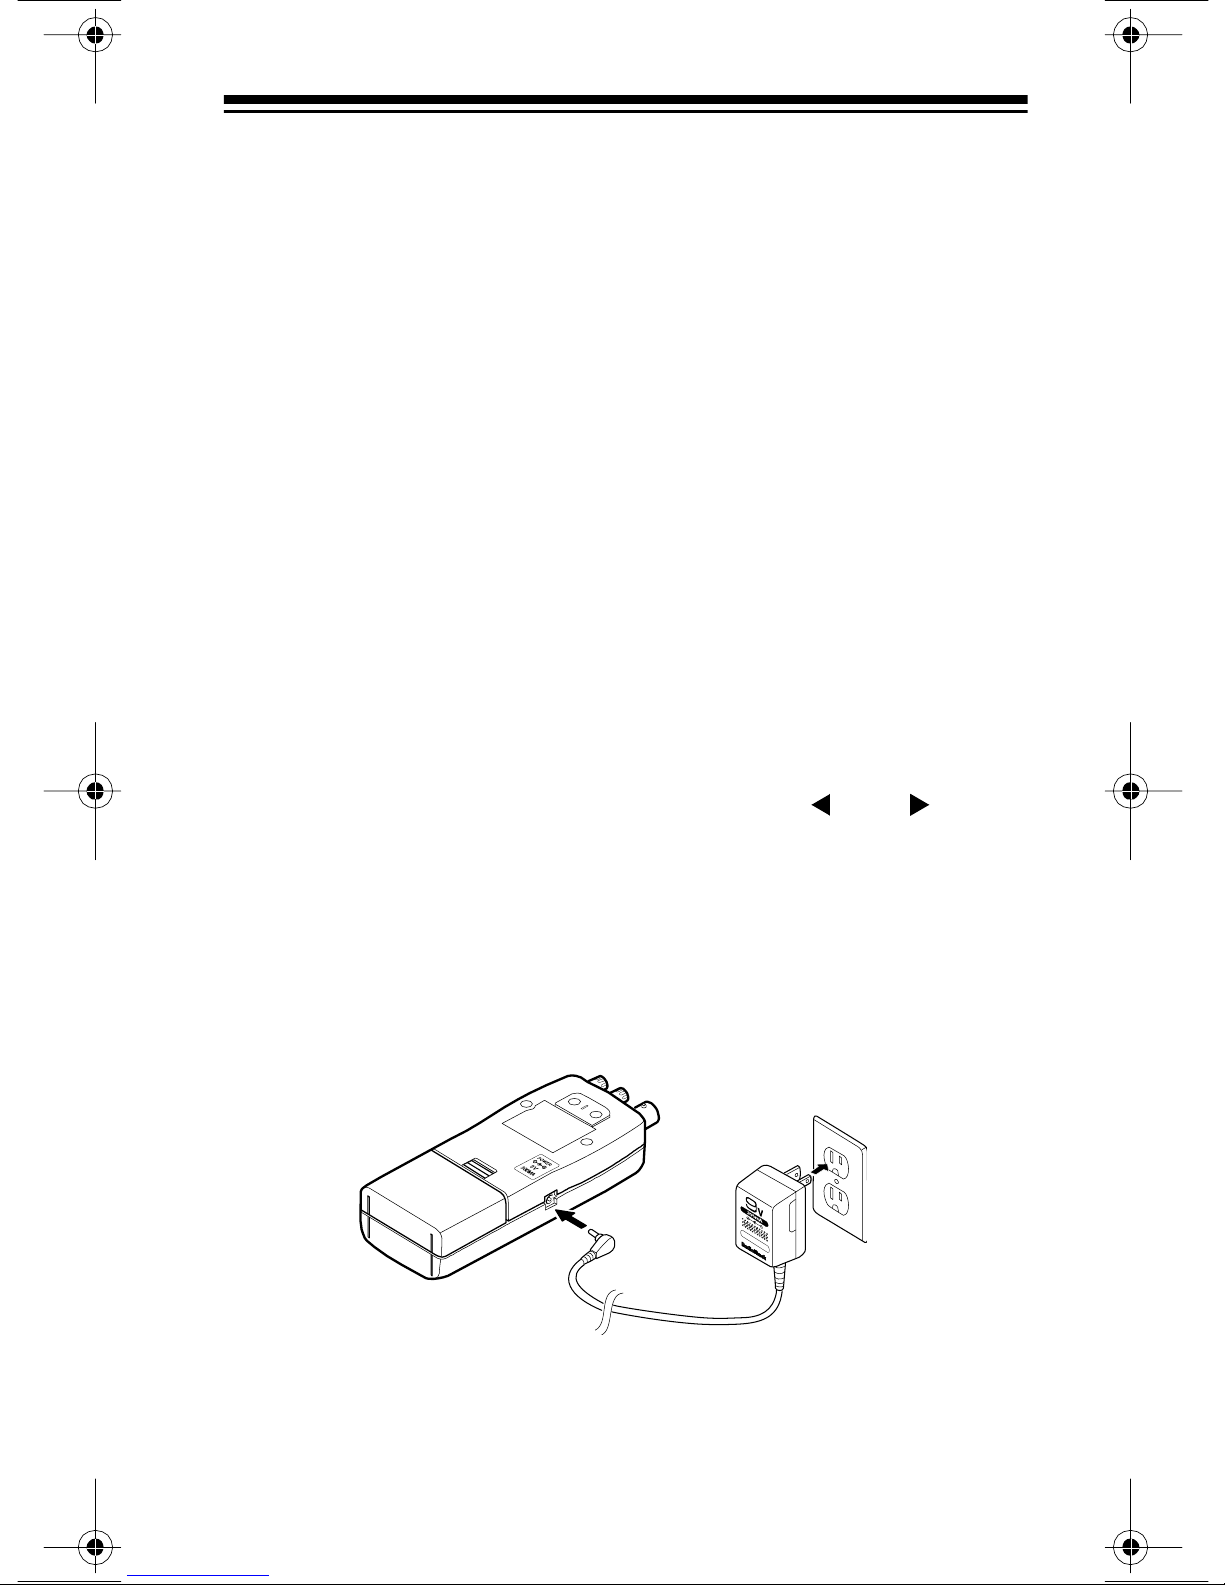
Using Standard AC Power
You can power the scanner from a standard AC outlet usi ng an optional AC adapter (such as Cat. No. 273-1665).
Warning:
Do not use an AC adapter’s polar ized plug with an extension
cord, receptacle, or other outlet unless the blades can be fully inserted
to prevent blade exposure.
Cautions:
• The recommended AC adapter supplies 9 volts and delivers at
least 300 milliamps. It has a barrel plug with a center negative tip
that correctly fi ts the scanne r’s
POWER
jack. Usi ng an adapter that
does not meet these specifications could damage the scanner or
the adapter.
• To protect your scanner and AC adapter, always plug the adapter
into the scanner bef ore you plug it into the AC outlet, and always
unplug the adapter from the AC outlet before you unplug it from
the scanner.
• If batteries are installed, make sure
ALKALINE JACK NI-CD
is
set to the correct position (see “Using Internal Batteries” on
Page 8).
1. Turn
VOLUME
counterclockwise until it clicks to make sure power
is turned off.
2. Plug the adapter’s 3.4 mm out side diameter/1.3 mm inside diameter barrel plug into your scanner’s
POWER
jack.
3. Plug the other end of the adapte r in to a standard AC outlet .
11
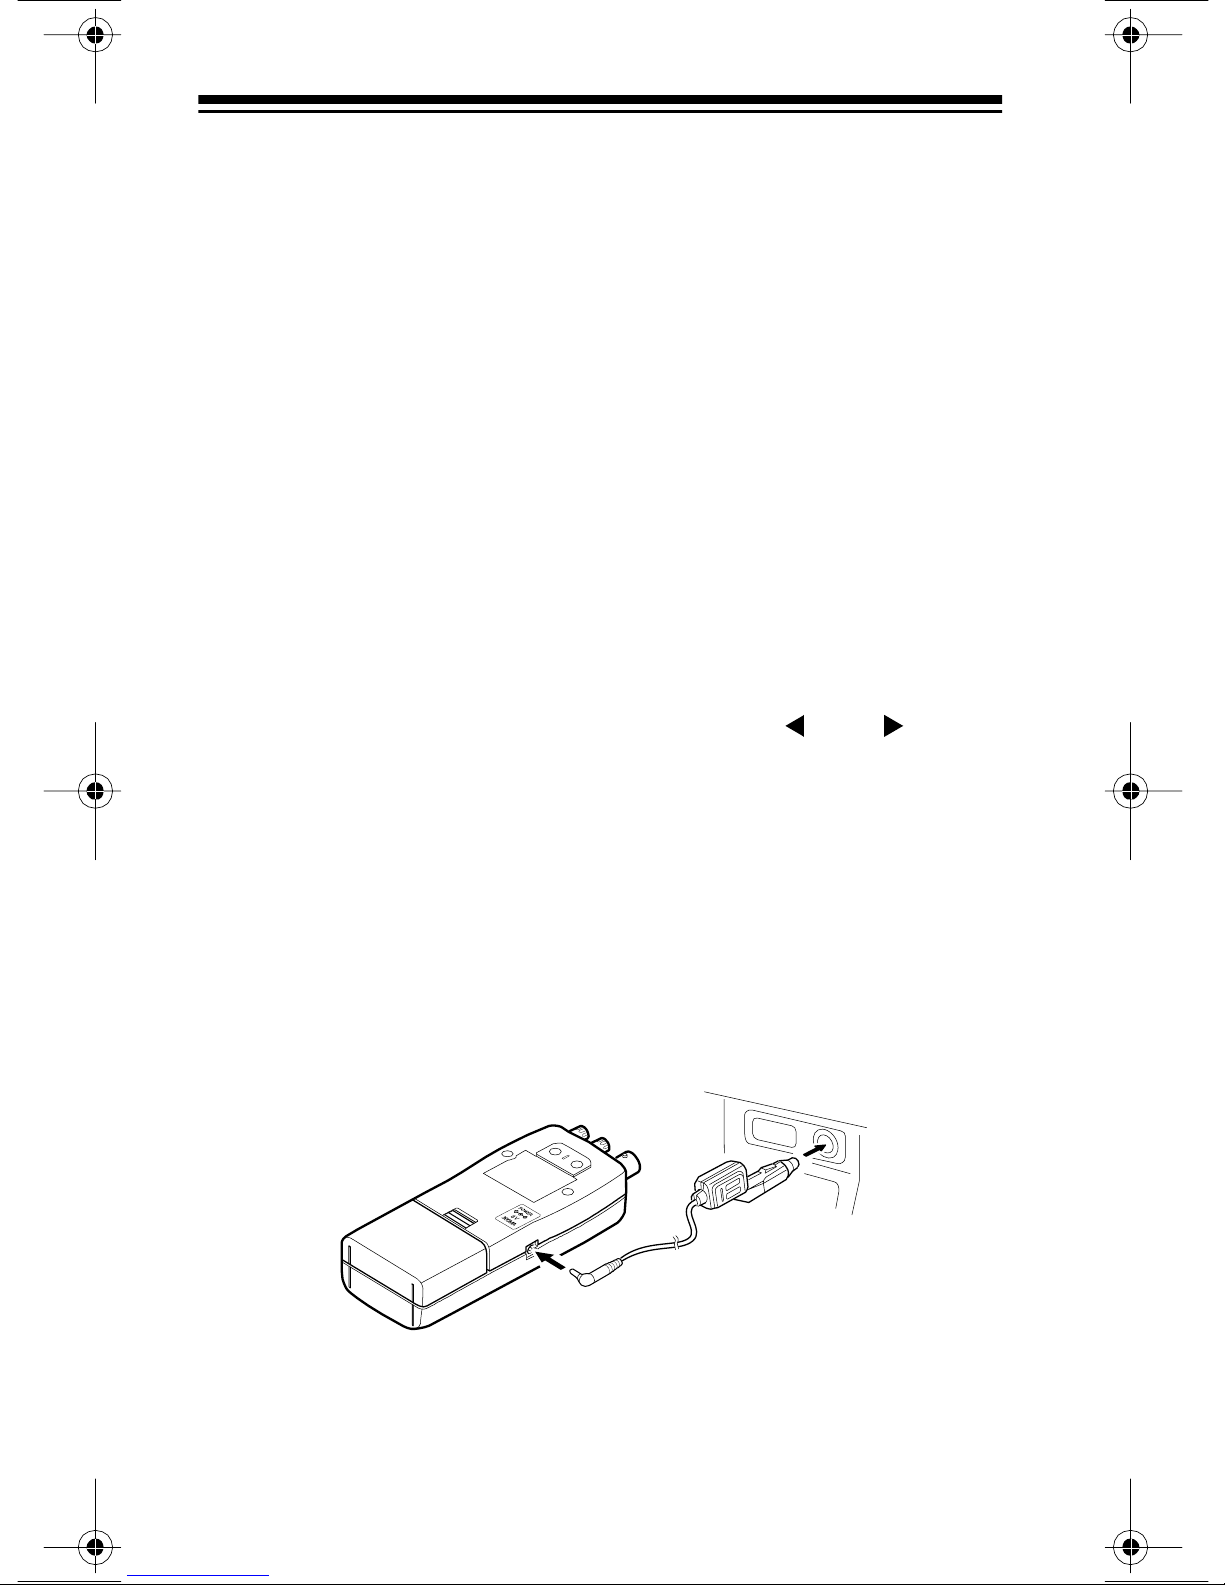
Using Vehicle Battery Power
To power the scanner from your vehicle's cigarette-lighter socket, you
need a DC adapter, such as Cat. No. 270-1560.
Cautions:
• The DC adapter must be capable of delivering 9 volts and at least
300 milliamps, its center tip must be set to negative, and its barrel
plug must correctly fit the scanner's
mended adapter meets these specifications. Using an adapter that
does not meet these specifications coul d damage the scanner or
the adapter.
• To protect your vehicle' s electrical system, always plug the adapter
into the scanner before you plug it into your vehicle's cigarettelighter socket. Always unplug the adapter from the vehicle's cigarette-lighter socket before you unplug i t from the scanner.
POWER
jack. The recom-
• If batteries are installed, make sure
ALKALINE JACK NI -CD
is
set to the correct position (see “Using Internal Batteries” on
Page 8).
1. Turn
VOLUME
counterclockwise until it clicks to make sure power
is turned off .
2. Set the DC adapter’s voltage switch t o 9V.
3. Connect the adapter’s 3.4 mm outer diameter/1.3 mm inner diameter tip to the adapter’s cord, matching TIP to –.
4. Plug the adapter’s barrel plug into your scanner’s
POWER
jack.
5. Plug the other end of the adapter into your vehicle’s cigarettelight er socket.
12
When you finish using the DC adapter, disconnect it f rom the cigarettelighter socket, then disconnect it from your scanner.
Note: If the scanner does not operate properly when you connect a DC
adapter, unplug the adapter from the cigarette-lighter socket and clean
the socket to r e m ove ashes and other debris.
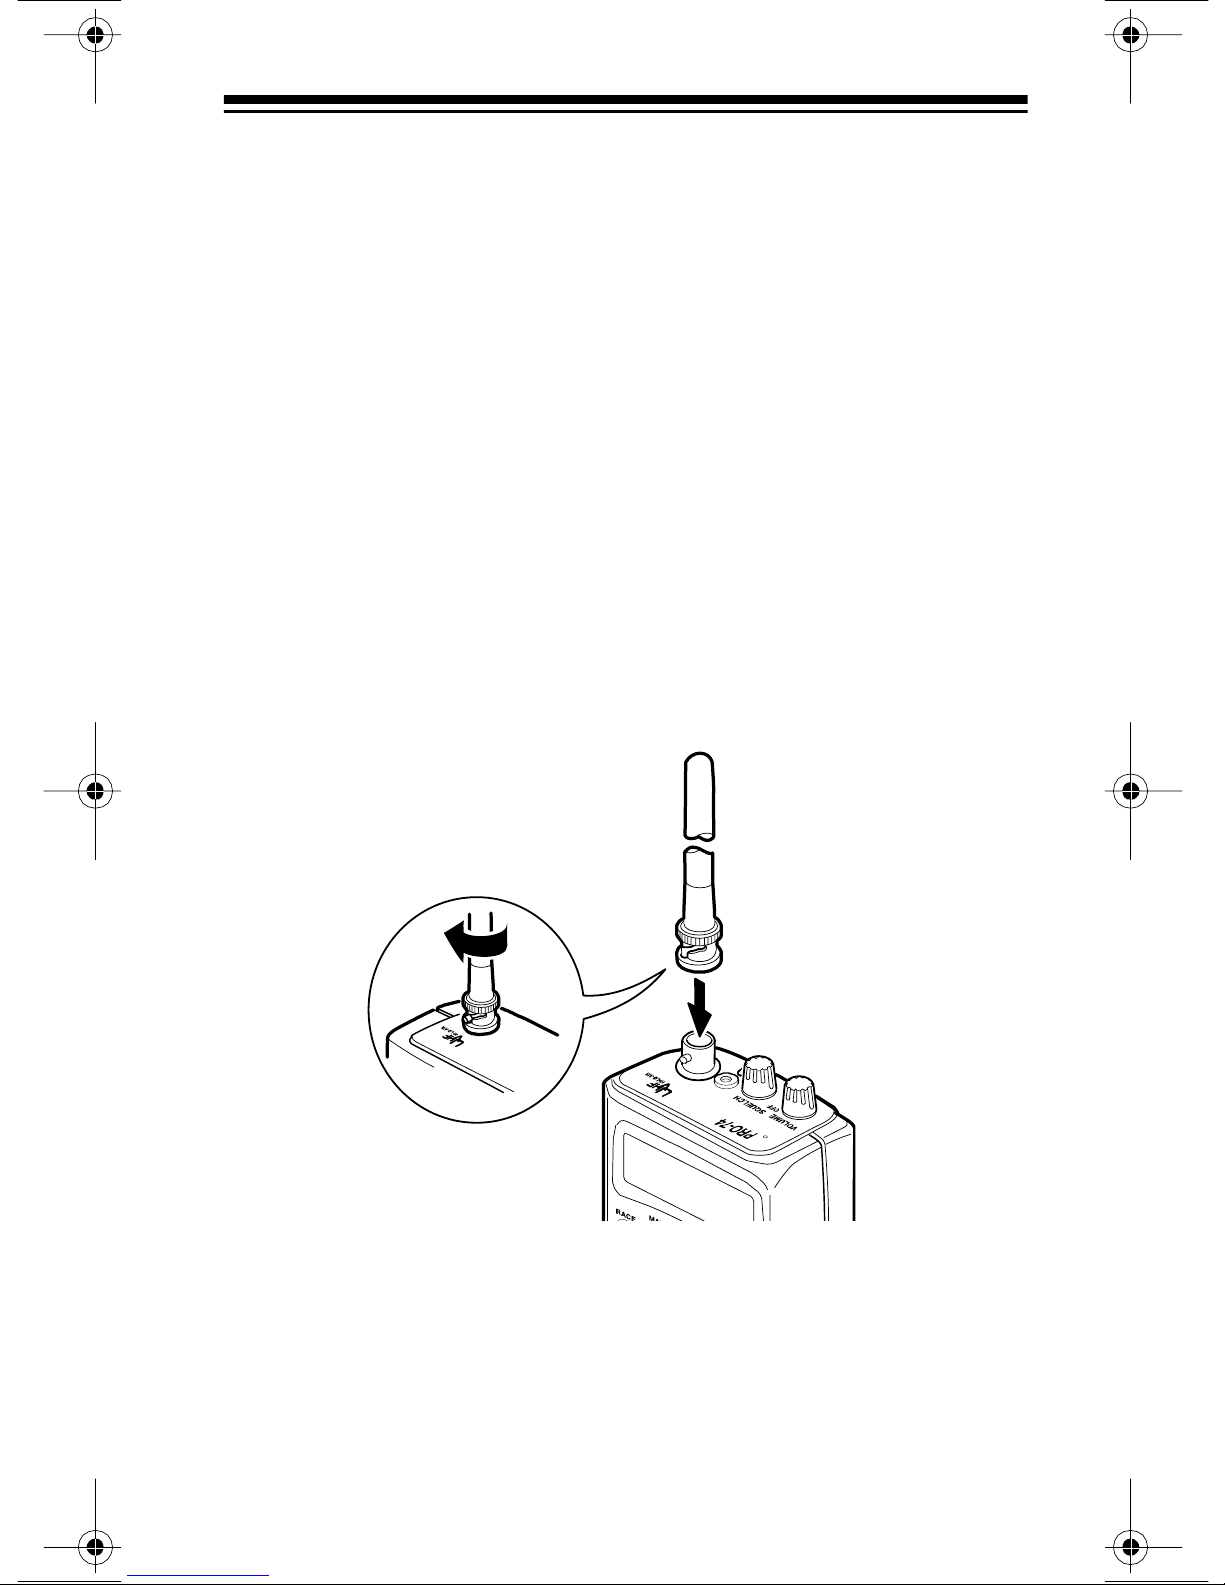
CONNECTING AN ANTENNA
The supplied stub antenna helps your scanner receive most strong
transmissions at events and makes the scanner easier to carry and
use. The supplied flexible antenna provides slightly better reception
and helps your scanner rece ive strong local signals. You can attac h either of the supplied antennas or an optional antenna to the scanner
(see “Connecting an Optional Antenna” on Page 14).
Follow thes e steps to attach either of t he supplied antennas to the connector on the top of your scanner.
1. Align the slots aro und the ant enna’s connector wi th the tabs on t he
scanner’s BNC connect or.
2. Slide the antenna’s connector down over the scanner’s connect or
and rotate the antenna connector’s outer ring clockwise until it
locks into place.
13

Connecting an Optional Antenna
The scanner’s antenna jack makes it easy to use the scanner with a
variet y of antenna s. Instead of either of the sup pli ed antennas, you can
attach a different one, such as an external mobile antenna or outdoor
base station antenna. Your local RadioShack store sells a variety of
antennas.
Always use 50-ohm coaxial cable, such as RG-58 or RG-8, to connect
an outdoor antenna. For lengths over 50 feet, use RG-8 low-loss dielectric coaxial cable. If your antenna’s cable does not have a BNC
connector, use a BNC adapter, available at your local RadioShack
store.
Follow the installation instructions supplied with the antenna, route the
antenna cable to the scanner, then connect it to the antenna
lowing the steps in “Connecting an Antenna” on Page 13.
jack fo l-
Warning:
Use extreme caution when installing or removing an outdoor
antenna. If the ant enna starts to fall, le t it go! It could contact overhead
power lines. If the antenna touches a power line, contact with the antenna, mast, cable or guy wires can cause electrocution and death!
Call the power company to remove the antenna. Do not attempt to do
so yourse lf.
Cautions
:
• Do not run the cable over sharp edges or moving parts.
• Do not run the cabl e next to power cabl es or other antenn a cables.
• Do not run the cable through a vehicle’s engine compartment or
other areas that produce ext reme heat.
• Follow all cauti ons and warnings included with the ante nna.
14
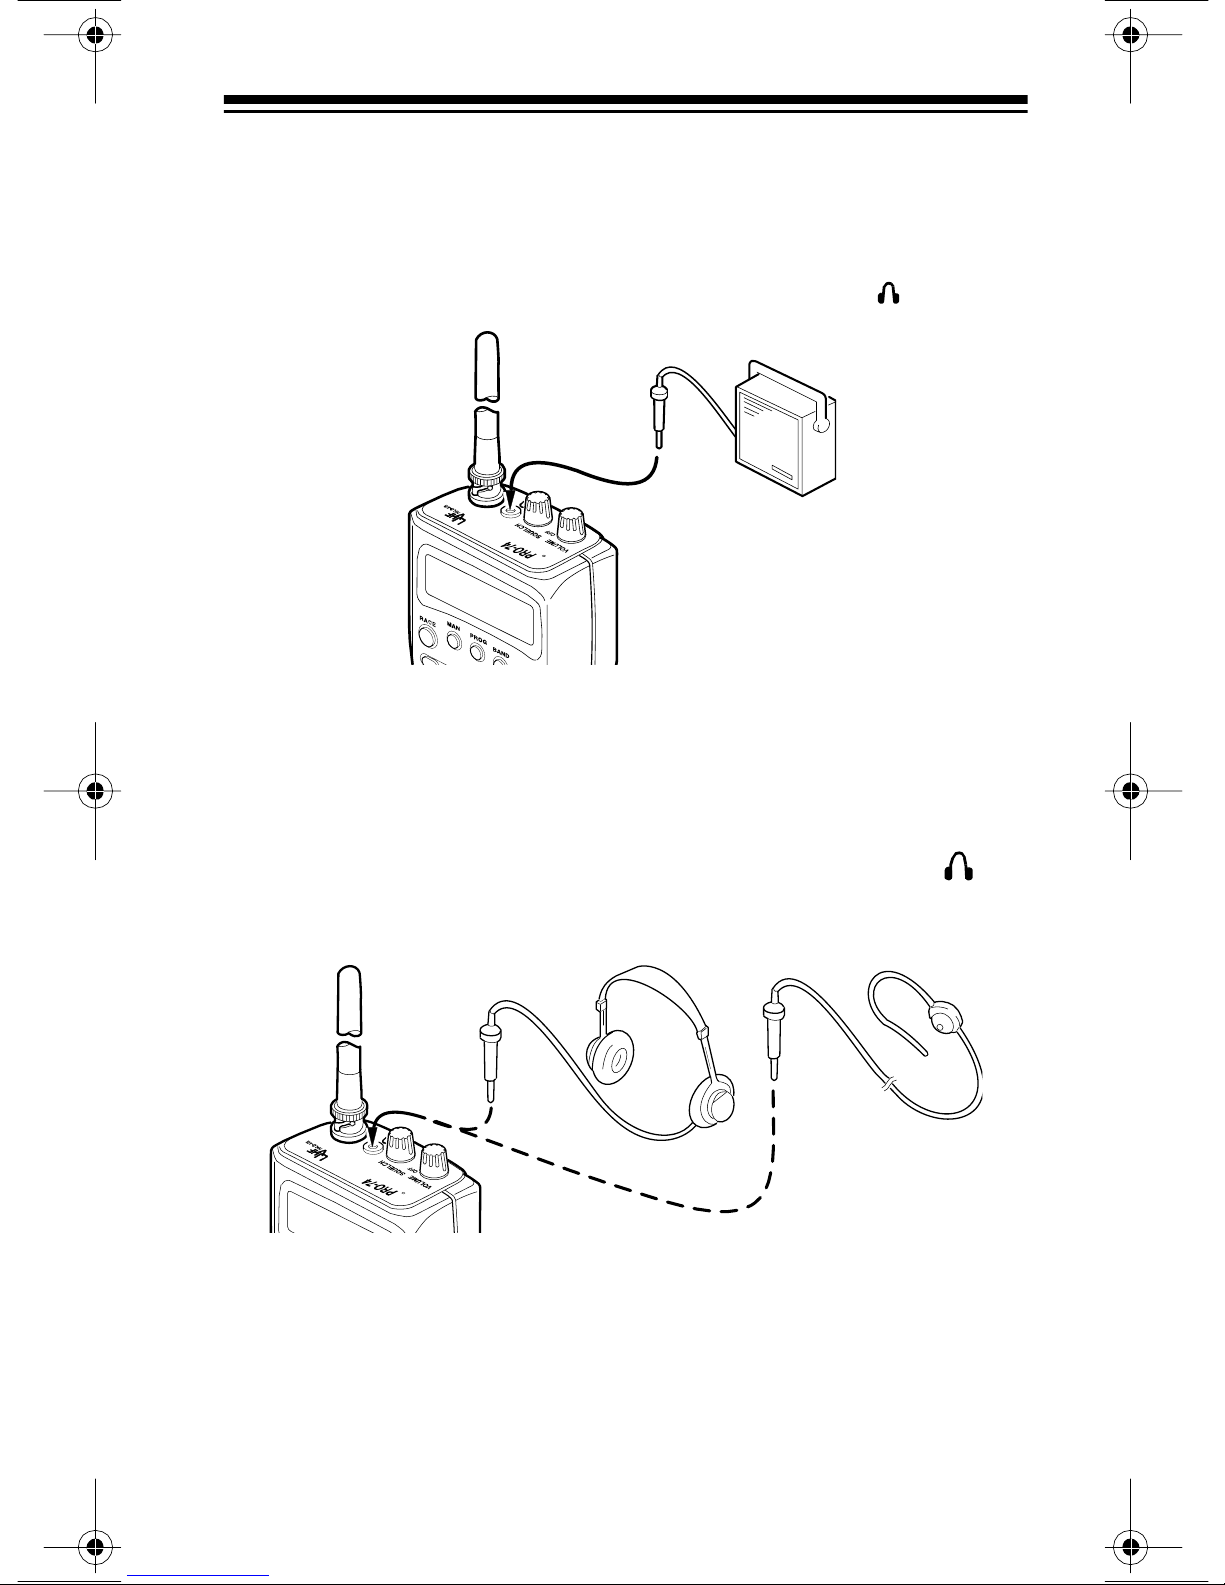
CONNECTING AN EXTENSION SPEAKER
In a noisy area, an extension speaker (such as Cat. No. 21-549), positioned i n the right place, might provide more comfortable listening. Plug
the speaker cable’s
1
/8-inch mini-plug into your scanner’s jack.
CONNECTING AN EARPHONE/
HEADPHONES
For private listening, you can plug an earphone or headphones with a
1
/8-inch mini-plug (such as Cat. No. 33-178 or 20-210) into the jack
on top of your scanner. This automatically disconnects the internal
speaker.
15
Listening Safely
To protect your hearing, follow these guidelines when you use an earphone or headphones.
• Do not listen at extremely high volume levels. Extended highvolume lis tening can lead to permanent hearing loss.
• Set the volume to the lowest setting before you begin listening.
After you begin listening, adjust the volume to a comfortabl e level.
• Once you set the volume, do not increase it. Over time, your ears
adapt to the volume level, so a volume level that does not cause
discomfort might sti ll dam age your hearing.
Traffic Safety
Do not use an earphone/headphones with your scanner when operating a motor vehicle or riding a bicycle in or near traffic. Doing so can
create a tr aff ic hazard and could be illegal in some areas.
If you use an earphon e/headphones with your scann er, be v ery careful.
Do not listen to a continuous broadcast. Even though som e earphones/
headphones let you hear some outside sounds when listening at normal volume level s, they still can present a traffic hazard.
ATTACHING THE BELT CLIP
You can attach the supplied belt clip to make your scanner easier to
use when you are on the go. Use a Phillips screwdriver and the two
supplied screws to attach the belt clip to the scanner. Then slide the
belt clip over your belt or waistband.
16
 Loading...