

Page 1
20-310 .fm Page 1 Wed nesday, Au gust 4, 1999 10:49 AM
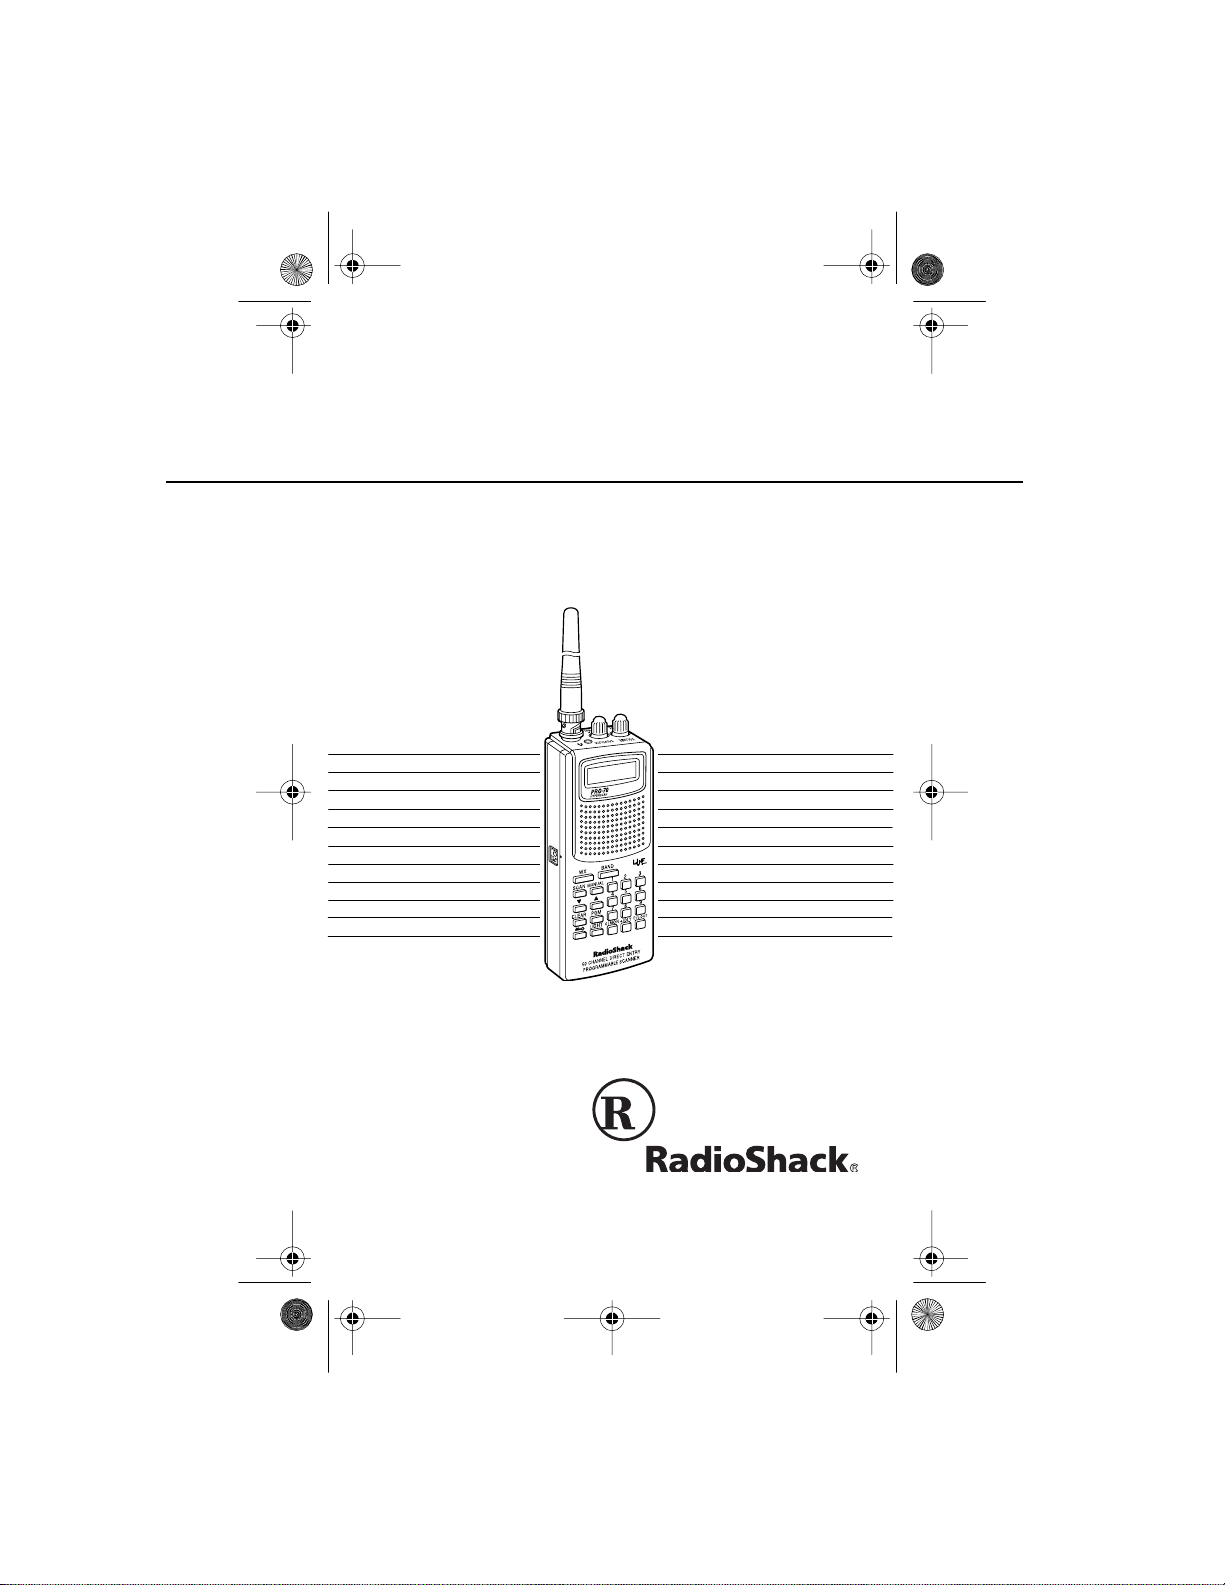
OWNER’S MANUAL
50-Channel Portable Scanner
Please read before using this equipment.
PRO-70
Cat. No. 20-310
Page 2

20-310 .fm Page 2 Wed nesday, Au gust 4, 1999 10:49 AM
INTRODUCTION
Your new RadioShack PRO-70 50-Channel Portable
Scanner lets you in on all the action. This scanner gives
you direct access to over 22,000 exciting frequencies, including police and fire departments, ambulance services,
and amateur radio ser vices. You can select up to 50 channels to scan, and you can change your selection at any
time.
The secret to your scanner’s ability to scan so many frequencies is it s custom-d esi gned micro pro cessor — a tiny,
built-in computer. Your scanner also has these special
features:
Ten Preprogrammed Search Bands
— let you search
for transmissions within preset frequency ranges, so you
can find intere sting frequencies more quickly.
Ten Preprogrammed Weather Frequencies
— keep
you informed about cur rent weather conditions.
Two-Second Automatic Scan Delay
— delays scanning
for 2 seconds before moving to another channel, so you
can hear more replies .
50 Channels
— let you st ore up to 50 of your favorite fr e-
quencies for easy recall and scanning.
Monitor Memory
— lets you temporarily save an active
frequency you locate during a direct search, until you decide whether or not you want to save it into a channel.
Memory Backup
— keeps the channel frequencies
stored in memory for abou t 1 hour during a power loss.
©
1997 Tandy Corporation.
RadioShack is a registered trademark used by Tandy Corporation.
U.S. Patent No’s. 3,794,925: 3,801,914: 3,961,261: 3,962,644:
4,027,251: 4,092,594: 4,123,715: 4,245,348.
All Rights Reserved.
2
Page 3

20-310 .fm Page 3 Wed nesday, Au gust 4, 1999 10:49 AM
Channel Lockout — k eeps channels you select from being scanned.
Key Lock — lets you lock the scanner’s keys to help prevent accidental ly changing the scanner ’s programming.
Flexible Antenna with BNC Connector — provides excellent reception and is designed to help prevent antenna
breakage.
Liquid Crystal Display — makes it easy to view and
change programming information.
Display Backlight — makes the scanner easy to read in
low light situations.
Three Power Options — let you power the scanner from
internal batteries (non-rechargeable batteries or a rechargeable scanner battery pack) or external AC or DC
power (using optional adapters).
We recommend you record your scanner’s serial number
here. This number is on the scanner’s back panel.
Serial Number:
3
Page 4

20-310 .fm Page 4 Wed nesday, Au gust 4, 1999 10:49 AM
Your PRO-70 scanner contains the following preprogrammed frequencies (divided into search bands). See
“Using Band Search” on Page 25.
Frequency
Band
Search
Range
Description
(in MHz)
0 29-30 10-Meter Amateur Radio
1 30-50 VHF Low
2 50-54 6-Meter Amateur Radio
3 137- 144 Aircraf t/ A ir Sho w s ,
Government
4 144-148 2-Meter Amateur Radio
5 148- 174 VHF Hi
6 380- 420 U.S . G over n m ent
7 420-450 70-Centimeter Amateur Radi o
8 450- 470 UHF Low
9 470- 512 UHF “ T ” Band
In addition, your scanner is preprogrammed with the following weather service frequencies:
161.650 161.775 162.400 162.425
162.525 162.450 162.475
162.500 162.550 163.275
4
Page 5

20-310 .fm Page 5 Wed nesday, Au gust 4, 1999 10:49 AM
This owner’s m anual also incl udes the section “A General
Guide to Scanning,” which helps you target frequency
ranges in your service area so you can search for a wide
variety of broadcasts.
FCC NOTICE
Your scanner might cause TV or radio interference even
when it is operating properly. To determine whether your
scanner is causin g the inte rfere nce, turn off your scanne r.
If the interference goes away, your scanner is causing
the interference. Try the following methods to eliminate
the interference.
• Move your scanner away from the TV or radio
• Connect your scanner to an outlet that is on a different electrical circuit from the TV or radio
• Contact your loca l Radi oShack store for help
If you cannot eliminate the interference, the FCC requires
that you stop using yo ur scanner.
This device complies with Part 15 of the
eration is subject to the following conditions: (1) This device must not cause harmful interference, and (2) This
device must accept any interference received, including
interference that may cause undesired operation.
Note:
Mobile use of this scanner is unlawful or requires a
permit in some areas. Check the laws in your area.
FCC Rules
. Op-
5
Page 6

20-310 .fm Page 6 Wed nesday, Au gust 4, 1999 10:49 AM
SCANNING LEGALLY
Scanning is a fun and interesting hobby. You can hear
police and f ire departments, am bulance services, government agencies, private companies, amateur radio services, air craft , and milit ary o peratio ns. It is legal to listen to
almost every transmission your scanner can receive.
However, there are some electronic and wire communications that are illegal to intentionally intercept. These include:
• Telephone conversations (cellular, cordless, or other
private means of telephone signal transmi ssion)
• Pager transmissions
• Scrambled or encrypted transmissions
According to the
vacy Act
possibly imprisoned for intentionally listening to, using, or
disclosing t he contents of such a transmission unless you
have the consent of a party to the communication (unless
such activity i s o therwi se il legal ). Thes e laws ch ange f rom
time to time and there might be state or local laws tha t also
affect legal scanner usage.
6
(ECPA), as amended, you could be fined and
Federal Electronic Communications Pri-
Page 7

20-310 .fm Page 7 Wed nesday, Au gust 4, 1999 10:49 AM
CONTENTS
Preparation ...... ... .............. ... .. ............... .. ... ....... .. ... ...... 9
Power S ou r ce s ..................... .. ... ....... ... .. ....... ... .. .... 9
Using Batteries ............................................... 9
Using Standard AC Power .......... .................. 11
Using Vehicle Battery Power ........................ 12
Charging a Rechargeabl e Battery Pack ...... . 13
Connecting the Antenna ...................................... 14
Connecting an Optio nal Antenna .................. 15
Connecting an Earphone/Headphones ................ 16
Listening Safely ........................................... 16
Traffic Safety ................................................. 16
Connecting an Extension Speaker ...................... 17
Using the Belt Clip ............................................... 17
Understanding the PRO-70 ...................................... 18
A Look at the Keypad .............. ............................ 18
A Look at the Display ........... .. .......... .. .................. 19
Operation ....... .. ...................... ... .. ....... ... .. ........ .. .. ....... 21
Turning On the Scanner and Setting SQUELCH . 21
Searching For and Storing Active Frequencies ... 22
Active Frequency References ...................... 22
Storing Frequenc ies ..................................... 23
Using Band Search ......... .......... .. .................. 25
Using Direct Search ...................................... 27
Using the Monitor Memory ................................... 28
Listening to the Monitor Memory .................. 28
Moving a Frequency from the Monitor
Memory to a Channel ................................... 28
Scanning the Stored Channels ............................ 29
Monitoring a Stored Channel ......................... ...... 30
Clearing a Stored Channel .................................. 31
Spec ia l F eatures ................. .. ... ....... .. ... ....... ... .. ......... 32
Using the Keylock ................................................ 32
Locking Out Channels ......................................... 32
Using a 2-Second Delay ........ .. .......... ............ ...... 33
Using the Display Backlight ................................. 34
Listening to a Weat her Band ............................... 34
7
Page 8

20-310 .fm Page 8 Wed nesday, Au gust 4, 1999 10:49 AM
A Gener a l S ca n n in g Gu id e ................ .. ... ....... ... .. ..... 36
Guide to Frequencies .......................................... 36
National Weather Frequencies ..................... 36
Ham Radio Frequencies ............................... 36
Birdie Frequencies ....................................... 37
Guide to the Action Bands ................................... 37
United States Broadcast Bands ........ ........... 37
Typical Band Usage ..................................... 38
Primary Usage .............................................. 38
Spec ifi ed In te r va ls .................. .. ... ....... ... .. ..... 39
Band Allocation ................................. ........... .. ...... 40
Avoiding Image Frequencies ............................... 45
Frequency Conversion ........................................ 46
Troubleshooting ........................................................ 47
Resetting/Initializing the Scanner ........................ 49
Resetting the Scanner .................................. 49
Initializing the Scanner ................................. 50
Care and Maintenance .............................................. 51
Spec if ic a ti on s ..... ............... .. ... .............. ... .. ........ .. .. ... 52
8
Page 9

20-310 .fm Page 9 Wed nesday, Au gust 4, 1999 10:49 AM
PREPARATION
POWER SOURCES
You can power your scanner from any of three sources:
• Internal batteries or a rechargeable scanner battery
pack (not supplied — see “Using Batteries”)
• Standard AC power (with an optional AC adapter —
see “Using Standard AC Power” on Page 11)
• Vehicle battery power (with an optional DC adapter
— see “Using Vehicle Battery Power” on Page 12)
Notes:
• Connecting an AC or DC adapter to the scanner dis-
connects any internal batteries, but it does not disconnect a rechargeable battery pack. If you install a
rechargeable battery pack, you can operate the
scanner and recharge the battery pack at the same
time. See “Using Batteries” and “Charging a
Rechargeable Battery Pack” on Page 13.
• If the scanner stops working properly after connect-
ing it to power, try resetting it. See “Resetting/Initializing the Scanner” on Page 49.
Using Batteries
You can power your s canner fro m six AA batte ries. For the
longest operation and best performance, we recommend
alkaline batteries, such as RadioShack Cat. No. 23-552.
You can also power the scanner from a rechargeable
scanner battery pack, such as Cat. No. 23-288.
Note:
You can also use six rechargeable nickel-cadmium
batteries (such as Cat. No. 23-125) to power the scanner.
To charge or recharge nickel-cadmium batteries, however, you must remove them from the scanner and use an
external charg er (s uch as Cat. No. 23-134).
9
Page 10
20-310 .fm Page 10 We dnesday, A ugust 4, 1999 10:49 AM
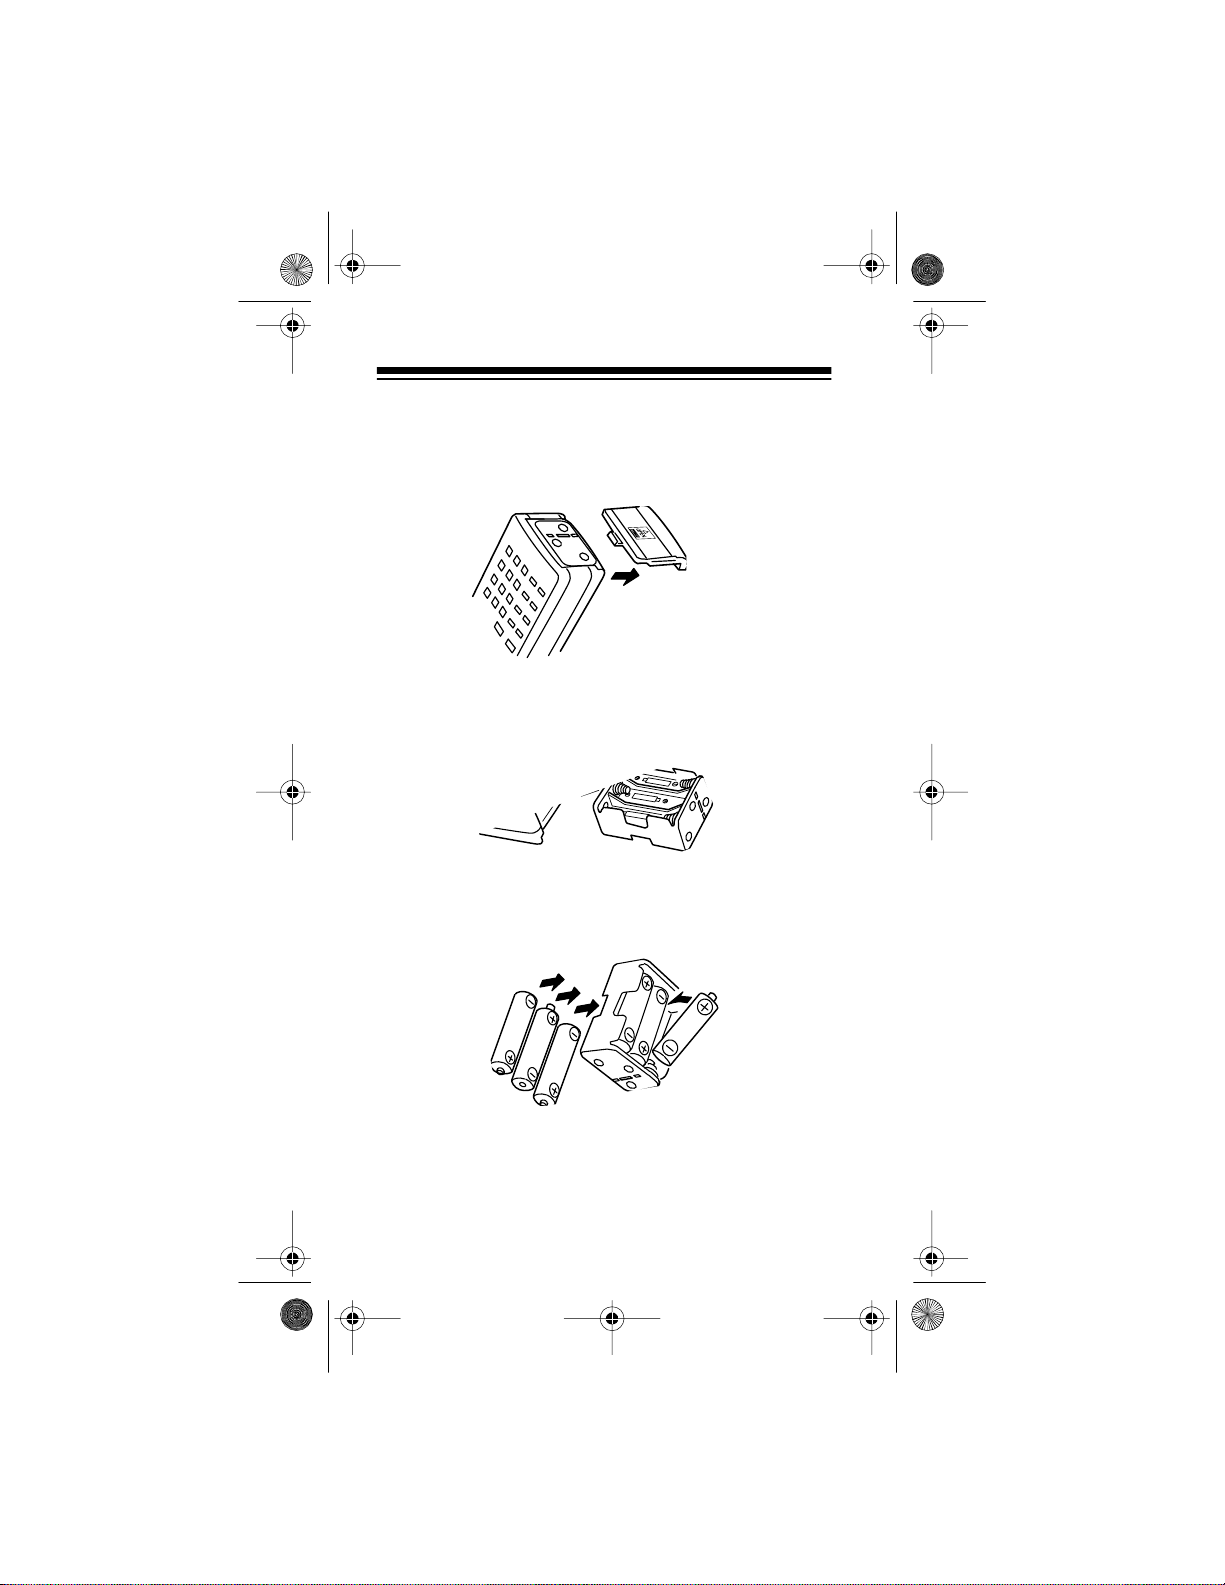
Follow these steps to install batteries or a battery pack.
1. Press down on the battery com partment cover on the
bottom of the scanner and slide the cover in the
direction of the arr ow to r em ove it.
2. Pull up and slide the battery holder or battery pack
out of the battery compartment.
3. If you are installing individual batte ri es, insert six batteries in the battery holder as indicated by the polarity symbols (+ and –) mark ed on the bat tery holder.
10
Page 11
20-310 .fm Page 11 We dnesday, A ugust 4, 1999 10:49 AM
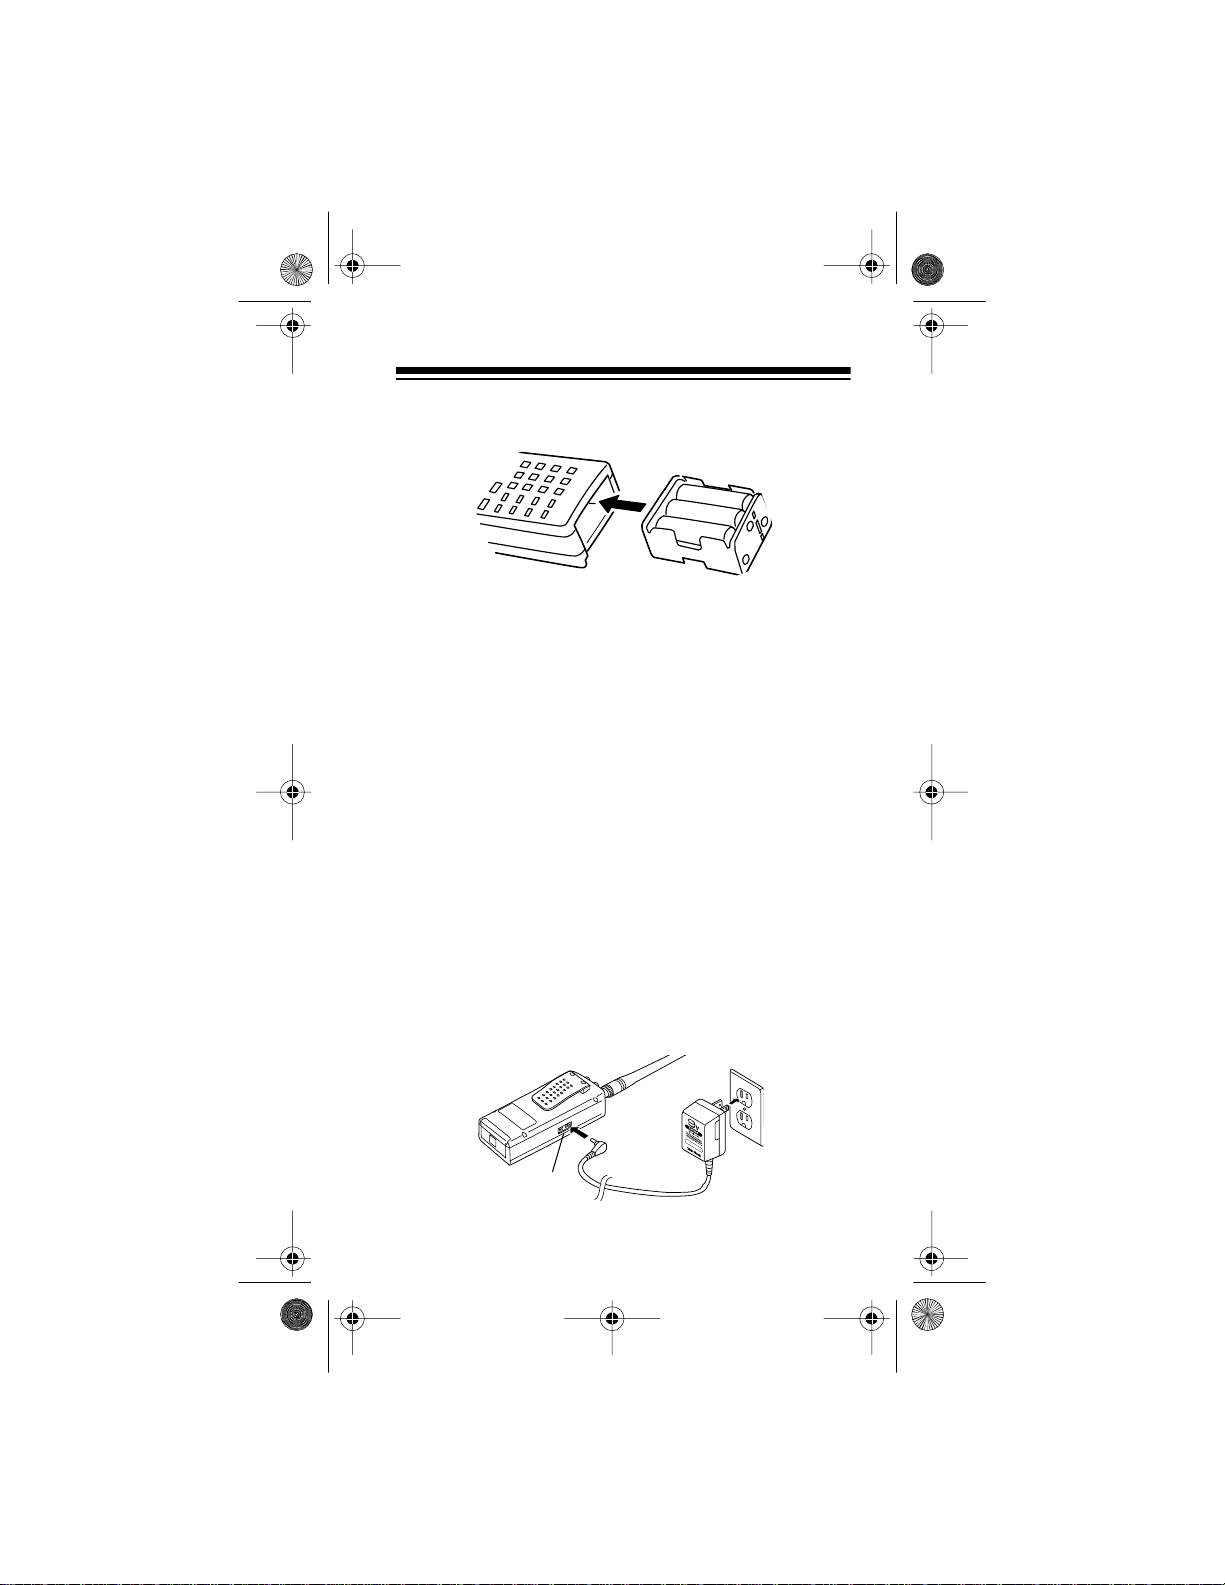
4. Slide the battery holder or battery pack into the compartment.
Caution: The battery holder or battery pack fits only
one way inside the battery compartment. Do not
force it.
5. Replace the cover.
If
flashes on the disp lay, immediat el y repla ce all s ix
BATT
non-rechargeable batteries, remove and recharge all six
rechargeable batteries, or rec harge the battery pac k. See
“Charging a Rechargeable Battery Pack” on Page 13.
Caution: Always dispose of old batteries promptly and
properly. Do not bury or burn them.
Using Standard AC Power
To power the scanner from AC power, you need an AC
adapter such as RadioShack Cat. No. 273-1665. Plug the
adapter’s barrel plug into the scanner’s
PWR/DC 9V
Then plug the adapt er’s power mo dule in to a stan dard AC
outlet.
PWR/DC 9V
jack.
11
Page 12

20-310 .fm Page 12 We dnesday, A ugust 4, 1999 10:49 AM
Warning: Do not use an AC adapter’s polarized plug with
an extension cord, receptacle, or other outlet unless the
blades can be fully inserted to prevent blade exposure.
Cautions:
• You must use an AC adapter that supplies 9 volts
and delivers at least 300 milliamps. Its center tip
must be set to negative, and i ts plug must correctly fit
the scanner’s
PWR/DC 9V
jack. The recommended
adapter meets these specifications. Using an
adapter that does not meet these specifications
could damage the scanner or the adapter.
• When you finish using the AC adapter, disconnect it
from the AC outlet first. Then disconnect it from the
scanner.
Using Vehicle B attery Power
To power the scanner from your vehi cle’s cigarette lighter
socket, you need a DC Adapter, such as Cat. No. 270-
1560.
Cautions:
• You must use a DC adapter that supplies (regulated)
9-volt power and de livers at lea st 300 millia mps. Its
center tip must be set to negative, and its plug must
correctly fit the scanner’s
PWR/DC 9V
jack. The recommended adapter meets these specifications.
Using an adapter that does not meet these specific ations could damage the scanner or the adapter.
• To protect your vehicle’s electrical system, always
plug the adapter into the scanner before you plug it
into your vehicle’s cigarette-lighter socket. Always
unplug the adapter from the vehicle’s cigarettelighter socket before you unplug it from the scanner.
12
Page 13
20-310 .fm Page 13 We dnesday, A ugust 4, 1999 10:49 AM
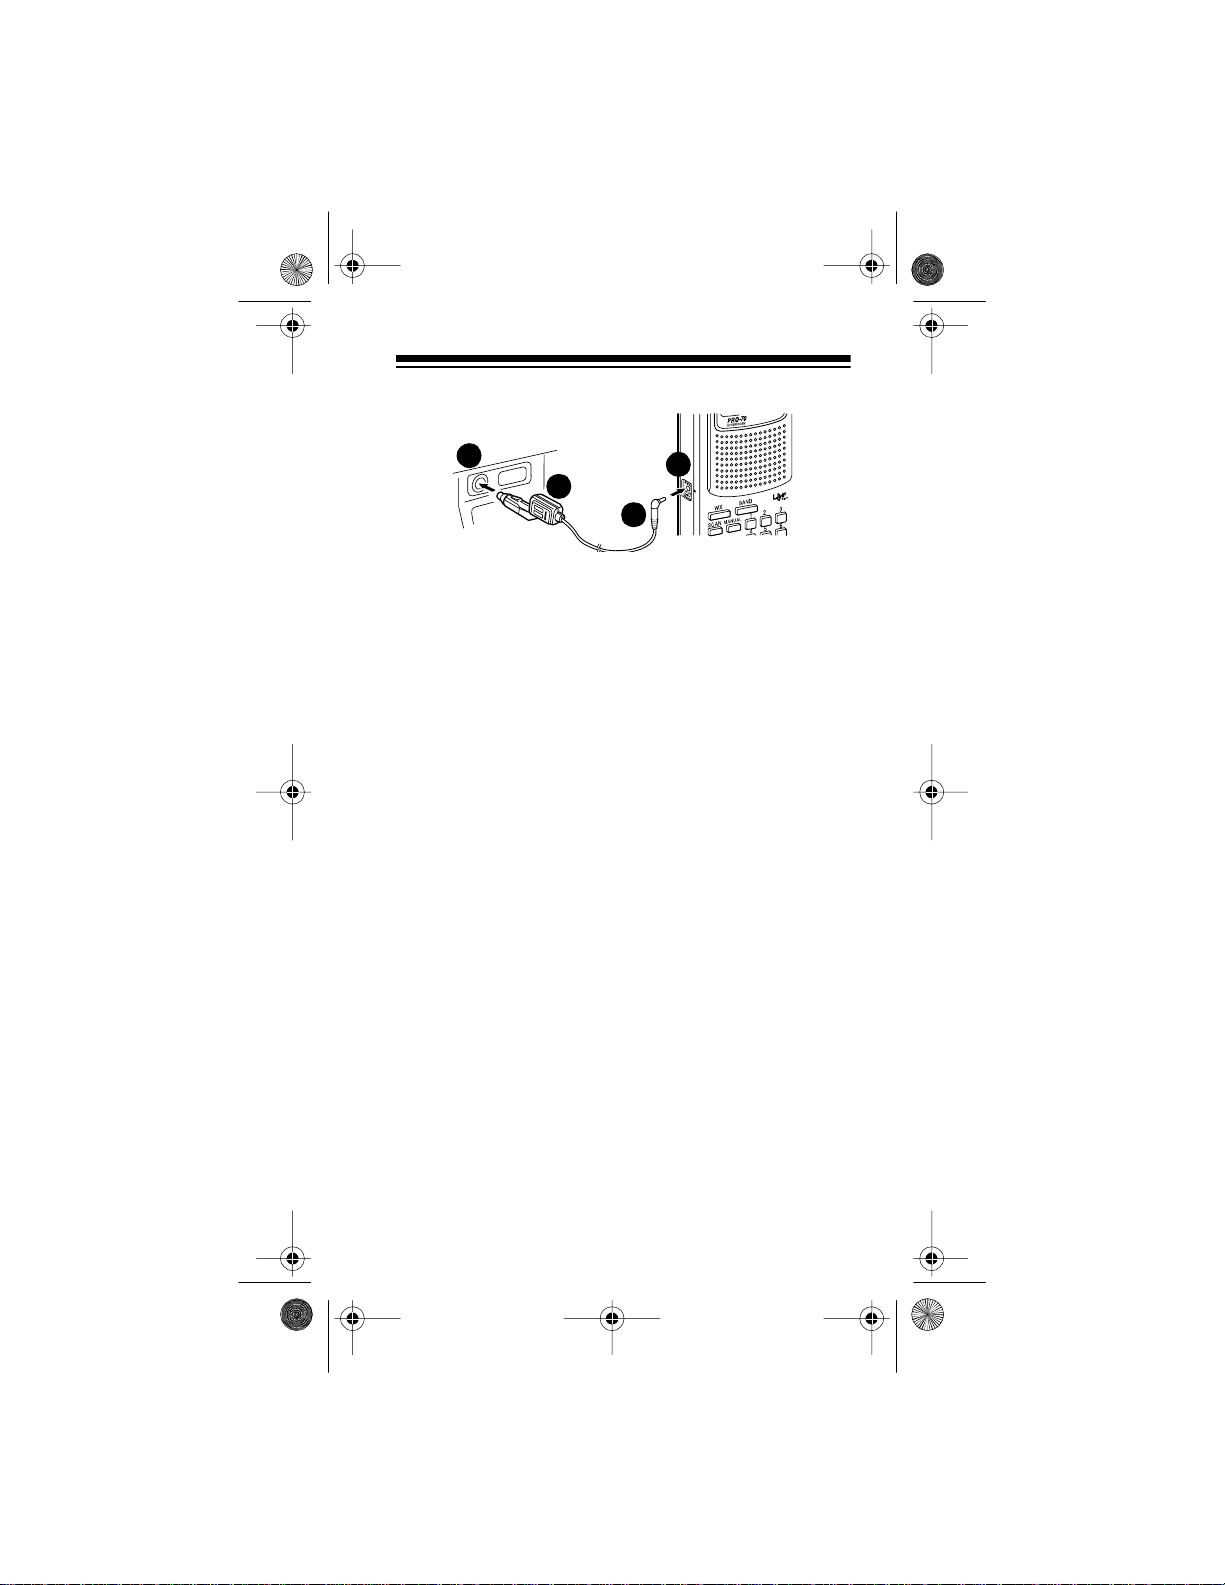
4
2
3
1
1. Connect the DC adapter’s orange barrel plug to the
adapter’s cable, wit h the tip set to – (negative).
2. Set the adapter’s volta ge switch to 9V.
3. Insert the barrel plug into the scanner’s
PWR/DC 9V
jack.
4. Plug the other end of the adapter into your vehicle’s
cigarette-lighter socket.
Note:
If the scanner does not operate properly when you
connect a DC adapter, unplug the adapter from the cigarette-lighter socket and clean the socket to remove ashes
and other debris.
Charging a Rechargeable Battery Pack
Your scanner has a built-in charging circuit that lets you
charge a recharge able scan ner ba tter y pack (Cat . No. 23288, not supplied) while it is in the scanner. To charge a
battery pack, simply connect an appropriate AC or DC
adapter to the
PWR/DC 9V
jack.
Note:
If you want to take the battery pack out of the scanner to charge it, follow the instructions provided with the
battery pack.
It takes about 14-16 hours to recharge a battery pac k that
is fully discharged. You can operate the scanner while recharging the battery pack, but the charging time is l engthened.
13
Page 14
20-310 .fm Page 14 We dnesday, A ugust 4, 1999 10:49 AM
Note: A rechargeable battery pack lasts longer and delivers more power i f y ou occasio nally let it f ully disc harge. To
do this, sim ply us e the sc anner unti l
display. Then fully charge the battery pack.
Important! At the end of a rechargeable battery pack’s
useful life, it must be recycled or disposed of properly.
Contact your lo cal, county, or state hazar dous waste m anagement authorit ies for inf ormation on r ecycling or disposal programs in your area. Some options that might be
available are: muni cipal cu rb-si de coll ecti on, drop- off bo xes at retailers, recycling collection centers, and mail -back
programs.
appears on the
BATT
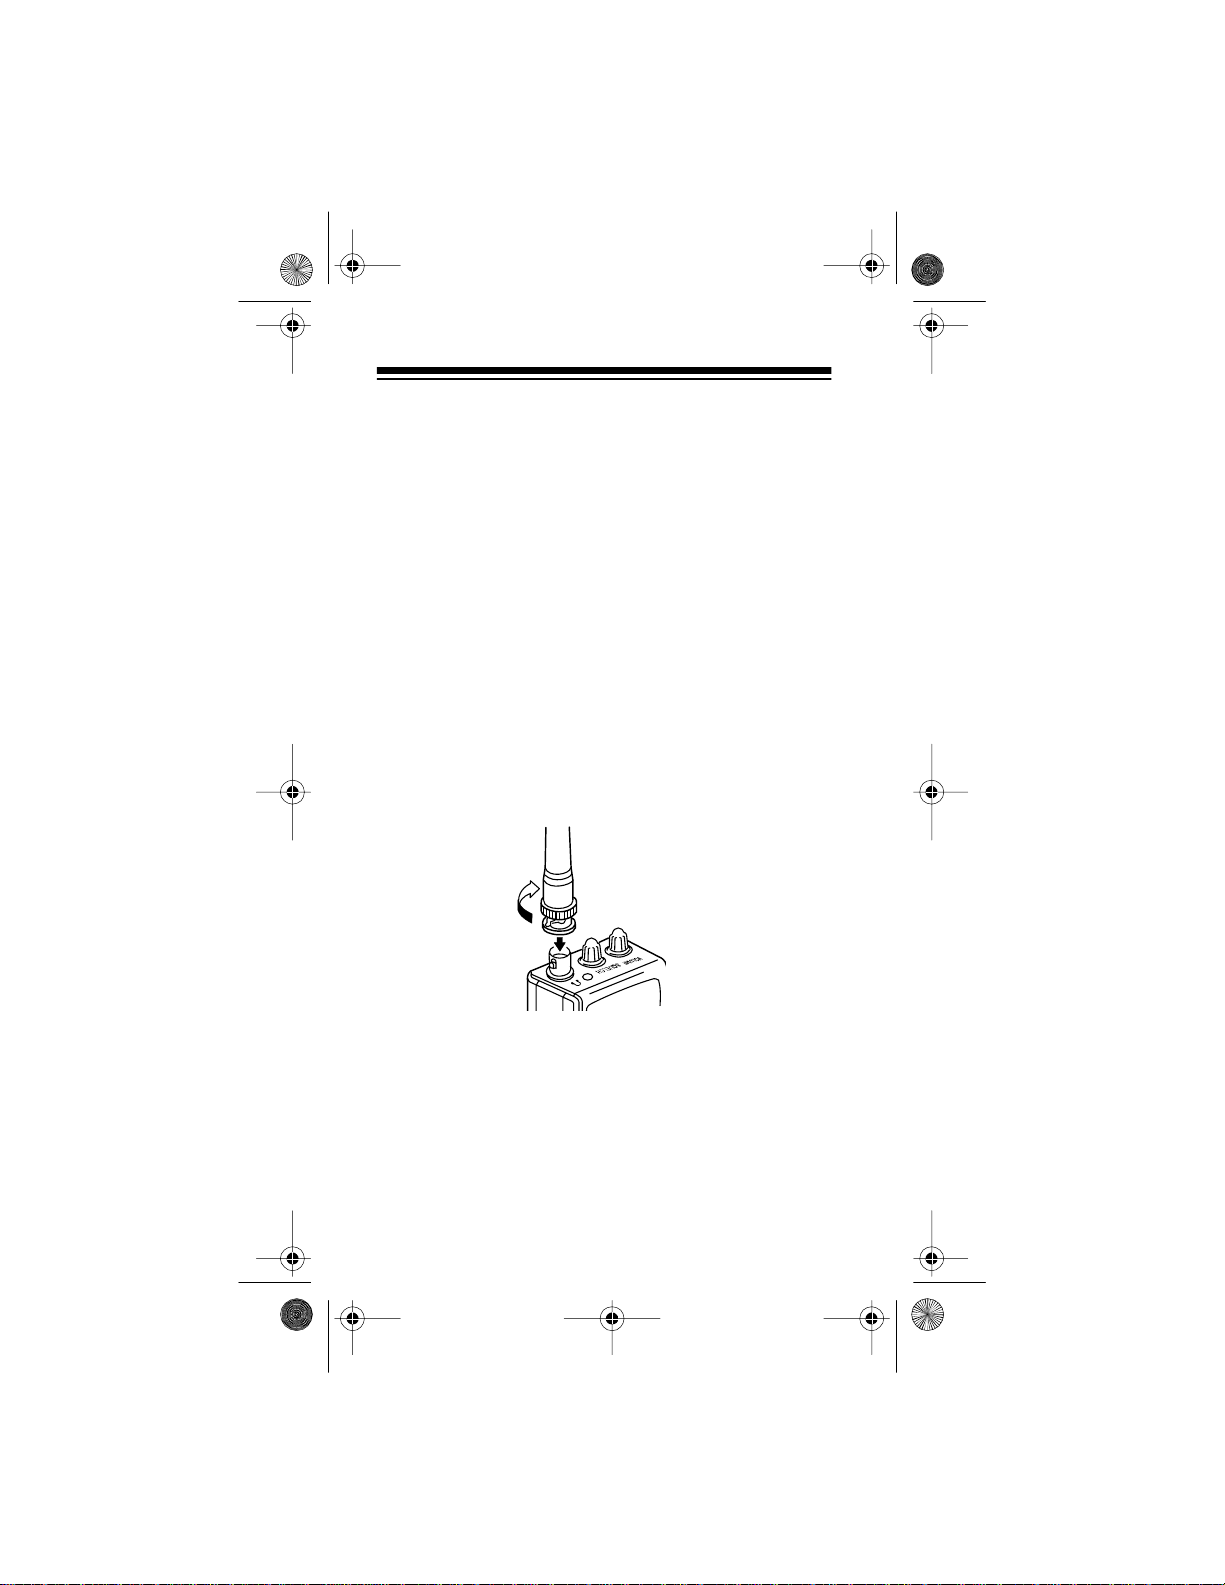
CONNECTING THE ANTENNA
Follow these steps to attach the supplied flexible antenna
to the
jack on the top of your sca nner.
ANT
1. Align the slots around the antenna’s connector with
the tabs on the
2. Press the antenna down over the jack and turn the
antenna’s base clockwise until it locks into place.
14
ANT
jack.
Page 15

20-310 .fm Page 15 We dnesday, A ugust 4, 1999 10:49 AM
Connecting an Optional Antenna
The antenna connector on your sca nner makes it easy to
use the scanner wit h a variety of antennas. Instead of the
supplied anten na, you can attach a different one, such as
an external mobile antenna or outdoor base station ant enna. Your local RadioShack store sells a variety of antennas.
Always use 50-ohm coaxial cable, such as RG-58 or RG8, to connect an outdoor antenna. For lengths over 50
feet, use RG- 8 low- loss die lectr ic c oaxial ca ble. If yo ur antenna’s cable does not have a BNC connector, you will
also need a BNC adapter (also available at your local RadioShack store).
Follow the instal lation instructi ons supplied with the antenna, route the antenna cable to the scanner, then connect
it to the
ANT
jack.
Warning:
Use extreme caution when installing or removing an outdoor antenna. If the antenna starts to fall, let it
go! It could contact overhead power lines. If the antenna
touches a power line, contact with the antenna, mast, cable or guy wires can cause electrocution and death! Call
the power company to remove the antenna. Do not attempt to do so yourself.
15
Page 16
20-310 .fm Page 16 We dnesday, A ugust 4, 1999 10:49 AM
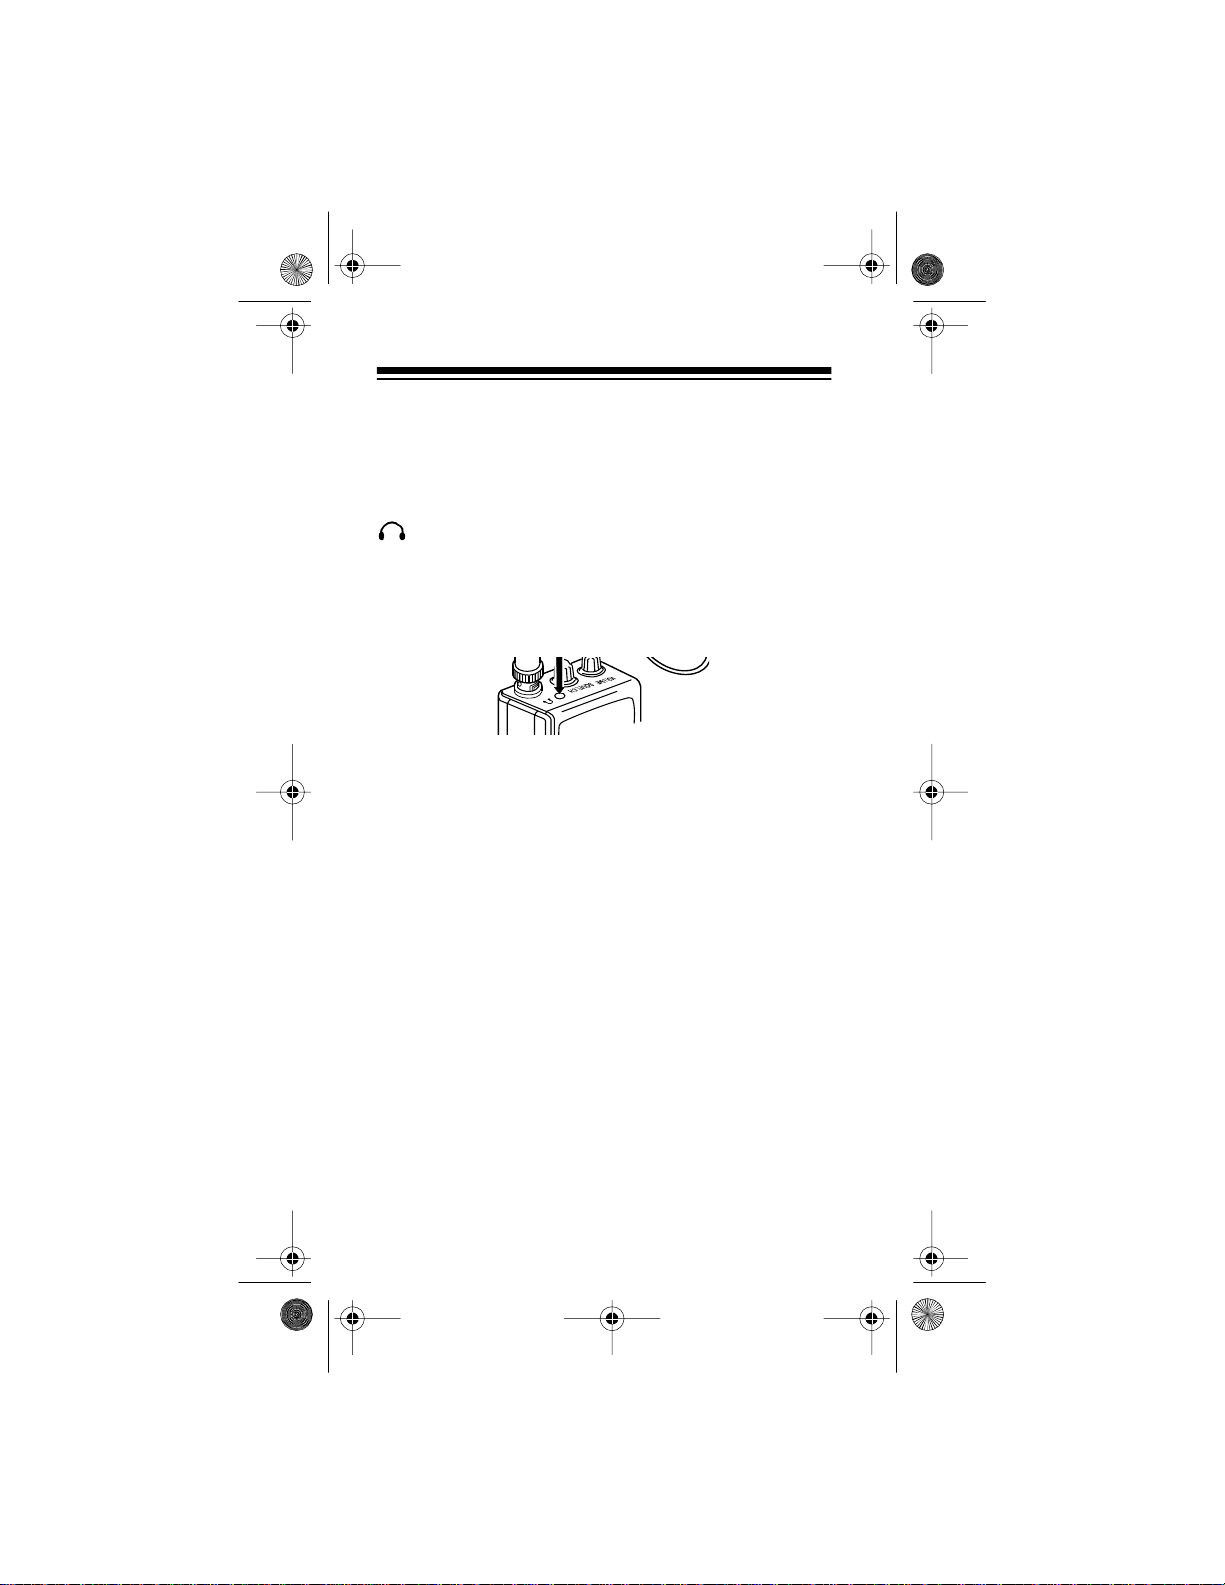
CONNECTING AN EARPHONE/
HEADPHONES
For private listening, you can plug an earphone or mono
headphones (such as Cat. No. 33-175 or 20-210) into the
jack on top of your scanner. This automatically dis-
connects the internal speaker.
Listening Safely
To protect your hearing , foll ow these gui deli nes when you
use an earphone or headphones:
• Do not listen at extremely high volume levels.
Extended high-volume listening can lead to permanent hearing loss.
• Set the volume to the lowest setting before you begin
listening. Aft er you begin listening, adjust the volume
to a comfortable level.
• Once you set the volume, do not increase it. Over
time, your ears adapt to the volume level, so a volume level that does not cause discomfort might still
damage your hearing.
Traffic Safety
Do not wear an earphone or headphones while you drive
a vehicle or ride a bicycl e. This can create a traffic hazard
and can be illegal in some areas.
16
Page 17
20-310 .fm Page 17 We dnesday, A ugust 4, 1999 10:49 AM
Even though some earphones and headphones let you
hear some outside sounds when you listen at normal levels, they still can present a traffic hazard.
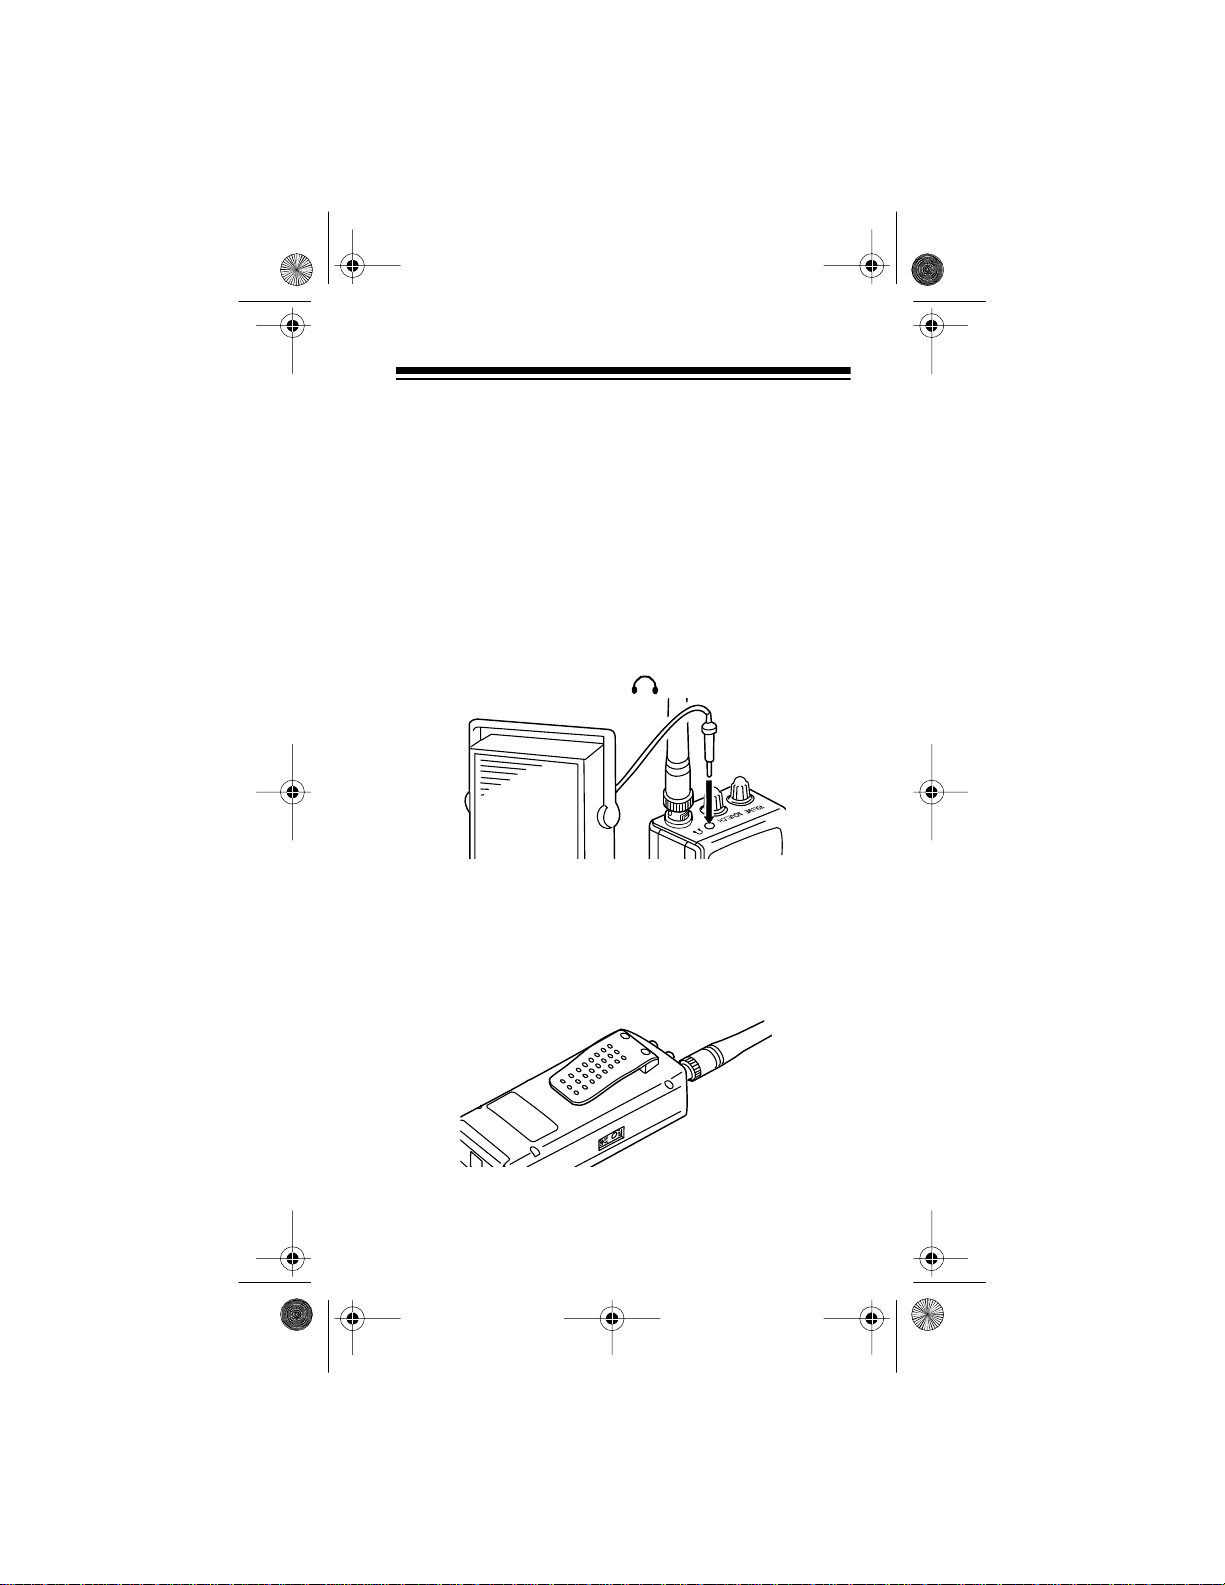
CONNECTING AN EXTENSION
SPEAKER
In a noisy area, an extension speaker (such as Cat. No.
21-549) or an amplified speaker (such as Cat. No. 21-
541), positioned in the right place, might provide more
comfortable listening. Plug the speaker cable’s
mini-plug int o your scanner’s jack.
1
/8-inch
USING THE BELT CLIP
You can use the belt cl ip at tached to the back of the scanner for hands-free carrying when you are on the go. Simply slide the belt clip over your belt or waistband.
17
Page 18

20-310 .fm Page 18 We dnesday, A ugust 4, 1999 10:49 AM
UNDERSTANDING THE PRO-70
A LOOK AT THE KEYPAD
Your scanner’s key s might seem confusi ng at first, but this
information should help you understand each key’s function.
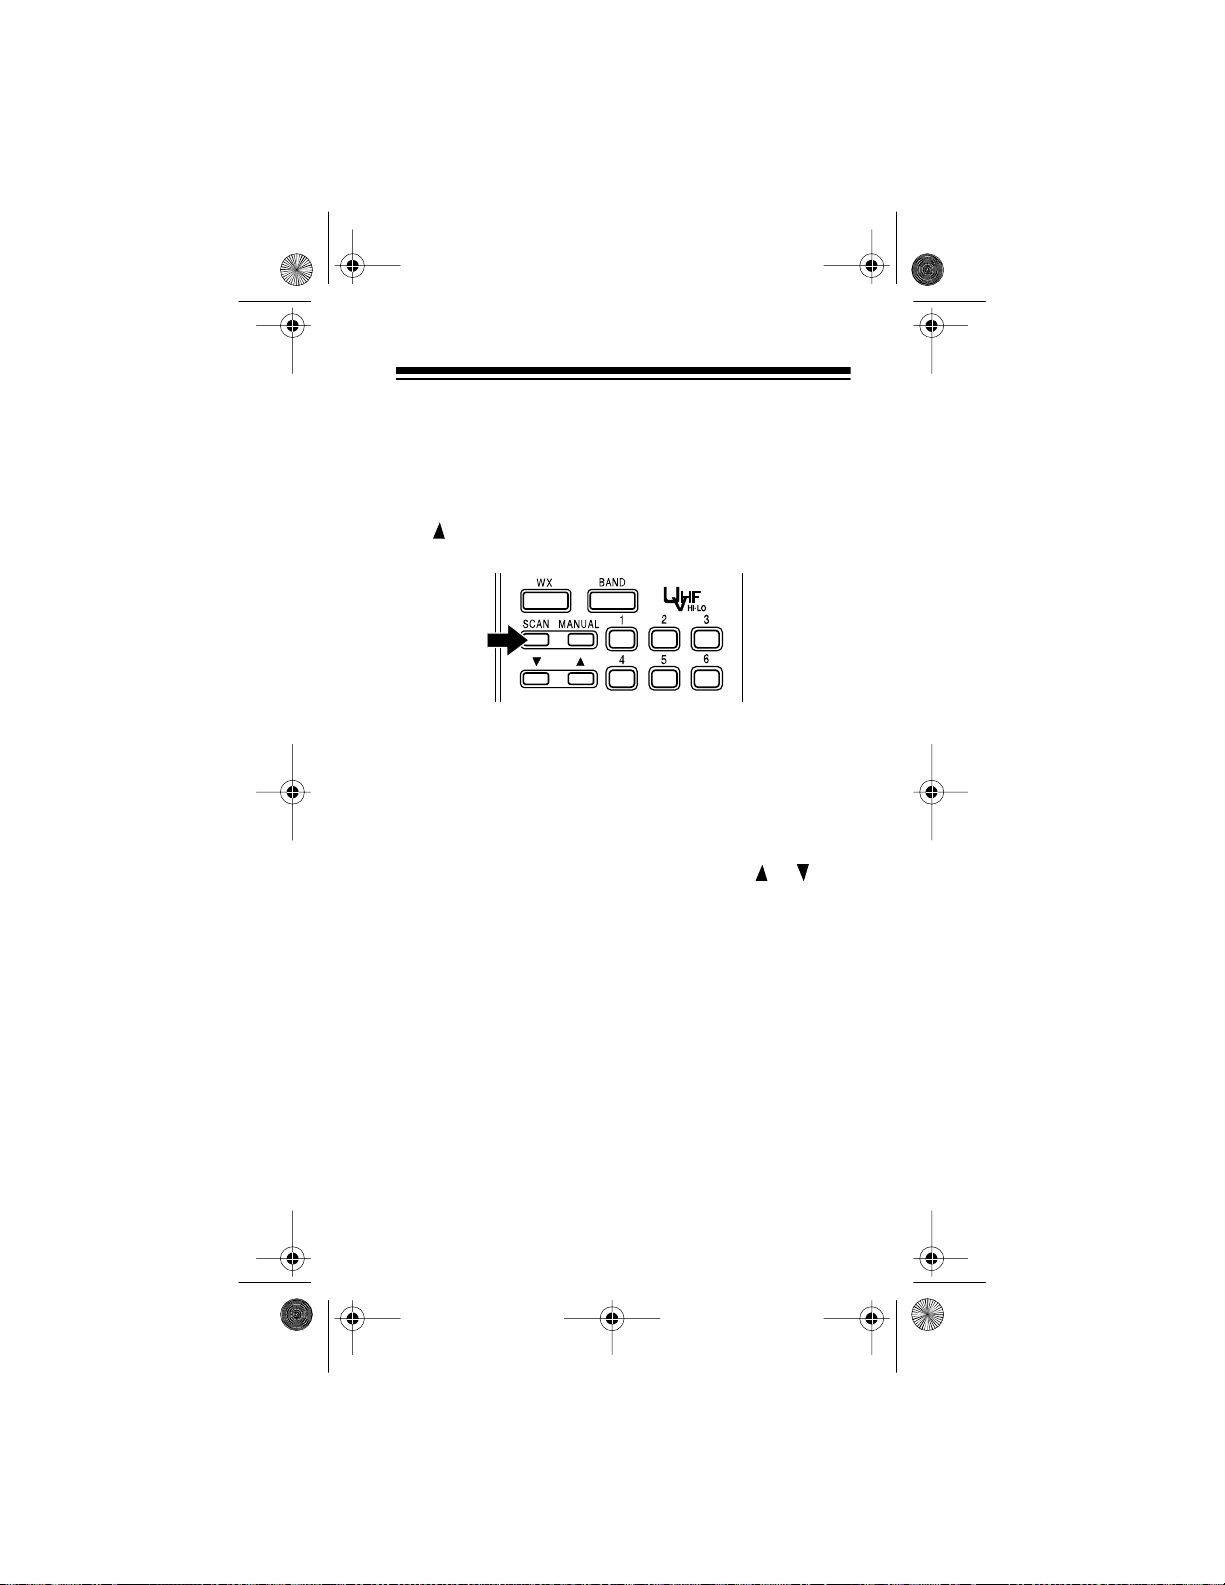
WX
— scans through the 10
preprogrammed weather
channels.
BAND
— selects a prepro-
grammed search band.
SCAN
— scans through the
programmed channels.
MANUAL
— stops scanning and lets you directly enter a
channel number.
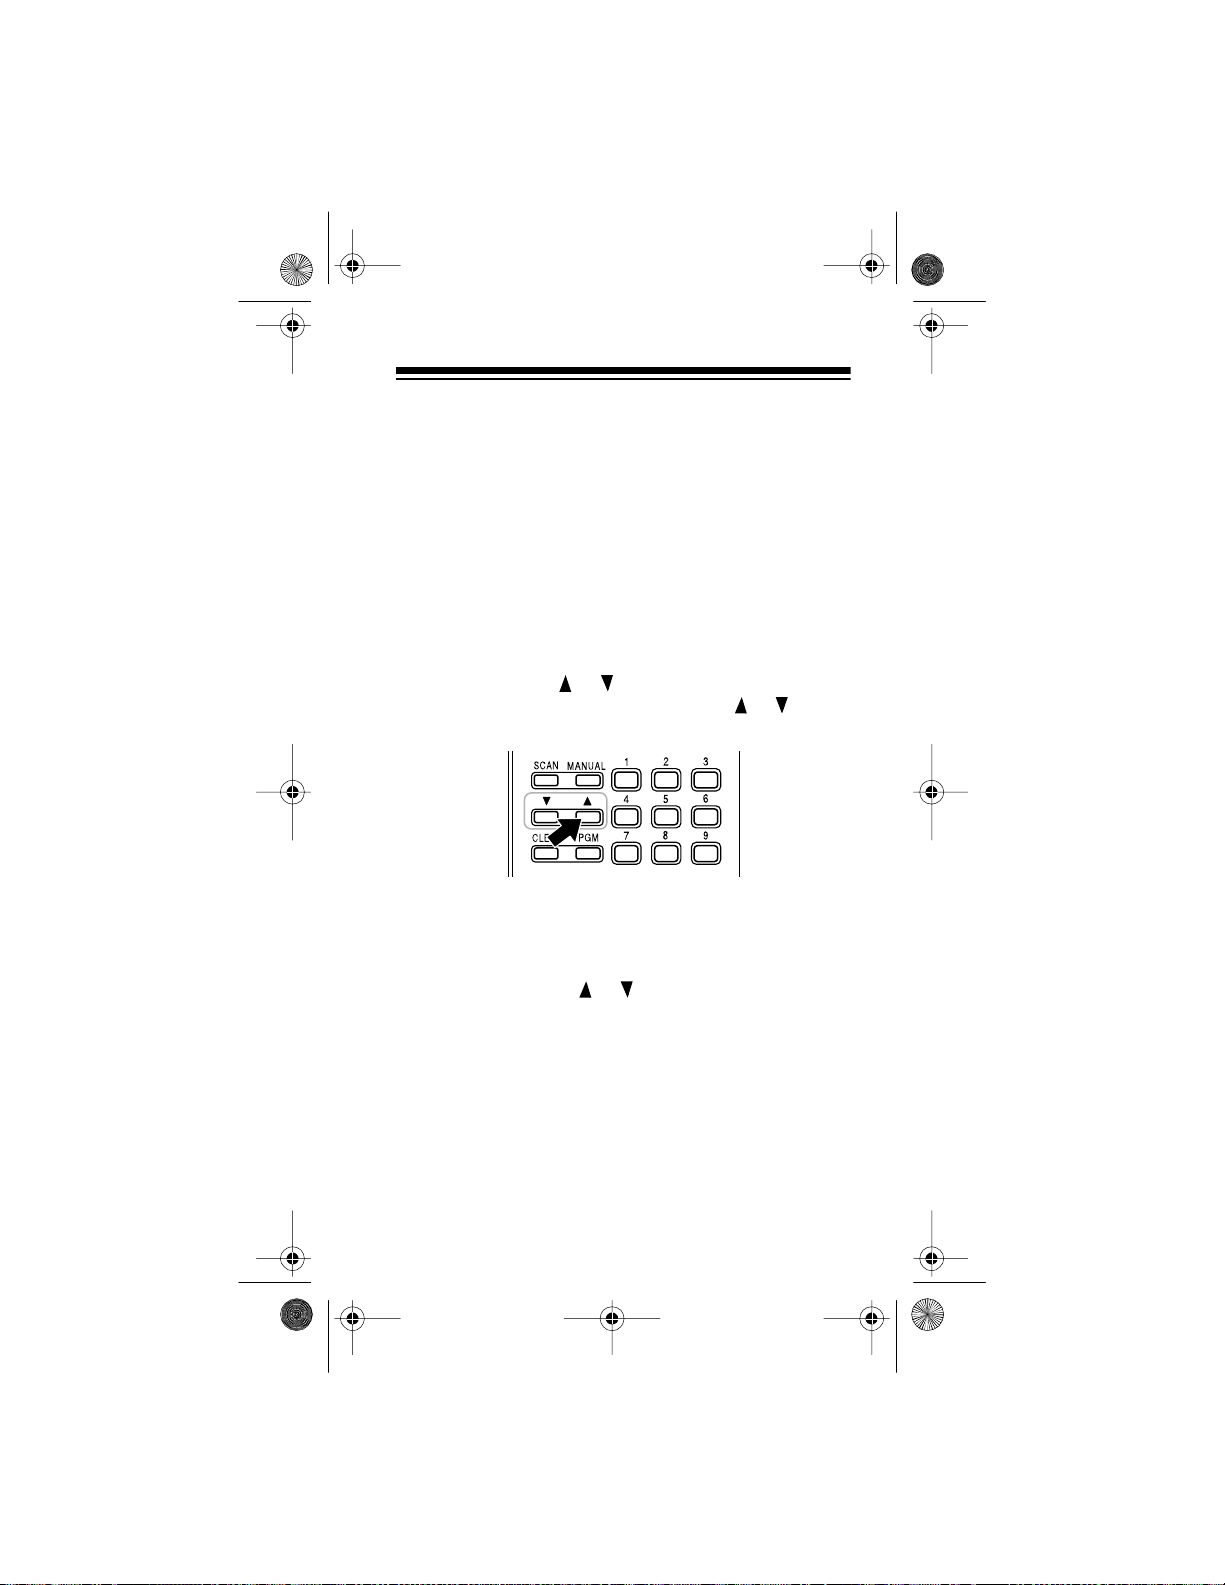
/ — begins searching up or down for active frequen-
cies, or selects the direction when you scan channels.
CLEAR
— clears an incorrect entry.
PGM
— programs frequencies into channels.
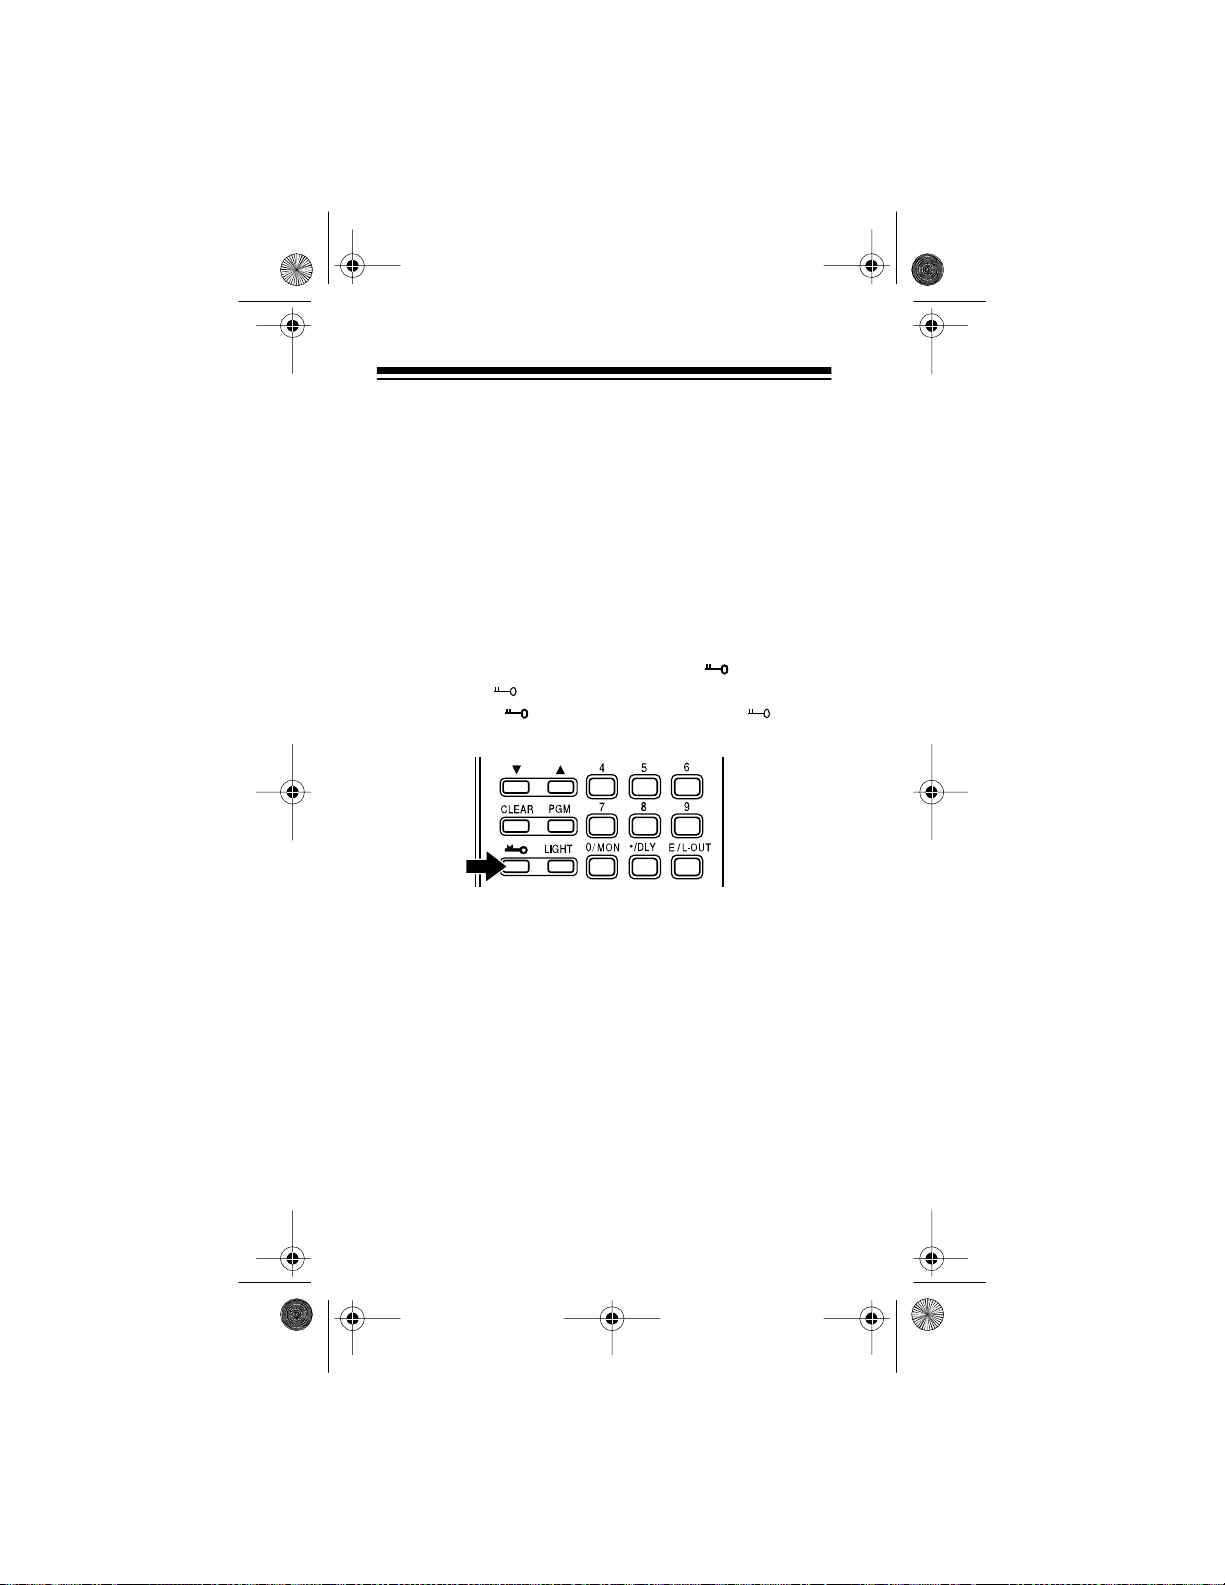
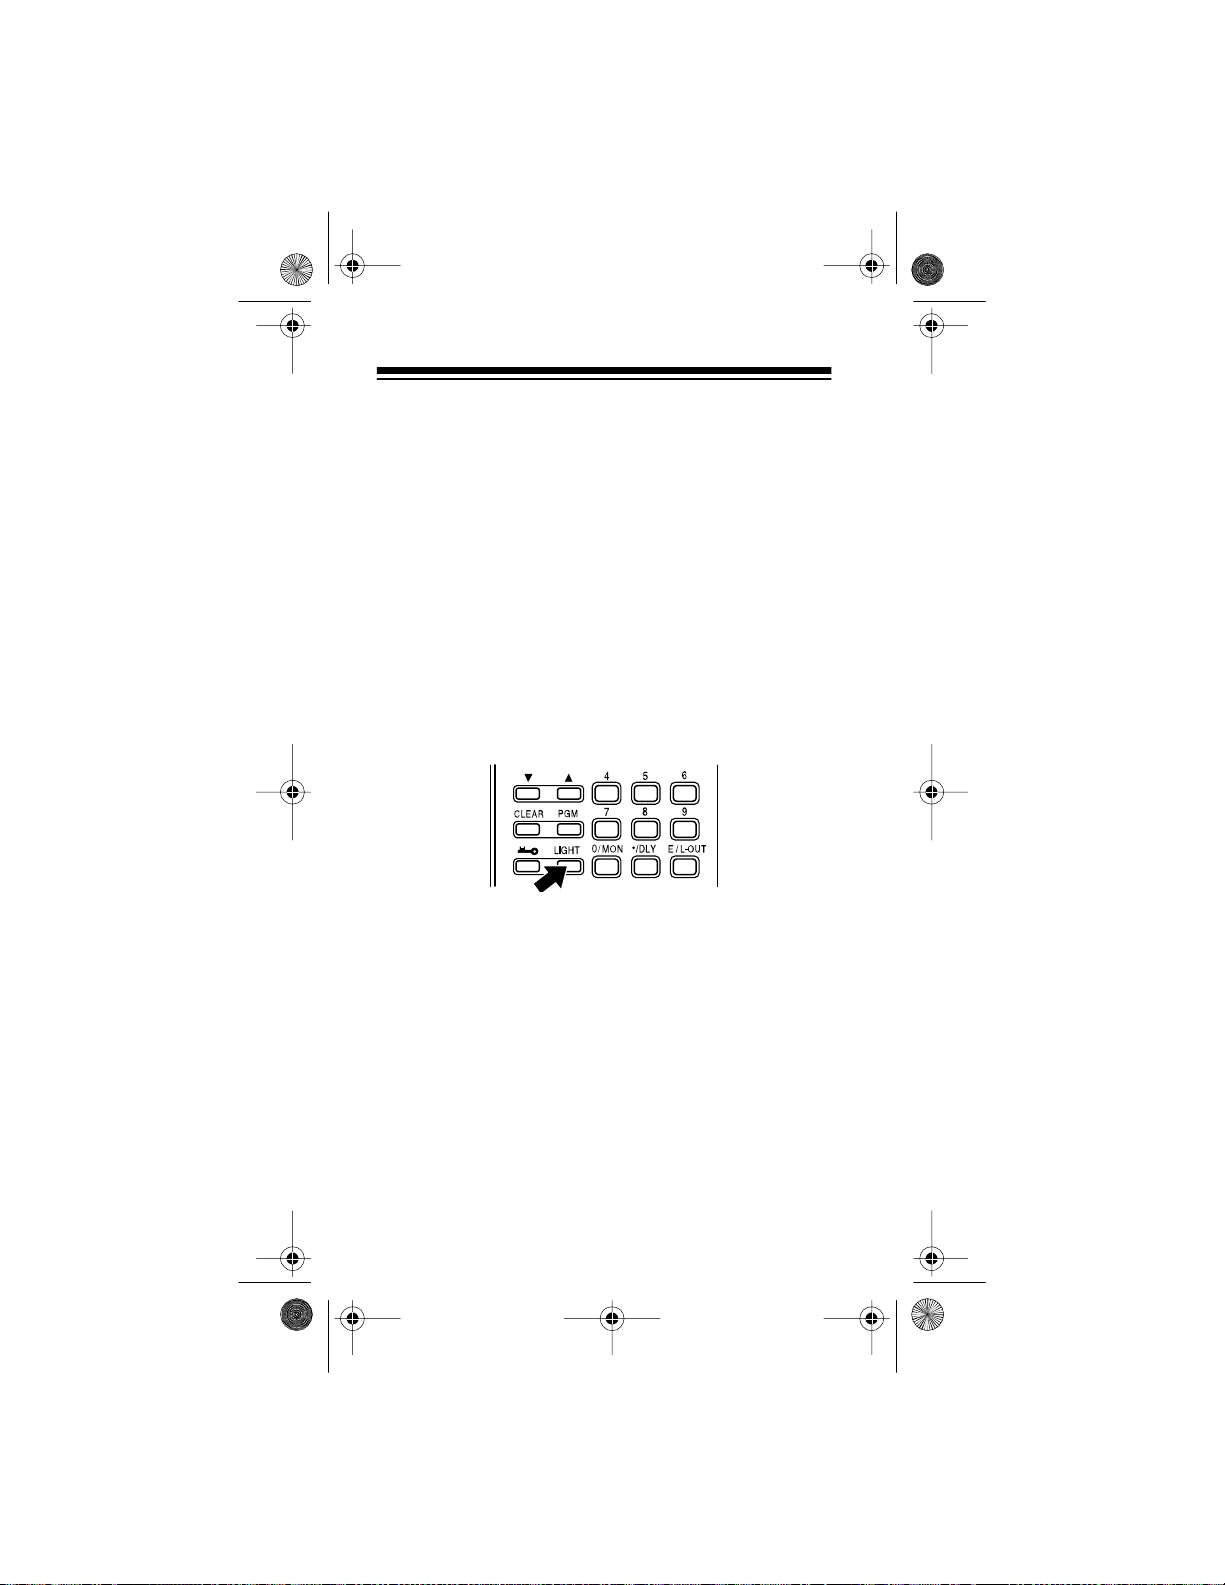
— locks/unlocks the key pad to prevent accident al en-
tries.
LIGHT
— turns on/off the display’s backlight.
Number Keys (
0/MON
— enters a zero or accesses the monitor memory.
./DLY
— enters a decimal point (neces sar y when pr ogr am-
1-9
) — enter a channel/frequency number.
ming frequencies), or programs a 2-second delay for the
selected channel.
E/L-OUT
— (enter/lockout) enters frequencies into chan-
nels, or locks out channels so they will not be scanned.
18
Page 19

20-310 .fm Page 19 We dnesday, A ugust 4, 1999 10:49 AM
A LOOK AT THE DISPLAY
The display has indi cators th at show the scanner ’s current
operation. A quick look at the display will help you understand how to operate your scanner.
— appears when you manually select a channel.
MAN
— appears when you scan channels.
SCAN
— appears when you scan or manually search the 10
WX
preprogrammed weather channels.
— appears when you listen to the mon it or memory.
MON
— appears when the batteri es are l ow.
BATT
— appears when you manually select a channel you
L/O
locked-out whi le scanning.
— appears during band and direct frequency
SRCH
searches.
/ — indicate the search or scan direction.
— appears when you program a 2-second delay
DELAY
for a channel.
— appears while you program frequencies into the
PGM
scanner’s channels.
— appears when you lock the keypad.
19
Page 20

20-310 .fm Page 20 We dnesday, A ugust 4, 1999 10:49 AM
— the digits that precede this indicator (1—50) show
ch
which channel the scann er is tuned to.
— appears during a direct frequency search.
–d
000.0000
which frequency th e scanner is tuned to.
Error
dUPL
quency that is already stored in another channel.
— the digits in the m iddle of th e displ ay sho w
— appears when you make an entry error.
— (duplicate) appears when you try to store a fre-
20
Page 21
OFF
MAX
MIN
MAX
VOLUME
SQUELCH
OFF
MAX
MIN
MAX
VOLUME
SQUELCH
20-310 .fm Page 21 We dnesday, A ugust 4, 1999 10:49 AM
OPERATION
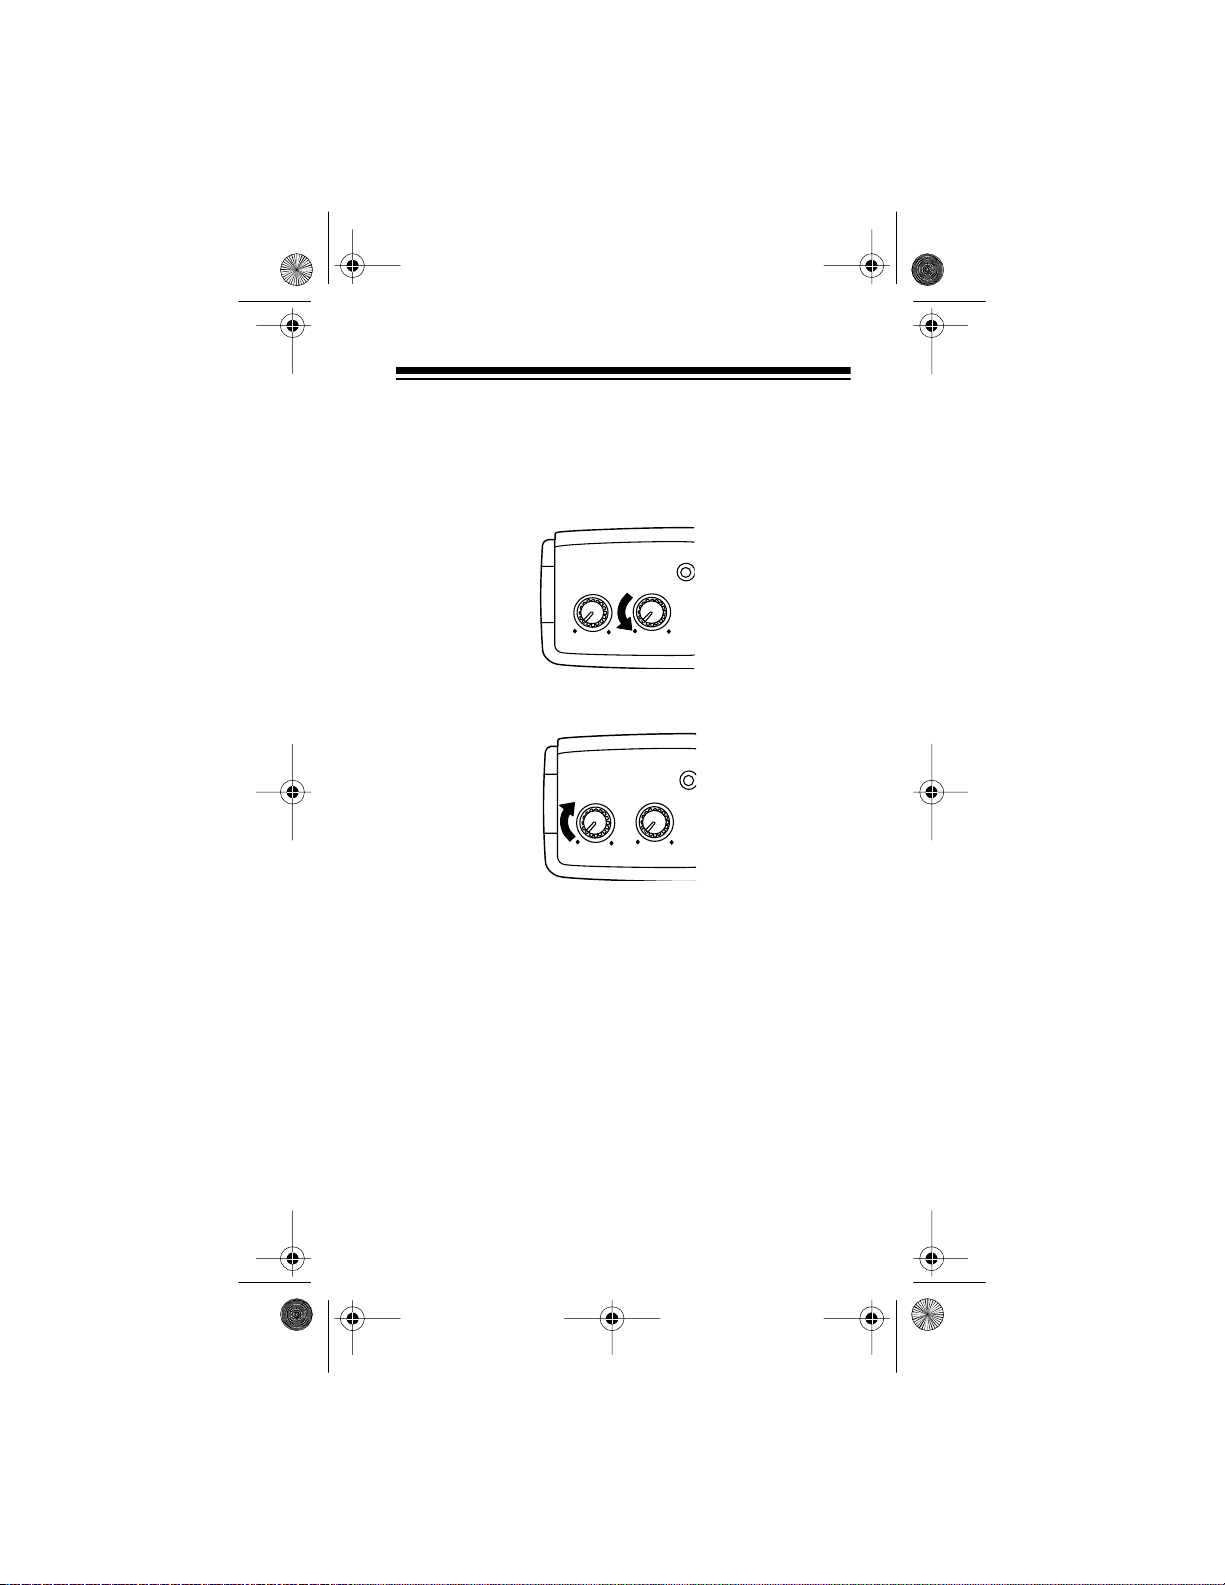
TURNING ON THE SCANNER AND
SETTING SQUELCH
1. Turn
SQUELCH
fully counterclockwise before you
turn on the scanner.
2. Turn
VOLUME
clockwise until you hear a hissing
sound.
3. Turn
SQUELCH
clockwise, just unt il t he hissi ng sound
stops.
Note:
To listen t o a weak or dist ant station, t urn
counterclockwise. If reception is poor, turn
clockwise to cut out weak t ransmissions.
SQUELCH
SQUELCH
21
Page 22

20-310 .fm Page 22 We dnesday, A ugust 4, 1999 10:49 AM
SEARCHING FOR AND STORING
ACTIVE FREQUENCIES
Your scanner can store up to 51 frequencies. Each frequency can be stored in either a memor y called a cha nnel,
or the temporary memory called a monitor. This scanner
has 50 channels and one monitor memory.
You can store frequenc ies using any of these methods.
• Manually enter and store a specific frequency (see
“Storing Frequencies” on Page 23).
• Search for active frequencies within a range of preprogrammed frequencies and store selected frequencies in the scanner’s channel memories (see
“Using Band Search” on Page 25) .
• Search for active frequencies starting directly from
one specific frequency and store a frequency in the
scanner’s monitor memory (see “Using Direct
Search” on Page 27).
• Recall the monitor memory frequency and move that
frequency to a channel memory (see “Using the
Monit or Memo ry” on P ag e 28 ).
Active Frequency References
Good references for active frequencies are RadioShack ’s
Beyond Police Call, Police Call Radio Gui de Includi ng Fire
and Emergency Services
tory
, and
Radio!
magazine. We update these references
often, so be sure to get a curr ent copy.
If you do not have a r eferen ce to fr equen cies i n your ar ea,
or if you want to search for unlisted frequencies, use a
band search or direct search. See also “Guide to the Action Bands” on Page 37 in this manual.
22
,
Aeronautical Frequency Direc-
Page 23

20-310 .fm Page 23 We dnesday, A ugust 4, 1999 10:49 AM
Storing Frequencies
Follow these steps to store frequencies into your scanner’s channels.
PGM
.
1. Press
the scanner is in the programming mode.
2. Use the number keys to enter the channel number
(1-50) where you want to store the frequency, then
PGM
press
desired channel numbe r appears.
Notes:
• If you enter an invalid channel number,
appears on the display. Simply repeat this step.
• If a frequency is currently stored in the selected
channel, the channel number does not flash but
the current frequency number appears on the display. You can either repeat this step to select a di fferent channel, or replace the current frequency
with a new one.
3. Use the number keys and
quency (including the decimal point) you want to
store in that chan nel.
appears on the display to indicate
PGM
again. Or, repeatedly press
./DLY
to enter the fre-
PGM
until the
Error
23
Page 24

20-310 .fm Page 24 We dnesday, A ugust 4, 1999 10:49 AM
4. Press
E/L-OUT
to store the frequency. The selected
channel number stops flashing, indicating that the
selected channel is stored.
Notes:
• If you entered an invalid frequency in Step 3,
Error
L-OUT
appears on the display after you press
. Simply repeat Steps 3 and 4 and enter a
valid frequency in Step 3.
• Your scanner automatically rounds the entered
frequency down to the nearest valid frequency.
For example, if you try to enter a frequency of
151.4730, your scanner accepts it as 151.4700.
• If you entered a frequency that is already s tored in
another channel,
(duplicate) and the low-
dUPL
est-numbered channel containing the duplicate
frequency flash on the display for about 3 seconds.
To store the duplicate frequency, press
E/L-OUT
again. To store a different frequency, repeat Steps
3 and 4, and enter a different frequency in Step 3.
5. Repeat Steps 2-4 to program another channel.
E/
24
Page 25

20-310 .fm Page 25 We dnesday, A ugust 4, 1999 10:49 AM
Using Band Search
If you do not know of a f requency to st ore, yo u can sea rch
your scanner’s preprogrammed search bands for active
frequencies, then store any that you find into your scanner’s channels.
Follow these steps to search for and store active frequencies using band searc h.
1. Press
2. To select a different band, within 2 seconds, enter
BAND
. The last selected band number (b fol-
lowed by a number, such as
) and the associated
b2
frequency search range appear on the display.
the desired band number (
descriptions) or repeatedly press
0-9
, see Page 4 for
BAND
until the
desired band number appears on the display. After
about 2 seconds,
appears, the next avail-
SRCH
able channel flashes, and the scanner begins
searching rapid ly upward in that band (fro m lowest to
highest frequency) for an active frequency.
Notes:
• To select a different band a fter the scanner beg ins
searching the current band, simply repeat this
step.
25
Page 26

20-310 .fm Page 26 We dnesday, A ugust 4, 1999 10:49 AM
• To reverse the rapid search direction at any time,
press and hold or for about 1second.
• To search the selected band upward or downward
in small increments (in steps of 5 or 12.5 kHz,
depending on the band), press and release or
so or disappears from the display. See
“Specified Intervals” on Page 39.
3. When the scanner finds an active frequency, it stops
scanning and displays that frequency’s number. To
store that frequency in the channel currently flashing
on the display, simply press
E/L-OUT
. The scanner
stores the frequency, then the next available channel
flashes on the display.
Notes
:
• You cannot store an active frequency in the moni-
tor memory during band sear ch.
• After you store a frequency into the last available
channel,
number. If you try to store a channel while
appears, Ch
appears instead of a channel
--ch
appears briefly on the display.
FULL
--ch
In order to stor e mo re frequencies, you must clear
some channels. See “Clearing a Stored Channel”
on Page 31.
4. To search for another active frequency in the
selected band, press and hold or for about 1
second, then repeat Step3.
To select a different band then search for another
active frequen cy, repeat Steps 2 and 3.
26
Page 27
20-310 .fm Page 27 We dnesday, A ugust 4, 1999 10:49 AM
Using Direct Search
During a direct search, the scanner searches upward or
downward, starting from a frequency you specify. Follow
these steps to use dir ect search.
1. Press
MANUAL
want to use as a starting poi nt for the search.
Note:
T o st art fro m a frequency al read y stored in one
of your scanner’s channels, press
enter the desired channel number, then press
UAL
PGM
or
2. Press and hold or for about 1 second to search
upward or downward.
on the display.
or
again.
PGM
, then enter the frequency you
MANUAL
–d, SRCH
, and or appear
or
PGM
MAN-
,
3. When the scanner stops on an active frequency, you
can either:
• Press
0/MON
to store it in the monitor memory.
• Press and hold or to continue the search.
27
Page 28

20-310 .fm Page 28 We dnesday, August 4, 1999 10:49 AM
USING THE MONITOR MEMORY
After you st ore a freque ncy in t he s canner’ s monitor memory during a direct search, you can recall it and move it to
one of your scanner’s channel memories.
Listening to the Monitor Memory
To recall a frequency stored in the monitor memory, simply press
stored frequency appear on the display.
MANUAL
then
0/MON
.
MAN
then
MON
and the
Moving a Frequency from the Monitor
Memory t o a Channel
1. Press
2. Press
3. Press
28
MANUAL
you want to store the frequency, then press
and the selected channel number appear on
PGM
the display.
MON
appear on the display.
E/L-OUT
stops flashing, and the frequency is stored in the
selected channel.
, enter the channel number where
.
and the monitor memory frequency
MON
.
disappears, the channel n um ber
MON
PGM
.
Page 29
20-310 .fm Page 29 We dnesday, August 4, 1999 10:49 AM
SCANNING THE STORED
CHANNELS
To set the scanner t o continuously scan t hrough all channels with stored frequencies, simply press
and appear on the display, and the scanner begins to
rapidly scan upward unti l it finds an active frequency.
If the scanner finds an active frequency, it stops and displays that c hannel and f requency number , then i t automa tically begins scanni ng again when the transmission ends
on that frequency .
Notes:
• To reverse the scanning direction, press or .
• To set the scanner to remain on the current channel
for 2 seconds after the transmission ends, see
“Using a 2-Second Delay” on Page 33.
• To set the scanner to remain on the current channel,
even after the transmission stops, press
any time during the transmission so
and
toring a Stored Channel” on Page 30).
• To lock out channels so the scanner does not stop
for a transmission on those channels, see “Locking
Out Channels” on Page 32.
disappears from the display (see “Moni-
SCAN
SCAN
MANUAL
MAN
.
appears
SCAN
at
29
Page 30

20-310 .fm Page 30 We dnesday, August 4, 1999 10:49 AM
MONITORING A STORED CHANNEL
You can continuously monitor a specific channel without
scanning. This is useful if you hear an emergency broadcast on a channel and do not want to miss any details —
even though there might be periods of sile nce — or if you
simply want to monitor that channel.
Follow these steps to manually select a channel.
1. Press
2. Enter the channel number.
3. Press
MANUAL
MANUAL
.
again.
30
Page 31

20-310 .fm Page 31 We dnesday, August 4, 1999 10:49 AM
CLEARING A STORED CHANNEL
If you no longer want a frequency stored in a channel
(and you do not want to replace that frequency with a different one), follow these steps to clear the stored frequency.
1. Select the channel that you want to clear.
2. Press
3. Press
4. Press
PGM
.
appears on the display.
PGM
CLEAR
. The frequency number flashes on the
display.
E/L-OUT
Channels” on Page 32) appears, the channel number flashes, and the frequency number changes to
000.0000
cleared.
.
(lockout — see “Locking Out
L/O
on the display to indicate the channel is
5. To clear another channel, use the number keys to
enter that channel number (1-50), then press
again. Or, repeatedly press
channel number appears. Then repeat Steps 3-4.
PGM
until the desired
PGM
31
Page 32
20-310 .fm Page 32 We dnesday, August 4, 1999 10:49 AM
SPECIAL FEATURES
USING THE KEYLOCK
Once you program your scanner, you can protect it from
accidental program changes by turning on the keylock
feature. When the keypad is lock ed, the only contr ols that
operate are
Page 34),
Note:
scanning channels or monitoring a single channel, whichever feature you last selected.
To turn on the keylock, press and hold for about 3
seconds until appears on the display. To turn it off,
press and hold for about 3 seconds until disappears from the displ ay.
LIGHT
(see “Using the Display Backlight” on
VOLUME
The keylock does not prevent the scanner from
, and
SQUELCH
.
LOCKING OUT CHANNELS
You can increase the effective scanning speed by locking
out individual channels that have a continuous transmission, such as a weather channel (see “National Weather
Frequencies” on Page 36) or birdie fr equency (s ee “ Bird ie
Frequencies” on Page 37). To lock out a channel, select
that channel t hen press
play.
32
E/L-OUT
.
appears on the di s-
L/O
Page 33

20-310 .fm Page 33 We dnesday, August 4, 1999 10:49 AM
To remove the l ock-out from a channel, select that channel again, th en press
display.
Notes:
• You can manually select locked-out channels.
• Your scanner automatically locks out empty channels.
E/L-OUT
so
disappears fr om the
L/O
USING A 2-SECOND DELAY
Many agencies use a t wo-wa y radi o syst em th at has a period of several seconds between a query and a reply. To
avoid missing a reply, you can program a 2-second delay
into any channel or frequency. When your scanner stops
on a channel or fr equency wi th a pr ogra mmed del ay,
appears on the display and the scanner continues to
LAY
monitor that frequency for 2 seconds after the transmission stops befor e resum ing scanning.
You can program a 2-second delay in these three ways:
• If the scanner is scanning and stops on an active
channel, quick ly press
ning again.
• If the desired channel is not selected, manually
select the channel, then press
./DLY
before it continues scan-
./DLY
.
DE-
33
Page 34
20-310 .fm Page 34 We dnesday, August 4, 1999 10:49 AM
• If the scanner is in the search mode, press
while the scanner is searching.
the display and the scanner automatically adds a 2second delay to every transmission it stops on.
To turn off the 2- sec ond d elay, press
ner is monitoring the ch annel or frequen cy.
pears from the displ ay.
DELAY
./DLY
while the sc an-
DELAY
./DLY
appears on
disap-
USING THE DISPLAY BACKLIGHT
You can turn on the display’ s back light for easy viewi ng in
the dark. Pres s
onds. To turn off the light before 5 seconds elapse, press
LIGHT
again.
LIGHT
to turn on t he d ispla y lig ht for 5 se c-
LISTENING TO A WEATHER BAND
The FCC (Federal Communications Commission) has allocated 11 channels for use by the National Oceanic and
Atmospheric Administration (NOAA). NOAA broadcasts
your local forecast and regional weather information on
one or more of these channels. We have programmed
your scanner with 10 of the U.S. frequencies most commonly used by NOAA.
34
Page 35

20-310 .fm Page 35 We dnesday, August 4, 1999 10:49 AM
To hear your local forecast and regional weather information, simply press
through the weather band, and and
WX
. Your scanner begins to scan
appear on the
WX
display. To reverse the scanning direction, press or .
Your scanner sho uld s top with in a few s econd s o n your l ocal weather broadcast. If the broadcast is weak, you can
press or again to resume scanning.
Note:
To manually select a preprogrammed weather
channel, you can:
• repeatedly press
WX
until
appears on the dis-
MAN
play, then repeatedly press or to move forward
or backward t hrough the channels.
• press the number (
0-9
) of the channel you want to li s-
ten to.
35
Page 36

20-310 .fm Page 36 We dnesday, August 4, 1999 10:49 AM
A GENERAL SCANNING GUIDE
Reception of the frequencies covered by your scanner i s
mainly “line-o f-si ght.” This means you us ually cann ot hear
stations that are beyond the horizon.
GUIDE TO FREQUENCIES
National Weather Frequencies
161.650 161.775 162.400 162.425
162.440* 162 .450 162.475 162.500
162.525 162.550 163.275
*Not preprogrammed in this scan ner, but you can manually program it.
Ham Radio Frequencies
Ham radio operators often transmit emergency information when other means of communication break down.
The following chart shows the fr equencies t his scanner r eceives that Ham radio operators normally use:
Wavelengt h
(meters)
10-meter 29.000–29.700
6-meter 50.000–54.000
2-meter 144.000–148.000
70-cm 420.000–450.000
Note:
Your scanner cannot receive AM transmissions on
these bands.
36
Frequency
(MHz)
Page 37

20-310 .fm Page 37 We dnesday, August 4, 1999 10:49 AM
Birdie Frequencies
Every scanner has birdie frequencies. Birdies are signals
created inside the scanner’s receiver. These operating
frequencies might interfere with broadcasts on the same
frequencies. If you p rogram one of th ese freq uencies , you
hear only no ise on t hat f requency . If t he int erfe renc e is not
severe, you might be able to turn
cut out the birdie.
The birdie frequencies on this unit to watch for are:
29.900 30.455 30.735 31.480
32.090 32.530 33.580 38.400
51.200 51.225 140.800 143.430
144.000 147.200 153.600 156.800
160.000 162.200 166.400
To find the birdies i n your scanner, begi n by disconnect ing
the antenna and moving it away from the receiver. Make
sure that no other nearby radio or TV sets are turned on
near the scanner . Use the sear ch funct ion and s can ev ery
frequency band from its lowest frequency to the highest.
Occasionally, the searching will stop as if it had found a
signal, often without any sound. That is a birdie. Make a
list of all the birdies in your particular scanner for future
reference.
SQUELCH
clockwise to
GUIDE TO THE ACTION BANDS
United States Broadcast Bands
In the United States, there are several broadcast bands.
The standard AM and FM bands are probably the most
well known. There are als o four televisi on audio broadc ast
bands — the lower three transm it on the VHF band and
the fourth transmits on the UHF band.
37
Page 38

20-310 .fm Page 38 We dnesday, August 4, 1999 10:49 AM
Typical Band Usage
HF Band (3.00–30.0 MHz)
10-Meter Amateur 29.00–29.70 MHz
High Range 29.70–29.90 MHz
VHF Band (30.00–300.0 MHz)
Low Range 30.00–50.00 MHz
6-Meter Amateur 50.00–54.00 MHz
U.S. Government 137.00–144.00 MH z
2-Meter Amateur 144.00–148.00 MH z
High Range 148.00–174.00 MHz
UHF Band(300.00 MHz–3. 0 GHz)
Military Aircraft 380.00–384.00 MHz
U.S. Government 406.00–420.00 MH z
70-Centimeter Ama teur 420.00–450.00 MH z
Low Range 450.00–470.00 MHz
FM-TV Audio Broadcast,
Wide Band 470.00–512.00 MH z
Primary Usage
As a general rul e, most of t he radio ac tivity i s concentra ted
on the following frequencies:
VHF Band
Activities Frequencies (MHz)
Government, Polic e, and Fire 153.785–155.980
Emergency Services 158.730–159.460
Railroad 160.000–161.900
38
Page 39

20-310 .fm Page 39 We dnesday, August 4, 1999 10:49 AM
UHF Band
Activities Frequencies (MHz)
Land-Mobile
“Paired” Frequencies 450.000–470.000
Base Stations 451.025–454.950
Mobile Units 456.025–459.950
Relay Repeater Units 460.025–464.975
Remote Control Stations 465.025–469.975
Note: Remote con trol stat ions an d mobi le un its o per ate at
5 MHz higher than their associ ated base stations and relay repeater uni ts.
Specified Intervals
Frequencies in diff eren t bands ar e acce ssibl e only at specific intervals. For example:
Frequency Range(s) Specified Interval
29–54 and 137–144 MHz 5.0 kHz steps
380–512 12.5 kHz steps
Note: Your scanner automatically rounds the enter ed frequency down to the closest valid frequ ency. For example,
if you try to enter 151.473, your scanner accepts this as
151.470.
39
Page 40

20-310 .fm Page 40 We dnesday, August 4, 1999 10:49 AM
BAND ALLOCATION
To help decide which frequency ranges to scan, use the
following listing of the typical services that use the frequencies your scanner receives. These frequencies are
subject to change, and might vary from area to area. For
a mor e co mp lete lis ting , re fer to
Including Fire and Emergency Services
local RadioShack store.
Abbreviations Services
AIR.........................................................................Aircraft
BIFC............. .. ............ .Boise (ID) Interagenc y Fir e Cache
BUS ....................................................................Business
CAP ......... .. ... ....... .. ... .............. ... .. ....... ... .. ...Civil Air Patro l
CB...............................................................Citizens Band
CCA ........................................................Common Carrier
CSB .............................................. Conventional Systems
CTSB ..............................Conventional/Trunked Systems
FIRE.... .. ............... .. ... ....... .. ... ....... ... .. ...... Fir e D e p ar tm e n t
HAM...............................................Amateur (Ham) Radio
GOVT...............................................Federal Government
GMR .............................................. General Mobile Radio
GTR.......................................................General Trunked
IND.......................................................Industrial Services
(Manufacturing, Construction, Farming, Forest Products)
MAR....................... ... .. ....... ... .. ......Milita r y A m a te u r R a di o
MARI......................... .. ... ....... .. ... .. M a rit im e Li m ited Coas t
(Coast Guard, Marine telephone,
Shipboard Radio, Private stations)
MARS ................................Military Affiliate Radio System
MED.......... .. .................... .. ..Emergency/Medical Services
MIL.................................................................U.S. Military
MOV...................................Motion Picture/Video Industry
NEW ..................................................New Mobile Narrow
NEWS......... ..............Relay Press (Newspaper reporters)
OIL.................................................Oil/Petroleum Industry
POL .. ... ....... ... .. ....... ... .. ....... ... .. ........ .. .. .Polic e De p ar tm e n t
PUB ..........................................................Public Services
(Public Safety, Local Govt., Forestry Conservation)
PSB.............................................................. Public Safety
Polic e Call Radio G uide
, available at your
40
Page 41

20-310 .fm Page 41 We dnesday, August 4, 1999 10:49 AM
PTR..........................................................Private Trunked
ROAD............. ............. .. .. ..Road & Highway Maintenance
RTV......................... Radio/TV Remote Broadcast Pickup
TAXI....... ... .. ....... ... .. ....... ... .. ........ .. .. ........ .. ...Tax i S e rv ic e s
TELB.....................................................Mobile Telephone
(Aircraft, Radi o Com mo n Carrier, Landline companies)
TELC........ ....................... .......................Cordless Phones
TELM ............. .............................Telephone Maintenance
TOW................................................................T ow Trucks
TRAN ... ....... .. ... ....... ... .. ....... ... .. ... Transpo r ta tion Serv ices
(Tr u cks, Tow T rucks, Buses, Railroad, Other)
TSB...... .. ... ....... .. ... ....... .. ... ....... ... .. ....... . Trunk e d Sys tems
TVn .............................................FM-TV Audio Broadcast
USXX ............................................Government Classified
UTIL ............................................. Power & Water Utilities
WTHR ................................................................. Weather
High Frequency ( HF) Hi — (3 MHz–30 MHz)
10-Meter Amateur Band— (28.0–29.7 MHz)
29.000–29.700................. .......... .. .. .......... .. ...............HAM
Very High Frequency (VHF) — (30 MHz–300 MHz)
Low Band — (29.7–50 MHz — in 5 kHz steps)
29.700–29.790............................................................IND
29.900–30.550................. .......... .. .. .......... .. .....GOVT, MIL
30.580–31.980................. .......... .. .. .......... .. .......IND, PUB
32.000–32.990................. .......... .. .. .......... .. .....GOVT, MIL
33.020–33.980.........................................BUS, IND, PUB
34.010–34.990................. .......... .. .. .......... .. .....GOVT, MIL
35.020–35.980.............................BUS, PUB, IND, TELM
36.000–36.230................. .......... .. .. .......... .. .....GOVT, MIL
36.250...................................................Oil Spill Clean-Up
36.270–36.990...................................... ..........GOVT, MIL
37.020–37.980. .................................................PUB, IND
38.000–39.000...................................... ..........GOVT, MIL
39.020–39.980...................................... .....................PUB
40.000–42.000.....................................GOVT, MIL, MARI
42.020–42.940...................................... .....................POL
42.960–43.180............................................................IND
43.220–43.680.......................................TELM, IND, PUB
43.700–44.600........................................................TRAN
44.620–46.580.................................................POL, PUB
46.600–46.990............................................. GOVT, TELC
41
Page 42

20-310 .fm Page 42 We dnesday, August 4, 1999 10:49 AM
47.020–47.400........................................................... PUB
47.42 0........ ... .. ....... ... .. ....... ... .. ........ .Amer ic an Re d C ro s s
47.440–49.580...................................................IND, PUB
49.610–49.990.................................................MIL, TELC
6-Meter Amateur Band — (50–54 MHz)
50.00–54.00............... .. .............................................HAM
U.S. Government Band (138–144 MHz)
137.000–144.000.......... .. ................................GOVT, MIL
2-Meter Amateur Band (144–148 MHz)
144.000–148.000.......... .. ..........................................HAM
VHF-Hi BAND (148–174 MHz)
148.050–150.345............ .. .. .....................CAP, MAR, MIL
150.775–150.790.......... ....................... .....................MED
150.815–150.965.......... ....................... .....................TOW
150.980................... ............ ........... .. .....Oil Spill Clean Up
150.995–151.130.......... ....................... ...................ROAD
151.145–151.475.......... ....................... ......................POL
151.490–151.955...............................................IND, BUS
151.985....................................................................TELM
152.0075...................................................................MED
152.030–152.240.....................................................TELB
152.270–152.465............ .. .. ..............................IND, TAXI
152.480................... ............ ........... .. ............ .. ............BUS
152.510–152.840.......... ....................... ....................TELB
152.870–153.020............ .. .. ..............................IND, MOV
153.035–153.725............ .. .. ......................IND, OIL, UTIL
153.740–154.445............ .. .. .............................PUB, FIRE
154.490–154.570...............................................IND, BUS
154.585................... ............ ........... .. .....Oil Spill Clean-Up
154.600–154.625.......... ....................... ......................BUS
154.655–156.240.......................MED, ROAD, POL, PUB
156.255.......................................................................OIL
156.275–157.425.....................................................MARI
157.450.....................................................................MED
157.470–157.515...................................................... TOW
157.530–157.725............ .. .. ..............................IND, TAXI
157.740................... ............ ........... .. ............ .. ............BUS
157.770–158.100.......... ....................... ....................TELB
158.130–158.460............ .. .. .BUS, IND, OIL, TELM, UTIL
158.490–158.700.......... ....................... ....................TELB
158.730–159.465.................................POL, PUB, ROAD
42
Page 43

20-310 .fm Page 43 We dnesday, August 4, 1999 10:49 AM
159.480.......................................................................OIL
159.495–161.565....................................................TRAN
161.580.......................................................................OIL
161.600–162.000............................................MARI, RTV
162.0125–162.35.................. ............ ..GOVT, MIL, USXX
162.400–162.550...................................................WTHR
162.5625–162.6375.......................... ..GOVT, MIL, USXX
162.6625......... ........................ .. ................................MED
162.6875–163.225.................. ............GOVT, MIL, USXX
163.250......................... .. ................................. .. .......MED
163.275–166.225.................. ............ ..GOVT, MIL, USXX
166.250......................... .. .....................GOVT, RTV, FIRE
166.275–169.400..........................................GOVT, BIFC
169.445........... .. .................... .. ....................Wireless Mics
169.500........... .. .................... .. ................................GOVT
169.505........... .. .................... .. ....................Wireless Mics
169.55–169.9875.................. ............ ..GOVT, MIL, USXX
170.000........... ................................. .........................BIFC
170.025–170.150.................. ............ .. .GOVT, RTV, FIRE
170.175–170.225....................................................GOVT
170.245–170.305........................................Wireless Mics
170.350–170.400............................................GOVT, MIL
170.425–170.450......................................................BIFC
170.475......................... .. ........... ............ .. .. ............ ....PUB
170.4875–173.175.................GOVT, PUB, Wireless Mics
173.225–173.375.................. ............ .. MOV, NEWS, UTIL
173.3875–173.5375........................................... .. .......MIL
173.5625–173.5875.................MIL Medical/Crash Crews
173.60–173.9875....................................................GOVT
Ultra High Frequency (UHF) (300 MHZ–3 GHz)
Military Airc raft Band (319.1–383.9 MHz)
380.000–383.900..........................................Coast Guard
U. S. Government Band (406–450 MHz)
406.125–419.975.................. ............ .. ........GOVT, USXX
70-cm Amateur Band (420–45 0 MHz)
420.000–450.000......................................................HAM
Low Band (450–470 MHz)
450.050–450.925.......................................................RTV
451.025–452.025.................. .........IND, OIL, TELM, UTIL
452.0375–453.00............IND, TAXI, TRAN TOW, NEWS
43
Page 44

20-310 .fm Page 44 We dnesday, August 4, 1999 10:49 AM
453.0125–453.9875...................................................PUB
454.000.......................................................................OIL
454.025–454.975.....................................................TELB
455.050–455.925.......................................................RTV
457.525–457.600.......................................................BUS
458.025–458.175......................................................MED
460.0125–460.6375...............................FIRE, POL, PUB
460.650–462.175.......................................................BUS
462.1875–462.450............ .. ...............................BUS, IND
462.4625–462.525............ .. ...........IND, OIL, TELM, UTIL
462.550–462.725.......... ....................... .................... .GMR
462.750–462.925.......... ....................... .................... ..BUS
462.9375–463.1875.......... .............................. .. ........MED
463.200–467.925.......... ....................... .................... ..BUS
FM-TV Audio Broadcast,
UHF Wide Band (470–512 MHz)
(Channels 14 through 20 in 6 MHz steps)
475.750...........................................................Channel 14
481.750...........................................................Channel 15
487.750...........................................................Channel 16
493.750...........................................................Channel 17
499.750...........................................................Channel 18
505.750...........................................................Channel 19
512.000...........................................................Channel 20
Note: Some cities use the 470–512 MHz band for land/
mobile service.
44
Page 45

20-310 .fm Page 45 We dnesday, August 4, 1999 10:49 AM
AVOIDING IMAGE FREQUENCIES
You might discover one of your re gular stations o n another frequency that is not listed. Thi s might be what is known
as an image frequency. For example, you might find a service that regularly uses a frequency of 453.275 also on
474.675.
To see if it is an image, do a little math.
Note the new frequency. 474.675
Double the interme diate frequency
of 10.7 MHz (21.400 ) and subtract it
from the new frequency. –21.400
If the answer is the regular frequency, 453.275
then you have tuned to an image.
Occasionally you might get in ter ference on a weak or distant channel f rom a strong broadcast 21.4 MHz below the
tuned frequenc y. This is rar e, and t he im age sign al is u sually cleared whenever there is a broadcast on the actual
frequency.
45
Page 46

20-310 .fm Page 46 We dnesday, August 4, 1999 10:49 AM
FREQUENCY CONVERSION
The tuning location of a station can be expressed in frequency (kHz or MHz) or in wavelength (meters). The following information can help you make the necessary
conversions.
1 MHz (million) = 1,000 kHz (t housand)
To convert MHz to kHz, multiply the number of MHz by
1,000:
30.62 MHz × 1000 = 30,620 kHz
To convert from kHz to MHz, divide the num ber of kHz by
1,000.
127,800 kHz ÷ 1000 = 127.8 MHz
To convert MHz to meters, divide 300 by the number of
MHz.
÷
300
50 MHz = 6 meters
46
Page 47

20-310 .fm Page 47 We dnesday, August 4, 1999 10:49 AM
TROUBLESHOOTING
If your scanner is not working as it should, these suggestions might help you eliminate the pr oblem. If the scanner
still does not operate properly, take it to your local RadioShack store for assistance.
PROBLEM
Scanner is
totally inoperative.
Poor or no
reception
Error
appears on
the display.
Keypad
does not
work.
POSSIBLE
CAUSES
The batteries
are dead.
The optional
AC or DC
power adapter
is not connected.
Improperly
connected
antenna.
Programmed
frequencies a re
the same as
birdie frequencies.
Programming
error.
Keylock is
turned on.
REMEDIES
Replace the batteries with fresh ones
or recharge the battery pack.
Be sure the adapter
is fully ins e rted into
PWR/DC 9V
the
jack.
Be sure the
antenna is properly
connected.
Avoid programming frequencies
listed under “Birdie
Frequencies” on
Page 37 or only
select them manually.
Reprogram the frequency correctl y.
Turn off keylock.
47
Page 48

20-310 .fm Page 48 We dnesday, August 4, 1999 10:49 AM
PROBLEM
Keys do not
work or display
changes.
Scanner is
on but will
not scan.
In the scan
mode, the
scanner
locks on frequencies
that have an
unclear
transmission.
POSSIBLE
CAUSES
Undetermined
error.
REMEDIES
Turn the scanner
off then on agai n,
or reset the scanner (see “Resetting/Initializing the
Scanner” on Page
49).
SQUELCH
correctly
adjusted.
is not
SQUELCH
Adjust
clockwise (s ee
“Turning On the
Scanner and Setting SQUELCH” on
Page 21).
Birdies. Avoid program-
ming frequencies
listed under “Birdie
Frequencies” on
Page 37 or only listen to them manually.
48
Page 49

20-310 .fm Page 49 We dnesday, August 4, 1999 10:49 AM
RESETTING/INITIALIZING THE
SCANNER
If the scanner ’s di splay l ocks up o r do es not wor k proper ly
after you connect a power source , you might need to reset
or initialize the scanner.
IMPORTANT!
scanner (see “Resetting the Scanner”). If that does not
work, you can initialize the scanner (see “Initializing the
Scanner” o n Page 50); howev er, t his c lears all info rmat ion
stored in you r scanner’s memory.
If you h ave pr oble ms, firs t try to reset t he
Resetting the Scanner
1. Turn off the scanner, then turn it on again.
2. Insert a pointe d object, such as a straightened paper
clip, into the reset openi ng on the side of the scanner
(as shown below) and gently press then release the
reset button inside the opening.
Note:
If the scanner still does not work properl y, you might
need to initialize the scanner (see “Initializing the Scanner” on Page 50).
49
Page 50

20-310 .fm Page 50 We dnesday, August 4, 1999 10:49 AM
Initializing the Scanner
Caution:
This procedur e clears all i nformation you stored
in the scanner’s m em ory. Initialize the scanner only when
you are sure the scanner is not working properly.
1. Turn off the scanner, then turn it on again.
2. Press and hold
3. While holding down
CLEAR
.
CLEAR
, insert a pointed object,
such as a straightened paper clip, into the reset
opening on the side of the scanner and gently press
then release the reset button inside the opening.
4. When the display reappears, release
Note:
You must release
RESET
before releasing
CLEAR
.
CLEAR
otherwise the memory mig ht not clear.
,
50
Page 51

20-310 .fm Page 51 We dnesday, August 4, 1999 10:49 AM
CARE AND MAINTENANCE
To enjoy your RadioShack PRO-70 50-Channel Portable
Scanner for a long time:
Keep the scanner dry. If it gets wet, wipe it dry
immediately . Liqui ds can cont ain m inerals t hat
can corrode the el ectronic circuits .
Use only fresh batteries of the recommended
size and type. Always remove old and weak
batteries. They can leak chemicals that destroy electronic circuits.
Handle the sc anner gent ly an d c arefull y. Dropping it can damage circuit boards and cases
and can cause the scanner t o work imprope rly.
Use and store the scann er only i n normal temperature environments. Temperature extremes can shorten the life of electronic
devices, dam age batteries, and distort or melt
plastic par ts.
Keep the scanner away from dust and dirt,
which can cause premature wear of parts.
Wipe the scanner with a damp cloth occasionally to keep it looki ng new. Do not use hars h
chemicals, cleaning solvents, or strong detergents to clean th e scanner.
Modifying or tamper ing with the sca nner ’s i nternal components can cause a malfunction and might invalidate its
warranty and void your FCC authorization to operate it. If
your scanner is not operating as it should, take it to your
local RadioShack store f or assistance.
51
Page 52

20-310 .fm Page 52 We dnesday, August 4, 1999 10:49 AM
SPECIFICATIONS
Frequency Coverage:
Ham............................... 29–30 MHz (5.0 kHz st eps)
VHF Lo .......................... 30–50 MHz (5.0 kHz steps)
Ham............................... 50–54 MHz (5.0 kHz st eps)
Government............... 137–144 M Hz (5.0 kHz steps)
Ham........................... 144–148 MHz (5.0 kHz steps)
VHF Hi....................... 148–174 MHz (5.0 kHz steps)
Ham/Government.... 380–450 MHz (12.5 kHz steps)
UHF Lo.................... 450–470 MHz (12.5 kHz steps)
UHF Hi (T)............... 470–512 MHz (12.5 kHz steps)
Channels of Operation:.......... .. .......... .. ........ 50 Channels
and 1 Monitor Memory
Sensitivity (20 dB S/N):
29–54 MHz......................................................1.0 µV
137–174 MHz............................................... .. .1.0 µV
380–512 MHz............................................... .. .1.0 µV
Selectivity:
±10 kHz . ..................... ... .. ........ .. .. ........ .. ... ....... –6 d B
±18 kHz . ..................... ... .. ........ .. .. ........ .. ... ..... –50 d B
Spurious Rejection:
29–54 MHz.................................... 50 dB at 40 MHz
137–174 MHz. ............................. 50 dB at 154 MHz
Scanning Rate ........................Up to 25 channels/second
Search Rate ................................. Up to 50 steps/second
Delay Time ...................................................... 2 seconds
Intermediate Frequencies (IF):
1st.............................................................. 10.7 MHz
2nd............ .. .......... ............ .................... .. ..... 455 kHz
IF Rejection: 10.7 MHz ....................... 70 dB at 154 MHz
Squelch Sensitivity:
Threshold....................................... Less than 1.0 µV
Tight................................................... (S+N)/N 25 dB
Antenna Impedance........................................... 50 Ohms
52
Page 53

20-310 .fm Page 53 We dnesday, August 4, 1999 10:49 AM
Audio Output Power (10%THD)........... 200 mW Nominal
3
Built-in Speaker 1
/8 Inch (36 mm) 8 ohm, Dynamic Type
Power Requirements ..................+9 V DC, 6 AA batteries
AC Adapter (Cat. No. 273-1665)
DC Adapter (Cat. No. 270-1560)
Rechargeable Batt ery Pack (Cat. No. 23-288)
Current Drain (Squelched)..................... .. .. .......... .. .50 mA
Dimensions (HWD) ................... 6
3
/4 × 27/16 × 19/16 Inches
(171 × 62 × 40 mm)
Weight............................ ... .. ............... .. ... ....... ... .. ....8.1 o z
(229 g)
Supplied Accessory ......................... ................... Antenna
Specifications are typical; individual units might vary.
Specifications are subject to change and improvement
without notice.
53
Page 54

20-310 .fm Page 54 We dnesday, August 4, 1999 10:49 AM
NOTES
54
Page 55

20-310 .fm Page 55 We dnesday, August 4, 1999 10:49 AM
55
Page 56

y
y
g
g
y
g
y
y
g
y
y
g
y
y
g
g
g
y
g
g
j
y g
g
20-310 .fm Page 56 We dnesday, August 4, 1999 10:49 AM
Limited One-Year Warranty
This product is warranted by RadioShack against manufactur ing defects in
material and workmanship under normal use for one (1)
purchase from RadioShack compan
dioShack franchisees and dealers. EXCEPT AS PROVIDED HEREIN, RadioShack MAKES NO EXPRESS WARRANTIES AND ANY IMPLIED
WARRANTIES, INCLUDING THOSE OF MERCHANTABILITY AND FITNESS FOR A PARTICULAR PURPOSE, ARE LIMITED IN DURATION TO
THE DURATION OF THE WRITTEN LIMITE D WARRANTIES CONTAINED
HEREIN. EXCEPT AS PROVIDED HEREIN, RadioShack SHALL HAVE NO
LIABILITY OR RESPONSIBILITY TO CUSTOMER OR ANY OTHER PE RSON OR EN TI TY WI TH RE SP EC T TO A NY L I ABILITY, LOSS OR DA MA GE
CAUSED DIRECTLY OR INDIRECTLY BY USE OR PERFORMANCE OF
THE PRODUCT OR ARISING OUT OF ANY BREACH OF THIS WARRANTY,
INCLUDING, BUT NOT LIMITED TO, ANY DAMAGES RESULTING FROM
INCONVENIENCE, LOSS OF TIME, DATA, PROPERTY, REVENUE, OR
PROFIT OR ANY INDIRECT, SPECIAL, INCIDENTAL, OR CONSEQUENTIAL DAMA GE S, EV EN IF Rad i oSh a ck HAS BE EN ADVI S ED OF TH E PO SSIBILITY OF SUCH DAMAGES.
Some states do not allow the limitations on how lon
or the exclusion of inc id ental or cons eque ntia l d ama
tions or exclusions ma
In the event of a pro duct defect du rin
and the RadioShack sales receipt as proof of purchase date to an
dioShack store. RadioSh ack will, at its optio n, unless otherwise prov ided b
law: (a) correct the defect by product repair without charge for parts and labor;
(b) replace the product with one of the same or similar des i
the purchase price. Al l replace d par ts and pr oducts , and pr odu cts on whi ch a
refund is made, become the propert
parts and products ma
paired or replaced parts and products are warrant ed for the remainder of the
ori
inal warranty period. You will be charged for repair or replacem ent of the
product made after the expiration of the warrant
This w arran t
to acts of God, a buse, ac cident, mis use, i mproper or abnormal usa
to follow instructions, imprope r installation or mai ntenance, alteration, li
nin
those provided b
such as fuses or batteries; (d) cosmeti c dama
or insurance costs; or (f) costs o f pro duct remova l, insta llation , set-up service
ad
ustment or reinstallation.
This warra nt
ri
hts which vary from state to state.
does not cove r: (a) da mage or failure ca used by or attributable
or other incidence of excess voltage or current; (b) any repairs other than
100 Throckmorton St., Suite 600, Fort Worth, TX 76102
not apply to you.
be used in the performance of warranty servic e. Re-
a RadioShack Authorized Service Facility; (c) consumables
ives you specific l egal rights, and you may also have ot her
RadioShack Customer Relations, Dept. W,
-owned stores and authorized Ra-
the warranty period, take the product
of RadioShack. New or reconditioned
e; (e) transportation, ship pin
We Service What We Sell
ear from the date of
an implied warranty lasts
es, so the a bove limi ta-
Ra-
n; or (c) refund
period.
e, failure
ht-
3/97
RadioShack
A Division of Tandy Corporation
Fort Worth, Texas 76102
GE-95D-1652
5A7 Printed in Hong Kong
 Loading...