


Table of contents
1 Introduction
2Connecting the video recorder
3 Initialinstallation
4 Settings
5Operating instructions
6 Playback
7Removing picture interference
8Manual recording
9Programmed recordings
10Otherfunctions
11 Suppressinginterference
12 Before you call an engineer
|
Important notes for operation |
Page 4 |
|
||
|
The most important functions of your new video recorder . . . . . |
. .Page 5 |
|
Important information for customers in Great Britain . . . . . . . . . |
. Page 6 |
|
Preparing the remote control for operation |
Page 7 |
|
||
|
Connecting to a TV set with a scart socket . . . . . . . . . . . . . . . . . |
. Page 7 |
|
Connecting to a TV set without a scart socket . . . . . . . . . . . . . . |
. Page 9 |
|
Connecting additional devices . . . . . . . . . . . . . . . . . . . . . . . . . . . |
. Page 9 |
|
Setting channel, date and time for the first time |
Page 10 |
|
||
|
Searching manually for TV channel . . . . . . . . . . . . . . . . . . . . . . . . |
Page 11 |
|
Allocating decoder . . . . . . . . . . . . . . . . . . . . . . . . . . . . . . . . . . . . |
.Page 12 |
|
Using a satellite receiver . . . . . . . . . . . . . . . . . . . . . . . . . . . . . . . |
Page 13 |
|
Finding a TV channel automatically |
Page 14 |
|
||
|
Sorting and clearing of TV channels manually . . . . . . . . . . . . . . . . |
Page 15 |
|
Changing time and date . . . . . . . . . . . . . . . . . . . . . . . . . . . . . . . |
Page 16 |
|
General information |
Page 17 |
|
||
|
Navigation in the main menu . . . . . . . . . . . . . . . . . . . . . . . . . . . . |
Page 17 |
|
Playing cassettes |
Page 18 |
|
||
|
Selecting tape position display type . . . . . . . . . . . . . . . . . . . . . . . |
Page 19 |
|
Reset / display tape position . . . . . . . . . . . . . . . . . . . . . . . . . . . . . |
.Page 20 |
|
Searching for tape position with picture (picture search) . . . . . . . |
Page 20 |
|
Searching for tape position without picture (forward wind and rewind) |
. Page 20 |
|
Searching automatically for tape position (index search) . . . . . . . |
Page 21 |
|
Finding a blank position on tape automatically . . . . . . . . . . . . . . . |
Page 21 |
|
Still picture / slow motion . . . . . . . . . . . . . . . . . . . . . . . . . . . . . . |
Page 22 |
|
||
|
Fine-tuning tracking |
Page 23 |
|
||
|
Optimizing still picture . . . . . . . . . . . . . . . . . . . . . . . . . . . . . . . . . |
Page 23 |
|
Starting and stopping recording manually |
Page 24 |
|
||
|
Starting recording manually and stopping automatically . . . . . . . . . |
Page 25 |
|
Lining up manual recordings . . . . . . . . . . . . . . . . . . . . . . . . . . . . |
Page 26 |
|
Selecting the recording speed . . . . . . . . . . . . . . . . . . . . . . . . . . . |
Page 26 |
|
Automatic recording from a satellite receiver . . . . . . . . . . . . . . . |
.Page 27 |
|
Activate / deactivate direct recording . . . . . . . . . . . . . . . . . . . . . |
.Page 28 |
|
Making a direct recording . . . . . . . . . . . . . . . . . . . . . . . . . . . . . . |
.Page 29 |
|
Programming timer with VIDEO Plus+ |
Page 30 |
|
||
|
Problem solving (VIDEO Plus-Programming) . . . . . . . . . . . . . . . . |
Page 32 |
|
Programming timer without VIDEO Plus+ . . . . . . . . . . . . . . . . . . |
Page 33 |
|
Problem solving (Timer programming) . . . . . . . . . . . . . . . . . . . . . |
Page 35 |
|
“Turbo Timer”-Recording . . . . . . . . . . . . . . . . . . . . . . . . . . . . . . . |
.Page 36 |
|
Problem solving (Turbo Timer programming) . . . . . . . . . . . . . . . . |
.Page 37 |
|
Delete / check / change programmed recordings . . . . . . . . . . . . . |
Page 38 |
|
Using “NexTView Link” . . . . . . . . . . . . . . . . . . . . . . . . . . . . . . . |
.Page 38 |
|
Adjusting automatic switch-off |
Page 39 |
|
||
|
Adjusting the child lock . . . . . . . . . . . . . . . . . . . . . . . . . . . . . . . . |
Page 39 |
|
Replaying cassette continuously . . . . . . . . . . . . . . . . . . . . . . . . . . |
.Page 40 |
|
Changing the TV system . . . . . . . . . . . . . . . . . . . . . . . . . . . . . . . |
Page 40 |
|
Energy-saving mode . . . . . . . . . . . . . . . . . . . . . . . . . . . . . . . . . . . |
.Page 41 |
|
Adjusting the OSD information . . . . . . . . . . . . . . . . . . . . . . . . . . |
.Page 42 |
|
||
|
Optimizing the modulator |
Page 43 |
|
||
|
Switching the modulator on and off . . . . . . . . . . . . . . . . . . . . . . . |
Page 44 |
|
Error correction |
Page 45 |
|
||
|
Technical data . . . . . . . . . . . . . . . . . . . . . . . . . . . . . . . . . . . . . . . |
Page 45 |

VR 210/07
Operating Instructions
with
Remote control
You |
will |
find |
explanations for |
the |
|
controls |
and |
the |
displays on your video |
|
recorder on the second |
|
to last page of these |
|
operating instructions. |
TIP |
|
Accessories
4Operating instructions
4Quick Start Guide
4Remote control
4Batteries
4Aerial cable
4Mains cable
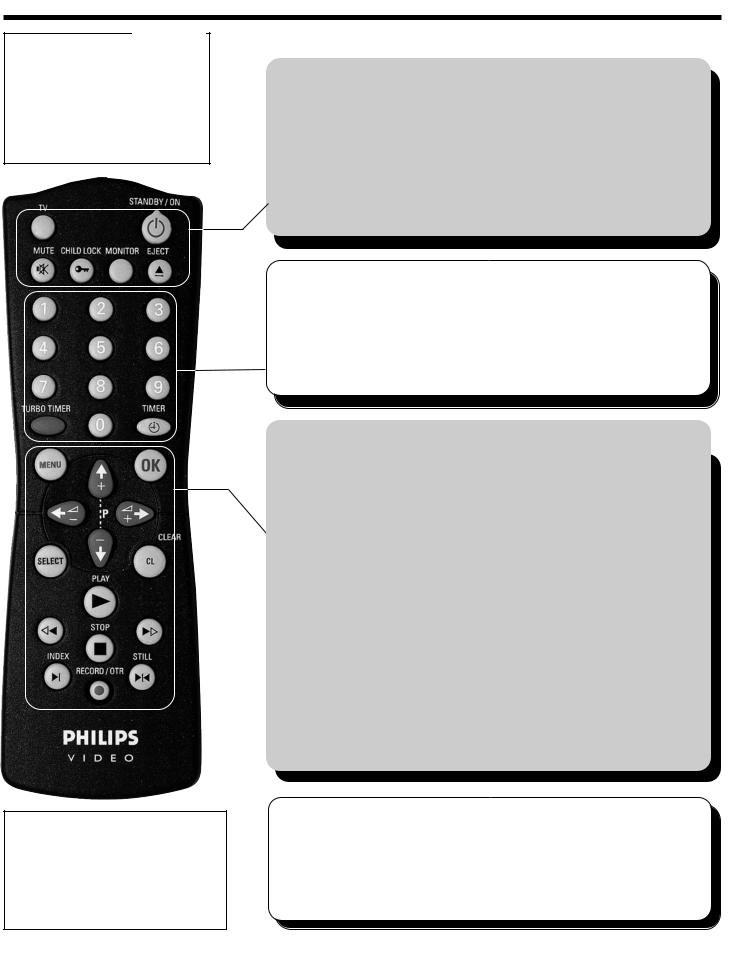
TV |
ä Call up additional functions (see below) |
STANDBY/ON m |
ä Switch set on/off |
|
ä Interrupt function |
MUTE y |
ä Interrupt programmed recording |
ä Additional TV function only (see below) |
MENU |
ä Switch main menu on/off |
OK |
ä Store |
SELECT |
ä Confirm |
ä Select function |
|
CLEAR / CL |
ä Delete entry |
; P+ / = P- |
ä Delete programmed recording |
ä Select next / previous menu point |
|
S+ P / QS- |
ä Select next / previous programme number |
ä Select input field |
|
H |
ä In STOP or STANDBY mode: Rewind |
PLAY G |
ä In playback mode: Fast reverse |
ä Play back recorded cassette |
|
I |
ä In STOP or STANDBY mode:Wind forward |
STOP h |
ä In playback mode: Fast forward |
ä Stop tape |
|
RECORD n |
ä Start manual recording |
INDEX E |
ä With H or I: Search for index |
STILL R |
marking |
ä Stop tape and show still picture |
REMOTE CONTROL

1 Introduction
Welcome to the family of owners of
Philips VHS video recorders.
Thank you for choosing to buy our product. Please wait at least three hours after transporting the appliance before starting installation. The set needs this time in order to become acclimatised to its new environment (temperature, air humidity, etc.).
Your Philips Team hopes that you will enjoy using your new video recorder.
This product complies with the requirements of Directive 73/23/EEC + 89/336/EEC + 93/68 EEC.
Important notes for operation
|
You should not under any circumstances open the set yourself.You |
|
would expose yourself to the risk of an electric shock from the |
|
hazardous high voltage inside. |
|
|
|
When the appliance is connected to the power supply, there are some |
|
components which are constantly operational.To switch off the video |
|
recorder completely, you must disconnect it from the power supply. |
|
|
|
The video recorder does not contain any components that can be |
|
repaired by the customer. |
|
|
! |
Make sure that air can circulate freely through the ventilation slots on |
the video recorder. |
|
|
|
Make sure that no objects or liquids enter the video recorder. If liquid is |
|
spilt into it, disconnect the video recorder immediately from the power |
|
supply and call the After Sales Service for advice. |
|
The video recorder should not be used immediately after transportation |
|
from a cold to a hot area or vice versa, or in conditions of extreme |
|
|
humidity. |
|
|
|
These operating instructions have been printed on non-polluting paper. |
|
Please deposit old batteries at the relevant collection points. |
|
|
|
Please make use of the facilities available in your country for disposing |
|
of the video recorder packaging in a way that helps to protect the |
|
environment. |
|
This electronic device contains many materials which can be recycled. |
|
Please enquire about the possibilities for recycling your old set. |
IMPORTANT NOTES FOR OPERATION |
4 |
ENGLISH |
|

The most important functions of your new video recorder
Your Philips video recorder can be used, not only for recording and playing back VHS cassettes, but it also has a whole range of special functions which will make day-to-day use of your new video recorder easier for you.
Plug in and off you go - getting started with your new video recorder just couldn’t be simpler. Once you have connected the cables, you will immediately see text on the screen which will assist you at all stages of operation.
The Easylink function guarantees the best possible connection between your video recorder and other Home Cinema devices.
Philips has developed a system which makes it possible for you to get the best possible playback quality from video cassettes. Interference on old, often-played tapes is minimized, and in new or high quality cassettes, details are even clearer.
The precision mechanism developed by Philips guarantees short rewind times and, by automatically detecting the length of the tape, makes operation as easy as possible for the user.
The simple programming system for video recorders revolutionized the video world when it was introduced. Instead of having to enter many different details (date, starting time, finish time, programme), which was often tiresome and liable to errors, all you have to do is enter a number, up to nine digits long, which can be found in any TV programme listing. Once you have done that, all the relevant details for the recording are stored.
VIDEO Plus+ and PlusCode are registered trademarks of the Gemstar Development Corporation. The VIDEO Plus+ system is manufactured under licence from the Gemstar Development Corporation.
So that you can identify your machine in the event of theft, enter the serial number (PROD. NO) here.You will find it on the type plate on the back of the set.
MODEL NO. |
VR 210/07 |
|
|
|
|
|
|
|
|
||
PROD. NO. |
.............................. |
|
|
|
|
|
|
|
|
||
|
|
|
|
|
|
|
|
|
|
|
|
If you have any problems using the video recorder, please read the corresponding chapters in this instruction manual. If you have any questions, there is also a customer support service available in your country. You can find the telephone number in the guarantee information enclosed in the packaging. Please have your model number (MODEL NO.) and production number (PROD. NO.) ready.
ENGLISH |
5 |
THE MOST IMPORTANT FUNCTIONS |
|

Important information for customers in Great Britain
This set is fitted with an approved moulded 13 amp plug.To change the fuse in this plug or to attach a different plug, please proceed as follows:
1Take off the fuse cover and remove the old fuse
2Insert a new fuse. Suitable fuses are those of the type BS 1362 3A,A.S.T.A.- or BSI-approved
3Close the fuse cover
If the attached plug does not meet your requirements, you can cut it off and replace with a suitable plug. Please observe the following conditions:
If your new plug uses a built-in fuse, this should be a 3A fuse.
If your new plug does not contain a built-in fuse, please do not use any fuses in your fusebox with a rating of more than 5A.
Please destroy the old, cut-off plug so that it cannot be used elsewhere.
4Connect the blue cable (neutral “N”) to the terminal in the plug which is marked with the letter “N” or coloured black
5Connect the brown cable (live, “L”) to the terminal in the plug which is marked with the letter “L” or coloured red
6Do not in any circumstances connect either of the two cables to the terminal
in the plug which is marked with the letter “E”, the symbol “ \” or coloured green or green / yellow
!Before you refit the plug cover, make sure, that the grip at the bottom of the plug is clamped over the plastic cover of the lead, not just over the two wires.
IMPORTANT INFORMATION FOR CUSTOMERS IN GREAT BRITAIN |
6 |
ENGLISH |
|
2 Connecting the video recorder
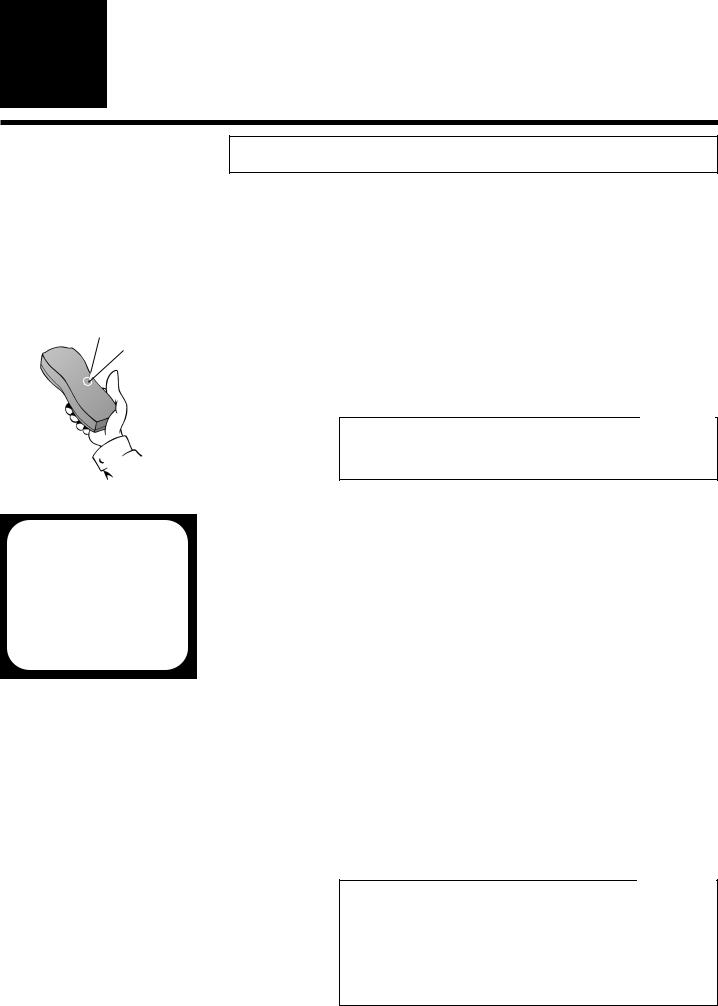
Preparing the remote control for operation
1Take the remote control of the video recorder and the enclosed batteries (2 batteries).
2Open the battery compartment, insert the batteries as shown and then close the battery compartment.The remote control is now ready to use.
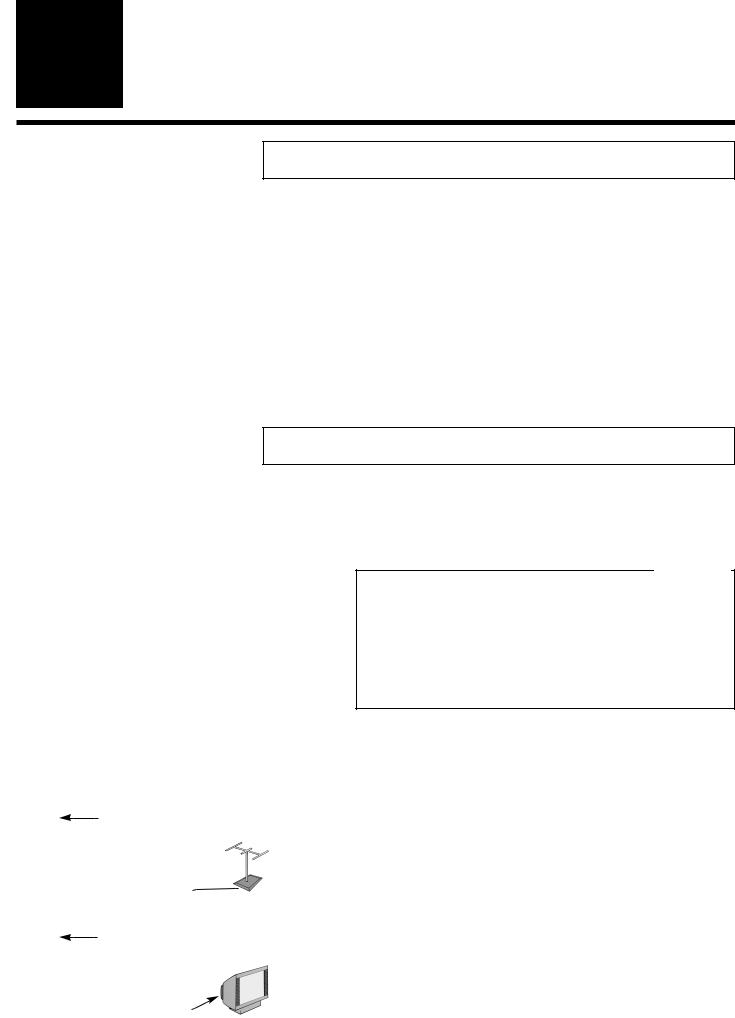
Aerial cable
Mains cable
Scart cable
Connecting to a TV set with a scart socket
1Have the following cables ready: An aerial cable (enclosed), a mains cable (enclosed) and a scart cable
What is a scart cable?
The scart or Euro-AV cable serves as the universal recording and playback connector for picture-, soundand control signals.With this type of connection, there is practically no loss of quality during the signal transfer. We recommend that you use a scart cable (available
from specialist stores) when using this video recorder. PARDON?
2Switch off your TV set
3Remove the aerial cable plug from the back of
your TV set and insert it into the aerial socket 2on the back of the video recorder
4Take the enclosed aerial cable and connect
the appropriate ends to the aerial socket of your TV set and to the TV socket 3 on the back of the video recorder
ENGLISH |
7 |
REMOTE CONTROL / CONNECTION (TV WITH SCART SOCKET) |
|
AV1 |
EXT1 |
|
|
|
||
|
|
|
|
|
|
|
|
|
|
|
|
|
|
|
|
|
|
|
|
|
|
|
|
|
|
|
|
CONGRATULATIONS
YOU NOW OWN A NEW
PHILIPS
VIDEO RECORDER
CONTINUEPOK
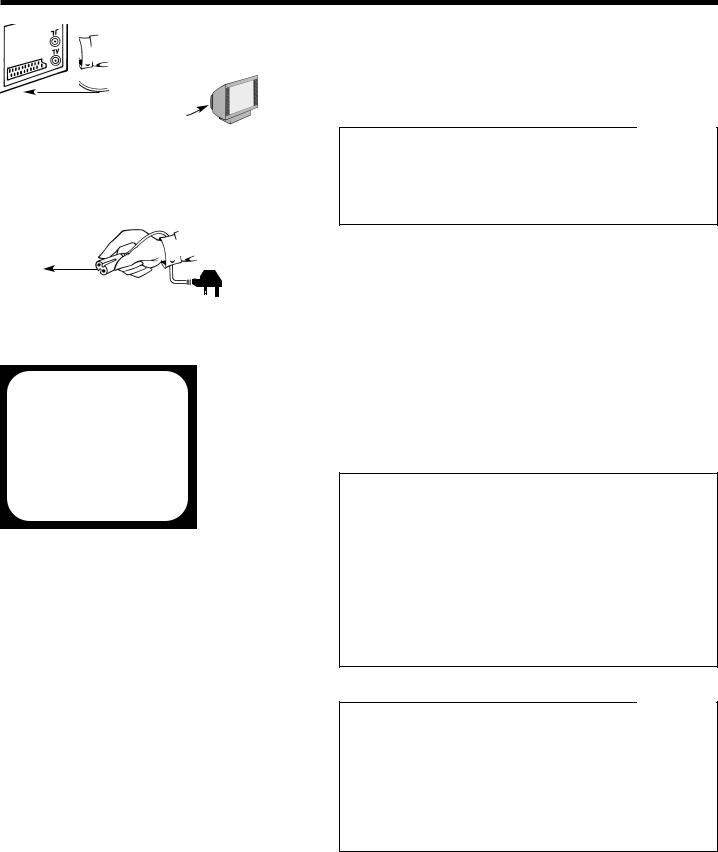
5Take a scart cable and connect one end to the scart socket on the back of your TV set and the other to the scart socket AV1 EXT1 on
the back of the video recorder.
8 My TV set has more than one scart socket.
4Then you have a more modernTV set. Please check first (with the aid of the operating instructions for the TV set), which of the available scart sockets is
intended for use with the video recorder. |
PROBLEM |
6Take the enclosed mains cable and connect the appropriate ends to the mains socket 4
on the back of the video recorder and the other to the nearest free socket
7Your set should automatically switch over to
allocated to video EXT, 0 or AV).You
8 I can not see the welcome screen, only the mess-
sage “EASYLINK IS LOADING DATA FROM |
TV” |
|
|
4 Congratulations!Your TV set supports the Easylink |
|
||
|
|||
function. It automatically sends the settings for the |
|
||
available TV channels and the time and date |
|
||
information straight to the video recorder.As soon |
|
||
as the transfer is complete, the current settings for |
|
||
year, month, date and time appear on the screen |
|
||
(see left). Correct and/or confirm with the arrow |
|
||
keys ;P+, =P-, S+ P and QS- or with the |
|
||
PROBLEM |
|||
number keys 0-9 and confirm with OK. |
|
||
8 My screen is still blank
4If a TV set receives a signal via the scart socket, it usually switches automatically to the corresponding programme number. This automatic function might be adversely affected. Please switch manually to the corresponding programme number (usually: EXT, 0 or AV)
4 Check the cable connections |
PROBLEM |
8You can find more details in the chapter “Initial Installation”
CONNECTION (TV WITH A SCART SOCKET) |
8 |
ENGLISH |
|
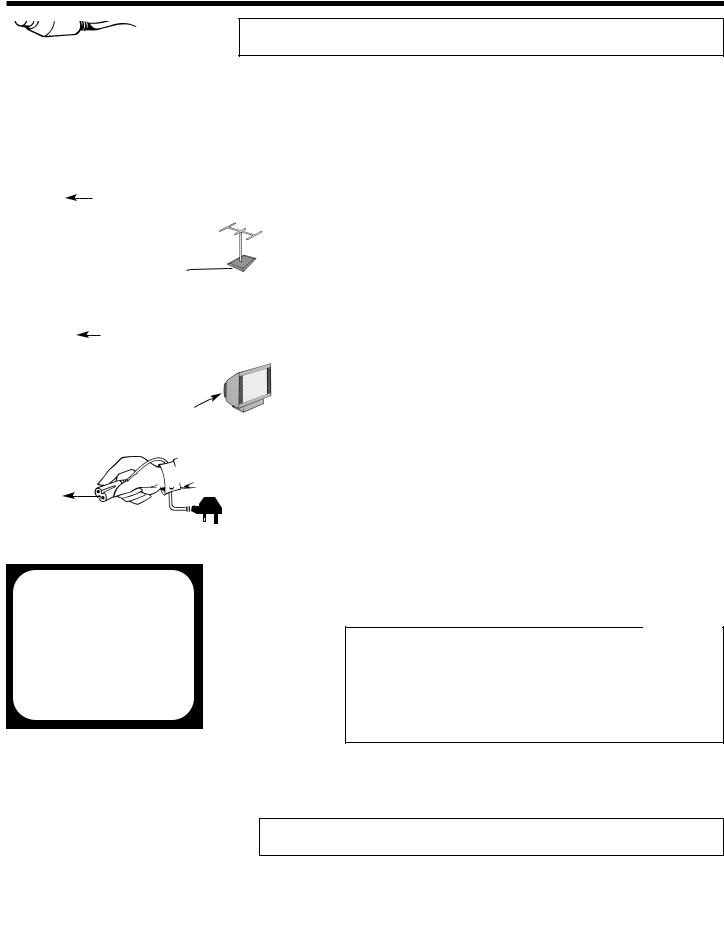
Aerial cable
Mains cable
CONGRATULATIONS
YOU NOW OWN A NEW
PHILIPS
VIDEO RECORDER
CONTINUEPOK
Connecting to a TV set without a scart socket
1Have the following cables (provided with your new video recorder) ready: 1 aerial cable and 1 mains cable
2Switch off your TV set
3Remove the aerial cable plug from the back of
your TV set and insert it into the aerial socket 2on the back of the video recorder
4Take the enclosed aerial cable and connect
the appropriate ends to the aerial socket of your TV set and to the TV socket 3 on the back of the video recorder
5Take the enclosed mains cable and connect the appropriate ends to the mains socket 4 on the back of the video recorder and the other to the nearest free socket
6Switch on your TV set and select on your TV set the programme number which will in future be used for operation with the Videorecorder
7On your TV change the settings of this programme number until you see the adjacent welcome screen clearly and in colour on the screen
8 There is no test image
4 Your video recorder “broadcasts” on the frequency 583MHz (CH35) in the UHF range (ultra high frequency). Repeat the matching of the selected programme numbers on the TV set.
4 Check the cable connections |
PROBLEM |
8You can find more details in the chapter “Initial Installation”

 AV2 EXT2
ENGLISH
Connecting additional devices
Additional devices, such as a decoder, camcorder, satellite receiver, etc., can be connected to the scart socket AV2 EXT2 on the back of the video recorder. You will need a scart cable for this (available from specialist stores).
9 CONNECTION (TV WITHOUT SCART SOCKET) / ADDITIONAL DEVICES
3 Initial installation
AUTO INSTALL
SEARCHING
00 TV CHANNELS FOUND
hhhh_______________
PLEASE WAIT...
Setting channel, date & time for the first time
If your TV set supports the Easylink function and you have already corrected and/or confirmed the settings for year,month,date and time, you can skip this section.Your video recorder has already stored all the necessary details. Please continue by reading the section “Finding TV channels manually”.
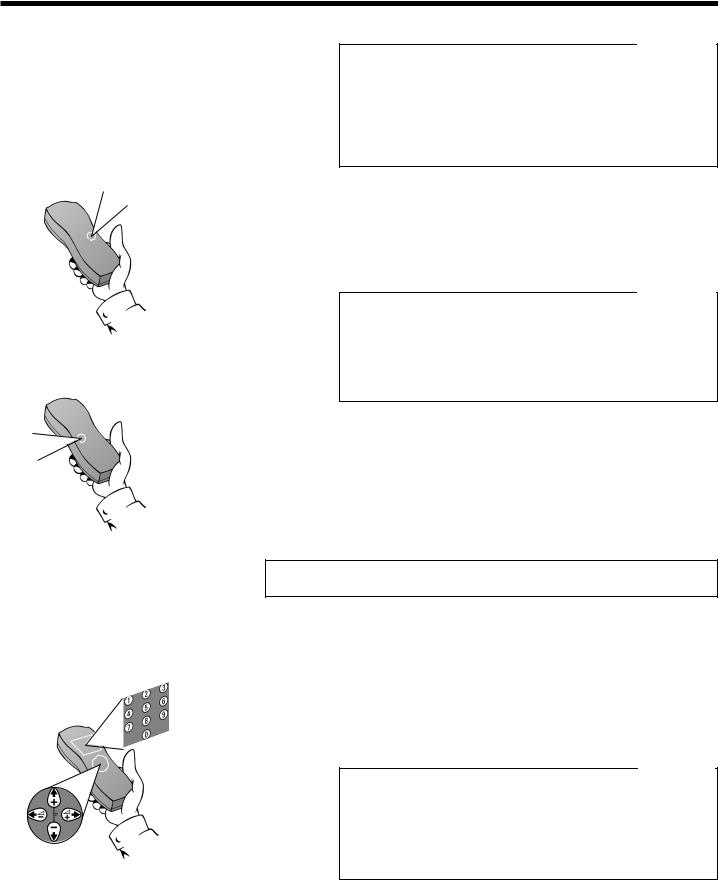
1Using the OK button activate the automatic initial installation
“Aim” correctly |
|
Always point the remote control at the video recorder |
TIP |
and not at the TV set. |
2The set seeks out and stores all available TV
channels as well as time and |
date. |
|
|
|
This procedure may take several minutes. As |
|
|
||
soon as all the data has been stored, the |
|
|
||
screen will show the message “STORED”. |
|
|
||
|
|
|
|
|
|
The Teletext clock resets automatically |
|
|
|
|
If a TV channel which has Teletext is stored as |
|
|
|
|
programme number P01, the video recorder |
|
|
|
|
automatically takes in the date and time from the text |
|
|
|
|
function. The change from summer to winter time |
|
|
|
|
TIP |
|||
|
and vice versa should also occur automatically. |
|
||
3The initial setting of channel, date and time is completed
8The time is not shown in the display of the video recorder (“-:-”) or is shown incorrectly
4While initial installation was going on, the set was unable to recognise the time. Please read the paragraph in Section 4 “Setting the time and
date” to correct this problem |
PROBLEM |
|
SETTING CHANNEL, DATE AND TIME |
10 |
ENGLISH |
|
MAIN MENU
CLOCK
AUTO INSTALL
MANUAL SEARCH
TV CHANNEL ALLOC.
RECORD SPEED
AUTO STANDBY
TV SYSTEM
SPECIAL SETTINGS
OK
MANUAL SEARCH |
|
PROGRAMME NUMBER |
QP01P |
S-CHANNEL |
NO. |
CHANNEL NUMBER |
21 |
DECODER |
OFF |
TV SYSTEM |
AUTO |
NICAM |
ON |
EXITPMENU STOREPOK
Searching manually for TV channel
In exceptional cases, it may happen that on initial installation the set does not find all the available TV channels. In this case, the missing TV channels must be searched for and stored manually. If your TV set supports the Easylink function, you can start the automatic transfer of the channel data as follows.
1Switch on the TV set and - if necessary - select the programme number set for video recorder operation
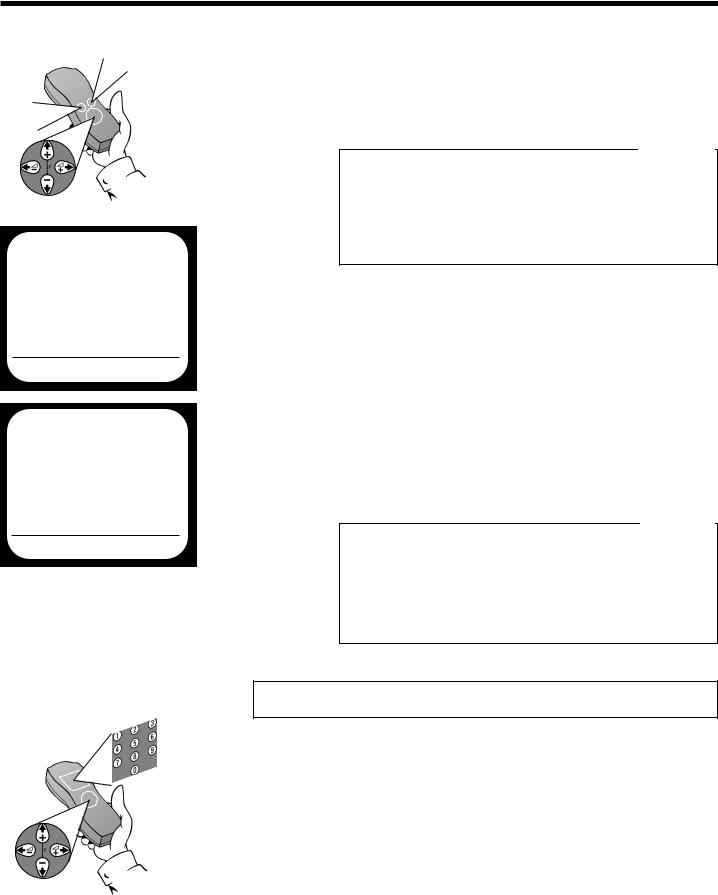
2Press the MENU button on the remote control.The on-screen menu appears
3Use =P- or ;P+ to select the option “MANUAL SEARCH”
4Confirm with OK
5Use S+ P or QSto select the programme number (e.g.: “P 01”), which you want to manually allocate to a TV channel
6If you are looking for a special channel, use =P- or ;P+ to select the option “S-CHANNEL” and use S+ P or QSto activate the “YES” setting. To search for a “normal” channel, the “NO” setting must be selected.
What is a channel, or a special channel? |
|
TV channels are transmitted on precisely-defined |
|
frequency ranges.These ranges are also referred to as |
|
“channels”. Each channel has its own TV station |
|
allocated to it. Most cable and satellite TV providers |
|
supply tables of channel allocations. Special channels |
|
(hyperband channels) are transmitted on special |
PARDON? |
frequencies. |
7Use =P- or ;P+ to select the option “CHANNEL NUMBER” and use S+ P or QS- to enter the number of theTV-Channel required
ENGLISH |
11 |
SEARCHING MANUALLY FOR TV CHANNEL |
|
8 I don’t know the channels for my TV stations |
|
4 No problem. Hold down the button S+ P to |
|
start the automatic channel search. A changing |
|
channel number will appear on screen. Continue |
|
the automatic channel search until you have found |
PROBLEM |
the desired TV station. |
8Press OK to store the TV channel found.The screen will briefly show “STORED”
8I cannot find the TV channels from my satellite receiver
4These do not have to be stored as actual TV channels.On your video recorder, select programm
number “E2”. Individual TV channels must be |
PROBLEM |
selected on the actual satellite receiver itself |
9Finish manual sorting of TV channels by
pressing the MENU button or return to step 3 to allocate additional TV channels
Allocating decoder
If your TV set supports the Easylink function you must allocate the decoder directly to the TV set. If necessary, you should refer to the instructions for your TV set for assistance.
1Use =P- and ;P+ or the number keys 0-9 to select the TV channel, which will in future be automatically decoded by your decoder
What is a decoder? |
|
Like a deciphering machine, a decoder (available in TV |
|
and video stores) deciphers the TV channels for which |
|
additional charges must be paid. Without the |
|
appropriate decoder, you will receive these TV |
PARDON? |
channels distorted. |
ALLOCATING DECODER |
12 |
ENGLISH |
|
MAIN MENU
CLOCK
AUTO INSTALL
MANUAL SEARCH
TV CHANNEL ALLOC.
RECORD SPEED
AUTO STANDBY
TV SYSTEM
SPECIAL SETTINGS
|
OK |
MANUAL SEARCH |
|
PROGRAMME NUMBER |
QP01P |
S-CHANNEL |
NO. |
CHANNEL NUMBER |
21 |
DECODER |
OFF |
TV SYSTEM |
AUTO |
NICAM |
ON |
EXITPMENU STOREPOK
2Press the MENU button
3The on-screen menu appears. Use the buttons
to select =P- and ;P+ the menu point “MANUAL SEARCH” and confirm with OK
What is an on-screen menu? |
|
The on-screen menu takes the mystery out of using |
|
your new video recorder. All settings and recording |
|
steps can be done easily via the on-screen menu by |
|
following the corresponding instructions on the |
PARDON? |
screen |
4Use =P- or ;P+ to select the option “DECODER”
5Using S+ P or QS- , activate the setting “ON”. The display will show “DEC” When selecting “OFF” the decoder will not be allocated
6Confirm with OK (screen will show “STORED”) and leave the on-screen menu with the MENU button
Check decoder allocation at a glance |
|
There is no need to call up the on-screen menu to check |
|
to which TV channel on the video recorder a decoder is |
|
allocated. Simply use =P- and ;P+ to select a TV channel. |
|
If “DEC” appears in the display, a decoder is allocated to |
|
this channel. |
TIP |
Using a satellite receiver
Those TV channels which are received via a satellite receiver connected (to the scart socket AV2 EXT2), can be viewed on the video recorder on programme number “E2”. On the remote control press the number button 0 and then the button =P- to select this programme number. The TV channels of the satellite receiver are selected not on the video recorder itself, but directly on the satellite receiver.
ENGLISH |
13 |
USING A SATELLITE RECEIVER |
|
4 Settings
MAIN MENU
CLOCK
AUTO INSTALL
MANUAL SEARCH
TV CHANNEL ALLOC.
RECORD SPEED
AUTO STANDBY
TV SYSTEM
SPECIAL SETTINGS
OK
AUTO INSTALL
SEARCHING
00 TV CHANNELS FOUND
hhhh_______________
PLEASE WAIT...
Finding a TV channel automatically
On initial installation, the video recorder performs an automatic channel search. If the channel assignments of your cable or satellite TV provider change or if you are reinstalling the video recorder, e.g. after moving house, you can start this procedure again. The video recorder finds all the available TV channels and stores the new settings. If your TV set supports the Easylink function, you can start the automatic transfer of the channel data as follows.
1Switch on the TV set and - if necessary - select the programme number set for video recorder operation
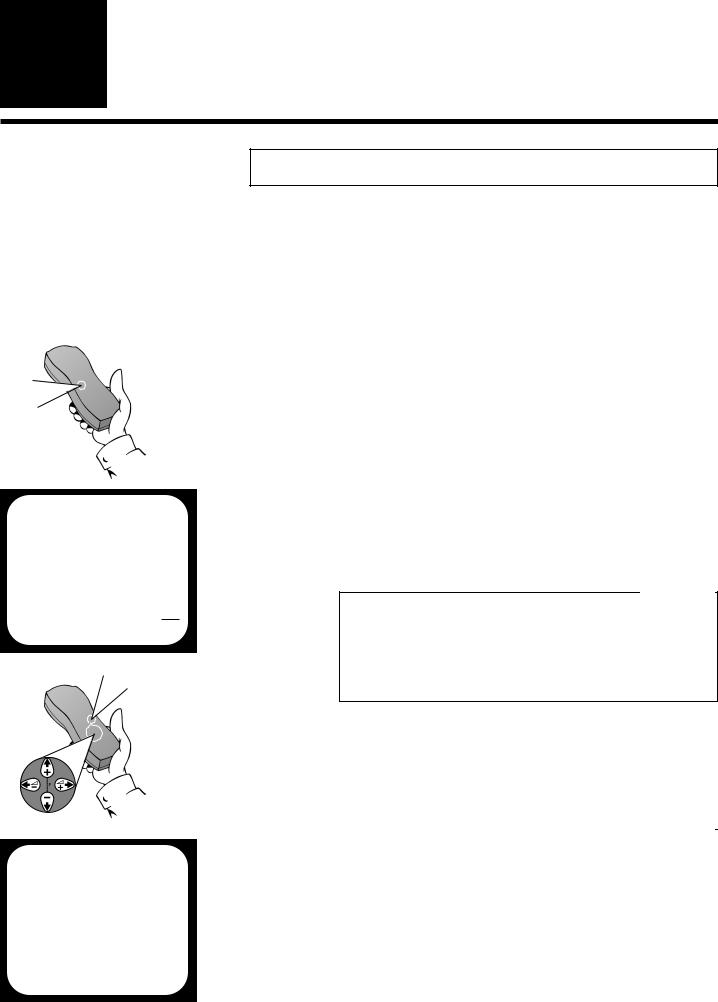
2Press the MENU button on the remote control.The on-screen menu appears
3Use =P- or ;P+ to select the option “AUTO INSTALL” (automatic channel search) and confirm with OK
Sequence of TV channels |
|
If your TV set supports the Easylink function, the video |
|
recorder stores the TV channels in the TV set’s usual |
|
sequence. If your TV set does not support this function |
|
theTV channels will be stored in the following sequence: |
TIP |
BBC1, BBC2, ITV, CH 4, CH 5, other. |
4The set seeks out and stores allavailable TV channels. This procedure may take several minutes. As soon as all the TV channels have been stored, the screen will show the message “STORED”.
|
|
|
|
|
8 The video recorder is not finding all |
the TV |
|
|
|
channels |
|
|
|
|
4 In exceptional cases, it may happen that the set |
|
|
||
does not find all the available TV channels. In this |
|
|
||
case, the missing TV channels must be searched |
|
|
||
for and stored manually.You can look up how to |
|
|
||
do this in the chapter “Initial installation” |
|
|
||
PROBLEM |
||||
(“Searching manually for TV channel”). |
|
|||
5 Finish with the button MENU
FINDING A TV CHANNEL AUTOMATICALLY |
14 |
ENGLISH |
|

MAIN MENU
CLOCK
AUTO INSTALL
MANUAL SEARCH
TV CHANNEL ALLOC.
RECORD SPEED
AUTO STANDBY
TV SYSTEM
SPECIAL SETTINGS
OK
TV |
CHANNEL ALLOC. |
|
ALLOCATE ON |
QP01P |
|
TV |
CHANNEL |
BBC1 |
ALLOCATEPSELECT STOREPOK
Sorting and clearing of TV channels manually
After you have performed the automatic channel search you may not agree with the sequence in which the individual TV channels have been allocated to the programme positions of the video recorder. You can use this function to individually sort the TV channels found or to delete unwanted TV channels or those with poor reception. If your TV set supports the Easylink function, you will not need to rearrange the TV channels later. The sequence corresponds to the channel assignment of your TV set.
1Switch on the TV set and - if necessary - select the programme number set for video recorder operation
2Press the MENU button on the remote control. Das Bildschirmmenü erscheint
3 Use =P- or ;P+ to select the option “TV CHANNEL ALLOC.” and confirm with OK
4Use S+ P or QSto select the TV channel, to be allocated a programme position
5 Sorting: |
Press SELECT, to allocate theTV |
|
channel to the programme |
|
position set P 01 |
Delete: |
Delete the TV channel set with |
|
CLEAR (CL) |
6Continue repeating the steps 4 and 5, to allocate additional TV channels (P 02, P 03,...) or to delete additional TV channels and confirm with OK
7Finish the manual sorting / deleting of TV channels with the button MENU
New sequence regardless of Easylink |
|
If your TV set supports the Easylink function, you |
|
cannot change the sequence of the TV channels on the |
|
video recorder. If you do not agree with the sequence |
|
of the channels,you must change the channel allocations |
FOR |
on the TV set and then start the automatic channel |
|
search on the video recorder afresh. |
EXPERTS |
|
|
|
|
ENGLISH |
15 |
SORTING AND CLEARING OF TV CHANNELS MANUALLY |
|
 Loading...