


 Loading...
Cover
Before use
Outline of edit process
Assistant edit
Input mode
Edit mode
Process mode
Output mode
Help mode
Settings mode
Listing of menus
Operating Instructions
DV Editing Software
MotionDV STUDIO 5.6E LE for DV
Before use, please read these instructions completely.
Product Support Information: http://panasonic.co.jp/pavc/global/cs/index.html
*English only
VQT0U82
|
Contents |
Contents |
|
Before use |
|
Please read the following first ....................................................................................... |
10 |
Operating environment ................................................................................................. |
12 |
Requirements ........................................................................................................................................... |
14 |
Features........................................................................................................................ |
15 |
Convenient functions ............................................................................................................................... |
16 |
Activating MotionDV STUDIO ....................................................................................... |
17 |
Exiting MotionDV STUDIO ....................................................................................................................... |
19 |
About MotionDV STUDIO ............................................................................................. |
20 |
Operation Mode ....................................................................................................................................... |
20 |
Assistant edit ................................................................................................................................... |
21 |
Screen configuration for MotionDV STUDIO ........................................................................................... |
22 |
Outline of edit process .................................................................................................. |
23 |
Assistant edit |
|
Assistant edit................................................................................................................. |
24 |
Display of Edit Assistant .......................................................................................................................... |
24 |
Outline of operation .................................................................................................................................. |
25 |
Setting screen .......................................................................................................................................... |
27 |
- 2 -
|
Contents |
Input mode |
|
About the Input mode.................................................................................................... |
32 |
DV device input mode................................................................................................... |
33 |
Screen configuration ................................................................................................................................ |
33 |
Capturing a video clip at one touch of a button ........................................................................................ |
40 |
Capturing video clips by specifying the range .......................................................................................... |
42 |
Indexing and capturing a video ................................................................................................................ |
46 |
Capturing multiple video clips at one time (Batch Capture) ..................................................................... |
50 |
Directly capturing a video being taken by the camera ............................................................................. |
52 |
Capturing a still image clip (Snapshot) .................................................................................................... |
54 |
Capturing still images in the card ............................................................................................................. |
56 |
Saving tape information ........................................................................................................................... |
58 |
About library screen ................................................................................................................................. |
61 |
Displaying files ................................................................................................................................. |
61 |
Displaying all folders registered ....................................................................................................... |
62 |
Changing a file icon arrangement .................................................................................................... |
62 |
Renaming a file ................................................................................................................................ |
63 |
Deleting a file ................................................................................................................................... |
63 |
Registering a folder .......................................................................................................................... |
64 |
Import sound data mode ............................................................................................... |
66 |
Screen configuration ................................................................................................................................ |
67 |
Capturing audio materials ........................................................................................................................ |
68 |
Edit mode |
|
About the Edit mode ..................................................................................................... |
71 |
Non-linear edit mode..................................................................................................... |
72 |
- 3 -
|
Contents |
Screen configuration ................................................................................................................................ |
72 |
Arranging clips on the edit track ............................................................................................................... |
77 |
Changing the order of the clips ................................................................................................................ |
80 |
Copying clips ............................................................................................................................................ |
81 |
Deleting clips ............................................................................................................................................ |
82 |
Playing the edited contents ...................................................................................................................... |
83 |
Setting the aspect ratio of the preview screen ......................................................................................... |
85 |
Saving the editing information (edited contents) ...................................................................................... |
86 |
Trimming clips .......................................................................................................................................... |
88 |
Dividing a clip ........................................................................................................................................... |
91 |
Adding audio (Audio Mix) ......................................................................................................................... |
93 |
Applying effects to a clip .......................................................................................................................... |
99 |
Types of video effects ...................................................................................................................... |
99 |
Applying a video effect................................................................................................................... |
101 |
Applying effects between clips ............................................................................................................... |
104 |
Types of transition effects .............................................................................................................. |
104 |
Applying a transition effect ............................................................................................................. |
108 |
Adding a telop (Simplified Title) ............................................................................................................. |
111 |
Combining special effect into clip (Manual Rendering) .......................................................................... |
114 |
Printing tape labels ................................................................................................................................ |
116 |
Types of printing format ................................................................................................................. |
117 |
Printing tape labels......................................................................................................................... |
118 |
Process mode |
|
About the Process mode............................................................................................. |
121 |
Title editor mode ........................................................................................................ |
122 |
Screen configuration .............................................................................................................................. |
122 |
Setting the preferences of edit screen ................................................................................................... |
125 |
- 4 -

|
Contents |
Setting the preferences.................................................................................................................. |
125 |
Setting the display.......................................................................................................................... |
126 |
Preparing a clip in which a title will be inserted ...................................................................................... |
128 |
Preparing video clip from edit track................................................................................................ |
128 |
Preparing clip from library .............................................................................................................. |
129 |
Preparing video clip from menu ..................................................................................................... |
130 |
Setting the background aspect ratio ...................................................................................................... |
132 |
Applying effects to the image ................................................................................................................. |
133 |
Setting Brightness & Contrast/Hue & Saturation/Sharpness ......................................................... |
134 |
Changing to Sepia/Negative/Monochrome .................................................................................... |
136 |
Changing colours ........................................................................................................................... |
136 |
Inserting a frame .................................................................................................................................... |
138 |
Inserting text-based title ......................................................................................................................... |
139 |
Entering the text............................................................................................................................. |
139 |
Decorating text-based title ............................................................................................................. |
141 |
Applying detailed settings to text.................................................................................................... |
142 |
Inserting an animation ............................................................................................................................ |
149 |
Placing animation........................................................................................................................... |
149 |
Operating placed animation ........................................................................................................... |
151 |
Inserting a video clip as sub-screen ....................................................................................................... |
154 |
Placing video clip as sub-screen.................................................................................................... |
154 |
Changing the form of sub-screen video ......................................................................................... |
156 |
Applying fade effects to text, animation and sub-screen (video clip) ..................................................... |
157 |
Applying motion effects to text, animation and sub-screen (video clip) ................................................. |
159 |
Drawing graphics and lines .................................................................................................................... |
164 |
Drawing graphics .......................................................................................................................... |
165 |
Changing the line width and colour of graphics and lines .............................................................. |
166 |
Confirming the title created .................................................................................................................... |
168 |
Saving the title ....................................................................................................................................... |
169 |
Saving as a title file (TTE file) ........................................................................................................ |
170 |
- 5 -

|
Contents |
Saving as a video clip .................................................................................................................... |
172 |
Saving as a still image clip............................................................................................................. |
173 |
Output mode |
|
About the Output mode............................................................................................... |
174 |
DV device output mode .............................................................................................. |
176 |
Screen configuration .............................................................................................................................. |
176 |
Preparing the data to be output from the edit track ................................................................................ |
180 |
Preparing data to be output from the library .......................................................................................... |
181 |
Preparing from the library in the DV device output mode ............................................................. |
181 |
Preparing from the library in the Edit mode.................................................................................... |
182 |
Outputting to a video device (DV device) ............................................................................................... |
183 |
File output mode ........................................................................................................ |
186 |
Screen configuration .............................................................................................................................. |
187 |
Preparing the data to be output from the edit track ................................................................................ |
191 |
Preparing data to be output from the library .......................................................................................... |
192 |
Preparing from the library in the File output mode ........................................................................ |
192 |
Preparing from the library in the Edit mode.................................................................................... |
193 |
Outputting as a file ................................................................................................................................. |
194 |
Video email mode ...................................................................................................... |
197 |
Screen configuration .............................................................................................................................. |
197 |
Preparing the data to be output from the edit track ................................................................................ |
200 |
Preparing the data to be output from the library .................................................................................... |
201 |
Preparing from the library in the Video email mode ...................................................................... |
201 |
Preparing from the library in the Edit mode.................................................................................... |
202 |
Exporting to email software .................................................................................................................... |
203 |
- 6 -

|
Contents |
Help mode |
|
About the Help mode .................................................................................................. |
205 |
Help mode .................................................................................................................. |
206 |
Displaying the Operating Instructions .................................................................................................... |
206 |
Settings mode |
|
Settings mode ............................................................................................................ |
207 |
Input tape setting screen................................................................................................................ |
207 |
Video setting screen....................................................................................................................... |
208 |
Device setting screen..................................................................................................................... |
209 |
Library setting screen..................................................................................................................... |
210 |
TOOL BOX setting screen ............................................................................................................. |
210 |
Detecting function setting screen................................................................................................... |
211 |
Advanced settings screen ............................................................................................................. |
212 |
Calibration .............................................................................................................................................. |
213 |
Addition applications to TOOL BOX ....................................................................................................... |
216 |
Listing of menus |
|
Menus of MotionDV STUDIO...................................................................................... |
219 |
File menu ...................................................................................................................................... |
219 |
Input tape menu ............................................................................................................................ |
220 |
Edit menu ...................................................................................................................................... |
222 |
View menu .................................................................................................................................... |
223 |
Library menu ................................................................................................................................. |
224 |
- 7 -

|
Contents |
Tools menu ................................................................................................................................... |
224 |
Help menu ..................................................................................................................................... |
225 |
Menus of Title editor ................................................................................................... |
226 |
File menu ...................................................................................................................................... |
226 |
Edit menu ...................................................................................................................................... |
227 |
View menu .................................................................................................................................... |
227 |
Object menu .................................................................................................................................. |
228 |
Tools menu ................................................................................................................................... |
230 |
Background menu ......................................................................................................................... |
230 |
Menus of Library ......................................................................................................... |
232 |
File menu ...................................................................................................................................... |
232 |
Library menu ................................................................................................................................. |
232 |
Help menu ..................................................................................................................................... |
232 |
Q&A |
|
Computer connections cannot be made normally ...................................................... |
233 |
Your video device cannot be operated ...................................................................... |
234 |
Video cannot be imported from the video device ....................................................... |
236 |
Special effects cannot be used normally .................................................................. |
240 |
Audio mix does not work well ..................................................................................... |
242 |
Recording on a tape cannot be performed normally .................................................. |
243 |
Titles cannot be created normally .............................................................................. |
247 |
Printing cannot be performed normally ...................................................................... |
248 |
About video editing (Non-linear edit) with MotionDV STUDIO ................................... |
249 |
Other .......................................................................................................................... |
251 |
- 8 -

|
Contents |
Glossary................................................................................................ |
254 |
Requests and tips ................................................................................ |
258 |
Other ..................................................................................................... |
260 |
- 9 -


 Please read the following first
Before use
Please read the following first
•Refer to the “operating instructions for PC connection” for installing MotionDV STUDIO and connection with video devices.
•The video screen on a PC does not display information such as the date from the device connected.
•Sample images, etc., supplied with this software can be used for your personal use only. You must be authorised to use them for profit.
•Observe the following conditions for use of SBG sounds. It is prohibited to distribute (sell, rent, freely distribute, loan, etc.) the music data itself separated or duplicated, or the music created from the music data separated from videos or images (including an Internet website), or to distribute them through public transmission (transmission through the Internet or broadcasting) as an independent trade object.
It is also prohibited to use them for the purpose of offending public order and morals, defamation of character, or other purposes which run foul of the law.
•The actual contents and screen, and those described in these operating instructions may differ depending on the version of the software or PC operating environments used, etc. Please be aware of this beforehand.
Before use
•In these operating instructions, the operations are described basically based on the Windows® XP screen. The screen display may be different depending on the PC used or the OS version.
•Pages to be referred to are shown as (>00).
•In these operating instructions, the operations are described based on the PAL system. The screen display may be different on the NTSC system.
•In these operating instructions, the operations are described using the screen display on the English version.
•No information is provided about basic PC operations and terms. Please refer to the relevant PC manual.
•In these operating instructions, the MotionDV STUDIO 5.6E LE for DV is partially referred to as MotionDV STUDIO for short.
•In these operating instructions, all digital video cameras and digital video devices are collectively described as video device except when we need to limit the type of the device for explanation.
•Before using the MotionDV STUDIO, exit any other operating applications and the resident programmes.
•Before using the MotionDV STUDIO, exit screen savers and power-saving programme. (@252)
-10 -

 Please read the following first
This product is licensed under the MPEG-4 Visual patent portfolio license for the personal and non-commercial use of a consumer for (i) encoding video in compliance with the MPEG-4 Visual Standard (“MPEG-4 Video”) and/or (ii) decoding MPEG-4 Video that was encoded by a consumer engaged in a personal and non-commercial activity and/or was obtained from a video provider licensed by MPEG LA to provide MPEG-4 Video. No license is granted or shall be implied for any other use. Additional information including that relating to promotional, internal and commercial uses and licensing may be obtained from MPEG LA, LLC. See http://www.mpegla.com.
∫ About usable file formats
This software allows the following file formats to be input and edited, or output:
Input/Edit |
Output |
AVI/BMP/JPEG/PNG/ |
MPEG1/ASF/AVI |
TIFF (uncompressed)/ |
|
WAV (uncompressed) |
|
• Some files in the above file format may not be used.
Before use
∫About DV connection and USB connection
You can use an USB 2.0 cable (for USB connection) or a DV cable (optional) (for DV connection). (Each one of the terminals should be equipped with the DV device.) Functions are limited as follows depending on the method for connection.
|
USB |
DV |
|
connection |
connection |
Calibration (@213) |
t |
± |
DV device input mode (@33) |
±*1 |
± |
DV device output mode (@176) |
t |
±*3 |
SD card copy function in File |
±*2 |
t |
output mode (@186) |
|
|
*1: Video device : Tape Playback Mode or Tape Recording Mode
*2: Video device : PC Connection Mode
*3: If the video device does not have the DV input function, you cannot use the DV device output mode of MotionDV STUDIO.
•USB connection is compatible with USB 2.0 (High Speed) cable only.
•In USB connection, the mode etc. on the video device differ depending on the functions you want to use. For details on how to connect, refer to the operating instructions of the video device.
•To play ASF files, a device which supports MPEG4 motion image (ASF format) is needed.
- 11 -


 Operating environment
Operating environment
The following PC environments are required for the MotionDV STUDIO to be installed and used.
•The operation of this software cannot be guaranteed when fonts other than English font are selected and used. Set the English font.
•Even if the system requirements mentioned in these operating instructions are fulfilled, some personal computers can not be used.
•This software is not Macintosh compatible.
•This software is not compatible with Microsoft® Windows® 3.1, Windows® 95, Windows® 98, Windows® Me and Windows NT®.
•Operation is not guaranteed on an upgraded OS.
•Operation on an OS other than the one pre-installed is not guaranteed.
•This software is not compatible with a multi-boot environment.
•This software is not compatible with a multi-CPU environment.
•Operation is not guaranteed on Microsoft® Windows® XP Media Center Edition, Tablet PC Edition and not compatible with 64-bit computers.
•For playing back motion video (such as ASF files), a video player such as Windows Media® Player, is required.
Before use
•You need to log on with a user name that has administrator authority.
(includes installation and uninstallation)
Compatible PCs:
IBM® PC/AT compatible personal computer with Intel® Pentium® III 800 MHz or higher of CPU (including
compatible CPUs. Intel® Pentium® 4 1.6 GHz or higher recommended)
Compatible OS: Pre-installed:
Microsoft® Windows® XP Home Edition SP2 Microsoft® Windows® XP Professional SP2 Microsoft® Windows® 2000 Professional SP4
RAM:
256 MB or more (512 MB or more recommended)
Display:
High Color (16 bit) or more (32 bit recommended) Desktop resolution of 1024 k 768 pixels or more (1280 k 1024 pixels or more recommended)
Graphics card complying with DirectX® 9.0b or 9.0c, and DirectDraw® overlay
- 12 -


 Operating environment
Free hard disk space:
Ultra DMA-33 or more (100 or more is recommended) 640 MB or more
Separate free space is required for importing and editing video.
[1 GB capacity is required for a video of around 4 minutes in the AVI (DV-AVI) format]
Necessary software:
Microsoft® DirectX® 9.0b or 9.0c
•If you install the software in a personal computer that is not compatible with DirectX® 9.0b or 9.0c, the personal computer may stop operating properly. If you are unsure if your personal computer is compatible, contact the maker.
Microsoft® Windows Media® Player 6.4 to 10 Sound:
DirectSound® Support
Drive:
CD-ROM drive (for installation)
Interface:
DV (IEEE1394) terminal (IEEE1394.a)
USB port (USB2.0 High Speed) (only compatible with importing video)
Before use
•When two or more USB devices are connected to one PC, or when devices are connected through USB hub or by using USB extension cable, operation is not guaranteed.
Other requirements:
Mouse or equivalent pointing device
- 13 -


 Operating environment
Requirements
Video device with DV (IEEE1394) terminal or USB terminal
•Some functions may not be used depending on the combination of a digital video camera, PC, and interface card. Besides, the operation of the video devices except those made by Panasonic is not included in the
warranty.
DV tapes, etc. (optional)
DV cable (optional) (When using in DV connection)
•Select one according to the shape of the terminal on the PC.
USB cable (When using in USB connection) AC adaptor
Before use
Note
`On any device which does not support the DV input function, the edited data cannot be output to a tape.
`You can also output edited videos (ASF files) to an SD Memory Card, if a USB Reader/Writer for SD Memory Card (optional) or the video device equipped with the reader/writer function for SD Memory card (made by Panasonic) is used. (@175)
`Refer to @11 for the limit on the functions in DV connection and USB connection.
- 14 -
Features
Features
The MotionDV STUDIO is the software that allows videos to be captured from a video device, edited and outputted. Digital edition on a PC (Non-linear edit) enables you to create video works with minimum deterioration of image quality. You can also apply various special effects such as fade effects, transition effects and titles to videos.
∫Video effects
Applies digital effects to videos captured.
∫Transition effects
Applies digital effects to scene transitions of the video captured to produce a creative scene transition.
∫Audio mix
Adds audio to videos captured.
Before use
∫Creating titles (using the Title editor mode)
Adds a title using characters and illustrations on the Title editor mode.
Note
`Refer to “Glossary” for details about “Non-linear editing”. (@256)
- 15 -


 Features
Convenient functions
∫Edit Assistant
This is the function used to automatically perform the input of video (capturing), the edition of video and the preparation for output.
All you have to do is to select an item in each of the input, process, and output stages in accordance with the guide on the assistant screen. Even beginners can edit the video without difficulty. (@24)
∫Locating TOOL BOX on the desktop
TOOL BOX is located on the desktop. Icons to call out the functions, [Input], [Edit], [Process], [Output]... are arranged in it. (@22)
∫Capturing still image clip (Snapshot)
You can capture still image clips from the video device or the clips on the edit track. (@54)
∫Creating DV tape list (Index)
You can create an index that allows the contents of a DV tape to be viewed at a glance. (The index can be saved on a PC as a tape information file.) (@46)
Before use
∫Printing tape label or time sheet
The data information of the input tape track or the edit track can be printed on a tape label with an image or in the form of a time sheet. (@116)
∫Sending motion image with e-mails by Video email mode
You can send a video captured from a video device by e-mail. (@197)
- 16 -


 Activating MotionDV STUDIO
Activating MotionDV STUDIO
1.Select [start] >> [All Programs (Programs)] >> [Panasonic] >> [MotionDV STUDIO 5.6E LE for DV] >> [MotionDV STUDIO LE for DV].
An overview of MotionDV STUDIO is displayed on the screen.
•When it is activated for the first time, the Licence Agreement will appear. Please read it carefully and click [I agree].
2.Click [EXIT this screen].
A
Before use
•Clicking A will prevent the screen from being displayed in the future.
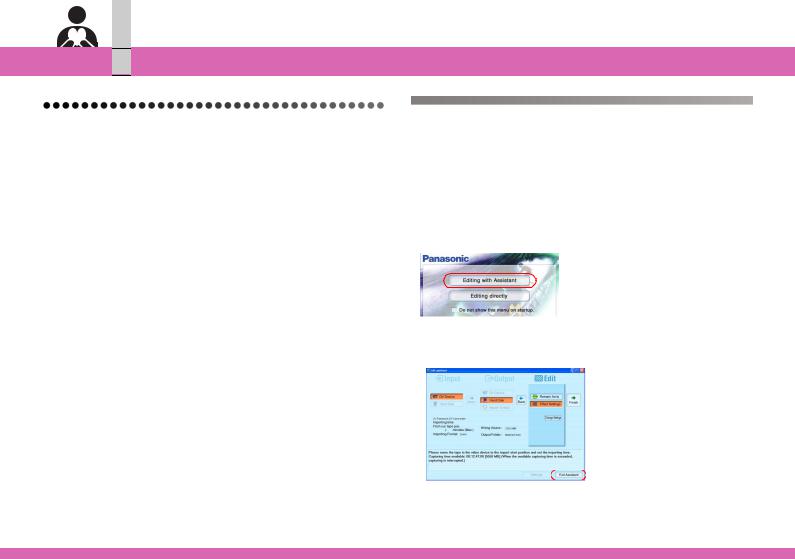
3.Select an editing method.
A
B
ASelect this if you edit using the assistant function. The Edit Assistant for the MotionDV STUDIO is
activated. (@24)
BThe MotionDV STUDIO is activated.
•Check [Do not show this menu on startup.], and the MotionDV STUDIO will be directly activated in the next activation and after.
To restore the menu, check [Help] >> [Show menu on startup] in the MotionDV STUDIO menu.
- 17 -
Before use

 Activating MotionDV STUDIO
Action Required
`Before activating:
-Connect the video device to the PC. (Refer to the “operating instructions for PC connection”.)
-Exit other operating applications and the resident programmes.
-Cancel the screen saver and the power-saving programme.
-Check the supplementary description and the latest information.
Select [start] >> [All Programs (Programs)] >> [Panasonic] >> [MotionDV STUDIO 5.6E LE for DV] >> [Readme First] to check it.
Note
`If the amount of data registered in the MotionDV STUDIO library is large, the activation of the MotionDV STUDIO will slow down because it takes time to read the data. (@64)
- 18 -
Before use

 Activating MotionDV STUDIO
Exiting MotionDV STUDIO
Click  in the TOOL BOX to exit MotionDV STUDIO.
•You may also select [File] >> [Exit] to exit the MotionDV STUDIO.
- 19 -


 About MotionDV STUDIO
About MotionDV STUDIO
Operation Mode
The MotionDV STUDIO has the following operation modes.
Switch the operation modes in accordance with editing.
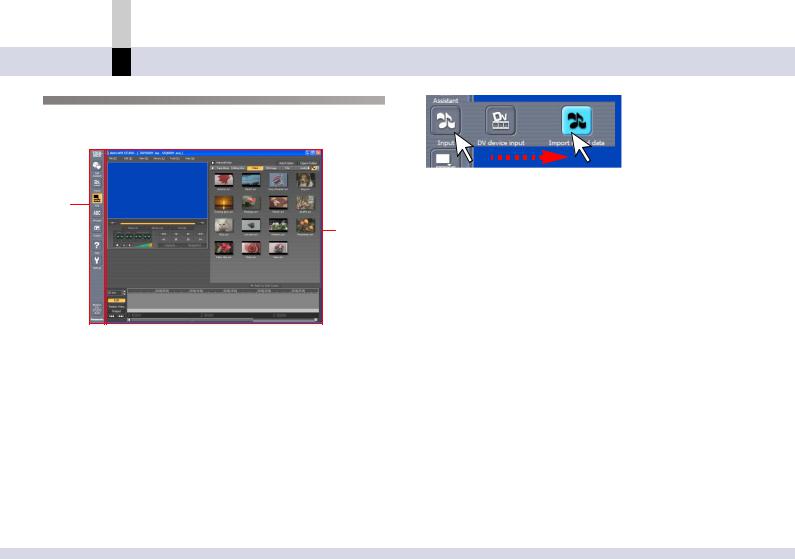
∫Input mode (@32)
Select when inputting video or audio from the video device, etc.
DV device input mode:  (@33)
(@33)
Select when inputting video or audio from the video device.
Import sound data mode:  (@66)
(@66)
Select when inputting audio from the microphone or audio CD.
∫Edit mode (@71)
Select when the data is edited.
Non-linear edit mode:  (@72)
(@72)
Select when you edit.
Before use
∫Process mode (@121)
Select when inserting a title and processing the video.
Title editor mode:  (@122)
Select when a title is added to a video using the title editor.
∫Output mode (@174)
Select when outputting video or audio to the external device.
DV device output mode:  (@176)
Select when outputting video or audio to the video device.
File output mode:  (@186)
Select when outputting video or audio as 1 file.
You can also record the output data (ASF file) onto the SD Memory Card when you connect the USB reader/ writer (optional) for SD Memory Card (made by Panasonic) or the video device equipped with the reader/writer function for SD Memory Card with the USB cable.
Video email mode:  (@197)
Select when you want to export video or audio as the format which can be sent as an e-mail.
- 20 -
Before use

 About MotionDV STUDIO
∫Help mode (@205)
Select when you need help for operation.
Help mode:  (@206)
Select when you want to read the Operating Instructions for the MotionDV STUDIO.
∫Settings mode:  (@207)
Select when you want to change various settings for the MotionDV STUDIO.
∫Quit: 
Select when you want to quit MotionDV STUDIO.
Assistant edit
Using the asssitant function automatically performs the input of video (capturing), the edition of video and the preparation for output.
All you have to do is to select an item in each of the input, process, and output stages in accordance with the guide on the assistant screen. Even beginners can edit the video without difficulty. (@24)
- 21 -
Before use
About MotionDV STUDIO |
|
Screen configuration for MotionDV STUDIO |
Example: |
The MotionDV STUDIO screen mainly consists of the TOOL BOX (1) and the work area (2).
1
2
1TOOL BOX
The icons to switch the operation modes are located in the TOOL BOX.
∫How to switch the operation modes
Move the mouse cursor onto an icon in the TOOL BOX, and the operation mode icon will appear. When you select an icon, the mode will be switched and the screen corresponding to the mode will appear in the work area.
Clicking an icon in the TOOL BOX switches to the operation mode corresponding to the icon.
•The icon of the mode selected is displayed in orange in the TOOL BOX.
•The setting for the TOOL BOX can be done on the TOOL BOX setting screen in the Settings mode. (@210)
2Work area
In the work area, various screens are displayed in conjunction with the operation mode selected in the TOOL BOX. For details, please refer to the page describing each operation mode.
In some operation modes, the work area may be displayed as an independent window.
- 22 -


 Outline of edit process
Outline of edit process
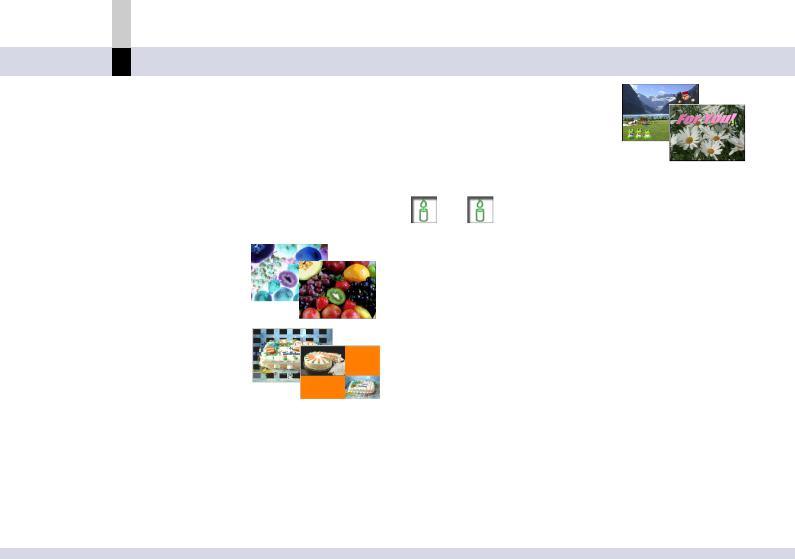
The flow of video editing using MotionDV STUDIO is as follows:
1 4
2
3
Before use
1Capturing a video (Input mode) (@32)
Captures a video onto a hard disk as video clips or still image clips.
2Editing (Edit mode) (@71)
Arranges the video clips or still image clips in your favourite order on the edit track.
•You can apply a variety of effects to the video or to the scene transition of the video.
3Processing (Process mode) (@121)
You can process the video by adding a title.
4Outputting (Output mode) (@174)
Outputs (records) the results of the editing process.
•You can output the edited contents as a file or send them to the email software as an ASF file.
- 23 -

 Assistant edit
Assistant edit
Assistant edit 
By following the guide on the Edit Assistant screen, you can automatically input (capture), edit and prepare for output video. Even beginners can easily edit video without difficulty.
You can involve titles, effects, background music, etc. in the video on edit effect screen.
This function is suitable for capturing long-time video which is recorded in a tape or entering titles.
Assistant edit
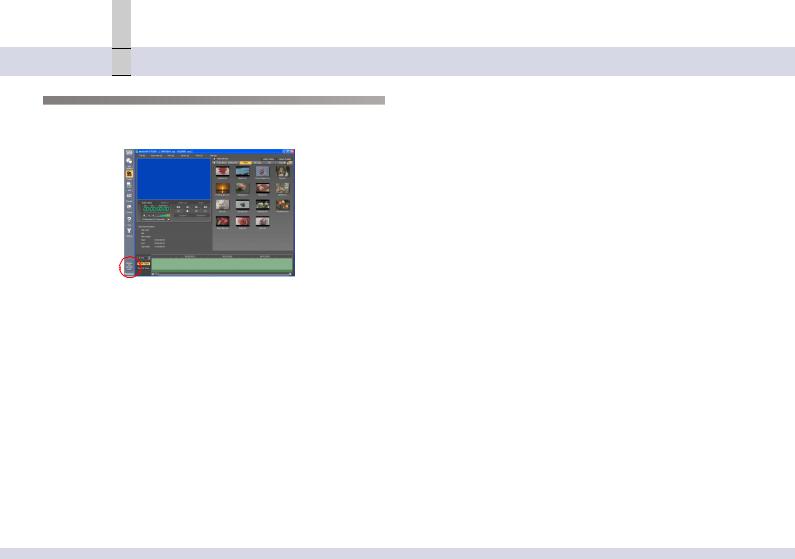
Display of Edit Assistant
Click  in the TOOL BOX, and the Edit Assistant will be displayed.
It can also be displayed with the following methods:
•In the MotionDV STUDIO menu, select [File] >> [Run Assistant].
•Click [Editing with Assistant] in the menu screen shown when the programme is activated.
∫ To close the Edit Assistant
Click [Exit Assistant] in the input/output setting screen.
- 24 -

 Assistant edit
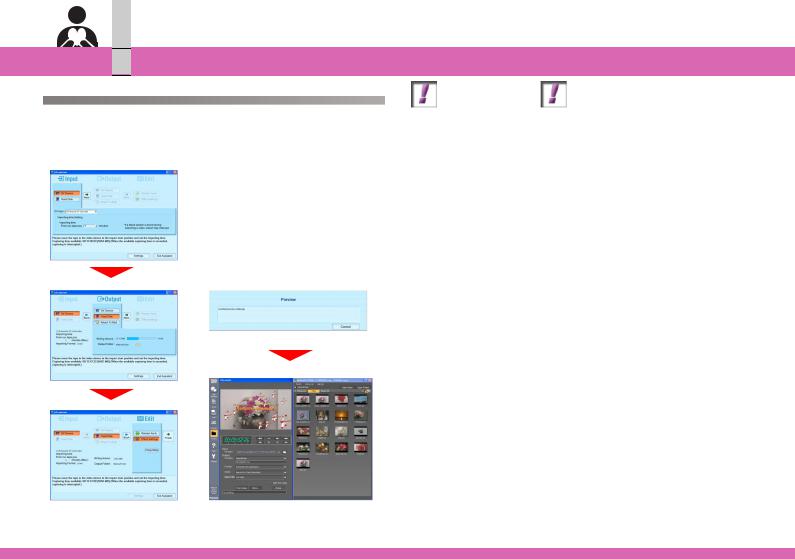
Outline of operation
When editing using the Edit Assistant, follow the procedure below:
1
2 4
3
Assistant edit
Action Required
`To capture video from the video device (DV device), connect the video device in the Tape Playback Mode and set the tape position to the point where you want to start the inputting beforehand. (Refer to the “operating instructions for PC connection” for the connection to the PC.)
1Select the video input source (capture source).
2Select the output destination of the captured video.
Input source |
Output destination |
Video device (DV device) |
Video device (DV device) |
Hard disk |
Hard disk |
|
|
|
|
3Select whether you need effects or not and the type of the effect to be applied to the video.
•You can also set for the title, effect and background music. (@30)
4Click [Finish] to start the automatic edit.
Input of video, edition of a video and the preparation for output will be performed automatically as set and the Output mode screen will be displayed in accordance with the output destination.
Now, the assistant edit is completed.
Make various settings and output the video. (@174)
-25 -
Assistant edit

 Assistant edit
Note
`The data created by using the Edit Assistant is saved as an editing information file (SEQ file) and is displayed in the [Editing infor...] library. (e.g., [Assist0001.seq])
Each clip is also saved in [Video] or [Still image], etc. in the library and given a name beginning with [Assist]. (e.g., [Assist_cap0001.avi])
- 26 -

 Assistant edit
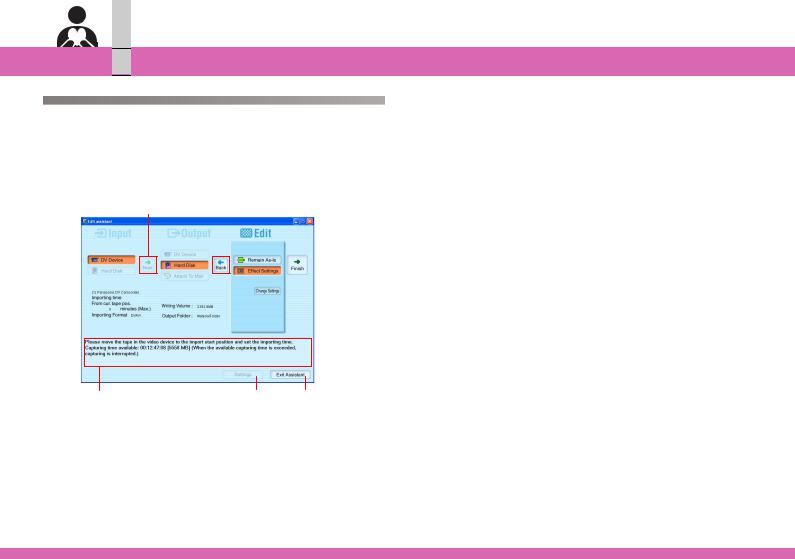
Setting screen
The screen shown below is used for the assistant edit.
1Input/output setting screen
Set the input (capture) source, the effect application Yes/No, and the output destination for the video inputted and/or edited.
|
|
|
B C D E |
|||||||||
A |
|
|
|
|
|
|
|
|
|
|
|
F |
|
|
|
|
|
|
|
|
|
|
|
||
|
|
|
|
|
|
|
|
|
|
|
||
|
|
|
|
|
|
|
|
|
|
|
|
|
|
|
|
|
|
|
|
|
|
|
|
|
G |
|
|
|
|
|
|
|
|
|
|
|||
|
|
|
|
|
|
|
|
|
|
|
|
|
|
|
|
|
|
|
|
|
|
|
|
|
|
H I J
Assistant edit
A.Select the video input source.
Select the input source (video device/hard disk) and make necessary settings. (@28)
B.Displays the subsequent or previous setting screen.
C.Select the output destination for the video inputted and/or edited.
D.Displays the subsequent or previous setting screen.
•If the total size of the output data exceeds the free space of the hard disk, you cannot proceed to the items for editing.
E.Select whether or not an edit effect is applied.
F.The assistant edit is executed.
G.You can change the effect which is already set.
H.If the input source button is selected in A, the subsequent procedure will be displayed for easier operation.
I.Select the save destination for the video inputted and/or edited.
•You can select one from the folders registered in the MotionDV STUDIO library (the default is the [MaterialFolder]). (@64)
•You can additionally register a new folder by pressing [Add] button.
You can delete registered folders by pressing [Del] button.
J.Exit the Edit Assistant.
All the settings made will be disabled.
- 27 -


 Assistant edit
∫About input settings
Depending on the input source (video device/hard disk), different settings are necessary.
For video device (DV device)
A
B
ASelect the video device name of the input source.
BSelect the duration of video capturing.
•Capturing will start from the current tape position.
•The default is 5 minute.
•When outputting a video to the hard disk, set the duration taking the disk’s free space into consideration.
Note
`When there is 30 seconds or more of a blank area in the tape, capturing stops halfway.
`Do not display the menu screen on the monitor of the video device. The video device cannot be properly controlled from MotionDV STUDIO.
Assistant edit
For hard disk
B
A
C
AThe names of the files to be imported are displayed.
•The files will be output in the order on the display. You may change the order of the files by dragging and dropping them.
•If you want to remove any files from the list, click the file name to highlight it, right-click it and then select [Delete].
BWhen this is checked, all scene transitions are divided.
•You can only add effects on the divided parts. CClick this to display the file selection screen.
Select a file to be imported and click [OK].
•You can only select AVI format files.
•When you click  , you can select files from the folders registered in the library of MotionDV STUDIO. (@64)
If you want to select another folder, click  in the selection screen to select any folder and click [OK].
•To cancel the selection, click the file again.
- 28 -
Assistant edit

 Assistant edit
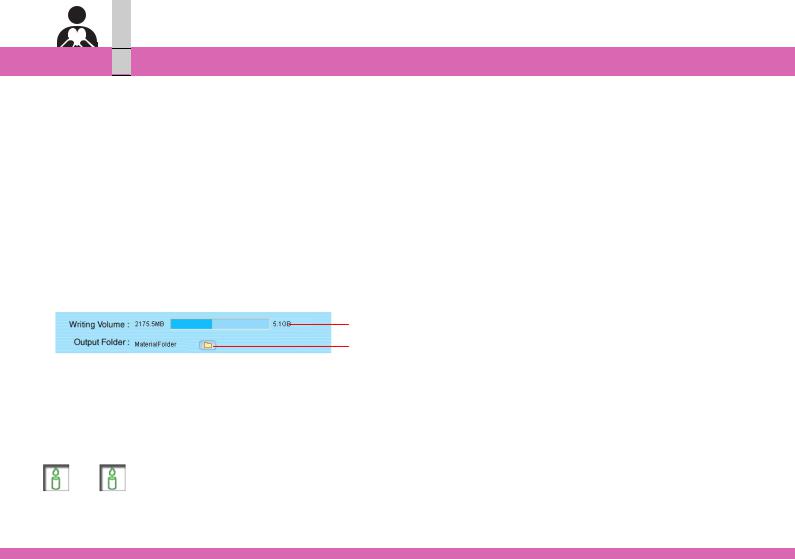
∫About output settings
Depending on the output destination (video device/hard disk/e-mail), different settings are necessary.
For video device (DV device)
A
AWhen you click  to select the length of the tape inserted in the video device, the approximate capacity required for writing is displayed by a numerical value and a bar graph.
For hard disk/e-mail
A
B
AThe approximate capacity required for writing is displayed by a numerical value and a bar graph.
BYou can select the destination folder from the folders registered in the library of MotionDV STUDIO (the default is [MaterialFolder]). (@64)
Note
`If the volume of the written data exceeds the capacity of the output destination, the bar graph is displayed in red.
- 29 -

 Assistant edit
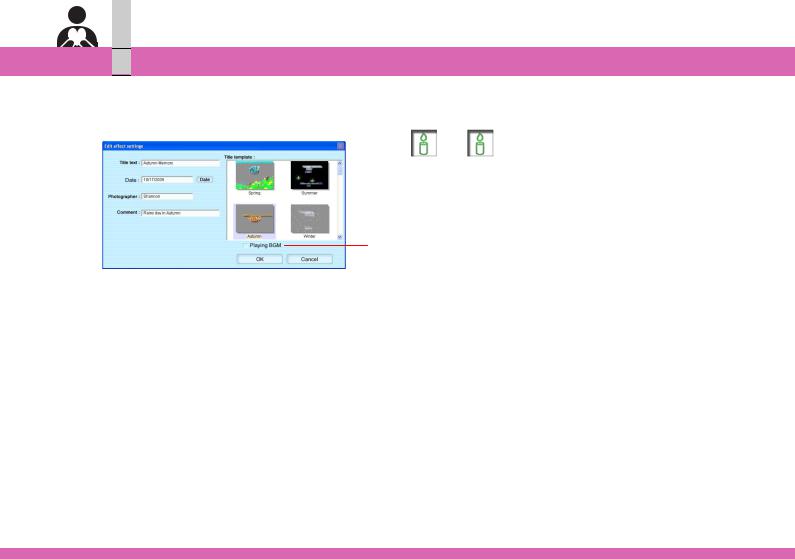
∫About edit effect settings
You can set edit effects (titles, effects, background music).
A |
|
|
|
|
|
|
|
|
|
|
|
|
|
||||
B |
|
|
|
|
|
D |
||
|
|
|
|
|
||||
|
|
|
||||||
C |
|
|
|
|
|
|
|
|
|
|
|
|
|
|
E |
||
|
|
|
|
|
|
|||
|
|
|
||||||
|
|
|
|
|
|
|
||
|
|
|
|
|
|
|
||
AIf you enter characters here, they will be displayed in the title.
•Up to 20 alphanumeric (single-byte) characters can be entered.
BYou can enter the name of the photographer and the date taken for the setting.
In the initial setting, the PC user name and the current date are entered for the photographer and the date taken on, respectively.
CYou can enter a simple comment in the opening title.
• Up to 30 alphanumeric (single-byte) characters can
be entered.
DYou can select the template of the title for the opening and ending scenes.
EWhen you check this, the background music in the
Assistant edit
selected template is played.
When you uncheck this, you can stop playback.
Note
`Up to 120 seconds of audio can be set as a background music.
`If there is no SBG file for the template, the background music will not be set.
`Characters that can be input in [Title text] and [Comment] are alphanumeric characters only.
`If your PC does not have fonts of characters in [Title text] and [Comment], the characters may not be properly displayed.
- 30 -
Loading...