


KitchenAid 5KSB5553BCL, 5KSB5553BMS, 5KSB5553EAC, 5KSB5553EBU, 5KSB5553ECL Owner's Manual
...ARTISAN™ BLENDER WITH GLASS PITCHER AND CULINARY JAR
INSTRUCTIONS
ARTISAN™ BLENDER MIT GLASBEHÄLTER UND KULINARISCHEN
KÜCHENMIXBEHÄLTER
ANLEITUNGEN
BLENDER/MIXEUR ARTISAN™ AVEC BOL EN VERRE ET BOL CULINAIRE
INSTRUCTIONS
FRULLATORE ARTISAN™ CON CARAFFA IN VETRO E CARAFFA
CULINARIA
ISTRUZIONI PER L’USO
ARTISAN™ BLENDER MET GLAZEN KAN EN MENGBEKER
INSTRUCTIES
LICUADORA ARTISAN CON JARRA DE CRISTAL Y RECIPIENTE PARA
COCINAR
INSTRUCCIONES
LIQUIDIFICADOR ARTISAN™ COM JARRA EM VIDRO E COPO
CULINÁRIO
INSTRUÇÕES
ARTISAN™ ΜΠΛΕΝΤΕΡ ΜΕ ΓΥΑΛΙΝΗ ΚΑΝΑΤΑ ΚΑΙ ΚΑΝΑΤΑ ΜΠΛΕΝΤΕΡ
ΟΔΗΓΙΕΣ
ARTISAN™ BLENDER MED GLASKANNA OCH GLASTILLBRINGARE
BRUKSANVISNING
ARTISAN™ BLENDER MED GLASSMUGGE OG KULINARISK KRUKKE
INSTRUKSJONER
ARTISAN™-TEHOSEKOITIN LASIKANNULLA JA KULINAARISELLA
ASTIALLA
OHJEET
ARTISAN™ BLENDER MED GLASKANDE OG KULINARISK GLAS
INSTRUKTIONER
ARTISAN™ BLANDARI MEÐ GLERKÖNNU OG MATVINNSLUKÖNNU
LEIÐBEININGAR
W10482505A |
Model 5KSB5553 |

<![endif]>English
Table of Contents |
|
Blender Safety ........................................................................................................................... |
3 |
Electrical Requirements............................................................................................................. |
3 |
Important Safeguards................................................................................................................. |
4 |
Blender Features........................................................................................................................ |
5 |
0.75 L Culinary Blender Jar Features......................................................................................... |
7 |
Preparing the Blender for Use................................................................................................... |
8 |
Before First Use................................................................................................................. |
8 |
Blender Assembly.............................................................................................................. |
8 |
Using the Blender...................................................................................................................... |
9 |
Before Use......................................................................................................................... |
9 |
Operating the Blender....................................................................................................... |
9 |
CRUSH ICE...................................................................................................................... |
10 |
PULSE Mode.................................................................................................................... |
11 |
Ingredient Cup................................................................................................................. |
11 |
Soft Start Blending Feature.............................................................................................. |
11 |
Speed Control Guide............................................................................................................... |
12 |
Care and Cleaning................................................................................................................... |
13 |
Troubleshooting....................................................................................................................... |
14 |
Blender Tips............................................................................................................................. |
15 |
Culinary Blender Jar Tips......................................................................................................... |
17 |
Household KitchenAid™ Blender and 0.75 L Culinary Blender Jar Warranty......................... |
18 |
Service Centers........................................................................................................................ |
18 |
Customer Service.................................................................................................................... |
18 |
NOTE: DUE TO THE UNIQUE CONTAINER AND BLADE DESIGN, READ THESE INSTRUCTIONS AND RECIPES BEFORE USING YOUR NEW KITCHENAID™ BLENDER TO ACHIEVE MAXIMUM PERFORMANCE RESULTS.
2
Blender Safety
Your safety and the safety of others are very important.
We have provided many important safety messages in this manual and on your appliance. Always read and obey all safety messages.
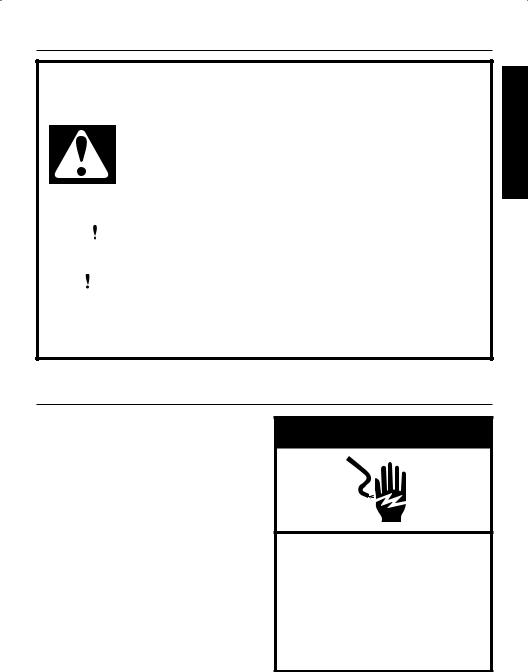
This is the safety alert symbol.
This symbol alerts you to potential hazards that can kill or hurt you and others.
All safety messages will follow the safety alert symbol and either the word “DANGER” or “WARNING.” These words mean:
|
|
You can be killed or seriously injured |
DANGER |
|
|
|
if you don’t immediately follow |
|
|
|
instructions. |
|
|
|
|
|
You can be killed or seriously injured |
|
||
WARNING |
|
|
|
if you don’t follow instructions. |
|
|
|
|
All safety messages will tell you what the potential hazard is, tell you how to reduce the chance of injury, and tell you what can happen if the instructions are not followed.
Electrical Requirements
Volts: 220-240 Volts
Hertz: 50 Hz a.c.
NOTE: This product is supplied with
a Y type power cord. If the power cord is damaged, it must be replaced by the manufacturer or its service agent in order to avoid a hazard.
Do not use an extension cord. If the power supply cord is too short, have a qualified electrician or serviceman install an outlet near the appliance.
 WARNING
Electrical Shock Hazard Plug into a grounded outlet. Do not use an adapter.
Do not use an extension cord.
Failure to follow these instructions can result in death, fire or electrical shock.
<![endif]>English
3

<![endif]>English
IMPORTANT SAFEGUARDS
When using electrical appliances, basic safety precautions should always be followed to reduce the risk of fire, electric shock, and/or injury to persons including the following:
1.Read all instructions.
2.To protect against risk of electrical shock, do not put Blender in water or other liquid.
3.Close supervision is necessary when any appliance is used by or near children.
4.Unplug from outlet when not in use, before putting on or taking off parts, and before cleaning.
5.Avoid contact with moving parts.
6.Do not operate the Blender with a damaged cord or plug or after appliance malfunctions, or is dropped or damaged in any manner. Return appliance to
the nearest Authorized Service Center for examination, repair or electrical or mechanical adjustment.
7.Do not use outdoors.
8.Do not let cord hang over edge of table or counter.
9.Keep hands and utensils out of container while blending to reduce the risk of severe injury to persons or damage to the Blender. A scraper may be used but must be used only when the Blender
is not running.
10.Blade assembly is sharp. Handle carefully.
11.To reduce risk of injury, never put locking collar and blade assembly on the base without having the pitcher properly attached.
12.Always operate Blender with cover in place.
13.The use of attachments, including canning jars, not recommended by KitchenAid may cause a risk of injury to persons.
14.When blending hot liquids, remove center piece of two-piece cover.
15.Flashing light indicates ready to operate - avoid any contact with blades or moveable parts.
16.This appliance is not intended for use by persons (including children) with reduced physical sensory or mental capabilities, or lack of experience and knowledge, unless they have been given supervision or instruction concerning use of the appliance by a person responsible for their safety.
17.Children should be supervised to ensure that they do not play with the appliance.
SAVE THESE INSTRUCTIONS
This product is designed for household use only.
This appliance is marked according to the European directive 2002/96/EC on Waste Electrical and Electronic Equipment (WEEE).
By ensuring this product is disposed of correctly, you will help prevent potential negative consequences for the environment and human health, which could otherwise be caused by inappropriate waste handling of this product.
The symbol  on the product, or on the documents accompanying the product,
indicates that this appliance may not be treated as household waste. Instead it shall be handed over to the applicable collection point for the recycling of electrical and electronic equipment.
Disposal must be carried out in accordance with local environmental regulations for waste disposal.
For more detailed information about treatment, recovery and recycling of this product, please contact your local city office, your household waste disposal service or the shop where you purchased the product.
4

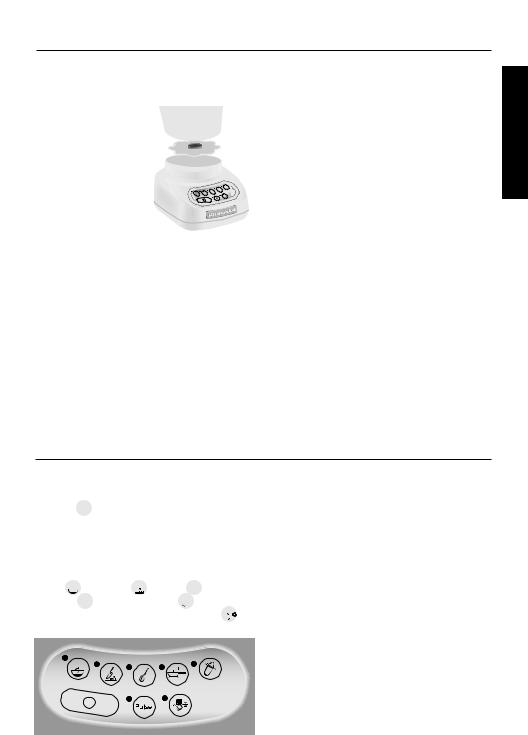
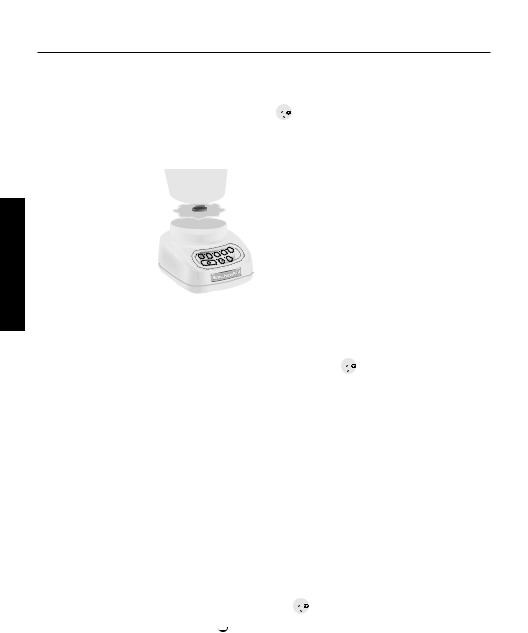
Blender Features

 Stay-Put Lid
  with Clear, 60 mL
  Ingredient Cup
Easy Pour
1,5 L Glass
Pitcher
Stainless
Steel Blade
Locking Collar
and Blade Assembly
Speed
Selection
Buttons
Durable
Steel-Reinforced
Couplers
Clean Touch
 Control Pad
Die-Cast
Metal Base
<![endif]>English
WARNING: Flashing light indicates ready to operate. Do not touch blades.
5
<![endif]>English
Blender Features
This Blender was built and tested to KitchenAid quality standards for optimum performance and long, trouble-free life.
Robust Motor
Rugged 0.9-horsepower motor supplies the power for superb performance with all blending tasks – from pureeing sauces to making chunky salsas, or uniformly crushing a pitcher of ice or frozen fruit within seconds for silky smoothies.
Easy Pour 1.5 L
Glass Pitcher
Glass Pitcher resists scratches,
stains and odors. Pitcher is
 removable from locking collar for easy cleaning, and withstands a range of extreme temperatures. Easy pour spout provides smooth, drip-free pouring.
Stay-Put Lid with Clear, 60 mL Ingredient Cup
Provides a strong seal. The flexible lid will maintain its tight seal throughout
the life of the Blender. The lid incorporates a removable 60 mL cup for convenience in measuring and adding ingredients.
Stainless Steel Blade
Sharp oversized blade tines are positioned on four different planes for fast, thorough, and consistent blending.
Locking Collar and Blade Assembly
Durable, one-piece blade design is built into the locking collar for easy handling and cleaning. This assembly keeps the blades from rotating until the pitcher is properly
attached to the collar and put on the Blender base.
Durable Steel-Reinforced Couplers
Commercial-quality couplers with 12 interlocking teeth provide direct transfer of motor power to the blade. Pitcher coupler is coated for quiet operation.
Speed Selection Buttons
Create frozen drinks and puree sauces or soups in seconds. Blend with confidence, control, and consistency at all speed settings: STIR (  ), CHOP (
  ), MIX (
  ), PUREE (
 ), and LIQUEFY (
  ). The PULSE
(

 ) mode works with all five speeds. The CRUSH ICE (

 ) feature is designed specifically for crushing ice and will automatically pulse at staggered intervals for optimal results.
Intelli-Speed Motor Control
Exclusive Intelli-Speed control automatically works to keep speed constant – even through density changes when ingredients are added. This advanced KitchenAid design maintains an optimal blending speed for each culinary task and control-pad setting.
Soft Start Blending Feature
The Blender starts at a slower speed to pull food into the blade then quickly increases to selected speed setting. This design feature reduces start-up kick and allows hands-free operation.
Die-Cast Metal Base
Heavy, die-cast metal base ensures stable, quiet operation when blending a full pitcher of ingredients. Four rubber feet on wide, solid base provide a no-slip, non-marring grip. Smooth and rounded, the base is easy to clean and features cord storage underneath.
Clean Touch Control Pad
Wipes clean in an instant. Smooth control pad has no crevices or cracks to trap ingredients.
6

0.75 L Culinary Blender Jar Features
Culinary Blender
Jar Lid with
Drizzle Cap*
0.75 L
Culinary
Blender Jar
* On the lid the following
caution is written: “CAUTION: DO NOT OPERATE WITHOUT THIS
COVER IN PLACE”.
<![endif]>English
Shatter-Resistant Culinary Blender Jar
Clear jar is shatter, scratch, and stain resistant (BPA free material). Durable Culinary Blender Jar is useful for small capacity recipes and individual servings.
Culinary Blender Jar Lid with Drizzle Cap
The twist-lock lid includes a removable drizzle cap that fits both the Culinary Blender Jar and pitcher lids. This versatile cap can be used to drizzle oils or other ingredients while the blender is in operation.
7

<![endif]>English
Preparing the Blender for Use
Before First Use
Before using your Blender for the first time, wipe Blender base with a warm sudsy cloth, then wipe clean with a damp cloth. Dry with a soft cloth. Wash pitcher, culinary jar, lids, locking collar and blade assembly, sealing ring and ingredient cup in warm, sudsy water (see “Care and Cleaning”). Rinse parts and wipe dry.
Blender Assembly
1.Put locking collar with blade assembly pointing up on a sturdy surface.
2.Put sealing ring, flat side down, around the blades and into the groove within the locking collar.
Sealing
Ring
Locking
Collar
3.Align the pitcher (or culinary jar) tabs with the slots of the locking collar.
4.Press down and rotate pitcher (or culinary jar) clockwise, approximately 1/4 turn until two clicks are heard.
5.Adjust the length of the Blender power cord.
6.Put pitcher (or culinary jar) assembly onto the Blender base.
8
Preparing the Blender for Use
NOTE: When properly positioned, pitcher (or culinary jar) assembly will rest completely on Blender base. If not, repeat steps 3 and 4.
Gap |
No |
Gap |
7. Put lid on pitcher (or culinary jar).
 WARNING
Electrical Shock Hazard Plug into a grounded outlet. Do not use an adapter.
Do not use an extension cord.
Failure to follow these instructions can result in death, fire or electrical shock.
8.Plug power cord into a grounded outlet. Blender is now ready for operation.
9.Before removing the pitcher (or culinary jar) assembly from the base, always press “O” (OFF) and unplug the power cord.
<![endif]>English
Using the Blender
Before Use
NOTE: While the Blender is on or the PULSE (

 ) mode indicator light is blinking:
-Do not interfere with blade movement
-Do not remove pitcher (or culinary jar) lid
Operating the Blender
The KitchenAid™ Blender has five speeds: STIR (  ), CHOP (
  ), MIX (
  ), PUREE (
 ), and LIQUEFY (
  ). In addition, it also features CRUSH ICE (

 ) and PULSE (
 ) mode.
1.With convenient one-step operation, this unit will operate only when a speed selection button is pressed.
2.Before operating the Blender, make sure the pitcher (or culinary jar) is properly secured in the locking collar and assembly is positioned on the Blender base.
Continued on next page
9

<![endif]>English
Using the Blender
NOTE: If a gap exists between the locking collar and the base, the pitcher (or culinary jar) might not be locked into the locking collar or the assembly is not positioned properly on the Blender base. See “Blender Assembly” for further instructions.
Gap |
No |
Gap |
3.Put ingredients in pitcher (or culinary jar) and firmly attach lid.
4.Press the desired speed button for continuous operation at that speed. The green indicator light by the selected speed will stay lit. You may change settings without stopping the unit by pressing a new speed button.
IMPORTANT: If blending hot foods or liquids, remove the center ingredient cup. Operate only on STIR ( ) speed.
5.To turn off the Blender, press “O”. The “O” (OFF) button will stop any speed and deactivate the Blender at the same time.
6.Before removing the pitcher (or culinary jar) assembly, unplug the power cord.
CRUSH ICE
Your KitchenAid™ Blender offers a CRUSH ICE (

 ) feature. When selected, the Blender will automatically pulse at staggered intervals at the optimal speed for crushing ice or other ingredients.
1.Before operating the Blender, make sure the pitcher assembly is properly positioned on the Blender base.
NOTE: If a gap exists between the locking collar and the base, the pitcher might not be locked into the locking collar or the collar is not positioned properly on the Blender base. See “Blender Assembly” for further instructions.
2.Put ingredients into the pitcher and firmly attach lid.
3.Press CRUSH ICE (

 ). The indicator light will stay lit. The Blender will automatically pulse at staggered intervals.
4.To turn off the CRUSH ICE ( 

 ) feature, press “O”. The Blender is now ready for continuous operation.
5.Before removing the pitcher assembly, unplug the power cord.
10
Using the Blender
PULSE Mode
Your KitchenAid™ Blender offers PULSE (

 ) mode, which allows a “Pulse-at-any- Speed” feature.
NOTE: PULSE (

 ) mode will not work with the CRUSH ICE (

 ) feature.
1.Before operating the Blender, make sure the pitcher (or culinary jar) assembly is properly positioned on the Blender base.
NOTE: If a gap exists between the locking collar and the base, the pitcher (or culinary jar) might not be locked into the locking collar or the collar is not positioned properly on the Blender base. See “Blender Assembly” for further instructions.
2.Put ingredients into pitcher (or culinary jar), and firmly attach lid.
3.Press PULSE (

 ). The indicator light above the button will blink to indicate that all five speeds are in the PULSE (

 ) mode.
4.Select a speed button. Press and hold for the desired length of time. Both the speed button and PULSE (

 ) mode indicators will stay lit when pulsing at the selected speed. When button is released, the blending will stop, but
the Blender will remain in PULSE (

 ) mode and the PULSE (

 ) mode indicator will return to blinking. To pulse again or at another speed, simply press and hold the button of the desired speed.
5.To turn off the PULSE (

 ) mode feature, press “O”. The Blender is now ready for continuous operation.
6.Before removing the pitcher (or culinary jar) assembly, unplug the power cord.
Ingredient Cup
The 60 mL ingredient cup can 


 be used to measure and add


 ingredients. Remove cup and
  add ingredients at STIR (
  ), CHOP (
  ) or MIX (
  ), speeds. When operating at higher speeds, with a full pitcher or with hot contents, stop the Blender and then add ingredients.
IMPORTANT: If blending hot foods or liquids, remove the center ingredient cup. Operate only on STIR (
Soft Start Blending Feature
The Soft Start blending feature automatically starts the Blender at a lower speed to
draw ingredients into the blades, then quickly increases to the selected speed for optimal performance.
NOTE: The Soft Start blending feature only works when a speed is selected from the “O” (OFF) mode and does not work with the PULSE (

 ) mode or CRUSH ICE (
 ) features.
<![endif]>English
11

<![endif]>English
Speed Control Guide
Item |
|
|
|
Speed |
Blended ice drink. . |
. . . . . . . . |
|||
Cheesecake.. . . . . . . . . . . . |
||||
Chopped fruits . |
. . . . . . . . . |
|||
Chopped vegetables. |
. . . . . . . |
|||
Cream cheese-based spread. . |
. . . . . . . . . |
|||
Cream soup . . |
. . . . . . . . . . |
|||
Crushed/chopped Ice |
. . . . . . . . . |
|||
Dip. . . . . . . . . . |
. . . . |
. |
|
|
Finely chopped fresh fruits. |
. |
. . . . . |
||
Finely chopped |
|
|
|
|
fresh vegetables. . . |
. . . . |
. . . |
. . . . . . . . . |
|
Fluffy gelatin for pie/desserts . |
. . . . . |
|||
Frozen chopped fruit |
|
|
|
|
(defrost slightly until it |
|
|
||
can be probed with a |
|
|
||
knife tip) . . |
. . . . . . . . . . . |
|||
Frozen yogurt-based drink . |
. |
. . . . |
||
Fruit juice from |
|
|
|
|
frozen concentrate . |
. . . |
. . . |
. |
|
Fruit-based drink (thin). . |
. . . . . . |
|||
Fruit-based drink (thick). . . |
. . . |
. |
||
Fruit-based sauce. . |
. . . . . . . . |
|||
Grated hard cheese. . . |
. . . |
. . . |
. . . . . . . . . |
|
Item Speed
Gravy . . . . . . . . . . . . . . . .  Ice milk-based drink. . . . . . . . .
Meat salad for
sandwich filling . . . . . . . . .
 Mousse . . . . . . . . . . . . . .
  Oatmeal. . . . . . . . . . . . .
  Pancake batter . . . . . . . . . . .
  Pesto. . . . . . . . . . . . . . .
  Pureed fruit/Baby food. . . . . . . . .
  Pureed meat/Baby food meat . . . . .
Pureed vegetables/Baby food
vegetables. . . . . . . . . . . .  Salad dressing . . . . . . . . . . . .
  Savory crumb topping . . . . . .
 Sherbet-based drink. . . . . . . . .
Smooth ricotta or
cottage cheese . . . . . . . . . .
Streusel topping . . . . . . . . . . . 
Sweet crumb topping. . . . . . .
Sweet crunch topping. . . . . . . 

Vegetable-based main dish sauce. . . .
Waffle batter . . . . . . . . . . . . . 
White sauce . . . . . . . . . . . .
Tip - Process up to one standard ice cube tray or 12 to 14 standard ice cubes at a time. Occasional stirring with a spatula will be helpful only when Blender is “O” (OFF). The CRUSH ICE (

 ) feature has been optimized to crush and chop ice without adding any liquid ingredients.
12

Care and Cleaning
The Blender pitcher, culinary jar, locking collar and blade assembly can be easily cleaned as individual components or together without disassembly.
•Clean the Blender thoroughly after every use
•Do not immerse the Blender base or cord in water
•Do not use abrasive cleansers or scouring pads
To Clean Individual Components
1.Lift the pitcher (or culinary jar) assembly in a straight, upwards motion off the Blender base. Place assembly on a hard surface. Then, while holding locking collar, rotate pitcher (or culinary jar) counterclockwise, two clicks, to separate locking collar and blade assembly, and sealing ring from the pitcher (or culinary jar). Wash components with soapy water. Rinse and wipe dry.
NOTE: Hand wash the lid, ingredient cup, locking collar, and sealing ring — these items may be damaged in the dishwasher. Pitcher can be placed in the bottom rack of an automatic dishwasher.
To Clean Without Disassembly
1.Put the pitcher (or culinary jar) on the Blender base, fill half full with warm (not hot) water, and add 1 or 2 drops of dishwashing liquid. Put the lid on the
pitcher (or culinary jar), press the STIR (  ) speed setting, and run the Blender for 5 to 10 seconds. Remove the pitcher (or culinary jar) and empty contents.
Rinse with warm water until clean.
2.To clean the lids and ingredient cup, wash in warm soapy water, then rinse and dry thoroughly.
3.Wipe the Blender base and cord with a warm, sudsy cloth; wipe clean with a damp cloth, and dry with a soft cloth.
<![endif]>English
Pitcher |
Culinary |
Jar |
Sealing
Ring
Locking
Collar
and Blade
Assembly
2.Wipe the Blender base and cord with a warm, sudsy cloth; wipe clean with a damp cloth, and dry with a soft cloth.
13

Troubleshooting
<![endif]>English
The Blender does not operate when a setting is selected:
|
Check to see if the Blender is plugged into |
|
|
an outlet. If it is, press “O”(OFF), then |
|
|
unplug the Blender. Plug it back in to the |
|
|
same outlet. If the Blender still does not |
|
|
work, check the fuse or circuit breaker |
|
|
on the electrical circuit the Blender is |
|
|
connected to and make sure the circuit is |
|
No indicator lights are lit. |
closed. |
|
|
||
The Blender stops while blending: |
|
|
|
The Blender may be overloaded. If the |
|
|
Blender becomes overloaded when blending |
|
|
heavy ingredients, it will automatically |
|
|
shut off to prevent damage to the motor. |
|
|
Press “O” (OFF) to reset the Blender and |
|
|
unplug the power cord. Remove the pitcher |
|
|
assembly from the base and divide contents |
|
All indicator lights are flashing |
into smaller batches. Adding liquid to the |
|
pitcher may also reduce the load on the |
||
at the same time. |
||
Blender. |
||
|
||
|
The Blender may be jammed. If it’s |
|
|
jammed, the Blender will stop running to |
|
|
prevent damage to the motor. Press “O” |
|
|
(OFF) to reset the Blender and unplug the |
|
|
power cord. Remove the pitcher assembly |
|
|
from the base and with a scraper, free the |
|
|
blades by breaking-up or removing the |
|
Indicator lights are flashing alternately. |
contents at the bottom of the pitcher. |
|
|
The Blender turns on, but blades will not rotate.
|
The pitcher is not properly secured in the |
|
locking collar, not allowing couplers to |
|
engage. Remove pitcher from base and |
Gap |
fully seat into collar. Press down and rotate |
pitcher clockwise in the locking collar past |
|
|
the second “click.” This will allow the |
|
pitcher assembly to engage the coupler. See |
|
“Blender Assembly”. |
If the problem cannot be fixed with the steps provided in this section, then contact an authorized service center (see “Service Centers”).
Do not return the Blender to the retailer – they do not provide service.
14

Blender Tips
Quick Tips
•In order to produce a smoother texture,
blend with CRUSH ICE (

 ) if you’re making beverages using ice.
•Smaller ice cubes can be chopped or crushed faster than large ones.
•Add food to this Blender pitcher in larger quantities than you would with other blenders – you can add 2 to 3 cups (475 to 710 mL) at a time versus 1 cup (235 mL) portions.
•For many ingredient mixtures, start
the blending process at STIR (  ) to thoroughly combine the ingredients. Then increase to a higher speed, if necessary.
•Be sure to keep lid on pitcher while blending.
•If desired, remove center ingredient cup of pitcher lid to add liquids or ice cubes
while the Blender is operating at STIR (  ), CHOP (
  ) or MIX (
  ) speeds.
•When operating at higher speeds with a full pitcher or with hot contents, stop the Blender and then add ingredients.
•Stop the Blender before using utensils
in the pitcher. Use a rubber spatula to mix ingredients only when the Blender is “O” (OFF). Never use any utensil, including spatulas,
in the pitcher while the motor is running.
•Cool hot foods, if possible, before blending. Begin blending warm foods
at STIR (  ). Increase to higher speed, if necessary.
•Remove center ingredient cup when blending hot liquids and operate only
on STIR (  ). Do not place bare hand on pitcher lid when processing hot liquids.
•Stop and check the consistency of foods after a few seconds to prevent over-processing.
How To ...
Reconstitute frozen juice: For a 175 mL can of orange juice concentrate, combine the juice and correct amount of water in the pitcher. Cover and blend at MIX (  ) until thoroughly combined, about 10 to 15 seconds.
For a 355 mL can, combine the juice and 1 can of water in the pitcher. Cover and blend at MIX (  ) until thoroughly combined, about 20 to 30 seconds. Stir in remaining 2 cans of water.
Dissolve flavored gelatin: Pour boiling water into the pitcher; add gelatin. Remove center ingredient cup and blend at STIR (  ) until gelatin is dissolved, about 10 to
30 seconds. Add other ingredients.
Make cookie and graham cracker crumbs: Break larger cookies into pieces about 4 cm in diameter. Use smaller cookies as-is. Place in pitcher. In PULSE (

 ) mode, cover and blend at CHOP (
  ), pulsing
a few times, about 3 seconds each time, until desired consistency is reached. Use the crumbs to make a quick topping for frozen yogurt, pudding, or a fruit compote.
To make a finer crumb for pie and dessert crusts, break graham crackers or cookies into pieces about 4 cm in diameter and place in the pitcher. In PULSE (

 ) mode, cover and blend at LIQUEFY (
  ), pulsing a few times until desired consistency is reached, about 20 to 30 seconds.
Make cracker crumbs: Follow procedure for cookies. Use as a topping or as an ingredient in main dish casseroles and vegetable dishes.
Make bread crumbs: Tear bread into pieces about 4 cm in diameter. Follow procedure for cookies. Use as a topping or as an ingredient in main dish casseroles and vegetable dishes.
<![endif]>English
15

<![endif]>English
Blender Tips
Chop fruits and vegetables: Put 2 cups (475 mL) of fruit or vegetable chunks in pitcher. In PULSE (

 ) mode, cover and blend at STIR (
  ), pulsing a few times, about
2 to 3 seconds each time, until desired consistency is reached.
Puree fruits: Place 2 cups (475 mL) canned or cooked fruit in pitcher. Add 2 to 4 tablespoons (30 to 60 mL) fruit juice or water per cup (240 mL) of fruit. Cover and blend at PUREE ( ) about 5 to 10 seconds.
Puree vegetables: Place 2 cups (475 mL) canned or cooked vegetables in pitcher. Add 2 to 4 tablespoons (30 to 60 ml) broth, water, or milk per cup (240 mL) of vegetables. Cover and blend at PUREE ( ) about 10 to 20 seconds.
Puree meats: Place cooked, cubed, tender meat in pitcher. Add 3 to 4 tablespoons (45 to 60 mL) broth, water, or milk per cup
(240 mL) of meat. Cover and blend on STIR (  ) 10 seconds. Stop the Blender and scrape sides of pitcher. Cover and blend on PUREE (
 ) 10 to 20 seconds longer.
Puree cottage cheese or ricotta cheese:
Place cottage cheese or ricotta cheese in pitcher. Cover and blend at MIX (  ) until smooth, about 25 to 35 seconds. Stop the Blender and scrape sides as needed. If
necessary, add 1 tablespoon (15 mL) of skim milk per cup (240 mL) of cottage cheese. Use as a base for low-fat dips and spreads.
Combine liquid ingredients for baked goods: Pour liquid ingredients in pitcher. Cover and blend at LIQUEFY (  ) until well-mixed, about 10 to 15 seconds. Pour liquid mixture over dry ingredients and stir well.
Take lumps out of gravy: If sauce or gravy becomes lumpy, place in the pitcher. Cover and blend at MIX (  ) until smooth, about 5 to 10 seconds.
Combine flour and liquid for thickening:
Place flour and liquid in pitcher. Cover and blend at STIR (  ) until smooth, about 5 to 10 seconds.
Prepare white sauce: Place milk, flour, and salt, if desired, in pitcher. Cover, and blend at STIR (  ) until well-mixed, about 5 to 10 seconds. Pour into saucepan and cook
as usual.
Prepare pancake or waffle batter from mix: Place mix and other ingredients in pitcher. Cover and blend at MIX (  ) until well-mixed, 10 to 20 seconds. Stop the Blender and scrape sides of the pitcher as needed.
Grate cheese: Cut very cold cheese into 1,5 cm cubes. Place up to 1/2 cup (120 mL) cheese in the pitcher. Cover, and blend at LIQUEFY (  ) about 5 to 10 seconds. For hard cheeses, such as Parmesan, bring to room temperature, then blend at LIQUEFY (
 ) for 10 to 15 seconds.
Make oatmeal for a baby: Place uncooked rolled oats in pitcher. In PULSE (

 ) mode, blend at MIX (
  ) until desired consistency, about 5 pulses, 2 to 3 seconds each pulse.
Cook as usual.
Make baby food from adult food: Place prepared adult food in pitcher. Cover
and blend at STIR (  ) about 10 seconds. Then blend at PUREE (
 ) about 10 to 30 seconds.
Rinse your Blender Pitcher: Fill pitcher one-half full with warm water. Add a few drops of dishwashing liquid. Cover and blend at STIR (  ) until sides are clean, about 5 to 10 seconds. Rinse and dry. For complete cleaning, pitcher can also be cleaned in an automatic dishwasher. For best results, hand washing is recommended for the lid, ingredient cup, locking collar and blade assembly, and sealing ring. Refer to “Care and Cleaning”.
16

Culinary Blender Jar Tips
Culinary Blender Jar
The Culinary Blender Jar is ideal for blending salad dressings, fresh mayonnaise, salsa or pesto and just the right size for single serving shakes or smoothies. Or use it to chop fresh herbs or nuts while preparing recipes.
This Culinary Blender Jar complements the Artisan™ 1.5 L glass pitcher. This small Culinary Blender Jar performs better and faster for smaller amounts, and processing will result in a finer texture: such as baby food, puréeing soups, fresh herbs, spices, smoothies, bread crumbs, biscuits and dips (humus, pesto, mayonnaise).
Processes smaller quantities of specific ingredients to obtain the following results:
-bread crumbs (100 g brown or 50 g white)
-processing carrots
-humus (using 130 g drained chickpeas)
-mayonnaise (2 large eggs & 150/200 mL olive oil)
-herbs (such as 25 g of parsley)
-peanut butter (100 g cashew nuts)
-almond nuts (50 g or 150 g)
-soup (up to 750 g vegetables + herbs)
-smoothie (210 g or 425 g tinned fruit; whole banana; cup full of juice + 1 Tbsp. yogurt)
-chopping cheese
-pesto (70 mL, 1 garlic clove, 20 g basil, 20 g pine nuts and 45 g parmesan cheese
-spices (30 mL coriander seeds)
-spices (30 mL mustard seeds)
-biscuits (8 or 100 g)
Drizzle Cap
This versatile cap fits into both the pitcher and Culinary Blender Jar lid and is used to drizzle oils or other liquids while the Blender is in operation.
very fine result
evenly fine chopped result very good result
very consistent (thick) result (best result by adding vinegar, salt and pepper once mixture has thickened)
coarsely chopped result fine ground result
ground to very fine texture very good result
perfect results
very fast and perfect result very good consistency
fine (but not as powder)
good, fine result to powder fine on high speed
perfect fine result
<![endif]>English
17

Household KitchenAid™ Blender and
0.75 L Culinary Blender Jar Warranty
|
|
|
|
|
|
|
|
|
|
|
|
Length of |
KitchenAid |
KitchenAid |
| <![if ! IE]> <![endif]>English |
|
Warranty: |
Will Pay For: |
Will Not Pay For: |
|
|
|
|
|
|
Europe, Australia and |
Replacement parts and |
A. Repairs when Blender |
|
|
|
|||
|
|
New Zealand: |
repair labor costs to |
and Culinary Blender |
|
|
Three years Full Warranty |
correct defects in materials |
Jar are used for |
|
|
from date of purchase. |
or workmanship. Service |
operations other than |
|
|
Other: |
must be provided by an |
normal household food |
|
|
Authorized KitchenAid |
preparation. |
|
|
|
One Year Full Warranty |
Service Center. |
|
|
|
from date of purchase. |
|
B. Damage resulting from |
|
|
|
|
accident, alterations, |
|
|
|
|
misuse, abuse, or |
|
|
|
|
installation/ operation |
|
|
|
|
not in accordance with |
|
|
|
|
local electrical codes. |
|
|
|
|
|
KITCHENAID DOES NOT ASSUME ANY RESPONSIBILITY FOR INDIRECT DAMAGES.
Service Centers
All service should be handled locally by an Authorized KitchenAid Service Center. Contact the dealer from whom the unit was purchased to obtain the name of the nearest Authorized KitchenAid Service Center.
In the U.K.:
Call: 0845 6011 287
In Ireland:
M.X. ELECTRIC
Service Department
25 Alymer Crescent
Kilcock, CO.KILDARE
Call: 87 2581574
Fax: 1 628 4368
In Australia:
Call: 1800 990 990
In New Zealand:
Call: 0800 881 200
Customer Service
For U.K. & Northern Ireland: |
Address: |
Freephone helpline number on: |
KitchenAid Europa, Inc. |
0800 988 1266 |
PO BOX 19 |
(calls from mobiles are charged |
B-2018 ANTWERP 11 |
at your standard network rate) |
BELGIUM |
For Southern Ireland: |
www.KitchenAid.co.uk |
Helpline number on: |
|
+44 (0) 20 8616 5148 |
www.KitchenAid.eu |
|
18

Distributed by:
KitchenAid Europa, Inc.
Nijverheidslaan 3 Box 5
B-1853 STROMBEEK-BEVER
BELGIUM
®Registered Trademark of KitchenAid, U.S.A.
™Trademark of KitchenAid, U.S.A.
©2012. All rights reserved.
Specifications subject to change without notice.
W10482505A |
04/12 |

<![endif]>Deutsch
Inhaltsverzeichnis |
|
Sicherheitshinweise für den Blender.......................................................................................... |
21 |
Elektrische Voraussetzungen...................................................................................................... |
21 |
Wichtige Sicherheitshinweise..................................................................................................... |
22 |
Funktionen des Blenders............................................................................................................ |
23 |
Funktionen des kulinarischen Küchenmixbehälters |
|
des Blenders mit 0,75 L Fassungsvermögen...................................................................... |
25 |
Zusammenbauen des Blenders.................................................................................................. |
26 |
Vor dem ersten Verwenden............................................................................................... |
26 |
Zusammenbauen des Blenders.......................................................................................... |
26 |
Verwenden des Blenders............................................................................................................ |
27 |
Vor dem Verwenden.......................................................................................................... |
27 |
Bedienen des Blenders....................................................................................................... |
27 |
ZERKLEINERN VON EIS................................................................................................... |
28 |
PULSMODUS..................................................................................................................... |
29 |
Zutatenbehälter.................................................................................................................. |
29 |
„Soft Start“-Blenderfunktion.............................................................................................. |
29 |
Auswählen der richtigen Geschwindigkeit................................................................................. |
30 |
Reinigung und Pflege................................................................................................................... |
31 |
Problemlösung............................................................................................................................ |
32 |
Tipps für den Blender................................................................................................................. |
33 |
Tipps für den kulinarischen Küchenmixbehälter ....................................................................... |
35 |
Garantie für den Household KitchenAidTM Blender |
|
und den 0,75 L kulinarischen Küchenmixbehälter............................................................. |
36 |
Kundendienststellen.................................................................................................................... |
36 |
Kundenservice............................................................................................................................ |
37 |
HINWEIS: DIESES GERÄT ZEICHNET SICH DURCH EINE SPEZIELLE BEHÄLTERUND MESSERKONSTRUKTION AUS. LESEN SIE DAHER DIESE ANLEITUNGEN UND REZEPTE DURCH, BEVOR SIE IHREN NEUEN KITCHENAID™-BLENDER ZUM ERSTEN MAL EINSETZEN. NUR SO KÖNNEN SIE BESTMÖGLICHE ERGEBNISSE ERZIELEN.
20
Sicherheitshinweise für den Blender
Ihre Sicherheit und die Sicherheit anderer sind von großer Wichtigkeit.
Im vorliegenden Handbuch und an Ihrem Gerät sind zahlreiche Sicherheitshinweise vorgesehen. Lesen und beachten Sie bitte immer alle diese Sicherheitshinweise.
Dieses Zeichen weist Sie auf mögliche Gefahren hin, die zum Tode oder zu Verletzungen führen können.
Alle Sicherheitshinweise stehen nach diesem Zeichen oder dem Wort „GEFAHR“ oder „WARNUNG“. Diese Worte bedeuten:
 GEFAHR
 WARNUNG
Sie können schwer oder tödlich verletzt werden, wenn Sie diese Hinweise nicht unmittelbar beachten.
Sie können schwer oder tödlich verletzt werden, wenn Sie diese Hinweise nicht beachten.
Alle Sicherheitshinweise erklären Ihnen die Art der Gefahr und geben Hinweise, wie Sie die Verletzungsgefahr verringern können, aber Sie informieren Sie auch über die Folgen, wenn Sie diese Hinweise nicht beachten.
Elektrische Voraussetzungen
Spannung: 220-240 Volt
Hertz: 50 Hz Wechselstrom
HINWEIS: Dieses Produkt ist mit einem Y-Netzkabel ausgestattet. Falls das Kabel beschädigt wird, muss es vom
Hersteller oder dessen Service-Vertretung ausgewechselt werden, um eine Gefahr zu vermeiden.
Verwenden Sie kein Verlängerungskabel. Falls das Netzkabel zu kurz ist, lassen Sie von einem Fachmann eine zusätzliche Steckdose in der Nähe des Aufstellortes des Gerätes einbauen.
 WARNUNG
Stromschlaggefahr Schukostecker benutzen Keinen Adapter benutzen
Kein Verlängerungskabel benutzen
Nichtbeachtung dieser Instruktionen kann zum Stromschlag, Feuer oder Tod führen.
<![endif]>Deutsch
21

<![endif]>Deutsch
WICHTIGE SICHERHEITSHINWEISE
Bei der Benutzung elektrischer Geräte sollten stets grundlegende
Sicherheitsvorkehrungen getroffen werden, um das Risiko von Bränden, elektrischen Schocks und/oder Körperverletzungen
zu verringern.
1.Lesen Sie sämtliche Anleitungen.
2.Zur Vermeidung eines Stromschlags stellen Sie den Blender niemals in Wasser oder andere Flüssigkeiten.
3.Seien Sie besonders vorsichtig, wenn sich Kinder in der Nähe befinden. Kinder sollten das Gerät nur unter Aufsicht benutzen.
4.Ziehen Sie den Netzstecker aus der Steckdose, wenn Sie Gerätezubehör anbringen oder entfernen, um es zu reinigen.
5.Vermeiden Sie es, mit beweglichen Teilen in Kontakt zu kommen.
6.Betreiben Sie den Blender nicht, wenn das Netzkabel oder der Stecker beschädigt sind, nachdem das Gerät Fehlfunktionen hatte, es fallen gelassen wurde oder wenn es auf andere Art beschädigt wurde. Übergeben Sie das Gerät zur Überprüfung, Reparatur oder elektrischen bzw. mechanischen Neueinstellung
an das nächstgelegene autorisierte Wartungszentrum.
7.Benutzen Sie das Gerät nicht im Freien.
8.Lassen Sie das Netzkabel nicht über die Tischkante oder die Kante von Anrichten hängen.
9.Fassen Sie beim Blenden nicht mit den Händen oder Hilfsmitteln in den Behälter, da es ansonsten zu Körperverletzungen oder Geräteschäden kommen könnte. Sie
können einen Schaber verwenden, aber nur, wenn der Blender nicht in Betrieb ist.
10.Die Klingen sind scharf. Gehen Sie vorsichtig damit um.
11.Um das Risiko von Verletzungen zu verringern, setzen Sie den Verschlussring samt Messereinheit nie auf das Basisteil, ohne den Behälter vorher sorgfältig
zu befestigen.
12.Betreiben Sie den Blender nur mit sicher befestigter Abdeckung.
13.Die Benutzung von Zusatzteilen, einschließlich Einweckgläsern, die
nicht von KitchenAid empfohlen wurden, kann Risiken für Körperverletzungen bergen.
14.Nehmen Sie beim Mixen heißer Flüssigkeiten den Zutatenbehälter in der Mitte des zweiteiligen Deckels heraus.
15.Dieses Produkt ist ausschließlich für die Verwendung im Haushalt vorgesehen.
16.Dieses Gerät ist nicht für den Gebrauch durch Kinder oder Personen mit eingeschränkten körperlichen, sensorischen oder geistigen Fähigkeiten oder unerfahrene und unwissende Personen geeignet, sofern diese nicht unter Aufsicht einer anderen Person, die für die Sicherheit der erstgenannten
Personen verantwortlich ist, stehen oder von dieser Aufsichtsperson in
die Benutzung des Gerätes eingewiesen wurden.
17.Kinder sollten das Gerät nur unter Aufsicht verwenden, damit sie nicht damit spielen.
HEBEN SIE DIESE ANLEITUNG GUT AUF
Dieses Produkt ist ausschließlich für die Verwendung im Haushalt vorgesehen.
In Übereinstimmung mit den Anforderungen der Europäischen Richtlinie 2002/96/EG über Elektround Elektronik-Altgeräte (WEEE) ist vorliegendes Gerät mit einer Markierung versehen.
Sie leisten einen positiven Beitrag für den Schutz der Umwelt und die Gesundheit des Menschen, wenn Sie dieses Gerät einer gesonderten Abfallsammlung zuführen. Im unsortierten Siedlungsmüll könnte
ein solches Gerät durch unsachgemäße Entsorgung negative Konsequenzen nach sich ziehen.
Auf dem Produkt oder der beiliegenden Produktdokumentation ist folgendes Symbol einer durchgestrichenen
Das Symbol der abgebildeten
Abfalltonne:  weist darauf hin, dass eine Entsorgung im normalen Haushaltsabfall nicht zulässig ist. Entsorgen Sie dieses Produkt im Recyclinghof mit einer getrennten Sammlung für Elektround Elektronikgeräte.
22

Die Entsorgung muss gemäß den örtlichen Bestimmungen zur Abfallentsorgung erfolgen.
Bitte wenden Sie sich an die zuständigen Behörden Ihrer Gemeindeverwaltung, an den lokalen Recyclinghof für Haushaltsmüll oder
an den Händler, bei dem Sie dieses Gerät erworben haben, um weitere Informationen über Behandlung, Verwertung und Wiederverwendung dieses Produkts zu erhalten.
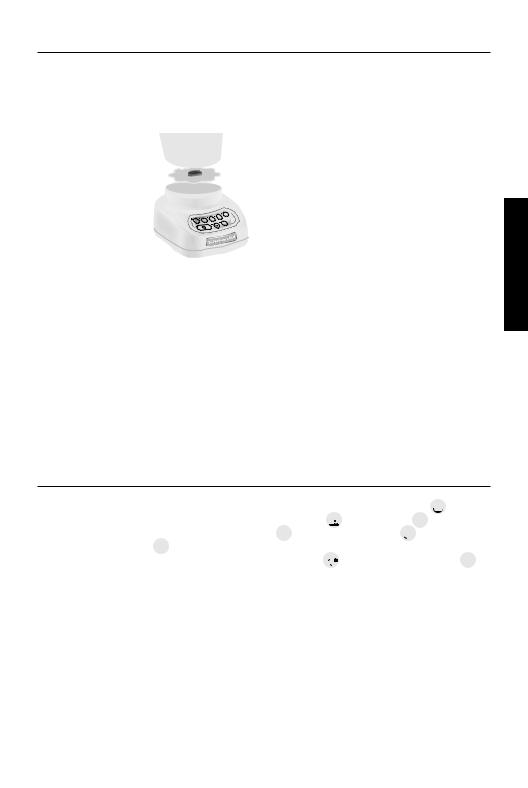
Funktionen des Blenders
Glasbehälter mit 1,5 L
Fassungsvermögen und speziellem Ausgießer für einfaches Ausgießen
Stabile,
stahlverstärkte Kupplung
Gegen unbeabsichtigtes Öffnen gesicherter Deckel mit durchsichtigem 60-mL-Zutatenbehälter
<![if ! IE]><![endif]>Deutsch
Patentierte Klinge aus rostfreiem Stahl


 Verschlussring mit Messereinheit
Tasten für Geschwindigkeitswahl
“Clean Touch“-
 Bedienelemente
Basis aus
Spritzgussmetall
WARNUNG: Bei blinkenden Anzeigen ist das Gerät betriebsbereit. Berühren Sie keinesfalls die Messer.
23

<![endif]>Deutsch
Funktionen für den Blender
Dieser Blender wurde für optimale Leistung und eine lange, problemlose Lebensdauer entsprechend des KitchenAidQualitätsstandards hergestellt und getestet.
Robuster Motor
Der robuste Motor mit 0,9 PS stellt die hervorragende Leistung für Mixaufgaben bereit: vom Pürieren von Saucen bis zum Herstellen sämiger Salsa-Dips, zum gleichmäßigen Zerkleinern von Eis oder gefrorener Früchte für leckere Shakes.
Glasbehälter mit 1,5 L
Fassungsvermögen
und speziellem Ausgießer
Der Glasbehälter ist
 kratzfest sowie fleckenund geruchsabweisend. Er kann zum einfachen Reinigen vom Verschlussring
getrennt werden und ist über einen weiten Bereich temperaturbeständig. Die spezielle Form sorgt für gleichmäßiges und tropfenfreies Ausgießen.
Gegen unbeabsichtigtes Öffnen gesicherter Deckel mit durchsichtigem 60-mL-Zutatenbehälter
Die Abdeckung schließt den Behälter dicht ab. Der flexible Deckel bleibt für die gesamte Lebensdauer des Blenders dicht. Ein abnehmbarer 60-mL-Behälter zum
bequemen Messen und Einfüllen von Zutaten ist integriert.
Patentierte Klinge aus rostfreiem Stahl
Die scharfen, sehr großen Klingenspitzen drehen sich auf vier verschiedenen Ebenen, um die Zutaten schnell, gründlich und einheitlich zu mixen.
Verschlussring mit Messereinheit
Das stabile, einteilige Messerund Klingendesign ist für einfaches Verwenden und Reinigen mit dem Verschlussring verbunden. Dieser Geräteteil ist so konstruiert, dass die Messer nur drehen können, wenn der Behälter korrekt auf dem Ring angebracht und auf die Basis des Blenders aufgesetzt ist.
Stabile, stahlverstärkte Kupplung
Die hochwertige Kupplung mit zwölf Zähnen überträgt die Kraft des Motors direkt auf die Klinge. Die Kupplung am Behälter ist
für leisen Betrieb beschichtet.
Tasten für Geschwindigkeitswahl
Bereiten Sie in wenigen Sekunden Kaltgetränke, Saucen oder Suppen zu. Bei jeder Geschwindigkeit können Sie sich auf die Leistung des Gerätes verlassen. Sie behalten stets die volle Kontrolle
und erzielen gleichmäßige Ergebnisse. Es gibt die fünf Geschwindigkeitsstufen RÜHREN (  ), HACKEN (
  ), BLENDEN (
  ), PÜRIEREN
( ) und VERFLÜSSIGEN (
  ). Bei allen Geschwindigkeiten kann der PULSMODUS (

 ) zum Einsatz kommen. Und zum
Zerkleinern von Eis gibt es einen speziellen Modus ( 

 ), der automatisch für optimale Ergebnisse gepulst ist.
Intelli-Speed-Motorsteuerung
Die exklusive Intelli-Speed-Steuerung sorgt automatisch für gleich bleibende Drehzahlen, auch bei wechselnder Dichte durch das Hinzufügen von Zutaten. Dieses fortschrittliche KitchenAid-Design behält die optimale Mixgeschwindigkeit für jede Aufgabe und jede Einstellung bei.
“Soft Start“-Blendfunktion
Der Blender beginnt bei kleineren Umdrehungszahlen, die Zutaten zur Klinge zu ziehen und beschleunigt dann schnell auf die gewählte Geschwindigkeit. Damit wird ein Ruckeln beim Einschalten vermieden oder vermindert, sodass Sie das Gerät nicht festhalten müssen.
Basis aus Spritzgussmetall
Die schwere Basis aus Spritzgussmetall sorgt für sicheren Stand und leisen Betrieb beim Mixen eines randvollen Behälters. Vier Gummifüße an der großen, soliden Basis
verhindern Verrutschen und Beschädigungen. Die glatte und abgerundete Basis lässt sich einfach reinigen. Das Netzkabel kann sauber unter der Basis aufgerollt werden.
“Clean Touch“-Bedienelemente
Sie können die Bedienelemente blitzschnell säubern. Es gibt keine Vertiefungen oder Spalten, in oder an denen Zutaten hängen bleiben können.
24

Funktionen des kulinarischen Küchenmixbehälters
mit 0,75 L Fassungsvermögen
kulinarischer Küchenmixbehälter mit 0,75 L Fassungsvermögen
Deckel des kulinarischen Küchenmixbehälters mit Tropfeinsatz *
<![if ! IE]><![endif]>Deutsch
* Folgender Warnhinweis ist auf dem Einsatz aufgedruckt: “CAUTION: DO NOT OPERATE WITHOUT THIS COVER IN PLACE“ (VORSICHT: GERÄT NUR MIT DIESEM EINSATZ BETREIBEN).
Bruchfester kulinarischer Küchenmixbehälter
Das durchsichtige Gefäß ist bruchund kratzfest sowie fleckenunempfindlich und aus BPA-freiem Material hergestellt. Der robuste kulinarische Küchenmixbehälter ist optimal für die Zubereitung kleiner Mengen und von Einzelportionen geeignet.
Der Deckel des kulinarischen Küchenmixbehälters mit Tropfeinsatz
Der Schraubdeckel ist mit einem herausnehmbaren Tropfeinsatz ausgestattet, der sowohl auf diesen kulinarischen Küchenmixbehälter als auch auf den Standardglasbehälter passt. Dieser Einsatz ermöglicht die Dosierung von Öl oder anderen Zutaten während des Mixvorganges.
25

<![endif]>Deutsch
Zusammenbauen des Blenders
Vor dem ersten Verwenden
Waschen Sie den Blender mit einem warmen, seifigen Lappen ab und wischen Sie ihn dann mit einem feuchten Tuch sauber, bevor Sie ihn in Betrieb nehmen. Trocknen Sie das Gerät mit einem weichen Tuch ab. Waschen Sie Behälter, kulinarischen Kühenmixbehälter, Deckel, Verschlussring, Messereinheit und Zutatenbehälter in warmen, seifigen Wasser. (siehe „Pflege und Reinigung des Blenders”). Spülen Sie alle Teile mit klarem Wasser ab und trocknen Sie sie ab.
Zusammenbauen des Blenders
1.Legen Sie den Verschlussring so auf einer stabilen Oberfläche ab, dass die Messereinheit nach oben weist.
2.Setzen Sie den Dichtungsring mit der flachen Seite nach unten in die Vertiefung des Verschlussringes rund um die Klingen ein.
 Dichtungsring
3.Richten Sie die Nasen am Behälter (oder am kulinarischen Küchenmixbehälter) an den Kerben des Verschlussringes aus.
4.Drücken Sie den Behälter (oder den kulinarischen Küchenmixbehälter) nach unten und drehen Sie ihn gleichzeitig etwa eine Vierteldrehung im Uhrzeigersinn,
bis zwei Einrastgeräusche zu hören sind.
5.Passen Sie die Länge des Netzkabels für den Blender an.
6.Setzen Sie den Behälter (oder den kulinarischen Küchenmixbehälter) auf die Basis des Blenders.
Verschlussring
26
Zusammenbauen des Blenders
HINWEIS: Bei korrekter Ausrichtung liegt der Behälter (oder der kulinarische
Küchenmixbehälter) vollständig auf der Basis auf. Falls dies nicht der Fall ist, wiederholen Sie die Schritte 3 und 4.
|
Keine |
Lücke |
Lücke |
7.Setzen Sie den Deckel auf den Behälter (oder den kulinarischen Küchenmixbehälter).
 WARNUNG
Stromschlaggefahr Schukostecker benutzen Keinen Adapter benutzen
Kein Verlängerungskabel benutzen
Nichtbeachtung dieser Instruktionen kann zum Stromschlag, Feuer oder Tod führen.
8.Stecken Sie den Netzstecker in eine geerdete Steckdose. Der Blender ist jetzt einsatzbereit.
9.Bevor Sie den Behälter (oder den kulinarischen Küchenmixbehälter) von der Basis entfernen, drücken Sie stets die Taste „O“ (OFF/AUS) und ziehen Sie den Netzstecker.
Verwenden des Blenders
Vor dem Verwenden
HINWEIS: Beachten Sie folgende Hinweise, wenn der Blender eingeschaltet ist oder die PULSMODUS-Anzeige (

 ) blinkt:
-Behindern Sie die Klinge nicht (zum Beispiel durch Hineingreifen oder Anhalten).
-Lassen Sie den Deckel vom Behälter (oder vom kulinarischen Küchenmixbehälter) geschlossen.
Bedienen des Blenders
Der KitchenAid™-Blender verfügt über fünf Geschwindigkeitsstufen: Es gibt die fünf
Geschwindigkeitsstufen RÜHREN (  ), HACKEN (
  ), BLENDEN (
  ), PÜRIEREN (
 ) und VERFLÜSSIGEN (
  ). Außerdem stehen ein Modus zum ZERKLEINERN
VON EIS (

 ) und ein PULSMODUS (

 ) zur Verfügung.
1.Drücken Sie einfach eine der Wahltasten, um den Mixvorgang zu starten.
2.Achten Sie vor dem Mixen darauf, dass der Behälter (oder der kulinarische Küchenmixbehälter) korrekt mit dem Verschlussring verbunden ist und richtig auf die Basis aufgesetzt wurde.
<![endif]>Deutsch
Fortsetzung auf nächster Seite 27
<![endif]>Deutsch
Verwenden des Blenders
HINWEIS: Ist eine Lücke zwischen Verschlussring und Basis zu sehen, ist der Behälter (oder der kulinarische
Küchenmixbehälter) vermutlich nicht richtig mit dem Schlussring verbunden oder die Einheit ist nicht korrekt auf die Basis gestellt. Für weitere Anleitungen, siehe das Kapitel über das „Zusammenbauen des Blenders“.
|
Keine |
Lücke |
Lücke |
3.Füllen Sie die Zutaten in den Behälter (oder den kulinarischen Küchenmixbehälter) und verschließen Sie ihn sorgfältig mit dem Deckel.
4.Drücken Sie die Taste für die gewünschte Geschwindigkeit, um den Mixvorgang
zu starten. Die grüne Anzeige neben der gewählten Geschwindigkeit leuchtet auf. Sie können eine andere Geschwindigkeit durch Drücken der entsprechenden Taste wählen, ohne zuvor den Vorgang anzuhalten.
WICHTIG: Nehmen Sie beim Mixen heißer Zutaten den Zutatenbehälter in der Mitte des
Deckels heraus. Verwenden Sie nur die Geschwindigkeitsstufe RÜHREN ( ).
).
5.Drücken Sie zum Ausschalten des Blenders die Taste „O“. Die Taste zum Ausschalten deaktiviert die gewählte Geschwindigkeit und hält gleichzeitig den Blender an.
6.Ziehen Sie stets den Netzstecker, bevor Sie den Behälter (oder den kulinarischen Küchenmixbehälter) abnehmen.
ZERKLEINERN VON EIS
Ihr KitchenAid™-Blender verfügt über eine Funktion zum ZERKLEINERN VON EIS
(

 ). Ist diese gewählt, läuft die Klinge immer wieder kurzzeitig mit der optimalen Geschwindigkeit zum Zerkleinern von Eis und anderen Zutaten an.
1.Achten Sie vor dem Mixen darauf, dass der Behälter richtig auf die Basis aufgesetzt wurde.
HINWEIS: Ist eine Lücke zwischen Verschlussring und Basis zu sehen, ist der Behälter vermutlich nicht richtig mit dem Verschlussring verbunden oder der
Verschlussring ist nicht korrekt auf der Basis montiert. Für weitere Anleitungen, siehe das Kapitel über das „Zusammenbauen
des Blenders“.
2.Füllen Sie die Zutaten in den Behälter und verschließen Sie ihn sorgfältig mit dem Deckel.
3.Drücken Sie die Taste ZERKLEINERN
VON EIS ( 

 ). Die Anzeige leuchtet dauerhaft. Der Blender läuft automatisch mehrmals kurz an.
4.Drücken Sie zum Ausschalten der Funktion zum ZERKLEINERN VON EIS
(

 ) die Taste „O“. Der Blender ist jetzt für den Dauerbetrieb bereit.
5.Ziehen Sie stets den Netzstecker, bevor Sie den Behälter abnehmen.
28

Verwenden des Blenders
PULSMODUS
Ihr KitchenAid™-Blender verfügt über einen PULSMODUS (

 ), der auf jeder Geschwindigkeitsstufe eingesetzt werden kann.
HINWEIS: Der PULSMODUS (

 ) kann nicht zeitgleich mit der Funktion zum ZERKLEINERN VON EIS (

 ) eingesetzt werden.
1.Achten Sie vor dem Mixen darauf,
dass der Behälter (oder der kulinarische Küchenmixbehälter) richtig auf die Basis gesetzt wurde.
HINWEIS: Ist eine Lücke zwischen Verschlussring und Basis zu sehen, ist der Behälter vermutlich nicht richtig mit dem Verschlussring verbunden oder der
Verschlussring ist nicht korrekt auf der Basis montiert. Für weitere Anleitungen, siehe das Kapitel über „Zusammenbauen des Blenders“.
2.Füllen Sie die Zutaten in den Behälter (oder den kulinarischen Küchenmixbehälter) und verschließen Sie ihn sorgfältig mit dem Deckel.
3.Drücken Sie die Taste PULSMODUS (

 ). Die Anzeige über der Taste beginnt zu blinken, da nun für alle fünf
Geschwindigkeitsstufen der PULSMODUS ( ) aktiviert ist.
4.Wählen Sie eine Geschwindigkeitsstufe. Halten Sie die Taste für die gewünschte Dauer gedrückt. Die Anzeigen der gewählten Geschwindigkeitstaste und für den PULSMODUS (

 ) leuchten während des gepulsten Mixvorgangs. Wenn Sie die Taste loslassen, endet der Mixvorgang. Der PULSMODUS
(

 ) bleibt weiter aktiviert und die PULSMODUS-Anzeige (

 ) blinkt. Um erneut bei derselben oder einer anderen Geschwindigkeit im PULSMODUS
(

 ) zu mixen, halten Sie einfach die gewünschte Taste gedrückt.
5.Drücken Sie zum Ausschalten des PULSMODUS (

 ) die Taste „O“. Der Blender ist jetzt für den Dauerbetrieb bereit.
6.Ziehen Sie stets den Netzstecker, bevor Sie den Behälter (oder den kulinarischen Küchenmixbehälter) abnehmen.
Zutatenbehälter
Die 60-mL-Zutatenbehälter kann zum Messen und Einfüllen von Zutaten
verwendet werden. Entfernen Sie den Behälter und füllen Sie Zutaten ein, wenn eine der Geschwindigkeitsstufen RÜHREN (  ), HACKEN (
  ) oder BLENDEN (
  ) verwendet wird. Wenn Sie eine höhere Geschwindigkeitsstufe verwenden, der
Behälter sehr voll ist oder heiße Zutaten zum Einsatz kommen, halten Sie den Blender an, bevor Sie Zutaten einfüllen.
WICHTIG: Nehmen Sie beim Mixen heißer Zutaten den Zutatenbehälter in der Mitte des
Deckels heraus. Verwenden Sie nur die Geschwindigkeitsstufe RÜHREN ( ).
).
„Soft Start“-Mixfunktion
Die “Soft Start“-Mixfunktion aktiviert den Blender bei niedrigen Umdrehungszahlen, um die Zutaten zur Klinge hin zu ziehen und beschleunigt dann schnell auf die gewählte Geschwindigkeit.
HINWEIS: Die „Soft Start“-Mixfunktion wird nur aktiviert, wenn die Geschwindigkeit aus dem Modus „O“ (OFF/AUS) gewählt wird. In Verbindung mit dem PULSMODUS (

 ) oder dem Modus zum ZERKLEINERN VON EIS (
 ) funktioniert „Soft Start“ nicht.
<![endif]>Deutsch
29

<![endif]>Deutsch
Auswählen der richtigen Geschwindigkeit
Speise/Getränk Geschwindigkeit
Gemischtes Eisgetränk. . . . . . . . . .  Käse-/Quarkkuchen . . . . . . . . . . .
  Zerkleinertes Obst. . . . . . . . . .
 Zerkleinertes Gemüse . . . . . . . . .
 Rahmkäse-Aufstrich . . . . . . . . . . .
  Creme-Suppe. . . . . . . . . . . . . .
  Zerkleinertes/zerhacktes Eis. . . . . . .
  Dip. . . . . . . . . . . . . . . . .
  Fein gehackte frische Früchte.. . . . . . .
  Fein gehacktes frisches Gemüse.. . . . . .
Luftige Gelatine für
Obstkuchen/Nachspeisen. . . . . . .
Gefrorene, gehackte Früchte (leicht antauen lassen, bis eine
Messerspitze eindringen kann) . . . . .
Getränk auf Basis von
gefrorenem Joghurt . . . . . . . . . .
Fruchtsaft aus gefrorenem Konzentrat. . . .
Fruchtgetränk (dünn) . . . . . . . . . . . 
Fruchtgetränk (dick). . . . . . . . . . .
Fruchtsauce. . . . . . . . . . . . . . . 
Geriebener Hartkäse . . . . . . . . . . . 
Speise/Getränk |
|
|
Geschwindigkeit |
|||
Bratensaft . |
. . . . . . . . . . . . . . |
|
||||
Milcheisgetränk. . |
. . . . . . . . . . . |
|
||||
Fleischsalat für |
|
|
|
|
||
Sandwich-Füllungen. . |
. . . . . . . |
|
||||
Mousse . |
. |
. . . . . . . . . . . . . . |
|
|||
Haferbrei.. . . . . . . . . . . . . . . |
|
|||||
|
||||||
Pfannkuchenteig . . |
. . . . . . . . . . . |
|
||||
Pesto. . |
. . . . . . . . . . . . . . . |
|
||||
Pürierte Früchte/Babynahrung |
. . . . . |
|
||||
|
||||||
Püriertes Fleisch/Fleisch für
Babynahrung.. . . . . . . . . . . .
Püriertes Gemüse/Gemüse |
|
|
||
für Babynahrung. . |
. . . . . . . . . . |
|||
Salatdressing. . |
. . . . . . . . . . . . |
|||
Pikante Garnierung. . |
. . . . . . . . |
|||
Sorbetgetränk. . |
. . . . . . . . . . . . |
|||
Weicher Ricottaoder Hüttenkäse. . |
. . . |
|||
Streuselgarnierung. . . . |
. . . . . . |
. |
|
|
Sweet-Crumb-Garnierung. . |
. . . . . |
|||
Sweet-Crunch-Garnierung. . |
. . . . . |
|||
Gemüsesauce für Hauptgerichte . . |
. . . . |
|||
Waffelteig. . . . . . |
. . . . . |
. . . . . . |
. . . . . |
. . . . . . . . |
Weiße Sauce. . |
. . . . . . . . . . . . |
|||
Tipp - Eis kann in Mengen eines normalen Eiswürfelbehälters (etwa 12 bis 14 normale Eiswürfel) jederzeit verarbeitet werden. Sie können den Vorgang beschleunigen, indem Sie das Eis bei ausgeschaltetem Motor („O“) (OFF/AUS) hin und wieder rühren. Die Funktion zum ZERKLEINERN VON EIS (

 ) wurde so entwickelt, dass Sie Eis ohne Hinzufügen von Flüssigkeiten zerhacken und zerkleinern können.
30
 Loading...