


USER MANUAL
FULLY AUTOMATIC WASHING MACHINE
Model BW-S70G
Thank you for your purchase of 


 Fully Automatic
Washing Machine.
●Please read this "USER MANUAL" carefully for proper operation.
●Please to keep this manual for further reference.

Preface
|
 The number next to the sign is the page number for detailed description.
Stirring agitator
Powerful washing effect without damage to laundry
Stirring the laundry up and down can achieve the same effect as pressing, flapping, rubbing by hands. This will control the damage to laundry under the minimum level, gently and quickly removing the dirt.
柔、迅速地去除污漬。
Blades at the rear of |
pressing |
flapping |
rubbing |
|
Pushing action from |
Dropping action from |
Action forcing laundry |
||
stirring agitator |
||||
|
bottom to top |
top to bottom |
to move up and down |
|
|
|
|
|
Air-jet drying
By inhaling clean air, instead of using any heater, the laundry is dehydrated with the wind dehydration and high speed spinning function, providing drying effect.
May be used to air-dry the heat-irresistible swimsuit or the underwear containing the heat-insulation materials.
Keep room free of mugginess for causing no temperature rise.
Control the black mildew in washing spinning basket.
·
The drying capacity: The blending chemical fiber is below 3.0kg, chemical fiber is below 4.0kg (Provide the same drying effect as the airing in the room)
3.0kg 4.0kg ( )
The duration is irrelevant to the dryness level for applying the timer mode of drying.
Go on with the air-jet process in case of insufficient drying.
Please read "USER MANUAL" carefully for proper operation.
Water-saving circulating water flow
With little water in high efficiency
The circulating water flow will come into being when stirring the water with the blades at the rear of stirring agitator and combining sprinklers in three directions. Only small quantity of water will be sufficient to remove the dirt efficiently.
3,
Upper circle |
1 |
|
|
|
|
1 |
|
sprinkler |
3 |
|
|
2 |
|
||
|
|
2 |
|
|
|
||
|
|
Lower circle sprinkler |
|
|
|
|
|
|
|
|
3 |
|
|
Blades at rear |
|
|
|
top view |
|
|
side view |
|
|
|
|
|
2

Nanometer titanium deodorization filter net
The nanometer titanium can absorb and remove the peculiar smell, while the artificial oxygen generation function can capture and remove the hypersensitivity causing substance like pollen.
Inhaling hole
Air will blow from here.
Be sure to open it when drying.
 Nanometer titanium deodorization filter net
Unable to remove the smell or pollen on washing.
Unable to remove all smell and pollen.
Water stream dredge & Laundry rearrangement and spinning
&
Through water stream dredge process to clean the entire washing · spinning basket and laundry rearrangement and spinning process for easy taking out post-spinning laundry, so the laundry wrapping and dehydration corrugation can be avoided.
·
Water stream dredge |
Laundry rearrangement and spinning |
|
1.Cleanout |
2.Spinning |
3.Dredge |
|
|
|
Pulsator rotates in reverse direction of washing spinning basket to evenly and gently wash laundry.
輕柔地清洗衣物。
gh speed spinning & thorough waterPulsator rotation so that the laundry pushed on washing
spinning |
spinning basket scatters. |
|
|
The laundry rearrangement may not work in the case that the washing load is less than 1kg or more than 6kg.
1kg 6kg
The laundry rearrangement may not work in the case of manual set of "RINSE", "SPIN" or "SPIN ONLY".
High speed [1,000 rpm] spinning 1,000 /
1,000 rpm high speed spinning, improving spinning capacity.
1,000 /
Press
 button for 3 seconds to set at 1,000 rpm.


 3 1,000 /
(This setting will be remained for later use.) ( )
3

CONTENTS |
|
|
|
Safety Precaution ............................................................................................... |
5 |
Installation Guide ................................................................................................................. |
8 |
Installation ................................................................................................................................. |
13 |
Safety Check ..................................................................................................................... |
14 |
Washing Machine Repair ........................................................................................ |
14 |
Technical Description ..................................................................................................... |
15 |
Control Panel ..................................................................................................................... |
16 |
About the Lid Lock Hold .............................................................................................. |
19 |
When want to change buzzer sound ................................................................... |
19 |
Before using your Machine ............................................................................................. |
20 |
Checking amount of Laundry and displaying water level .......................... |
21 |
How to use detergent, Bleach and fabric softener .................. |
22 |
Amount of Laundry, detergent and fabric softener ........................ |
24 |
Use the detergent again Use sizing agent ............................... |
26 |
How to select Washing Process ...................................................................... |
27 |
Content of Laundry Process .................................................................................... |
28 |
NORMAL Process .............................................................................................................. |
30 |
HEAVY Process ................................................................................................................. |
32 |
FAVOUR Process ....................................................................................................... |
34 |
SAVING Process ............................................................................................................ |
36 |
Use the washing cap ...................................................................................................... |
38 |
BLANKET Process ............................................................................................................. |
40 |
SILK Process ..................................................................................................................... |
43 |
SPEEDY Process .............................................................................................................. |
48 |
SOAK Process ................................................................................................................... |
50 |
Washing in your Favorite Way .............................................................. |
52 |
Preset duration Washing ............................................................................................ |
54 |
WIND DEHYDRATION Process ..................................................................................... |
56 |
AIR-JET Process ............................................................................................................... |
58 |
Use Guidelines .................................................................................................... |
64 |
BASKET AIR-JET Process ............................................................................................. |
65 |
BASKET CLEAN Process .............................................................................................. |
66 |
Maintenance and Repair .......................................................................................... |
67 |
When Failure Happens ............................................................................................... |
73 |
Optional Parts .................................................................................................................... |
80 |
Product Specifications ....................................................................................................... |
80 |
4

Safety Precautions
Please read this part of substance carefully for proper operation before using your machine.
The precautions stated here are classified as "Warning" and "Attention" according to the damage and the emergency caused by misoperation, and are described respectively in line with the marks below
“ ” “ ”
Warning With no respect to this mark, the misoperation may cause death or GBH.
Attention With no respect to this mark, the misoperation may cause body harm or object damage.
Graphic mark |
This mark indicates the content of warning or attention. |
|
|
|
This mark indicates the prohibited action.
This mark indicates the compulsory action to be carried out.
 Warning
|
Dismantle, repair or alterations should |
|
|
Please use the single socket with |
|
|
|
only carried out by professional |
|
|
220V, 10A specification. |
|
|
Dismantling |
technicians. |
Power |
|
220V 10A |
|
|
|
|
|
|
|||
Prohibited |
|
|
|
|
|
|
|
The share of the same socket with |
|||||
Avoid electric shock, fire, and body injury due to |
other electric appliances may cause |
|
||||
fire due to excessive heat. |
|
|||||
improper activity. |
|
|
||||
|
|
|
||||
|
This washing machine is equipped |
|
|
Washing machine should not be |
|
|
|
with the electricity wire with bi- |
|
|
installed in humid place or in places |
||
|
electrode grounding plug, please use |
|
|
exposed to wind and rain. |
|
|
|
the bi-electrode grounding socket. |
|
|
|
||
Grounding |
Humid places |
|||||
The creepage protector shall be used |
||||||
|
prohibited |
|
|
|
||
|
if possible. |
|
|
|
||
|
|
|
|
|
|
|
|
|
|
|
|
|
|
|
|
|
|
|
|
|
To prevent electricity leak which may cause injuries. |
Otherwise, electricity leak causing electric shock or fire may occur. |
|||||
|
|
|
||||
|
Electricity supply must be unplugged |
|
Do not put water in direct contact with |
|||
|
with dry hands. |
|
the unit during maintenance and repair. |
|||
|
|
|
|
|||
Wet hands |
|
Prohibited |
|
|
||
Prohibited |
|
|
|
|
|
|
|
|
|
|
|
||
|
|
|
|
|
||
Otherwise, this may cause electric shock.
This may cause short circuit or electric shock.
5

Safety Precautions (continued)
 Warning
Do not put your hand into the basket |
|
Do not put your hands into the |
|
until it has stopped completely. |
|
washing • spinning basket during the |
|
|
|
washing and rinsing process. |
|
Prohibited |
Prohibited |
|
|
|
|
|
|
|
|
||
Even when the spinning of the basket |
Even when the spinning is slow, hands may be trapped by |
||
is slow, there is still a danger of being |
|||
caught in the motion, resulting injuries. |
clothes. If necessarily, please press pause button, and put |
||
Particular attention should be paid |
your hands into the basket after it has stopped completely. |
||
when children are around. |
( |
||
|
|
||
|
) |
||
Damaged or loosen wire or plug |
|
Do not damage wire. |
|
should not be used. |
|
|
|
|
Prohibited |
Do not damage or alter the wire |
|
Prohibited |
forcibly bend, pull, twist or handle |
||
|
|||
|
the wire. Beside, please do not |
||
|
|
||
|
|
put weight on or trap the wire. |
|
|
|
|
|
|
|
|
|
|
|
|
|
Otherwise electric shock, short circuit or fire may take place. |
Damage of wire may cause electric shock or fire. |
||
|
|
||
Keep child away from the washing |
|
Thoroughly wipe the power plug |
|
spinning basket and do not place box |
|
when dirt is adhering the prong or |
|
or shelves next to the washing machine. |
|
around the base of the prong. |
|
Prohibited |
Clear |
|
|
|
|
|
|
|
|
||
|
|||
Children may fall into the |
|
|
|
basket resulting in injuries. |
Failure to do so may cause a fire. |
||
|
|||
|
|||
|
|||
|
|
||
This washing machine is strictly |
|
Do not put the laundry attached with |
|
prohibited to get close to the |
|
combustibles or inflammables into |
|
locations with candle, mosquito- |
|
washing basket. |
|
No smoke or fire repellent incense, dog-end or other |
Prohibited |
|
|
kinds of open flame. |
|
Do not put the laundry attached with |
|
|
|||
|
|
gasoline, benzene, thinner, alcohol, |
|
|
|
sodium hydroxide or above-mentioned |
|
|
liquid into washing machine. |
||
|
|
||
|
|
|
|
|
|
|
|
To avoid injuries caused by the lock damage. |
To prevent fire or explosion which may cause injuries. |
||
|
|
||
6

 Warning
Do not insert a screwdriver into the Lid Lock hold.
Prohibited
To avoid injuries caused by the lock damage.
Do not open the lid in locked status by force.
Otherwise, the lid or locking device Prohibited may be damaged, resulting in
unstoppable spinning of washing • spinning basket and thus causing injuries.
身傷害。
 Attention
|
Do not pull the wire from the |
|
Do not stand on or put weight on the |
|
|
socket when unplugging the unit. |
|
top of the unit. |
|
|
|
|
|
|
Prohibited |
Prohibited |
|
||
|
|
|
|
|
To avoid electric shock or fire cause by short |
Otherwise, deformation and damage |
|||
ciruit may result. |
may result causing injuries. |
|||
|
|
|||
|
Do not connect to the hot water supply. |
|
Keep hands and feet away from the |
|
|
And, water of above 50oC should not be |
|
||
|
|
bottom of the washing when it is |
||
|
used for washing. |
|
||
|
|
motion. |
||
Prohibited |
Prohibited |
|||
|
||||
|
50 oC |
|
|
|
Electric shock or leakage may occur |
|
|||
Ports in motion beneath the |
||||
due to deformation of plastic parts of |
unit may cause injuries. |
|||
the unit. |
||||
|
||||
|
||||
|
|
|||
|
|
|||
|
|
|||
|
Please unplug the unit when not using |
|
Water supply hose should be tightly |
|
|
the unit for a long period of time. |
|
screwed to the unit. |
|
|
|
|
|
|
Electric shock or leakage due to aging of insulator may |
water |
Union nut |
||
leakage |
||||
cause fire. |
|
|||
|
|
|||
|
|
|
||
|
Check water supply hose connection |
Failure to do so may result in water leakage. |
||
|
by turning on the water before |
|
||
leakagewater |
washing. |
Used for a long period of time, the unit may |
||
|
result in water leakage caused by loosen |
|||
|
|
union nut. So please check it in time and |
||
To prevent damages caused by possible water leakage |
screw tightly again. |
|||
|
||||
due to loosen screw. |
|
|||
|
|
|||
|
When installing the washing machine, |
|
Electricity supply must be unplugged |
|
|
be sure to draw out the water drainage |
|
with dry hands during maintenance |
|
water |
hose until the black and purple mark is |
|
and repair. |
|
seen. |
|
|
||
leakage |
|
|
|
|
|
|
|
|
|
|
|
|
||
Failure to do so may cause friction leading to damage. |
Otherwise, electric leakage causing |
|||
|
injuries may occur. |
|||
|
|
|||
7

Safety Precautions (continued)
 Attention
Please turn off the water tap when not using the unit.
water leakage
To prevent damages caused by water leakage.
Do not wash, rinse and spin the water proof fabric or cloth.
Prohibited |
|
|
|
sleeping bag, raincoat, cover of skiing, utilities, |
|
|
bicycles, cars and motors |
|
|
|
|
|
( |
) |
Otherwise may lead to injury by abnormal vibration during spinning or damage the washing machine, wall, floor and clothes.
壁、地板以及衣物的損壞。
Do not incline installing the washing cap. Do not use the washing cap except SILK process, BLANKET process.
Prohibited
Splash of water may occur or washing cap may be swung out of the basket.
Installation Guide
Installation of Washing Machine
Where to install
 Please install on a solid horizontal surface.
Installation on a slippy or irregular surface may result in noise and shaking.
生振動和噪音。
 Avoid installing the unit too close to the wall.
This is to prevent abnormal vibration and noise.
Solid, horizontal surface |
Weak surface |
Irregular surface |
|
|
|
How to install
 The unit should be installed on a flat horizontal surface.
Otherwise sudden stop or abnormal sound may result during the spinning cycle.
8

Installation Guide (continued)
1 |
Put the washing machine at the installa- |
tion place. |
• Make adjustment according to the following steps if the washing machine is not put on a flat horizontal surface or there's gap under the leg:
步驟調節
• Heighten the adjustable leg till no gap exists at its side.
• If there's gap opposite to the adjustable leg, make the rear leg stand closely on the ground, and insert proper plank between the front leg and the ground to fill up the gap.
3 According to the bubble location on the horizontal indicator, rotate the adjustable leg to locate the bubble at the circle center.
If the bubble is out of half of the circle radius, the ground is too
sloppy to be regulated to flat with only the adjustable leg.The plank shall be properly inserted.
用可調機腳調節。可用適當的板材 鋪墊。
plank
2 |
Check the bubble location on the horizon- |
|
|
||||||
tal indicator. |
|
4 |
Check the existence of gap under the |
||||||
|
• No leg adjustment is required if the bubble is right at |
washing machine leg. |
|||||||
|
the circle center. |
|
|
||||||
|
|
|
• If gap exists, adjust the adjustable leg. |
||||||
|
|
|
|
|
|
Circle |
|
|
|
|
|
|
|
|
|
Observe the horizontal |
|
|
|
|
|
|
|
|
|
|
|
|
|
|
|
|
|
|
|
indicator from above. |
|
|
|
|
|
|
|
|
|
Bubble |
|
|
|
|
|
|
|
|
|
|
|
|
|
|
|
|
|
|
|
|
|
|
|
|
|
|
|
|
|
|
|
|
|
•Adjust height with the adjustable leg if the bubble is not in the circle.
■To install the machine on an inclined floor, leg caps in the attached accessory kit can be used to adjust height by connecting them to the fixed leg.
(Three standards: 2mm, 4mm, 8mm, two of them.) ( 2mm 4mm 8mm 2 )
How to Use the Adjustable Leg
Loosen the lock nut by unscrewing in 1 arrow direction 1 before using the
adjustable leg to stabilize unit.
1
Loosening
Lock nut
 Adjustable leg
Elevating Lowering
After adjusting of the unit, tighten 2 the lock nut by screwing it in arrow
direction.
2
|
|
Tightening |
|
|
|
|
|
|
|
|
|
|
|
Lock nut |
|
Plastic base |
|
|
|
|
|
||
|
Tighten the lock nut until it reaches the plastic base. |
||
|
|
||
|
|
||
|
|
Maximum adjustable |
|
|
At most 40mm |
range is 40mm. |
|
|
40mm |
|
|
|
40mm |
|
|
|
|
|
|
9
Installation Guide (continued)
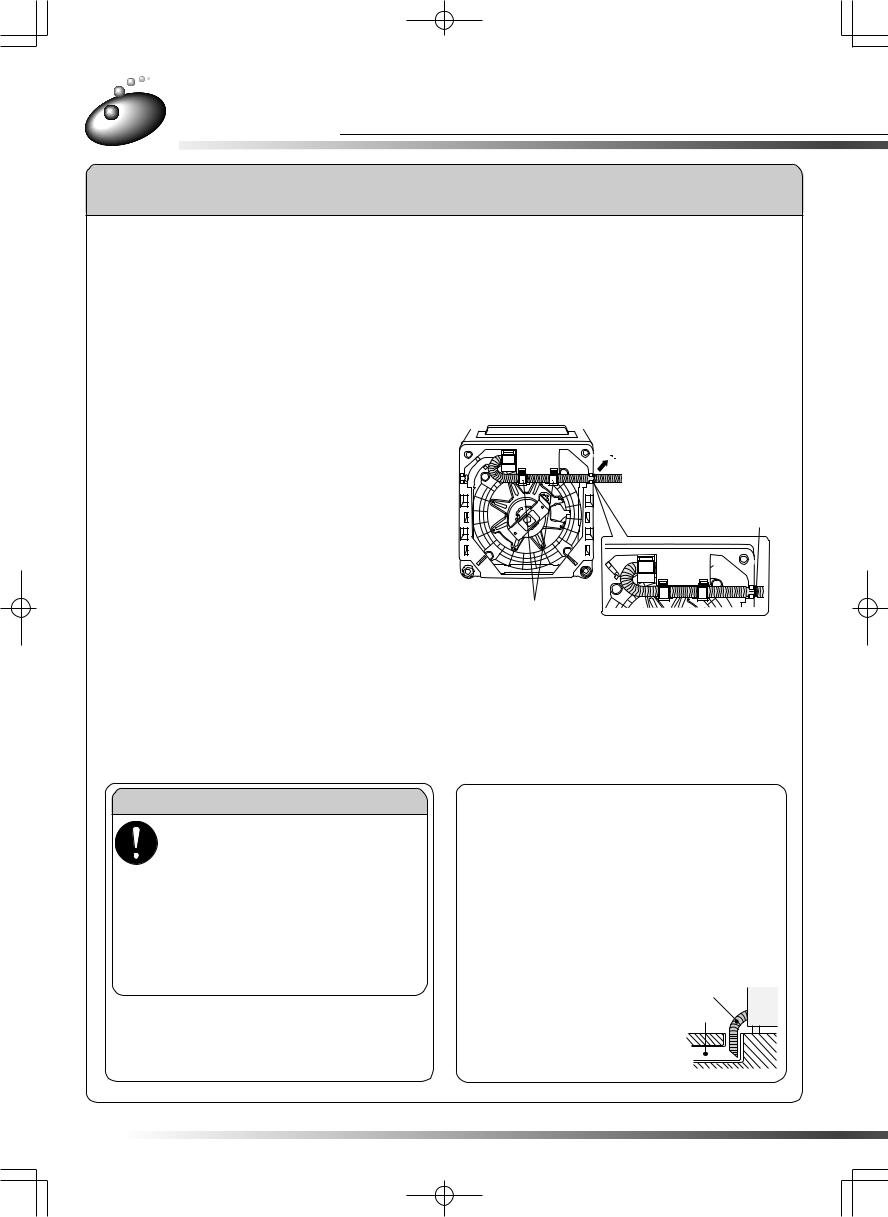
How to Change the Water Drainage hose
■Water drainage hose is attached on the right side of unit at shipment,
It can be reattached on the left side to suit drainage needs.Be sure to insert the front end of water drainage hose into the water drainage hose outlet.
請視排水位置的具體情況將其換至左側。排水管的前端必須插入排水口。
1
2
Lay the unit down slowly.
Lay the unit down on some corrugate paper to prevent damage.
Pull out the water drainage hose from left side.
1 Remove the water drainage hose cover at left side of
main unit.
2 Align the black or purple mark of water drainage hose into recessed part of main unit.
(There are 2 marks on water drainage hose. When pulling out from right side, align the black mark into with recessed part of main unit; when pulling out from left side, align with the purple mark.)
( 2
部嵌入。
3When pulling out water drainage hose from left side, pass the water drainage hose through soft hose retaining clamp and then pull it out.
後再引出。
Hose retainer
The water drainage hose cover

Purple mark
 Attention
The black or purple mark of the water drainage hose should be inserted into the corresponding groove of the unit.
紫色標記部嵌入機體相對應的凹槽內。
Water drainage hose which inserts into the unit, can 't touch other parts, to prevent the damage caused by water leakage.
破損產生漏水而導致不必要的損失。
Water drainage hose retainer must be tightened.
The inner section of the water drainage hose must be secured by the retainer before fetched out.
■When fitting the water drainage hose to the water drainage outlet
If the water drainage outlet is too shallow or the end of the water drainage hose touches the grounds, cut the end of the water drainage hose in an oblique angle.
排水管的前端沿斜向切除一部分。
Failure to do so may cause insufficient rinsing or unit malfunction due to poor drainage or too much subbles during rinsing and spinning.
充分或因肥皂沫而影響電機運轉。
Water drainage hose
Water drainage outlet
10
Water Drainage Hose Related Parts
Ensure that the water drainage hose will not separate from its outlet even if there is vibration or the outlet is too big or too shallow.
■ Extended the water drainage hose
Please use optional extension drainage tube for lengthening the water drainage hose.
Follow the instructions below to improve drainage efficiency.
Length of water drainage hose should not exceed 5m.
5m
Extension drainage hose
Less than 5m
5m
Height of water drainage hose should not exceed 15cm and length should not exceed 2m.
15cm2m
Less than 15m
15m
Less than 2m
2m
Attention
The method of pulling out the water drainage hose as shown below should be avoided. Otherwise, water leakage or abnormal sound may occur.
Water drainage hose should not be inserted into the outlet directly from the inside.
When purchasing extension hose, make sure that the inner diameter of the hose is big enough, otherwise, poor drainage may cause and result in the malfunction of the unit.
常運轉。
How to Install the Water Supply Hose
Connecting the water supply hose to the main unit
Firmly tighten the union nut when |
Union nut |
connecting the water supply |
|
|
|
hose to the main unit. |
|
|
|
|
|
Loosely tightened union nut will cause water leakage.
When removing the hose, unscrew the union nut first.
Extended the water supply hose
Please use the optional extended water supply hose.
To extend the water supply hose, please purchase it at HITACHI service center or special service stations.
約維修站去購買。
specifications are available for extended water supply hose: 1m, 2m and 3m.
1m 2m 3m
11

Installation Guide (continued)
How to Install the One Touch Joint
1 Confirm the diameter of the water tap.
If the diameter exceeds 2cm, remove the joint ring.
2cm
Screw 
Joint ring
Label One touch joint
2 Check the distance between joints A and B.
A B
Screw joint B in the arrow direction to adjust the gap.
B
Joint


Approximately 6


 6
6

 Joint
Joint 

Press the sealed pad evenly against the |
Tighten joint Bin the arrow direction |
tap and tighten the four screws in a uniform |
to reduce the gap between joint A |
3 fashion. |
4 and B to 4mm or less. |
4 |
B A B |
|
4mm |
Water tap |
Joint |
|
|
||
|
||
Sealed pad |
||
(After tighten) |
||
|
Joint |
( ) |
|
Less than 4mm |
||
|
4mm |
|
Tighten screw in advance if it is |
Joint |
|
|
||
located close to the wall. |
||
|
||
|
|
|
|
|
For water supply hose installation, please refer to "Installation" in the user manual.
Loosening may occur with extended use. In such case, reinstall the joint following steps 2 to 4.
2 ~ 4
(Carry out the same steps when reinstalling the one touch joint at a change of residence, etc.) ( )
Appropriate water tap Horizontal taps A and B as shown below.
A B
Horizontal tap A |
Horizontal tap B |
Square mouth tap |
Universal household tap |
Swivel tap |
A |
B |
|
|
|
Distance must be over 1.6cm in order to install correctly.
1.6cm
May break off after install the one touch joint.
會脫落。
Water leakage may occur.
12

Installation |
|
 Attention
Please turn on the water tap to check to connecting condition of the water supply hose before washing.
To prevent damages caused by water leakage due to loosen screw.
How to install and remove the water supply hose
Water tap
Do not allow water tap, one touch joint and rubber ring to touch the unit when installing them.
洗衣機機體。
■ Installing
1Push down the rubber ring and insert the tap into the one touch joint.
接器內。
One touch joint 

Latch
Rubber ring 
Release the rubber ring and 2push up the water supply
hose until it clicks.
直至發出“ ”
Pull the water supply hose to check that it does not come off easily.
不會脫落。
■Removing
Water supply hose
Turn off
Latch
Rubber ring
Turn off the water tap.
1
Press the start button and let the unit run for about 2ten seconds.
10
This is to prevent water splash when removing the tap.
3Remove the latch and the water supply hose while pushing down the rubber ring.
Main unit
Turn the union nut in the direction as shown by the arrow and firmly. Connect it to the water supply opening.
相連。
 Attention
Firmly tighten the union nut when con-
necting the water supply hose to the main unit.
Failure to do so may result in water leakage.
Union nut
Loosely tightened union nut will cause water leakage.
When removing the hose, unscrew the union nut first.
Please note that water supply hose and one touch joint should be used.
The appliance is to be connected to the water mains using new hose-sets and that old hosesets should not be reused.
接水管不得再次使用。
13

Safety Check
If any of the following conditions or other abnormalities occur, immediately pull out the power plug to prevent an accident and request help from an authorized dealer or agent.
, , ()
•Never conduct repairs by yourself as it may be dangerous.
,
•If you have used the washing machine for 4 - 5 years,even if the following conditions and other abnormalities do not occur, request for safety inspection of the machine is stilled required.
4 ~ 5 , ,
•If the power supply cord is damaged, Please repair it in a repair shop appointed by the manufacturer or its service agents in order to avoid a hazard.
•The washing machine is not to be used by children or persons with reduced physical , sensory or mental capabilities, or lack of experience and knowledge, unless they have been given supervision or instruction.
•The washing machine having ventilation openings in the base.
The washing machine bottom must not be obstructed by carpeting when the washing machine is installed on a carpet floor.
•When you turn on the switch, the machine sometimes does not operate.
•The power cord has "cracks" or "flaws".
•There are abnormal sounds and vibrations during operation.
•The agitator does not stop easily. (It takes over 15 seconds for the agitator to stop )
( 15 )
•There is water leakage. (Basket,hose, joint,etc.)
( )
•There is a smell of burning.
•If you touch the machine, you may get an electric shock.
,
In case when the washing machine is used in places other than ordinary households.
•If the washing machine is in use for extremely long periods of time compared to ordinary household usage, such as in dormitories and hospitals,it may be necessary to change parts (such as the clutch,belt or sealed pad) more frequently.In this case,consult with the dealer from whom you purchased the washing machine and have the machine inspected periodically.
, , ( ),
Washing Machine Repair
In case of malfunction of the washing machine, read the manual in detail before requesting repair services. If the problem still cannot be solved, contact an authorized service dealer or a service agent and provide the following information.
1 Model name: BW-S70G.
2Describe abnormal situations and damages in detail. 3 Your address and telephone number.
, ,,
1 BW-S70G
3
14

Technical Description
 The number next to the sign is the page number for detailed description.
Inhaling window  63
63
Inhaling net Nanometer titanium deodorization filter net
納米鈦除臭淨化網 63
63
Lid
Power Wire
Fabric softener injection
 23 24 68
Level instrument
 9
9
Control panel
 16
16
Water Drainage Hose
Water inlet |
Water drainage opening for dryer |
|
|
72 |
|
|
Washing·Spinning basket |
|
· |
 65 66
65 66
Detergent bleach injection
•
 22 69
22 69
Lint filter
 70
70
Balance ring

Agitator
Water drainage hose rest
Water supply box
 68
68
Water injection opening
70
Lid lock
19
Box body
Adjustable leg
9
Accessories (Refer to"Installation Guide")
Water supply hose |
Water Supply Hose |
Leg cap |
Tray scraper |
|
|
|
(for adjusting height) |
(washing tray cleaner) |
|
|
|
|
|
|
|
|
|
|
|
(One) |
|
|
|
|
(1 ) |
(One) |
(Six) |
(One) |
|
( 1.5m) |
||||
(1 ) |
(6 ) |
(1 ) |
||
(About 1.5m) |
15

Control Panel
|
|
|
|
|
|
|
|
|
Water level indicator |
Washing indicator |
|
SOAK indicator |
Lid Lock indicator |
||||
|
|
|
|
|
||||
|
|
|
|
|
|
|
|
|
Display water level. |
The lighting indicator indicates |
|
The lighting |
Lid Lock indicator will |
||||
|
the set process. |
|
indicator indicates |
light when the lid is in |
||||
|
|
|
|
|
steeping duration. |
locked status. |
||
|
|
|
|
|
|
|
||
|
|
|
¡The flashing indicator indicates |
|
|
|
¡Before spinning, the |
|
operating process. |
lid will automatically |
|
|
lock. |
19 |
|
|
|
|
|
19 |
WATER LEVEL button
Used to set required water level or change setting.  34 52
34 52
時使用。 34 52
34 52
¡After the washing machine starting, please press "PAUSE" button temporarily.
按鈕。
¡Press and hold "WATER LEVEL" button to replenish water during the course of washing or rinsing.
(No water will be replenished after reaching the top water level of each process.  28
28
位」按鈕。按住水位按鈕時進行補水。( )
 28
28
WASH· RINSE· SPIN button |
SOAK button |
PRESET button |
· · |
|
|
Used to set WASH, RINSE, SPIN |
Used for washing when |
Used for operation with |
process or change setting. |
selecting SOAK program. 50 |
PRESET time. 54 |
|
|
|
|
50 |
54 |
|
|
|
¡After the washing machine |
|
|
starting, please press "PAUSE" |
|
|
button temporarily.The setting |
|
|
could not be changed after |
|
|
washing completes. |
|
|
(Some processes cannot be |
|
|
changed. ) 28 |
|
|
|
|
|
|
|
|
|
|
|
( ) |
|
|
28 |
|
|
The
¡P "3
¡P b
If
¡T a
START/
Used opera
16

r
ill in
he lly
PRESET REMAINING time indicator
·
The remaining time will indicate at the end of operation.
¡Press "PRESET" button, and the preset time finishes within "3HR to 12 HR".
3 12
¡Press "AIR JET" button, and the air jet duration switches between "30 MIN to 180 MIN".
30 180
If the remaining time is over 99 minutes, it will indicate "--" .
99 --
¡The displayed remaining time will automatically correct according to the actual operation status.
Programme indicator |
|
Air-jet Duration indicator |
|
|
|
|
|
|
The selected indicator |
|
The lighting indicator |
for processes lights. |
|
indicates the set |
|
|
duration. |
|
|
|
With each pressing |
|
|
on the PROGRAM |
|
¡The flashing |
button, the indicator |
|
indicator indicates |
for processes will |
|
operating process. |
light in sequence. |
|
|
|
|
|
|
|
|
|
POWER switch |
||
|
|
||
|
Used for power switch. |
||
|
|
|
|
|
¡Automatic power OFF |
||
|
Buzzer beeps and the power of unit will be |
||
|
switched off automatically at the end of operation. |
||
BW-S70G |
The washing machine will be automatically |
||
switched off after 5 minutes of no start operation |
|||
|
|||
|
when power on. |
76 |
|
|
|
|
|
|
|
||
|
5 |
||
|
|
76 |
|
10 minutes before operation stops, the buzzer will beep.  19
19
10 19
START/PAUSE button (One touch button)
/
Used for start or pause operation.
PROGRAM button
There are seven options available, you can choose the right one based on the types and dirty levels of the washing.
7
¡The selected indicator for processes lights.
¡"NORMAL", "HEAVY", "FAVOUR" process is with memory function, and last selected program will be displayed after power on.
通電源後將顯示上一次的所選 的程序。
WIND DEH button |
AIR JET button |
|
|
|
|
|
|
|
Used to make laundry wind |
Used to set air-jet. |
|
dehydration and shorten |
|
|
drying time. |
|
|
|
|
|
|
|
|
17
Control Panel (continued)
The washing machine sound "Hoola, hoola" after the power supply is switched on. About 1 second later, the indicator lights.
1
Two sounds will be heard when selecting options like "57L" in WATER LEVEL, "8 MIN" in WASH, "WATER STORAGE TWICE" in RINSE, "7 MIN" in SPIN, "3 HR LATER " in PRESET, "30 MIN" in AIR JET,"NORMAL" in WASH process etc. to inform you standard point.
57L 8 2 7 330
Never press 2 or more buttons at the same timer to prevent misoperation.
2
notes |
|
After the power supply is cut off, the power switch doesn't work within 5 seconds (until the indicator |
for processes turns off).
If the power is to be switched on again, please press the switch after the indicator turning off.
5 ( )
■After power on, press this button for 3 seconds to change setting.
3
Change buzzer sound. 19 |
Can be set for high speed spinning. |
|
|
||
|
||
Press and hold for 3 seconds in "NORMAL" process, |
|
|
the lid will be automatically locked after water supply of |
Finish beep can be cancelled |
|
WASH process.(safe mode) |
||
19 |
||
3 |
||
|
||
( ) 19 |
|
|
Select whether carry out water storage for 3 times and |
"Loosening process" for rearrangement can be |
|
water injection for 3 times in "HEAVY" process. |
cancelled. |
|
3 3 |
18 |
About loosening & spinning (In the last phase of spinning, execute the "Loosening process", so that the laundry can be easily got out.)
“ "
Cancellation for loosening & spinning
•This machine has been set with loosening & spinning process before delivering from factory.
1Switch on the power supply.

2Press "PROGRAM" button for 3 seconds.

 3
3
3After buzzer sounds "Hoola", loosening & spinning will be cancelled.
“ -"
Canceling the loosening & spinning
Setting the loosening & spinning
If the above settings have been executed, during the last phase for spinning, the "Loosening process" will not be executed.
To set the loosening & spinning process, please repeat the above procedures.
“ "“ - "
18
About the Lid Lock Hold
To prevent exceptional damage and protect safety of children, the lid will be automatically locked before the first spinning.
When you want to open the lid
Press "START" button |
|
Washing operation stops and lid unlocks. |
When restart |
|
|
|
|
|
Press "START" button |
|
Irrelevant to washing process. Lid can be locked automatically. |
|
|
|
■Lid is locked after setting water supply.(Safe mode)
1 Close the lid and press "POWER SWITCH" button .
.
2 Press and hold "WASH" button
 for over three seconds.
 3
3
•When unlocking setting, press and hold WASH button 
 for over three seconds.
 3
3
•The setting for Safe Mode can be memorized until next time.
3 Cut off the power supply.
When setting |
When unlocking |
|
|
Indicator |
Indicator |
lighted |
turns off |
|
|
When want to change buzzer sound
The sound alert can be turned into common electronic buzzer sound.
In addition, the buzzer sound can be cancelled at end of cancellation.Please execute the following process.
When want to turn rhythm sound into buzzer sound |
|
|
|
|
|
|
|
|
Mixing sound 1 |
|
|
|
|||
1 |
Press the "POWER" button to power on. |
(initial setting) |
Mixing |
|
Mixing |
||
1 |
sound 2 |
|
sound 3 |
||||
( ) |
|
|
2 |
|
3 |
||
|
|
||||||
2 |
|
|
|
|
|
|
|
Press and hold "WATER LEVEL" button for over three seconds. |
|
|
|
||||
3
|
Mute (with |
|
|
button |
|
Mono |
clicking |
|
sound |
sound) |
|
track |
( |
Mute |
|
) |
|
•To return to rhythm sound, press and hold "WATER LEVEL" button for over three seconds again.
3
•Various rhythms emit after setting.It will inform of the following signal after setting completes: "prolonged P" when muted (with button clicking sound), "short and discontinuous P" when button clicking sound is muted.
“ P” “ P”
■The completion sound (within 10 minutes) can be cancelled by pressing and holding START button 

 for 3 seconds after power on.To return original rhythm, please execute with the same procedure.The sound after setting should be "P, P, P-".The sound after canceling setting should be "P, P, P".
10 
 3"P P P " "P P P"
(During spinning, the buzzer will not sound if caused by safe switch operation and spinning correction due to the uneven laundry arrangement.)
( )
19

Before Using Your Machine
Preparation for washing machine
When the first using
The washing machine can be used only after the proper installation in compliance with the "Installation Guide".
|
Turn on |
|
Water 2 |
|
One touch joint |
|
|
|
supply hose |
|
|
|
|
|
Daily using
1 The front of the water drainage hose must insert in the water drainage outlet.
2 Connect the water supply hose and turn on the water tap.
3 Insert the power plug into the socket.
220V~ 3 220V
Drainage outlet
 1
1
Preparation for the washing
Please secure strings, zips |
The laundry from which the |
Please remove soil or dirt |
Remove anything from the |
and fasteners |
hair or silk is inclined to run |
f r o m l a u n d r y b e f o r e |
laundry before washing. |
|
shall have its inner side turn |
washing. |
(Do not forget anything in |
|
to external before washing. |
|
pocket) |
|
|
|
|
|
|
|
( ) |
|
|
|
Remove matches, hairpins |
|
|
|
or coins etc. from laundry. |
|
|
|
|
• This is to prevent damage to clothes and zips.
• To avoid damaging the clothes and unit malfunction.
Clothes of easily-fadeaway colors must be separated.
The jeans and alike
•The bluejeans that are inclined to fade may decolor during washing.
The vulnerable laundry shall be put into the wash string bag before washing.
入洗衣袋中進行洗滌。
To be cautious, please put the laundry with lace or the woman underwear with steel wire into the optional wash string bag before washing.
鋼絲的女性內衣放入市面出售的洗 衣袋中清洗。
•Prevent the laundry from damaging by accident.
The laundry from which the silk is inclined to run shall be put into the string bag before washing.
The laundry made of corduroy or other particular cloth, and the black hose or other clothing sensitive to silk-running shall be put into the optional anti-silk-running string bag before washing.
售的防脫絲洗衣袋中清洗。
Please handle the dirt as early as possible.
As it's hard to remove the dirt after adhering to laundry for long, the dirt shall be under cleanout and handling with detergent before washing, which brings better washing effect.
20
How to put laundry in
Put in the laundry as |
Put bulky or floating laundry in basket first. |
evenly distributed as |
|
possible.
Jean |
Sheet |
|
|
||
|
||
|
•It smoothes rotation of the laundry.
•Splash of water must be prevented.
The bluejeans and other thick cloth shall be evenly distributed in the washing basket before washing. (Prevent the laundry from overflowing during washing)


• Press the laundry into basket with hand when filling water, and make the water infiltrate the cloth sufficiently.
滲入布料。
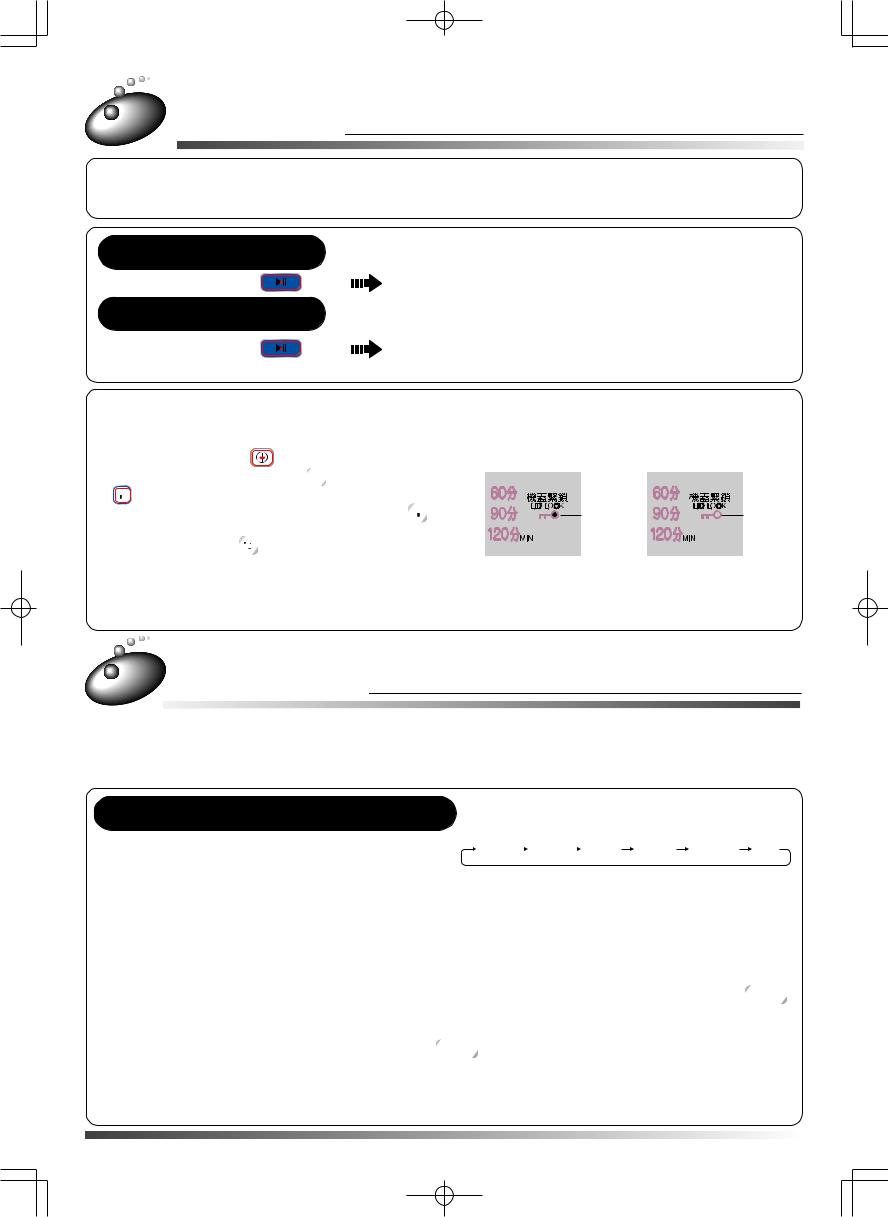
•Splash of water must be prevented.
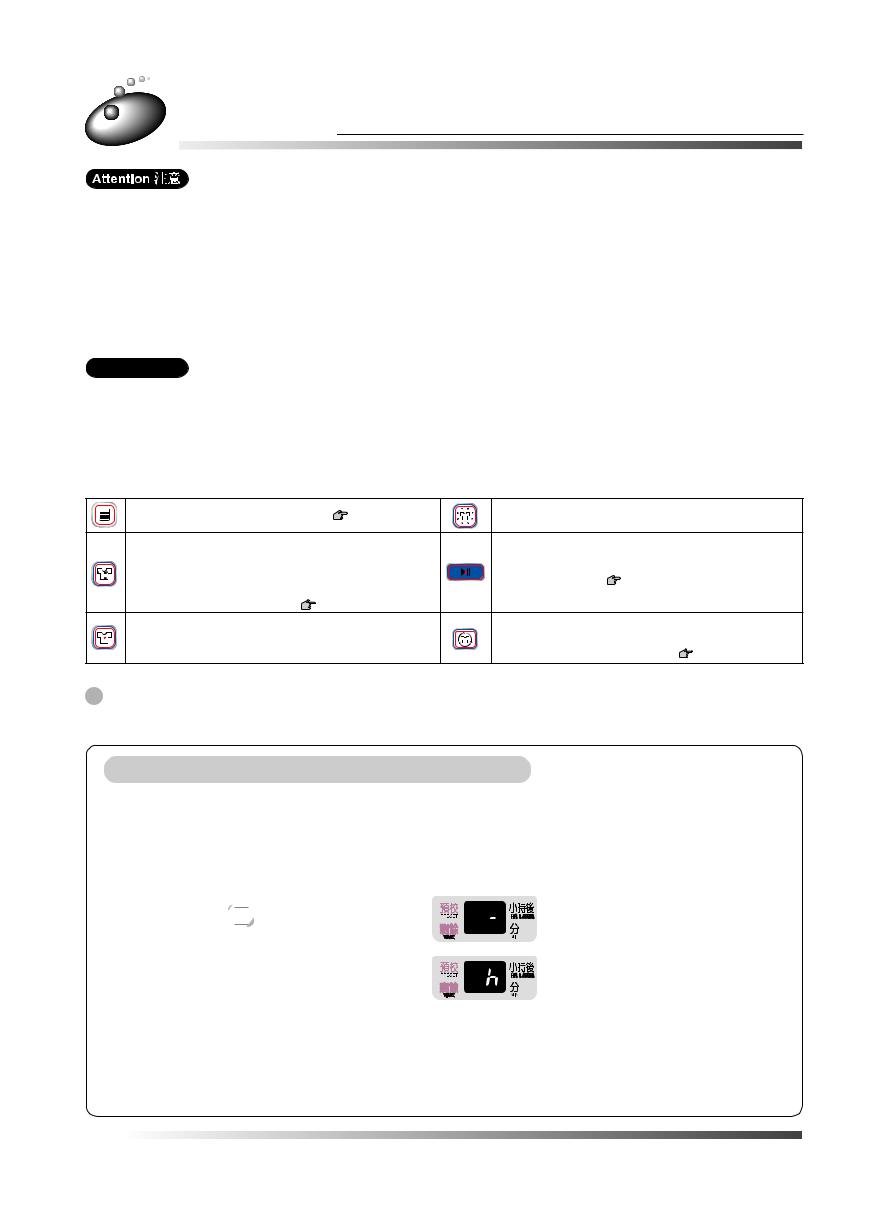
Checking Amount of Laundry and displaying water level
Checking amount of laundry
Select the process required for washing after putting in laundry, and press the "START" button. The sensors begin to detect the weight of washing, displaying the water level correspondently. (The detection is not included in the processes of "FAVOUR", "SPEEDY", "BLANKET" , "SILK" , "AIR JET" ,"BASKET CLEAN", "BASKET AIR JET".)
「被毯」、「絲絨」、「風乾」、「筒清洗」、「筒風乾」程序不執行該功能。
For the detergent amount required under normal water level, please refer to the normal value indicated on detergent container or the related stipulations in section "washing load, amount of detergent" on Page 24.
“ ” P24
Put the laundry in and press the |
Display the water level correspondent to |
1 power switch. |
2 washing load. |
Select the process required for |
|
washing, and press "START" |
|
button. |
|
|
|
|
|
|
|
•The pulsator rotates with absence of water to check the washing load. (cause no damage to clothies)
The remaining time displays "-" during washing load detection and returns to the display for remaining time after detection completing.
Checking washing load
Display remaining time
3 Put detergent in  22~23
22~23
22~23
•Close washing lid after putting detergent in.
•When the water has been supplied to status over the required level with water basket in advance, put the detergent directly into the washing & spinning basket when the operation starts.
·
•Require water level
In the concave of stirring agitator the water amount that can be approximately seen.
21

How to use detergent, Bleach and fabric softener
When the water has been completely filled with water basket in advance, put the detergent directly into the washing
&spinning basket when the operation starts.
Powder synthetic detergent / Liquid detergent
/
 Warning
Do not add excessive amount of detergent
As the washing capacity for a spoon of detergent differs according to its category, so be sure to refer to the "Standard using amount" described on package box of detergent and do not put too much detergent comparing to water display level (L). If too much detergent has been put, it may not dissolve completely, generates excessive foams causing mulfunction of the washing machine, water leakage or electric shock.
“ ”(L)
 Attention
Be sure to operate the washing machine after closing detergent dispenser
If the washing machine is operated while the detergent dispenser is open, the laundry may be damaged.
If the washing machine is operated while the detergent dispenser is open, the dispenser may break off during washing, causing deformation or damage.
■Put detergent (Powder synthetic detergent or liquid detergent) into the injection opening of detergent • bleach.
About 30 °
30 °
1 Open the detergent dispenser
The injection for detergent can be lifted up to about 30 ° (Opening it by force may cause damage)
打開至30° ( )
|
2 Put in detergent |
|
3 |
Close the detergent |
Lint filter |
|
dispenser |
|
|
|
|
|
|
|
|
|
|
|
Injection opening of detergent • bleach |
|
|
• |
|
•When water is adhering to the detergent dispenser, please wipe it first.
•When the detergent adheres to the dispenser, it remains even the dispenser is closed. If the detergent still adheres to the dispenser after 2 or 3 times of repetitive open and close, please remove the dispenser for cleaning up.
2 3
 69
69
•Please dissolve natural soap and composite soap etc. completely and then directly put in washing spinning basket.
•If the caked detergent puts into detergent dispenser, it may remain in dispenser. Please smash it and then put in.
•For the liquid detergent, gently pour it into the injection opening after diluting with water, to reduce remaining detergent.
•When using pill-shape, plate-shape or lump-shape etc. solid detergent, please directly put into washing spinning basket.
•When the detergent dispenser is in a location hard to put in the detergent, please rotate the washing spinning basket and move to where can be easily put in.
•The detergent dispenser may be sometimes hard to open according to the laundry load. At this time, collect all the laundry to side of detergent dispenser, and then open the dispenser again.
•When closing detergent dispenser, please press on its both sides till fixing into position. (Otherwise it may break off during the operation)
22

Fabric softener
■Put detergent in from fabric softener injection opening at beginning of washing.
(Please dilute with 2 times amount of water and then put in (maximum amount: 120 ml))
2120ml
•Fabric softener will be dispensed automatically during the final rinse.
Fabric softener injection

1Open the box
2 Put in fabric softener
Fabric softener injection opening
3 Close the box
•Do not carelessly splash the fabric softener around.
•Do not put detergent into the fabric softener injection box. (Otherwise, it may cause malfunction.)
•Do not leave the fabric softener for a long period (over 12 hours) after putting it into the fabric softener injection box, otherwise it may be caked.
12
•Fabric softener may sometimes attach to the injection opening. Please remove the fabric softener injection box for cleaning or use dispense scraper included with washing machine to remove the fabric softener.
 68
68
•Do not replenish excessive fabric softener. Otherwise, fabric softener attached may cause cloth discolor.
會導致衣物變色。
•The fabric softener can be completely closed only after fixing it into position. (Closing the lid by force while fabric softener injection box is still open will cause damage)
•Foam may occur according to the category and using amount of fabric softener. When pulling out box, immediately clean up the foam when it flows out.
Bleach
■Liquid bleach
•Dilute the bleach with water before washing and gently pour it into the injection opening.
about 30°
30°
Open lid
1
3 Close lid
Pour the diluted bleach in
2
Lint filter
Bleach injection opening 
•For using amount and how to use bleach, please refer to the indication.
•Do not directly pour the bleach onto washing.
Otherwise, it may cause discolor or damage for cloth.
•Do not leave for an extended period after pouring chlorine
·
•Be sure to operate the washing machine only after detergent dispenser is completely closed.
(Otherwise, once the detergent dispenser drops during operation, it might damage the clothing.)
■Powder bleach
•Put into washing ·spinning basket
·
23

How to use detergent, Bleach and fabric softener (continued)
Dismantlement of the fabric softener injection box
■Removing the fabric softener injection box |
■Installing the fabric softener injection box |
||
|
|
||
|
2 Pressing on this point while pulling out |
1 Press the protrusion |
|
|
|
|
|
1 |
1 Pull out the box till it can be |
1 While press and hold the |
|
removed. |
protrusion |
||
|
|||
|
|
|
|
|
|
2 Push in the box to install. |
|
|
2 Press the protrusion on box |
2 |
|
|
(Please press till it completely |
||
|
while straightly pulling out to- |
contacts inside) |
|
|
wards you. |
|
|
|
|
|
|
|
|
|
|
Amount of Laundry, detergent and fabric softener
·
|
|
|
|
|
|
|
|
|
|
|
|
|
|
|
|
Synthetic deterg |
|
|
|
|
|
|
|
|
||
|
|
|
|
|
|
|
|
|
WATER LEVEL |
|
|
|
|
|
|
||
|
|
|
Concentrated type |
|||||
|
Amount of laundry |
|
|
|
||||
(Manually set) |
|
|
|
|
|
|
||
|
|
|
|
|
||||
( ) |
|
|
Powder |
|
|
|
||
|
|
|
|
|
|
|
|
|
|
|
|
|
20g for 30L of water |
25g for 30L of water |
20ml for 30L of w |
||
|
|
|
|
30L 20g |
30L 25g |
|
30L 20m |
|
|
|
|
|
|
|
|
|
|
68L |
|
|
45g |
57g |
|
|
45ml |
|
|
|
7 |
|
|
|
|
|
|
57L |
|
38g |
48g |
|
|
38ml |
||
|
|
|
|
|||||
|
|
5 |
|
|
|
|
|
|
46L |
|
31g |
38g |
|
|
31ml |
||
|
|
|
|
|||||
|
|
3 |
|
|
|
|
|
|
35L |
|
23g |
29g |
|
|
23ml |
||
|
|
|
|
|||||
|
|
1 |
|
|
|
|
|
|
24L |
|
16g |
20g |
|
|
16ml |
||
|
|
|
|
|||||
|
|
|
|
|
|
|
|
|
24
 Loading...