


OPERATING MANUAL
MANUAL DE FUNCIONAMIENTO
MANUALE DI ISTRUZIONI
NOTICE D’UTILISATION
ROOM AIR CONDITIONER
WALL MOUNTED TYPE
HSU-09RD03/R2(SDB)
HSU-12RD03/R2(SDB)
Please read this operation manual before using the conditioner.
Keep this operation manual for future reference.
NO.0010520880
Haier Industrial Park, No.1 Haier Road, Qingdao, P.R.China
IT CONFORMITÀ ALLE DIRETTIVE EUROPEE PER I MODELLI:
CE
Tutti i prodotti sono conformi alle seguenti normative europee:
-Direttiva 73/23/EEC Basso Voltaggio
-Direttiva 2006/95/EC Basso Voltaggio
-Direttiva 89/336/EEC Compatibilità elettromagnetica
-Direttiva 2004/108/EC Compatibilità elettromagnetica
ROHS
Il prodotto è conforme alla normativa 2002/95/EEC sulla restrizione d’uso di sostanze inquinanti negli apparecchi elettrici ed elettronici.
WEEE
Informativa al consumatore come previsto dalla normativa europea 2002/96/CE riguardante i rifiuti di apparecchiature elettriche ed elettroniche.
SPECIFICHE DI SMALTIMENTO:
Il climatizzatore è contrassegnato con questo simbolo, ciò significa che i prodotti elettrici ed elettronici non possono essere smaltiti insieme ai rifiuti domestici non differenziati. Non cercare di demolire il sistema da soli: la demolizioni dei sistemi di condizionamento, nonché il recupero del refrigerante, dell’olio e di qualsiasi altra
 parte devono essere eseguiti da un installatore qualificato in conformità alla legislazione locale e nazionale vigente in materia.I climatizzatori devo essere trattati presso una struttura spe-
cializzata nel riutilizzo, riciclaggio e recupero dei materiali. Il corretto smaltimento del prodotto eviterà le possibili conseguenze negative all’ambiente e alla salute dell’uomo. Per maggiori informazioni contattare l’installatore o le autorità locali. Le batterie devono essere tolte dal telecomando e smaltite separatamente conformemente alla legislazione locale e nazionale vigente in materia.
EN EUROPEAN REGULATIONS CONFORMITY FOR THE MODELS:
CE
All the products are in conformity with the following European provision:
-Low Voltage Directive 73/23/EEC
-Low Voltage Directive 2006/95/EC
-Electromagnetic CompatibilitY 89/336/EEC
-Electromagnetic CompatibilitY 2004/108/EC
ROHS
The products are fulfilled with the requirements in the directive 2002/95/EEC of the European parliament and of the council on the Restriction of the use of Certain Hazardous Substances in Electrical and Electronic Equipment (EU RoHS Directive).
WEEE
In accordance with the directive 2002/96/CE of the European parliament, herewith we inform the consumer about the disposal requirements of the electrical and electronic products.
DISPOSAL REQUIREMENTS:
Your air conditioning product is marked with this symbol. This means that electrical and electronic products
shall not be mixed with unsorted household waste. Do not try to dismantle the system yourself: the dis-
mantling of the air conditioning system, treatment of the refrigerant, of oil and of other part must be done by a qualified installer in accordance with relevant local and national legislation. Air conditioners must be
treated at a specialized treatment facility for re-use, recycling and recovery. By ensuring this product is disposed of correctly, you will help to prevent potential negative consequences for the environment and human health. Please contact the installer or local authority for more information. Battery must be removed from the remote controller and disposed of separately in accordance with relevant local and national legislation.
FR CONFORMITÉ AUX DIRECTIVES EUROPÉENNES POUR LES MODÈLES:
CE
Tous les produits sont conformes aux directives européennes suivantes:
-Directive 73/23/CEE Basse tension
-Directive 2006/95/CE Basse tension
-Directive 89/336/CEE Compatibilité électromagnétique
-Directive 2004/108/CE Compatibilité électromagnétique
ROHS
L'appareil est conforme à la directive 2002/95/CEE relative à la limitation de l'utilisation de certains substances dangereuses dans les équipements électriques et électroniques.
DEEE (WEEE)
Information au consommateur comme le prévoit la directive européenne 2002/96/CE relative aux déchets d'équipements électriques et électroniques.
SPECIFICATIONS POUR L'ELIMINATION:
Ce pictogramme, apposé sur le climatiseur, signifie que les équipements électriques et électroniques ne peuvent pas être éliminés avec les déchets ménagers non triés. Ne pas essayer de démanteler l'équipement soi-même: le démantèlement des systèmes de climatisation, ainsi que la récupération du frigorigène, de
 l'huile et de toute autre partie doivent être effectués par un installateur qualifié conformément à la législation locale et nationale en vigueur en la matière. Les climatiseurs doivent être
traités dans un centre spécialisé dans la réutilisation, le recyclage et la valorisation des matériaux. L'élimination correcte de ces appareils permet d'éviter les effets nocifs sur l'environnement et la santé humaine. Pour plus de renseignements contacter l'installateur ou les autorités locales. Les piles doivent être retirées de la télécommande et éliminées séparément, conformément à la législation locale et nationale en vigueur en la matière.

Haier Industrial Park, No.1 Haier Road, Qingdao, P.R.China
ES CONFORMIDAD EUROPEA DE LAS REGULACIONES PARA LOS MODELOS:
CE
Todos los productos están en conformidad con las siguientes Normativas Europeas:
-Bajo Voltaje directiva 73/23/EEC
-Bajo Voltaje directiva 2006/95/EC
-Compatibilidad electromagnética 89/336/EEC
-Compatibilidad electromagnética 2004/108/EC
ROHS
Los productos cumplen los requisitos de la directiva 2002/95/EEC del parlamento Europeo y el consejo regulador Del uso de materiales peligrosos en equipamientos eléctricos Y electrónicos. (EU RoHS Directiva).
WEEE
De acuerdo con la directiva 2002/96/CE del parlamento Europeo, Informamos al consumidor acerca del reciclage de los productos Electrónicos y eléctricos.
REQUISITOS PARA LA ELIMINACIÓN:
Su acondicionador de aire está marcado con este símbolo. Esto significa que los productos eléctricos y electrónicos no deben mezclarse con el resto de resi-
duos domésticos no clasificados.
No intente desmontar el sistema usted mismo: El desmantelamiento del acondicionador de aire, así como el tratamiento del refrigerante, aceite y otros componentes, debe ser efectuado por un instalador compe-
tente de acuerdo con las normas locales y nacionales aplicables. Los acondicionadores de aire deben ser tratados en instalaciones especializadas para su reutilización, reciclaje y recuperación. Al asegurarse de desechar este producto de la forma correcta, està contribuyendo a evitar posibles consecuencias negativas para el entorno y para la salud de las personas. Contacte, por favor, con el instalador o con las autoridades locales para obtener más información. Las pilas del control remoto deben extraerse y eliminarse por separado y de acuerdo con la normativa local y nacional aplicable.

Haier Industrial Park, No.1 Haier Road, Qingdao, P.R.China
Contains fluorinated greenhouse gases |
|
covered by the Kyoto Protocol |
A |
R410A |
1= |
kg |
|
|
|
|
B |
2 |
|
2= |
kg |
|
1 |
|
C |
|
|
|
|
|
|
1+2= |
kg |
|
|
|
D |
F |
E |
|
|
IT INFORMAZIONI IMPORTANTI SUL REFRIGERANTE UTILIZZATO
Questo prodotto contiene gas fluorurati ad effetto serra inclusi nel Protocollo di Kyoto. Non liberare tali gas nell’atmosfera.
Tipo di refrigerante: R410A Valore GWP*: 1975
*GWP = potenziale di riscaldamento globale
Compilare con inchiostro indelebile,
•1 la carica di refrigerante di fabbrica del prodotto
•2 la quantità di refrigerante aggiuntiva nel campo e
•1+2 la carica di refrigerante totale
sull’etichetta di carica del refrigerante fornita con il prodotto
L’etichetta compilata deve essere collocata in prossimità della portata di carica del prodotto (ad esempio, nell’interno del coperchio della valvola d’intercettazione).
Acontiene gas fluorurati ad effetto serra inclusi nel protocollo di Kyoto
Bcarica di refrigerante di fabbrica del prodotto: vedi targhetta con il nome dell’unità
C quantità di refrigerante aggiuntiva nel campo
D carica di refrigerante totale
Eunità esterna
Fcilindro del refrigerante e collettore di carica
EN |
IMPORTANT INFORMATION REGARDING THE REFRIGERANT USED |
||
This product contains fluorinated greenhouse gases covered by the Kyoto |
The filled out label must be adhered in the proximity of the product charging |
||
Protocol. Do not vent into the atmosphere. |
port (e.g. onto the inside of the stop valve cover). |
||
Refrigerant type: R410A |
A |
contains fluorinated greenhouse gases covered by the Kyoto Protocol |
|
GWP* value: 1975 |
B |
factory refrigerant charge of the product: see unit name plate |
|
*GWP = global warming potential |
C |
additional refrigerant amount charged in the field |
|
|
|
D |
total refrigerant charge |
Please fill in with indelible ink, |
E |
outdoor unit |
|
• 1 |
the factory refrigerant charge of the product |
F |
refrigerant cylinder and manifold for charging |
•2 the additional refrigerant amount charged in the field and
•1+2 the total refrigerant charge
on the refrigerant charge label supplied with the product.
FR INFORMATION IMPORTANTE RELATIVE AU RÉFRIGÉRANT UTILISÉ
Ce produit contient des gaz à effet de serre fluorés encadrés par le protocole de Kyoto. Ne pas laisser les gaz s’échapper dans l’atmosphère.
Type de réfrigérant: R410A Valeur GWP*: 1975
*GWP = potentiel de réchauffement global
Prière de compléter à l’encre indélébile,
•1 la charge de réfrigérant d’usine du produit
•2 la quantité de réfrigérant supplémentaire chargée sur place et
•1+2 la charge de réfrigérant totale
sur l’étiquette de charge de réfrigérant fournie avec le produit.
L’étiquette complétée doit être apposée à proximité de l’orifice de recharge du produit (par ex. à l’intérieur du couvercle de la vanne d’arrêt).
Acontient des gaz à effet de serre fluorés encadrés par le protocole de Kyoto
Bcharge de réfrigérant d’usine du produit: voir plaquette signalétique de l’unité
C quantité de réfrigérant supplémentaire chargée sur place D charge de réfrigérant totale
Eunité extérieure
Fcylindre de réfrigérant et collecteur de recharge

Haier Industrial Park, No.1 Haier Road, Qingdao, P.R.China
Contains fluorinated greenhouse gases |
|
covered by the Kyoto Protocol |
A |
R410A |
1= |
kg |
|
|
|
|
B |
2 |
|
2= |
kg |
|
1 |
|
C |
|
|
|
|
|
|
1+2= |
kg |
|
|
|
D |
F |
E |
|
|
ES INFORMACIÓN IMPORTANTE EN RELACIÓN AL REFRIGERANTE UTILIZADO
Este producto contiene los gases fluorados de efecto invernadora regulados por el Protocolo de Kioto. No vierta gases a la atmósfera.
Tipo de refrigerante: R410A Valor GWP*: 1975
*GWP = Potencial de calentamiento global
Rellene con tinta indeleble,
•1 la carga de refrigerante de fábrica del producto
•2 la cantidad adicional de refrigerante cargado en campo y
•1+2 la carga total de refrigerante
En la etiqueta de carga de refrigerante suministrada con el producto.
La etiqueta rellenada debe pegarse cerca de la conexión de carga del producto (p.ej. en el interior de la cubierta de la válvula de tope).
AContiene los gases fluorados de efecto invernadora regulados por el
Protocolo de Kioto
BCarga de refrigerante de fábrica del producto: véase placa de especifi-
caciones técnicas de la unidad
C Cantidad adicional de refrigerante cargado en campo D Carga total de refrigerante
EUnidad exterior
FCilindro del refrigerante y dosificador de carga

Cautions
Disposal of the old air conditioner
Before disposing an old air conditioner that goes out of use, please make sure it's inoperative and safe. Unplug the air conditioner in order to avoid the risk of child entrapment.
It must be noticed that air conditioner system contains refrigerants, which require specialized waste disposal. The valuable materials contained in an air conditioner can be recycled
.Contact your local waste disposal center for proper disposal of an old air conditioner and contact your local authority or your dealer if you have any question. Please ensure that the pipework of your air conditioner does not get damagedprior to being picked up by the relevant waste disposal center, and contribute to environmental awareness by insisting on an appropriate, anti-pollution method of disposal.
Disposal of the packaging of your new air conditioner
All the packaging materials employed in the package of your new air conditioner may be disposed without any danger to the environment.
The cardboard box may be broken or cut into smaller pieces and given to a waste paper disposal service. The wrapping bag made of polyethylene and the polyethylene foam pads contain no fluorochloric hydrocarbon.
All these valuable materials may be taken to a waste collecting center and used again after adequate recycling.
Consult your local authorities for the name and address of the waste materials collecting centers and waste paper disposal services nearest to your house.
Safety Instructions and Warnings
Before starting the air conditioner, read the information given in the User's Guide carefully. The User's Guide contains very important observations relating to the assembly, operation and maintenance of the air conditioner.
The manufacturer does not accept responsibility for any damages that may arise due to non-observation of the following instruction.
 Damaged air conditioners are not to be put into operation. In case of doubt, consult your supplier.
 Use of the air conditioner is to be carried out in strict compliance with the relative instructions set forth in the User's Guide.
 Installation shall be done by professional people, don't install unit by yourself.
 For the purpose of the safety,the air conditioner must be properly grounded in accordance with specifications.
 Always remember to unplug the air conditioner before openning inlet grill. Never unplug your air conditioner by pulling on the power cord. Always grip plug firmly and pull straight out from the outlet.
 All electrical repairs must be carried out by qualified electricians. Inadequate repairs may result in a major source of danger for the user of the air conditioner.
 Do not damage any parts of the air conditioner that carry refrigerant by piercing or performating the air conditioner's tubes with sharp or pointed items, crushing or twisting any tubes, or scraping the coatings off the surfaces. If the refrigerant spurts out and gets into eyes, it may result in serious eye injuries.
1

&DXWLRQV
'R QRW REVWUXFW RU FRYHU WKH YHQWLODWLRQ 7KH DSSOLDQFH LV QRW LQWHQGHG IRU XVH JULOOH RI WKH DLU FRQGLWRQHU 'R QRW SXW ILQJHUV E\ \RXQJ FKLOGUHQ RU LQILUP SHUVRQV RU DQ\ RWKHU WKLQJV LQWR WKH LQOHW RXWOHW DQG ZLWKRXW VXSHUYLVLRQ
VZLQJ ORXYHU
'R QRW DOORZ FKLOGUHQ WR SOD\ ZLWK WKH DLUFRQGLWLRQHU ,Q QR FDVH VKRXOG FKLOGUHQ EH DOORZHG WR VLW RQ WKH RXWGRRU XQLW
6SHFLILFDWLRQV
 7KH UHIULJHUDWLQJ FLUFXLW LV OHDN SURRI
7KH PDFKLQH LV DGDSWLYH LQ IROORZLQJ VLWXDWLRQ
$SSOLFDEOH DPELHQW WHPSHUDWXUH UDQJH
|
,QGRRU |
0D[LPXP ' % : % |
R& R& |
&RROLQJ |
0LQLPXP ' % : % |
18R& 4R& |
|
2XWGRRU |
0D[LPXP ' % : % |
R& R& |
|
|
0LQLPXP ' % |
-10R& |
|
|
|
|
|
|
,QGRRU |
0D[LPXP ' % |
R& |
+HDWLQJ |
0LQLPXP ' % |
- R& |
|
2XWGRRU |
0D[LPXP ' % : % |
R& R& |
|
|
|
0LQLPXP ' % |
R& |
,I WKH SRZHU VXSSO\ FRUG LV GDPDJHG LW
PXVW EH UHSODFHG E\ WKH PDQXIDFWXUHU
RU LWV VHUYLFH DJHQW RU D VLPLODU TXDOLILHG
SHUVRQ
,I WKH IXVH RI LQGRRU XQLW RQ 3& ERDUG LV
EURNHQ SOHDVH FKDQJH LW ZLWK WKH W\SH RI
7 $ 9 ,I WKH IXVH RI RXWGRRUXQLW LV EURNHQ FKDQJH LW ZLWK WKH W\SH RI
7 $ 9
7KH ZLULQJ PHWKRG VKRXOG EH LQ OLQH ZLWK
WKH ORFDO ZLULQJ VWDQGDUG
$IWHU LQVWDOODWLRQ WKH SRZHU SOXJ VKRXOG
EH HDVLO\ UHDFKHG
7KH ZDVWH EDWWHU\ VKRXOG EH GLVSRVHG
SURSHUO\
2

Cautions
Safety Instruction
 Please read the following Safety Instructions carefully prior to use.
 The instructions are classified into two levels, WARNING and CAUTION according to the seriousness of possible risks and damages as follows. Compliance to the instructions are strictly required for safety use.
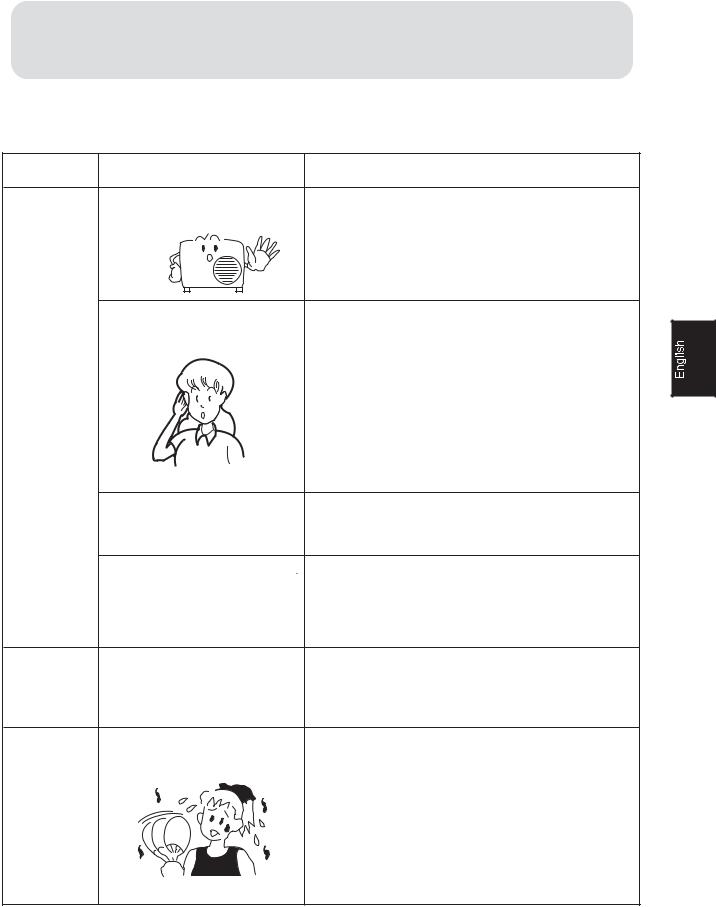
Installation
 WARNING
Please call Sales/Service Shop for the Installation.
Do not attempt to install the air conditioner by yourself because improper works may cause electric shock, fire, water leakage.
lnstallation in a inadequate place may cause accidents. Do not install in the following place.
 CAUTION
Connect the earth |
Do not install in the |
Do not get the unit |
Check proper |
cable. |
place where there is |
exposed to vapor |
installation of the |
|
any possibility of |
or oil steam. |
drainage securely |
|
inflammable gas |
|
|
|
leakage around the |
|
|
|
unit. |
|
|
earthing |
|
|
|
|
|
|
STRICT |
|
PROHIBITION |
PROHIBITION |
ENFORCEMENT |
3

Cautions
|
WARNING |
|
|
When abnormality such as burnt-small found, |
Use an exclusive power source with a |
||
immediately stop the operation button and |
circuit breaker |
|
|
contact sales shop. |
|
|
|
OFF |
STRICT |
|
|
|
ENFORCEMENT |
|
|
Connect power supply cord |
Use the proper voltage |
Do not use power supply cord |
|
to the outlet completely |
|
|
extended or connected in halfway |
|
|
|
|
STRICT |
|
STRICT |
PROHIBITION |
ENFORCEMENT |
|
ENFORCEMENT |
|
|
|
||
Do not use power supply cord |
Take care not to damage |
Do not insert objects into the air |
|
in a bundle. |
the power supply cord. |
inlet or outlet. |
|
PROHIBITION |
PROHIBITION |
PROHIBITION |
Do not start or stop the |
Do not channel the air flow directly |
Do not try to repair or reconstruct |
operation by disconnecting |
at people, especially at infants or |
by yourself. |
the power supply cord and so on. |
the aged. |
|
PROHIBITION |
PROHIBITION |
|
Do not use for the purpose of storage of food, art work, precise equipment, breeding, or cultivation.
 CAUTION
Take fresh air occasionally especially |
Do not operate the switch with |
when gas appliance is running at the |
wet hand. |
same time. |
|

 PROHIBITION
Do not install the unit near a fireplace or other heating apparatus.
PROHIBITION
Do not place animals or plants in the direct path of the air flow
STRICT
ENFORCEMENT
Check good condition of the installation stand
PROHIBITION
Do not place any objects on or climb on the unit.
PROHIBITION
Do not pour water onto the unit for cleaning
PROHIBITION
Do not place flower vase or water containers on the top of the unit.
PROHIBITION |
PROHIBITION |
PROHIBITION |
4

Parts and Functions
Indoor unit
Air filter(inside)
Inlet grille
Anion generator (inside)
Horizontal louver(inside) (adjust up and down air flow. Don't adjust it manually)
Inlet
display board(inside)
Outlet
Vertical flap
(adjust left and right air flow)
Power plug
Outdoor unit
 3
3
1 |
OUTLET |
3 |
CONNECTING PIPING AND ELECTRICAL WIRING |
2 |
INLET |
4 |
DRAIN HOSE |
5
Parts and Functions
16 |
17 |
|
|
||
15 |
18 |
|
14 |
A B |
|
19 |
||
13 |
||
20 |
||
12 |
||
|
||
11 |
21 |
|
10 |
22 |
|
9 |
23 |
|
|
||
8 |
24 |
|
7 |
25 |
|
6 |
26 |
|
5 |
27 |
|
28 |
||
4 |
||
29 |
||
|
||
3 |
30 |
|
|
31 |
|
2 |
32 |
|
|
||
1 |
|
|
1.RESET |
|
When the remote controller appears abnormal, use a sharp pointed article to press this button to reset the remote controller normal.
2.LIGHT button
Control the lightening and extinguishing of the indoor LED display board.
3. TIMER button
Used to select TIMER ON, TIMER OFF, TIMER ON-OFF.
4. CLOCK button
Used to set correct time.
5. SLEEP button
Used to select sleep mode.
6. MODE button
AUTO COOL DRY FAN HEAT
7.TIMP button
Used for adjusting humidity or clock time and timed time.
8.HEALTH button
Used to set healthy operation.
The unit will generate negative ions if this function switched on.
20 |
15 |
16 |
10 14 21 |
9. ON/OFF button
Used for unit start and stop.
10. TIMER ON display
11. FAN SPEED display
|
|
|
|
|
|
|
|
|
LOW MED |
|
HI |
|
AUTO |
||||
|
|
|
|
|
|
|
|
|
12.LOCK display
13.SWING UP/DOWN display
14.SLEEP display
15.HEALTH display
16.Operation mode display
Operation mode AUTO COOL DRY FAN HEAT
Remote controller
Display board
17.Singal sending display
18.POWER/SOFT display
19.Left/right air flow display
20.TEMP display
Remote controller: to display the TEMP setting.
21.TIMER OFF display
22.CLOCK display
23.TEMP button
Used to select your desired temperature.
24. FAN button
Used to select fan speed: LOW,MED, HI, AUTO.
25. HEALTH AIRFLOW button
Used to set the health airflow mode.
26. SWING UP/DOWN button
Used to select up or down air sending direction.
27. SWING LEFT/RIGHT button
Used to select left/right air flow.
28. FRESH button(optional)
Use to set fresh air function.
29. SET button
Used to confirm timer and clock settings.
30. POWER/SOFT button
Used to set power/soft function.
31. LOCK
Used to lock buttons and LED display. If pressed, the other buttons will be disabled and the lock condition display appears. Press it once again, lock will be canceled and lock condition display disappears.
32. 10
Low-Temperature Heating Operation Down to 10
About temperature/humidity display key:
1.under the constant temperature dehumidification mode, for the first time to enter, then the remote controller displays the set temperature, the display panel displays the actual temperature, press this key, the temperature /humidity won’t alternate. After adjusting the set temperature, press this key again, the remote controller will display the set temperature or the set humidity, and the display will display the actual temperature or the actual humidity at the same time.
2.Under the other modes, press this key, the display panel will display the actual humidity at present for a certain time, then the actual humidity will automatically switch back to display temperature. The display of the remote controller won’t change.
NOTE:(1) The following functions and related displays are not available: 28
(2) The unit is without Self-clean function.
6

Parts and Functions
 Clock Set
When unit is started for the first time and after replacing batteries in remote controller, clock should be adjusted as follows:
1. Press CLOCK button,"AM" or "PM" flashes.
2. Press or to set correct time. Each press will increase or decrease 1 min. If the button is kept depressed, time will change quickly.
3. After time setting is confirmed, press SET, "AM" or "PM" stop flashing, while clock starts working.

 Remote controller's operation

 When in use, put the signal transmission head directly to the receiver hole on the indoor unit.
 The distance between the signal transmission head and the receiver hole should be within 7m without any obstacle as well.
 Don't throw or knock the remoter controller.
 When electronic-started type fluorescent lamp or change-over type fluorescent lamp or wireless telephone is installed in the room, the receiver is apt to be disturbed in receiving the signals, so the distance to the indoor unit should be shorter.
Loading of the battery
Load the batteries as illustrated right 2 R-03 (7#) batteries
Remove the battery cover:
Slightly press"  "area and push down the cover as illustrated.
Load the battery:
Be sure that the loading is in line with the "+" / "-". request as illustrated on the bottom of the case.
Put on the cover again.
Confirmation indicator:
After pressing power ON/OFF, if no display, reload the batteries.
Note:
 Full display or unclear display during operation indicates the batteries have been used up. Please change batteries.
 Used two new same-typed batteries when loading.
 If the remote controller can't run normally during operation, please remove the batteries and reload several minutes later.
Hint:
Remove the batteries in case unit won't be in usage for a long period. If there are any display after taking-out, just need to press reset key.
7

Operation
Auto Operation
Display board
1. Unit start
Press ON/OFF on the remote controller, unit starts.
Remote controller
5  4
4
2.Select operation mode
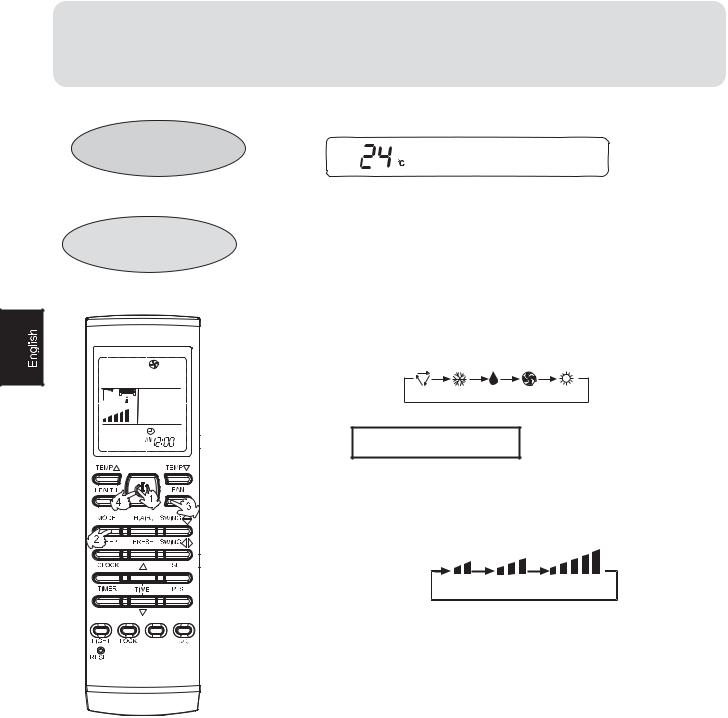
Press MODE button. For each press, operation mode changes as follows:
Remote controller:
AUTO COOL DRY FAN HEAT
Then Select Auto operation
3.Select temp.setting
Press TEMP. button
 Every time the button is pressed, temp.setting increase 1oC,if kept depressed, it will increase rapidly.
 Every time the button is pressed, temp.setting decrease 1oC,if kept depressed, it will decrease rapidly.
Select a desired temperature.
4.Fan speed selection
Press FAN button. For each press, fan speed changes as follows:
Remote controller:
LOW MED HI AUTO
Air conditioner is running under displayed fan speed. When FAN is set to AUTO, the air conditioner automatically adjusts the fan speed according to room temperature.
5.Unit stop
Press ON/OFF button, the unit stops.
About Auto Operation
Under the mode of auto operation, air conditioner will automatically select Cool or Fan operation according to room temperature.
8

Operation
Cool Operation
Display board
1. Unit start
Remote controller
Press ON/OFF on the remote controller, unit starts.
2.Select operation mode
Press MODE button. For each press, operation mode changes as follows:
Remote controller:
AUTO COOL DRY FAN HEAT
Then Select COOL operation
3.Select temp.setting
Press TEMP. button
 Every time the button is pressed, temp.setting increase 1oC,if kept depressed, it will increase rapidly
 Every time the button is pressed, temp.setting decrease 1oC,if kept depressed, it will decrease rapidly
Select a desired temperature.
4.Fan speed selection
Press FAN button. For each press, fan speed changes as follows:
Remote controller:
LOW MED HI AUTO
Air conditioner is running under displayed fan speed. When FAN is set to AUTO, the air conditioner automatically adjusts the fan speed according to room temperature.
5.Unit stop
Press ON/OFF button, the unit stops.
9

Operation
Dry Operation
Display board
Remote controller |
1. Unit start |
|
Press ON/OFF on the remote controller, unit starts. |
2.Select operation mode
|
Press MODE button. For each press, operation mode |
|
|
changes as follows: |
|
|
Remote controller: |
|
|
AUTO COOL DRY FAN HEAT |
|
|
Then Select DRY operation |
|
|
3.Select temp.setting |
|
|
Press TEMP. button |
|
|
Every time the button is pressed, temp.setting |
|
5 |
increase 1oC,if kept depressed, it will increase |
|
rapidly. |
||
|
||
|
Every time the button is pressed, temp.setting |
|
|
decrease 1oC,if kept depressed, it will decrease |
|
|
rapidly. |
|
|
Select a desired temperature. |
4.Fan speed selection
Press FAN button. For each press, fan speed changes as follows:
Remote controller:
LOW MED |
HI |
AUTO |
5.Unit stop
Press ON/OFF button, the unit stops.
About constant temperature dehumidification operation:
when constant temperature dehumidification runs, if the room temperature is 3oC higher than the set temperature, the air conditioner will automatically decrease the temperature and dehumidify; if the
temperature deviation is less than 3oC, the air conditioner will automatically keep the temperature and dehumidify, so these can make the temperatures of the air inside and outside near to each other and avoid the cold airflow blowing people.
10
Operation
Fan Operation
Display board
Remote controller
1. Unit start
Press ON/OFF on the remote controller, unit starts.
2.Select operation mode
Press MODE button. For each press, operation mode changes as follows:
Remote controller:
AUTO COOL DRY FAN HEAT
Then Select FAN operation
3.Fan speed selection
Press FAN button. For each press, fan speed changes as follows:
Remote controller:
LOW MED |
HI |
4.Unit stop
Press ON/OFF button, the unit stops.
About FAN operation
In FAN operation mode, the unit will not operate in COOL mode but only in FAN mode,AUTO is not available in FAN mode.And temp.setting is disabled. In FAN mode,SLEEP and POWER/SOFT operation is not available.
11

Operation
Heat Operation
Display board
Remote controller |
1. Unit start |
|
|
|
|
Press ON/OFF on the remote controller, unit starts. |
|||
|
2.Select operation mode |
|
|
|
|
Press MODE button. For each press, operation mode |
|||
|
changes as follows: |
|
|
|
|
Remote controller: |
|
|
|
|
AUTO |
COOL DRY |
FAN |
HEAT |
|
Then Select HEAT operation |
|
|
|
|
3.Select temp.setting |
|
|
|
|
Press TEMP. button |
|
|
|
|
Every time the button is pressed, temp.setting |
|||
|
increase 1oC,if kept depressed, it will increase |
|||
|
rapidly |
|
|
|
|
Every time the button is pressed, temp.setting |
|||
|
decrease 1oC,if kept depressed, it will decrease |
|||
|
rapidly |
|
|
|
|
Select a desired temperature. |
|
|
|
|
4.Fan speed selection |
|
|
|
|
Press FAN button. For each press, fan speed changes as |
|||
|
follows: |
|
|
|
|
Remote controller: |
|
|
|
|
LOW |
MED |
HI |
AUTO |
|
Air conditioner is running under displayed fan speed |
|||
|
IN HEAT mode, warm air will blow out after a short period |
|||
|
of the time due to cold-draft prevention function. |
|||
When FAN is set to AUTO, the air conditioner automatically adjusts the fan speed according to room temperature.
5.Unit stop
Press ON/OFF button, the unit stops.
12
Operation
Air Flow Direction Adjustment
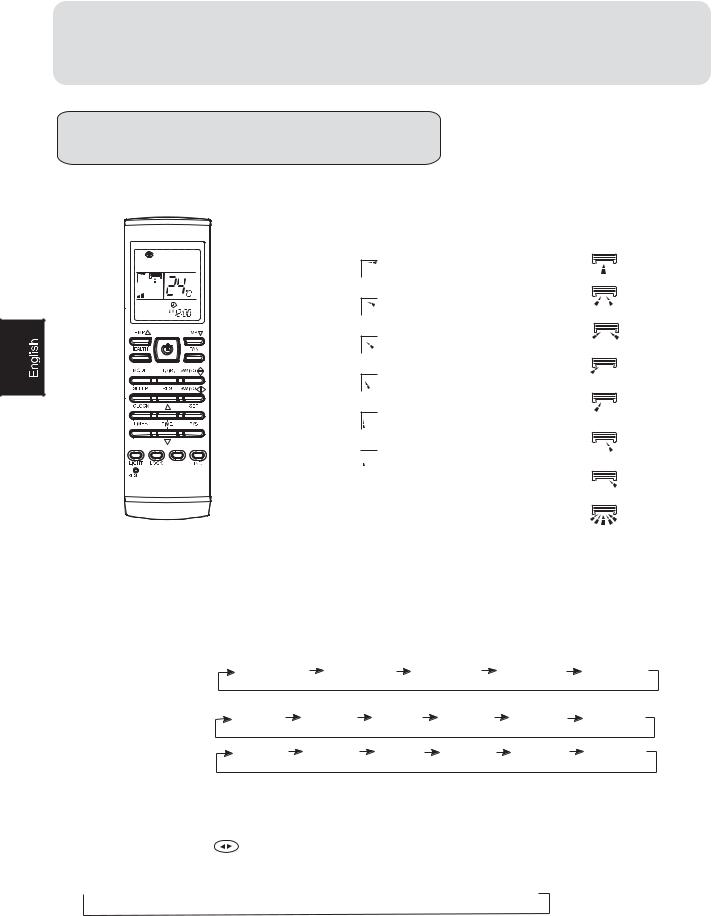
1.Status display of air sending
Horizontal louvers
Pos.1
Pos.2
Pos.3
Pos.4
Pos.5
Pos.6 
 (Auto swing)
Vertical flap
Pos.1
Pos.2
Pos.3
Pos.4
Pos.5
Pos.6
Pos.7
Pos.8
2.Up and down air flow direction
For each press of  button, air flow direction on remote controller displays as follows according to different operation modes:
COOL/DRY/FAN:
remote controller: |
Pos.1 |
Pos.2 |
|
Pos.3 |
Pos.4 |
Pos.6 |
HEAT: |
|
|
|
|
|
|
remote controller: |
Pos.5 |
Pos.4 |
Pos.3 |
Pos.2 |
Pos.1 |
Pos.6 |
AUTO: |
Pos.1 |
Pos.2 |
Pos.3 |
Pos.4 |
Pos.5 |
Pos.6 |
remote controller: |
The horizontal louvers will swing according to the above positions.
3.Left and right air flow direction
For each press of |
button, remote controller displays as follows : |
remote controller:
 Pos.1
Pos.1  Pos.2
Pos.2  Pos.3
Pos.3  Pos.4
Pos.4  Pos.5
Pos.5  Pos.6
Pos.6  Pos.7
Pos.7  Pos.8
Pos.8
The vertical flap will swing according to the above positions
Note:When restart after remote turning off, the remote controller will automatically memorize the previous set swing position.
13

Operation
Sleep Operation
Display board
Before going to bed, you can simply press the SLEEP button and unit will operate in SLEEP mode and bring you a sound sleep.
Use of SLEEP function
After the unit starts, set the operation status, then press SLEEP button before which the clock must be adjusted and time being set. Operation Mode
1. In COOL mode
1 hours after SLEEP mode starts, temp. will become 1OC higher than temp. setting. After another 1 hours, temp. rises by 1OC further.
The unit will run for further 6 hours then stops. Temp. is higher than temp. setting so that room temperature won't be too Iow for your sleep.
SLEEP operation starts |
SLEEP operation stops |
||||
|
|
|
|
Approx.6hrs |
|
|
|
|
|
|
|
|
|
1 hr |
|
Rises 1OC |
|
1 hr |
|
Rises 1OC |
|||
|
|
|
|
|
|
Temp.setting |
|
|
Unit stop |
||
In COOL mode
2.In HEAT mode
1 hours after SLEEP mode starts, temp will become 2OC ower than temp. setting. After another 1 hours, temp decrease by 2OC further. After more another 3 hours
temp. rises by 1OC further. The unit will run for further 3
hours then stops. Temp. is lower than temp.setting so room temperature won't be too high for your sleep.
Remote Controller
Temp.setting |
Unit stop |
|
1 hr |
Decreases 2OC |
|
1 hr |
|
Decreases 2OC |
|
|
3 hrs |
3 hrs |
Rises 1OC |
SLEEP |
SLEEP |
operation starts |
operation stops |
In HEAT mode
3.In AUTO mode
The unit operates in corresponding sleep mode adapted to the automatically selected operation mode.
4.In FAN mode
It has no SLEEP function.
5.Set the wind speed change when sleeping If the wind speed is high or middle before setting for the sleep, set for lowing the wind speed after sleeping.
If it is low wind, no change.
6.Note to the power failure resume:
press the sleep button ten times in five seconds and enter this function after hearing four sounds. And press the sleep button ten times within five seconds and leave this function after hearing two sounds.
NOTE: With the power failure resume, when setting
the TIMER ON, TIMER OFF and TIMER ON/OFF, it’s memorized as shutdown status when resuming after power out.
14
Operation |
Timer On/Off Operation |
Display board
Remote Controller
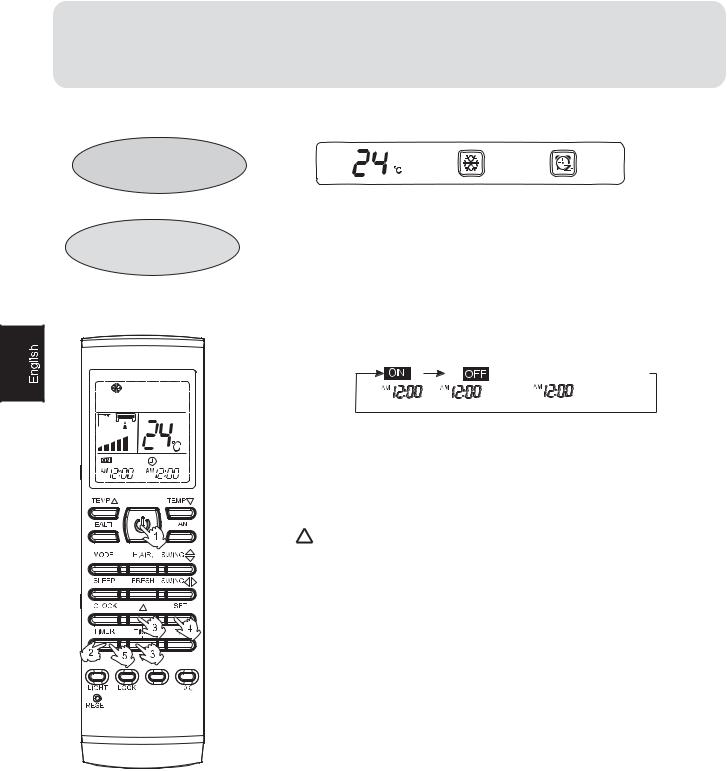
Set clock correctly before starting TIMER operation.
1.After unit starts, select your desired operation mode Operation mode will be displayed on LCD.
2.Timer mode selection
Press TIMER button to change TIMER mode. Every time the button is pressed, display changes as follows: Remote controller:


 BLANK
BLANK
TIMER ON TIMER OFF |
TIMER ON-OFF |
Then select your desired TIMER mode (TIMER ON or TIMER OFF). "  "or "
"or "  "will flash.
3.Time setting
Press HOUR 
 button.
Every time the button is pressed, time setting increases 1 min, if kept depressed, it will increase rapidly.
 Every time the button is pressed, time setting decreases 1 min, if kept depressed, it will decrease rapidly.
It can be adjusted within 24 hours.
4.Confirming your setting
After setting correct time, press SET button to confirm "  "or"
"or"  "on the remote controller stops flashing. Time displayed: Unit starts or stops at x hour x min.
(TIMER ON or TIMER OFF).
5.Cancel TIMER mode
Just press TIMER button several times until TIMER mode disappears.
Hints:
After replacing batteries or a power failure happens, time setting should be reset. Remote controller possesses memory function, when use TIMER mode next time, just press SET button after mode selecting if time setting is the same as previous one.
15
2SHUDWLRQ 7LPHU 2Q 2II 2SHUDWLRQ
'LVSOD\ ERDUG
5HPRWH &RQWUROOHU


6HW FORFN FRUUHFWO\ EHIRUH VWDUWLQJ 7,0(5 RSHUDWLRQ
$IWHU XQLW VWDUWV VHOHFW \RXU GHVLUHG RSHUDWLRQ PRGH
2SHUDWLRQ PRGH ZLOO EH GLVSOD\HG RQ /&'
7LPHU PRGH VHOHFWLRQ
3UHVV 7,0(5 EXWWRQ WR FKDQJH 7,0(5 PRGH (YHU\ WLPH
WKH EXWWRQ LV SUHVVHG GLVSOD\ FKDQJHV DV IROORZV
5HPRWH FRQWUROOHU


 %/$1.
%/$1.
7,0(5 21 7,0(5 2)) |
7,0(5 21 2)) |
7KHQ VHOHFW \RXU GHVLUHG 7,0(5 PRGH 7,0(5 21 2))ZLOO IODVK
7LPH VHWWLQJ
3UHVV +285 EXWWRQ
(YHU\ WLPH WKH EXWWRQ LV SUHVVHG WLPH VHWWLQJ LQFUHDVHV
PLQ LI NHSW GHSUHVVHG LW ZLOO LQFUHDVH UDSLGO\
(YHU\ WLPH WKH EXWWRQ LV SUHVVHG WLPH VHWWLQJ GHFUHDVHV
PLQ LI NHSW GHSUHVVHG LW ZLOO GHFUHDVH UDSLGO\
,W FDQ EH DGMXVWHG ZLWKLQ KRXUV
7LPHU FRQILUPLQJ IRU 7,0(5 21 $IWHU VHWWLQJ FRUUHFW WLPH SUHVV 7,0(5 EXWWRQ WR FRQILUPRQ WKH UHPRWH FRQWUROOHU VWRSV IODVKLQJVWDUWV IODVKLQJ 7LPH GLVSOD\HG 8QLW VWDUWV RU VWRSV DW [ KRXU [ PLQ
7LPH VHWWLQJ IRU 7,0(5 2))
-XVW SUHVV +285 EXWWRQ IROORZ WKH VDPH SURFHGXUH LQ7LPH VHWWLQJ IRU 7,0(5 21
7LPH FRQILUPLQJ IRU 7,0(5 2))
$IWHU WLPH VHWWLQJ SUHVV 6(7 EXWWRQ WR FRQILUPRQ WKH UHPRWH FRQWUROOHU VWRSV EOLQNLQJ 7LPH GLVSOD\HG 8QLW VWRSV DW [ KRXU [ PLQ
7R FDQFHO 7,0(5 PRGH
-XVW SUHVV 7,0(5 EXWWRQ VHYHUDO WLPHV XQWLO 7,0(5
GH GLVDSSHDUV $FFRUGLQJ WR WKH 7LPH VHWWLQJ VHTXHQFH RI 7,0(5 21 RU 7,0(5 2)) HLWKHU 6WDUW 6WRS RU 6WRS 6WDUW FDQ EH DFKLHYHG
16

2SHUDWLRQ 32:(5 62)7 2SHUDWLRQ
5HPRWH FRQWUROOHU
32:(5 2SHUDWLRQ
:KHQ \RX QHHG UDSLG FRROLQJ \RX FDQ XVH WKLV IXQFLWRQ
6HOHFWLQJ RI 32:(5 RSHUDWLRQ
3UHVV 32:(5 62)7 EXWWRQ (YHU\ WLPH WKH EXWWRQ LV SUHVVHG GLVSOD\ FKDQJHV DV IROORZV


 %/$1. 32:(5 62)7
6WRS WKH GLVSOD\ DW

,Q 32:(5 RSHUDWLRQ VWDWXV
7R FDQFHO 32:(5 RSHUDWLRQ
3UHVV 32:(5 62)7 EXWWRQ WZLFH 32:(5 62)7 GLVDSSHDUV
62)7 2SHUDWLRQ
<RX FDQ XVH WKLV IXQFWLRQ ZKHQ VLOHQFH LV QHHGHG IRU UHVW RU UHDGLQJ
6HOHFWLQJ RI 62)7 RSHUDWLRQ
3UHVV 32:(5 62)7 EXWWRQ (YHU\ WLPH WKH EXWWRQ LV SUHVVHG GLVSOD\ FKDQJHV DV IROORZV


 %/$1. 32:(5 62)7
6WRS WKH GLVSOD\ DW 
,Q 62)7 RSHUDWLRQ PRGH IDQ VSHHG DXWRPDWLFDOO\ WDNHV /2:
7R FDQFHO 62)7 RSHUDWLRQ
3UHVV 32:(5 62)7 EXWWRQ WZLFH 32:(5 62)7 GLVDSSHDUV
+LQWV
'XULQJ 32:(5 RSHUDWLRQ LQ UDSLG &22/ PRGH WKH URRP
ZLOO VKRZ LQKRPRJHQHRXV WHPSHUDWXUH GLVWULEXWLRQ
/RQJ SHULRG 62)7 RSHUDWLRQ ZLOO FDXVH HIIHFW RI QRW WRR FRRO
17
Operation
Emergency and Test Operation
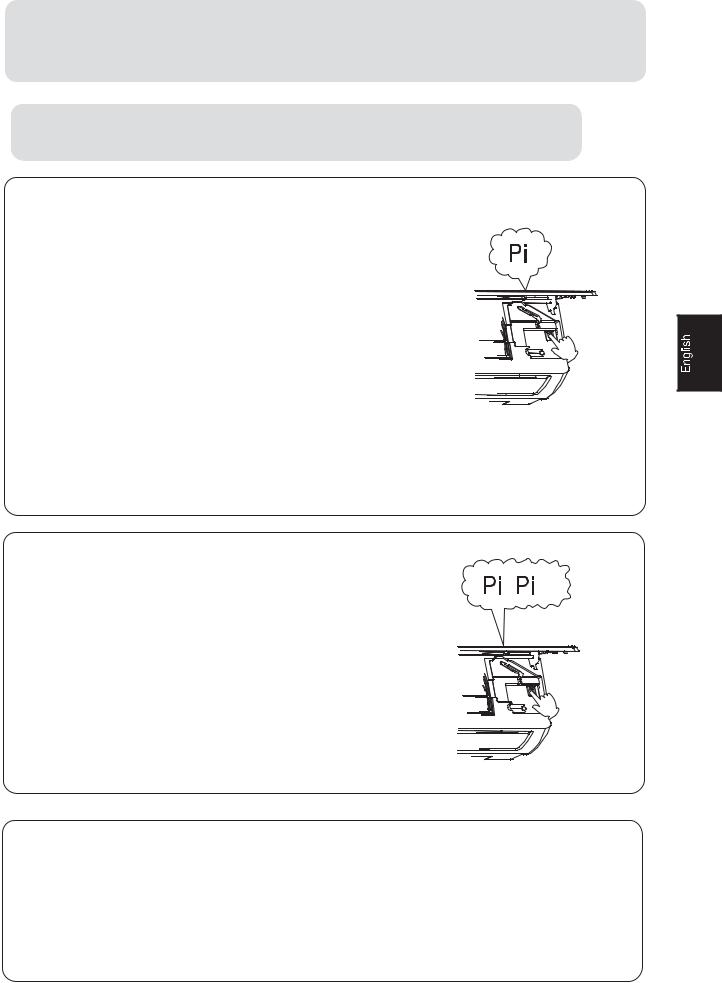
Emergency operation:
 Use this operation only when the remote controller is defective or lost.
 When the emergency operation switch is pressed,the" Pi "sound is heard once, which means the start of this operation.
 In this operation, the system automatically selects the operation modes, cooling or heating, according to the room temperature.
Temperature |
Operation |
Designated |
Timer |
Air flow |
|
mode |
temperature |
mode |
|
ABOVE 21OC |
COOLING |
24OC |
NO |
AUTOMATIC |
|
|
|
|
|
BELOW 21OC |
HEATING |
24OC |
NO |
AUTOMATIC |
|
|
|
|
|
 It is not possible to operate in dry mode.
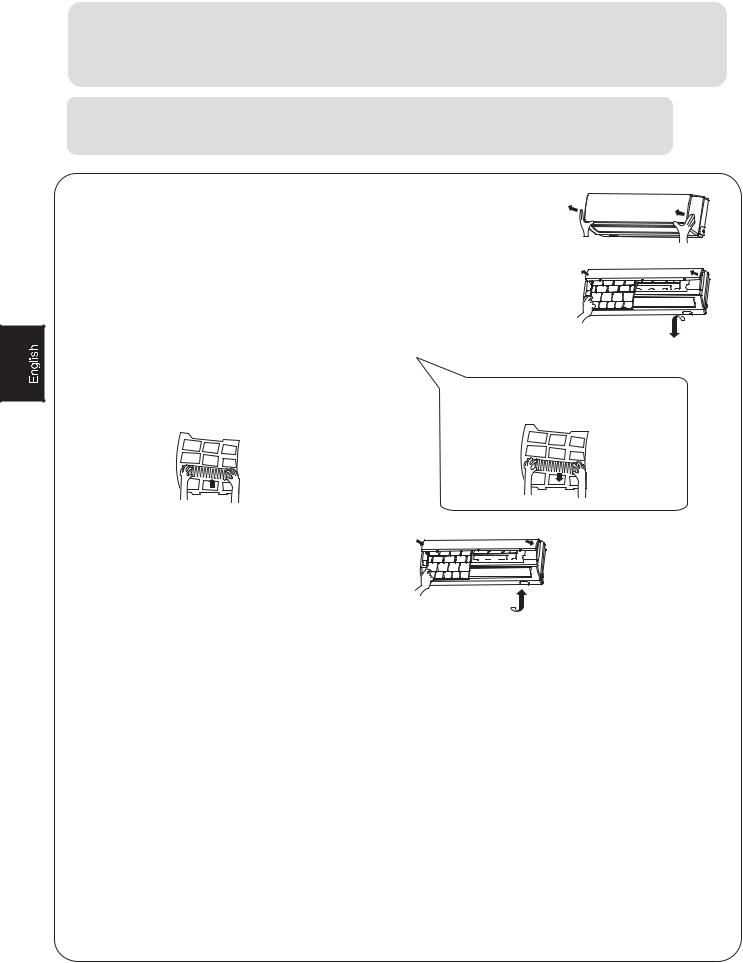
Test operation:
Test operation switch is the same as emergency switch.
 Use this switch in the test operation when the room temperature is below 16OC, do not use it in the normal operation.
 Continue to press the test operation switch for more than 5 seconds. After you hear the "Pi" sound twice, release your finger from the switch: the cooling operation starts with the air flow speed "Hi".
 After 30 minutes, test operation ends automatically.
Removal of the restriction of emergency or test operation
 Press the emergency operation switch once more, or manipulate through the remote controller; the "Pi" sound, the emergency or test operation is
terminated.
 When the remote controller is manipulated, it gets the system back to the normal operation mode.
18

Maintenance
For Smart Use of The Air Conditioner
Setting of proper room |
Do not block the air inlet |
temperature |
or outlet |
Proper temperature
Close doors and windows |
Use the timer effectively |
during operation |
|
During cooling operation prevent the penetration of direct sunlight with curtain or blind
If the unit is not to be used for |
Use the louvers effectively |
a long time, turn off the power |
|
supply main switch. |
|
OFF
19

Maintenance
For Smart Use of The Air Conditioner
 WARNING
Before maintenance,be sure to turn off the system and the circuit breaker.
Remote Controller |
Indoor Body |
Do not use water, wipe the controller with a dry cloth.Do not use glass cleaner or chemical cloth.
Wipe the air conditioner by using a soft and dry cloth.For serious stains,use a neutral detergent diluted with water.Wring the water out of the cloth before wiping.then wipe off the detergent completely.
Do not use the following for cleaning
Gasoline,benzine, thinner or cleanser may damage the coating of the unit.
Hot water over 40OC(104OF) may cause discoloring or deformation.
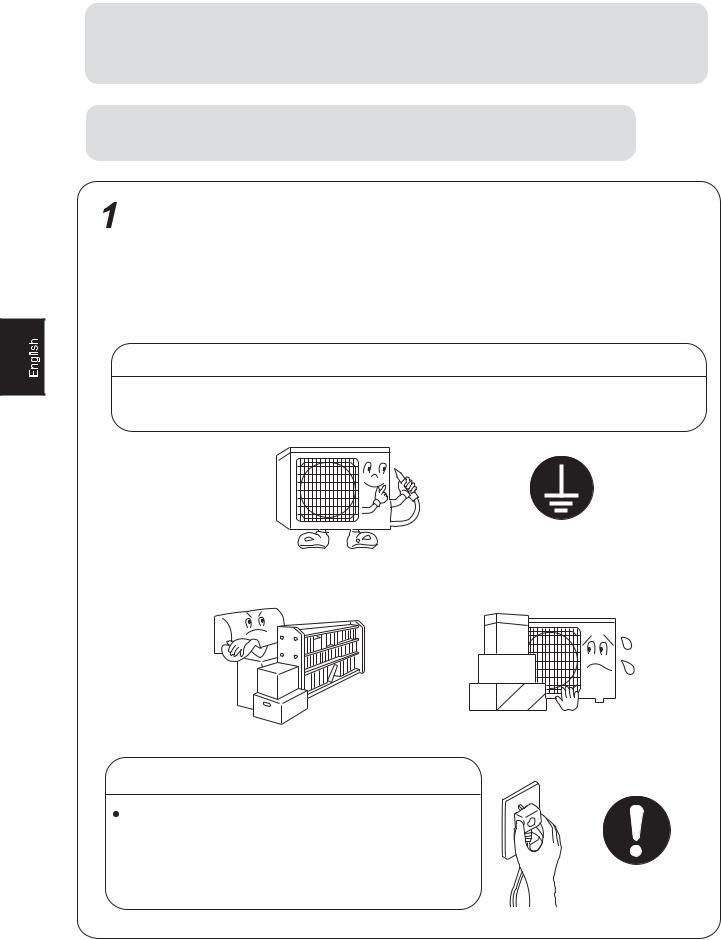
Air Filter cleaning
 Open the inlet grille by pulling it upward.
 Remove the filter.
Push up the filter's center tab slightly until it is released from the stopper, and remove the filter downward.
 Clean the filter.
Use a vacuum cleaner to remove dust, or wash the filter with water.After washing, dry the filter completely in the shade.
 Attach the filter.
Attach the filter correctly so that the "FRONT" indication is facing to the front.Make sure that the filter is completely fixed behind the stopper.If the right and left filters are not attached correctly, that may cause defects.
 Close the inlet grille.
Once every two weeks
20
0DLQWHQDQFH
5HSODFHPHQW RI $LU 3XULI\LQJ )LOWHU
2SHQ WKH OQOHW *ULOOH
3URS XS WKH LQOHW JULOOH E\ XVLQJ D VPDOO GHYLFH QDPHG JULOOH VXSSRUW ZKLFK ORFDWHG LQ WKH ULJKW VLGH RI WKH LQG RRU XQLW
'HWDFK WKH VWDQGDUG DLU ILOWHU
6OLGH WKH NQRE VOLJKWO\ XSZDUG WR UHOHDVH WKH ILOWHU WKHQ ZLWKGUDZ LW
$WWDFK $LU 3XULI\LQJ )LOWHU
3XW DLU SXULI\LQJ ILOWHU DSSOLDQFHV LQWR WKH |
'HWDFK ROG $LU 3XULI\LQJ )LOWHU |
ULJKW DQG OHIW ILOWHU IUDPHV |
$WWDFK WKH VWDQGDUG DLU ILOWHU
1HFHVVDU\ LQVWDOODWLRQ
$77(17,21
7KH ZKLWH VLGH RI WKH SKRWRFDWDO\VW DLU SXULI\LQJ ILOWHU IDFH RXWVLGH DQG WKH EODFN VLGH IDFH WKH XQLW
7KH JUHHQ VLGH RI WKH EDFWHULD NLOOLQJ PHGLXP DLU SXULI\LQJ ILOWHU IDFH RXWVLGH DQG WKH ZKLWH VLGH IDFH WKH XQLW
&ORVH WKH ,QOHW *ULOOH
&ORVH WKH *ULOOH VXUHO\
127(
 7KH SKRWRFDWDO\VW DLU SXULI\LQJ ILOWHU DQG WKH EDFWHULD NLOOLQJ PHGLXP DLU SXULI\LQJ ILOWHU ZLOO EH XVHG EDVHG RQ UHDO VLWXDWLRQ
 7KH SKRWRFDWDO\VW DLU SXULI\LQJ ILOWHU ZLOO EH VRODUL]HG LQ IL[HG WLPH ,Q QRUPDO IDPLO\ LW ZLOO EH VRODUL]HG HYHU\ PRQWKV
 3OHDVH NHHS WKH EDFWHULD NLOOLQJ PHGLXP DLU SXULI\LQJ ILOWHU LQ WKH FRRO DQG GU\ FRQGLWLRQV DYRLG ORQJ WLPH GLUHFWO\ VXQVKLQH ZKHQ \RX VWRS XVLQJ LW RU LWV DELOLW\ RI VWHULOL]DWLRQ ZLOO EH UHGXFHG
21

Maintenance
To Keep Your Air conditioner in Good Condition after Season.
 Operate in cooling mode for 2-3 hours.
To prevent breeding mold or bad smell, be sure to operate at the designated temperature or 30OC,cooling mode and High speed fan mode for 2-3 hours.
 Put off the power supply cord.
 Cleaning the body.
 Take out the batteries from the wireless remote controller.
22
Maintenance
Before Setting in High season
Cleaning the standard air filter.
Operation without filter may cause troubles.Be sure
to attach both right and left filters prior to the operation. Each of them are of different shapes.
 Connecting the earthing cable.
 Caution
 Incomplete earthing may cause an electric shock.
EARTHING
 Do not block the air inlet or outlet.
 Plug-in
 Caution
After brush away dust at the plug, insert the |
|
plug of the power supply cord into the outlet |
|
completely.In case of suing exclusive circuit |
|
breaker,switch on the circuit breaker. |
NO WET HAND |
|
23
Trouble shooting
Before asking for service, check the following first.
Phenomenon
The system does not restart immediately.
Noise is heard:
Normal Performance inspection
Smells are generated.
Mist or steam are blown out.
Multiple |
Does not work at all. |
|
check |
||
|
||
|
Poor cooling |
Cause or check points
 When unit is stopped, it won't restart immediately until 3 minutes have elapsed to protect the system.
 When the electric plug is pulled out and reinserted, the protection circuit will work for 3 minutes to protect the air conditioner.
 During unit operation or at stop, a swishing or gurgling noise may be heard. At first 2-3 minutes after unit start, this noise is more noticeable. (This noise is generated by refrigerant flowing in the system.)
 During unit operation, a cracking noise may be heard. This noise is generated by the casing expanding or shrinking because of temperature changes.
 Should there be a big noise from air flow in unit operation, air filter may be too dirty.
 This is because the system circulates smells from the interior air such as the smell of furniture, cigarettes.
 During COOL or DRY operation, indoor unit may blow out mist. This is due to the sudden cooling of indoor air.
 Is power plug inserted?
 Is there a power failure?
 Is fuse blown out?
 Is the air filter dirty? Normally it should be cleaned every 15 days.
 Are there any obstacles before inlet and outlet?
 Is temperature set correctly?
 Are there some doors or windows left open?
 Is there any direct sunlight through the window during the cooling operation?(Use curtain)
 Are there too much heat sources or too many people in the room during cooling operation?
24

Precauciones
Eliminación de su antiguo aparato de aire
acondicionado
Antes de eliminar un aparato antiguo de aire acondicionado que haya dejado de ser utilizado, asegúrese de que haya quedado inutilizado. Desenchufe el aparato de aire acondicionado para evitar riesgos a los niños.
Los aparatos de aire acondicionado contienen líquidos refrigerantes que requieren un proceso de eliminación especial. Los valiosos materiales que contiene un aparato de aire acondicionado se pueden reciclar. Póngase en contacto con su centro local de reciclado o su distribuidor para la correcta eliminación de su antiguo aparato de aire acondicionado o si tiene alguna duda. Asegúrese de que la entubación de su aparato de aire acondicionado no resulta dañado antes de que sea recogido por el centro de eliminación de residuos. Contribuya con la conciencia ecológica insistiendo en que se realice una eliminación adecuada y no contaminante.
Eliminación del embalaje de su nuevo aire acondicionado
Todos los materiales de embalaje utilizados con su nuevo aparato de aire acondicionado pueden eliminarse sin peligro para el medio ambiente.
La caja de cartón debe dividirse o cortarse en piezas más pequeñas y entregarse a un servicio de eliminación de residuos de papel. La bolsa de embalaje está hecha de polietileno y los paneles de espuma de polietileno no contienen cloro-fluoro carbonos.
Todos estos valiosos materiales deben ser llevados a un centro de reciclado para que puedan volver a ser utilizados.
Consulte a su autoridad local para conocer el nombre y la dirección de los centros de recogida de materiales residuales más cercanos a su hogar.
Instrucciones y advertencias de seguridad
Antes de poner en marcha el aparato de aire acondicionado, lea detenidamente la información del manual de usuario. El manual de usuario contiene observaciones muy importantes relacionadas con el montaje, uso y mantenimiento del aparato de aire acondicionado.
El fabricante no aceptará ninguna responsabilidad por daños derivados de no respetar las siguientes instrucciones.
Los aparatos de aire acondicionado dañados no deben ponerse en funcionamiento. En caso de duda, consulte con su proveedor.
Utilice el aparato de aire acondicionado en estricto cumplimiento con las instrucciones definidas en el manual del usuario.
La instalación debe ser realizada por un profesional. No instale el aparato usted mismo.
Por su seguridad, el aire acondicionado debe conectarse correctamente a masa de acuerdo con las especificaciones.
Recuerde siempre desenchufar el aparato de aire acondicionado antes de abrir la rejilla de entrada. Nunca desenchufe su aparato de aire acondicionado tirando del cable de alimentación. Agarre el enchufe firmemente y tire para extraerlo.
Todas las reparaciones eléctricas deben ser realizadas por electricistas cualificados. Las reparaciones inadecuadas podrían representar una fuente importante de riesgo para el usuario del aire acondicionado.
No dañe ningún componente del aire
acondicionado |
que contenga refrigerante |
|
perforando |
los |
tubos del mismo con objetos |
afilados |
o |
puntiagudos, aplastando o |
torciendo los tubos o arañando las cubiertas de las superficies. Si se produce una fuga de refrigerante y penetra en los ojos podrían provocarse lesiones oculares serias.
25
 Loading...