


www.empireflight.com
HOKUM 52-KA VERSUS COMANCHE 66-RAH - ENGAGED ENEMY
USG-COHOKCDRUK
USER GUIDE

DISCLAIMER
By installing, copying, or otherwise using this Software product, you agree to be bound by the limitations set out below.
LIMITED WARRANTY
Empire Interactive warrants that the software will perform substantially in accordance with the accompanying written materials for a period of ninety (90) days from the date of receipt. Any implied warranties on the software are limited to ninety (90) days, unless the effect of this clause has been specifically excluded by applicable law.
CUSTOMER REMEDIES
Empire Interactive’s entire liability and your exclusive remedy shall be, at Empire Interactive’s option, either (a) return of the price paid, or (b) replacement of the software or hardware that does not meet this Limited Warranty and which is returned to the place of purchase with a copy of your receipt. This Limited Warranty is void if failure of the software has resulted from accident, abuse, or misapplication. Any replacement software will be warranted for the remainder of the original warranty or thirty (30) days, whichever is longer.
NO OTHER WARRANTIES
To the maximum extent permitted by applicable law, Empire Interactive and its suppliers disclaim all other representations, warranties, conditions or other terms, either express or implied, including, but not limited to implied warranties and/or conditions of merchantability and fitness for a particular purpose, with regard to the software and the accompanying written materials.
NO LIABILITY FOR CONSEQUENTIAL DAMAGES
To the maximum extent permitted by applicable law, in no event shall Empire Interactive or its suppliers be liable for any damages whatsoever (including without limitation, direct or indirect damages for personal injury, loss of business profits, business interruption, loss of business information, or any other pecuniary loss) arising out of the use of or inability to use this product, even if Empire Interactive has been advised of the possibility of such damages. In any case, Empire Interactive’s and its suppliers’ entire liability under any provision of this agreement shall be limited to the amount actually paid by you for the software, unless the effect of this clause has been specifically excluded by applicable law.
This Software Licence Agreement is governed by the law of the laws of England.
ENEMY ENGAGED - RAH-66 COMANCHE VERSUS KA-52 HOKUM AND EMPIRE ARE TRADEMARKS OF ENTERTAINMENT INTERNATIONAL (UK) LTD. SOFTWARE ©2000 RAZORWORKS LTD. ALL RIGHTS RESERVED. PUBLISHED BY EMPIRE INTERACTIVE. DOLBY AND THE DOUBLE D SYMBOL ARE TRADEMARKS OF DOLBY LABORATORIES LICENSING CORPORATION.

www.razorworks.com

i
TECHNICAL SUPPORT
If you experience any technical problems with this or any other Empire product, please contact our technical support staff.
When you call, it helps if you have the following information to hand: computer type, available hard disk space, total RAM, type of video card and a list of the options you choose when you installed the game. If possible be at your computer when you call.
TECHNICAL SUPPORT: (0)20 8343 9143 10am-6pm
If you prefer to write to us, be sure to enclose the same details.
Empire Interactive
Technical Support Dept.
The Spires, 677 High Road,
North Finchley
London N12 0DA
If you have internet access and would like to contact us on-line, you will find us at:
support@empire.co.uk

|
|
C o n t e n t s |
ii |
|
|
|
|
|
|
|
|
1. |
Introduction |
1.0 |
|
|
Getting Started . . . . . . . . . . . . . . . . . . . . . . . . . . . . . . . . . . . . . . . . . . . . . . . . . . . . . . . . . |
. . . . . . . . . . . . . . 1.1 |
|
|
Quick Start . . . . . . . . . . . . . . . . . . . . . . . . . . . . . . . . . . . . . . . . . . . . . . . . . . . . . . . . . . . . . . |
. . . . . . . . . . . . . . 1.2 |
|
|
Strategy Guide . . . . . . . . . . . . . . . . . . . . . . . . . . . . . . . . . . . . . . . . . . . . . . . . . . . . . . . . . . |
. . . . . . . . . . . . . . 1.2 |
|
|
Updates . . . . . . . . . . . . . . . . . . . . . . . . . . . . . . . . . . . . . . . . . . . . . . . . . . . . . . . . . . . . . . . . . . |
. . . . . . . . . . . . . . 1.2 |
|
|
Compatibility With Apache Havoc . . . . . . . . . . . . . . . . . . . . . . . . . . . . . . . . . . . . . |
. . . . . . . . . . . . . . 1.3 |
|
|
Conversion Training From Apache Havoc . . . . . . . . . . . . . . . . . . . . . . . . . . . . . |
. . . . . . . . . . . . . . 1.3 |
|
2. |
Menu Screens |
2.0 |
|
|
Main Screen . . . . . . . . . . . . . . . . . . . . . . . . . . . . . . . . . . . . . . . . . . . . . . . . . . . . . . . . . . . . . |
. . . . . . . . . . . . . . 2.1 |
|
|
Pilots Screen . . . . . . . . . . . . . . . . . . . . . . . . . . . . . . . . . . . . . . . . . . . . . . . . . . . . . . . . . . . . |
. . . . . . . . . . . . . . 2.1 |
|
|
Options Screen . . . . . . . . . . . . . . . . . . . . . . . . . . . . . . . . . . . . . . . . . . . . . . . . . . . . . . . . . |
. . . . . . . . . . . . . . 2.2 |
|
|
Combat Screen . . . . . . . . . . . . . . . . . . . . . . . . . . . . . . . . . . . . . . . . . . . . . . . . . . . . . . . . . |
. . . . . . . . . . . . . . 2.5 |
|
|
Session Screen . . . . . . . . . . . . . . . . . . . . . . . . . . . . . . . . . . . . . . . . . . . . . . . . . . . . . . . . . . |
. . . . . . . . . . . . . . 2.6 |
|
|
Gunship Screen . . . . . . . . . . . . . . . . . . . . . . . . . . . . . . . . . . . . . . . . . . . . . . . . . . . . . . . . . |
. . . . . . . . . . . . . . 2.6 |
|
|
Campaign and Mission Planning Screen . . . . . . . . . . . . . . . . . . . . . . . . . . . . . . . |
. . . . . . . . . . . . . . 2.7 |
|
3. |
In-Flight |
3.0 |
|
|
Basic Handling . . . . . . . . . . . . . . . . . . . . . . . . . . . . . . . . . . . . . . . . . . . . . . . . . . . . . . . . . . |
. . . . . . . . . . . . . . 3.1 |
|
|
Missions . . . . . . . . . . . . . . . . . . . . . . . . . . . . . . . . . . . . . . . . . . . . . . . . . . . . . . . . . . . . . . . . . |
. . . . . . . . . . . . . . 3.5 |
|
|
Radio Messages . . . . . . . . . . . . . . . . . . . . . . . . . . . . . . . . . . . . . . . . . . . . . . . . . . . . . . . . . |
. . . . . . . . . . . . . . 3.8 |
|
|
Views . . . . . . . . . . . . . . . . . . . . . . . . . . . . . . . . . . . . . . . . . . . . . . . . . . . . . . . . . . . . . . . . . . . . |
. . . . . . . . . . . . . . 3.12 |
|
|
Controls . . . . . . . . . . . . . . . . . . . . . . . . . . . . . . . . . . . . . . . . . . . . . . . . . . . . . . . . . . . . . . . . . |
. . . . . . . . . . . . . . 3.18 |
|
4. |
Comanche Cockpits |
4.0 |
|
|
Instrument Panel . . . . . . . . . . . . . . . . . . . . . . . . . . . . . . . . . . . . . . . . . . . . . . . . . . . . . . . . |
. . . . . . . . . . . . . . 4.2 |
|
|
Multi-Function Displays (MFDs) . . . . . . . . . . . . . . . . . . . . . . . . . . . . . . . . . . . . . . . |
. . . . . . . . . . . . . . 4.5 |
|
|
Helmet Integrated Display and Sight System (HIDSS) . . . . . . . . . . . . . . . |
. . . . . . . . . . . . . . 4.16 |
|
|
Acquiring Targets . . . . . . . . . . . . . . . . . . . . . . . . . . . . . . . . . . . . . . . . . . . . . . . . . . . . . . . . |
. . . . . . . . . . . . . . 4.19 |
|
|
Weapons . . . . . . . . . . . . . . . . . . . . . . . . . . . . . . . . . . . . . . . . . . . . . . . . . . . . . . . . . . . . . . . . . |
. . . . . . . . . . . . . . 4.30 |
|
|
Pilot Night Vision Sensor (PNVS) . . . . . . . . . . . . . . . . . . . . . . . . . . . . . . . . . . . . . . |
. . . . . . . . . . . . . . 4.39 |
|

iii
5. Hokum Cockpits |
5.0 |
Instrument Panel . . . . . . . . . . . . . . . . . . . . . . . . . . . . . . . . . . . . . . . . . . . . . . . . . . . . . . . . . . . . . . . . . . . . . . |
5.2 |
Multi-Function Displays (MFDs) . . . . . . . . . . . . . . . . . . . . . . . . . . . . . . . . . . . . . . . . . . . . . . . . . . . . . |
5.6 |
Head Up Display (HUD) . . . . . . . . . . . . . . . . . . . . . . . . . . . . . . . . . . . . . . . . . . . . . . . . . . . . . . . . . . . . . . |
5.15 |
Acquiring Targets . . . . . . . . . . . . . . . . . . . . . . . . . . . . . . . . . . . . . . . . . . . . . . . . . . . . . . . . . . . . . . . . . . . . . . |
5.18 |
Weapons . . . . . . . . . . . . . . . . . . . . . . . . . . . . . . . . . . . . . . . . . . . . . . . . . . . . . . . . . . . . . . . . . . . . . . . . . . . . . . . |
5.29 |
Night Vision Goggles (NVG) . . . . . . . . . . . . . . . . . . . . . . . . . . . . . . . . . . . . . . . . . . . . . . . . . . . . . . . . . |
5.36 |
Windshield Wipers . . . . . . . . . . . . . . . . . . . . . . . . . . . . . . . . . . . . . . . . . . . . . . . . . . . . . . . . . . . . . . . . . . . . |
5.37 |
Ejector Seats . . . . . . . . . . . . . . . . . . . . . . . . . . . . . . . . . . . . . . . . . . . . . . . . . . . . . . . . . . . . . . . . . . . . . . . . . . |
5.37 |
6. |
Ground School |
6.0 |
|
Helicopters – Basic Handling and Principles . . . . . . . . . . . . . . . . . . . . . . . . . . . . . . . . . . . . . . . . |
6.1 |
|
Tactical Flying . . . . . . . . . . . . . . . . . . . . . . . . . . . . . . . . . . . . . . . . . . . . . . . . . . . . . . . . . . . . . . . . . . . . . . . . . |
6.23 |
7. |
Comanche Versus Hokum |
7.0 |
|
RAH-66 Comanche . . . . . . . . . . . . . . . . . . . . . . . . . . . . . . . . . . . . . . . . . . . . . . . . . . . . . . . . . . . . . . . . . . . |
7.1 |
|
Ka-52 Hokum B "Alligator" . . . . . . . . . . . . . . . . . . . . . . . . . . . . . . . . . . . . . . . . . . . . . . . . . . . . . . . . . . . |
7.7 |
8. |
Campaign Scenarios |
8.0 |
|
Sword In The Sand . . . . . . . . . . . . . . . . . . . . . . . . . . . . . . . . . . . . . . . . . . . . . . . . . . . . . . . . . . . . . . . . . . . |
8.2 |
|
War Of Independence . . . . . . . . . . . . . . . . . . . . . . . . . . . . . . . . . . . . . . . . . . . . . . . . . . . . . . . . . . . . . . . . |
8.4 |
|
Task Force Lebanon . . . . . . . . . . . . . . . . . . . . . . . . . . . . . . . . . . . . . . . . . . . . . . . . . . . . . . . . . . . . . . . . . . . |
8.6 |
9. |
Recognition Guide |
9.0 |
10. |
Appendices |
10.0 |
|
Trouble Shooting . . . . . . . . . . . . . . . . . . . . . . . . . . . . . . . . . . . . . . . . . . . . . . . . . . . . . . . . . . . . . . . . . . . . . . |
10.1 |
|
Acronyms . . . . . . . . . . . . . . . . . . . . . . . . . . . . . . . . . . . . . . . . . . . . . . . . . . . . . . . . . . . . . . . . . . . . . . . . . . . . . . |
10.7 |
|
Credits . . . . . . . . . . . . . . . . . . . . . . . . . . . . . . . . . . . . . . . . . . . . . . . . . . . . . . . . . . . . . . . . . . . . . . . . . . . . . . . . . |
10.8 |

1 . INTRODUCTION

1.1I N T R O D U C T I O N
Enemy Engaged
RAH-66 Comanche Versus Ka-52 Hokum
Throughout this manual the game title is abbreviated to ‘Comanche Hokum’.
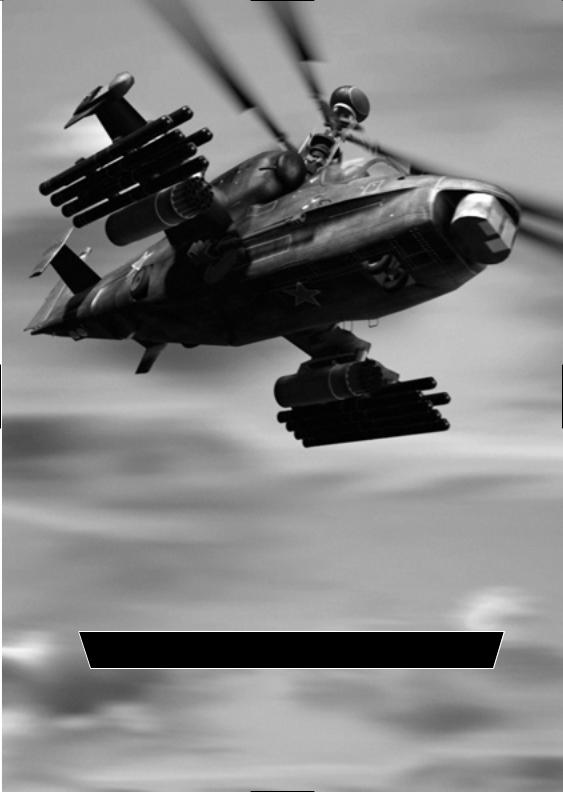
Comanche Hokum is a combat flight simulator showcasing two state-of-the-art helicopters; the American RAH-66 Comanche and the Russian Ka-52 Hokum B.
Both of these formidable gunships are capable of day, night and all weather missions and able to operate away from base for extended periods at the front line.
Comanche Hokum provides an accurate simulation of both helicopters including realistic flight dynamics, authentic weapons systems and detailed cockpits, displays and instruments. You can fly as both pilot and co-pilot/gunner and the crew are fully animated to increase the immersion.
There are options to configure the game for both novice and accomplished players. A ‘Quick Start’ keyboard guide has also been included.
Comanche Hokum features three diverse, real world combat zones, accurately modelled from digital data. The landscapes have rugged terrain ideally suited to low-level helicopter combat and making ‘line of sight’ tactics a real part of the game play. Each campaign can be played from either standpoint and in multiplayer games you can fly co-operatively or competitively with other players.
The campaign ‘engine’ is fully dynamic and reactive. There are no scripted events or outcomes. The war rages continuously, even when you are at a base re-arming and refuelling. You fly realistic missions with your wingmen and can co-ordinate attacks via radio messages. Your skill and judgement will determine success or failure.
Comanche Hokum features in excess of 60 different aircraft and vehicles all of which are highly detailed and articulated and have realistic payloads and physics.
If you have Apache Havoc installed then Comanche Hokum will allow you to play the Apache Havoc campaigns and to fly the Apache and Havoc gunships.
Getting Started
Installation
Insert your Comanche Hokum CD into your drive. If ‘Autorun’ is enabled on your system, the Setup program will start automatically. If Autorun is not enabled, from Windows Explorer, click on the autorun.exe icon on the Comanche Hokum CD.
Follow the on-screen instructions. Once all of the files have been copied on to your hard drive, the installation process will create a shortcut for you.
Please note that a Direct3D compatible graphics accelerator card is required to run Comanche Hokum.

I N T R O D U C T I O N 1.2
Starting
Comanche Hokum requires the full resources of your computer so terminate all other running applications before starting.
The program requires the Comanche Hokum CD in your drive at all times during use.
To start the game, click on the Comanche Hokum shortcut created by the installation program.
If you experience any difficulty running Comanche Hokum then refer to the ‘Trouble Shooting’ section in the Appendices.
Exiting
To exit Comanche Hokum return to the Main screen and click on the ‘EXIT’ button.
Alternatively, press l+ X at any time.
Quick Start
To get in the air quickly then follow these steps:-
1.On the Main screen select ‘Combat’
2.On the Combat screen select ‘Free Flight’
3.On the Session screen select a scenario then ‘OK’
4.On the Gunship screen select a gunship then ‘SELECT’
You will be transferred to a base and placed in the cockpit of your gunship. You have infinite weapons and fuel and are invulnerable to crashes. The enemy will not fire at you. These options may be changed on the Session screen after selecting the scenario.
Refer to the ‘In-Flight’ chapter ‘Basic Handling’ section for the take-off and flight procedures. Use the ‘Quick Start’ keyboard guide.
Press h to view the map. Press l+ Q to quit.
Strategy Guide
On the Comanche Hokum CD is a Strategy Guide containing useful game play tactics and much more. This is a HTML document and requires a web browser to read it.
Look in the ‘Strategy Guides\Comanche Hokum Guide’ folder.
Updates
Check www.razorworks.com for latest information and updates.

1.3I N T R O D U C T I O N
Compatibility With Apache Havoc
If you have Apache Havoc installed then Comanche Hokum will allow you to play the Apache Havoc campaigns and to fly the Apache and Havoc gunships. Effectively giving Comanche Hokum 6 combat zones and 4 different gunships to fly.
The installed version of Apache Havoc is not upgraded by Comanche Hokum and cannot play the new campaigns.
For full compatibility you must upgrade the installed version of Apache Havoc to version 1.1E. The upgrade patches are supplied on the Comanche Hokum CD in the ‘Apache Havoc Patches v1_1e’ folder. Simply launch the patch.exe within the language folder that matches your version of Apache Havoc. Then run Apache Havoc once to apply the changes.
Conversion Training From Apache Havoc
If you are familiar with Apache Havoc then Comanche Hokum should be straight forward to get used to. However, you should at least read chapter 2 ‘Menu Screens’ and chapter 3 ‘InFlight’ in this manual.
The Comanche Hokum keyboard layout is nearly identical to the Apache Havoc keyboard layout. The ‘select object to view’ keys s to v have been changed. The cockpits are now fully virtual and there are some key changes. The new keys are documented in the ‘In-Flight’ chapter.
If you fly the Apache or Havoc gunships from within Comanche Hokum, their cockpits are the same as in Apache Havoc and only the pilot’s seat is modelled.
An incoming laser guided missile warning has been added to the Apache Aircraft Survivability Equipment (ASE) MFD page and to the Havoc Threat Warning Display (TWD).
The Havoc TWD uses the right most lamp to indicate a laser guided missile warning. This was previously documented as an early warning radar (EWR) lamp.
The new ‘altitude hold‘ function g+ H does not apply to the Apache or Havoc gunships.
The Havoc ‘Toggle HUD size’ key has been changed from g+ K to l+ K
Comanche Hokum cannot read the Apache Havoc pilot logs.
2 . MENU SCREENS

2.1M E N U S C R E E N S
Use the mouse to make selections unless stated otherwise. You can click on ‘live’ text – that is text which changes colour as you move the mouse over it.
Main Screen
Combat
Choose this option to advance to the Combat screen to select a game type.
Pilots
Choose this option to advance to the Pilots screen where you can select and create pilots and view their logs and medals.
Options
Select this option to change the game settings.
EXIT
Exit the game.
Pilots Screen
Pilot Roster
The pilot roster allows you to Add, Rename and Delete pilots.
Select a pilot by clicking on his name.
Blue Force
Choose Blue Force to display the selected pilot’s logs and medals for flying the Comanche (and Apache if Apache Havoc is installed).
Red Force
Choose Red Force to display the selected pilot’s logs and medals for flying the Hokum (and Havoc if Apache Havoc is installed).
Medals
Choose Medals to view the selected pilot’s medals.
Weapons Log
Choose Weapons Log to view the selected pilot’s weapons log.
Flight Log
Choose Flight Log to view the selected pilot’s log.

M E N U S C R E E N S 2.2
Rank
The selected pilot’s rank and date commissioned are displayed.
OK
Return to the Main screen.
Options Screen
Controls
Ensure that you have calibrated your game controllers before launching Comanche Hokum (from the Start menu select Settings then Control Panel then Game Controllers).
Cyclic
Select Keyboard or Joystick for the cyclic stick.
Collective
Select Keyboard or Throttle for the collective lever.
Pedals
Select Keyboard or Rudder Pedals for the pedals.
Device
Cycle through the available game controllers to select the required device.
Reverse Throttle
A collective lever works in the reverse sense to a jet aircraft throttle. Setting this option to on makes the collective work in the same sense as the throttle.
Multiplayer
To create (host) or join multiplayer games you will need to select a service provider (connection method). Some service providers will require additional properties to be entered.
You can join multiplayer games at any time as long as you have chosen an identical service provider to the host.
When connecting to another player via a modem connection, the player who answers the call is automatically assigned the host status. The host must wait in the Multiplayer screen in order to connect to an incoming call.
Connection
Cycle through the connection options (Internet TCP/IP, Modem, Serial, IPX, etc.) to select the required service provider and then enter the required parameters.

2.3M E N U S C R E E N S
Dynamics
The options marked with an asterisk (*) are explained fully in chapter 6 ‘Ground School’.
*Blade Stall
Set retreating blade stall effect on or off. The imbalance of lift created by this effect will cause the helicopter to roll and the pilot to apply constant cyclic corrections. Novice pilots should turn this effect off.
Cross Couple
Set cross coupling effect on or off. With this option turned on the pilot will notice minimal turning effect upon large collective inputs. Turning the cross coupling effect off will require constant yaw input to maintain heading. Novice pilots should turn this effect on.
*Ground Effect
Set ground effect on or off. The ground effect simulates low altitude air cushioning created by the rotor downwash. Novice pilots should turn this effect off.
Keyboard Assist
Set keyboard assistance on or off. Helicopter flight requires subtle inputs unobtainable from keyboard control. Keyboard assistance implements a damping factor to help provide these inputs and allow smoother flight.
Over-Torque
Set over-torque effect on or off. With over-torque set to off you will not get over-torque warnings when the torque readout exceeds 100% and the gunship will not be damaged. Novice pilots should turn this effect off.
*Vortex Ring
Set the vortex ring effect on or off. You can unintentionally create a vortex ring around your main rotor if you make a sustained high-speed descent vertically or at a steep angle. This is a hazardous situation! Novice pilots should turn this effect off.
Wind
Set wind effects on or off. Novice pilots should turn this effect off.
Realism
Co-Pilot Target ID
Sets the method in which target identifications are reported. Refer to ‘CP/G Assistance: Target ID’ in the ‘Comanche Cockpit’ and ‘Hokum Cockpit’ chapters.
Co-Pilot ECM
Set Co-Pilot operating counter measures on or off. Set to on and the Co-Pilot will take care of releasing chaff and flares and will operate the IR and Radar jammers. You can release extra chaff and flares if required.

M E N U S C R E E N S 2.4
Avionics
Select either Novice or realistic avionics. With Novice avionics selected you do not need to operate the targeting devices. Arming a weapon will arm the HIDSS / HUD targeting modes automatically and you can designate targets simply by looking at them. Refer to the ‘Comanche Cockpit’ and ‘Hokum Cockpit’ chapters.
Also, with Novice selected your wingmen are initially set to ‘Weapons Free’ so you do not need to send a radio command to make them fire.
Difficulty
The difficulty option affects the enemy's response time and the amount of weapon damage incurred. This only affects you and not the other entities in the world. In multiplayer games each player retains their own difficulty level. That is, this value is not set globally by the server. Therefore a novice player can compete with more experienced players by adjusting their respective difficulty levels.
At the Easy difficulty setting, the player’s weapons do not take account of ‘armour penetration angles’. Usually, if a weapon hits the front of a tank, where it is more heavily armoured, then less damage will be inflicted than if the weapon hits the rear or sides of the tank.
Graphics
Terrain Detail
Select 3D terrain detail to suit your processor speed. High detail demands more processor power than Low detail.
Object Detail
Select 3D object detail to suit your processor speed. High detail demands more processor power than Low detail.
Cockpit Detail
Select cockpit detail to suit your processor speed. High detail demands more processor power than Low detail.
Rain Textures
Cockpit rain textures may be set on or off as a matter of preference.
Cockpit Rotors
The main rotor blur effect visible from the cockpit may be set on or off as a matter of preference.
Device Selection
Cycle through the available hardware graphics devices and select the hardware which has the best Direct3D support. Changing device requires you to restart Comanche Hokum.
Screen Resolution
Cycle through the available screen resolutions and click ‘Accept’ to apply.

2.5M E N U S C R E E N S
Sound
Sound Effects
Set sound effects on or off.
Music
Set music on or off.
Speech
Set all speech on or off.
Co-Pilot Speech
Set Co-Pilot speech on or off.
OK
Exit the Options screen.
Combat Screen
There are three different game types offered in the Combat screen plus a demo mode.
Campaign
Campaign games are large-scale dynamic campaigns based over the entire map. To win the campaign you need to complete all of the given objectives.
Skirmish
Skirmish games are mini-campaigns contained within a small area of the map. Skirmish games provide useful practice before taking on a full campaign and also require much less bandwidth in multiplayer games.
Free Flight
Free Flight games allow you to explore all of the flying areas, practice flying and familiarise yourself with the avionics and weapons systems.
Demo
The demo allows you to watch a campaign in action.
Press l+ Q or c to quit the demo.
CANCEL
Return to the Main screen.

M E N U S C R E E N S 2.6
Session Screen
The session list shows all of the available games.
New games are listed in white text. If you have selected a multiplayer connection then starting a new game makes you the host of that game.
Existing multiplayer games are listed in amber text. You may join these games at any time. Saved games are listed in green text. Saved games may be renamed or deleted.
After you have selected a game, the game details and options are displayed. Select ‘OK’ when you are ready to continue.
Select ‘CANCEL’ to return to the Combat screen.
Gunship Screen
From the Gunship screen select which side you want to play the campaign from. Select ‘RAH-66 Comanche’ for the Blue Force and ‘KA-52 Hokum B’ for the Red Force.
If you have Apache Havoc installed then you can choose between flying Comanches and Apaches or Hokums and Havocs in the campaign.
Select ‘SELECT’ to continue to the Campaign and Mission Planning screen. Select ‘CANCEL’ to return to the Session screen.

2.7M E N U S C R E E N S
Campaign and Mission Planning Screen
The Campaign and Mission Planning screen is the focal point of the campaign. From here you get an overview of the campaign and can assess the current situation in order to decide your next mission.
General Layout
SELECT INFORMATION
SELECT |
|
MISSION |
|
AND |
INFORMATION WINDOW |
GUNSHIP |
CAMPAIGN |
MESSAGE WINDOW |
|
TIME |
|
|
|
|
|
|
CURRENT MISSION STATUS |
|
EXIT |
|
CONFIRM/ |
|
CURRENT GUNSHIP STATUS |
|
|
COCKPIT |
|
|
|
|
|
CLEAR/QUIT MISSION |
|
Diagram 2.1: General layout of the Campaign and Mission Planning screen
Familiarise yourself with the layout of this screen – try selecting all the options. You will notice that many items react to a ‘mouse over’ event by displaying additional relevant information as you move the mouse pointer over them. The additional information may be displayed in the message window, on the map or in the current mission and gunship status lines.
Generally you can click on graphical icons and ‘live’ text – that is text that changes colour as you move the mouse pointer over it.

M E N U S C R E E N S 2.8
Selecting a Mission and Gunship
There are several ways of selecting a mission and gunship and you can select them in any order.
For instance, you may prefer to select a mission first simply because you want to fly a particular type of mission. Alternatively you may opt to select a gunship first so that you can fly with other players in a multiplayer game or you want to fly a particular type of gunship if you have Apache Havoc installed.
‘Auto-Select’
The easiest way to select a mission and gunship is to use the auto-select function:-
1.Click the ‘Auto-Select’ text in the current mission status line and a mission will be automatically selected. The mission briefing is displayed in the information window.
2.Click the ‘Auto-Select’ text in the current gunship status line and a gunship will be automatically selected for the mission. The flight group details are displayed in the information window.
3.Click ‘Confirm’ then ‘Cockpit’ to fly the mission.
‘Available’ and ‘OOB’ (Order Of Battle)
Select the ‘Available’ button to list all of the missions or groups available to you.
Select the ‘OOB’ button to list the ‘Order Of Battle’ for all of your forces (air, land and sea). You can view missions, groups and bases.
‘Unassigned’ Missions
Unassigned mission are missions which have not been assigned to a flight group yet. If you select an unassigned mission you then need to select a flight group in order to fly the mission.
Unassigned missions may be taken by computer-controlled (AI) flight groups or by other players in multiplayer games. Unassigned missions will eventually expire (timeout) if they are not taken.
To select an unassigned mission and a gunship:-
1.Click ‘Clear’ / ’Quit Mission’ to clear any previously selected missions or gunships.
2.Select ‘Available’ and ‘Missions’.
3.Unassigned and assigned missions are listed, for example:-
Unassigned [3 x RECON] [2 x CAS] Assigned
[1 x SEAD]

2.9M E N U S C R E E N S
4. Click on a mission type to display the missions available, for example:-
Unassigned [3 x RECON] RECON #1 RECON #2 RECON #3 [2 x CAS] Assigned
[1 x SEAD]
5.As you move the mouse pointer over the missions, details of the mission are shown in the message window and the current mission status line. The mission is indicated on the map (if it is view).
6.Click on a mission and a full briefing for the mission is displayed in the information window.
7.Click ‘Accept’ to accept the mission. The ‘Groups’ button is automatically selected and the flight groups available for this mission are listed. If no flight groups are available then click ‘Clear Mission’ to start again.
8.Click on a flight group type to expand the groups available, for example:-
[2 x Recon / Attack Helicopters]
Freelancer
Gator
[1 x Attack Helicopters]
9.As you move the mouse pointer over the flight groups, details of the group are shown in the message window and the current gunship status line. The flight group is indicated on the map (if it is in view).
10.Click on a flight group and the group’s details are displayed in the information window.
11.You are normally assigned the flight group leaders gunship (i.e. ‘1-1 RAH-66 Comanche’) but you can select another from the list.
12.Click ‘Accept’ to accept the gunship.
13.Click ‘Confirm’ then ‘Cockpit’ to fly the mission.
‘Assigned’ Missions
If you have accepted an assigned mission then the flight group is already selected but you can change gunship within the group. Click ‘Accept’ to the gunship. Click ‘Confirm’ then ‘Cockpit’ to fly the mission.
M E N U S C R E E N S 2.10
‘Completed’ Missions
Completed missions are only listed when the ‘OOB’ option is selected.
Map
There are many maps displayed in various contexts, however, the functionality of all maps is the same.
Mouse Controls
The map reacts to ‘mouse over’ events. Simply point at icons to find out what they are.
Point to a location on the map and right-click to centre the map around this position.
Point to a location on the map and left-click to ‘goto’ (that is move your gunship to) this position. This option is only available in Free Flight games.
Keyboard Controls
[ ] \ ^ Move map
= Zoom in
- Zoom out
+ (numpad) Zoom in
- (numpad) Zoom out
> Zoom in
< Zoom out
l+ = Increase time acceleration (single player) l+ - Decrease time acceleration (single player)
l+ + (numpad) Increase time acceleration (single player) l+ - (numpad) Decrease time acceleration (single player)
` Centre map on player
C Centre map on player
h Toggle cockpit/menus
Map Buttons
Maximise
Maximise map.
Minimise
Minimise map.

2.11M E N U S C R E E N S
Zoom In
Zoom in.
Zoom Out
Zoom out.
Side
Toggle ‘side’ map.
The side map indicates the territorial possession of both sides.
Fog
Toggle ‘fog’ map.
The fog map indicates areas in which you have little or no intelligence.
Grid
Toggle the map grid.
Keysites
Toggle keysite icons. Keysites are tactical sites such as airbases, FARPs, ports, oil refineries, etc.
Missions
Toggle mission destinations.
Air Forces
Toggle air force icons.
Ground Forces
Toggle ground force icons.
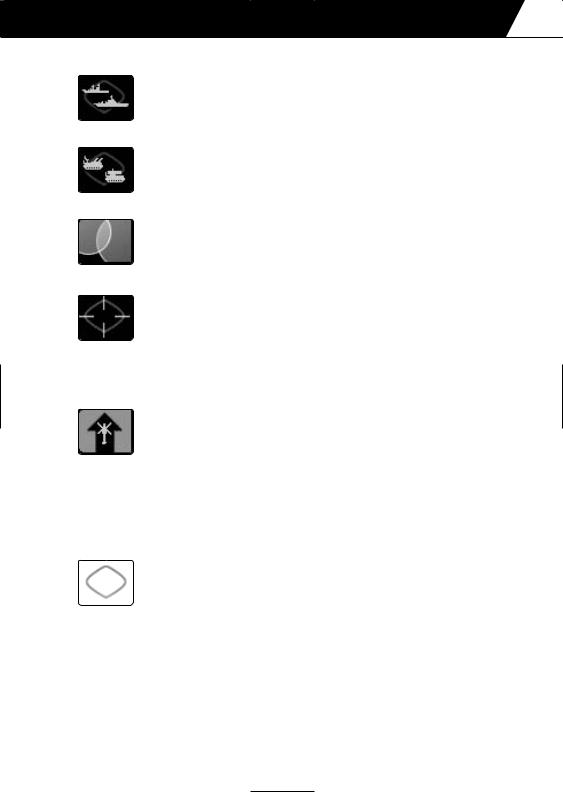
M E N U S C R E E N S 2.12
Sea Forces
Toggle sea force icons.
Air Defences
Toggle air defence icons.
Ground Radar (threat circles)
Toggle air defence radar threat circles.
Track
Depending on the map context the track button does the following:-
1.Group information displayed – track the selected unit.
2.Mission information displayed – does nothing.
3.Base information displayed – does nothing.
4.All other maps – track the player’s gunship.
Goto
Toggle ‘goto’ feature. Only available in Free Flight games.
Map Icons
Move the mouse pointer over any map icon and details will be displayed in the message window.
Event
The most recent event log message is displayed in the message window and the event locator is displayed on the map to show the origin of the message. Click on the message window to display the event log in the information window.

2.13M E N U S C R E E N S
Explosions
Explosions are drawn on the map indicating current engagements.
Waypoints
The waypoint route is displayed on the map.
Editing Waypoint Routes
The waypoint route can only be edited once the mission and gunship have been confirmed (by clicking ‘Confirm’).
To move a waypoint, select it with the mouse pointer and drag it to a new location. The start base, landing base and objective waypoints cannot be moved.
To insert a waypoint, click on the ‘+’ symbol between the two waypoints that you wish to insert a new waypoint.
To delete a waypoint, highlight the waypoint by moving the mouse pointer over the waypoint and press the ;key. The start base, landing base and objective waypoints cannot be deleted.
Mission Briefing and Debriefing
The mission briefing is displayed in the information window. The details of the mission are listed and a short account of the mission objectives is given.
After a mission is completed (successfully or unsuccessfully) the mission debriefing is displayed in the information window.
To display your briefing or debriefing click the mission name (i.e. ‘RECON #2’) in the current mission status line.
The mission briefing is available as soon as the mission is complete and not when you have returned to base. At this point you can quit the mission (an AI pilot will fly the gunship back to base) and you can select another mission to fly.
Promotion and Medals
After a mission you may be promoted or be awarded a medal. Details are given in the debriefing.
Sit Rep (Situation Report)
The Sit Rep outlines your campaign objectives and gives an indication of the campaign progress using ‘force strength’ and ‘kills/losses’ indicators.
In order to win the campaign your forces must successfully complete all of the campaign objectives.

M E N U S C R E E N S 2.14
Some objectives require your forces to capture an enemy installation. To achieve this your forces must weaken the installation via strike missions. Once battle damage assessment has shown the installation to be sufficiently weakened your forces will attempt to insert troops to capture it.
Log (Event Log)
The event log keeps account of all the significant actions that have occurred during the campaign.
The event log is listed with the latest event at the top. Click on any event text to view the location of the message origin.
Payloads
After selecting a gunship you can change the weapon loadout. You can only change the gunship’s weapons when you are landed at an airbase, carrier or FARP.
To change weapons cycle through the weapons available for each pylon or select a default weapon loadout (air-to-ground, air-to-air or recon/scout).
You may change the weapon loadout for any of the gunships in your flight group. For gunships other than Apache Longbows, Comanches, Havocs and Hokums you can only select the three default options.
Chat
Use the chat facility to communicate with other players in multiplayer games.
Options
You can change the game options during a campaign, however, some options will be unavailable and are greyed out.
Save
Save a campaign at any time. The saved game will be available on the Session screen.
Enter a filename for the saved game (restricted to 8 characters – there is no need to enter a file extension).
Quit Campaign
To quit the campaign click the ‘Exit’ button or press l+ Q.
3. IN-FLIGHT

3.1IN-FLIGHT
Basic Handling
If you are a novice pilot then it is recommended that you read the ‘Ground School’ section of the manual to familiarise yourself with the basic principles and handling of a helicopter.
This section will guide you through the flight controls as required for Comanche Hokum and explain the function of the automatic flight systems; ‘autopilot’, ‘altitude hold’ and ‘hover hold’.
Select a ‘Free Flight’ mission to practice your flight procedures. Ensure that you select a passive environment and turn the collisions and weapon damage off.
The flight controls are the same for both Comanche and Hokum.
To re-iterate the lesson from Ground School:-
"It is worth emphasising that all your control movements ('control inputs') should be as smooth and deliberate as possible. Sudden, violent control inputs are to be avoided whenever possible, but especially in hovering or low-speed flight. Make sure that you know where to find airspeed, altitude and vertical velocity readouts on the Head-Up Display (HUD)."
Taking off and rising to the hover
1.Release the rotor brake R
2.The rotor blades will start to spin and the canopy doors will close
3.When the main rotor RPM has reached 90% the ‘RTR RPM’ warning light will turn off and the helicopter is ready for take-off
4.Release the wheel brakes B
5.Watching the torque value on the head-up display, gently increase the collective to 6575% Q
6.The helicopter will start to climb
7.Climb to an altitude of 100 feet / 30 metres so that the helicopter is out of ‘ground effect’
8.Adjust the collective to hold the helicopter in a steady hover Q and A
Transition from the hover to forward flight
1.Ease the cyclic forward and the helicopter will start to accelerate \
2.The helicopter will lose altitude so gently increase the collective to compensate for this Q

IN-FLIGHT 3.2
Climbing and diving
1.Pull back on the cyclic to climb ^
2.The helicopter will climb but lose forward speed
3.Push the cyclic forward to regain forward speed \
4.Raise the collective to climb Q
5.The helicopter will climb but gain forward speed
6.To climb without losing or gaining speed you need to simultaneously pull back on the cyclic and raise the collective ^ and Q
7.Push the cyclic forward to dive \
8.The helicopter will lose height but gain forward speed
9.Pull the cyclic back to reduce the dive ^
10.Lower the collective to lose height A
11.The helicopter will lose height and forward speed
12.To dive without losing or gaining speed you need to simultaneously push forward on the cyclic and lower the collective \ and A
Turning in forward flight
1.When the helicopter is hovering or flying at low speed (below 60 knots / 110 km/h) use the pedals to turn Z and X
2.At higher speeds, turning is accomplished by tilting the cyclic left or right to bank the helicopter ] and [
3.If you fly sustained or steeply-banked turns you’ll need to raise the collective Q or ease back on the cyclic ^ (with loss of some forward speed) to avoid losing height
Slowing to the hover from forward flight
1.Start the manoeuvre by pulling back on the cyclic ^ to tilt the helicopter backwards
2.Lower the collective to prevent the helicopter from climbing A
3.As the helicopter slows, gently raise the collective Q to compensate for the diminished main rotor thrust
4.As you approach the hover ease the cyclic forward \ to bring the helicopter level, simultaneously raising the collective Q to maintain altitude
5.Use the pedals Z and X as necessary to keep the helicopter straight

3.3IN-FLIGHT
Landing
1.From a steady hover, gently lower the collective A and the helicopter will begin to lose altitude
2.Watching your vertical speed, adjust the collective Q and A to maintain a steady rate of descent
3.Just before touchdown reduce the rate of descent to soften the landing
4.After touchdown, bottom the collective A
5.Engage the wheel brakes B
6.Engage the rotor brake R
7.The rotor blades will spin down and the canopy doors will open
Taxiing
1.With the rotor blades spun up and the wheel brakes disengaged, increase the collective Q to between 25 and 50%
2.To start taxiing, push gently forward on the cyclic \
3.Use the pedals Z and X to steer the helicopter
4.To slow down, ease back on the cyclic ^
5.To stop apply the wheel brakes B
Trim
Trim re-centres the cyclic to the currently held position. Trim is useful when flying long distances in a straight line so that you do not need to keep pressure on the cyclic.
Autopilot
The autopilot system will fly the helicopter around the waypoint route and eventually land back at base. Autopilot will not engage the enemy at ‘target’ waypoints.
G Autopilot (engage/disengage)
Autopilot is unavailable if the helicopter control systems are damaged or if the helicopter is out of fuel.
Autopilot cannot be engaged when the helicopter's radar altitude is below 25 metres (approximately 80 ft).
Coming in to land at a base, the helicopter may enter a holding pattern until a landing pad becomes available.

IN-FLIGHT 3.4
Altitude Hold
The altitude hold system will attempt to hold the helicopter at the current radar altitude, in effect, terrain following for nap of the earth flying.
Altitude hold is unavailable if the helicopter control systems are damaged or if the helicopter is out of fuel.
The radar altitude setting can be increased or decreased by one unit at a time (1 foot Comanche, 1 metre Hokum).
g+ H Altitude hold (engage/disengage)
g+ J Decrease altitude hold level
g+ K Increase altitude hold level
Hover Hold
The hover hold system will attempt to hold the helicopter in a stationary position (station keeping).
Hover hold is unavailable if the helicopter control systems are damaged or if the helicopter is out of fuel.
Hover hold can only be engaged if the horizontal velocity of the helicopter is below 20 knots (approximately 40 Km/h).
Use collective to adjust the hover height and yaw to adjust the heading. Hover hold will disengage with any cyclic input.
Hover hold bleeds off any horizontal velocity and adjusts the collective to zero the vertical velocity. It is not an immediate effect and may take a few moments to stabilise. If you are using a throttle stick then you will have to adjust the collective manually.
Stable hover hold is the same as hover hold except that it maintains altitude automatically for players with throttle sticks.
H Hover hold (engage/disengage)
m+ H Stable hover hold (engage/disengage)
 Loading...