


The Story of How We Learned to
Make the Bombs that Made the
Whole World Feel Better
A Guide to
Tactical Combat
by the Local Union of Brotherhood Scribes 432
1

Table of Contents
Installation |
5 |
Introduction |
5 |
Playing the Game |
6 |
Starting a Single-Player Game |
7 |
Single-player Campaigns |
7 |
Tutorial Missions |
8 |
Starting a Multiplayer Game |
9 |
LAN Games |
9 |
Gamespy Games |
9 |
Direct TCP/IP Games |
11 |
Playing Modem-to-Modem |
11 |
Port Information |
11 |
Hosting a Game |
12 |
Multiplayer Game Types |
13 |
Game Modes |
13 |
Continuous Turn-Based Mode |
13 |
Individual Turn-Based Mode |
13 |
Squad Turn-Based Mode |
13 |
Tactical Screen |
14 |
Selecting Characters |
14 |
Grouping Characters |
15 |
Movement |
15 |
Cursors |
15 |
Interface Bar |
16 |
Display Window |
16 |
Mini-Map Button |
16 |
Text Display Button |
16 |
Character Tabs |
16 |
Character Portrait |
16 |
Action Points |
17 |
Weapon/Item Hands |
17 |
Interface Bar (cont.) |
|
Sentry Mode Buttons |
17 |
Sentry Mode Defensive |
17 |
Sentry Mode Aggressive |
18 |
Stance Buttons |
18 |
Skill Button (SKL) |
18 |
Inventory Button (INV) |
18 |
Character Button (CHR) |
18 |
PipBoy Button(PIP) |
18 |
Menu Button (MNU) |
18 |
Overwatch Button |
18 |
End Turn Button |
18 |
End Combat Button (END CMBT) |
19 |
Skilldex |
19 |
Inventory |
19 |
Moving Multiple Items |
20 |
Character Screen |
21 |
PIPBoy |
21 |
Briefings |
22 |
Dialogue |
22 |
Map |
22 |
Archives |
22 |
Done |
22 |
Menu |
22 |
Help |
22 |
Save Game |
22 |
Load Game |
22 |
Options |
22 |
Exit to Main |
22 |
Done |
23 |
Speech |
23 |
2 |
3 |

Table of Contents (cont.)
Barter |
23 |
Prices |
24 |
The Bunker |
25 |
The General – Mission Briefings |
25 |
Quartermaster – Equipment |
25 |
Recruits Master – Character Pool |
25 |
Medical Officer – Healing Equipment |
26 |
Mechanic – Vehicles |
26 |
World Map |
26 |
Vehicles |
27 |
Entering/Exiting a Vehicle |
27 |
Vehicle Movement |
27 |
Vehicle Combat |
27 |
Options Screen |
27 |
Game |
28 |
Run Mode |
28 |
Game Difficulty |
28 |
Message Filter |
28 |
Turn Based |
28 |
Language Filter |
28 |
Violence Level |
28 |
Display |
28 |
Anti-Aliased Tiles |
29 |
Anti-Aliased Characters |
29 |
Cursor Mode |
29 |
Sound |
29 |
Master Volume |
29 |
Sound FX Volume |
29 |
Music Volume |
29 |
Speech Volume |
29 |
Saving/Loading a Game |
29 |
Saving a Game |
29 |
Loading a Game |
30 |
Combat |
30 |
Starting Combat |
30 |
Action Points |
30 |
Targeting |
31 |
Line of Sight (LOS) |
31 |
Damage |
32 |
Critical Hits |
32 |
Death |
32 |
Gaining Experience & Levels |
33 |
Characters |
33 |
Statistics |
33 |
Derived Statistics |
35 |
Traits |
36 |
Skills |
39 |
Perks |
40 |
Rank |
55 |
Reputation |
55 |
Other Details |
55 |
Credits |
58 |
Technical Support |
65 |
Limited Warranty |
68 |
Interplay Website |
70 |
Installation
To install the game, insert the Fallout Tactics CD-ROM #1 into your CD-ROM drive. If you have auto-start enabled, the setup screen will appear shortly.
If you do not have auto-start enabled, or the setup screen does not appear, then you must run the SETUP.EXE file located on CD-ROM #1.
The installation process will begin. Follow the on-screen instructions. Insert the other CD-ROMs when prompted. The setup program will also allow you to install Gamespy Arcade, for fast and easy access to Internet multiplayer gaming.
To start the game, once the installation process has completed, click on Start -> Programs -> 14 Degrees East -> Fallout Tactics -> Fallout Tactics.exe
To view last minute information and updates to this manual, be sure to read the Fallout Tactics Readme.txt file. This file is available in your installation folder. You can also click on Start -> Programs -> 14 Degrees East -> Fallout Tactics -> Fallout Tactics Readme.txt
Introduction
Fallout Tactics is a squad-based tactical combat game set in the Fallout universe. Assemble your men (or women, or mutants or critters...) and defeat your enemies using all of your skills and tools available. Triumph or die in the wastelands - the fate of your squad rests in your hands.
We suggest that you start with the Tutorial missions. They will bring you up to speed on using the interface, the basics of movement and combat, and even some tactical strategies to try. See Tutorial Missions page 8.
The single-player campaign is a series of missions, over which one of the many stories of the Fallout universe will be told. You will be in charge of a Brotherhood of Steel squad, responsible for managing the development of your squaddies, keeping them safe, and improving their equipment and skills. See Starting a Single-player Game, page 7.
4 |
5 |
You can also battle real-life opponents, using a home network or the Internet. These opponents will be more challenging than the single player game. Create characters from several different races and form squads that will send your enemies running before you. See Starting a Multiplayer Game, page 9.
Playing the Game
This chapter of the Brotherhood of Steel manual focuses on the user interface. For a basic introduction within the game, try playing a tutorial mission, see page 8. If you need a list of hotkeys, press H during a mission.
Main Menu
When the game is started, the intro movies will play. You can press ESC to bypass them.
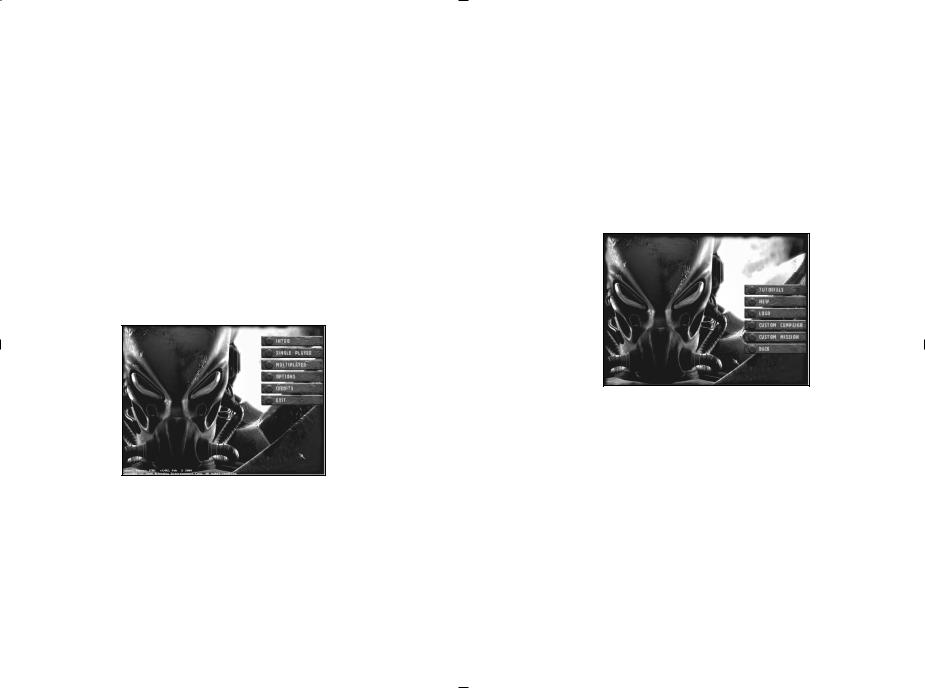
When the intro movies have finished, you will see the main menu screen.
The main menu screen.
You can select from the following options:
INTRO: This button will display the intro movie again. Use this to amaze your friends!
SINGLE-PLAYER: Click this button to display the Single-Player Game screen, page 7.
MULTIPLAYER: Click here to select the Multiplayer Game screen, page 9.
OPTIONS: This button will open the Options menu screen, page 27. CREDITS: Clicking this button will display a list of the people who worked on Fallout Tactics.
EXIT: Click this button when you are done playing the game and wish to quit.
The version number of the game is displayed at the bottom of this screen. See www.interplay.com/falloutbos for program updates.
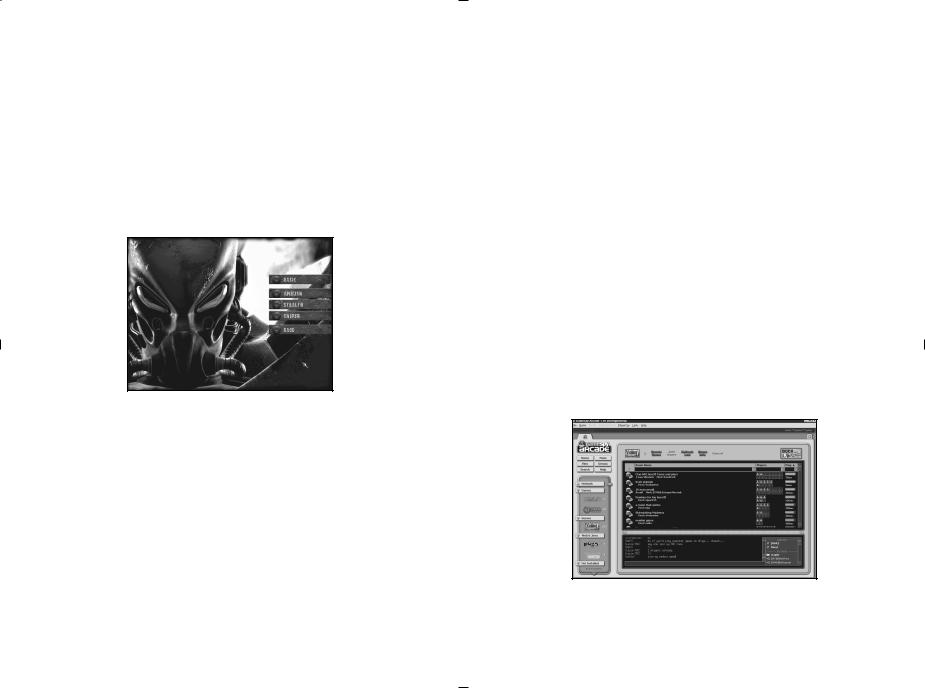
Starting a Single-Player Game
The start of a perfectly good single-player game.
TUTORIALS: Click this button to display tutorial missions to help you learn how to play.
NEW: This will start a new single-player campaign game. LOAD: Click this to load a previously saved game, see page 29.
CUSTOM CAMPAIGN: This will display a list of custom campaign missions for you to play.
CUSTOM MISSION: This displays a list of custom missions for you to play.
BACK: This will return you to the main menu.
Single-player Campaigns
A single-player campaign game is a series of missions. You will start with a limited number of characters, including a primary
character, cheap weapons and armor, no vehicles and little
6 |
7 |
experience. As you progress through the missions, you will gain more of all of these.
To start a single-player game, you need to pick or create a primary character. This is your representative in the Fallout Tactics world. The primary character must go on each and every mission. You need to keep this character safe, for if this character dies, your game is over and you must load a previously saved game or restart the campaign.
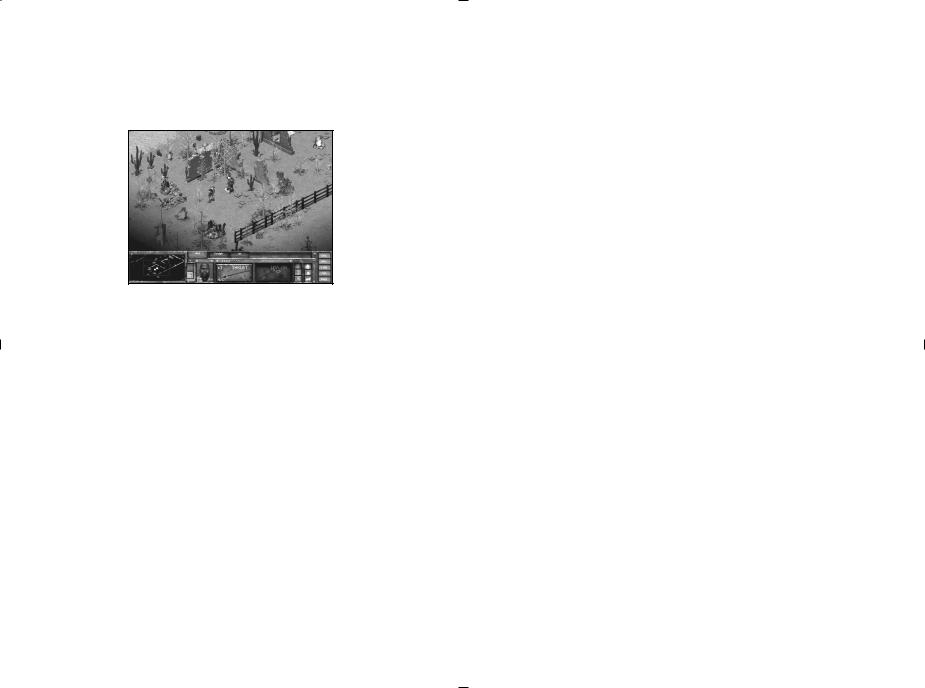
Tutorial Missions
There are two types of tutorial missions: basic and tactical. The Basic tutorial is designed to teach you what the interface does, while tactical tutorials give you some simple tactics to use in your games.
Tutorial Mission menu screen.
Tutorial missions come pre-supplied with a character or squad for you to use. If you lose characters in a tutorial mission, it will not affect your other games.
Follow the orders of the tutorial instructor. Click DONE on the instructor windows to close them. If you need to review a message from the instructor, click on PIP and select the desired message.
The tactical tutorials will start with a movie of the instructor showing you one tactic for defeating the test. You will then be given the opportunity to play the tutorial test yourself. If you follow the sample tactics, you should be successful.
You can end your tutorial at any time by pressing ESC and selecting EXIT TO MENU from the menu.
Starting a Multiplayer Game
There are three ways to play a multiplayer game: LAN, Direct TCP/IP and using the GameSpy network. To start a LAN or Direct TCP/IP game, start Fallout Tactics normally and click on MULTIPLAYER from the main menu. To play in a GameSpy game over the Internet, launch GameSpy Arcade from the Start->Programs menu.
Click in the Enter Name text box and type your name. The Active Servers window will show the current games. You can click BACK to return to the main menu.
LAN Games
You can play Fallout Tactics on a TCP/IP based Local Area Network. An IPX based LAN is not supported.
Fallout Tactics will display all current games on your LAN. To start a new game, click HOST. To join an existing game, click on the game and then click JOIN.
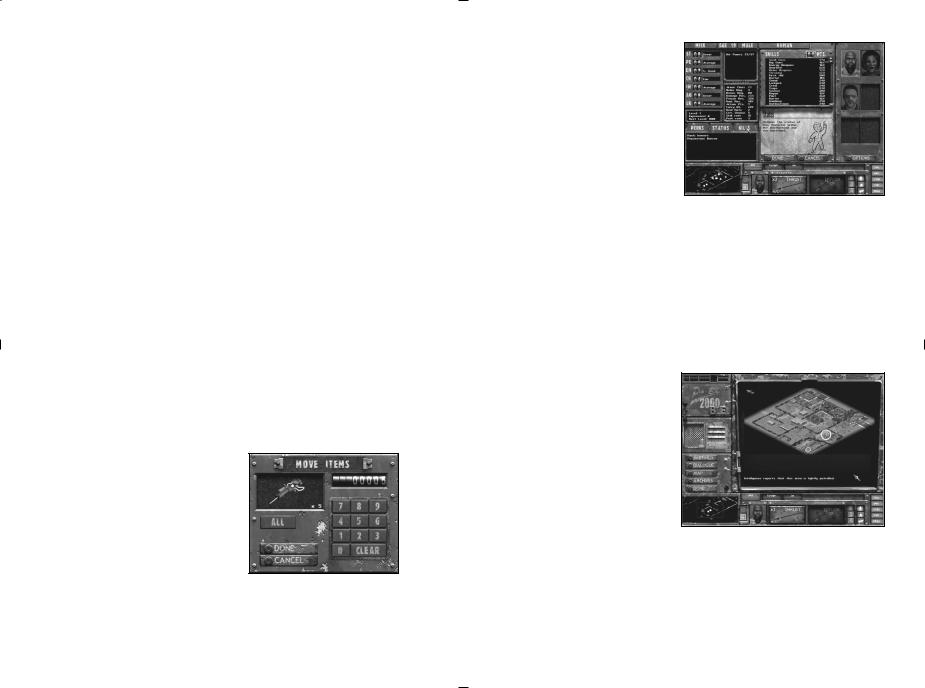
Gamespy Games
The easiest way to play Fallout Tactics online is through GameSpy Arcade, which comes conveniently bundled with the game. If you haven’t done so already, insert your Fallout Tactics CD and install Arcade now. Then, to play Fallout Tactics online, launch the Arcade software, and follow these simple instructions:
This is GameSpy Arcade.
8 |
9 |

Make sure Fallout Tactics is listed in Arcade: When you launch Arcade, you should see a Fallout Tactics icon (along with icons from any other Arcade-supported games you have installed) under the "Games" tab on the left hand side of the software. Clicking on this tab will take you to the Fallout Tactics chat room / staging area in Arcade, from which you can meet and greet other players, find servers to play on, create your own server, or try the patience of Arcade’s chat administrators by relentlessly testing the language filters.
Finding a server: Upon entering the Fallout Tactics lobby in Arcade, you’ll see two main windows. The upper window displays a list of servers running Fallout Tactics. Each server listing will include important information, such as the number of people playing and your "ping" to the server (the amount of time it takes your PC to send data to another PC, and receive it back; the lower this is, the better). If you’re looking for a specific server, you can use the text boxes at the top of the server listing window to sort the servers according to specific criteria (room name, maximum or minimum number of active players, maximum ping, etc.)
Joining a game: Once you’ve found a server that you’re sure you’d like to join, highlight it on the server list and either double-click on its listing or press the "Join Game" button above the server listing window. Arcade will take you into a staging room, in which you can trash talk with your fellow players and prepare for combat. When you’re ready to play, click the "Ready" button at the top of the screen. When everyone in the room has signaled their readiness, the host can then launch the game. Once he does this, Arcade will immediately fire up Fallout Tactics and launch you into the action.
Starting a game: Arcade also enables you to launch your own Fallout Tactics server. To do this, enter the Fallout Tactics lobby in Arcade and click the "Create Room" button above the server listing window. You will be asked to set the parameters of your game – max. number of players, the server’s name, and the game type, if any. Once you’ve done this, Arcade will create a staging room for you, in which other players can gather to play against you online. When all of the players present in the staging room have clicked their "Ready" button, you can launch the game by pressing the "Launch Game" button at the top of the screen. This will take you and all of the other players in the room into your session of Fallout Tactics.
10
Problems?
If you have problems using Arcade, whether installing the program, registering it, or using it in conjunction with Fallout Tactics, consult our help pages, located at http://www.gamespyarcade.com/help/ or e-mail us by using the form located at http://www.gamespyarcade.com/support/contact.shtml.
Direct TCP/IP Games
Enter the IP address of your host server in the Optional Server IP box. Press ENTER. The JOIN button will light up when the server is found. Click JOIN to enter the game.
The IP address for your machine may be obtained by going to Start- >Run->WINIPCFG. This works on Win95, Win98 and WinME.
Playing Modem-to-Modem
While Fallout Tactics does not support direct modem-to-modem gameplay, you can use Win98se or later to create a network connection between two computers using modems. When connected in this manner, Fallout Tactics will think it’s on a LAN and let you play.
Quality of gameplay will depend on the speed and quality of your connection.
Port Information
All players should be using the latest version of DirectX.
The following TCP and UDP ports must be open on your proxy server or firewall:
Connection |
Ports for Client Configuration |
Ports for Host Configuration |
Initial TCP Connection |
47624 Outbound |
47624 Inbound |
Subsequent TCP Inbound |
2300-2400 |
2300-2400 |
Subsequent TCP Outbound |
2300-2400 |
2300-2400 |
Subsequent UDP Inbound |
2300-2400 |
2300-2400 |
Subsequent UDP Outbound |
2300-2400 |
2300-2400 |
To verify that these ports are open or to open these ports, please contact your network administrator or Internet service provider (ISP).
If you are the administrator of the network, please consult |
|
the documentation provided with your networking software |
|
to determine the steps to open these ports. |
11 |

Hosting a Game
Enter your server name (it defaults to your player name). Optionally, enter a password. Players must enter this password before they will be allowed to join.
You can set the game options. These cannot be changed once the game starts. Click on the Options button.
Turn Based: CTB (Continuous turn based), Individual or Squad.
Bandwidth: Low, Medium, or High.
Line of Sight: Squad (you can only see what your squad can see), Team (you can see what your allies can see) or Off (you can see everything all the time).
Max Squad Members: Sets the maximum number of characters per squad.
Time of Day: Default, Pre-Dawn, Day, Evening, or Night.
Friendly Fire: The likelyhood that you will hit your own squaddies if they are between you and your target. Defaults to 25%, can be set from 0% to 100%.
AP Regeneration Rate: How fast Action Points regenerate in CTB mode. Defaults to 100%, can be set from 25% to 200%.
Turn Time Limit: How many seconds players have to act on their turn in Individual or Squad Turn-Based modes. 0 seconds means no limit.
Game Time Limit: How long the game will last, in minutes. 0 means the game will not end until all enemy squads are defeated.
Points: This determines the maximum number of points players can spend on their squad.
Click START GAME when ready. Click LEAVE GAME to cancel.
Multiplayer Game Types
There are two game types in Multiplayer: Skirmish and Assault. In Skirmish, you must defeat the other enemy squads. In Assault, one side plays the defenders and the other side is the attackers. The attackers must throw a switch in the defender's base to win. The defenders must stop the attackers from accomplishing their mission.
Game Modes
There are three different game modes that Fallout Tactics can be played in. All three modes use very similar rules, but there are some differences that need to be discussed.
Continuous Turn-Based Mode (CTB)
This is the default game mode. In this mode, all players and characters can act at the same time. Walking and Running do not cost Action Points, but all other actions do. Action Points regenerate over time. Characters with more APs will regenerate them faster than characters with less Action Points.
Individual Turn-Based Mode (ITB)
This is the game mode most like the original Fallout series. All characters will move one at a time, based on their Sequence statistic. Characters may not move out of order, with the exception of the Delay Action command, which will move a character farther down the sequence list. Once every character has had a chance to move, all characters will regain all Action Points and the turn will start over from the top of the list.
Squad Turn-Based Mode (STB)
This is a variant of ITB. In this mode, all characters for a particular player will get a chance to move at the same time. When all characters in the squad have moved, the next player or the computer will get a chance to act. When all squads have moved, the turn will start over from the top with the first squad.
ITB and STB are collectively called Turn-Based mode, or TB. If a rule applies to both ITB and STB, it will be referenced as TB mode.
You can change the game mode at any time during a singleplayer game using the Options screen, page 27.
12 |
13 |
The host will set the game mode for a multiplayer game. The game mode cannot be changed in a multiplayer game once the game starts.
Tactical Screen
The Tactical Screen is where you will spend the vast majority of your missions.
This is the tactical screen --
life ends here in the Wasteland...
The top portion of the screen is the game view. This is where the action takes place. It is here that you can give orders to your troops to move and fire, in addition to other actions, like grabbing items, talking to people, opening doors, picking locks, and rummaging through 60-year old trash.
The bottom part of the screen is the interface bar. This bar is so important, it gets its own section (see page 16).
Hold the mouse cursor over a button or display on the interface for a second to get a description and the default hotkey.
Selecting Characters
You can left-click on one of your characters to select them. Shift-left- click to add a character to the current selection or remove a currently selected character. You can also left-click and drag to select multiple characters.
You can also select characters using their character tabs, see page 16.
Press F1 to F6 to select an individual squad member.
Press F12 to select all characters.
Grouping Characters
Characters can be grouped, making it easier to select your sniper team or your close combat specialists, for example. Ctrl-F7 to ctrl-F11 will set the currently selected squad members to a grouping. Press F7 to F11 to select that grouping.
Movement
You give move orders in the game view.
Left-click on the ground to move. In turn-based mode, hold the cursor over a point for a brief moment to see how many Action Points it will cost to move there. An X means too far away or something is blocking that location.
Ctrl-left-click to force move. This will allow you to move behind a closed door, for example, without opening it.
Shift-left-click to run. If the Always Run option is on, this will walk your characters instead.
Press the BACKSPACE key to stop movement at any time.
Other Actions
Left-click on objects to search them, open them, pick them up and otherwise use the object.
Left-clicking on an enemy will fire at them. Right-click will fire at an enemy or a point on the ground. Ctrl-right-click to force fire, even at a neutral or allied character. See Combat, on page 30, for more information.
Cursors
The cursor will change to show the current action. For example, moving the cursor over a non-hostile intelligent critter will show a targeting icon with a speech bubble -- you can talk to this person. If you hold down the control key, the cursor will change to show the percentage chance to hit this person.
14 |
15 |

Interface Bar
The interface bar at the bottom of the tactical screen gives you access to other game commands and gives you status information.
From left to right:
Display Window: This window either displays the mini-map or the text display. When the mini-map is
displayed, the plus and minus symbols can be used to zoom the map in and out (respectively). When the text display is active, a scrollbar can be used to scroll the text.
Mini-Map Button: This button will change the display window to show the mini-map. White dots are your squad members. Green dots are known neutrals. Red dots are
known enemies. Grey dots The display window in text display mode. are unknown forces.
Text Display Button: This button will change the display window to show the text display. The amount of text displayed depends on an Option setting, see page 27. The text display will give combat information and game feedback.
Character Tabs: Each active character in your squad has a character tab. This tab is used to select that character and to give some feedback under certain situations. Left-click on a tab to select just that character. Shift-left-click to select multiple characters. Right-click on a tab to center the screen on that character.
Character Portrait: This shows the currently selected character. The Armor Class and Hit Points of this character are displayed here for easy reference.
Action Points: This shows the maximum number of Action Points this character has. As Action Points are used, the lights will change brightness and dim.
Weapon/Item Hands: Each character can have two readied items at a time. Left-click on a button to make that the active weapon or item. See Inventory, page 19.
The current weapon mode is in the upper right. The AP cost is
in the lower left. The lower right is the targeted shot button. The green bar is the amount of ammo remaining. If it is a stackable weapon, like grenades, the upper left corner shows the total number in inventory. Right-click on the
weapon to change the weapon mode. Click the targeted shot button to toggle targeted shots on and off - they cost 1 AP extra, but allow aiming at specific locations. See Combat, page 30.
The AP cost to use this item is in the lower left. If the item has a limited number of uses, like a First Aid Kit, the green bar on the right shows how much of the item is left. If it is a stackable item, the upper left shows the inventory count.
If your race, stance or strength won't let you use the item, the item will turn red.
Sentry Mode Buttons: These three buttons are only displayed in CTB. In turn-based mode, see Overwatch Button, page 18. From top to bottom: Sentry Mode Off, Sentry Mode Defensive, Sentry Mode Aggressive.
Sentry Mode Defensive: The character will alert you when an enemy is spotted by flashing their character tab. If this character is fired on, they will return fire.
16 |
A character portrait. |
17 |
Sentry Mode Aggressive: This character will actively fire on the enemy.
Characters on sentry mode will not fire if their chance to hit is too small, see Combat, page 30. You can set the percentage by rightclicking on any of the Sentry buttons. The possible values are: 95% (only fire if you’re almost assured of hitting), 66% (fire under good conditions), 33% (fire under possible conditions) and 1% (what the heck, fire away!).
Stance Buttons: There are three stance buttons, use these to stand, crouch and go prone. These affect combat, see page 30.
Skill (SKL) Button: This button toggles the Skilldex, see page 19.
Inventory (INV) Button: This toggles the Inventory window, see page 19.
Character (CHR) Button: This displays the Character screen, see page 21.
PIPBoy (PIP) Button: Clicking this button goes to the PIPBoy, see page 21.
Menu (MNU) Button: Opens the menu, see page 22.
Overwatch Button: When playing in turn-based mode, the three Sentry buttons mysteriously turn into the Overwatch button. Clicking this will place the selected character(s) into Overwatch mode. This will let them fire a shot during another character’s turn automatically. Use this to cover doorways and alley corners. Overwatch can only be selected at the beginning of a character’s turn.
The Interface Bar - Turn-Based mode (TB) details
End Turn (END TURN) Button: Clicking this button will end the current characters turn (in Individual TB mode) or your squads turn (in Squad TB mode).
End Combat (END CMBT) Button: Clicking this button will attempt to end the current round of combat. If there are other critters that wish to continue combat, your turn will end and combat will continue. You cannot End Combat in a multiplayer turn-based game.
Skilldex
Some skills are used automatically, like weapon skills. Other skills require an active use. One way to use these active skills is to use the Skilldex. Click the SKL button on the interface bar or press S to toggle the Skilldex. Clicking the CLOSE button or using a skill will close the Skilldex.
Eight skills are displayed on the Skilldex. Click on a skill button to ready that skill. Except for Sneak, all other skills then need a target. The cursor will change. Left-click on the target to use that skill. Right-click to cancel.
The percentage next to the skill shows how likely you are able to perform that skill. The higher the number the better. Skills may go higher than 100%, but there is always a 5% chance of failure -- regardless of modifiers and skill percentage.
Inventory
Items characters are carrying are displayed in the Inventory window. Click the INV button on the interface bar or press I to toggle the Inventory display. Once the Inventory window is displayed, you can left-click on the character tabs to view the inventory of any of your characters.
The inventory window shows your selected character’s current inventory, a statistics screen and has an armor slot for equipping armor. Click the DONE button to close the inventory window.
This is the inventory window. All of your stuff is here.
18 |
19 |
The statistics screen shows your character’s name, primary statistics, current and maximum hit points, the current selected weapon or item, and the armor statistics. If a weapon is currently selected, it will display the basic weapon information, including: damage, range, current and maximum ammo count and currently loaded ammo type. A weapon can only have one ammo type loaded at a time.
You can get a description of an inventory item by left-clicking on it once. To view your statistics again, left-click on the item description.
Double-click an item to use it on the current character.
To equip your character, left-click and drag the item to your hands or to the armor slot on the right side of the inventory window. Weapons are automatically loaded when you drag them to your hands and unloaded when you drag them to your inventory. You can load a specific type of ammo by dragging the desired ammo to the weapon when it is equipped in your hand.
To drop something on the ground, simply drag it from your inventory to the ground. The dropped item will be placed at your character’s feet.
To exchange items with another character in your squad, move them closer together and then drag the item from inventory to the desired character tab or directly to the character. If the two characters are too far apart, you will be told that the first person can’t reach the other. Characters need to be within three meters of each other.
Moving Multiple Items
If you select more than one item to be moved, the Move Items window will appear.
You can either use your mouse to enter the desired number, type on your keyboard or select ALL. CLEAR will
reset the count to 0. Click DONE
when you are ready to move the items The Move Item window. or CANCEL to try again.
Character Screen
To see detailed information about your character’s statistics and skills, click on the CHR button or press the C key.
You can click on almost any part of this screen to get more detailed information about a statistic, skill, trait or perk.
This is the character screen.
It displays, well, characters...
Only one character can be viewed at a time. Click on the character tabs or their portraits to select other characters. You can use shift-left- click to select multiple characters, but only one character will be displayed at a time. To re-order characters, right-click on a character portrait and right-click on another portrait to swap their positions.
When a character gains a level, you can use the character screen to improve their skills and, occasionally, purchase new perks. See Characters, page 33.
PIPBoy
The PIPBoy is a Personal Information Processor, sort of a handy device for keeping track of things. Click on the PIP button or press P.
The PIPBoy will record briefings and conversations. Also, Brotherhood Scribes
input all the available intelligence,
including a map of the known area, about a mission into your PIPBoy.
The top of the PIPBoy has the current date and time.
20 |
21 |
There are five buttons that control the PIPBoy functionality:
BRIEFINGS: This displays the various mission briefings, plus shows the status of completed missions. Click on a briefing title to display that briefing. Click BACK to return to the briefings list.
DIALOGUE: Collects all the important dialogue that you've had within the current mission. Click on a listing to see the dialogue. Click BACK to return to the dialogue list.
MAP: This will display a map of the current mission, plus all the known mission intelligence. Click on the numbered areas on the map to display this information. The green circle is your starting position. Some missions will require you to return to this point for extraction. The map is only displayed when you are actually in the mission area.
ARCHIVES: This displays all of the in-game movies that have been shown.
DONE: When you are finished with the PIPBoy, click here.
Menu
Pressing ESC will normally bring up the menu, or you can press the MNU button on the interface bar.
HELP: This displays a list of the default hotkeys and basic mouse functionality. You can do the same by pressing H.
SAVE GAME: Single-player only. This will display the save game screen, so you can save your progress. See Saving/Loading a Game, page 29.
LOAD GAME: Single-player only. To load a previously saved game, click here.
OPTIONS: This will display the Options screen, where you can adjust Game, Display and Sound options. See page 27.
EXIT TO MAIN: This will quit the current mission, without saving, and return to the main menu. You must confirm this action.
DONE: Return to the game.
Speech
You can only initiate speech against a neutral or friendly character. Left-click on a character to speak to them. If they have anything to say, they will either float it over their head or they will display a speech window.
Characters will use floating speech if they don’t have a lot to say. Some floating speech is important, some is not.
Characters that have more dialogue will use a speech window. The speech window is displayed over the normal interface bar. A speech window will pause
the game, so feel free to take the time to read it. Click the DONE button to end the speech and unpause the game again. The volume of any spoken speech audio can be controlled from the Audio Options menu, see page 27.
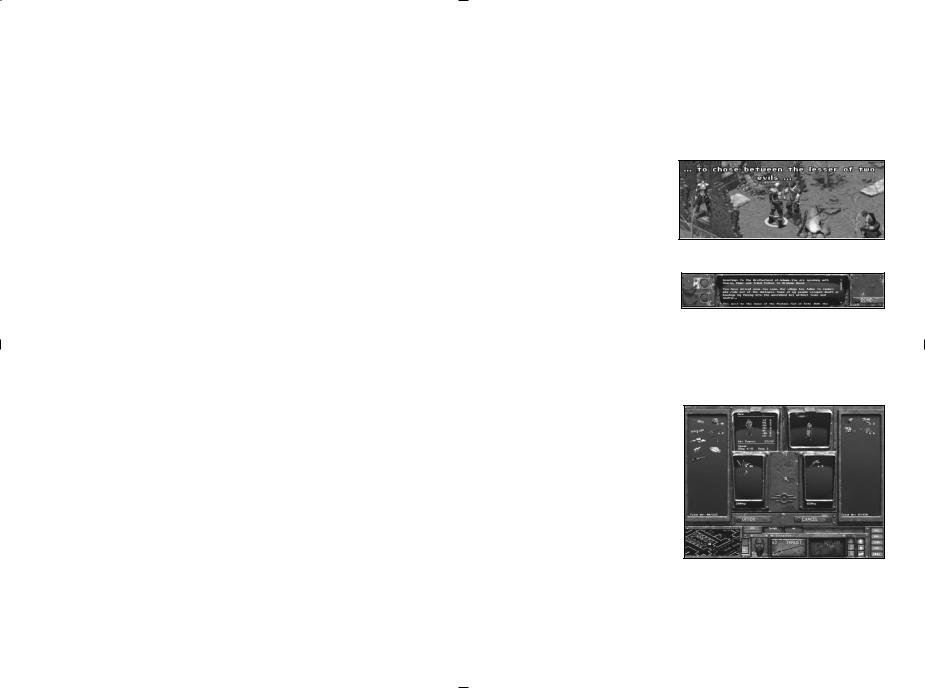
Barter
Some characters are willing to bargain for just about anything. You can use the barter screen to trade items back and forth. Talk to a character, if they display the BARTER button in the lower right hand side of their speech window, click it to start the bartering process.
This is the barter screen. Your side is on the left and the trader’s side is on the right.
22 |
23 |
|
 Loading...