


DUNGEON KEEPER™ GOLD
WARNING: TO OWNERS OF PROJECTION TELEVISIONS
Still pictures or images may cause permanent picture-tube damage or mark the phosphor of the CRT. Avoid repeated or extended use of video games on largescreen projection televisions.
EPILEPSY WARNING
PLEASE READ BEFORE USING THIS GAME OR ALLOWING YOUR CHILDREN TO USE IT.
Some people are susceptible to epileptic seizures or loss of consciousness when exposed to certain flashing lights or light patterns in everyday life.
Such people may have a seizure while watching television images or playing certain video games. This may happen even if the person has no medical history of epilepsy or has never had any epileptic seizures.
If you or anyone in your family has ever had symptoms related to epilepsy (seizures or loss of consciousness) when exposed to flashing lights, consult your doctor prior to playing.
We advise that parents should monitor the use of video games by their children. If you or your child experience any of the following symptoms: dizziness, blurred vision, eye or muscle twitches, loss of consciousness, disorientation, any involuntary movement or convulsion, while playing a video game, IMMEDIATELY discontinue use and consult your doctor.
PRECAUTIONS TO TAKE DURING USE
•Do not stand too close to the screen. Sit a good distance away from the television screen, as far away as the length of the cable allows.
•Preferably play the game on a small screen.
•Avoid playing if you are tired or have not had much sleep.
•Make sure that the room in which you are playing is well lit.
•Rest for at least 10 to 15 minutes per hour while playing a video game.
1

INSTALLING DUNGEON KEEPER GOLD
When you install Dungeon Keeper Gold, you will install both Dungeon Keeper™ and The Deeper Dungeons™ at the same time. The Dungeon Keeper™ Editor will not be installed. To install this, please refer to the readme.txt file in the Editor subdirectory of the Dungeon Keeper™ Gold CD.
WINDOWS® 95
Note: If you already have Dungeon Keeper installed on your hard disk, it is a good idea to uninstall it before installing Dungeon Keeper Gold. This is because Dungeon Keeper Gold will automatically install both Dungeon Keeper™ and The Deeper Dungeons™ at the same time. If you have any save games you want to keep, move the contents of the Keeper save directory to a safe place, uninstall Dungeon Keeper and then install Dungeon Keeper Gold. Then copy the contents of your old save directory into the new save directory.
When you are in Windows, insert the Dungeon Keeper Gold CD into the CD drive. Windows 95 will automatically detect the disc and run the installation program. Follow the simple instructions on the screen to install Dungeon Keeper Gold.
If Windows 95 fails to recognise the Dungeon Keeper Gold CD, just run setup on the root of the CD and the installation will begin.
Running Dungeon Keeper
To run Dungeon Keeper, click on the Start button and go to the Programs menu. Go up to the Bullfrog menu and then to the Dungeon Keeper Gold menu. Click on the Play Dungeon Keeper option.
Please refer to the Dungeon Keeper manual for more information on the game.
Running The Deeper Dungeons
To run The Deeper Dungeons, click on the Start button and go to the Programs menu. Go up to the Bullfrog menu and then to the Dungeon Keeper Gold menu. Click on the Play The Deeper Dungeons option.
You can play the levels included with The Deeper Dungeons in any order but bear in mind that they are harder and more challenging than those in Dungeon Keeper. It is recommended that you play Dungeon Keeper first before attempting The Deeper Dungeons.
THE DEEPER DUNGEONS
EVIL NEVER SLEEPS...
The world is under your total domination. The Avatar and his band of happy followers lie dead and rotting at your feet. Your power is complete, millions of demonic creatures obey your every command and weak, pitiful subjects quake in your presence. Depravity and evil rule and you are master...
Doomsday, the anniversary of your great victory, and the land is preparing for an orgy of blood and mayhem. Late at night, grave news reaches your ear and you realise your dominion is in danger from the last place you expected. The Avatar has returned, reincarnated by some misguided Knights who escaped the slaughter of your first victory. They have taken over many of the caverns that lie hidden below the surface of the world and have mustered a new army. You must strike first and wipe them out once and for all.
2

NEW FEATURES
The following features have been included in the Deeper Dungeons Data Disc:
•Fifteen new levels to test your strength and cunning.
•Fifteen new multiplayer levels to play against your friends and slaughter their pitiful armies.
•New dungeon graphics.
•Improved Artificial Intelligence for the enemy Dungeon Keepers. Improvements include:
- Enemy Keepers will now sell doors and traps to gain revenue.
-Enemy Keepers preserve their gold.
-Gold finding abilities are greatly improved.
• Miscellaneous enhancements that include:
-Creatures no longer teleport to unexplored areas of the map.
-Parties who have had their leader killed now choose a new leader and continue their quest.
-Improved creature AI.
PLAYING MULTIPLAYER MAPS AS A SINGLE PLAYER
You can also play the multiplayer maps even if you are a lone single player. If you choose this option, computer players will replace your absent opponents. To do this, click on the Start button and select the Run option. Type in the location of Dungeon Keeper on your hard disk and add
-1player on the end e.g. c:\program files\bullfrog\keeper\keeper95.exe -1player. When the Dungeon Keeper Main Menu appears, click on the Multiplayer button and you will see a new option below the normal network options called 1 Player. Click on this option and you will enter the Multiplayer Levels Map. Click on any flag to start that level.
You can do the same on The Deeper Dungeons by typing deeper95.exe instead of keeper95.exe. Warning: This is an unsupported feature and was therefore omitted from the original manual. Bullfrog™ or Electronic Arts™ do not take any responsibility for incompatible levels or other errors related with this feature.
DUNGEON KEEPER EDITOR MANUAL AMENDMENTS
The following are amendments to the Dungeon Keeper Editor Manual supplied with Dungeon Keeper Gold:
PLAYING YOUR SINGLE PLAYER LEVELS
In the manual it says that you can play your newly created levels by using the command keeper95 -level xxx (where xxx is the number of the level). Unfortunately, this is incorrect. The only way to play your levels is by using only The Deeper Dungeons and adding your level to it’s own list of single levels.
3

To do this, go to the Levels subdirectory of your Keeper directory on your hard disk. In there, you will find a file called Ddiskmp.lof. Open this file with Notepad and you will see that all the Deeper Dungeons levels are listed here. On each line of the list, the number is the level number and after the comma is the name of the level. You will need to add yours to the end by entering it’s level number and name. Once you have done this, save Ddiskmp.lof. and close it. Then, when you next start The Deeper Dungeons, your level will be on the single player level list.
EDITING THE KEEPER.CFG
To edit the Keeper.cfg file, which you need to alter when you install the Dungeon Keeper Editor, you must use Notepad. To do this, double click on the file and Windows 95 will ask you what program you want to use to edit it. Scroll down the list of programs and find Notepad. Select this and click on OK. You will then be able to edit the Keeper.cfg file.
DUNGEON KEEPER DIRECT 3D
The Dungeon Keeper Direct 3D version supports 3D accelerator cards using the Direct3D standard. You can play the Direct 3D version if you have a 3D accelerator card and you have DirectX5 or greater installed. If you do not have an accelerator card, you should play the standard version of Dungeon Keeper.
For the minimum specification and the machines supported by the Direct 3D version, please read the ReadMeD3D.txt which can be found in the DK-D3D directory of the Dungeon Keeper Gold CD. Before you install the Direct 3D version, make sure your machine is one of those supported.
INSTALLATION
Note: before installing Dungeon Keeper Direct 3D, you will first need to install Dungeon Keeper Gold.
First insert your Dungeon Keeper Gold CD. Leave your computer alone for a moment and wait for the Dungeon Keeper Menu to appear. Click on exit to remove it. Next, double left click on the My Computer icon on your Windows Desktop. Find the icon for your CD drive (normally labelled D: ) and right click on it. This will bring up the icon’s menu. Left click on the Open option and you will see the contents of the Dungeon Keeper Gold CD. Double left click on the Install Keeper Direct3D icon and follow the onscreen instructions. The installation program will know where you installed Dungeon Keeper and will ask you to confirm.
If you do not have DirectX5, you will be asked whether or not you want to install it. Dungeon Keeper Direct 3D requires DirectX5 or later for it to work and will not work with DirectX3 or earlier.
To run Dungeon Keeper Direct 3D, click on the Start button, go into Program Files and find the Bullfrog folder. In the Bullfrog folder will be a folder called Dungeon Keeper - Direct 3D. Enter this folder and select Dungeon Keeper Direct 3D.
READMED3D.TXT
If you have any problems with the installation or running the Direct3D version of Dungeon Keeper, please refer to the ReadMeD3D.txt. To read this file, go to the Dungeon Keeper Direct 3D folder of the Bullfrog folder in your Start Menu and select Readme Direct3D.
There are many potential complexities involved with the Direct3D version due to the variety of hardware 3D accelerators in existence. Please consult this readme file for the very latest information about your card.
4

3D Accelerator Cards Supported
Please see the Readme Direct3D file for the latest information. Dungeon Keeper Direct3D runs on most Direct3D accelerator cards with DirectX5 support. This list includes, but is not limited to, cards based on the following chipsets: 3Dfx-Voodoo, nVidia-RIVA128, ATI-RagePro, Videologic/NEC PowerVR-PCX2 and 3DLabs-Permedia2.
HELP AND FREQUENTLY ASKED QUESTIONS
VIEWING DUNGEON KEEPER IN HIGH RESOLUTION
To view Dungeon Keeper in high resolution, press ALT-R. Please note that this feature requires a PC with sixteen megabytes to run. If you press Alt-r and the game does not change resolution then you do not have enough memory. Note that the Direct3D version will only run in high resolution mode.
You also require more than eight megabytes to enable the special lens effects when Possessing certain creatures.
GHOSTS
Contrary to the manual, Ghosts do not float through doors or walls for gameplay reasons.
DEMON SPAWN BECOMING DRAGONS
Demon Spawn do become Dragons but only on certain levels in the game. As the Dragon is a very powerful creature, this feature was removed from certain levels to make them more of a challenge.
CANCELLING CALL TO ARMS
Trouble is often encountered when cancelling the Call to Arms spell. This small section explains how to use it properly:
When you click on the Call to Arms icon, your mouse pointer changes to a waving flag and you will be in ‘cast’ mode.
CLICKING THE LEFT MOUSE BUTTON
When you click the left mouse button on the ground for the first time, a flag will appear. Do not click the right mouse button yet. Any creatures near the flag will enter a trance and walk towards the flag.
When you first cast the spell on the ground, you pass from ‘cast’ mode to ‘move’ mode. The ‘move’ mode means that you can move the flag around by left clicking on the ground elsewhere. Any creatures already under the influence of the flag will try and get to it even if they are on the other side of the map. This feature enables you to move the flag around your dungeon, by left clicking on the floor, collecting all your creatures into a small army. Then, by placing the flag on the other side of the map in your enemy’s dungeon, your creatures will walk across the map to the flag and into the enemy dungeon.
5

CLICKING THE RIGHT MOUSE BUTTON
If you click the right mouse button when you are in ‘move’ mode, all you will do is take your mouse pointer out of ‘move’ mode. You will not cancel the spell as the Call to Arms flag is still active in the dungeon, attracting creatures. This feature enables you to keep the Call to Arms going, cast different spells or build rooms, and then return to the Call to Arms later.
If you click the right mouse button before you cast the spell on the ground (while you are still in ‘cast’ mode’) you will just cancel the casting of the spell and your mouse pointer will return to normal.
If you have clicked the right mouse button when in ‘move’ mode, by clicking on the spell’s icon on the Control Panel again, you will re-enter ‘move’ mode and you will be able to reposition the flag once more.
CANCELLING THE CALL TO ARMS SPELL
To actually cancel the Call to Arms spell, your mouse pointer must be a waving flag (in ‘move’ mode). Then you have to click the spell’s button on the Control Panel. The flag will the disappear and your creatures will return to their normal jobs. You will have returned to ‘cast’ mode and you will be able to recast the spell. If you want to, by clicking the right mouse button you will return your mouse pointer to normal.
If you have clicked the right mouse button after casting the spell, then you will need to click the spell’s button twice: once to re-enter ‘move’ mode and a second time to cancel the spell for good.
Remember: You can increase the range of the Call to Arms spell by holding down the left mouse button when you cast it or move it.
Also, the spell does not cost any money if cast on your own land. If you cast it on enemy ground, then you will have to pay. If you cast the spell on an enemy room, your creatures will destroy that room when they get to it.
Note: The Sight of Evil spell works in exactly the same way.
THE DEEPER DUNGEON CREDITS
Producer: |
Alex Peters |
Programming: |
Alex Peters |
Artwork: |
Andy Bass |
Lead Level Designer: |
Barrie Parker |
Level Design: |
Barrie Parker, Andy Robson, Steve Lawrie,Tim Minor, |
|
Andy Trowers,Wayne Frost,Jon Rennie, Matt Dixon |
Script and Documentation: |
Jon Rennie, Neil Cook |
Design Assistant Manager: |
Andy Robson |
The Wrecking Crew: |
Andy Robson, Steve Lawrie, Andy Trowers,Wayne Frost, |
|
Nathan Smethurst, Tristan Paramor, Jeff Brutus |
Additional Testing: |
Tim Minor, Jon Rennie, Dan Riley |
Installation: |
Andy Nuttall |
6

DUNGEON KEEPER GOLD CREDITS
Producer: |
Sean Cooper |
Project Leader: |
Alex Peters |
Installer Programming: |
Andy Nuttall |
Documentation: |
Jon Rennie |
Testing Manager: |
Andy Robson |
Lead Tester: |
Nathan Smethurst |
Testing: |
Steve Lawrie, Tristan Paramor, Jeff Brutus |
Product Manager: |
David Dyett |
Translation Co-ordinators: |
Petrina Wallace, Clare Parkes |
Documentation Layout: |
Brian Howlett & Anita K. Legg |
Documentation Editor: |
James Lenoël |
Quality Assurance: |
Simon Romans, Peter Hill |
Materials Planner: |
Kevin Smith |
Original Game Design: |
Peter Molyneux, Simon Carter, Mark Healey, |
|
Dene Carter, Jonty Barnes, Alex Peters |
Special Thanks: |
Simon Carter, Dene Carter, Mark Stacey, Colin Robinson, |
|
Steve Fitton, Stan Ragan |
DUNGEON KEEPER DIRECT3D CREDITS |
|
Programming: |
Morten Pedersen |
Project Leader: |
Ian Shaw |
Installer Programming: |
Andy McDonald |
Documentation: |
Jon Rennie |
Testing Manager: |
Dominic Murphy |
Original Graphic Engine Design: |
Martin Bell, Glenn Corpes |
Special Thanks: |
Colin Robinson, David Bryson, Nick Goldsworthy, |
|
Julian Glover, John Miles, Darren Pattenden, Alex Peters |
DUNGEON KEEPERª MANUAL
CONTENTS |
|
1.0 Introduction . . . . . . . . . . . . . . . . . . . . . . |
. 6 |
3.0 Playing the Game . . . . . . . . . . . . . . . . . . . |
6 |
3.1 Moving Around . . . . . . . . . . . . . . . . . . . . |
7 |
3.2 The Options Panel . . . . . . . . . . . . . . . . . . |
7 |
3.2.1 Load and Save . . . . . . . . . . . . . . . . . . |
7 |
3.2.2 Graphics . . . . . . . . . . . . . . . . . . . . . . . |
8 |
3.2.3 Sound . . . . . . . . . . . . . . . . . . . . . . . . . |
9 |
3.2.4 Computer Assistance . . . . . . . . . . . . . |
9 |
3.2.5 Quit . . . . . . . . . . . . . . . . . . . . . . . . . |
10 |
4.0 The Control Panel . . . . . . . . . . . . . . . . . .10
4.1 The Dynamic Map . . . . . . . . . . . . . . . . .10
4.1.1 The Map Screen . . . . . . . . . . . . . . . . 11
4.2 Money . . . . . . . . . . . . . . . . . . . . . . . . . . 11
5.0 The Information Panel . . . . . . . . . . . . . . |
12 |
|
5.1 |
Imprison . . . . . . . . . . . . . . . . . . . . . . . . |
12 |
5.2 |
Flee . . . . . . . . . . . . . . . . . . . . . . . . . . . |
.12 |
5.3 Payday Bar . . . . . . . . . . . . . . . . . . . . . |
.12 |
|
5.4 |
Research Time Bar . . . . . . . . . . . . . . . . . |
12 |
5.5 |
Workshop Time Bar . . . . . . . . . . . . . . . . |
13 |
5.6 Number of Rooms . . . . . . . . . . . . . . . . . |
13 |
|
5.7 |
Number of Creatures . . . . . . . . . . . . . . . |
13 |
5.8 |
Query . . . . . . . . . . . . . . . . . . . . . . . . . . . |
13 |
6.0 The Rooms Panel . . . . . . . . . . . . . . . . . . |
14 |
|
6.1 Selected Rooms and Information . . . . . . |
14 |
|
6.2 |
Room icons . . . . . . . . . . . . . . . . . . . . . . |
14 |
6.2.1 Blank Spaces . . . . . . . . . . . . . . . . . . |
14 |
|
6.2.2 Question Marks . . . . . . . . . . . . . . . . |
14 |
|
6.2.3 Sunken Icon . . . . . . . . . . . . . . . . . . . |
15 |
|
6.2.3 Raised Icon . . . . . . . . . . . . . . . . . . . |
15 |
|
6.3 |
Laying Rooms . . . . . . . . . . . . . . . . . . . . |
15 |
6.4 |
Selling Rooms . . . . . . . . . . . . . . . . . . . . |
15 |
7.0 The Research Panel . . . . . . . . . . . . . . . . |
16 |
7.1 Casting Spells . . . . . . . . . . . . . . . . . . . . |
16 |
7.2 Cancelling a Spell . . . . . . . . . . . . . . . . . |
16 |
8.0 The Workshop Panel . . . . . . . . . . . . . . . |
17 |
8.1 Traps . . . . . . . . . . . . . . . . . . . . . . . . . . . |
17 |
8.1.1 Placing Traps . . . . . . . . . . . . . . . . . . |
17 |
8.1.2 Selling a Trap . . . . . . . . . . . . . . . . . . |
18 |
8.2 Doors . . . . . . . . . . . . . . . . . . . . . . . . . . . |
18 |
8.2.1 Placing Doors . . . . . . . . . . . . . . . . . |
.18 |
8.2.2 Locking Doors . . . . . . . . . . . . . . . . . |
18 |
8.2.3 Selling a Door . . . . . . . . . . . . . . . . . |
19 |
9.0 The Creature Panel . . . . . . . . . . . . . . . . . 19
9.1 Idle . . . . . . . . . . . . . . . . . . . . . . . . . . . .19
9.2 Working . . . . . . . . . . . . . . . . . . . . . . . . . 19
9.3 Fighting . . . . . . . . . . . . . . . . . . . . . . . . . 20
10.0 Pop-up Icons . . . . . . . . . . . . . . . . . . . . . |
20 |
|
10.1 |
Reading Pop-up Icons . . . . . . . . . . . . |
.20 |
10.2 |
Deleting Pop-up Icons . . . . . . . . . . . . . |
20 |
10.3 Objective . . . . . . . . . . . . . . . . . . . . . . . |
21 |
|
10.4 |
Important Information . . . . . . . . . . . . . |
21 |
10.5 |
A Battle . . . . . . . . . . . . . . . . . . . . . . . . |
21 |
10.6 |
New Creature . . . . . . . . . . . . . . . . . . . . |
22 |
10.7 |
Manufactured Item . . . . . . . . . . . . . . . . |
22 |
10.8 Newly Researched Item . . . . . . . . . . . . |
22 |
|
11.0 The Dungeon View . . . . . . . . . . . . . . . . |
23 |
17.0 Individual Rooms . . . . . . . . . . . . . . . . . |
31 |
|||
11.1 Your Mouse Pointer . . . . . . . . . . . . . . . |
23 |
17.1 |
Treasure Room . . . . . . . . . . . . . . . . . . . |
31 |
||
11.1.1 Normal (an arrow) . . . . . . . . . . . . |
.23 |
17.2 |
Lair . . . . . . . . . . . . . . . . . . . . . . . . . . . |
31 |
||
11.1.2 Digging (a pickaxe) . . . . . . . . . . . . |
23 |
17.3 |
Hatchery . . . . . . . . . . . . . . . . . . . . . . . |
32 |
||
11.1.3 A Creature (a hand) . . . . . . . . . . . . |
24 |
17.4 |
Library . . . . . . . . . . . . . . . . . . . . . . . . . |
32 |
||
11.2 The Dungeon Heart . . . . . . . . . . . . . . . |
24 |
17.5 |
Training Room . . . . . . . . . . . . . . . . . . . |
33 |
||
11.3 Your Imps . . . . . . . . . . . . . . . . . . . . . . |
24 |
17.6 |
Bridge . . . . . . . . . . . . . . . . . . . . . . . . . |
33 |
||
|
|
|
17.7 |
Guard Post . . . . . . . . . . . . . . . . . . . . . . |
34 |
|
12.0 Building Your Dungeon . . . . . . . . . . . . |
25 |
17.8 |
Workshop . . . . . . . . . . . . . . . . . . . . . . . |
34 |
||
12.1 |
Digging . . . . . . . . . . . . . . . . . . . . . . . . |
25 |
17.9 |
Barracks . . . . . . . . . . . . . . . . . . . . . . . . |
35 |
|
12.2 |
Gold . . . . . . . . . . . . . . . . . . . . . . . . . . . |
26 |
17.10 |
Prison . . . . . . . . . . . . . . . . . . . . . . . . . |
35 |
|
12.3 |
Gems . . . . . . . . . . . . . . . . . . . . . . . . . . |
26 |
17.11 |
Torture Chamber . . . . . . . . . . . . . . . . |
36 |
|
12.4 |
Impenetrable Rock . . . . . . . . . . . . . . . . |
26 |
17.12 |
Temple . . . . . . . . . . . . . . . . . . . . . . . . |
36 |
|
|
|
|
17.13 |
Graveyard . . . . . . . . . . . . . . . . . . . . . |
37 |
|
13.0 Building Basic Rooms . . . . . . . . . . . . . . |
27 |
17.14 Scavenger Room . . . . . . . . . . . . . . . . |
37 |
|||
13.1 |
Building a Treasure Room . . . . . . . . . . |
27 |
17.15 |
Sell Room . . . . . . . . . . . . . . . . . . . . . |
37 |
|
13.2 |
Building a Lair . . . . . . . . . . . . . . . . . . . |
27 |
|
|
|
|
13.3 |
Building a Hatchery . . . . . . . . . . . . . . . |
28 |
18.0 Spells . . . . . . . . . . . . . . . . . . . . . . . . . . . |
38 |
||
|
|
|
18.1 |
Possess Creature . . . . . . . . . . . . . . . . . . |
38 |
|
14.0 Continuing Your Dungeon . . . . . . . . . . |
28 |
18.2 |
Create Imp . . . . . . . . . . . . . . . . . . . . . . |
39 |
||
14.1 |
Water . . . . . . . . . . . . . . . . . . . . . . . . . . |
28 |
18.3 |
Sight of Evil . . . . . . . . . . . . . . . . . . . . . |
39 |
|
14.2 |
Lava . . . . . . . . . . . . . . . . . . . . . . . . . . . |
29 |
18.4 |
Speed Creature . . . . . . . . . . . . . . . . . . . |
39 |
|
|
|
|
18.5 |
Must Obey . . . . . . . . . . . . . . . . . . . . . . |
39 |
|
15.0 Hidden Rooms and Secrets . . . . . . . . . . |
29 |
18.6 |
Call To Arms . . . . . . . . . . . . . . . . . . . . |
40 |
||
15.1 |
Secret Surprise . . . . . . . . . . . . . . . . . . . |
29 |
18.7 Conceal Creature . . . . . . . . . . . . . . . . . |
40 |
||
15.2 |
New Rooms . . . . . . . . . . . . . . . . . . . . . |
29 |
18.8 |
Hold Audience . . . . . . . . . . . . . . . . . . . |
40 |
|
15.3 |
Hero Gates . . . . . . . . . . . . . . . . . . . . . . |
29 |
18.9 |
Heal . . . . . . . . . . . . . . . . . . . . . . . . . . . |
40 |
|
|
|
|
18.10 |
Lightning Strike . . . . . . . . . . . . . . . . . |
41 |
|
16.0 Rooms . . . . . . . . . . . . . . . . . . . . . . . . . . |
30 |
18.11 |
Protect Creature . . . . . . . . . . . . . . . . . |
41 |
||
16.1 |
Room Flags . . . . . . . . . . . . . . . . . . . . . |
30 |
18.12 Turn To Chicken . . . . . . . . . . . . . . . . |
41 |
||
16.1.1 Health . . . . . . . . . . . . . . . . . . . . . . . |
30 |
18.13 |
Cave-In . . . . . . . . . . . . . . . . . . . . . . . |
42 |
||
16.1.2 Capacity . . . . . . . . . . . . . . . . . . . . . |
30 |
18.14 |
Disease . . . . . . . . . . . . . . . . . . . . . . . . |
42 |
||
16.1.3 Efficiency . . . . . . . . . . . . . . . . . . . . |
30 |
18.15 |
Armageddon . . . . . . . . . . . . . . . . . . . . |
42 |
||
|
|
|
18.16 |
Destroy Walls . . . . . . . . . . . . . . . . . . . |
42 |
|
19.0 Traps and Doors . . . . . . . . . . . . . . . . |
. .43 |
23.11 |
Luck . . . . . . . . . . . . . . . . . . . . . . . . . . |
51 |
||
|
|
|
23.12 |
Strength . . . . . . . . . . . . . . . . . . . . . . |
.51 |
|
20.0 Traps . . . . . . . . . . . . . . . . . . . . . . . . . |
. .43 |
23.13 Wage . . . . . . . . . . . . . . . . . . . . . . . . . |
52 |
|||
20.1 |
Boulder Trap . . . . . . . . . . . . . . . . . . |
. .43 |
23.14 |
Skill . . . . . . . . . . . . . . . . . . . . . . . . . . |
52 |
|
20.2 |
Alarm Trap . . . . . . . . . . . . . . . . . . . |
. .44 |
3.15 |
Dexterity . . . . . . . . . . . . . . . . . . . . . . . |
52 |
|
20.3 |
Poison Gas Trap . . . . . . . . . . . . . . . . |
. . 44 |
23.16 |
Blood Type . . . . . . . . . . . . . . . . . . . . |
52 |
|
20.4 |
Lightning Trap . . . . . . . . . . . . . . . . . |
. . 44 |
23.17 Exiting From Query Creature Mode . . |
52 |
||
20.5 |
Word of Power Trap . . . . . . . . . . . . . |
. .44 |
|
|
|
|
20.6 |
Lava Trap . . . . . . . . . . . . . . . . . . . . . |
. . 45 |
24.0 Creature Types . . . . . . . . . . . . . . . . . . . |
53 |
||
|
|
|
24.1 Imp . . . . . . . . . . . . . . . . . . . . . . . . . . . |
53 |
||
21.0 Doors . . . . . . . . . . . . . . . . . . . . . . . . . |
. .45 |
24.2 |
Beetle . . . . . . . . . . . . . . . . . . . . . . . . . . |
53 |
||
21.1 |
Wooden Door . . . . . . . . . . . . . . . . . . |
. .45 |
24.3 Bile Demon . . . . . . . . . . . . . . . . . . . . . |
53 |
||
21.2 |
Braced Door . . . . . . . . . . . . . . . . . . . |
. .45 |
24.4 |
Dark Mistress . . . . . . . . . . . . . . . . . . . . |
53 |
|
21.3 |
Iron Door . . . . . . . . . . . . . . . . . . . . . . |
. 46 |
24.5 Demon Spawn . . . . . . . . . . . . . . . . . . . |
54 |
||
21.4 |
Magical Door . . . . . . . . . . . . . . . . . . |
. .46 |
24.6 |
Dragon . . . . . . . . . . . . . . . . . . . . . . . . . |
54 |
|
21.5 |
Selling a Trap or a Door . . . . . . . . . . . |
. 46 |
24.7 Fly . . . . . . . . . . . . . . . . . . . . . . . . . . . . |
54 |
||
|
|
|
24.8 |
Ghost . . . . . . . . . . . . . . . . . . . . . . . . . . |
54 |
|
22.0 Your Creatures . . . . . . . . . . . . . . . . . . |
. 46 |
24.9 |
Troll . . . . . . . . . . . . . . . . . . . . . . . . . . . |
55 |
||
22.1 |
Getting Creatures . . . . . . . . . . . . . . . . |
. 47 |
24.10 |
Hellhound . . . . . . . . . . . . . . . . . . . . . |
55 |
|
22.2 |
Looking After Your Creatures . . . . . . |
. 47 |
24.11 |
Horned Reaper . . . . . . . . . . . . . . . . . . |
55 |
|
22.2.1 Picking Up and Viewing Creatures |
. .47 |
24.12 |
Orc . . . . . . . . . . . . . . . . . . . . . . . . . . . |
55 |
||
22.2.2 Slapping Creatures . . . . . . . . . . . . |
. 48 |
24.13 Skeleton . . . . . . . . . . . . . . . . . . . . . . . |
55 |
|||
22.2.3 Sacking a Creature . . . . . . . . . . . . |
. 48 |
24.14 |
Spider . . . . . . . . . . . . . . . . . . . . . . . . |
56 |
||
22.2.4 Creature Moods . . . . . . . . . . . . . |
. .48 |
24.15 Tentacle . . . . . . . . . . . . . . . . . . . . . . . |
56 |
|||
22.3 |
Querying a Creature . . . . . . . . . . . . . |
. .49 |
24.16 |
Vampire . . . . . . . . . . . . . . . . . . . . . . . |
56 |
|
|
|
|
24.17 |
Warlock . . . . . . . . . . . . . . . . . . . . . . . |
56 |
|
23.0 Creature Information Panel . . . . . . . . |
. 49 |
|
|
|
|
|
23.1 |
The Primary Information Panel . . . . . |
.49 |
25.0 Creature Spells . . . . . . . . . . . . . . . . . . . |
57 |
||
23.2 |
Creature Anger Bar . . . . . . . . . . . . . |
. .49 |
25.1 |
Abilities . . . . . . . . . . . . . . . . . . . . . . . . |
57 |
|
23.3 |
Creature Experience . . . . . . . . . . . . . |
. .49 |
25.2 |
Dig . . . . . . . . . . . . . . . . . . . . . . . . . . . . |
57 |
|
23.4 Creature Name and Health . . . . . . . . |
. .50 |
25.3 |
Hand to Hand . . . . . . . . . . . . . . . . . . . . |
57 |
||
23.5 |
Creature Weapons . . . . . . . . . . . . . . . |
. 50 |
25.4 |
Arrow . . . . . . . . . . . . . . . . . . . . . . . . . |
57 |
|
23.6 |
The Secondary Information Panel . . . |
. .50 |
|
|
|
|
23.7 |
Creature Kills . . . . . . . . . . . . . . . . . . |
. .50 |
|
|
|
|
23.8 |
Gold Held . . . . . . . . . . . . . . . . . . . . . |
. 51 |
|
|
|
|
23.9 |
Defence . . . . . . . . . . . . . . . . . . . . . . |
. .51 |
|
|
|
|
23.10 Age / Time in Dungeon . . . . . . . . . |
. .51 |
|
|
|
|
|
26.0 Spells . . . . . . . . . . . . . . . . . . . . . . . . . . |
. 58 |
29.5 |
Barbarian . . . . . . . . . . . . . . . . . . . . . . . |
67 |
|||
26.1 |
Armour (Personal) . . . . . . . . . . . . . . . |
. 58 |
29.6 |
Wizard . . . . . . . . . . . . . . . . . . . . . . . . . |
67 |
||
26.2 |
Chicken (Weapon) . . . . . . . . . . . . . . . |
. 58 |
29.7 |
Witch . . . . . . . . . . . . . . . . . . . . . . . . . |
.68 |
||
26.3 |
Disease (Weapon) . . . . . . . . . . . . . . . |
. 58 |
29.8 Giant . . . . . . . . . . . . . . . . . . . . . . . . . . |
68 |
|||
26.4 |
Drain (Weapon) . . . . . . . . . . . . . . . . . |
. 58 |
29.9 Samurai . . . . . . . . . . . . . . . . . . . . . . . . |
68 |
|||
26.5 |
Fireball (Weapon) . . . . . . . . . . . . . . . |
. 59 |
29.10 |
Monk . . . . . . . . . . . . . . . . . . . . . . . . . |
68 |
||
26.6 |
Flamebreath (Weapon) . . . . . . . . . . . . |
. 59 |
29.11 |
Fairy . . . . . . . . . . . . . . . . . . . . . . . . . . |
68 |
||
26.7 Flight (Personal) . . . . . . . . . . . . . . . . . |
. 59 |
29.12 |
Lord of the Land . . . . . . . . . . . . . . . . |
69 |
|||
26.8 |
Freeze (Weapon) . . . . . . . . . . . . . . . . |
. 59 |
29.13 |
Avatar . . . . . . . . . . . . . . . . . . . . . . . . |
69 |
||
26.9 Grenade (Weapon) . . . . . . . . . . . . . . . |
. 60 |
|
|
|
|
||
26.10 |
Hailstorm (Weapon) . . . . . . . . . . . . . |
. 60 |
30.0 Win or Lose . . . . . . . . . . . . . . . . . . . . . . |
69 |
|||
26.11 |
Heal (Personal) . . . . . . . . . . . . . . . . . |
. 60 |
30.1 Statistics Screen and the High Score Table |
69 |
|||
26.12 |
Invisibility (Personal) . . . . . . . . . . . . |
.60 |
30.1.1 Statistics Screen . . . . . . . . . . . . . . . |
69 |
|||
26.13 |
Lightning (Weapon) . . . . . . . . . . . . . |
.60 |
30.1.2 High Score Table . . . . . . . . . . . . . . |
70 |
|||
26.14 |
Meteor (Weapon) . . . . . . . . . . . . . . . |
. 61 |
30.2 |
Torturing the Lord of the Land . . . . . . . |
70 |
||
26.15 |
Missile (Weapon) . . . . . . . . . . . . . . . |
. 61 |
|
|
|
|
|
26.16 |
Navigating Missile (Weapon) . . . . . . |
. 61 |
32.0 Appendix A: Creature Thought Bubbles |
70 |
|||
26.17 |
Poison Cloud (Weapon) . . . . . . . . . . |
. 61 |
32.1 |
Barrack . . . . . . . . . . . . . . . . . . . . . . . . |
70 |
||
26.17.1 Fart (Weapon) . . . . . . . . . . . . . . . |
. 61 |
32.2 |
Battle . . . . . . . . . . . . . . . . . . . . . . . . . . |
71 |
|||
26.18 |
Rebound (Personal) . . . . . . . . . . . . . |
. 62 |
32.3 |
Call To Arms . . . . . . . . . . . . . . . . . . . . |
71 |
||
26.19 |
Slow (Weapon) . . . . . . . . . . . . . . . . . |
.62 |
32.4 Flee . . . . . . . . . . . . . . . . . . . . . . . . . . . |
71 |
|||
26.20 |
Speed (Personal) . . . . . . . . . . . . . . . |
. 62 |
32.5 |
Guard . . . . . . . . . . . . . . . . . . . . . . . . . . |
71 |
||
26.21 |
Teleport (Personal) . . . . . . . . . . . . . . |
. 62 |
32.6 |
Home . . . . . . . . . . . . . . . . . . . . . . . . . . |
71 |
||
26.22 Wind (Weapon) . . . . . . . . . . . . . . . . |
. 62 |
32.7 |
Hungry . . . . . . . . . . . . . . . . . . . . . . . . . |
72 |
|||
26.23 |
Word of Power (Weapon) . . . . . . . . . |
. 63 |
32.8 |
Leave . . . . . . . . . . . . . . . . . . . . . . . . . . |
72 |
||
27.0 |
Possessing Creatures . . . . . . . . . . . . . |
. 63 |
32.9 |
Prison . . . . . . . . . . . . . . . . . . . . . . . . . . |
72 |
||
27.1 |
Controlling The Creature . . . . . . . . . . |
. 63 |
32.10 |
Psycho . . . . . . . . . . . . . . . . . . . . . . . . |
72 |
||
27.1.1 Controls . . . . . . . . . . . . . . . . . . . . |
. 63 |
32.11 |
Research . . . . . . . . . . . . . . . . . . . . . . . |
73 |
|||
27.1.2 Exiting Creature . . . . . . . . . . . . . . |
. 63 |
32.12 Scavenging/Being Scavenged . . . . . . . |
73 |
||||
27.2 |
The Possess Creature Panel . . . . . . . . |
. 64 |
32.13 |
Sleep . . . . . . . . . . . . . . . . . . . . . . . . . |
73 |
||
27.3 |
Changing Weapons . . . . . . . . . . . . . . . |
. 64 |
32.14 |
Sulk . . . . . . . . . . . . . . . . . . . . . . . . . . |
73 |
||
|
|
|
|
32.15 |
Torture . . . . . . . . . . . . . . . . . . . . . . . . |
74 |
|
28.0 Battles, Heroes and Enemy Creatures |
. 65 |
32.16 |
Train . . . . . . . . . . . . . . . . . . . . . . . . . |
74 |
|||
28.1 |
Creatures in Battle . . . . . . . . . . . . . . . |
. 65 |
32.17 |
Wages . . . . . . . . . . . . . . . . . . . . . . . . |
74 |
||
|
|
|
|
32.18 |
Workshop . . . . . . . . . . . . . . . . . . . . . . |
74 |
|
29.0 Heroes . . . . . . . . . . . . . . . . . . . . . . . . . |
. 66 |
|
|
|
|
||
29.1 |
Tunneller . . . . . . . . . . . . . . . . . . . . . . |
. 66 |
36.0 Credits . . . . . . . . . . . . . . . . . . . . . . . . . . |
75 |
|||
29.2 |
Thief . . . . . . . . . . . . . . . . . . . . . . . . . |
. 67 |
|
|
|
|
|
29.3 |
Archer . . . . . . . . . . . . . . . . . . . . . . . . |
. 67 |
Notice |
|
. . . . . . . . . . . . . . . . . . . . . . . . . . . . . . |
77 |
|
29.4 |
Dwarf . . . . . . . . . . . . . . . . . . . . . . . . . |
. 67 |
|
|
|
|
|
1.0 INTRODUCTION
Welcome to the realm of the Dungeon Keeper. This is your world. Above ground all might be peace and harmony, but deep in the bowels of the earth you rule over a realm of chaos and violence. Your task is to plan, dig and manage Dungeons with which to lure explorers with the promise of untold wealth. You also have to attract an army of evil creatures to do your bidding and, if you keep them fed, housed and paid, you can train them in combat and call on them to deal with the interlopers.
Different rooms attract certain creatures, so how you design the Dungeon directly affects the type of creatures who join your fight against the common good. You also need to dig for gold as this is the only thing that the creatures are interested in (loyalty is not a concept they understand). Each land is ruled over by a Lord who you have to defeat to force his realm into submission. You may also have to fight against rival Dungeon Keepers who know every underhand method in the book and are desperate to gain control of both your gold and your creatures. It’s going to require all your wits and wisdom, as well as all your back-stabbing craftiness, to finally gain control of every realm and prove yourself to be the supreme Dungeon Keeper.
The key to exploring the world of Dungeon Keeper is to experiment. Everything interacts with everything else and if you have an idea, no matter how outlandish, try it. You might find that you’ve discovered something to guarantee your victory over the foul forces of good.
Note: Section 2.0 Before the Game can be found in the Ref Card.
3.0 PLAYING THE GAME
You are now in the main game of Dungeon Keeper. This section of the manual takes you through all the game’s aspects, explaining the control panels, the different rooms and spells and how to get the best from your creatures.
The Screen is split into two sections: The Control Panel to the left and the
Dungeon View to the right.
The Control Panel has a map at the top which displays a limited view of your Dungeon. This is centred on you’re current position in the Dungeon View.
Under the map are five panels which can be selected by left-clicking on the icon tabs attached to each panel. The panels are (from left to right): Information, Rooms, Research, Workshop and Creatures. See the Control Panel section (section 4.0) later in the manual for more information.
The Dungeon View displays all of your Dungeon. Use this view to place rooms and control your creatures. For more information, see the Dungeon View section (section 11.0) later in the manual.
Pop-up icons appear at the edge of the Control Panel from time to time. When clicked on, these bring up important information about your dungeon, for example a new discovery, a new creature or a battle involving your creatures. See the Pop-up Icons section (section 10.0) for more information.

Each time you put your mouse over an icon or part of your dungeon, a scrolling Tooltip appears telling you what it is, how to use it and where in the manual it is mentioned and explained. You can also play the game in high resolution by pressing
ALT-R.
3.1 MOVING AROUND
You can scroll around the Dungeon by pressing the cursor keys or by moving the mouse to the edge of the screen. To rotate the map, hold down the right Ctrl key and press the left or right cursor key (or delete/page down). To zoom in and out, hold down the right Ctrl key and press the up cursor key to zoom in and the down cursor key to zoom out (or home/end). By doing both (e.g. holding down the up arrow and moving the mouse to the top edge of the screen) you can move at twice the speed. Holding down Shift and pressing the cursor keys scrolls you at twice the speed.
For right-handed players, it’s best to use these keys with your left hand (your middle three fingers on the cursor keys and your little finger on the right Ctrl key) and leave your right hand free for the mouse. Left-handed players can use the same setup but with opposite hands.
For more information on the keys in the game, see the Keys section (section 33.0) later in the manual.
3.2 THE OPTIONS PANEL
The Options Panel can be accessed by pressing the Esc key at the top left of your keyboard or simply by clicking on the panel. The panel has six icons on it: Load, Save, Graphics, Sound, Computer Assistance and Quit.
3.2.1 LOAD AND SAVE
Load restores the games previously saved on the Save menu. Left-click on the relevant icon to bring up each panel.
To load a game, left-click on the slot you want to load.
To save a game, click on a slot and change the text in it to your chosen filename. Now press Enter to save.

3.2.2 GRAPHICS
Graphics contains five options with which you can configure your game: Shadows, View Distance, View Type, Wall Height and Gamma Correction.
Shadows has five settings and determines the maximum number of shadows each creature can cast. The default is four.
View Distance sets how far your Dungeon is drawn from the centre of the Dungeon View, which directly affects the speed of the game. Its default setting is maximum size.
View Type toggles between the two types of view available in Keeper. The default view has warped walls and can be rotated. By left-clicking on the icon you enter a fast, forced perspective view which is quicker but has straight walls and can only be rotated through 90 degrees.
Wall Height enables you to make the walls one block high so that they are easier to see over. This can help when viewing your creatures.
Gamma Correction has five settings each one of which makes the screen a bit brighter. The default setting is lowest.

3.2.3 SOUND
Sound contains two bars with which you can set the volumes; the sound effects volume is at the top and the music at the bottom.
3.2.4 COMPUTER ASSISTANCE
You may select four different types of Computer Assistance. Each performs a different task for you, such as building your dungeon, laying traps or moving your creatures around. The default assistant is Aggressive.
Aggressive Computer Assistance constructs your dungeon, lays traps, casts spells and always tries to attack the enemy players.
Defensive Computer Assistance also constructs your dungeon, lays traps and casts spells but never goes out to attack the enemy.
Construction Only Computer Assistance only builds rooms and lays traps and isn’t able to cast spells or move creatures around.
Move Only Computer Assistance only moves creatures and slaps them.
3.2.5 QUIT
Quit takes you back to the Level Map.
You are then asked to confirm that you want to quit the game.
To exit from the panel or any of the sub-panels, click the right mouse button or press the Esc key.
4.0THE CONTROL PANEL
4.1THE DYNAMIC MAP
[Map Screen Options Panel Computer Assistant Increase scale Decrease scale Compass points]
The Dynamic Map on the Control Panel is centred on your Dungeon View and moves around as you rotate the Dungeon View. If you left-click with the mouse
button on the map, the Dungeon View jumps to that area. At the edge of the map are four letters marking the four points of the compass so that you know in which direction you are facing.
There is a dotted line stretching from the centre of the map. This always points directly at your Dungeon Heart, the core of your Dungeon. The red areas are tiles owned by you and the grey areas around these tiles are the reinforced walls. Yellow tiles indicate the presence of gold or gems and dark grey tiles are impenetrable rock. Creatures appear on the map as black flashing dots while heroes appear as white dots. Any multi-coloured flashing squares on the map represent as-yet unclaimed rooms, for example: Portals.
You can left-click on the map to zoom the Dungeon View to that place.
To the right of the map are two icons marked with a + and -. Clicking on these decreases or increases the scale of the map. To the top left is a scroll icon. Clicking on this takes you to the Map Screen.

4.1.1 THE MAP SCREEN
This screen displays your entire Dungeon and the area around it which you can dig through. Visually, it is the same as the Dynamic Map on the Control Panel. If you are battling against an enemy Keeper, you can see any part of his or her Dungeon you have discovered. Parts of
his or her Dungeon appear on the map in the appropriate colour.
If you left-click on any part of the map, the screen closes and the Dungeon View recentres itself. right-clicking on the map acts as an exit and takes you back to the Dungeon View without altering your position.
Attached to the mouse is a spy window which gives you a more detailed view of the area under your mouse. Also in this view, instead of appearing as dots, all the creatures are shown by their individual pictures and experience levels.
Move your mouse pointer over a room and a tool-tip appears giving you the name and, if available, information on that room.
4.2 MONEY
Just beneath the map are some gold digits denoting the total amount of gold you have to spend. Watch this figure carefully - you need to use your Imps to dig out some more gold if it becomes too low.

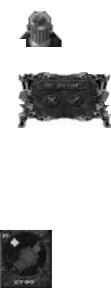
5.0 THE INFORMATION PANEL
At the top of the information panel there are two icons indicating the Creature Tendencies. These tell a creature what to do in the event of a battle. Both can be selected at once as they do not conflict with one other. The Creature Tendencies icons are:
5.1 IMPRISON
This is only available if you have built a Prison. This tells creatures to take enemy heroes or creatures to the Prison instead of killing them. For more information on the Prison see section 17.10.
5.2 FLEE
This tells the creatures to run away if they are too badly damaged.
5.3 PAYDAY BAR
Below these icons is the Payday Bar. This bar increases gradually over time and, when it reaches its peak, all of your creatures receive their wages from your Treasure Room.
The following two bars tell you how long it takes to research or build a new item. The length of time it takes depends on the size of your Research Room (the Library) or the Workshop. It also depends on the number of creatures working on research in the Library.
5.4 RESEARCH TIME BAR
This indicates the length of time for research of a new room or spell to be completed by the creatures using the Library.
5.5 WORKSHOP TIME BAR
This is the amount of time remaining before the building of a new object in the Workshop is complete. The Workshop is used for the construction of traps and doors. Note that you have to build a new trap or door every time you want to place one in the dungeon.
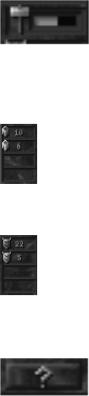
Under the Time Bars there are two columns of information on each Dungeon Keeper on the map:
5.6 NUMBER OF ROOMS
The number of rooms that the Keeper has in his or her Dungeon.
5.7 NUMBER OF CREATURES
The number of creatures that the Keeper has under his or her control.
If you are alone on the map, as you are on level 1, the only information available is on your own dungeon. If there are other Keepers on that level their information appears in their own colours.
5.8 QUERY
Left-click on the Query Button and your mouse pointer changes into a question mark. You can then query any creature to bring up the Creature Information Panel. While you are displaying a creature’s information panel, the Dungeon View follows that creature. You can also query a
creature by holding down Shift and left-clicking on the creature, this will also make you enter the creature.
See the Creature section (section 22.0) later in the manual for more information on the panel.
6.0 THE ROOMS PANEL
The Rooms Panel lists all of the rooms available for you to build on the current level. When you select a room, a picture icon of that room is displayed.
6.1 SELECTED ROOMS AND INFORMATION
To the left is a picture showing you which room you selected, for example, a bag of gold for a Treasure Room. Next to the picture are two numbers. The first, in red, is the amount of rooms you have of that type. The second, in gold, is the amount each room tile costs to place down.
When you place the first room of any type down, a bar appears to the right of these numbers. This bar indicates, collectively, how full up all those rooms are. If all your rooms of that type are full, the bar is at maximum.
6.2 ROOM ICONS
There are fifteen different types of room in Dungeon Keeper and each has its own slot on the panel. The icons on the panel have four states: blank, question mark, sunken or raised.
6.2.1 BLANK SPACES
If the box for the room icon is blank, it means that the room is not available on the current level.
6.2.2 QUESTION MARKS
If the box has a question mark inside, it means that the room is available for you to research.
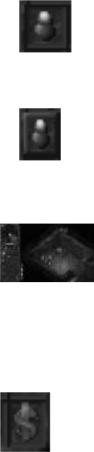
6.2.3 SUNKEN ICON
If the room icon’s box is sunken, it means that you have not built any rooms of that type yet.
6.2.3 RAISED ICON
If the icon is raised, it means that one or more rooms of that type are available on that level. You can see all the available rooms by right-clicking on an icon; this zooms the Dungeon View to each of those rooms in turn.
6.3 LAYING ROOMS
To lay a room, left-click on an icon and move over to the Dungeon View. Your mouse pointer changes so that you can see the type of room you are laying. You can only build on areas of Dungeon that you have claimed (a tile with a red dot in the centre). Once you have found a good spot, click
with the left mouse button to lay the room tile. Many rooms may require a minimum size of three by three tiles before they function properly, such as the Torture Chamber and the Temple.
To cancel the laying of a room, click the right mouse button and your cursor returns to normal.
See the Rooms section (section 16.0) later in the manual for more information on individual rooms.
6.4 SELLING ROOMS
The last icon on the panel is a dollar sign called the Sell Room Icon. If you left-click on this and then move the cursor over an already built room, you are able to sell that room tile and return the square to a normal tile. Note, however, that when you sell a room you only get back half its original price.
7.0 THE RESEARCH PANEL
The Research Panel lists all of the spells available for you to use on the current level. There are fifteen spells in all that you can research and use in Dungeon Keeper, and each has its own square on the panel. When a spell has been selected, its picture appears on the panel. It flashes to show that it has been selected.
7.1 CASTING SPELLS
Some spells need casting directly on a creature, some need to be cast on the Dungeon View and others are cast automatically.
To pick up a spell, simply left-click on it. If it needs to be cast on a specific creature, highlight the creature with the cursor and then left-click to cast the spell. To cast the spell on a specific location in the Dungeon, go to that place and click the left mouse button.
Each time you pick up a spell, the cursor changes into an icon of that spell so you can see exactly what you’re casting. You’re often able to hold down the left mouse button instead of just clicking it and this slowly builds up the power of the spell to increase its power or longevity.
When a spell is in action on the map, the icon for that spell becomes raised. Clicking the right mouse button on the spell icon jumps the Dungeon View to the point in the dungeon at which it is being used. Subsequent clicks with the right mouse button cycle through any of the spells that are currently active.
7.2 CANCELLING A SPELL
To cancel a spell while you’re still holding it, click the right mouse button.
See the Spells section (section 18.0) later in the manual for more information on individual spells.

8.0 THE WORKSHOP PANEL
The Workshop Panel contains all the traps and doors which you can place in your Dungeon. Each trap or door must be individually constructed in the Workshop by your creatures.
If you select a trap or a door, a picture icon of that door appears with a number beside it. This number tells you how many of those traps or doors you have available to place. Traps and doors
do not cost anything to place down, but must be manufactured beforehand.
8.1 TRAPS
There are six traps in Dungeon Keeper for you to manufacture.
8.1.1 PLACING TRAPS
To lay down a trap, click on the icon with the left mouse button. Move your mouse over to the Dungeon View and place the trap where you want it with the left mouse button. You can only place a trap down on your own tile, so make sure that you plan your defences carefully. If you decide against placing a trap,
click the right mouse button to cancel it.
When a trap is placed, it becomes transparent. This is because an Imp has to go and take it from the Workshop to the place you have specified.
Imps automatically go and place traps, but you may not want to wait for one of them to get around to it. Drop an Imp onto the transparent trap and it goes straight to the Workshop to get it. If you drop an Imp into the Workshop and onto a square occupied by a trap crate, then the Imp takes it to the nearest
trap and arms it. Sometimes an Imp may drop a crate it’s car rying because it gets killed or scared. The crate remains on the ground until another Imp, either yours or an enemy’s, picks it up. To prevent an enemy stealing your crate, you can drop an Imp onto the crate and it either takes it back to the Workshop or takes it to a trap if one needs arming.
When a trap has been set in your Dungeon, the trap’s icon on the panel becomes raised. You can then cycle through all traps of the same type by right-clicking on the icon. Although visible to your own beady eye, your traps are invisible to enemy Dungeon Keepers and heroes until triggered. But be warned - the same is true of your enemy’s traps, so move your forces with caution.

8.1.2 SELLING A TRAP
To sell a trap, left-click on the Sell Traps and Doors Icon (the dollar sign) at the bottom of the panel. Move the cursor over the trap and click the left mouse button; the trap is then sold.
For more information on Traps, see the Traps and Doors section (section 20.0) later in the manual
.
8.2 DOORS
There are four types of door in Dungeon Keeper.
Doors are effective barriers against an enemy, as they have to destroy them to get through. Your creatures, however, are able to go through your doors at will. This makes a good set of doors a very useful addition to the well-
protected Dungeon.
8.2.1 PLACING DOORS
You can only place a door down on your own tiles in a corridor one tile wide. Select the type of door you want to place down with the left mouse button; the mouse pointer changes to show your chosen door type. Move the mouse pointer over the Dungeon View and left-click to place the door down in a valid place.
Doors appear straight away, unlike the traps.
When a door has been placed down, the icon on the panel becomes raised. right-click on this icon to zoom and cycle through all the same door types owned by you on the map.
8.2.2 LOCKING DOORS
If you don’t want your creatures walking through doors, you can lock them. This allows you to cut off parts of your Dungeon. If you put your mouse over a door, the pointer changes into a spinning key. Now click the left mouse button to lock the door; a similar spinning key icon appears over the door to show you
that it is currently locked.
To unlock a door, left-click on the door again and the spinning key icon disappears.
 Loading...