


Manual
650552-MNL
UBI SOFT ENTERTAINMENT, INC. 625 Third Street, 3rd Floor, San Francisco, CA 94107
© 2002 Ubi Soft Entertainment. All Rights Reserved. Ubi Soft and the Ubi Soft logo are trademarks of Ubi Soft Entertainment in the U.S. and/or other countries. The Dragon's Lair name, logo, characters and indicia are either registered trademarks, trademarks, or copyrights of Dragon's Lair LLC and Don Bluth, and are used under license with permission. The Dragon's Lair 3D game © 2002 Dragon's Lair LLC and Don Bluth. The original Dragon's Lair game © 1983 Bluth Group Ltd. All rights reserved. Uses Bink Video. Copyright © 1997-2001 by RAD Game Tools Inc. Uses Genesis3D. Copyright © 1999 Eclipse Entertainment.
TECHNICAL SUPPORT
Before contacting Ubi Soft Entertainment’s Technical Support Department, please first read through this manual and the README file (on the game CD). Also browse through our FAQ listings or search our support database at our website, http://support.ubi.com. Here you will find the most recently updated information since the game’s release.
Also please make sure that your computer meets the minimum system requirements, as our support representatives will be unable to assist customers whose computers do not meet these criteria.
Whenever you contact the Technical Support Department, please include the following information or have it available if you are calling:
•Complete product title (including version number)
•Exact error message reported (if applicable) and a brief description of the problem you’re encountering
•Processor speed and manufacturer
•Amount of RAM
•Operating system
•Video card that you are using and amount of RAM it has
•Maker and speed of your CD-ROM or DVD-ROM drive
•Type of sound card you are using
Contact Us Over the Internet
This is the best way to contact us. Our website is open 24 hours a day, 7 days a week and it contains the most up-to- date Technical Support information available, including patches that can be downloaded free of charge. We update the Support pages on a daily basis, so please check here first for solutions to your problems http://support.ubi.com/.
Contact Us by Email
For fastest response via email, please visit our website at:
http://support.ubi.com/
From this site, you will be able to enter the Ubi Soft Entertainment Solution Center where you can browse
through our listings of Frequently Asked Questions (FAQ), search our database of known problems and solutions, or, for fastest email response, you can send in a request for Personal Assistance from a Technical Support Representative. It may take up to 72 hours for us to respond to your email depending upon the volume of messages we receive.
Contact Us by Phone
You can also contact us by phone by calling (919) 460-9778. Note that this number is for technical assistance only. No hints or tips are given over the Technical Support line. When calling our Technical Support line, please make sure you are in front of your computer and have all of the necessary information listed above at hand. Be advised that our Technical Support Representatives are available to help you Monday–Friday from 9 am–9 pm (Eastern Standard Time). While we do not charge for technical support, normal longdistance charges apply. To avoid long-distance charges, or to contact a support representative directly after these hours, please feel free to use one of the other support avenues listed above. Email issues usually receive a response within 2 business days.
Contact Us by Standard Mail
If all else fails you can write to us at:
Ubi Soft Technical Support
3200 Gateway Center Blvd
Suite 100
Morrisville, NC 27560
Return Policy
Please do not send any game returns directly to Ubi Soft Entertainment before contacting technical support. It is our policy that game returns must be dealt with by the retailer or online site where you purchased the product. If you have a damaged or scratched CD, please visit our FAQ listing for your game and get the latest replacement policy and pricing. We will not accept unsolicited returns/exchanges without prior approval and an RMA (Return Materials Authorization) number from a support representative.
|
CONTENTS |
Installation......................................... |
2 |
Starting Dragon’s Lair......................... |
4 |
Controls............................................. |
4 |
Introduction....................................... |
5 |
Loading & Saving............................... |
5 |
Main Menu......................................... |
6 |
Options Screen .................................. |
7 |
Game Screen..................................... |
8 |
Inventory ........................................... |
9 |
Weapons ........................................... |
10 |
Items................................................. |
11 |
Dragon Essences ............................... |
13 |
Heroes............................................... |
14 |
Enemies ............................................ |
15 |
Dirk’s Special Moves .......................... |
16 |
Credits............................................... |
23 |
Warranty ............................................ |
25 |
1
INSTALLATION
Insert Disk 1 (Install Disc). On the Autorun Screen, click “Install”.
Step 1- Click “Next” to go to the next screen.
Step 2- Click Agree to indicate agreement to software license. Step 3- Select the location of the target directory and click “Next”. Step 4- Select a program folder and click “Next”.
Step 5- Click on “Next” to install or cancel to back out. Step 6- Click on Close to finalize the installation.
Alternative Installation
Enter CD directory where Dragon’s Lair is installed on the Hard Drive. Double click on “Setup.exe”. Follow earlier instructions from Step 1 on.
Configuration
After Installation, a prompt will appear to configure Dragon’s Lair. Select Configuration to change the screen resolution, audio settings, control settings and advanced graphic settings. The configuration screen may be toggled off by clicking off the “Show this window every time” check box.
Alternative Configuration
Via the Startup Menu, select Programs >Dragon's Lair 3D >Configuration, and then follow the instructions above.
System Requirements
•Windows® 98/ME/2000/XP
•Pentium II® 300 or AMD K6®-III 400 (Pentium III® 800 recommended)
•64 MB RAM (128 MB recommended)
•DirectX® 8.1 (included in disc)
•16 MB video card (DirectX 8.1 compatible)
•Minimum Install = approximately 700 MB
•Full Install = approximately 1.5 GB
•Sound card (DirectX 8.1 compatible)
•DirectX-compatible joystick (optional)
Uninstall
Insert Disc 1 (Install Disc). On the Autorun Screen, click “Uninstall”.
Alternative Uninstall
Go to Start Menu and click on “Remove Dragon’s Lair 3D”.
OR
Go to Add/Remove Programs on Control Panel and select “Dragon’s Lair 3D”.
-Click “Yes” to confirm uninstallation, click “Yes or No” if you want to remove save games.
-Then program will uninstall.
2 |
3 |
STARTING DRAGON’S LAIR/CONTROLS
To Start the Game
Insert Disk 2.
On the Autorun Screen, click “Play”.
The Configuration Menu may show up. Select a screen resolution between 320X200 and 1600X1200. The recommended resolution setting depends on the power of the video card and the computer. A standard PIII 1GHz machine with a GeForce 2 class video card should select 1024X768 at 32bit color.
OR
Via the Startup Menu, select Programs >Dragon's Lair 3D >Dragon's Lair 3D.
To Change the Keyboard Controls
Press Esc at any time to access the Status screen. Click Options.
Then click Control Options.
Click on the key to change that key map. Select the new key map.
4
Default Keyboard Controls
Forward |
Up Arrow |
Back |
Down Arrow |
Left |
Left Arrow |
Right |
Right Arrow |
Camera Up |
I |
Camera Down |
K |
Camera Left |
J |
Camera Right |
L |
Use/Attack |
SPACE |
Jump |
LEFT ALT |
Crouch |
C |
Auto-target |
TAB |
Block |
B |
Quick Save |
F5 |
Quick Load |
F9 |
Equip Weapon |
LEFT CTRL |
Walk |
LEFT SHIFT |
Run |
R |
Sword |
1 |
Steel Arrow |
2 |
Fire Arrow |
3 |
Magic Arrow |
4 |
Amulet |
End |
Next Essence |
Page Down |
Previous Essence |
Page Up |
Inventory/Status |
Esc |
Look Around |
Home |
The mouse can also be used to control the camera
INTRODUCTION/LOADING AND SAVING
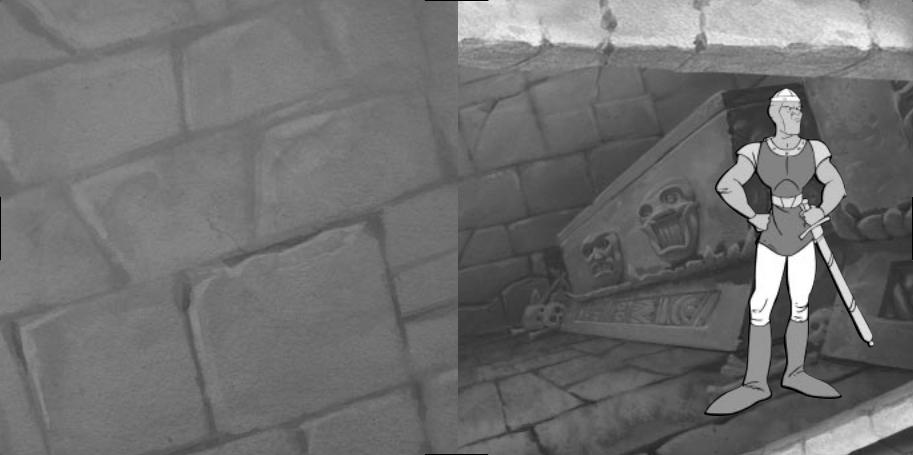
Welcome to the world of Dragon's Lair 3D. Here you will become the valiant Dirk the Daring on his quest to rescue the fair Princess Daphne from the evil wizard, Mordroc. You will fight your way through a castle, enchanted with treacherous monsters and obstacles. Be wary, as the Wizard will stop at nothing to protect his stolen prize. Lead on adventurer, your quest awaits …
Loading a game
1)From the main menu select Load Game, or from the inventory screen select Load.
2)The loading screen is where previously saved games can be loaded. Select the game and then select “Yes” to load the game.
Saving a game
1) Select Save from the inventory screen.
2) The saving screen is where current progress in the game can be saved. Select the slot and then select “OK” to save the game. Current saved games can be saved over by another saved game.
5
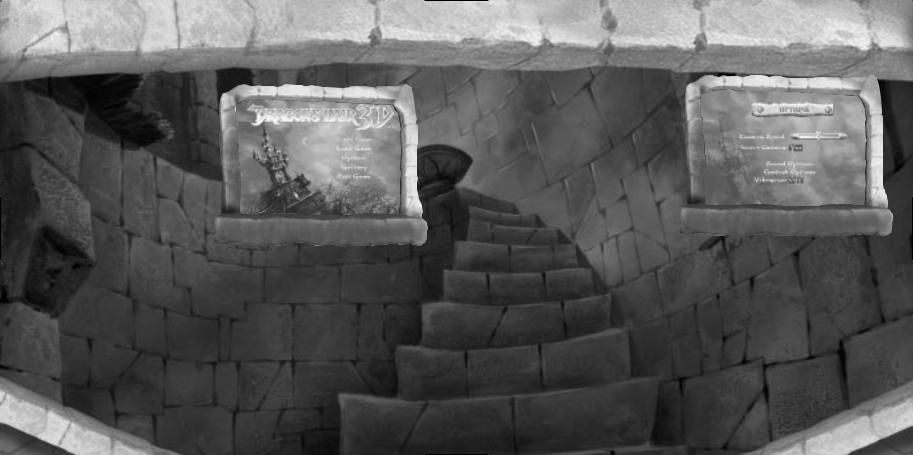
MAIN MENU
The Main Menu is the starting point of the game. Select a listing using the mouse or cursor keys.
Select from these options on the Main Menu Screen.
Start Game
Begin a new game.
Load Game
Load a previously saved game.
Options
Select options to change settings for Controls, Sound, and Camera Speed.
Gallery
Watch movies that have been acquired during your play through Dragon’s Lair 3D.
OPTIONS SCREEN
The options screen is where many features of the game can be changed. From the Main Menu or the Inventory screen select Options. When in the Options menu choose the option to either change the setting in the black boxes or to advance to that particular option’s menu.
Camera Speed
Adjust the speed of the movement of the camera.
Invert Camera
Change the up and down direction that the camera will be moved by the controls.
Sound Options
Adjust the volume for Music, Effects and Ambient sounds.
Control Options
Change the controls for your keyboard, mouse and gamepad.
Aspect Ratio
Choose the aspect ratio that best fits your monitor.
6 |
7 |
 Loading...