


 Loading...
DVD Player
DX-DVD2
USER GUIDE

DVD Player
|
Contents |
|
Important safety instructions.................................................................... |
2 |
|
Features .................................................................................................... |
6 |
|
Setting up your DVD player ..................................................................... |
11 |
|
Using your DVD player............................................................................. |
13 |
|
Troubleshooting...................................................................................... |
20 |
|
Maintaining ............................................................................................ |
21 |
|
Specifications.......................................................................................... |
22 |
|
Legal notices ........................................................................................... |
23 |
|
90-day limited warranty ......................................................................... |
25 |
|
Important safety instructions |
|
|
1 |
Read these instructions. |
|
2 |
Keep these instructions. |
|
3 |
Heed all warnings. |
|
4 |
Follow all instructions. |
|
5 |
Do not use this apparatus near water. |
|
6 |
Clean only with a dry cloth. |
|
7Do not block any ventilation openings. Install in accordance with the manufacturer's instructions.
8Do not install near any heat sources such as radiators, heat registers, stoves, or other apparatus (including amplifiers) that produce heat.
DVD Player |
3 |
9Do not defeat the safety purpose of the polarized or grounding-type plug. A polarized plug has two blades with one wider than the other. A grounding type plug has two blades and a third grounding prong. The wide blade or the third prong are provided for your safety. If the provided plug does not fit into your outlet, consult an electrician for replacement of the obsolete outlet.
10Protect the power cord from being walked on or pinched particularly at plugs, convenience receptacles, and the point where they exit from the apparatus.
11Only use attachments/accessories specified by the manufacturer.
12Use only with the cart, stand, tripod, bracket, or table specified by the manufacturer, or sold with the apparatus. When a cart is used, use caution when moving the cart/apparatus combination to avoid injury from tip-over.
13Unplug this apparatus during lightning storms or when unused for long periods of time.
14Refer all servicing to qualified service personnel. Servicing is required when the apparatus has been damaged in any way, such as power-supply cord or plug is damaged, liquid has been spilled or objects have fallen into the apparatus, the apparatus has been exposed to rain or moisture, does not operate normally, or has been dropped.
15To reduce the risk of fire or electric shock, do not expose this device to rain, moisture, dripping, or splashing, and no objects filled with liquids, such as vases, shall be placed on it.
16An apparatus with a three-prong, grounding-type plug is a Class I apparatus, which needs to be grounded to prevent possible electric shock. Make sure that you connect this Class I device to a grounding-type, three-prong outlet.
17The wall plug is the disconnecting device. The plug must remain readily operable.
18Batteries should not be exposed to excessive heat such as sunshine, fire, or the like.
Caution: Danger of explosion if the battery is incorrectly replaced. Replace only with the same or equivalent type.
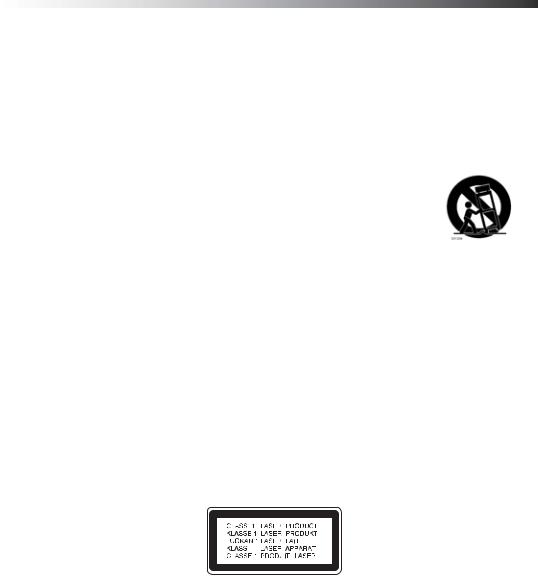
Warning: This product employs a laser system. To ensure correct use of this product, read this owner’s manual carefully and retain it for future reference. Should your player require maintenance, contact qualified service personnel.
Making adjustments to controls or performing procedures other than those specified herein may result in hazardous radiation exposure.
To prevent direct exposure to the laser beam, do not try to open the enclosure. Visible laser radiation when open. DO NOT STARE INTO THE BEAM.

4 |
DX-DVD2 |
Introduction
To ensure correct use of your player, read this owner’s manual carefully and retain for future reference.
About the  symbol
The  symbol may appear on your TV display during operation and indicates that the function is not permitted by your player or specific media.
Notes:
•Do not use irregularly shaped CDs (for example, heart-shaped or octagonal). Doing so may result in malfunctions.
•Depending on the recording software and the finalization, some recorded discs (CD-R/ RW or DVD±R/RW) may not be playable.
•DVD-R/RW, DVD+R/RW, and CD-R/RW discs recorded using a personal computer or a DVD or CD recorder may not play if the disc is damaged or dirty or if there is dirt or condensation on your player’s lens.
•If you record a disc using a personal computer, even if it is recorded in a compatible format, there are cases in which it may not play because of the settings of the application software used to create the disc. (Check with the software publisher for more detailed information.)
•Your player requires discs and recordings to meet certain technical standards in order to achieve optimal playback quality. Pre-recorded DVDs are automatically set to these standards. There are many different types of recordable disc formats (including CD-R containing MP3 or WMA files), and these require certain pre-existing conditions (see above) to ensure compatible playback.
•You should note that permission is required in order to download MP3 or WMA files and music from the Internet. Our company has no right to grant such permission. Permission should always be sought from the copyright owner.
Regional code
Your player has a regional code (1) printed on the back of the case. Your player can play only
DVDs labeled with the same regional code (1) or ALL.
Notes:
•Most DVDs have a globe with one or more numbers in it clearly visible on the cover. This number must match your player’s regional code or the DVD cannot play.
•If you try to play a DVD with a different regional code from your player, the message “Check Regional Code” appears on the TV screen.

DVD Player |
5 |
This product incorporates copyright protection technology that is protected by U.S patents and other intellectual property rights. Use of this copyright protection technology must be authorized by Macrovision, and is intended for home and other limited viewing uses only unless otherwise authorized by Macrovision. Reverse engineering or disassembly is prohibited.
Manufactured under license from Dolby Laboratories. “Dolby” and the double-D symbol are trademarks of Dolby Laboratories.
Disposal of your old appliance
1.When this crossed-out wheeled bin symbol is attached to a product, it means the product is covered by the European Directive 2002/96/EC.
2.All electrical and electronic products should be disposed of separately from the municipal waste stream via designated collection facilities appointed by the government or the local authorities.
3.The correct disposal of your old appliance will help prevent potential negative consequences for the environment and human health.
4.For more detailed information about disposal of your old appliance, please contact your city office, waste disposal service, or the shop where you purchased the product.
Other considerations
Notes:
•The top and rear panels of your player may become warm after a long period of use. This is not a malfunction.
•When your player is not in use, make sure that you remove the disc and turn off the power.
•If you do not use your player for an extended period, it may not function correctly. Turn on your player and use it occasionally.
•Do not place foreign objects in the disc tray.
•If you place your player near a TV, radio, or VCR, the playback picture may become poor and the sound may be distorted. In that case, place the player away from the TV, radio, or VCR.
•If the pickup on your player has moisture condensation, the player may not operate correctly. If this is the case, remove the disc and leave it on for two or three hours. That will allow the player to warm up and evaporate any moisture. If you leave the player plugged in, moisture condensation will seldom occur.
6 |
DX-DVD2 |
Features
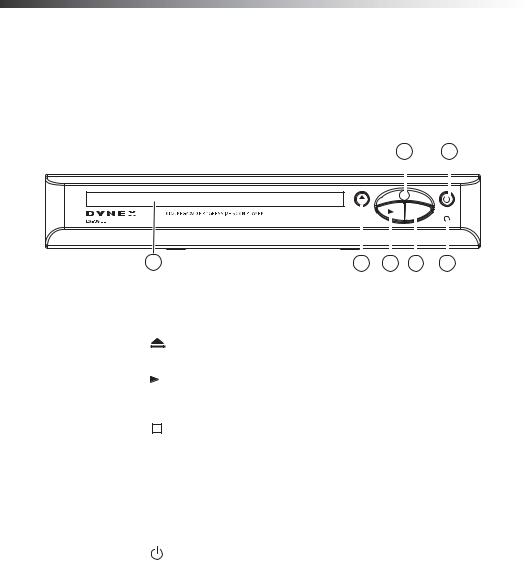
Front panel
6 7
|
1 |
|
|
|
|
|
|
|
|
|
|
|
|
|
|
|
|
|
|
|
|
|
|
|
|
|
|
||
|
|
|
|
|
|
|
|
|
|
|
|
|
||
|
|
|
|
|
|
|
|
|
|
|
|
|
||
|
|
|
|
|
|
|
|
|
|
|
|
|
||
|
|
|
|
|
|
|
|
|
|
|
|
|
||
|
|
|
|
|
|
|
|
|
|
|
|
|
||
|
2 |
3 |
|
|
4 |
5 |
||||||||
|
|
|
|
|
|
|
|
|
|
|
|
|
|
|
Item |
|
|
|
Description |
Function |
|
|
|
|
|
|
|
||
|
|
|
|
|
|
|
|
|
|
|
|
|
|
|
1 |
Disc tray |
Place a disc on the tray when it opens. |
|
|
|
|||||||||
|
|
|
|
|
|
|
|
|
|
|
|
|
|
|
2 |
|
|
|
(OPEN/CLOSE) |
Press to open or close the disc tray. |
|
|
|
||||||
|
button |
|
|
|
|
|
|
|
|
|
|
|||
|
|
|
|
|
|
|
|
|
|
|
|
|
||
3 |
|
|
|
(Play/Pause) |
Press to begin playback. Press again to |
|
||||||||
|
|
|
|
|||||||||||
|
|
|
|
|
pause playback. Press again to resume |
|
||||||||
|
|
|
|
|
playback. |
|
|
|
|
|
|
|
||
|
|
|
|
|
|
|
|
|
|
|
|
|
||
4 |
|
|
|
(stop) |
Press to stop playback. Playback begins |
|
||||||||
|
|
|
|
|||||||||||
|
|
|
|
|
from this point when you press PLAY. |
|
|
|
||||||
|
|
|
|
|
Press STOP twice to begin playback from |
|
||||||||
|
|
|
|
|
the beginning. |
|
|
|
|
|
|
|
||
|
|
|
|
|
|
|
|
|
|
|
|
|
||
5 |
Power indicator |
Turns red on standby and green when the |
|
|||||||||||
|
|
|
|
|
player is turned on. |
|
|
|
|
|
|
|
||
|
|
|
|
|
|
|
|
|
|
|
|
|
||
6 |
Remote control sensor |
Point the remote control at this sensor to |
|
|||||||||||
|
|
|
|
|
control playback. |
|
|
|
|
|
|
|
||
|
|
|
|
|
|
|
|
|
|
|
|
|
|
|
7 |
|
|
|
(standby/power) |
Press to turn your player on or off. |
|
|
|
||||||
|
|
|
|
|
|
|
|
|
|
|
|
|
|
|

DVD Player |
7 |
Back panel
|
|
|
4 |
1 |
2 |
3 |
5 |
Item |
Description |
Function |
|
|
|
1 |
AC power cable |
Plug this cable into an AC power outlet. |
|
|
|
2 |
Composite video |
Connect to the composite video input jack |
|
output |
on a TV (if available). |
|
|
|
3 |
Component output |
Connect to the component video input |
|
(Y Cb Cr) |
jacks on a TV (if available). |
|
|
|
4 |
Audio output (left/ |
Connect to the audio input jacks (left and |
|
right) |
right) of a TV, amplifier, or other |
|
|
equipment. |
|
|
|
5 |
Coax (digital) audio |
Connect to the digital audio coaxial jack on |
|
output |
an external amplifier, such as a Dolby |
|
|
Digital decoder. |
|
|
|

8 |
DX-DVD2 |
Remote control
Remote control
1 |
11 |
|
|
||
2 |
12 |
|
3 |
|
|
4 |
13 |
|
5 |
||
14 |
||
6 |
||
7 |
15 |
|
8 |
16 |
|
9 |
17 |
|
10 |
||
|
Item |
|
|
|
Button |
Function |
|
|
|
|
|
|
1 |
STANDBY/ |
Press to turn your player on or off. |
|||
|
|
|
|
|
|
2 |
SETUP |
Press to open and close the setup menu. |
|||
|
|
|
|
|
|
3 |
|
|
|
(Left arrow) |
Press to select menu options or adjust |
|
|
|
|
(Up arrow) |
settings. |
|
|
|
|
(Right arrow) |
|
|
|
|
|
|
|
|
|
|
|
(Down arrow) |
|
|
|
|
|
|
|
4 |
OK |
Press to make or confirm menu selections. |
|||
|
|
|
|
|
|
5 |
DISPLAY |
Press to open the on-screen display, which |
|||
|
|
|
|
|
provides current status information and |
|
|
|
|
|
where you can change settings and options. |
|
|
|
|
|
|
6 |
|
|
|
(stop) |
Press to stop playback. Playback begins |
|
|
|
|||
|
|
|
|
|
from this point when you press PLAY. Press |
|
|
|
|
|
STOP twice to begin playback from the |
|
|
|
|
|
beginning. |
|
|
|
|
|
|
7 |
|
(pause) |
Press to pause playback. Press once more to |
||
|
|||||
|
|
|
|
|
resume playback. |
|
|
|
|
|
|

DVD Player |
9 |
Item |
|
|
Button |
Function |
|
|
|
|
|
8 |
|
|
(fast reverse) |
Press to fast reverse the DVD or CD. Press |
|
|
|
|
repeatedly to step through the fast reverse |
|
|
|
|
speeds. |
|
|
|
|
|
9 |
|
|
(previous) |
Press to return to the previous chapter |
|
||||
|
|
|
|
(DVD) or track (CD). |
|
|
|
|
|
10 |
REPEAT |
Press during playback to step through |
||
|
|
|
|
repeat options, including repeat current |
|
|
|
|
chapter, repeat current title, repeat entire |
|
|
|
|
disc, and off. |
|
|
|
|
|
11 |
OPEN/CLOSE |
Press to open and close the disc tray. |
||
|
|
|
|
|
12 |
DVD MENU |
Press to open the DVD menu. |
||
|
|
|
|
|
13 |
TOP MENU |
Press to open the top DVD menu (available |
||
|
|
|
|
on some discs). |
|
|
|
|
|
14 |
|
(play) |
Press to start playback or resume playback |
|
|
|
|
|
from pause. |
|
|
|
|
|
15 |
|
(step) |
Press repeatedly to step forward frame by |
|
|
||||
|
|
|
|
frame in a video . |
|
|
|
|
|
16 |
|
(fast forward) |
Press to fast forward the DVD or CD. Press |
|
|
|
|
|
repeatedly to step through the fast forward |
|
|
|
|
speeds. |
|
|
|
|
|
17 |
|
|
(next) |
Press to advance to the next chapter (DVD) |
|
|
|||
|
|
|
|
or track (CD). |
|
|
|
|
|
Loading...