


Lifestyle 28

®
LIFESTYLE 18 Series II LIFESTYLE 28 Series II DVD Home Entertainment Systems
Operating Guide
®
2
Safety Information
English
Please read this owner’s guide
Please take the time to follow this guide carefully. It will help you set up and operate your system properly and enjoy
all of its advanced features. Save both the Installation Guide and the Operation Guide for future reference.
WARNING: To reduce the risk of fire or electric shock, do not expose the system to rain or moisture.
WARNING: This apparatus shall not be exposed to dripping or splashing, and objects filled with liquids, such as vases,
shall not be placed on the apparatus. As with any electronic products, use care not to spill liquids in any part of the sys-
tem. Liquids can cause a failure and/or a fire hazard.
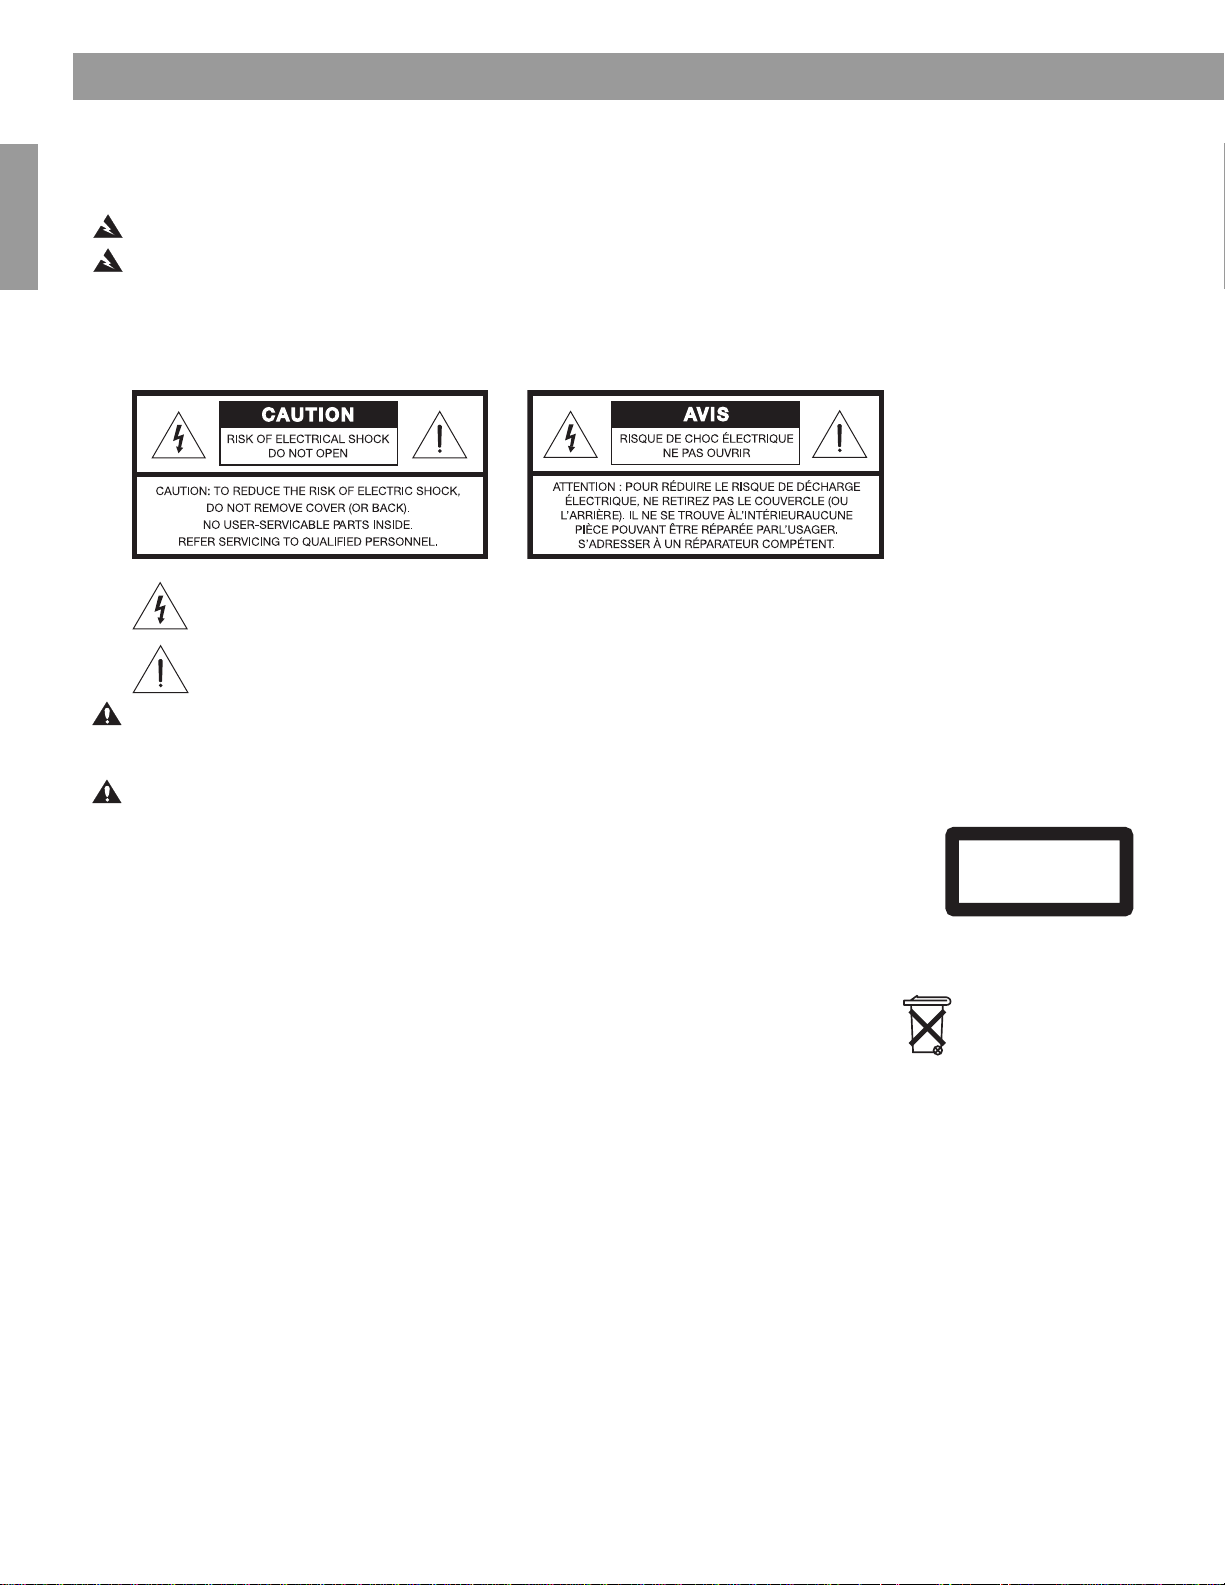
The CAUTION marks shown here are located on the bottom of your LIFESTYLE
®
DVD home entertainment system
media center and on the rear panel of the Acoustimass
®
module:
The lightning flash with arrowhead symbol, within an equilateral triangle, alerts the user to the presence of
uninsulated dangerous voltage within the system enclosure that may be of sufficient magnitude to consti-
tute a risk of electric shock.
The exclamation point within an equilateral triangle alerts the user to the presence of important operating
and maintenance instructions in this owner’s guide.
CAUTION: Use of controls or adjustments or performance of procedures other than those specified herein may result
in hazardous radiation exposure. The compact disc player should not be adjusted or repaired by anyone except properly
qualified service personnel.
CAUTION: No naked flame sources, such as lighted candles, should be placed on the apparatus.
Class 1 laser product
The DVD player contained within the media center is classified as a CLASS 1 LASER PRODUCT
according to EN 60825-1:1994 + A11. The CLASS 1 LASER PRODUCT label is located on the
bottom of the media center.
Class B emissions limits
This Class B digital apparatus meets all requirements of the Canadian Interference-Causing
Equipment Regulations.
Batteries
Please dispose of used batteries properly, following any local regulations. Do not incinerate.
Additional safety information
See the additional instructions on the Important Safety Instructions sheet enclosed in the shipping carton.
CLASS 1 LASER PRODUCT
KLASSE 1 LASER PRODUKT
LUOKAN 1 LASER LAITE
KLASS 1 LASER APPARAT
Batteries
©2004 Bose Corporation. No part of this work may be reproduced, modified, distributed or otherwise used without prior written permission.
Manufactured under license from Dolby Laboratories. “Dolby” and the double-D symbol are trademarks of Dolby Laboratories. Confidential Unpub-
lished Works. ©1992-1997 Dolby Laboratories. All rights reserved.
This product contains one or more programs protected under international and U.S. copyright laws as unpublished works. They are confidential and
proprietary to Dolby Laboratories. Their reproduction or disclosure, in whole or in part, or the production of derivative works therefrom without the
express permission of Dolby Laboratories is prohibited. Copyright 1992-1996 by Dolby Laboratories, Inc. All rights reserved.
“DTS” and “DTS Digital Surround” are registered trademarks of Digital Theater Systems, Inc.
MPEG Layer-3 audio compression technology licensed by Fraunhofer IIS and THOMSON multimedia.

3
English Français
Español
Contents
Where to find...
Introduction . . . . . . . . . . . . . . . . . . . . . . . . . . . . . . . . . . . . . . . . . . . . . . . . . . . . . . . . . . . . . . . . . . . 5
Welcome . . . . . . . . . . . . . . . . . . . . . . . . . . . . . . . . . . . . . . . . . . . . . . . . . . . . . . . . . . . . . . . . . . 5
Types of discs you can play . . . . . . . . . . . . . . . . . . . . . . . . . . . . . . . . . . . . . . . . . . . . . . . . . . . 5
Check for region number compatibility . . . . . . . . . . . . . . . . . . . . . . . . . . . . . . . . . . . . . . . 5
Glossary of audio terms . . . . . . . . . . . . . . . . . . . . . . . . . . . . . . . . . . . . . . . . . . . . . . . . . . . . . . 5
Capabilities and Controls . . . . . . . . . . . . . . . . . . . . . . . . . . . . . . . . . . . . . . . . . . . . . . . . . . . . . . . . 7
The remote control . . . . . . . . . . . . . . . . . . . . . . . . . . . . . . . . . . . . . . . . . . . . . . . . . . . . . . . . . 7
If the remote does not work as you expect . . . . . . . . . . . . . . . . . . . . . . . . . . . . . . . . . . . . 9
The media center . . . . . . . . . . . . . . . . . . . . . . . . . . . . . . . . . . . . . . . . . . . . . . . . . . . . . . . . . . . 10
Activating component or progressive scan connections . . . . . . . . . . . . . . . . . . . . . . . . . . . . . 11
System Operation . . . . . . . . . . . . . . . . . . . . . . . . . . . . . . . . . . . . . . . . . . . . . . . . . . . . . . . . . . . . . . 12
Making it all work together smoothly . . . . . . . . . . . . . . . . . . . . . . . . . . . . . . . . . . . . . . . . . . . . 12
To turn on other components . . . . . . . . . . . . . . . . . . . . . . . . . . . . . . . . . . . . . . . . . . . . . . 12
To watch video . . . . . . . . . . . . . . . . . . . . . . . . . . . . . . . . . . . . . . . . . . . . . . . . . . . . . . . . . . 12
To adjust what you see or hear . . . . . . . . . . . . . . . . . . . . . . . . . . . . . . . . . . . . . . . . . . . . . 13
Loading and playing a DVD . . . . . . . . . . . . . . . . . . . . . . . . . . . . . . . . . . . . . . . . . . . . . . . . . . . 13
Control options . . . . . . . . . . . . . . . . . . . . . . . . . . . . . . . . . . . . . . . . . . . . . . . . . . . . . . . . . 14
Using parental controls . . . . . . . . . . . . . . . . . . . . . . . . . . . . . . . . . . . . . . . . . . . . . . . . . . . 14
Loading and playing a CD . . . . . . . . . . . . . . . . . . . . . . . . . . . . . . . . . . . . . . . . . . . . . . . . . . . . 14
Control options . . . . . . . . . . . . . . . . . . . . . . . . . . . . . . . . . . . . . . . . . . . . . . . . . . . . . . . . . 15
Using the radio . . . . . . . . . . . . . . . . . . . . . . . . . . . . . . . . . . . . . . . . . . . . . . . . . . . . . . . . . . . . . 16
Changing stations . . . . . . . . . . . . . . . . . . . . . . . . . . . . . . . . . . . . . . . . . . . . . . . . . . . . . . . 16
Setting a station preset . . . . . . . . . . . . . . . . . . . . . . . . . . . . . . . . . . . . . . . . . . . . . . . . . . . 16
Using the headphone jack . . . . . . . . . . . . . . . . . . . . . . . . . . . . . . . . . . . . . . . . . . . . . . . . . . . . 17
Using the sleep timer . . . . . . . . . . . . . . . . . . . . . . . . . . . . . . . . . . . . . . . . . . . . . . . . . . . . . . . . 17
To set the timer . . . . . . . . . . . . . . . . . . . . . . . . . . . . . . . . . . . . . . . . . . . . . . . . . . . . . . . . . 17
Controlling External Sources . . . . . . . . . . . . . . . . . . . . . . . . . . . . . . . . . . . . . . . . . . . . . . . . . . . . . 18
Using your LIFESTYLE
®
remote with other components . . . . . . . . . . . . . . . . . . . . . . . . . . . . . 18
For TV control . . . . . . . . . . . . . . . . . . . . . . . . . . . . . . . . . . . . . . . . . . . . . . . . . . . . . . . . . . 18
For cable/satellite control . . . . . . . . . . . . . . . . . . . . . . . . . . . . . . . . . . . . . . . . . . . . . . . . . 21
For VCR (or DVR) control . . . . . . . . . . . . . . . . . . . . . . . . . . . . . . . . . . . . . . . . . . . . . . . . . . 22
For AUX control . . . . . . . . . . . . . . . . . . . . . . . . . . . . . . . . . . . . . . . . . . . . . . . . . . . . . . . . . 22
Designating one video tuner . . . . . . . . . . . . . . . . . . . . . . . . . . . . . . . . . . . . . . . . . . . . . . . . . . . 23
Changing Source Settings . . . . . . . . . . . . . . . . . . . . . . . . . . . . . . . . . . . . . . . . . . . . . . . . . . . . . . . 24
Making adjustments to a particular source . . . . . . . . . . . . . . . . . . . . . . . . . . . . . . . . . . . . . . . 24
How to see your options . . . . . . . . . . . . . . . . . . . . . . . . . . . . . . . . . . . . . . . . . . . . . . . . . . 24
How to change the settings . . . . . . . . . . . . . . . . . . . . . . . . . . . . . . . . . . . . . . . . . . . . . . . . 25
Tuner setting options (FM or AM radio) . . . . . . . . . . . . . . . . . . . . . . . . . . . . . . . . . . . . . . . . . . 26
CD setting options . . . . . . . . . . . . . . . . . . . . . . . . . . . . . . . . . . . . . . . . . . . . . . . . . . . . . . . . . . 26
DVD setting options . . . . . . . . . . . . . . . . . . . . . . . . . . . . . . . . . . . . . . . . . . . . . . . . . . . . . . . . . 27
TV setting options (for VCR, CBL-SAT, and Aux) . . . . . . . . . . . . . . . . . . . . . . . . . . . . . . . . . . . 28
This product incorporates copyright protection technology that is protected by method claims of certain U.S. patents and other intellectual property rights
owned by Macrovision Corporation and other rights owners. Use of this copyright protection technology must be authorized by Macrovision Corporation, and
is intended for home and other limited viewing uses only unless otherwise authorized by Macrovision Corporation. Reverse engineering or disassembly is
prohibited.
Consumers should note that not all high definition television sets are fully compatible with this product and may cause artifacts to be displayed in the picture.
In case of 525 progressive scan picture problems, it is recommended that the user switch the connection to the “standard definition” output. If there are
questions regarding our TV set compatibility with this model 525p DVD player, please contact our customer service center.
This product incorporates copyright protected technology and other intellectual property rights owned by Cirrus Logic, Inc. and subject to the copyright pro-
tection of the U.S. as well as other licensing restrictions and protections. Use of this copyright protected technology is limited solely to use with the Cirrus
Logic integrated circuits incorporated in this product. Reverse engineering or disassembly is prohibited.
Designed with UEI Technology™ Under License from Universal Electronics Inc. © UEI 2000-2002.

4
Contents
English
Using System Menus . . . . . . . . . . . . . . . . . . . . . . . . . . . . . . . . . . . . . . . . . . . . . . . . . . . . . . . . . . . 29
Making system adjustments . . . . . . . . . . . . . . . . . . . . . . . . . . . . . . . . . . . . . . . . . . . . . . . . . . . 29
How to see the System menu. . . . . . . . . . . . . . . . . . . . . . . . . . . . . . . . . . . . . . . . . . . . . . . 29
How to make changes . . . . . . . . . . . . . . . . . . . . . . . . . . . . . . . . . . . . . . . . . . . . . . . . . . . . 29
Audio options . . . . . . . . . . . . . . . . . . . . . . . . . . . . . . . . . . . . . . . . . . . . . . . . . . . . . . . . . . . . . . 30
Video options . . . . . . . . . . . . . . . . . . . . . . . . . . . . . . . . . . . . . . . . . . . . . . . . . . . . . . . . . . . . . . 32
Media center options . . . . . . . . . . . . . . . . . . . . . . . . . . . . . . . . . . . . . . . . . . . . . . . . . . . . . . . . 33
Remote control opitons . . . . . . . . . . . . . . . . . . . . . . . . . . . . . . . . . . . . . . . . . . . . . . . . . . . . . . 34
DVD lock options . . . . . . . . . . . . . . . . . . . . . . . . . . . . . . . . . . . . . . . . . . . . . . . . . . . . . . . . . . . 35
Applying parental control . . . . . . . . . . . . . . . . . . . . . . . . . . . . . . . . . . . . . . . . . . . . . . . . . . 35
Reference . . . . . . . . . . . . . . . . . . . . . . . . . . . . . . . . . . . . . . . . . . . . . . . . . . . . . . . . . . . . . . . . . . . . 37
Remote control maintenance . . . . . . . . . . . . . . . . . . . . . . . . . . . . . . . . . . . . . . . . . . . . . . . . . . 37
Replacing the remote control batteries . . . . . . . . . . . . . . . . . . . . . . . . . . . . . . . . . . . . . . . 37
Changing house code settings . . . . . . . . . . . . . . . . . . . . . . . . . . . . . . . . . . . . . . . . . . . . . 37
Setting up a second room with sound . . . . . . . . . . . . . . . . . . . . . . . . . . . . . . . . . . . . . . . . . . . 38
Bose
®
link: the key to assured compatibility . . . . . . . . . . . . . . . . . . . . . . . . . . . . . . . . . . . 39
Taking care of your LIFESTYLE
®
system . . . . . . . . . . . . . . . . . . . . . . . . . . . . . . . . . . . . . . . . . 40
Limited warranty . . . . . . . . . . . . . . . . . . . . . . . . . . . . . . . . . . . . . . . . . . . . . . . . . . . . . . . . . . . . 40
Troubleshooting . . . . . . . . . . . . . . . . . . . . . . . . . . . . . . . . . . . . . . . . . . . . . . . . . . . . . . . . . . . . 41
Contacting customer service . . . . . . . . . . . . . . . . . . . . . . . . . . . . . . . . . . . . . . . . . . . . . . . 42
Accessories . . . . . . . . . . . . . . . . . . . . . . . . . . . . . . . . . . . . . . . . . . . . . . . . . . . . . . . . . . . . . . . 43
Technical information . . . . . . . . . . . . . . . . . . . . . . . . . . . . . . . . . . . . . . . . . . . . . . . . . . . . . . . . 43
5
English
Introduction
Welcome
Thank you for purchasing a Bose
®
LIFESTYLE
®
DVD home entertainment system. Through
proprietary Bose technologies and innovative LIFESTYLE
®
systems design, this elegant and
easy-to-use system delivers superior performance for both music and video programming.
Types of discs you can play
The system can play the following types of discs having the corresponding logos:
•Video DVDs
• DVD-Rs or DVD-R/Ws
• Video CDs (VCDs)
•Audio CDs
•CD-Rs or CD-R/Ws
•MP3 CDs
that meet the following criteria:
All tracks are burned in a single, closed session and in ISO9660 disc format. Each file name
has an “.mp3” extension and no other periods. The file tag is no higher than ID3 (ID3v2).
Check for region number compatibility
For any DVD player and DVD disc to be compatible, their region numbers must match.
These numbers are assigned according to where the player and disc are sold.
Check the region number on the bottom of the media center included with your
system. Then be sure to choose only DVD discs that show the same region
number on the disc label or packaging. For example, a Region 1 DVD and
corresponding player should display the mark shown on the right.
Glossary of audio terms
Aspect ratio – The shape of the rectangular picture in a TV set expressed as the width of the
picture relative to the height. For example, if a TV picture has an aspect ratio of 4:3 (read as 4
by 3), the shape of that picture is 4 units wide by 3 units high. The two standard TV aspect
ratios are 4:3 and 16:9.
Chapter – A main division of contents in a DVD title.
Component video – A video signal split into three parts: luminance and two color signals
(marked as YPbPr). It provides the highest resolution video, but cannot be processed by all
television sets.
Composite video – A video signal in which the brightness (black and white) and color infor-
mation are combined. Compatible with most televisions and other video components, com-
posite video cables use RCA jacks.
Dolby Digital – A perceptual coding system for audio, developed by Dolby Laboratories and
accepted as an international standard. Dolby Digital is the most common means of encoding
multi-channel audio.
– The logo representing Dolby Digital.

6
Introduction
English
DTS – An abbreviation for Digital Theater Systems, a type of multi-channel surround sound
format used on certain CDs and many DVDs.
– The logo representing Digital Theater Systems.
DVD – An abbreviation most commonly known to mean Digital Video Disc or Digital Versatile
Disc. The audio/video/data storage system is based on 12-cm optical discs.
DVD video – A standard for storing and reproducing audio and video on DVD-ROM discs,
based on MPEG video, Dolby Digital audio, and other proprietary data formats.
IR – An abbreviation for infrared. Pertains to the type of remote that sends/receives com-
mands on an infrared light beam.
Letterbox – A video format which has an aspect ratio wider than 4:3 and is shown with black
bars above and below the TV picture.
MP3 – MPEG-1 Layer III audio. This is a compressed audio format that allows the recording
of many hours of music on a single CD.
NTSC – An abbreviation for National Television System Committee and a label for the video
format standard established by the committee for televisions used in the US and other
countries.
PAL – An acronym for the Phase Alternate Line video format used extensively in Western
Europe.
Pan & Scan – The technique of reframing a picture to conform to a different aspect ratio by
cropping parts of the picture. DVD video players can use the horizontal offset encoded with
the video on certain DVDs to automatically pan and scan widescreen video to a 4:3 ratio.
PCM – An abbreviation for Pulse Code Modulation. A common form of digital audio signal.
Progressive Scan – A video format which displays all lines of the picture frame in a single
pass, and refreshes the image sixty times a second. This format is not compatible with all
video displays.
RDS – A system that displays radio broadcast station and programming information. This
feature is available on European systems only.
SACD – An abbreviation for Super Audio Compact Disc and a music format for CD audio and
high-resolution digital audio stored on a CD-sized disc. The new Bose
®
LIFESTYLE
®
systems
(with which this guide is included) play the CD-compatible portion of such discs, identified by
the CD disc logo on the front of the disc.
SCMS – A system for preventing second-generation digital copies of copyrighted audio
material. A digital recorder equipped with SCMS will record digitally from another source, but
that recording cannot then be used as a source for a second-generation recording.
S-video – Also called Y/C. A video signal that keeps the brightness and color information
separate, and is significantly better than composite video. Requires the use of an S-video
cable and is compatible with many televisions and other video components.
Videostage
®
5 – Bose
®
proprietary Videostage 5 decoding circuitry gives you a five-channel
surround sound experience from everything you listen to – VHS tapes, stereo CDs, even
mono TV programs.
YPbPr – An analog video signal containing one luminance and two chrominance compo-
nents. Also referred to as YUV or Y, B-Y, R-Y or a component connection.
7
English
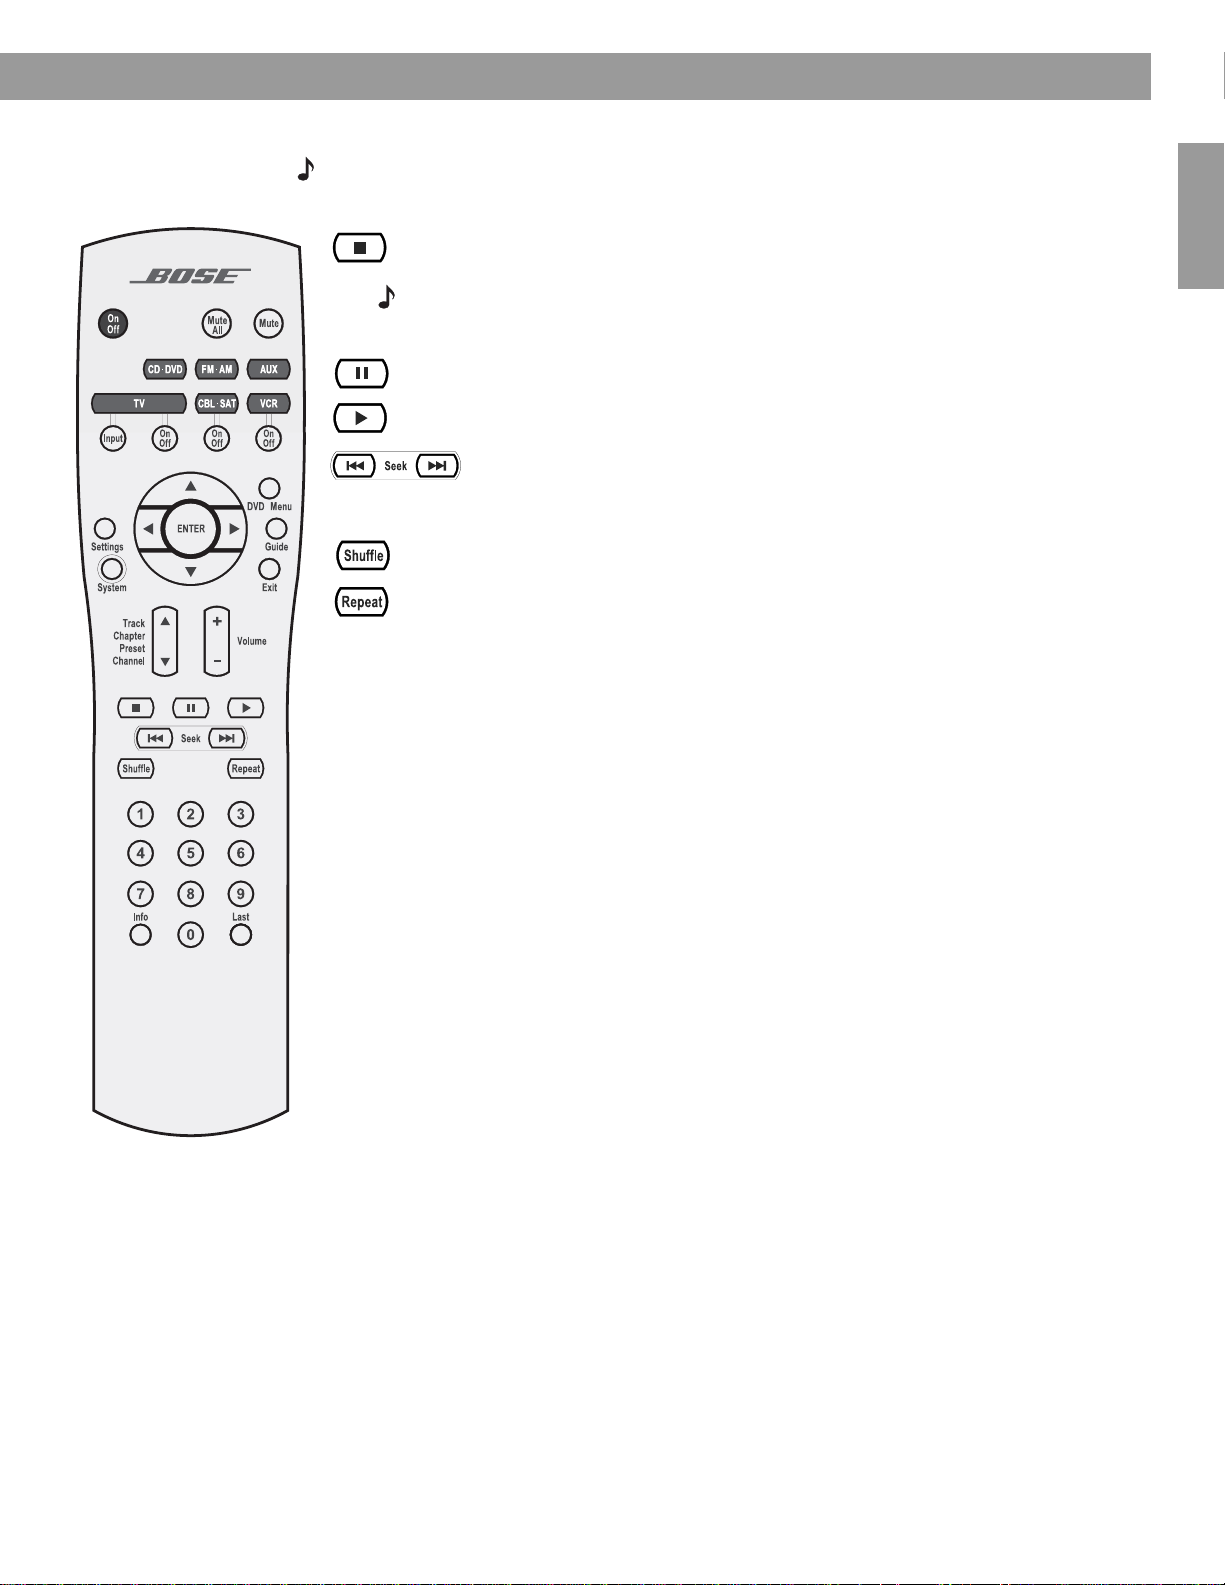
Capabilities and Controls
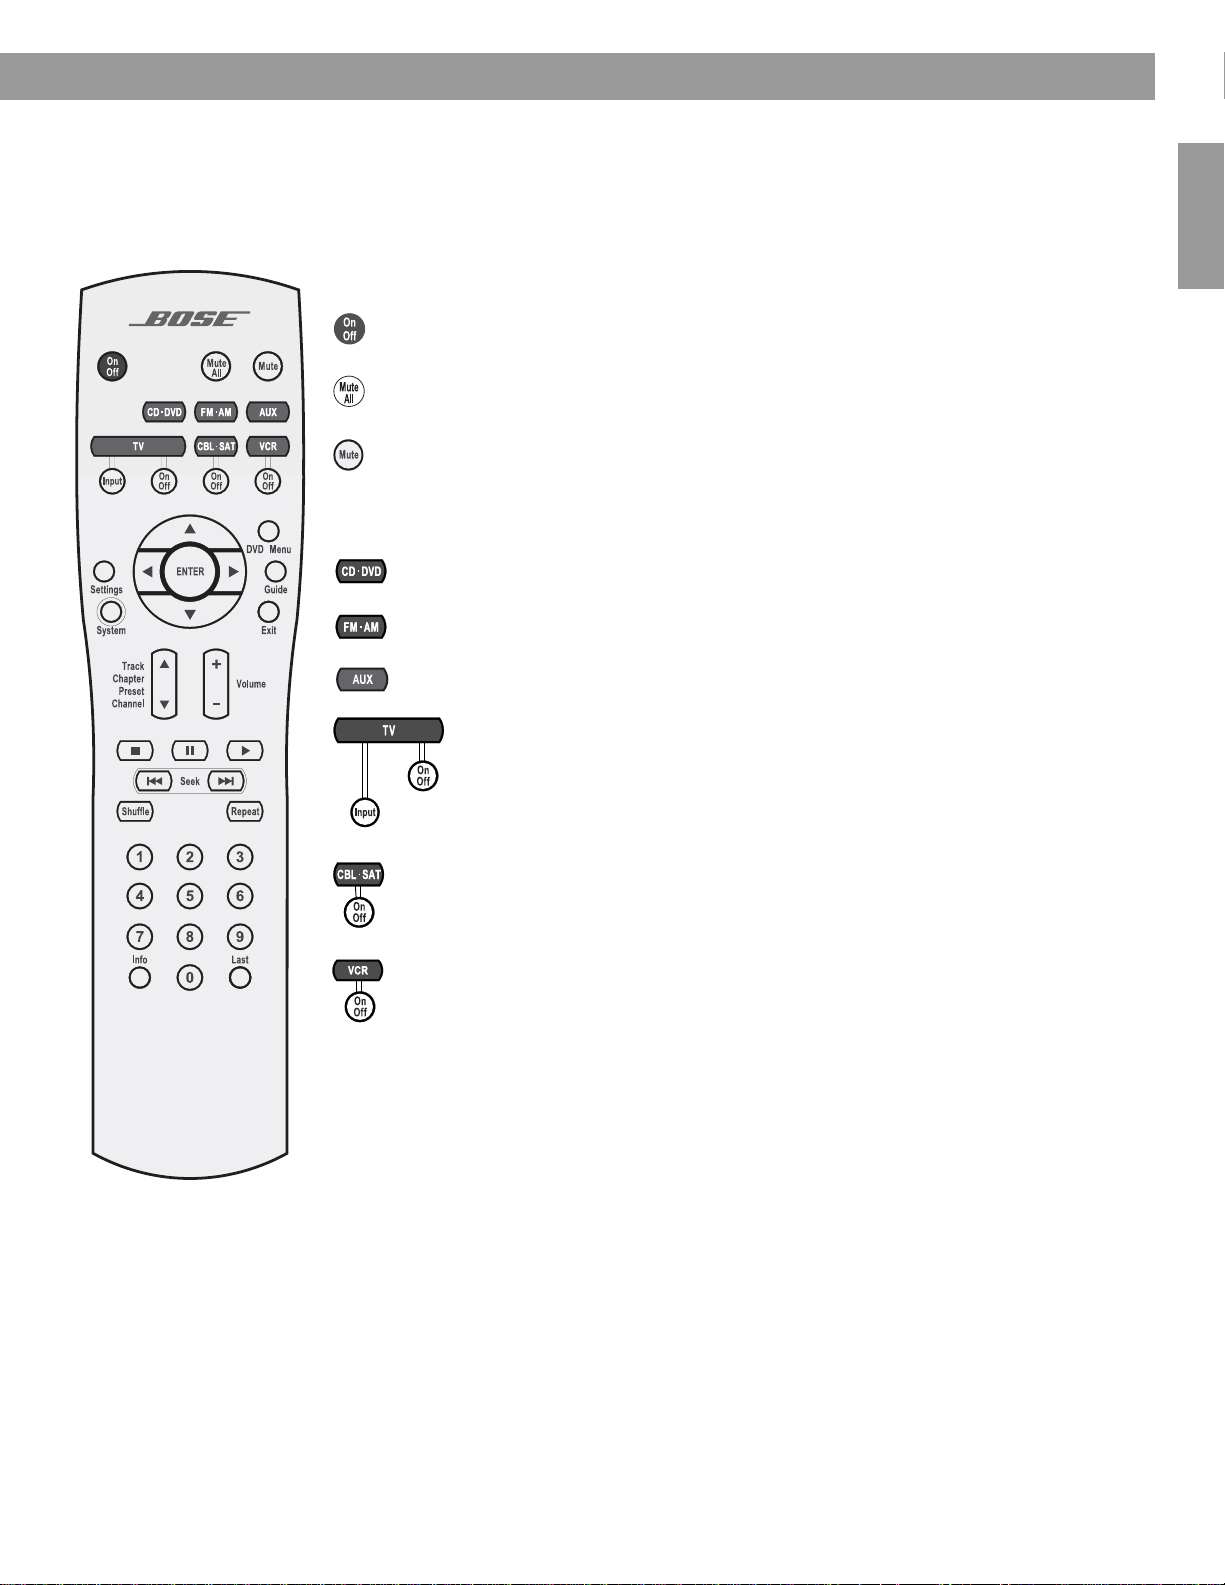
The remote control
The advanced radio-frequency remote control provided with the LIFESTYLE
®
system works
from almost anywhere inside your home. Simply press any button. There is no need to aim
the remote at the media center.
Power and mute
Source and input selection
*You can choose to set the LIFESTYLE
®
remote to control your TV, cable or satellite box, or
VCR so it will turn those devices on or off. To do that, refer to “Using your LIFESTYLE
®
remote
with other components” on page 18. Until then, however, simply turn on the TV or component
using its power button or remote control.
Turns the system on and off. Selects the source last used.
Mutes the volume for all connected speakers (main and in other rooms).
Mutes or unmutes the volume in the current room.
Turns the system on and selects the built-in disc player as source.
Turns the system on and selects the built-in FM/AM radio tuner set to the station
last selected. Switches between FM and AM when the radio is on.
Turns the system on and selects an AUX source connected to the media center.
Turns the system on and selects the TV connected to the media center as
source.
When the remote has been set to do so*, turns the TV on and off.
When the remote has been set to do so, scrolls the TV inputs to select one.
The input that connects to the media center is one choice.
Turns the system on and selects a cable box or satellite receiver connected to the
media center.
When the remote has been set to do so*, turns your cable or satellite box on and off.
Turns your system on and selects the VCR connected to the media center as the
sound source.
When the remote has been set to do so*, turns your VCR on and off.
8
Capabilities and Controls
English
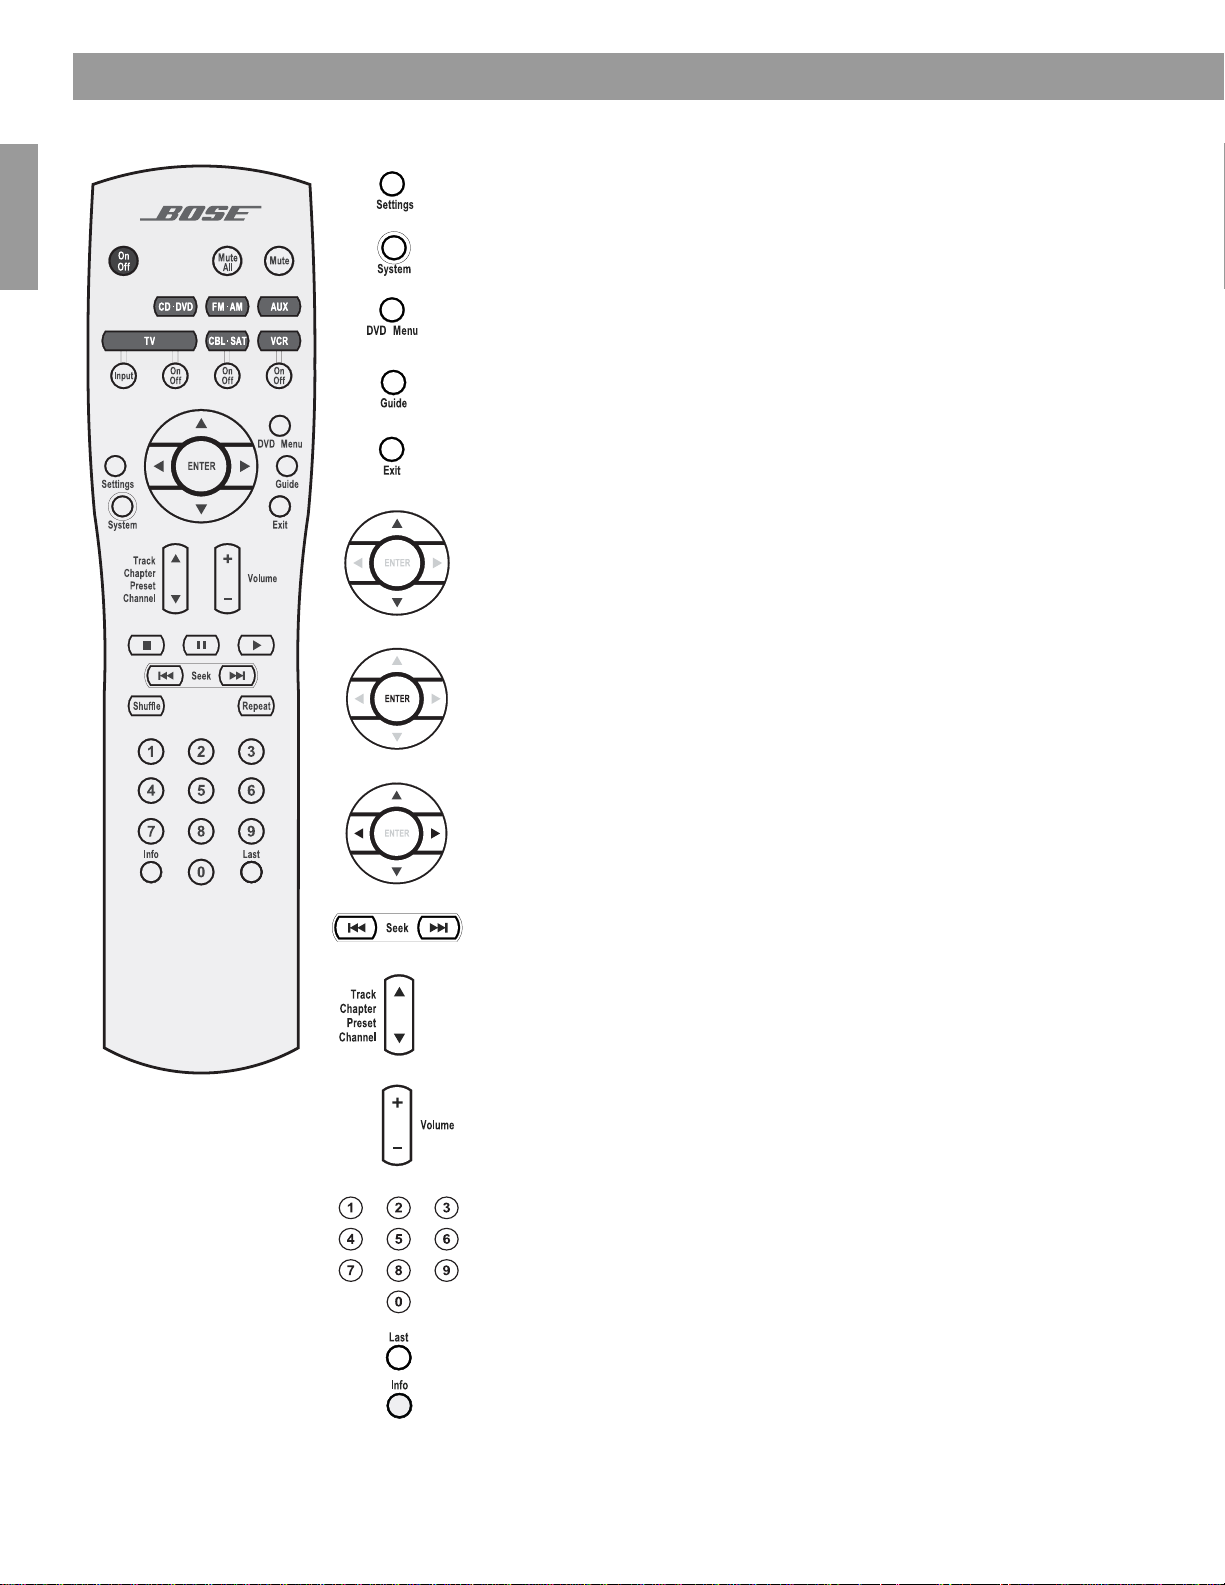
Menu and program selection
Enters or exits the Settings menu for the current source.
Enters or exits the System menu.
Enters or exits the menu of the DVD disc that is currently loaded.
Enters the main menu of a cable or satellite box.
Displays an electronic TV listings guide (if the TV, cable, or satellite pro-
vides that option).
Exits the Settings and System menus.
Exits electronic TV listings.
Tune the FM/AM radio up or down to the next frequency.
Selects the previous or next item in a menu list.
Enters submenus or confirms the selection of a menu item.
Move up, down, left, or right in a menu or screen.
Seek backward or forward to the next strong radio station.
Skip to the next or previous TV channel, CD track, DVD chapter, or radio
preset.
Raise or lower the volume of the current source.
Pressing + unmutes the current source in the current room only,
if it was muted.
Pressing – lowers the volume.
Select a DVD chapter, CD track, radio station preset, or TV channel that
corresponds to the numbers pressed. Use to make changes to some
items in the System and Settings menus, when numbers apply.
Skips to the previous TV channel.*
Displays or exits the cable or satellite information window, if available.
Pressing and holding this button (until the change is apparent), removes
or restores auido track information on the media center display.
9
Capabilities and Controls
English
Play options
Note: All of the buttons shown below, except Shuffle and Repeat, can be used with your VCR or
DVR after the remote has been set to control it.
If the remote does not work as you expect
If your system does not respond when you press a button on the remote, it could be time to
change batteries. For information on the type of batteries to use and how to change them,
refer to “Troubleshooting” on page 41.
In some buildings, you may experience “dead spots” where the remote control will not
operate effectively. If this happens, move the remote a foot or two and try again. Also make
sure the cord that connects the power supply to the media center (and contains the remote
antenna) is stretched to its full length. If these efforts do not work, move the media center a
few feet to a location where it provides a better response.
If the batteries are fine and the suggestions concerning “dead spots” above do not work, you
may need an antenna extender. To contact Bose
®
customer service to request one, refer to
the address list included with the system.
Stops the disc player.
Note: For DVDs and VCDs only, the system remembers the point where the disc was
stopped. Pressing again clears that memory.
Pauses the disc player.
Starts the disc player.
Skip back or forward to the start of a track or chapter.
Or, when pressed and held, scans back or forward through the
current CD or MP3 disc, or adjusts the speed of the scan.
Plays CD tracks in random order. Press
Shuffle
again to cancel this mode.
Repeats a whole CD or track, DVD chapter, or DVD title. Press
Repeat
again
to cancel the repeat mode.
10
Capabilities and Controls
English
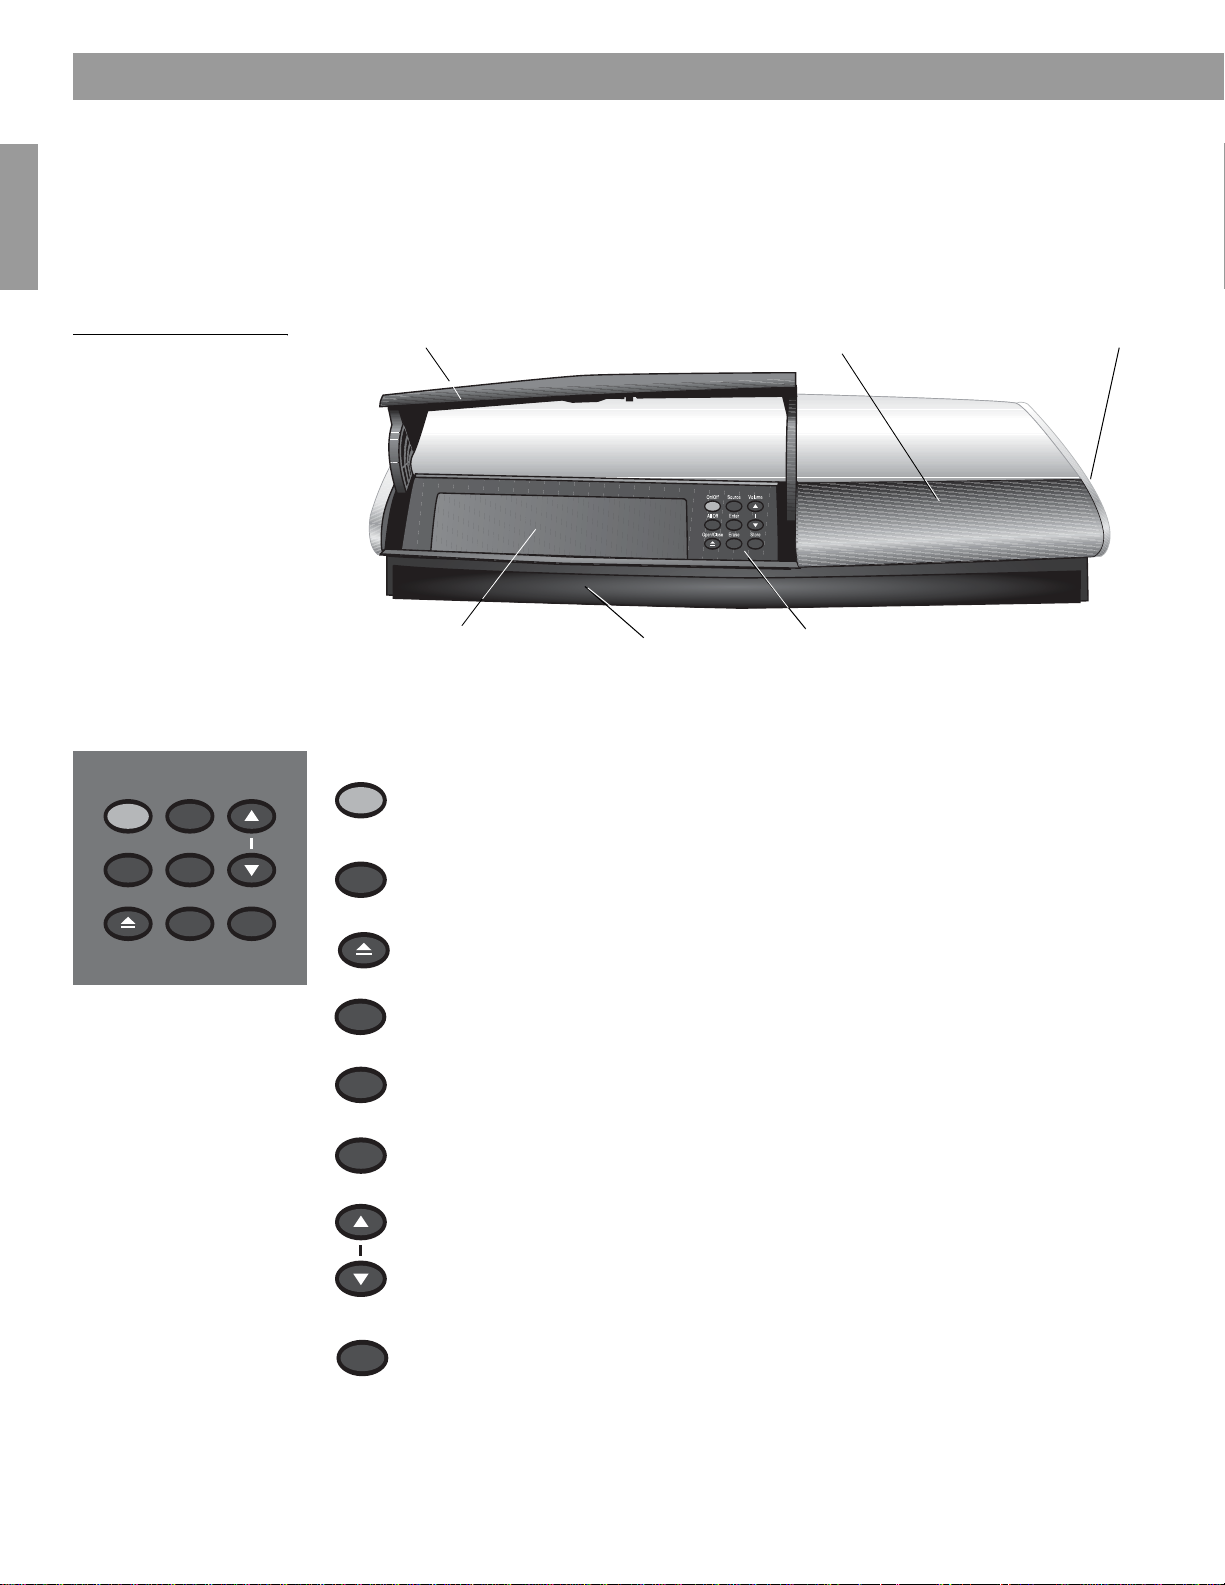
The media center
The CD/DVD tray and system controls are located under the front panel door of the media
center. To the right of that is the display window (Figure 1).
An IR signal emitter, located under the CD/DVD tray, enables you to control other compo-
nents using the LIFESTYLE
®
remote. Avoid blocking the emitter, so its signal will have a clear
path to other components or reflective surfaces in the room.
Figure 1
Front view of the media
center
Controls
The nine control buttons work as described below.
®
Front panel door – lifts up
Controls
Disc tray
Display window
Headphone jack
IR emitter
On/Off Source Volume
Enter
Erase
Store
All Off
Open/Close
Turns the system on or off in the main room only. Selects the source last used
when it turns the system on.
Turns off the system and all connected speakers (in all rooms).
Opens/closes the disc tray.
Steps through the available source selections.
Begins DVD play when that option appears selected on screen.
Works with the Store button to scan through the system settings options on the
media center display.
Removes a radio station preset.
Raises the volume of the system and unmutes the speakers (if they were muted).
Lowers the volume of the system but does not unmute the source.
Copies the tracks from an audio CD to the internal hard drive on the LIFESTYLE
®
38 and 48 systems only.
When the system is off, resets the remote control house code.
Works with the Enter button to scan through the system settings options on the
media center display.
On/Off
All Off
Open/Close
Source
Enter
Erase
Volume
Store
11
Capabilities and Controls
English
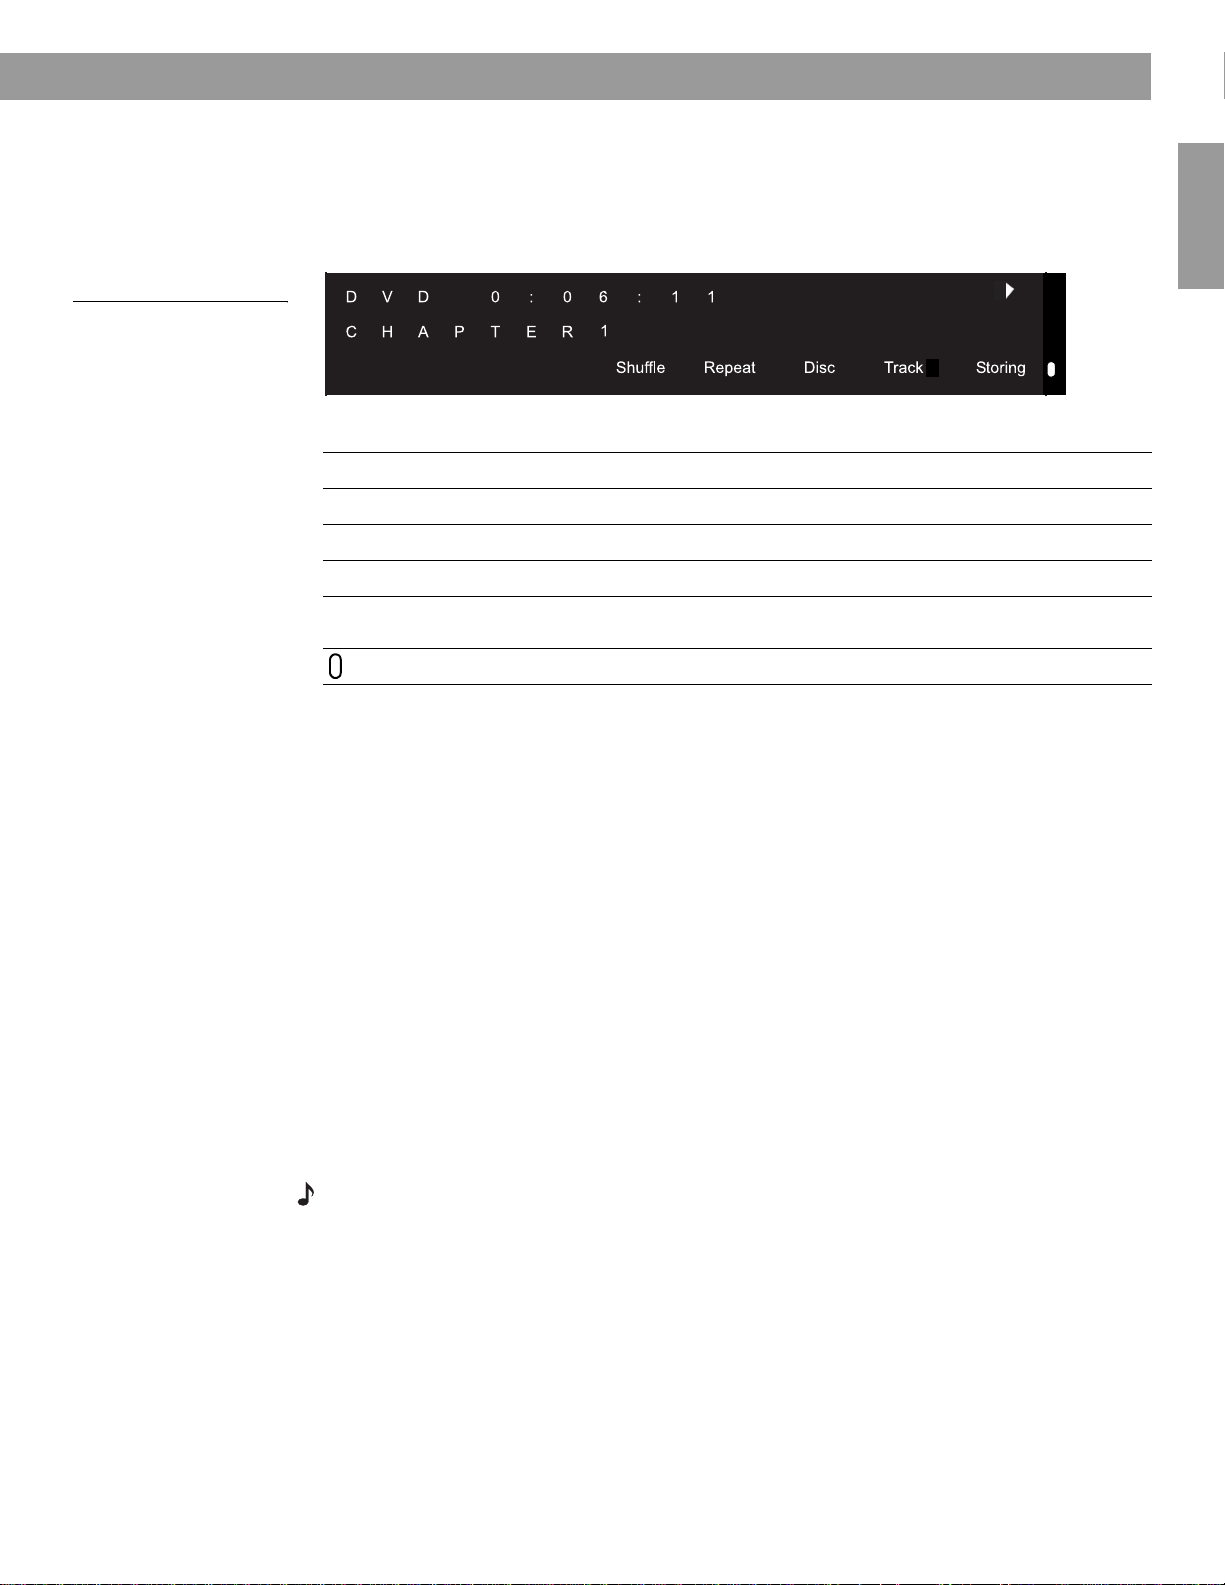
Display window
The media center display window indicates the state of the system, including what source is
playing, details of that program, and what option, if any, is selected (Figure 2).
When Settings menu items or messages appear in the display, they may scroll to reveal
information that does not fit in the two lines available.
Figure 2
Sample of information that
appears on the media
center display
Light indicators
Activating component or progressive scan connections
If you have used a component video connection between the media center and the TV, you
need to activate settings for the connection, as explained below.
With the media center turned off, use the controls on its front panel to follow these steps:
1. Press and hold the Enter button on the media center.
2. While holding the Enter button down, press the Store button.
Selections will appear on the media center display each time you press Store.
Move up and down using the Volume up and down buttons on the media center console.
3. When Video appears as the selection on the display, release the Store and Enter buttons.
4. Use the Volume up and down buttons to scroll through the Video options.
5. Stop scrolling at the proper selection.
• For a component connection only, select:
-NTSC COMPONENT (in North America)
-PAL COMPONENT (outside North America)
• For a component connection and progressive scan, select NTSC PROGRESSIVE.
Note: The system does not support PAL progressive video.
6. With the proper selection made, press Enter to confirm the selection and leave the Video
options.
The system is now ready to deliver the DVD video signal you prefer.
Shuffle
Shows when a CD, MP3 disc, or contents of an MP3 folder are playing in random order.
Repeat
Shows when the track or disc playing is set to repeat.
Disc
Shows when a disc in the CD/DVD tray is playing.
Track
Shows when a track is playing.
Storing
Shows when CD tracks are being copied to storage on LIFESTYLE
®
38 or 48 systems
only.
Lights briefly when a remote control command is received.

12
English
System Operation
Making it all work together smoothly
By pressing any source button on the LIFESTYLE
®
remote control, you can turn on the sys-
tem and select that source at the same time. Or, press the
On/Off
button on the remote control
or on the media center control panel. This turns the system on to the source that was last
used.
To use the system with your TV and other components, review the reminders below. They are
provided to help ensure that it all works together smoothly.
Note: For information on how to set the remote to operate other components, refer to “Using
your LIFESTYLE
®
remote with other components” on page 18.
To turn on other components
You need to:
1.Turn on the system.
2. Select the source.
3. Turn the source on (if it is an external component).
You can use your LIFESTYLE
®
remote control to do all of that, once you have set it to operate
the TV and other components.
To watch video
Your installation choices may require some activation settings, as indicated below.
• Getting the image to the TV screen:
– Be sure to select the proper Video input on your TV (consistent with the video input that
the media center connects to on the back of the TV). Use the
TV Input
button on the
LIFESTYLE
®
remote control.
• Using the component video connection option:
– If you have a component video connection between the TV and the media center, be
sure to make that selection on the display of the media center. Until you do, you may
see nothing on your screen when you select DVD as the source.
• Using the progressive scan capability of your TV:
– Make sure there is a component video connection between the TV and the media
center.
– Be sure to make the Progressive selection on the display of the media center. Until you
do, you may see nothing on your screen when you select DVD as the source.
– For other video components connected to the media center, make sure the component
is also connected using a component video adapter.
Note: For information on selecting component video or progressive scan on the media center,
refer to “Activating component or progressive scan connections” on page 11.
13
General System Operation
English
To adjust what you see or hear
• For changes to a particular source:
– Press the
Settings
button on the LIFESTYLE
®
remote control.
– To see your choices on the TV, be sure you have the TV on and its Video input is set for
the media center.
– For details on the changes you can make, refer to “Making adjustments to a particular
source” on page 24.
– For changes to system operation:
– Press the
System
button on the LIFESTYLE
®
remote control.
– Be sure you have the TV on and its Video input is set for the media center.
– For details on the changes you can make, refer to “Making system adjustments” on
page 29.
Loading and playing a DVD
The symbols below represent buttons on the LIFESTYLE
®
remote control unless otherwise
indicated.
1. Turn on your television.
2. Press to select the DVD player. If the system is off, this will also turn it on.
3. Lift up the media center front door and press on its control panel.
4. Insert a DVD into the tray (label side up).
5. Press again to close the disc tray.
6. Press to begin play.
You may need to press the play button more than once. Most DVD videos present on-screen
selections before the movie begins.
Note: Not all DVDs offer the same features. For example, you can choose to display subtitles
while watching a movie only if that disc provides subtitle information.
Open/Close
Open/Close
14
General System Operation
English
Control options
Note: For information on the quick adjustments you can make to DVD settings refer to
“DVD setting options” on page 27. Instructions on how to enter the menu to make those changes
are available in “How to see your options” on page 24.
Using parental controls
The parental control feature of your LIFESTYLE
®
system allows you to restrict access to
DVD movies with ratings you find inappropriate for members of your family.
Before you can use this feature, you choose a password and a level of restriction in the
System menu. To learn more about parental controls refer to “” on page 34.
Note: Refer to Troubleshooting if you have trouble with a password.
Loading and playing a CD
The symbols below represent buttons on the LIFESTYLE
®
remote control unless otherwise
indicated.
Press to select the CD player and begin playing the CD loaded in the disc tray. This
also turns the system on if it is off.
To l o ad a di sc :
1. Lift up the media center front door and press on its control panel.
2. Insert the audio CD into the tray.
3. Press to close the disc tray. Play begins automatically.
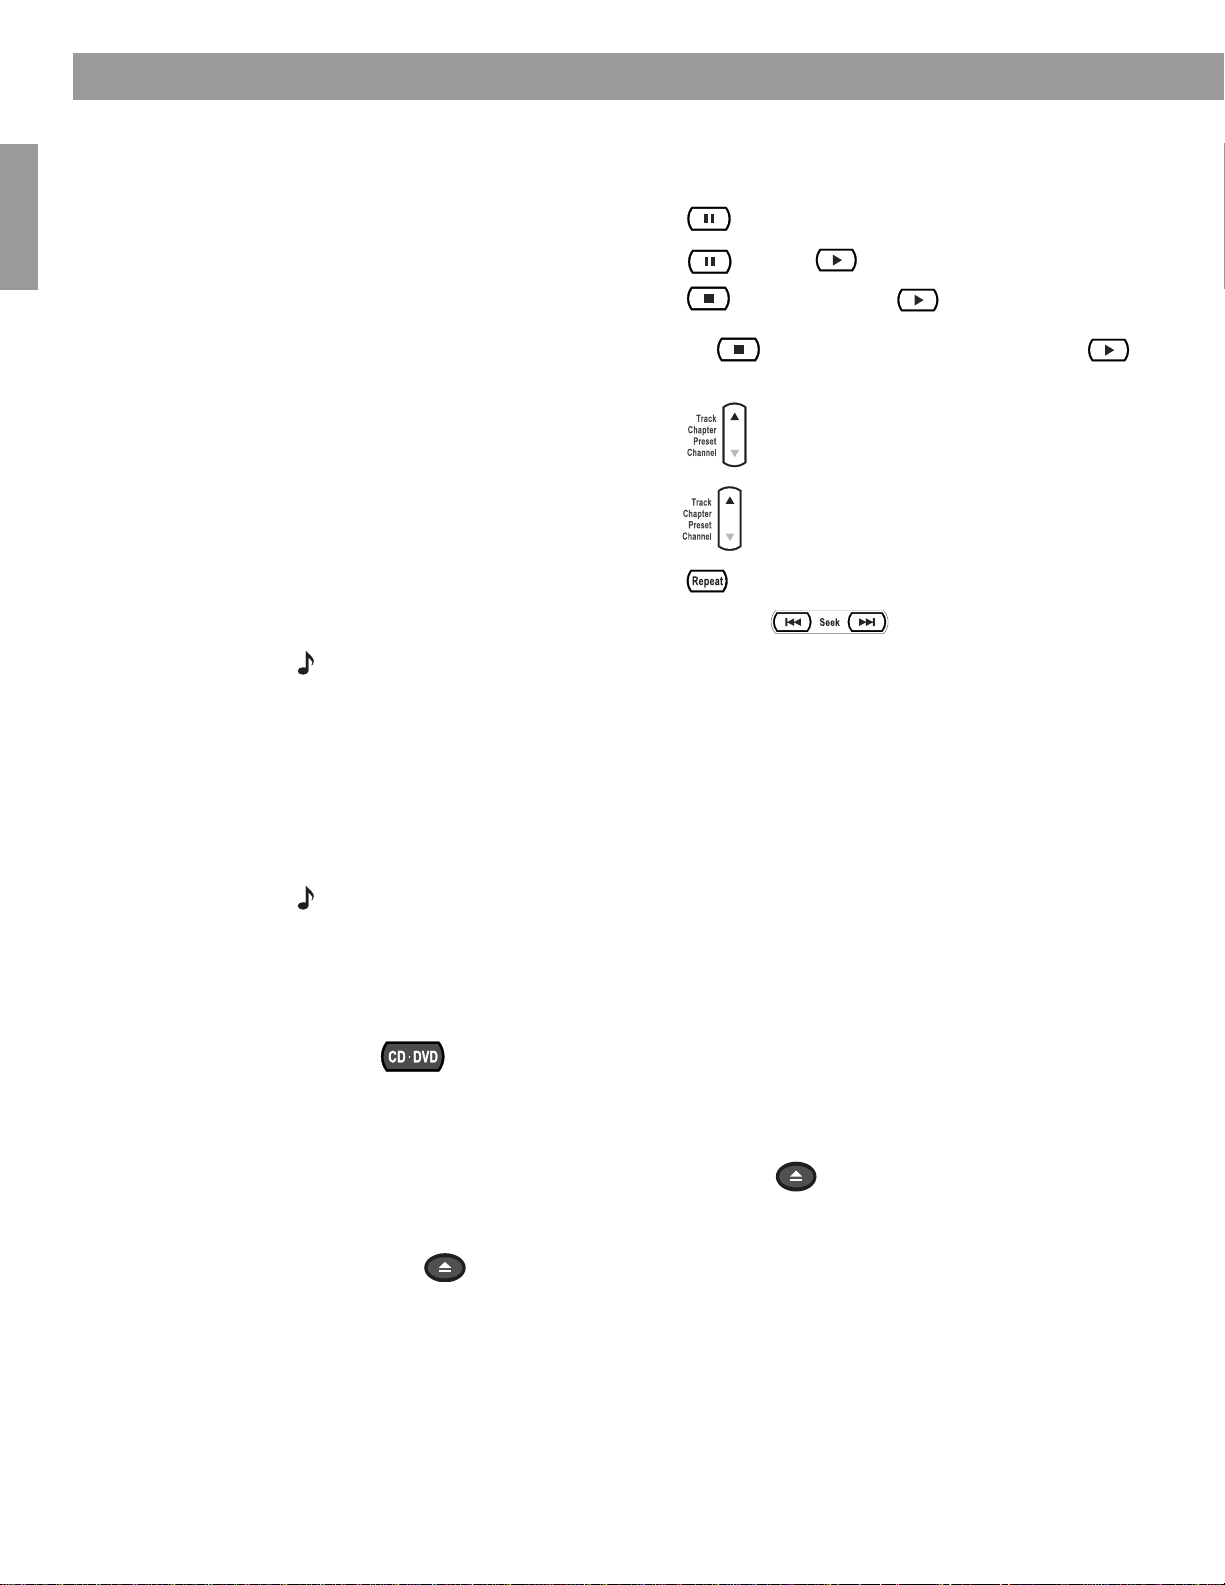
If you want to: Do this:
Pause a DVD movie … Press .
Resume play … Press again or .
Stop a DVD movie … Press once. Then press to continue playing
from where the movie stopped.
Or, press twice to stop and reset. Then press
to restart at the beginning of the DVD.
Skip to the next chapter … Press up.
Skip to the previous chapter … Press down twice.
Repeat a chapter … Press while the chapter you want to repeat plays.
Search backward or forward … Press and hold .
Open/Close
Open/Close
 Loading...