


3-225-220-31 (3)
FM/MW/LW
Cassette
Car Stereo
Operating Instructions
Návod k obsluze
Instrukcje Obsługi
Kullanım kılavuzu
Руководство по эксплуатации
GB
CZ
PL
TR
RU
For installation and connections, see the supplied installation/connections manual.
Informace o instalaci a zapojení naleznete v přiložené příručce Instalace / zapojení.
Szczegóły dotyczące instalacji i podłączeń, proszę sprawdzić w dostarczonym, osobnym podręczniku
Kurma ve bağlantı işlemleri için ünite beraberindeki Kurma/Bağlantılar kılavuzuna bakınız.
П орядок установки и подключения магнитолы описан в прилагаемой инструкции об установке/подключении.
XR-CA300 XR-L200
XR-CA310 XR-L210
2001 Sony Corporation
Welcome !
Thank you for purchasing this Sony Cassette Player.
XR-CA300/CA310 only
In addition to the cassette playback and radio operations, you can expand your system by connecting an optional CD/MD unit*1. When you operate this unit or a connected optional CD unit with the CD TEXT function, the CD TEXT information will appear in the display when you play a CD TEXT disc*2.
*1 You can connect a CD changer, an MD changer, a CD player, or an MD player.
*2 A CD TEXT disc is an audio CD that includes information such as the disc name, artist name, and track names.
This information is recorded on the disc.
Precautions
•If your car was parked in direct sunlight resulting in a considerable rise in temperature inside the car, allow the unit to cool off before operating it.
•If no power is being supplied to the unit, check the connections first. If everything is in order, check the fuse.
•If no sound comes from the speakers of a two-speaker system, set the fader control to the centre position.
•When a tape is played back for a long period, the cassette may become warm because of the built-in power amplifier. However, this is not a sign of malfunction.
If you have any questions or problems concerning your unit that are not covered in this manual, please consult your nearest Sony dealer.
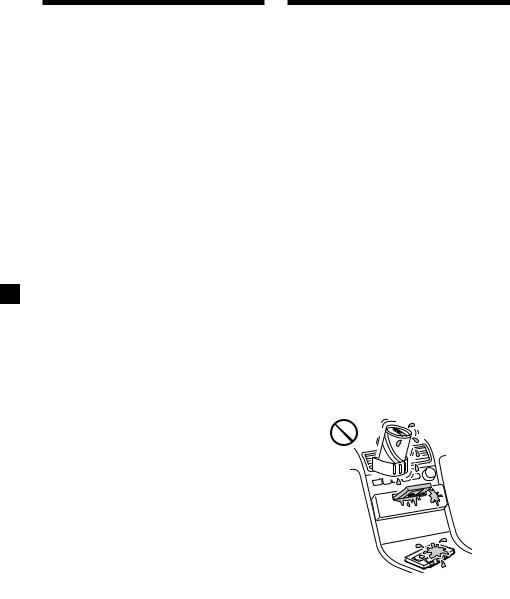
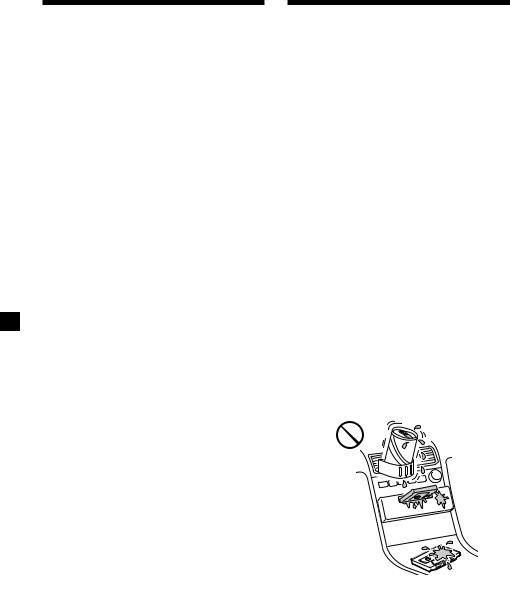
To maintain high quality sound
If you have drink holders near your audio equipment, be careful not to splash juice or other soft drinks onto the car audio. Sugary residues on this unit or cassette tapes may contaminate the playback heads, reduce the sound quality, or prevent sound reproduction altogether.
Cassette cleaning kits cannot remove sugar from the tape heads.
2
Notes on Cassettes
Cassette care
•Do not touch the tape surface of a cassette, as any dirt or dust will contaminate the heads.
•Keep cassettes away from equipment with built-in magnets such as speakers and amplifiers, as erasure or distortion on the recorded tape could occur.
•Do not expose cassettes to direct sunlight, extremely cold temperatures, or moisture.
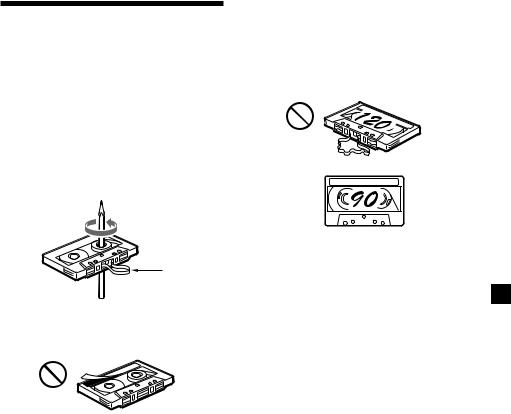
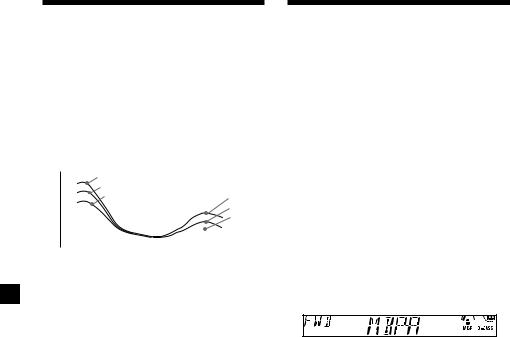
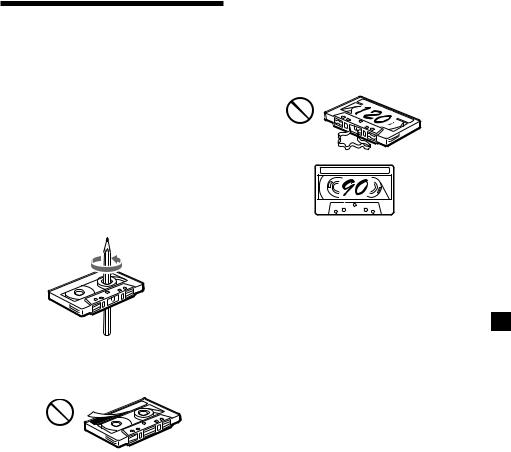
•Slack in the tape may cause the tape to be caught in the machine. Before you insert the tape, use a pencil or similar object to turn the reel and take up any slack.
Cassettes longer than 90 minutes
The use of cassettes longer than 90 minutes is not recommended except for long continuous play. The tape used for these cassettes is very thin and tends to stretch easily. Frequent playing and stopping of these tapes may cause them to become entangled in the cassette deck mechanism.
Slack
•Distorted cassettes and loose labels can cause problems when inserting or ejecting tapes. Remove or replace loose labels.
•The sound may become distorted while playing the cassette. The cassette player head should be cleaned after each 50 hours of use.
3

Table of Contents |
|
This Unit Only |
|
Location of controls ................................................. |
5 |
Getting Started |
|
Resetting the unit ................................................ |
6 |
Detaching the front panel .................................. |
6 |
Setting the clock .................................................. |
7 |
Cassette Player |
|
Listening to a tape ............................................... |
7 |
Radio reception during fast-forwarding or |
|
rewinding of a tape |
|
— Automatic Tuner Activation (ATA) ........ |
8 |
Radio |
|
Memorizing stations automatically |
|
— Best Tuning Memory (BTM) .................... |
8 |
Memorizing only the desired stations ............. |
9 |
Receiving the memorized stations .................... |
9 |
RDS |
|
Overview of the RDS function ........................ |
10 |
Displaying the station name ............................ |
10 |
Retuning the same programme automatically |
|
— Alternative Frequencies (AF) ................ |
10 |
Listening to traffic announcements ................ |
12 |
Presetting the RDS stations with the AF and |
|
TA data .......................................................... |
13 |
Locating a station by programme type .......... |
13 |
Setting the clock automatically ....................... |
14 |
Other Functions |
|
Adjusting the sound characteristics ............... |
15 |
Attenuating the sound ..................................... |
15 |
Changing the sound and display settings ..... |
15 |
Boosting the bass sound |
|
— D-bass ....................................................... |
16 |
Selecting the sound position |
|
— “My Best sound Position” ..................... |
16 |
With Optional Equipment
CD/MD Unit (XR-CA300/CA310 only)
Playing a CD or MD ......................................... |
17 |
Playing tracks repeatedly |
|
— Repeat Play .............................................. |
18 |
Playing tracks in random order |
|
— Shuffle Play .............................................. |
18 |
Additional Information |
|
Maintenance ....................................................... |
19 |
Dismounting the unit ....................................... |
20 |
Specifications ..................................................... |
21 |
Troubleshooting guide ..................................... |
22 |
4
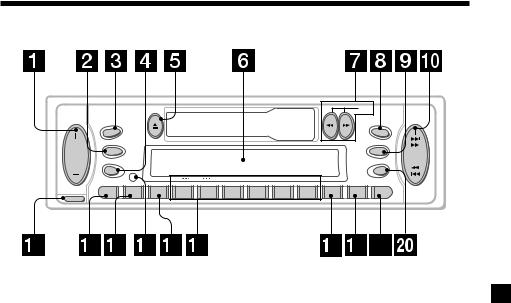
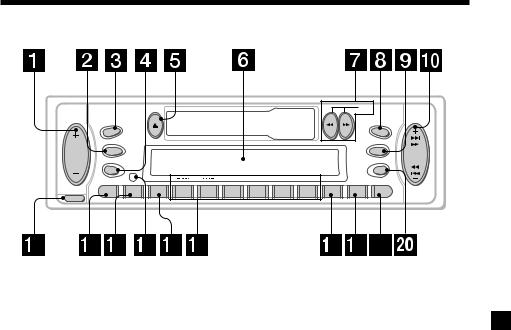
Location of controls
|
DIR |
|
SRC |
SOURCE |
|
MBP |
|
|
|
D-BASS |
|
MODE |
D |
SEEK |
|
|
AMS |
SEL |
OFF |
|
DISC REP SHUF ATA
BTM
ATT |
SENS |
AF |
1 |
2 |
3 |
4 |
5 |
6 |
TA |
PTY |
DSPL |
RELEASE
XR-CA300/CA310
Refer to the pages listed for details.
1 Volume +/– button 7
2MODE button
During radio reception: BAND select 8, 9
During CD/MD playback*:
CD/MD unit select 17
3XR-CA300/CA310:
SOURCE (TUNER/CD/MD) button 8, 9, 17
XR-L200/L210:
TUNER button 8, 9
4 SEL (select) button 7, 14, 15, 16, 17
5 Z (eject) button 7, 8, 9, 17
6 Display window
7m/M (fast winding)/DIR (tape transport direction change) buttons 7, 8
8MBP (My Best sound Position) button 16
9 D-BASS button 16
q; SEEK/AMS +/– button 9, 11, 14, 18
Seek 9
Automatic Music Sensor* 18 Manual search* 18
qa RELEASE (front panel release) button 6, 19
qs ATT (attenuate) button 15
qd SENS/BTM button 8, 9, 13
qf RESET button (located on the front side of the unit behind the front panel) 6
qg AF button 10, 11, 13
qh Number buttons 8, 9, 14, 15, 18 During radio reception:
Preset number select 9, 11
During tape playback:
(6) ATA 8
During CD/MD playback*:
(1)DISC – 18
(2)DISC + 18
(3)REP 18
(4)SHUF 18
qj TA button 12, 13
qk PTY (programme type) button 14
ql DSPL (display mode change) button 7, 10, 17
w; OFF button** 6
*XR-CA300/CA310 only
**Warning when installing in a car without ACC (accessory) position on the ignition key switch
Be sure to press (OFF) on the unit for two seconds to turn off the clock display after turning off the engine.
When you press (OFF) momentarily, the clock display does not turn off and this causes battery wear.
5
Getting Started
Resetting the unit
Before operating the unit for the first time or after replacing the car battery, you must reset the unit.
Remove the front panel and press the RESET button with a pointed object, such as a ballpoint pen.
RESET button
Note
Pressing the RESET button will erase the clock setting and some memorized functions.
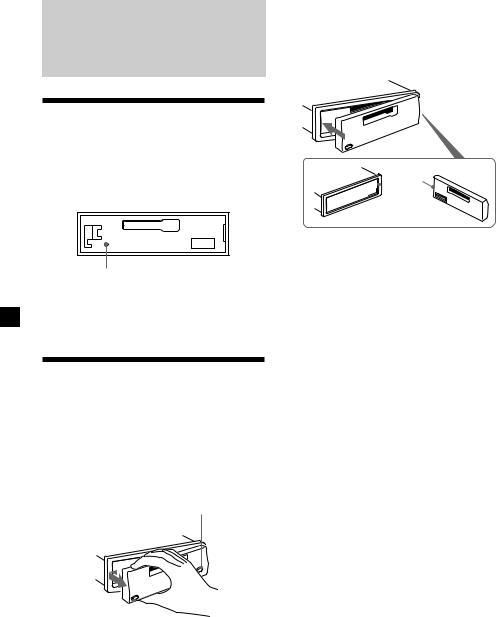
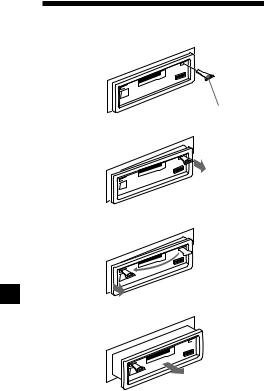
Detaching the front panel
You can detach the front panel of this unit to protect the unit from being stolen.
1 Press (OFF).
2 Press (RELEASE), then slide the front panel a little to the left, and pull it off towards you.
(OFF)
(RELEASE)

Notes
•Be sure not to drop the panel when detaching it from the unit.
•If you detach the panel while the unit is still turned on, the power will turn off automatically to prevent the speakers from being damaged.
•When carrying the front panel with you, use the supplied front panel case.
Attaching the front panel
Attach part A of the front panel to part B of the unit as illustrated and push the left side into position until it clicks.
A


 B
B
Notes
•Be sure not to attach the front panel upside down.
•Do not press the front panel too hard against the unit when attaching it.
•Do not press too hard or put excessive pressure on the display window of the front panel.
•Do not expose the front panel to direct sunlight or heat sources such as hot air ducts, and do not leave it in a humid place. Never leave it on the dashboard of a car parked in direct sunlight or where there may be a considerable rise in temperature.
Caution alarm
If you turn the car ignition off without removing the front panel, the caution alarm will beep for a few seconds.
If you connect an optional power amplifier and do not use the built-in amplifier, the beep sound will be deactivated.
6
Setting the clock
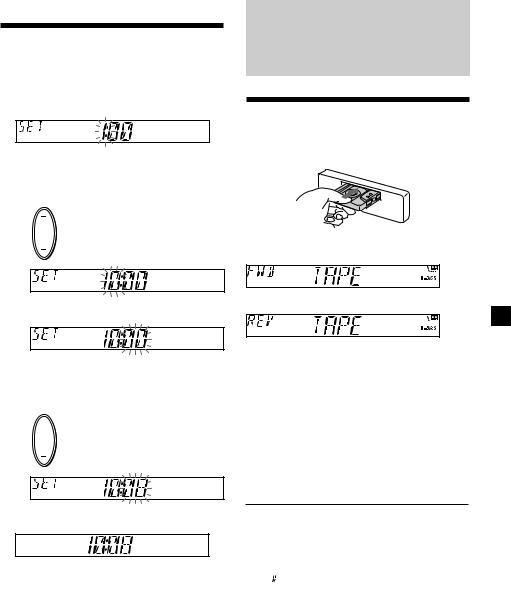
The clock uses a 24-hour digital indication.
Example: To set the clock to 10:08
1 Press (DSPL) for two seconds.
The hour indication flashes.
1Press either side of the volume button to set the hour.
to go forward
to go back
2 Press (SEL).
The minute indication flashes.
3Press either side of the volume button to set the minute.
to go forward
to go back
2 Press (DSPL).
The clock starts.
After the clock setting is complete, the display returns to normal playback mode.
Cassette Player
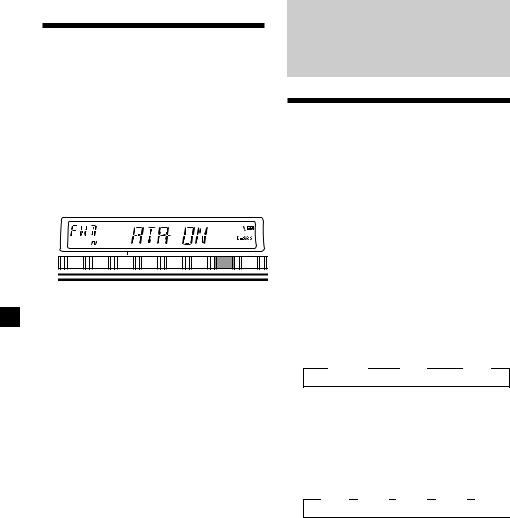
Listening to a tape
Insert a cassette.
Playback starts automatically.
The side facing up is played.
The side facing down is played.
Tip
To change the tape‘s playback direction, press m and M.
To stop playback and eject the cassette
Press Z.
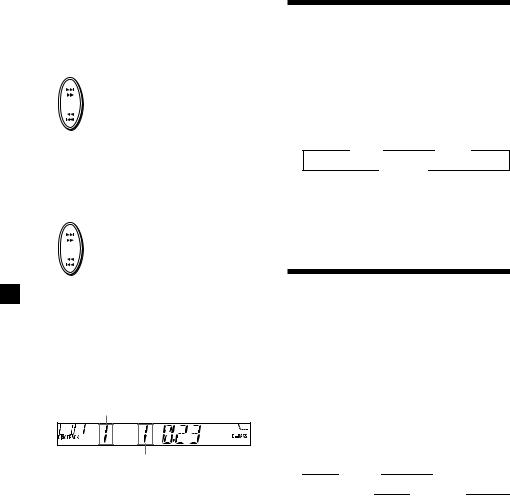
Fast-winding the tape
During playback, press m or M.
Direction |
|
To advance |
|
To rewind |
indicator* |
|
|
||
|
|
|
|
|
FWD |
|
M |
|
m |
|
|
|
|
|
REV |
|
m |
|
M |
* The indicator will flash while fast-winding the tape.
To start playback during fast-forwarding or rewinding, press the other fast-winding button partially until the locked button is released.
7
Radio reception during fast-forwarding or rewinding of a tape
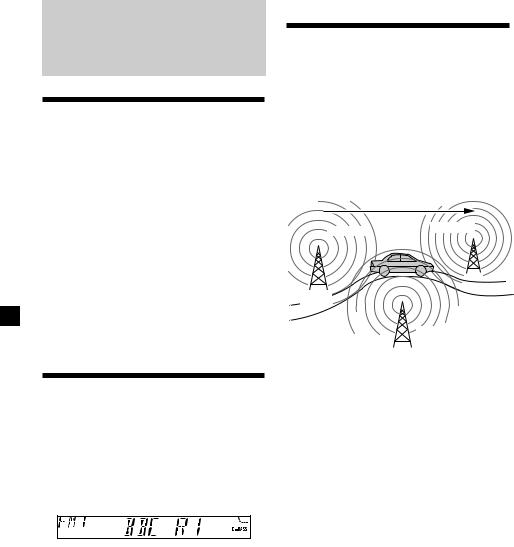
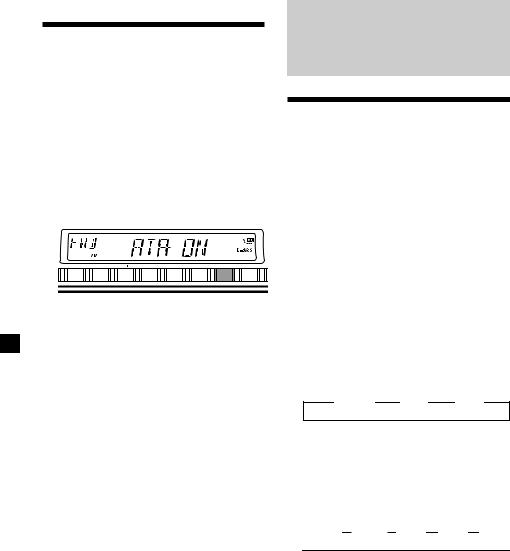
— Automatic Tuner Activation (ATA)
When fast-forwarding or rewinding with the m or M button, the tuner will turn on automatically.
During playback, press (6) (ATA) repeatedly until “ATA-ON” in the display appears.
ATA-ON yATA-OFF
|
|
DISC |
REP |
SHUF |
|
ATA |
|
AF |
1 |
2 |
3 |
4 |
5 |
6 |
TA |
To return to normal playback mode, select “ATA-OFF.”
Radio
Memorizing stations automatically
— Best Tuning Memory (BTM)
The unit selects the stations with the strongest signals and memorizes them in the order of their frequencies. You can store up to 6 stations on each band (FM1, FM2, FM3, MW, and LW).
Caution
When tuning in stations while driving, use Best Tuning Memory to prevent accidents.
1 Press (SOURCE) repeatedly, or (TUNER) to select the tuner.
In case of tape playback, press Z to eject the tape.
Each time you press (SOURCE), the source changes as follows:
B TUNER |
B CD* |
B MD* |
*If the corresponding optional equipment is not connected, this item will not appear (XR-CA300/CA310 only).
2 Press (MODE) repeatedly to select the band.
Each time you press (MODE), the band changes as follows:
B FM1 B FM2 B FM3 B MW B LW 
3 Press (SENS) (BTM) for two seconds.
The unit stores stations in the order of their frequencies on the number buttons.
A beep sounds when the setting is stored.
Notes
•The unit does not store stations with weak signals. If only a few stations can be received, some number buttons will retain their former setting.
•When a number is indicated in the display, the unit starts storing stations from the one currently displayed.
8

Memorizing only the desired stations
You can preset up to 18 FM stations (6 each for FM1, 2, and 3), up to 6 MW stations, and up to 6 LW stations in the order of your choice.
1 Press (SOURCE) repeatedly, or (TUNER) to select the tuner.
In case of tape playback, press Z to eject the tape.
2 Press (MODE) repeatedly to select the band.
3 Press either side of (SEEK/AMS) to tune in the station that you want to store on the number button.
4 Press the desired number button ((1) to
(6)) until “MEM” appears.
The number button indication appears in the display.
Note
If you try to store another station on the same number button, the previously stored station will be erased.
Receiving the memorized stations
1 Press (SOURCE) repeatedly, or (TUNER) to select the tuner.
In case of tape playback, press Z to eject the tape.
2 Press (MODE) repeatedly to select the band.
3 Press the number button ((1) to (6)) on which the desired station is stored.
If you cannot tune in a preset station
— Automatic tuning/ Local Seek Mode
Automatic tuning:
Press either side of (SEEK/AMS) to search for the station.
Scanning stops when the unit receives a station. Press either side of (SEEK/AMS) repeatedly until the desired station is received.
Local Seek Mode:
If the automatic tuning stops too frequently, press (SENS) repeatedly until “LOCAL-ON” appears.
“LCL” indicator is displayed.
Only the stations with relatively strong signals will be tuned in.
Tip
If you know the frequency of the station you want to listen to, press either side of (SEEK/AMS) until the desired frequency appears (manual tuning).
If FM stereo reception is poor
—Monaural Mode
During radio reception, press (SENS) repeatedly until “MONO-ON” appears.
“MONO” indicator is displayed.
The sound improves, but becomes monaural (“ST” disappears).
To return to normal mode, select “MONOOFF.”
9
RDS
Overview of the RDS function
Radio Data System (RDS) is a broadcasting service that allows FM stations to send additional digital information along with the regular radio programme signal. Your car stereo offers you a variety of services. Here are just a few: retuning the same programme automatically, listening to traffic announcements, and locating a station by programme type.
Notes
•Depending on the country or region, not all of the RDS functions are available.
•RDS may not work properly if the signal strength is weak or if the station you are tuned to is not transmitting RDS data.
Displaying the station name
The name of the current station lights up in the display.
Select an FM station (page 8).
When you tune in an FM station that transmits RDS data, the station name appears in the display.
Note
The “*” indication means that an RDS station is being received.
Changing the display item
Each time you press (DSPL), the item changes as follows:
Station Name* (Frequency) yClock
*When you tune in an FM station that transmits RDS data, the station name appears.
Note
“NO NAME” appears if the received station does not transmit RDS data.
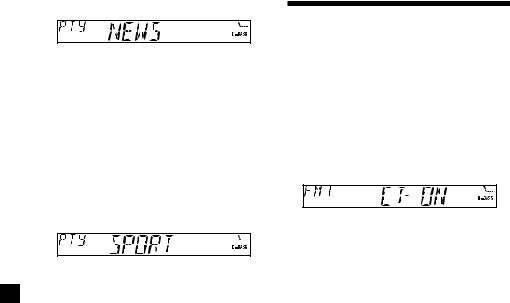
Retuning the same programme automatically
— Alternative Frequencies (AF)
The Alternative Frequencies (AF) function automatically selects and retunes the station with the strongest signal in a network. By using this function, you can continuously listen to the same programme during a longdistance drive without having to retune the station manually.
Frequencies change automatically.
96.0MHz
98.5MHz
Station
102.5MHz
1 Select an FM station (page 8).
2 Press (AF) repeatedly until “AF-ON” appears.
The unit starts searching for an alternative station with a stronger signal in the same network.
Note
When there is no alternative station in the area and you do not need to search for an alternative station, turn the AF function off by pressing (AF) repeatedly until “AF-OFF” appears.
10
Changing the display item
Each time you press (AF), the item changes as follows:
AF-ON yAF-OFF
Notes
•When “NO AF” and the station name flash alternately, it means that the unit cannot find an alternative station in the network.
•If the station name starts flashing after selecting a station with the AF function on, this indicates that no alternative frequency is available. Press either side of (SEEK/AMS) while the station name is flashing (within eight seconds). The unit starts searching for another frequency with the same PI (Programme Identification) data (“PI SEEK” appears and no sound is heard). If the unit cannot find another frequency, “NO PI” appears, and the unit returns to the previously selected frequency.
Listening to a regional programme
The “REG-ON” (regional on) function lets you stay tuned to a regional programme without being switched to another regional station. (Note that you must turn the AF function on.) The unit is factory preset to “REG-ON,” but if you want to turn off the function, do the following.
During radio reception, press (AF) for two seconds until “REG-OFF” appears.
Note that selecting “REG-OFF” might cause the unit to switch to another regional station within the same network.
To return to regional on, select “REG-ON.”
Note
This function does not work in the United Kingdom and in some other areas.
Changing the display item
Each time you press (AF) for two seconds, the item changes as follows:
REG-ON yREG-OFF
Local link function (United Kingdom only)
The Local Link function lets you select other local stations in the area, even if they are not stored on your number buttons.
1 Press a number button that has a local station stored on it.
2 Within five seconds, press the number button of the local station again.
3 Repeat this procedure until the desired local station is received.
11

Listening to traffic announcements
The Traffic Announcement (TA) and Traffic Programme (TP) data let you automatically tune in an FM station that is broadcasting traffic announcements even if you are listening to other programme sources.
Press (TA) repeatedly until “TA-ON” appears.
The unit starts searching for traffic information stations. “TP” appears in the display when the unit finds a station broadcasting traffic announcements. When the traffic announcement starts, “TA” flashes. The flashing stops when the traffic announcement is over.
Tip
If the traffic announcement starts while you are listening to another programme source, the unit automatically switches to the announcement and goes back to the original source when the announcement is over.
Notes
•“NO TP” flashes for five seconds if the received station does not broadcast traffic announcements. Then, the unit starts searching for a station that broadcasts it.
•When “EON” appears with “TP” in the display, the current station makes use of broadcast traffic announcements by other stations in the same network.
To cancel the current traffic announcement
Press (TA).
To cancel all traffic announcements, turn off the function by pressing (TA) until “TA-OFF” appears.
Presetting the volume of traffic announcements
You can preset the volume level of the traffic announcements beforehand so you won’t miss the announcement. When a traffic announcement starts, the volume will be automatically adjusted to the preset level.
1 Press the volume button to adjust the desired volume level.
2 Press (TA) for two seconds.
“TA” appears and the setting is stored.
Receiving emergency announcements
If an emergency announcement comes in while you are listening to the radio, the programme will automatically switch to it. If you are listening to a source other than the radio, the emergency announcements will be heard if you set AF or TA to on. The unit will then automatically switch to these announcements no matter which source you are listening to at the time.
12

Presetting the RDS stations with the AF and TA data
When you preset RDS stations, the unit stores each station’s data as well as its frequency, so you don’t have to turn on the AF or TA function every time you tune in the preset station. You can select a different setting (AF, TA, or both) for individual preset stations, or the same setting for all preset stations.
Presetting the same setting for all preset stations
1 Select an FM band (page 8).
2 Press (AF) and/or (TA) to select “AF-ON” and/or “TA-ON.”
Note that selecting “AF-OFF” or “TA-OFF” stores not only RDS stations, but also nonRDS stations.
3 Press (SENS) (BTM) until “BTM” flashes.
Presetting different settings for each preset station
1 Select an FM band, and tune in the desired station.
2 Press (AF) and/or (TA) to select “AF-ON” and/or “TA-ON.”
3 Press the desired number button until “MEM” appears.
Repeat from step 1 to preset other stations.
Tip
If you want to change the preset AF and/or TA setting after you tune in the preset station, you can do so by turning the AF or TA function on or off.
Locating a station by programme type
You can locate the station you want by selecting one of the programme types shown below.
Programme types |
Display |
|
|
News |
NEWS |
|
|
Current Affairs |
AFFAIRS |
|
|
Information |
INFO |
|
|
Sports |
SPORT |
|
|
Education |
EDUCATE |
|
|
Drama |
DRAMA |
|
|
Culture |
CULTURE |
|
|
Science |
SCIENCE |
|
|
Varied |
VARIED |
|
|
Popular Music |
POP M |
|
|
Rock Music |
ROCK M |
|
|
|
|||
Easy Listening |
EASY M |
|
|
|
|||
Light Classical |
LIGHT M |
|
|
Classical |
CLASSICS |
|
|
Other Music Type |
OTHER M |
|
|
Weather |
WEATHER |
|
|
Finance |
FINANCE |
|
|
Children’s Programmes |
CHILDREN |
|
|
Social Affairs |
SOCIAL A |
|
|
Religion |
RELIGION |
|
|
Phone In |
PHONE IN |
|
|
Travel |
TRAVEL |
|
|
Leisure |
LEISURE |
|
|
Jazz Music |
JAZZ |
|
|
Country Music |
COUNTRY |
|
|
National Music |
NATION M |
|
|
Oldies Music |
OLDIES |
|
|
Folk Music |
FOLK M |
|
|
Documentary |
DOCUMENT |
|
|
Not specified |
NONE |
|
|
Note
You cannot use this function in some countries where no PTY (Programme Type selection) data is available.
continue to next page t
13
1 Press (PTY) during FM reception.
The current programme type name appears if the station is transmitting the PTY data. “- - - - -” appears if the received station is not an RDS station, or if the RDS data has not been received.
If the TA function is ON, the unit starts searching for the next station.
2 Press (PTY) repeatedly until the desired programme type appears.
The programme types appear in the order shown in the above table. Note that you cannot select “NONE” (Not specified) for searching.
3 Press either side of (SEEK/AMS).
The unit starts searching for a station broadcasting the selected programme type. When the unit finds the programme, the programme type appears again for five seconds.
“NO” and the programme type appear alternately for five seconds if the unit cannot find the programme type. It then returns to the previously selected station.
Setting the clock automatically
The CT (Clock Time) data from the RDS transmission sets the clock automatically.
1 During radio reception, press (SEL) and
(2) simultaneously.
2 Press (2) repeatedly until “CT-ON” appears.
The clock is set.
In two seconds the normal display automatically appears.
To cancel the CT function
Select “CT-OFF” in step 2.
Notes
•The CT function may not work even though an RDS station is being received.
•There might be a difference between the time set by the CT function and the actual time.
14

Other Functions
Adjusting the sound characteristics
You can adjust the bass, treble, balance, and fader.
You can store the bass and treble levels independently for each source.
1 Select the item you want to adjust by pressing (SEL) repeatedly.
Each time you press (SEL), the item changes as follows:
BAS (bass) tTRE (treble) t
BAL (left-right) tFAD (front-rear)
2 Adjust the selected item by pressing either side of the volume button.
Adjust within three seconds after selecting the item.
Attenuating the sound
Press (ATT).
After “ATT-ON” momentarily flashes, the “ATT” indication appears in the display.
To restore the previous volume level, press (ATT) again.
“ATT-OFF” flashes momentarily.
Tip
When the interface cable of a car telephone is connected to the ATT lead, the unit decreases the volume automatically when a telephone call comes in (Telephone ATT function).
(XR-CA310/ illumination:green only)
Changing the sound and display settings
The following items can be set:
•CT (Clock Time) (page 14).
•A.SCRL (Auto Scroll)* (page 17).
•M.DSPL (Motion Display)
– the demonstration mode which appears when the tape is ejected and no source is selected (e.g., tuner is turned off).
•BEEP – to turn the beep sound on or off.
1 Press (SEL).
2 Press the preset number button to select the desired item.
Number buttons
(2): CT
(3): A.SCRL*
(4): M.DSPL
(6): BEEP
*When no CD or MD is playing, this item will not appear (XR-CA300/CA310 only).
Note
The displayed item will differ depending on the source.
3 Press the preset number button repeatedly to select the desired setting (Example: ON or OFF).
15
Boosting the bass sound
— D-bass
You can enjoy a clear and powerful bass sound. The D-bass function boosts the low frequency signal and high frequency signal with a sharper curve than conventional bass boost.
You can hear the bass line more clearly even while the vocal volume remains the same. You can emphasize and adjust the bass sound easily with the D-BASS button.
Level |
D.BASS-3 |
|
|
D.BASS-2 |
|
|
D.BASS-1 |
D.BASS-3 |
|
|
D.BASS-2 |
|
|
D.BASS-1 |
0dB 

Frequency (Hz)
Adjusting the bass curve
Press (D-BASS) repeatedly to select the desired bass curve.
As the D-BASS number increases so does the effect.
D.BASS-1 tD.BASS-2 tD.BASS-3 t D.BASS-OFF
Note
The bass sound may distort at same volume. If the bass sound distorts, select less effective bass curve.
Selecting the sound
position — “My Best sound Position”
When you drive without passengers, you can enjoy comfortable sound environment by “My Best sound Position.”
“My Best sound Position” has two presets, which adjusts the sound level of balance and fader. You can select one very easily with MBP button.
Display |
Balance Level |
Fader Level |
|||
window |
|
Right |
Left |
Front |
Rear |
MBP-A |
– 4dB |
0 |
0 |
– 4dB |
|
|
|
|
|
|
|
MBP-B |
0 |
– 4dB |
0 |
– 4dB |
|
|
|
|
|
|
|
MBP-OFF |
0 |
0 |
0 |
0 |
|
|
|
|
|
|
|
Press (MBP) repeatedly until the desired listening position.
Mode of “My Best sound Position” will be shown in the display in order of the table.
After one second, the display goes back to the normal playback mode.
If you want to adjust the sound level of balance and fader more precisely, you can do it in (SEL) button. (See “Adjusting the sound characteristics” on page 15.)
16
With Optional Equipment
CD/MD Unit
(XR-CA300/CA310 only)
This unit can control external CD/MD units. If you connect an optional CD unit with the CD TEXT function, the CD TEXT information will appear in the display when you play a CD TEXT disc.
Playing a CD or MD
1 Press (SOURCE) repeatedly to select CD or MD.
In case of tape playback, press Z to eject the tape.
2 Press (MODE) until the desired unit appears.
CD/MD playback starts.
When a CD/MD unit is connected, all the tracks play from the beginning.
Changing the display item
Each time you press (DSPL) during CD, CD TEXT, or MD playback, the item changes as follows:
V
Elapsed playback time
V
Disc name*1/Artist name*2
V
Track name*3
V
Clock
*1 If you have not labelled the disc or if there is no disc name prerecorded on the MD, “NO NAME” appears in the display.
*2 If you play a CD TEXT disc, the artist name appears in the display after the disc name. (Only for CD TEXT discs with the artist name.)
*3 If the track name of a CD TEXT disc or MD is not prerecorded, “NO NAME” appears in the display.
Automatically scrolling a disc name
— Auto Scroll
If the disc name, artist name, or track name on a CD TEXT disc or MD exceeds 8 characters and the Auto Scroll function is on, information automatically scrolls across the display as follows:
•The disc name appears when the disc has changed (if the disc name is selected).
•The track name appears when the track has changed (if the track name is selected).
If you press (DSPL) to change the display item, the disc or track name of the CD TEXT or MD disc is scrolled automatically whether you set the function on or off.
1 During playback, press (SEL).
2 Press (3) repeatedly to select “A.SCRL-ON.”
To cancel Auto Scroll, select “A.SCRL-OFF.”
Note
For some discs with very many characters, the following cases may happen:
—Some of the characters are not displayed.
—Auto Scroll does not work.
17
Locating a specific track
— Automatic Music Sensor (AMS)
During playback, press either side of (SEEK/AMS) momentarily for each track you want to skip.
To locate succeeding tracks
SEEK
AMS
To locate preceding tracks
Locating a specific point in a track
— Manual Search
During playback, press and hold either side of (SEEK/AMS). Release when you have found the desired point.
To search forward
SEEK
AMS
To search backward
Switching to other discs
During playback, press (1) (DISC –) or
(2) (DISC +) button.
The desired disc in the current unit begins playback.
(1)(DISC –): For preceding discs
(2)(DISC +): For succeeding discs
Disc number
Track number
Playing tracks repeatedly
— Repeat Play
You can select:
•REP-1 – to repeat a track.
•REP-2 – to repeat a disc.
During playback, press (3) (REP) repeatedly until the desired setting appears.
B REP-1 |
B REP-2 |
REP-OFF b
Repeat Play starts.
To return to normal playback mode, select “REP-OFF.”
Playing tracks in random
order — Shuffle Play
You can select:
•SHUF-1 – to play the tracks on the current disc in random order.
•SHUF-2 – to play the tracks in the current unit in random order.
•SHUF-ALL – to play all the tracks in all the units in random order.
During playback, press (4) (SHUF) repeatedly until the desired setting appears.
|
B SHUF-1 |
|
B SHUF-2 |
|
|
|
SHUF-OFF b |
SHUF-ALL* b |
|
||
|
|
||||
Shuffle Play starts.
*“SHUF-ALL” is only available when you connect two or more optinal CD/MD units.
To return to normal playback mode, select “SHUF-OFF.”
18
Additional
Information
Maintenance
Fuse replacement
When replacing the fuse, be sure to use one matching the amperage rating stated on the original fuse. If the fuse blows, check the power connection and replace the fuse. If the fuse blows again after replacement, there may be an internal malfunction. In such a case, consult your nearest Sony dealer.
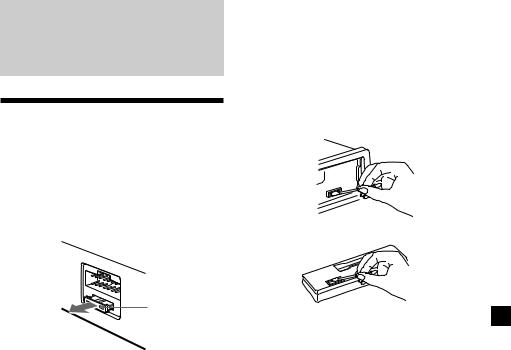
Cleaning the connectors
The unit may not function properly if the connectors between the unit and the front panel are not clean. In order to prevent this, open the front panel by pressing (RELEASE), then detach it and clean the connectors with a cotton swab dipped in alcohol. Do not apply too much force. Otherwise, the connectors may be damaged.
Main unit
Fuse (10 A)
Warning
Never use a fuse with an amperage rating exceeding the one supplied with the unit as this could damage the unit.
Back of the front panel
Notes
•For safety, turn off the engine before cleaning the connectors and remove the key from the ignition switch.
•Never touch the connectors directly with your fingers or any metal device.
19
Dismounting the unit
1
Release key (supplied)
2
3
4
20
Specifications
Cassette player section
Tape track |
4-track 2-channel stereo |
Wow and flutter |
0.13 % (WRMS) |
Frequency response |
30 – 15,000 Hz |
Signal-to-noise ratio |
55 dB |
Tuner section
FM
Tuning range |
87.5 – 108.0 MHz |
Aerial terminal |
External aerial connector |
Intermediate frequency |
10.7 MHz |
Usable sensitivity |
11 dBf |
Selectivity |
75 dB at 400 kHz |
Signal-to-noise ratio |
62 dB (stereo), |
|
68 dB (mono) |
Harmonic distortion at 1 kHz |
|
|
0.7 % (stereo), |
|
0.5 % (mono) |
Separation |
33 dB at 1 kHz |
Frequency response |
30 – 15,000 Hz |
MW/LW
Tuning range |
MW: 531 – 1,602 kHz |
|
LW: 153 – 279 kHz |
Aerial terminal |
External aerial connector |
Intermediate frequency |
10.7 MHz/450 kHz |
Sensitivity |
MW: 30 µV |
|
LW: 50 µV |
Power amplifier section
Outputs |
Speaker outputs |
|
(sure seal connectors) |
Speaker impedance |
4 – 8 ohms |
Maximum power output |
45 W × 4 (at 4 ohms) |
General
Outputs |
Power aerial relay control |
||
|
lead |
|
|
Input |
Telephone ATT control |
||
|
lead* |
|
|
Tone controls |
Bass ±9 dB at 100 Hz |
||
|
Treble ±9 dB at 10 kHz |
||
Power requirements |
12 V DC car battery |
||
|
(negative earth) |
|
|
Dimensions |
Approx. 178 × |
50 × |
176 mm |
|
(w/h/d) |
|
|
Mounting dimensions |
Approx. 182 × |
53 × |
161 mm |
|
(w/h/d) |
|
|
Mass |
Approx. 1.2 kg |
|
|
Supplied accessories |
Parts for installation and |
||
|
connections (1 set) |
|
|
|
Front panel case (1) |
||
Optional accessories** |
BUS cable (supplied with |
||
|
an RCA pin cord) |
|
|
|
RC-61 (1 m), RC-62 (2 m) |
||
Optional equipment** |
CD changer (10 discs) |
||
|
CDX-848X, CDX-646 |
||
MD changer (6 discs)
MDX-65
Source selector
XA-C30
*XR-CA310/ illumination:green only
**XR-CA300/CA310 only
Design and specifications are subject to change without notice.
21

Troubleshooting guide
The following checklist will help you remedy the problems you may encounter with your unit. Before going through the checklist below, check the connections and operating procedures.
General
Problem |
Cause/Solution |
|
|
No sound. |
•Cancel the ATT function (page 15). |
|
•Set the fader control to the centre position for two-speaker |
|
systems. |
|
•Adjust the volume with (+). |
The contents of the memory have been erased.
•The power cord or battery has been disconnected.
•The RESET button was pressed.
tStore again into the memory.
Indications do not appear |
Remove the front panel and clean the connectors. See |
in the display. |
“Cleaning the connectors” (page 19) for details. |
|
|
Tape playback
|
|
Problem |
Cause/Solution |
|
|||
|
|
|
|
|
|
The sound is distorted. |
The tape head is contaminated. |
|
|||
|
|
|
tClean the head with a commercially available dry-type |
|
|
|
cleaning cassette. |
|
|
|
|
Radio reception
Problem |
Cause/Solution |
|
|
Preset tuning is not possible. |
• Store the correct frequency in the memory. |
|
• The broadcast signal is too weak. |
|
|
Automatic tuning is not |
•The broadcast signal is too weak. |
possible. |
tUse manual tuning. |
|
•The local seek mode is set to ON. |
|
tSet the local seek mode to OFF (page 9). |
|
|
The stations cannot be |
Connect an power aerial control lead (blue) or accessory power |
received. |
supply lead (red) to the power supply lead of a car’s aerial |
The sound is hampered by |
booster. (When your car has built-in FM/MW/LW aerial in the |
noises. |
rear/side glass only.) |
|
|
The “ST” indication flashes. |
•Tune in the frequency accurately. |
|
•The broadcast signal is too weak. |
|
tSet to MONO mode (page 9). |
|
|
22

RDS
Problem |
Cause/Solution |
|
|
The SEEK starts after a few |
The station is non-TP or has a weak signal. |
seconds of listening. |
tPress (AF) or (TA) repeatedly until “AF-OFF” or |
|
“TA-OFF” appears. |
|
|
No traffic announcements. |
•Activate “TA.” |
|
•The station does not broadcast any traffic announcements |
|
despite being TP. |
|
tTune to another station. |
|
|
PTY displays “NONE.” |
The station does not specify the programme type. |
|
|
CD/MD playback (XR-CA300/CA310 only)
Problem |
Cause/Solution |
|
|
The sound skips. |
A dirty or defective disc. |
|
|
Error displays (when an optional CD/MD unit is connected)
(XR-CA300/CA310 only)
The following indications will flash for about five seconds, and an alarm sound will be heard.
Display |
Cause |
Solution |
NO MAG |
The disc magazine is not inserted in |
Insert the disc magazine in the CD/ |
the CD/MD unit. |
MD unit. |
|
|
|
|
NO DISC |
No disc is inserted in the CD/MD unit. Insert discs in the CD/MD unit. |
|
A CD is dirty or inserted upside down.*2
Clean or insert the CD correctly.
|
*1 |
An MD does not play because of some |
Insert another MD. |
|
ERROR |
||||
problem.*2 |
|
|||
|
|
A CD/MD cannot play because of |
Insert another CD/MD. |
|
|
|
some problem. |
|
|
|
|
|
|
|
BLANK |
*1 |
No tracks have been recorded on an |
Play an MD with tracks recorded on |
|
|
MD.*2 |
it. |
||
RESET |
|
The CD/MD unit cannot be operated |
Press the reset button of the unit. |
|
|
because of some problem. |
|
||
NOT READY The lid of the MD unit is open or MDs are not inserted properly.
Close the lid or insert the MDs properly.
HI TEMP |
The ambient temperature is more than |
|
50°C. |
Wait until the temperature goes down below 50°C.
*1 When an error occurs during playback of a CD or MD, the disc number of the CD or MD does not appear in the display.
*2 The disc number of the disc causing the error appears in the display.
If the above-mentioned solutions do not help improve the situation, consult your nearest Sony dealer.
23
Vítejte!
Děkujeme, že jste se rozhodli pro tento Sony Cassette Player.
Pouze XR-CA300/CA310
Jako doplnění funkcí magnetofonu a rádia můžete rozšířit váš systém zapojením přídavného přehrávače CD/MD *1.
Když budete ovládat tento přístroj nebo zapojený přídavný přehrávač CD pomocí funkce CD TEXT, objeví se na displeji informace CD TEXT, když budete přehrávat disk CD TEXT *2.
*1 Můžete také zapojit měnič CD, měnič MD, přehrávač CD nebo přehrávač MD.
*2 Disk CD TEXT je audio CD, které obsahuje informace jako jméno disku, jméno zpěváka nebo skupiny, názvy skladeb.
Tato informace je nahrána na disku.
Bezpečnostní opatření
•Bylo-li vaše auto zaparkováno na přímém slunci a došlo-li k velkému zvýšení teploty uvnitř auta, nechte přístroj vychladnout, než ho uvedete do provozu.
•Není-li přístroj pod proudem, zkontrolujte napřed jeho zapojení. Je-li vše v pořádku, zkontrolujte pojistku.
•Jestliže se z reproduktorů neozývá žádný zvuk, když jsou zapojené 2 reproduktory, nastavte vyvážení reproduktorů do středové polohy.
•Jestliže delší dobu posloucháte kazetu, může se stát, že se zahřeje od zabudovaného zesilovače. Není to však znakem poruchy.
Vyskytnou-li se další otázky nebo problémy týkající se vašeho přístroje, které nejsou popsány v tomto návodu k použití, obra5te se na nejbližší zastoupení firmy Sony.
Udržení vysoké kvality zvuku
Jestliže jsou v blízkosti vašeho rádia umístěné držáky na nápoje, dbejte na to, aby se do vašeho autorádia nedostaly ovocné š5ávy, ani jiné nápoje. Zbytky cukru na tomto přístroji nebo na kazetách by mohly zašpinit hlavy pro přehrávání, snížit kvalitu zvuku nebo všeobecně zhoršit reprodukci zvuku. Soupravy na čistění kazet nemohou odstranit cukr z hlav na přehrávání.
2
Poznámky ke kazetám
Péče o kazety
•Nedotýkejte se povrchu pásku v kazetě, protože by případné nečistoty nebo vlhkost zašpinily hlavy.
•Nepřibližujte kazety do blízkosti zařízení se silnými zabudovanými magnety, jako jsou reproduktory a zesilovače, protože by mohlo dojít k vymazání nebo poškození nahrávky na nahraném pásku.
•Nevystavujte kazety přímému slunečnímu záření, extrémně nízkým teplotám, ani vlhkosti.
•Případné smyčky na pásku by mohly způsobit zamotání pásku v přístroji. Než vložíte kazetu, napněte pásek za pomoci tužky nebo podobného předmětu - otáčením jednoho z koleček.
Kazety delší než 90 minut
Nedoporučujeme přehrávání kazet delších než 90 minut s výjimkou dlouhého souvislého přehrávání. Pásky užívané pro tyto kazety jsou velmi slabé, proto může snadno dojít k jejich natažení. Jejich časté přehrávání a zastavování může vést k tomu, že se navinou na hlavy mechaniky.

 Smyčka
•Zdeformované kazety nebo částečně odlepené nálepky mohou způsobovat problémy při zasouvání a vysouvání kazet. Odstraňte, příp. nahraCte uvolněné nálepky.
•Může se stát, že bude zvuk při přehrávání kazety rušený. Hlavy magnetofonu by měly být čistěny po každých 50 hodinách provozu.
3

Obsah |
|
Tento přístroj samotný |
|
Popis tlačítek ...................................................... |
5 |
Uvedení do provozu |
|
Vynulování přístroje ......................................... |
6 |
Odstranění předního panelu ........................... |
6 |
Nastavení hodin .............................................. |
7 |
Přehrávač kazet |
|
Poslech pásku ................................................ |
7 |
Poslech rozhlasu během rychlého převíjení |
|
kazety dopředu nebo dozadu |
|
— Automatická aktivace tuneru (ATA) ........ |
8 |
Rádio |
|
Automatické ukládání stanic do paměti |
|
— Best Tuning Memory |
|
(BTM - pamě5 ladění) ................................. |
8 |
Ukládání pouze požadovaných stanic ............ |
9 |
Vyvolávání stanic uložených do paměti .......... |
9 |
RDS |
|
Přehled funkcí RDS ....................................... |
10 |
Znázornění jména stanice ............................. |
10 |
Automatické přelaCování jedné stanice |
|
— Alternative Frequencies |
|
(AF - alternativní frekvence) ..................... |
10 |
Poslech dopravního hlášení .......................... |
12 |
Přednastavení stanic RDS s údaji AF a TA ... |
13 |
Vyhledávání stanice podle druhu |
|
programu .................................................. |
13 |
Automatické nastavení hodin ....................... |
14 |
Další funkce |
|
Nastavení zabarvení zvuku ........................... |
15 |
Ztlumení zvuku .............................................. |
15 |
Změna nastavení zvuku a displeje ................ |
15 |
Zvýraznění basů |
|
— D-Bass ................................................. |
16 |
Výběr zvukové pozice |
|
— “Nejlepší zvuková pozice” ................... |
16 |
S přídavnými přístroji |
|
Přehrávač CD/MD |
|
(pouse XR-CA300/CA310) |
|
Přehrávání CD nebo MD ............................... |
17 |
Opakované přehrávání skladeb |
|
— Opakované přehrávání ........................ |
18 |
Přehrávání skladeb v nahodilém pořadí |
|
— Náhodné přehrávání ............................ |
18 |
Dodatečné informace |
|
Údržba .......................................................... |
19 |
Demontáž přístroje ........................................ |
20 |
Technické údaje ............................................ |
21 |
Odstranění drobných závad .......................... |
22 |
4
Popis tlačítek
|
DIR |
|
SRC |
SOURCE |
|
MBP |
|
|
|
D-BASS |
|
MODE |
D |
SEEK |
|
|
AMS |
SEL |
OFF |
|
DISC REP SHUF ATA
BTM
ATT |
SENS |
AF |
1 |
2 |
3 |
4 |
5 |
6 |
TA |
PTY |
DSPL |
RELEASE
XR-CA300/CA310
Na uvedených stránkách naleznete další podrobné informace.
1 Tlačítko pro ovládání hlasitosti +/– 7
2Tlačítko MODE
Během příjmu rozhlasového vysílání: volba pásma - BAND 8, 9
Během přehrávání CD/MD*: volba přístroje CD/MD 17
3XR-CA300/CA310:
Tlačítko SOURCE (TUNER/CD/MD) - zdroj 8, 9, 17
XR-L200/L210: Tlačítko TUNER 8, 9
4 Tlačítko SEL (výběr) 7, 14, 15, 16, 17
5 Tlačítko Z (vysunutí) 7, 8, 9, 17
6 Displej
7Tlačítka m/M (rychlé převíjení)/DIR (změna směru přetáčení pásku) 7, 8
8Tlačítko MBP (Nejlepší zvuková pozice) 16
9 Tlačítko D-BASS 16
0 Tlačítko SEEK/AMS +/– 9, 11, 14, 18 Vyhledávání 9
Automatický hudební senzor* 18 Manuální vyhledávání* 18
qa Tlačítko RELEASE (uvolnění předního panelu) 6, 19
qs Tlačítko ATT (ztišení) 15
qd Tlačítko SENS/BTM 8, 9, 13
qf Tlačítko RESET (umístěné na přední straně přístroje za předním panelem) 6
qg Tlačítko AF 10, 11, 13
qh Číselná tlačítka 8, 9, 14, 15, 18 Během poslechu rádia:
Volba předvoleb 9, 11
Během přehrávání pásku:
(6) ATA 8
Během přehrávání CD/MD*:
(1)DISC – 18
(2)DISC + 18
(3)REP 18
(4)SHUF 18
qj Tlačítko TA 12, 13
qk Tlačítko PTY (typ programu) 14
ql Tlačítko DSPL (změna režimu displeje) 7, 10, 17
w; Tlačítko OFF** 6
*Pouze XR-CA300/CA310
**Upozornění pro instalaci v autě bez mezipolohy klíčku od zapalování Předsvědčte se, abyste stiskli (OFF) na přístroji na dvě sekundy, abyste vypnuli hodiny na displeji po vypnutí motoru.
Jestliže stisknete (OFF) pouze krátce, nevypne se displej s hodinami, a to vede k vybíjení baterie.
5

Uvedení do provozu
Vynulování přístroje
Než začnete s tímto přístrojem poprvé pracovat nebo po každé výměně autobaterie musíte přístroj vynulovat.
Sejměte přední panel a stiskněte tlačítko RESET špičatým nástrojem jako např. kuličkovým perem.
Tlačítko RESET - vynulování
Poznámka
Stisknutí tlačítka RESET způsobí vynulování nastavených hodin a vymazání některých funkcí uložených do paměti.
Odstranění předního panelu
Z tohoto přístroje můžete sejmout přední panel, abyste ho tak zajistili proti krádeži.
1 Stiskněte (OFF).
2Stiskněte (RELEASE), potom posuňte přední panel lehce doleva a sejměte ho směrem k sobě.
(OFF)
(RELEASE)

Poznámky
•Dbejte na to, aby vám panel při snímání nevypadl z ruky.
•Jestliže uvolníte přední panel a přístroj přitom bude stále zapnutý, dojde k automatickému vypnutí přístroje, aby nedošlo k poškození reproduktorů.
•Jestliže chcete nosit přední panel s sebou, ukládejte ho vždy do příslušného pouzdra, které je součástí příslušenství.
Nasazení předního panelu
NasaCte stranu A předního panelu na stranu B na přístroji podle ilustrace a zatlačte na levou stranu, dokud nezaklapne.
A


 B
B
Poznámky
•Dbejte na to, abyste nepohybovali předním panelem nahoru a dolů.
•Při nasazování netlačte přední panel příliš silně na přístroj.
•Netlačte příliš silně ani nenarážejte ničím na displej na předním panelu.
•Nevystavujte přední panel přímému slunečnímu záření, zdrojům tepla jako např. vedení teplého vzduchu, ani ho nenechávejte ve vlhkém prostředí. Nikdy ho nenechávejte na přístrojové desce apod. auta zaparkovaného na slunci, kdy by mohla teplota uvnitř auta nepřiměřeně stoupnout.
Bezpečnostní upozornění
Když vypnete klíček od zapalování - poloha OFF a nesejmete přední panel, ozve se na několik sekund bezpečnostní zvukový signál. Jestliže zapojíte přídavný zesilovač a nebudete používat zabudovaný zesilovač, bude zvukový signál deaktivovaný.
6

Nastavení hodin
Hodiny mají 24hodinový ukazatel.
Příklad: nastavení hodin na 10:08
1Stiskněte (DSPL) na dvě sekundy.
Číslice pro hodinu začnou blikat.
1Chcete-li nastavit hodiny, stiskněte libovolnou stranu tlačítka pro nastavení hlasitosti.
dopředu
dozadu
2 Stiskněte (SEL).
Číslice pro minuty začnou blikat.
3Chcete-li nastavit minuty, stiskněte libovolnou stranu tlačítka pro nastavení hlasitosti.
dopředu
dozadu
2Stiskněte (DSPL).
Hodiny se rozejdou.
Jakmile je nastavení hodin ukončeno, nastaví se na displeji normální režim přehrávání.
Přehrávač kazet
Poslech pásku
Vložte kazetu.
Přehrávání se spustí automaticky.
Přehrávání horní strany kazety.
Přehrávání dolní strany kazety.
Tip
Chcete-li změnit směr přehrávání kazety, stiskněte tlačítko m a M.
Chcete-li ukončit přehrávání a vysunout kazetu
Stiskněte Z.
Rychlé přetáčení pásku
Během přehrávání stiskněte m nebo
M.
Indikátor |
|
|
Dopředu |
|
Dozadu |
směru* |
|
|
|
||
|
|
|
|
|
|
FWD |
|
|
M |
|
m |
|
|
|
|
|
|
REV |
|
|
m |
|
M |
|
|
|
|
|
|
* Indikátor |
bude svítit během rychlého převíjení |
||||
kazety. |
|
|
|
|
|
Chcete-li spustit přehrávání během rychlého převíjení dopředu nebo dozadu, stiskněte částečně jiné tlačítko pro rychlé převíjení, dokud se neuvolní zablokované tlačítko.
7
Poslech rozhlasu během rychlého převíjení kazety dopředu nebo dozadu
— Automatická aktivace tuneru (ATA)
Jestliže přetáčíte kazetu rychle dopředu nebo dozadu za pomoci tlačítka m nebo M, zapne se tuner automaticky.
Během přehrávání tiskněte opakovaně
(6) (ATA), dokud se na displeji neobjeví “ATA-ON”.
ATA-ON yATA-OFF
|
|
DISC |
REP |
SHUF |
|
ATA |
|
AF |
1 |
2 |
3 |
4 |
5 |
6 |
TA |
Je spuštěn režim ATA.
Chcete-li se vrátit k režimu normálního přehrávání, zadejte “ATA-OFF”.
Rádio
Automatické ukládání stanic do paměti
— Best Tuning Memory (BTM - paměN ladění)
Tato funkce vybírá stanice s nejsilnějším signálem a ukládá je do paměti v pořadí jejich frekvencí. Můžete uložit do paměti až 6 stanic pro každé pásmo (FM1, FM2, FM3, MW, a LW).
Bezpečnostní upozornění
Jestliže ladíte stanice během řízení, používejte funkci automatického ladění, abyste předešli případné nehodě.
1Opakovaným stisknutím tlačítka (SOURCE) nebo tlačítka (TUNER) vyberte přijímač.
V případě přehrávání vysuňte kazetu stisknutím tlačítka Z.
Při každém stisknutí tlačítka (SOURCE) se zdroje mění v následujícím pořadí:
B TUNER |
B CD* |
B MD* |
*Jestliže není zapojený přehrávač/měnič CD/MD, neobjeví se na displeji tato položka (pouze XRCA300/CA310).
2Tiskněte opakovaně (MODE), abyste zadali pásmo.
Při každém stisknutí tlačítka (MODE) se pásma mění v následujícím pořadí:
 B FM1 B FM2 B FM3 B MW B LW
3Stiskněte (SENS) (BTM) na dvě sekundy.
Tento přístroj ukládá stanice do paměti v pořadí jejich frekvencí a přiřazuje je k číselným tlačítkům.
Jakmile je ladění ukončeno, ozve se zapípání.
Poznámky
•Přístroj neuloží do paměti stanice s přiliš slabým signálem. Jestliže lze naladit pouze několik stanic, zůstanou u některých tlačítek přiřazené jejich původní stanice.
•Jestliže je na displeji znázorněné číslo stanice, bude přístroj ukládat stanice do paměti počínající od znázorněného čísla.
8
 Loading...