


 Loading...
SONY KP-ES43ME1, KP-ES43MN1, KP-ES43SN1, KP-ES48ME1, KP-ES48MN1 User Manual
...ES61/53/48/43-KP TV Projection Rear Color
4-076-694-11 (2)
Projection TV
Operating Instructions |
GB |
|
|
|
|
•Before operating the unit, please read this manual thoroughly and retain it for future reference.
Mode d’emploi |
|
FR |
•Avant de faire fonctionner cet appareil, lisez attentivement le présent mode d’emploi et conservez-le pour toute référence ultérieure.
XXXXXXXXXX |
|
CT |
•xxxxxxxx xxxxxxxxxxxxxxxx xxxxxxxxxxxx xxxxxxxxxxx xxxxxxxxxxx xxxxxxx.
XXXXXXXXXX |
|
CS |
•xxxxxxxx xxxxxxxxxxxxxxxx xxxxxxxxxxxx xxxxxxxxxxx xxxxxxxxxxx xxxxxxx.
PR
• xxxxxxxx xxxxxxxxxxxxxxxx xxxxxxxxxxxx xxxxxxxxxxx xxxxxxxxxxx
  xxxxxxx.

AR
• xxxxxxxx xxxxxxxxxxxxxxxx xxxxxxxxxxxx xxxxxxxxxxx xxxxxxxxxxx xxxxxxx.


KP-ES61
KP-ES53
KP-ES48
KP-ES43
MN1, HK1, ME1, SN1
© 2000 Sony Corporation

2

Table of Contents
WARNING |
|
Using Your New Projection TV |
|
Getting Started ............................................................................................. |
5 |
Step 1: Connect the antenna .................................................................. |
5 |
Step 2: Insert the batteries into the remote .......................................... |
6 |
Step 3: Preset the channels automatically ........................................... |
6 |
Step 4: Adjusting the convergence automatically .............................. |
7 |
Connecting optional components ............................................................. |
8 |
Installing the projection TV ...................................................................... |
12 |
Watching the TV ........................................................................................ |
13 |
TV Projection New Your Using
Advanced Operations |
|
Selecting the picture and sound |
|
modes .................................................. |
17 |
Viewing higher quality pictures ...... |
18 |
Viewing your favorite channels ....... |
19 |
Watching two programs at the same |
|
time ...................................................... |
20 |
Displaying multiple programs ........ |
22 |
Enjoying stereo or bilingual |
|
programs ............................................. |
24 |
Viewing Teletext ................................. |
26 |
Operating optional components ...... |
28 |
Adjusting Your Setup (MENU) |
|
Introducing the menu system .......... |
30 |
Changing the “A/V CONTROL” |
33 |
GB |
|
setting ............................................ |
|
|
|
Changing the “MULTI PICTURE” |
|
||
setting ............................................. |
|
36 |
|
Changing the “FEATURE” |
|
38 |
|
setting ............................................ |
|
|
|
Changing the “SET UP” setting |
... 40 |
|
|
Changing the “CH PRESET” |
43 |
|
|
setting ............................................ |
|
|
|
Additional Information |
|
|
|
Troubleshooting ................................. |
|
46 |
|
Self-diagnosis function...................... |
|
49 |
|
Identifying parts and controls ......... |
50 |
|
|
Specifications ...................... |
Back cover |
|
|
The features you will enjoy include:
•“DRC-MF” for viewing higher quality pictures (page 18)
•“FAVORITE CH” for quick and easy program selection (page 19)
•“PIP” & “TWIN” for viewing two programs (page 20)
•“PROGRAM INDEX“ for displaying multiple programs (page 22)
•“PICTURE MODE”/“SOUND MODE” for customizing your projection TV (page 17)
•“WIDE MODE” to view 16:9 pictures (page 39)
Your projection TV also offers the following features:
•Digital Quick Focus function for automatic convergence adjustment (page 7)
•Menu language options
— English/Chinese/Arabic (page 15)
•“CHILD LOCK” for locking out specific channels (page 41)
•“INTELLIGENT VOL” for automatic volume adjustment (page 40)
•“FINE” tuning feature (page 45)
•Button Joystick  on the remote control for easier operation (page 15)
•“ECO MODE” to save energy (page 39)
•“GAME MODE” for video games (page 39)
3

WARNING
To prevent fire or shock hazard, do not expose the projection TV to rain or moisture. Dangerously high voltages are present inside the projection TV. Do not open the cabinet. Refer servicing to qualified personnel only.
For general safety:
•Do not expose the projection TV to rain or moisture.
•Do not open the rear cover.
For safe installation:
•Do not block the ventilation openings.
•Do not install the projection TV in hot, humid or excessively dusty places.
•Do not install the projection TV where it may be exposed to mechanical vibrations.
•Avoid operating the projection TV at temperatures below 5°C (41°F).
•If the projection TV is transported directly from a cold to a warm location, or if the room temperature has changed suddenly, the picture may be blurred or show poor color. This is because moisture has condensed on the mirror or lenses inside. If this happens, let the moisture evaporate before using the projection TV.
•To obtain the best picture, do not expose the screen to direct illumination or direct sunlight. It is recommended to use spot lighting directed down from the ceiling or to cover the windows that face the screen with opaque drapery. It is desirable to install the projection TV in a room where the floor and walls are not of reflecting material. If necessary, cover them with dark carpeting or wall paper.
•Do not install the appliance in a confined space, such as a bookcase or built-in cabinet.
For safe operations:
•Do not operate the projection TV on anything but 110–240/220-240 V AC, 50/60 Hz.
•Do not operate the projection TV if any liquid or solid object falls in it—have it checked immediately.
•Do not keep the projection TV plugged in if you are not going to use it for several days.
•Do not pull the power cord to disconnect the projection TV. Pull it out by the plug.
Caution
•When using TV games, computers, and similar products with your projection TV, keep the brightness and contrast functions at low settings. If a fixed (non-moving) pattern is left on the screen for long periods of time at a high brightness or contrast setting, the image can be permanently imprinted onto the screen. These types of imprints are not covered by your warranty because they are the result of misuse.
Cleaning the Screen
•To clean the screen with a cloth, please use a soft cloth lightly moistened with a mild detergent solution or water. Do not use any type of abrasive pad, alkaline cleaner, scouring powder or solvent, such as alcohol or benzine. As a safety precaution, unplug the TV before cleaning it.
•Do not rub, touch, or tap the surface of the screen with sharp or abrasive items, like a ball point pen or a screw driver. Otherwise, this type or contact may result in a scratched screen.
4
Using Your New Projection TV
Getting Started
Step 1 

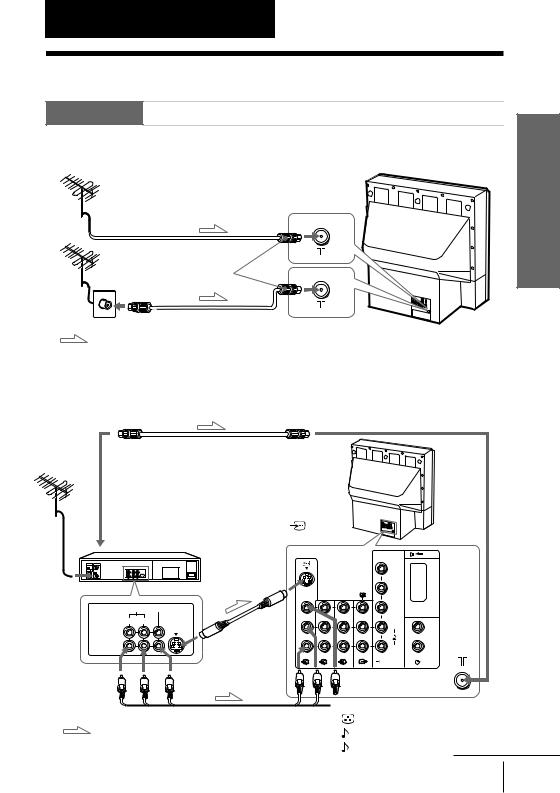
Connect the antenna
If you wish to connect a VCR, see the “Connecting a VCR” diagram below.
Rear of projection TV
or
Antenna cable (not supplied)
|
IEC connector |
|
(not supplied) |
|
Antenna cable (not supplied) |
: Signal flow |
CAUTION |
|
Do not connect the power cord until all other connections are |
|
complete; otherwise, a minimal current leakage through the antenna |
|
and/or other terminals to the ground could occur. |
Connecting a VCR
To play a video tape, press t (see page 14).
To 8 (antenna)
Antenna cable (not supplied) Rear of projection TV
To antenna |
To |
|
|
(S video input) |
|
||
output |
VCR |
|
|
|
C – |
||
|
|
|
|
|
S video cable |
Y |
3 |
|
|
|
|
|
|
|
|
|
(not supplied) |
CB/ |
|
|
|
||
|
B-Y |
# |
|
AUDIO |
VIDEO |
CR/ |
|
R-Y |
30W MAX 16 |
||
|
|
|
|
R L |
|
L |
L |
|
|
||
VIDEO IN |
|
|
|
VIDEO OUT |
To S video |
R |
R |
|
output |
1 2 3 |
|
To video and audio outputs
 To t 1, 2 or 3 (video input)
|
Audio/Video cable |
(yellow) |
|
: Signal flow |
(not supplied) |
|
|
-L (MONO) (white) |
|
||
|
|
||
|
|
|
|
|
|
-R (red) |
continued |
TV Projection New Your Using
Using Your New Projection TV 5
Getting Started (continued)
Notes
•If you connect a monaural VCR, connect the yellow plug to  (the yellow jack) and the black plug to
  -L (MONO) (the white jack).
•If you connect a VCR to the 8 (antenna) terminal, preset the signal output from the VCR to the program number 0 on the projection TV.
•When both the  (S video input) and t 1 (video input) are connected,
the  (S video input) is automatically selected. To view the video input to t 1 (video input), disconnect the S video cable.
Step 2
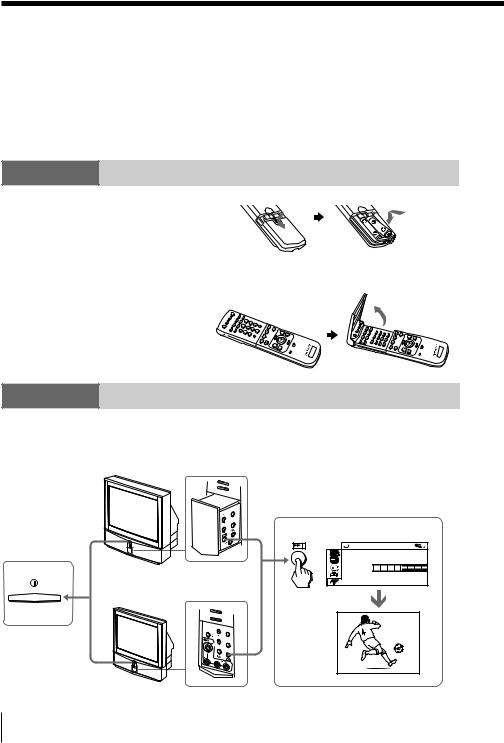
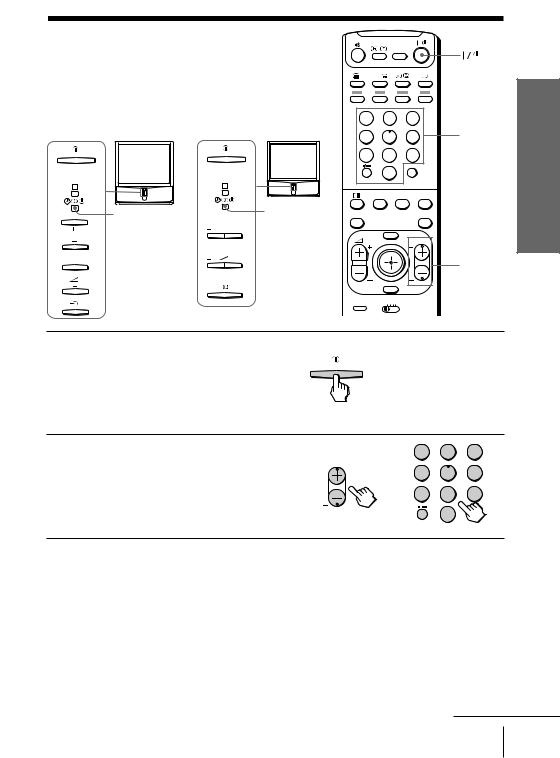
Insert the batteries into the remote
Notes
•Do not use old batteries or different types of batteries together.
•To operate some of the functions of your projection TV, you may have to open the remote control cover.
Step 3
Preset the channels automatically
Inside the lower
KP-ES61/53/48 right side panel
|
|
MENU |
|
|
ENTER |
1 |
Inside the |
|
|
lower panel |
|
|
KP-ES43 |
|
|
|
MENU |
|
4 |
|
|
|
ENTER |
|
L |
(MONO) |
|
|
R |
2
AU TO PROGRAM |
|
PR : |
0 1 |
T V |
S Y S : AU TO |
VH F L OW |
|
1
6 Using Your New Projection TV

Notes
•To stop the automatic channel presetting, press MENU twice.
•If your projection TV has preset an unwanted channel or cannot preset a particular channel, then preset your projection TV manually (see page 44).
•To open the lower panel of your projection TV, push on it, then it will open.
KP-ES61/53/48 |
KP-ES43 |
MENU
 4
4
ENTER
L (MONO)
R
Step 4
Adjusting the convergence automatically
Inside the lower
KP-ES61/53/48 right side panel
MENU
ENTER
|
Inside the |
|
KP-ES43 |
lower panel |
|
|
|
|
|
|
MENU |
|
4 |
|
|
|
ENTER |
|
L |
(MONO) |
|
|
R |
Note
•Adjust convergence about 20 – 30 minutes after the projection TV is first turned on.
The Digital Quick Focus feature allows you to adjust the convergence automatically.
TV Projection New Your Using
Using Your New Projection TV 7
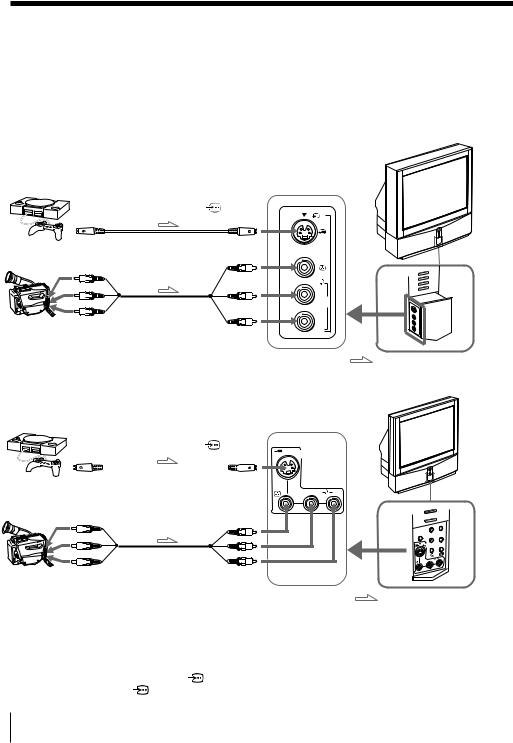
Connecting optional components
You can connect optional audio/video components, such as a VCR, multi disc player, camcorder, video game, or stereo system. To watch and operate the connected equipment, see pages 14 and 28.
Connecting a camcorder/video game equipment using the t (video input) jacks
|
|
|
|
|
KP-ES61/53/48 |
|
|
|
|
Rear of |
|
|
|
|
|
projection TV |
|
Video game equipment |
|
|
Inside the lower |
|
|
|
|
left side panel |
|
||
To S video output |
To |
|
4 |
|
|
(S video input) |
|
|
|||
|
|
|
|||
or |
S video cable |
|
|
|
|
(not supplied) |
|
|
|
||
Camcorder |
|
|
|
|
|
|
|
|
|
L |
|
Audio/Video cable |
|
(MONO) |
|
||
|
|
|
|||
(not supplied) |
|
|
R |
|
|
To video and |
|
|
|
|
|
|
To t 4 |
|
|
|
|
audio outputs |
|
|
|
|
|
|
|
(video input) |
|
|
|
|
|
|
|
|
: Signal flow |
|
|
|
|
Rear of |
KP-ES43 |
|
|
|
|
|
|
|
|
|
Inside the |
projection TV |
|
|
|
|
|
|
|
Video game equipment |
|
|
lower panel |
|
|
To S video output |
To |
|||
(S video input) |
||||
|
|
|
|
|
|
|
|
|
|
|
|
|
|
|
|
|
|
|
|

 4
4
or
S video cable (not supplied)
L
(MONO)
R
Camcorder
|
Audio/Video cable |
|
To video and |
(not supplied) |
To t 4 |
|
||
audio outputs |
|
(video input) |
|
MENU |
4 |
ENTER |
|
R |
L |
(MONO) |
: Signal flow
Notes
•When connecting video game equipment, display the “FEATURE” menu and select “ON” for “GAME MODE” to adjust the picture setting that is suitable for video games (see page 39).
•You can also connect video equipment to the t 1, 2, or 3 (video input)
jacks at the rear of your projection TV.
• When both the |
(S video input) and t 4 (video input) are connected, |
|
the |
(S video input) is automatically selected. To view the video input |
|
to t 4 (video input), disconnect the S video cable.
8 Using Your New Projection TV
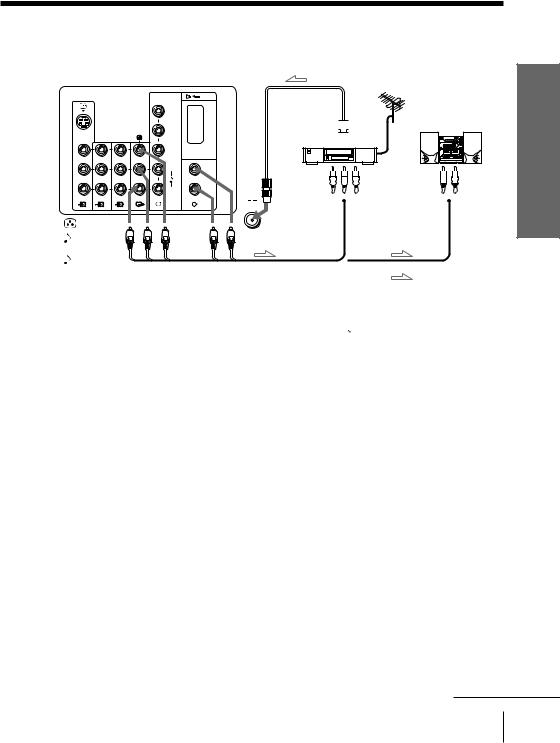
Connecting audio/video equipment using the T (monitor output) jacks
Rear of projection TV |
Antenna cable (not supplied) |
1 |
2 |
3 |
(yellow) |
|
|
-L (MONO) |
|
|
(white) |
|
|
-R (red) |
|
|
|
C – |
Y |
3 |
|
|
|
|
CB/ |
|
|
|
B-Y |
# |
CR/ |
|
R-Y |
30W MAX 16 |
|
|
L |
L |
R |
R |
To antenna 


output  VCR
VCR
To video 

 and audio

 inputs
or Audio system
To 
 audio
audio 
 inputs
To T |
Audio cable |
|
(monitor |
||
(not supplied) |
||
output) |
||
|
||
Audio/Video cable (not supplied) |
: Signal flow |
|
|
Notes
•If you select “DVD” on your TV screen, no signal will be output at the T (monitor output) jacks (see page 14).
•When connecting the audio cable to the  , you can adjust the volume with 2 +/–.
TV Projection New Your Using
continued
Using Your New Projection TV 9

Connecting optional components (continued)
Connecting a DVD player to  (component video input)
1Using an audio cable, connect R and L under  (component video input) on your projection TV to the LINE OUT, AUDIO R and L output connectors on your DVD player.
2Using a component video cable, connect Y, CB/B-Y, and CR/R-Y under  (component video input) on your projection TV to the COMPONENT VIDEO OUT Y, CB, and CR output connectors on your DVD player.
3Press t on the remote or the projection TV until “DVD” appears on the screen.
|
Rear of |
|
projection TV |
Component video cable |
To |
(not supplied) |
(component video input) |
To component |
|
video output |
|
Audio cable To audio (not supplied) output 

 Y
Y
CB/
B-Y
CR/
R-Y
|
|
|
|
L |
|
CR CB |
Y |
R-AUDIO-L VIDEO |
OPTICAL COAXIAL |
|
|
COMPONENT VIDEO OUT S VIDEO OUT |
LINE OUT |
DIGITAL OUT |
R |
||
-L (white) |
|||||
|
|
|
To |
||
|
|
DVD |
|
-R (red) |
|
|
|
player |
|
: Signal flow |
|
Notes
• Some DVD player terminals may be labeled differently:
Connect |
To (on the DVD player) |
Y (green) |
Y |
|
|
CB/B-Y (blue) |
Cb, B-Y or PB |
|
|
CR/R-Y (red) |
Cr, R-Y or PR |
|
|
•When connecting to  (component video input) on your projection TV, you must connect Y, CB, and CR to receive the video signals, and at least connect L and R to receive analog audio signals.
10 Using Your New Projection TV
Connecting a DVD player to t (video input)
Connect t 1, 2, or 3 (video input)  /
/ (audio/video) connectors on your projection TV to LINE OUT on your DVD player.
To audio/video |
To t 1, 2, or 3 |
Rear of |
|||
output |
(video input) |
||||
projection TV |
|||||
|
|
|
|
||
Audio/Video cable (not supplied)
R-AUDIO-L VIDEO
LINE OUT
DVD |
(yellow) |
|
1 2 |
3 |
|
player |
-L (MONO) |
: Signal flow |
|
(white) |
|
|
|
|
|
-R (red) |
|
Notes
•Since the high quality pictures on a DVD disc contain a lot of information, picture noise may appear. In this case, adjust the sharpness (“SHARP”) under “PERSONAL ADJUST” in the “PICTURE MODE” menu (see
page 34).
•Connect your DVD player directly to your projection TV. Connecting the DVD player through other video equipment will cause unwanted picture noise.
Connecting an amplifier with Dolby* Pro Logic decoder to 
 C– (center speaker input)
Connect the speaker terminals on your amplifier to  C– on your projection TV.
Rear of projection TV

 C
C
|
|
Amplifier with Dolby |
|
|
|
|
Pro Logic decoder |
|
|
|
Rear |
|
|
Rear |
|
speaker |
|
|
speaker |
|
(L) |
Front |
Front |
(R) |
|
|
speaker |
speaker |
|
to |
C– (center speaker |
(L) |
(R) |
|
|
|
|
||
inputs)
Note
•When making connection to  C– on your projection TV set “SPEAKER: CENTER IN” in the “A/V CONTROL” menu. (see page 33)
*Manufactured under license from Dolby Laboratories Licensing Corporation.
DOLBY, the double-D symbol ; and ”PRO LOGIC” are trademarks of Dolby Laboratories Licensing Corporation.
TV Projection New Your Using
Using Your New Projection TV 11

Installing the projection TV
For the best picture quality, install the projection TV within the areas below.
Optimum viewing area (Horizontal)
KP-ES43
min. |
|
|
(6 |
1.9 |
m |
ft.) |
||
60° |
43” |
|
|
|
|
60°
Optimum viewing area (Vertical)
KP-ES43
min. |
|
|
(6 |
1.9 |
m |
ft.) |
||
|
43” |
|
20°
 20°
20°
KP-ES61/53/48 |
KP-ES61/53/48 |
min.
60°
60°
|
|
|
min. |
|
|
|
|
||
min. |
2.4 |
|
2.7 |
m (9 |
ft.) |
|
|||
m |
|
61” |
|||||||
2.1 |
|
(8 ft |
|
||||||
|
|
|
|
|
|||||
|
m |
|
|
|
|
.) |
53” |
|
|
|
(7 |
ft.) |
|
|
|
||||
|
|
|
|
48” |
|
|
|
|
|
min. |
2.7 |
m |
|
|
|
|
|||||
|
|
|
|
|
|
|
|
||||
min. |
2.4 |
|
|
(9 |
ft.) |
61” |
|||||
m |
|
||||||||||
|
|
|
|||||||||
|
|
|
|
|
|
||||||
min. |
2.1 |
|
|
|
|
(8 |
ft.) |
53” |
|||
m |
(7 |
|
|||||||||
|
ft.) |
|
|||||||||
|
|
|
|
|
|
||||||
|
|
|
|
|
|
|
|
||||
|
|
|
|
|
|
|
|
|
|
||
|
|
|
|
|
|
|
|
48” |
|
||
|
|
|
|
|
|
|
20° |
|
|
||
|
|
|
|
|
|
|
20° |
|
|
||
12 Using Your New Projection TV
Watching the TV
DRC-MF
This section explains various functions and operations used while watching the TV. Most operations can be done using
the remote.
KP-ES61/53/48
R |
R |
1 indicator
PROGR
PROGR
KP-ES43
1 indicator
|
A/B |
|
|
1 |
2 |
3 |
|
4 |
5 |
6 |
Number |
7 |
8 |
9 |
buttons |
|
|||
|
0 |
JUMP |
|
|
|
|
|
|
PIC |
SOUND |
PIP |
|
MODE |
MODE |
PROGR + |
PROGR |
|
|
PIP |
INDEX |
|
|
PROGR – |
|
MENU |
PROGR |
|
|
PROGR |
ENTER |
+/– |
PRESET |
VTR 1 2 3 DVD |
TV Projection New Your Using
1 |
Press ! to turn on the |
|
projection TV. |
When the projection TV is in |
TV |
|
|
standby mode (the 1 indicator on |
|
the projection TV is lit red), press |
|
!/1 on the remote. |
|
2 Press PROGR +/– or the number buttons to select the TV channel.
For double digit numbers, press -, then the number (e.g., for 25, press -, then 2 and 5).
1 2 3
PROGR
or 4 5 6 7 8 9
JUMP
0
Note
•When you turn on the projection TV, either the program number or video mode is displayed for approximately 40 seconds. The ECO MODE ( 
 ) icon will also appear if “ECO MODE “ in the “FEATURE” menu is set “ON” (see page 39).
To select a TV program quickly
(1)Press and hold PROGR +/–.
(2)Release PROGR +/– when the desired program number appears.
Note
•When you select a TV program quickly, the picture may be disrupted. This does not indicate a malfunction.
continued
Using Your New Projection TV 13

Watching the TV (continued)
KP-ES61/53/48 |
|
KP-ES43 |
|
|
|
|
|
|
DRC-MF |
R |
R |
|
A/B |
|
|
|
|
||
|
|
|
|
|
1 indicator |
|
1 indicator |
|
|
PROGR |
PROGR |
1 |
2 |
3 |
|
||||
|
|
4 |
5 |
6 |
|
|
7 |
8 |
9 |
|
0 |
JUMP |
JUMP |
|
|
|
|
||
|
PIC |
SOUND |
PIP |
|
|
MODE |
MODE |
PROGR + |
|
|
PROGR |
|
PIP |
|
|
INDEX |
|
PROGR – |
|
|
MENU |
|
PROGR |
MENU |
DRC-MF |
ENTER |
|
|
ENTER |
|
|
|
||
|
|
|
|
|
|
PRESET VTR 1 2 3 DVD |
|
2 +/– |
|
VIDEO 

TITLE
|
TV |
PROGR – |
|
Additional tasks |
|
To |
Press |
Turn off temporarily |
@/1. |
|
The 1 indicator on the projection TV lights up red. |
Turn off completely |
! on the projection TV. |
Adjust the volume |
2 +/–. |
Mute the sound |
%. |
Watch the video input |
t (or t on the projection TV) to select “VIDEO 1”, |
(VCR, camcorder, etc.) |
“VIDEO 2”, “VIDEO 3”, “VIDEO 4” or “DVD”. |
|
To return to the TV screen, press a (or t on the |
|
projection TV). |
Jump back to the previous channel |
JUMP. |
Display the on-screen information* |
. |
*Some picture/sound settings, and either the program number or video mode are displayed. The on-screen display for the picture/sound settings disappears after about 3 seconds.
14 Using Your New Projection TV
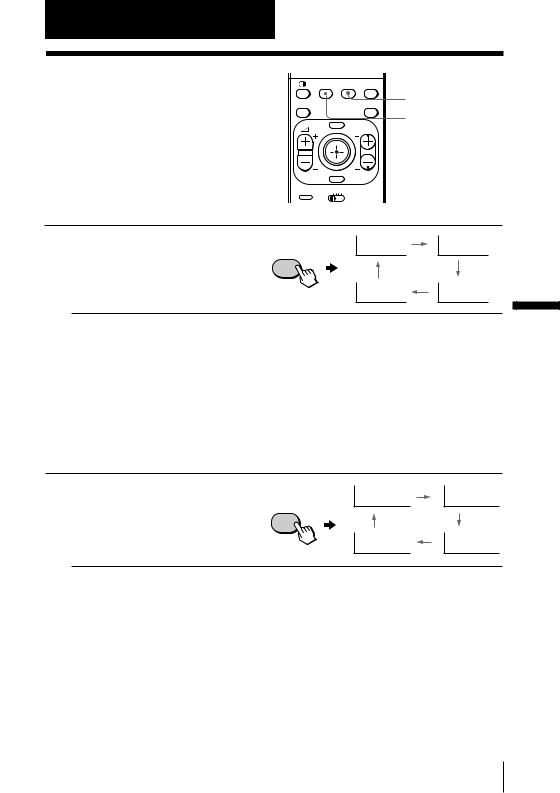
Using the Remote Control Button Joystick ( )
)
You can select the menu item on the |
7 |
8 |
|
9 |
|
screen by moving |
up, down, left or |
|
|||
To move |
0 |
JUMP |
|||
right (see page 32). |
|
|
|
|
|
To confirm a selected item, press . |
|
MODE |
MODE |
PROGR + |
|
|
|
|
PIC |
SOUND |
PIP |
You can also press ENTER on the remote |
PROGR |
|
|
PIP |
|
to confirm a selected item. |
INDEX |
|
|
PROGR – |
|
|
|
|
|
||
|
|
. |
MENU |
|
PROGR |
|
|
To confirm |
|
|
|
|
|
|
ENTER |
|
|
|
|
PRESET |
VTR 1 2 3 DVD |
|
|
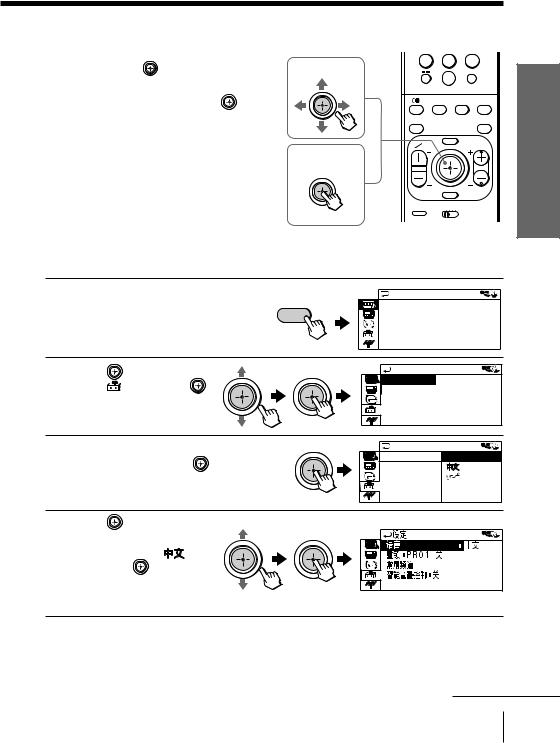
Changing the menu language
You can change the menu language as well as the on-screen language. For details on how to use the menu, see “Introducing the menu system” on page 30. 
1 |
Press MENU. |
|
TV |
|
|
A / V CONTROL |
|||
|
|
|
DRC-MF: DRC1250 |
|
|
|
|
|
PICTURE MODE: DYNAMIC |
|
|
|
MENU |
SOUND MODE: DYNAMIC |
|
|
|
SPEAKER:MAIN |
|
|
|
|
|
|
2 Move |
up or down to |
|
LANGUAGE : ENG L I SH |
|
|
|
|
|
S E T UP |
|
select |
, then press . |
|
CH I L D L OCK : PR 0 1 OF F |
|
|
|
|
|
|
|
|
|
F A VOR I T E CH |
|
|
|
|
I N T E L L I GEN T VO L : O F F |
3 Make sure “LANGUAGE” |
LANGUAGE/: |
ENGL I SH |
|
|
SE T |
UP |
|
is selected then press . |
CH I L D |
LOCK |
|
|
|||
|
F AVOR I T E |
C |
|
|
I NT E L L I GEN |
||
4 |
Move up or down to |
|
|
select the desired |
/ LANGUAGE |
|
language (e.g.,“ ”), |
|
|
|
|
|
then press . |
|
|
The selected menu |
|
|
language appears. |
|
TV Projection New Your Using
To return to the normal screen
Press MENU.
continued
Using Your New Projection TV 15

Watching the TV (continued)
Setting the Wake Up timer
1 |
Press until the desired |
|
period of time appears. |
The Wake Up timer starts immediately after you have set it.
WAKE UP TIMER:10M
After 10 minutes
WAKE UP TIMER:OFF |
|
|
WAKE UP TIMER:12H00M |
||
|
|||||
No Wake Up Timer |
|
|
|
After 12 hours |
|
2 |
Select the TV channel or video mode you want to wake up to. |
3 |
Press !/1, or set the Sleep timer if you want the projection TV to turn off |
|
automatically. |
The  indicator on the projection TV lights up orange.
To cancel the Wake Up timer
Press  until “WAKE UP TIMER: OFF” appears, or turn the projection TV off.
Note
•If no buttons or controls are pressed for more than two hours after the projection TV is turned on using the Wake Up timer, the projection TV automatically goes into standby mode. To resume watching the TV, press any button or control on the projection TV or the remote.
Setting the Sleep timer
Press  until the desired period of time appears.
The Sleep timer starts immediately after you have set it.
|
SLEEP TIMER:30M |
|
|
SLEEP TIMER:60M |
|||||||
|
|
||||||||||
After 30 minutes |
|
|
|
|
|
After 60 minutes |
|
||||
|
|
|
|
|
|
|
|
|
|||
|
|
|
|
|
|
|
|
|
|
|
|
|
SLEEP TIMER:OFF |
|
|
|
SLEEP TIMER:90M |
||||||
|
|
|
|
||||||||
|
|
|
|||||||||
No Sleep Timer |
|
After 90 minutes |
|
||||||||
To cancel the Sleep timer
Press  until “SLEEP TIMER: OFF” appears, or turn the projection TV off.
16 Using Your New Projection TV
Advanced Operations
Selecting the picture and sound modes
PIC |
SOUND |
PIP |
MODE |
MODE |
PROGR + |
PROGR |
|
PIP |
INDEX |
|
PROGR – |
MENU |
|
PROGR |
SOUND MODE
PIC MODE
You can select picture and sound modes and adjust the setting to your preference in the “PERSONAL” option.
Selecting the picture mode
ENTER
PRESET |
VTR 1 2 3 DVD |
Press PIC MODE |
PIC |
DYNAMIC |
STANDARD |
|
repeatedly until the |
||||
MODE |
|
|
||
desired picture mode is |
|
|
|
|
selected. |
|
|
|
|
|
|
PERSONAL |
HI-FINE |
Select |
To |
“DYNAMIC” |
receive high contrast pictures. |
|
|
“STANDARD” |
receive normal pictures. |
|
|
“HI-FINE” |
receive higher resolution pictures with mild contrast. |
|
|
“PERSONAL” |
receive the last adjusted picture setting from the “ADJUST” option in the |
|
“A/V CONTROL” menu (see page 34). |
|
|
Selecting the sound mode
Press SOUND MODE |
|
|
|
repeatedly until the |
SOUND |
9DYNAMIC |
9DRAMA |
desired sound mode is |
MODE |
|
|
|
|
|
|
selected. |
|
|
|
|
|
9PERSONAL |
9SOFT |
Operations Advanced
Select |
To |
“DYNAMIC” |
listen to dynamic and clear sound that emphasizes both the low and high |
|
tones. |
|
|
“DRAMA” |
listen to sound that emphasizes voice and high tones. |
|
|
“SOFT” |
receive soft sound. |
|
|
“PERSONAL” |
receive the last adjusted sound setting from the “ADJUST” option in the |
|
“A/V CONTROL” menu (see page 34). |
|
|
Tip
•You can also set the picture and sound modes using the menu (see “Changing the “A/V CONTROL” setting” on page 33).
Advanced Operations 17

Viewing higher quality pictures
— “DRC-MF”
The Digital Reality Creation-Multi Function (DRC-MF) feature allows you to enjoy higher quality pictures on your projection TV. You can select “DRC1250” to watch super real (higher resolution) pictures, or “DRC100” to reduce flicker if necessary.
DRC-MF
 DRC-MF
A/B
1 |
2 |
3 |
4 |
5 |
6 |
7 |
8 |
9 |
|
JUMP |
|
|
0 |
|
PIC |
SOUND |
PIP |
MODE |
MODE |
PROGR + |
PROGR |
|
PIP |
INDEX |
|
PROGR – |
|
MENU |
PROGR |
ENTER |
|
|
PRESET VTR 1 2 3 DVD |
|
|
Press DRC-MF repeatedly
until you receive the |
DRC-MF |
|
|
|
|
DRC-MF: DRC1250 |
DRC-MF: DRC100 |
||
desired picture quality. |
|
|||
|
|
|
||
Select |
To |
|
|
|
“DRC1250” |
select higher resolution pictures. |
|
||
“DRC100” |
reduce flicker on the screen. |
|
|
|
Tip
•When the broadcast signal is weak, you may see some dots or noise on the TV screen. To reduce this interference, display the “A/V CONTROL” menu and select “ADJUST” in “PICTURE MODE”, then adjust “SHARP” to reduce the sharpness (see page 34).
Note
•The DRC-MF mode is not selectable when using the “PROGRAM INDEX” or “FAVORITE CH” feature, or when the “GAME MODE”, Picture-In- Picture (“PIP”), or “TWIN” mode is turned “ON”.
The DRC-MF logo ( |
) and “DRC-MF” are trademarks of |
Sony Corporation. |
|
18 Advanced Operations

Viewing your favorite channels
— “FAVORITE CH”
You can display seven favorite channels for quick and easy selection.
The last seven channels selected with the number buttons are displayed in “AUTO” mode. You can set up your own favorite channels in “MANUAL” mode under the “FAVORITE CH” menu (see “Changing the favorite channel setting” on page 42).
DRC-MF
VIDEO 

TITLE
|
|
FAVORITE |
|
|
PIC |
SOUND |
PIP |
|
MODE |
MODE |
PROGR + |
PROGR |
|
|
PIP |
INDEX |
|
|
PROGR – |
|
MENU |
|
PROGR |
|
ENTER |
|
|
PRESET |
VTR 1 2 3 DVD |
|
|
FAVORITE
ENTER
Selecting a favorite channel
1 |
Press FAVORITE. |
TV |
FAVORITE CH |
|
1 |
|
|
|
|
|
|
||
|
FAVORITE |
|
|
|
3 |
|
|
|
|
|
|
|
4 |
|
|
|
12 |
10 |
8 |
6 |
2 Move  up, down, left or right to select the desired channel (e.g. PR 8), then press
  .
.
|
|
|
|
|
|
|
FAVORITE CH |
|
1 |
||
|
|
|
|
|
|
|
|
|
|
|
|
|
|
|
|
|
3 |
|
|
|
|
|
|
|
|
|
|
|
|
|
|
|
|
|
4 |
|
|
|
|
|
|
|
|
|
|
|
|
|
12 |
10 |
|
8 |
6 |
|
|
|
|
|
|
|
|
|
|
|
|
3 |
Press |
again. |
1.PR 01 |
|
|
FAVORITE CH |
8 |
|
|
|
|
|
2.PR 03 |
|
|
|
|
3.PR 04 |
|
|
|
7.PR 12 6.PR 10 5.PR 08 |
4.PR 06 |
|
|
|
Note |
|
|
|
|
• When you use your projection TV for the first time, seven preset channels |
|
|
|
|
appear. |
|
19 |
|
|
Advanced Operations |
||
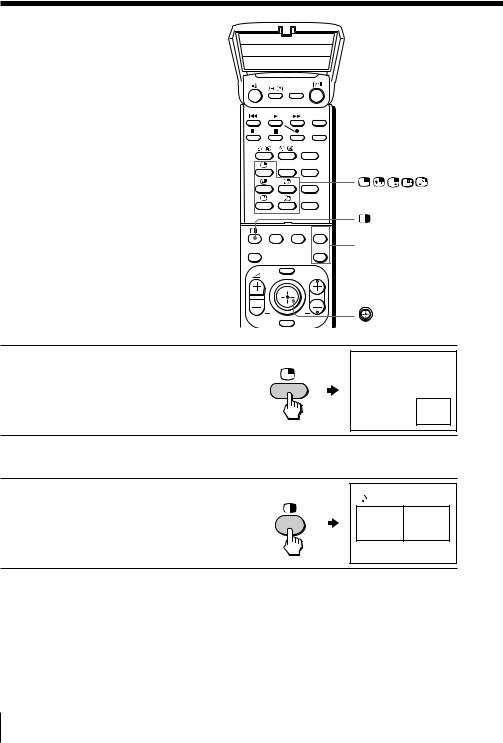
Watching two programs at the same time
— “PIP”, “TWIN”
With the Picture-in-Picture (PIP) or TWIN pictures features, you can display a different TV program or video within or beside the main picture.
DRC-MF
VIDEO 

TITLE
|
FAVORITE |
|
PIC |
SOUND |
PIP |
MODE |
MODE |
PROGR + |
PROGR |
|
PIP |
INDEX |
|
PROGR – |
MENU |
|
PROGR |
ENTER |
|
|
PIP PROGR +/ PIP PROGR –
Displaying the PIP screen
Press  .
.
12
Displaying TWIN pictures
Press  .
.
10 12
To return to the normal screen
Press  (when in the PIP screen) or
  (when in the TWIN picture screen).
Tip
•You can also display the PIP screen or TWIN pictures using the menu (see “Changing the MULTI PICTURE setting” on page 36).
20 Advanced Operations
Additional PIP/TWIN pictures tasks
To |
Press/Move |
change a TV program in the PIP |
Press PIP PROGR + or PIP PROGR –. For a video input, |
screen or in the right TWIN picture |
press . |
swap pictures between the main |
Press . |
and PIP screens |
|
freeze the PIP screen |
Press . |
|
To unfreeze the screen, press the button again. |
change the position of the PIP screen |
Press D. |
swap the right and left pictures of the TWIN pictures
Press . |
change the screen size of the TWIN |
Move left to increase the left screen size. |
pictures |
|
Move  right to increase the right screen size.
Notes
•The  button does not function in the TWIN pictures mode.
•When you display a video input on the PIP screen at a faster/slower speed, the picture may be disrupted depending on the VCR type.
•If you display different color systems on the main screen and the PIP screen, the size of the PIP screen may be different and the PIP picture may be disrupted. This does not indicate a malfunction of the projection TV.
•In the TWIN picture screen, you can only operate and hear the sound of the main left screen (  appears on the screen).
•When the  button is pressed, the TV screen flickers or goes blank for about one second before the TWIN pictures appear. This does not indicate a malfunction of the projection TV.
Advanced Operations 21

Displaying multiple programs
— “PROGRAM INDEX”
The PROGRAM INDEX feature displays all of the preset TV programs on twelve or seven sub screens for direct selection.
PIC |
SOUND |
PIP |
MODE |
MODE |
PROGR + |
PROGR |
|
PIP |
INDEX |
|
PROGR – |
|
|
PROGR INDEX |
|
MENU |
PROGR |
PROGR +/–
ENTER
PRESET VTR 1 2 3 DVD
Press PROGR INDEX. |
PROGR |
b |
|
|
Sub screens |
||
The first twelve preset |
|
1 |
2 |
3 |
4 |
||
INDEX |
|
||||||
|
|
|
|
|
|
||
programs appear one by |
|
|
|
|
16 |
|
|
one, clockwise from the |
|
|
Main screen |
12 |
|
5 |
|
|
|
|
|
|
|||
upper left corner. |
|
|
|
11 |
|
|
6 |
|
|
|
|
10 |
9 |
8 |
7 |
When the number of the |
|
|
|
|
|
|
|
|
|
|
|
|
|
|
|
|
16 |
1 |
|
||
preset TV programs is less |
|
|
|
|
|
|
|
|
|
|
than eight, the first seven |
Main screen |
|
|
|
|
|
|
2 |
|
|
|
|
|
|
|
|
|
|
|
||
preset programs appear |
|
|
|
|
|
|
|
|
|
|
|
|
|
|
|
|
|
|
|
|
|
|
|
|
|
|
|
|
3 |
|
||
one by one, clockwise from |
|
|
|
|
|
|
|
|
|
|
|
|
|
|
|
|
|
|
|
|
|
the upper right corner. |
|
|
|
7 |
6 |
5 |
4 |
|
||
|
|
|
|
|
|
|
|
|
|
|
|
|
|
|
|
|
|
|
|
|
|
Sub screens
Tip
•When you press the PROGR INDEX button in the TWIN pictures mode, the left picture appears as the main screen of the PROGRAM INDEX mode.
To view the next or the previous twelve preset programs
This works only when the number of the preset TV programs is more than twelve.
Press PROGR +/– on the remote or the projection TV.
|
|
|
|
|
|
|
|
|
|
|
|
|
1 |
2 |
3 |
4 |
|
|
13 |
14 |
15 |
16 |
|
|
|
|
|
|
|
|
|
|
|
|
|
12 |
|
16 |
5 |
16 |
17 |
|
|
|
|||
11 |
|
|
6 |
|
18 |
10 |
9 |
8 |
7 |
|
|
22 Advanced Operations
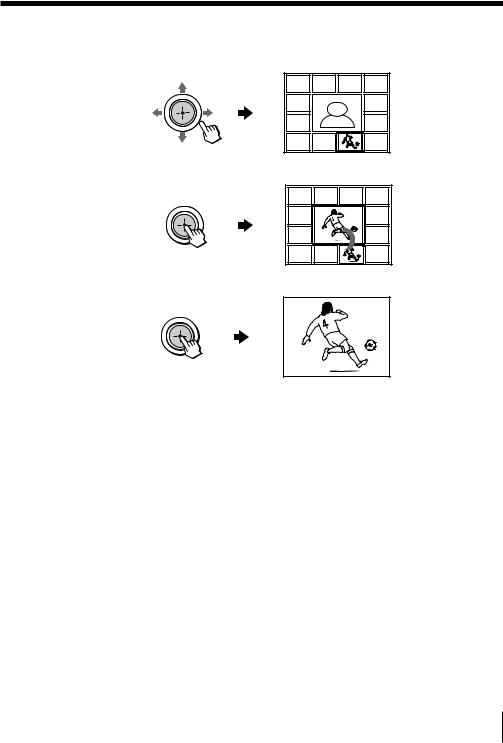
To select the desired program directly from the sub screens
1Move  up, down, left or right to move the frame to the screen of the program you want to watch.
1 |
2 |
3 |
4 |
12 |
|
16 |
5 |
|
|
|
|
11 |
|
|
6 |
10 |
9 |
8 |
7 |
2 Press  .
.
1 |
2 |
3 |
4 |
12 |
|
8 |
5 |
11 |
|
|
6 |
10 |
9 |
8 |
7 |
3 Press  again.
8
Tip
• Pressing the number buttons directly displays the program.
To return to the normal screen
Press PROGR INDEX again, or:
1Select “PROGRAM INDEX” from the “MULTI PICTURE” menu.
2Press  .
.
Tip
•You can also display multiple programs using the menu (see “Changing the MULTI PICTURE setting” on page 36).
Note
•When displaying multiple programs, only the sound of the main screen is heard.
Advanced Operations 23
Enjoying stereo or bilingual programs
You can enjoy stereo sound or bilingual programs of NICAM and A2 (German) stereo systems.
DRC-MF
A/B 
A/B
1 |
2 |
3 |
|
4 |
5 |
6 |
|
7 |
8 |
9 |
|
|
0 |
JUMP |
|
|
|
|
|
|
PIC |
SOUND |
PIP |
|
MODE |
MODE |
PROGR + |
PROGR |
|
|
PIP |
INDEX |
|
|
PROGR – |
Press A/B repeatedly until you receive the sound you
want. NICAM
A/B
The on-screen display
changes to show the selected sound and the
 indicator on the projection TV lights up red.
When receiving a NICAM program
Broadcasting |
On-screen display (Selected sound) |
|
|
|
|||||||||
|
|
|
|
|
|
|
|
|
|
|
|
|
|
NICAM stereo |
|
|
NICAM |
|
|
|
|
|
MONO |
|
|||
|
|
|
|
|
|
|
|
|
|||||
|
|
|
(Stereo sound) |
|
|
|
|
|
(Regular sound) |
||||
|
|
|
|
|
|
|
|
|
|
|
|
|
|
|
|
|
|
|
|
|
|
|
|
|
|
|
|
NICAM bilingual |
|
|
NICAM |
|
|
|
NICAM |
|
|
|
MONO |
|
|
|
|
|
MAIN |
|
SUB |
(Regular sound) |
|||||||
|
|
|
(Main sound) |
|
(Sub sound) |
|
|
|
|||||
|
|
|
|
|
|
|
|
|
|
|
|
|
|
|
|
|
|
|
|
|
|
|
|
|
|
|
|
NICAM monaural |
|
|
NICAM |
|
|
|
|
|
|
MONO |
|
|
|
|
|
|
|
|
|
|
|
|
|
||||
|
|
|
MAIN |
|
|
|
|
|
(Regular sound) |
||||
|
|
|
(Main sound) |
|
|
|
|
|
|
|
|
||
|
|
|
|
|
|
|
|
|
|
|
|
|
|
|
|
|
|
|
|
|
|
|
|
|
|
|
|
24 Advanced Operations

When receiving an A2 (German) program
Broadcasting |
On-screen display (Selected sound) |
|
|
|
|
|||||
|
|
|
|
|
|
|
|
|
|
|
A2 |
(German) stereo |
|
|
MONO |
|
|
|
STEREO |
|
|
|
|
|
|
|
|
|
|
|
||
|
|
(Regular sound) |
|
(Stereo sound) |
||||||
|
|
|
|
|
|
|
|
|
|
|
|
|
|
|
|
|
|
|
|
|
|
A2 |
(German) bilingual |
|
|
MAIN |
|
|
SUB |
|
||
|
|
|
|
|
|
|
||||
|
|
|
|
(Main sound) |
|
(Sub sound) |
||||
|
|
|
|
|
|
|
|
|
|
|
|
|
|
|
|
|
|
|
|
|
|
Receiving area for NICAM and A2 (German) programs
System |
Receiving area |
|
|
NICAM |
Hong Kong, Singapore, New Zealand, Malaysia, |
|
Thailand, etc. |
|
|
A2 (German) |
Australia, Malaysia, Thailand, etc. |
Notes
•If the signal is very weak, the sound becomes monaural automatically.
•If the stereo sound is noisy when receiving a NICAM program, select “MONO”. The sound becomes monaural, but the noise is reduced.
•Before receiving a NICAM stereo program in China, please check the NICAM broadcast condition at your area. When receiving a NICAM stereo program, the receiving conditions might vary depending on area. In addition, different strength of the NICAM broadcast signal might affect the receiving quality.
If the sound is distorted or noisy when receiving a monaural program through the 8 (antenna) terminal
Press A/B repeatedly until “MONO” appears on the screen.
To cancel the monaural sound setting, press A/B again until “AUTO” appears on the screen.
MONO |
|
AUTO |
|
Notes
•The “MONO” or “AUTO” setting is memorized for each program position.
•You cannot receive a stereo broadcast signal when the projection TV is in the “MONO” setting. Normally, set the projection TV to “AUTO”.
Advanced Operations |
25 |
|
|
Viewing Teletext
Some TV stations broadcast an information service called Teletext which allows you to receive various information, such as stock market reports and news.
DRC-MF
VIDEO
TITLE
FAVORITE
PIC |
SOUND |
|
MODE |
MODE |
SURROUND |
|
|
PROGR |
FAVORITE |
DRC-MF |
INDEX |
|
|
A/B |
|
A/B MENU |
PROGR |
|
|
(red, green, |
1 |
2 |
yellow, blue) |
3 |
||
|
ENTER |
|
4 |
5 |
6 |
PRESET |
VTR 1 2 3 DVD |
|
7 8 9
JUMP
0
Displaying Teletext |
PIC |
SOUND |
|
MODE |
MODE SURROUND |
|
TV |
PROGR |
|
FAVORITE |
INDEX |
1 Select a TV channel that carries the Teletext broadcast you want to watch.
MENU PROGR
2 |
Press |
to display the |
|
text. |
|
A Teletext page (normally the index page) is displayed. If there is no Teletext broadcast, “100?” is displayed at the top left corner of the screen after approximately 10 seconds.
|
ENTER |
|
|
|
|
|
P166 SECTEXT |
166 FR1 MAR 03:59:09 |
|||
PRESET |
VTR 1 2 3 DVD |
|
|
|
|
|
From Singapore |
|
|
|
|
|
Day |
Dep/Arr |
Flight |
Alrcraft |
|
|
To PARIS |
1.6 |
220/0588 |
SQ28 |
747 |
|
|
2 |
2130/1225 |
PA115 |
L15 |
|
|
3 |
2115/1330 |
SQ26 |
747 |
|
To OSAKA |
2.5 |
1000/1715 |
SQ6 |
747 |
|
|
4.6 |
0930/2015 |
CX522 |
L10 |
|
To ROMA |
2.7 |
2130/0745 |
SQ24 |
747 |
|
|
4 |
2300/0915 |
AZ487 |
747 |
|
To SYDNEY |
1 |
2210/0610 |
SQ21A |
747 |
|
|
2 |
2100/0835 |
SQ21A |
747 |
TV
To turn off Teletext
Press a.
26 Advanced Operations
Additional Teletext tasks
To |
Do this |
|
|
|
|
|
|
display a Teletext page on the TV |
Press . |
|
|
picture |
Each time you press |
, the screen changes as |
|
|
follows: Teletext t Teletext and TV t TV. |
||
|
|
|
|
check the contents of a Teletext service |
Press . |
|
|
|
An overview of the Teletext contents, including |
||
|
page numbers, appears on the screen. |
||
|
|
|
|
select a Teletext page |
Press the number buttons to enter the three-digit |
||
|
page number of the desired Teletext page.* If you |
||
|
make a mistake, reenter the correct page number. To |
||
|
access the next or previous page, press PROGR +/–. |
||
hold (pause) a Teletext page (stop the page from scrolling)
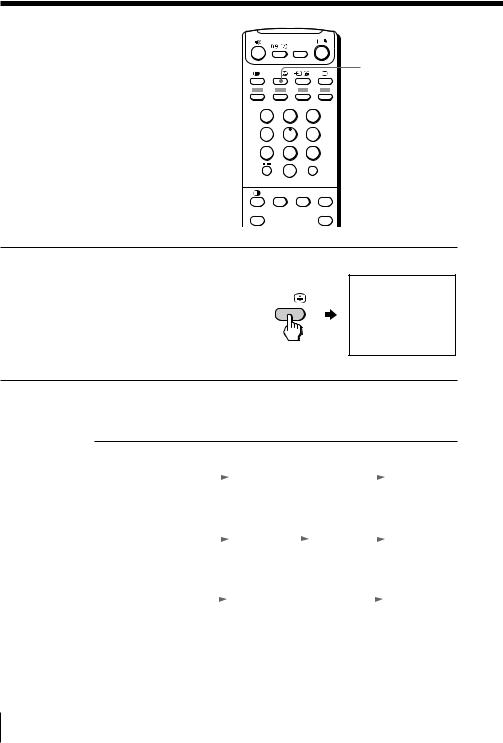
Press  to display the symbol “z” at the top left corner of the screen. To resume normal Teletext viewing, press
  or
or  .
.
reveal concealed information |
Press . |
(e.g., an answer to a quiz) |
To conceal the information, press the button again. |
|
|
enlarge the Teletext display |
Press . |
|
Each time you press , the Teletext display |
|
changes as follows: Enlarge upper half t Enlarge |
|
lower half t Normal size. |
|
|
stand by for a Teletext page while watching |
1 Enter the Teletext page number that you want to |
a TV program |
refer to, then press . |
2When the page number is displayed, press  to show the text.
*You can also select a Teletext page of any page number that appears in the colored column at the bottom of the screen using the corresponding colorcoded button on the remote.
Using FASTEXT
This feature allows you to quickly access a Teletext page that uses FASTEXT. When a FASTEXT program is broadcast, colored menus appear at the bottom of the screen. The color of each menu corresponds to the color-coded buttons on the remote (red  , green
  , yellow
  , and blue
  ).
).
To access a FASTEXT menu
Press the color-coded button on the remote corresponding to the menu you want. The menu page appears on the screen after a few seconds.
Advanced Operations |
27 |
|
|

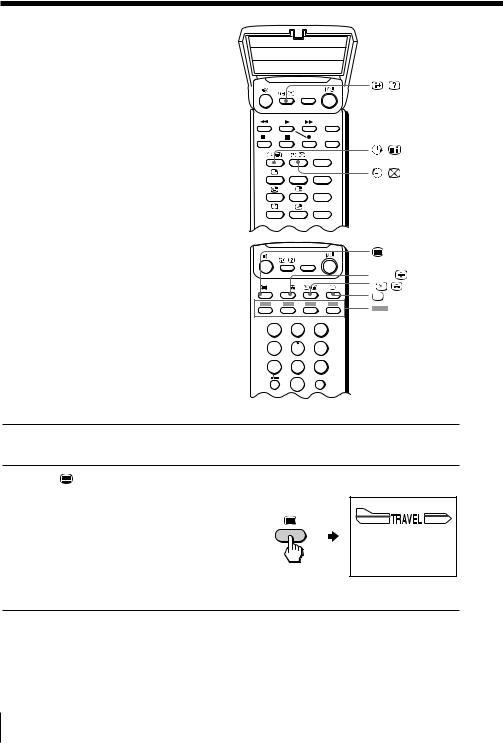
Operating optional components
You can use the supplied remote to operate Sony video equipment such as Beta, 8 mm, VHS or DVD.
DRC-MF
VIDEO 

TITLE
|
|
FAVORITE |
|
|
PIC |
SOUND |
PIP |
|
MODE |
MODE |
PROGR + |
PROGR |
|
|
PIP |
INDEX |
|
|
PROGR – |
|
MENU |
|
PROGR |
|
ENTER |
|
|
PRESET |
VTR 1 2 3 DVD |
|
|
VIDEO I/1
Video equipment operation buttons
MENU
VTR
Setting up the remote to work with other connected equipment
Switch VTR to select the desired equipment type (see the chart below).
For example, to operate a Sony 8 mm VCR:
VTR 1 2 3 DVD
To control |
Select |
DVD |
DVD |
|
|
VTR1 (Beta) |
1 |
|
|
VTR2 (8 mm) |
2 |
|
|
VTR3 (VHS) |
3 |
|
|
Notes
•If your video equipment is furnished with a COMMAND MODE selector, set this selector to the same position as the VTR switch.
•If the equipment does not have a certain function, the corresponding button on the remote will not operate.
28 Advanced Operations

Operating a VCR using the remote
To |
Press |
turn on/off |
VIDEO I /1 |
|
|
record |
N while pressing z. |
|
|
play |
N |
|
|
stop |
x |
|
|
fast forward (M) |
> |
|
|
rewind the tape (m) |
. |
|
|
pause |
X |
|
Press again to resume normal playback. |
|
|
search the picture forward (M) |
> or .during playback. |
or backward (m) |
Release to resume normal playback. |
Operating a DVD player using the remote
To |
Press |
turn on/off |
VIDEO I /1 |
|
|
play |
N |
|
|
stop |
x |
|
|
pause |
X |
|
Press again to resume normal playback. |
step through different tracks of an audio disc
> to step forward or . to step backward.
display the title menu |
TITLE |
|
|
|
|
display the menu |
MENU while holding down z. |
|
|
|
|
select the menu item |
Move |
up, down, left or right while holding |
|
||
down z.
Advanced Operations |
29 |
|
|
Adjusting Your Setup (MENU)
Introducing the menu system
The MENU button lets you open a menu and change the settings of your projection TV. The following is an overview of the menu system.
A/V CONTROL icon |
|
|
|
|
MULTI PICTURE icon |
S E T |
UP |
|
|
LANGUAGE/: |
ENG L I SH |
|||
|
||||
FEATURE icon |
CH I L D |
L OCK |
||
F A VOR I T E |
C |
|||
SET UP icon |
||||
I N T E L L I GEN |
||||
CH PRESET icon |
||||
|
|
|
||
Menu level 1 |
|
|
|
|
Return icon
Name of the current menu
Guide mark icon
Menu level 3
Menu level 2
Level 1 |
Level 2 |
Level 3/Function |
|||||
|
|
|
|
|
|
|
|
“A/V |
“DRC-MF” |
Select the “DRC-MF” mode: |
|||||
CONTROL” |
|
“DRC1250” t “DRC100” |
|||||
|
|
|
|
|
|
|
|
|
|
|
|
|
“PICTURE MODE” |
Select the picture mode: |
|
|
|
|
|
|
|
“DYNAMIC” t “STANDARD” t “HI-FINE” t |
|
|
|
|
|
|
|
||
|
|
|
|
|
|
||
|
|
|
|
|
|
“PERSONAL” t “ADJUST” |
|
|
|
|
|
|
|
|
|
|
|
|
|
|
“ADJUST” |
Adjust the “PERSONAL” option: |
|
|
|
|
|
|
“PICTURE” t “COLOR” t “BRIGHT” t “HUE” t |
||
|
|
|
|
|
|
||
|
|
|
|
|
|
“SHARP” |
|
|
|
|
|
|
|
|
|
|
|
|
|
|
“SOUND MODE” |
Select the sound mode: |
|
|
|
|
|
|
|
“DYNAMIC” t “DRAMA” t “SOFT” t |
|
|
|
|
|
|
|
“PERSONAL” t “ADJUST” |
|
|
|
|
|
|
“ADJUST” |
Adjust the “PERSONAL” option: |
|
|
|
|
|
|
|
“BASS” t “TREBLE” t “BALANCE” |
|
|
|
|
|
|
|
|
|
|
|
|
|
|
“SPEAKER” |
Select the “SPEAKER” mode: |
|
|
|
|
|
|
|
“MAIN” t “CENTER IN” |
|
“MULTI |
“PIP” |
Activate or deactivate the PIP feature. |
|||||
PICTURE” |
|
|
|||||
“PIP POSITION” |
Change the position of the sub screen. |
||||||
|
|
|
|
|
|||
|
|
|
|
|
“SWAP” |
Swap the pictures between the main and sub screens. |
|
|
|
|
|
|
|
|
|
|
|
|
|
|
“TWIN” |
Display a TV program or video beside the main screen. |
|
|
|
|
|
|
|||
|
|
|
|
|
“PROGRAM INDEX” |
Display all the preset TV programs at the same time. |
|
“FEATURE” |
“WIDE MODE” |
Activate or deactivate WIDE MODE feature. |
|||||
|
|
|
|
|
“ECO MODE” |
Activate or deactivate ECO MODE feature. |
|
|
|
|
|
|
“GAME MODE” |
Activate or deactivate GAME MODE feature. |
|
30 Adjusting Your Setup (MENU)
Loading...