


 Loading...
S M A R T P H O N E
User Manual
Please read this manual before operating your device and keep it for future reference.
Table of Contents
Special Features. . . . . . . . . . . . . . . . . . . . . . . . . . . . . |
. 1 |
S Pen . . . . . . . . . . . . . . . . . . . . . . . . . . . . . . . . . . . . . . |
. .2 |
Hello Bixby. . . . . . . . . . . . . . . . . . . . . . . . . . . . . . . . . |
. .2 |
Flexible Security. . . . . . . . . . . . . . . . . . . . . . . . . . . . |
. .2 |
Water and Dust Resistance. . . . . . . . . . . . . . . . . . . |
. 3 |
Getting Started. . . . . . . . . . . . . . . . . . . . . . . . . . . . . . |
4 |
Set Up Your Device . . . . . . . . . . . . . . . . . . . . . . . . . . . . |
. .5 |
Assemble Your Device.. . . . . . . . . . . . . . . . . . . . . . . |
.6 |
Start Using Your Device. . . . . . . . . . . . . . . . . . . . . |
. 10 |
S Pen . . . . . . . . . . . . . . . . . . . . . . . . . . . . . . . . . . . . . . |
.15 |
Learn About Your Device.. . . . . . . . . . . . . . . . . . . . . . |
. 17 |
Front View. . . . . . . . . . . . . . . . . . . . . . . . . . . . . . . . . |
. 18 |
Back View. . . . . . . . . . . . . . . . . . . . . . . . . . . . . . . . . . |
20 |
Navigation . . . . . . . . . . . . . . . . . . . . . . . . . . . . . . . . . |
.21 |
Home Screen. . . . . . . . . . . . . . . . . . . . . . . . . . . . . . . |
25 |
Customize YourHome Screen. . . . . . . . . . . . . . . . |
28 |
Notification Panel. . . . . . . . . . . . . . . . . . . . . . . . . . |
33 |
S Pen Functions. . . . . . . . . . . . . . . . . . . . . . . . . . . . |
36 |
Edge Screen. . . . . . . . . . . . . . . . . . . . . . . . . . . . . . . . |
42 |
Bixby...................................... |
47 |
Always On Display . . . . . . . . . . . . . . . . . . . . . . . . . . |
48 |
Face Recognition. . . . . . . . . . . . . . . . . . . . . . . . . . . |
50 |
Fingerprint Scanner. . . . . . . . . . . . . . . . . . . . . . . . . |
.51 |
Iris Scanner. . . . . . . . . . . . . . . . . . . . . . . . . . . . . . . . |
53 |
COM_N950U_EN_UM_TN_QH7_082917_FINAL
Multi Window. . . . . . . . . . . . . . . . . . . . . . . . . . . . . . |
55 |
Enter Text. . . . . . . . . . . . . . . . . . . . . . . . . . . . . . . . . . |
57 |
Emergency Mode .. . . . . . . . . . . . . . . . . . . . . . . . . . |
60 |
Apps . . . . . . . . . . . . . . . . . . . . . . . . . . . . . . . . . . . . . . . . . . |
62 |
Use Apps.. . . . . . . . . . . . . . . . . . . . . . . . . . . . . . . . . . |
63 |
Applications Settings. . . . . . . . . . . . . . . . . . . . . . . |
66 |
Calculator. . . . . . . . . . . . . . . . . . . . . . . . . . . . . . . . . . |
68 |
Calendar. . . . . . . . . . . . . . . . . . . . . . . . . . . . . . . . . . . |
70 |
Camera and Video. . . . . . . . . . . . . . . . . . . . . . . . . . |
73 |
Clock . . . . . . . . . . . . . . . . . . . . . . . . . . . . . . . . . . . . . . |
80 |
Contacts . . . . . . . . . . . . . . . . . . . . . . . . . . . . . . . . . . . |
83 |
Email . . . . . . . . . . . . . . . . . . . . . . . . . . . . . . . . . . . . . . |
90 |
Galaxy Apps. . . . . . . . . . . . . . . . . . . . . . . . . . . . . . . . |
93 |
Gallery . . . . . . . . . . . . . . . . . . . . . . . . . . . . . . . . . . . . |
94 |
Google Apps.. . . . . . . . . . . . . . . . . . . . . . . . . . . . . . . |
99 |
Table of Contents |
iii |
Internet. . . . . . . . . . . . . . . . . . . . . . . . . . . . . . . . . . . |
102 |
Messages .. . . . . . . . . . . . . . . . . . . . . . . . . . . . . . . . |
106 |
My Files . . . . . . . . . . . . . . . . . . . . . . . . . . . . . . . . . . |
. 110 |
PEN..UP. . . . . . . . . . . . . . . . . . . . . . . . . . . . . . . . . . . |
. 112 |
Phone. . . . . . . . . . . . . . . . . . . . . . . . . . . . . . . . . . . . |
. 113 |
Samsung Connect. . . . . . . . . . . . . . . . . . . . . . . . . |
. 122 |
Samsung Gear. . . . . . . . . . . . . . . . . . . . . . . . . . . . . |
.122 |
Samsung Health . . . . . . . . . . . . . . . . . . . . . . . . . . |
123 |
Samsung Notes.. . . . . . . . . . . . . . . . . . . . . . . . . . . |
125 |
Samsung Pay. . . . . . . . . . . . . . . . . . . . . . . . . . . . . . |
.127 |
Samsung+. . . . . . . . . . . . . . . . . . . . . . . . . . . . . . . . |
130 |
Secure Folder.. . . . . . . . . . . . . . . . . . . . . . . . . . . . . |
130 |
Smart Switch. . . . . . . . . . . . . . . . . . . . . . . . . . . . . . |
130 |
XFINITY Apps. . . . . . . . . . . . . . . . . . . . . . . . . . . . . . |
.131 |
Settings . . . . . . . . . . . . . . . . . . . . . . . . . . . . . . . . . . . . . |
133 |
How to Use Settings. . . . . . . . . . . . . . . . . . . . . . . |
134 |
Connections . . . . . . . . . . . . . . . . . . . . . . . . . . . . . . . . . |
135 |
Wi-Fi. . . . . . . . . . . . . . . . . . . . . . . . . . . . . . . . . . . . . |
136 |
Bluetooth. . . . . . . . . . . . . . . . . . . . . . . . . . . . . . . . . |
139 |
Phone Visibility. . . . . . . . . . . . . . . . . . . . . . . . . . . . |
.141 |
Data Usage.. . . . . . . . . . . . . . . . . . . . . . . . . . . . . . . |
142 |
Airplane Mode.. . . . . . . . . . . . . . . . . . . . . . . . . . . . |
144 |
NFC and Payment.. . . . . . . . . . . . . . . . . . . . . . . . . |
144 |
Mobile Hotspot. . . . . . . . . . . . . . . . . . . . . . . . . . . . |
145 |
Tethering. . . . . . . . . . . . . . . . . . . . . . . . . . . . . . . . . |
148 |
Mobile Networks. . . . . . . . . . . . . . . . . . . . . . . . . . |
149 |
Location. . . . . . . . . . . . . . . . . . . . . . . . . . . . . . . . . . |
149 |
Nearby Device Scanning. . . . . . . . . . . . . . . . . . . . |
.151 |
Printing. . . . . . . . . . . . . . . . . . . . . . . . . . . . . . . . . . . |
.151 |
Table of Contents |
iv |
MirrorLink. . . . . . . . . . . . . . . . . . . . . . . . . . . . . . . . |
.152 |
Download Booster . . . . . . . . . . . . . . . . . . . . . . . . . |
.152 |
Virtual Private Networks (VPN) . . . . . . . . . . . . . |
153 |
Ethernet . . . . . . . . . . . . . . . . . . . . . . . . . . . . . . . . . . |
154 |
Sounds and Vibration.. . . . . . . . . . . . . . . . . . . . . . . . |
.155 |
Sound Mode. . . . . . . . . . . . . . . . . . . . . . . . . . . . . . . |
156 |
Easy Mute. . . . . . . . . . . . . . . . . . . . . . . . . . . . . . . . . |
156 |
Vibrations. . . . . . . . . . . . . . . . . . . . . . . . . . . . . . . . . |
156 |
Volume . . . . . . . . . . . . . . . . . . . . . . . . . . . . . . . . . . . |
.157 |
Ringtone. . . . . . . . . . . . . . . . . . . . . . . . . . . . . . . . . . |
159 |
Notification Sounds. . . . . . . . . . . . . . . . . . . . . . . . |
159 |
Do Not Disturb. . . . . . . . . . . . . . . . . . . . . . . . . . . . |
160 |
System Sounds . . . . . . . . . . . . . . . . . . . . . . . . . . . . |
160 |
Key-Tap Feedback. . . . . . . . . . . . . . . . . . . . . . . . . |
. 161 |
Sound Quality and Effects . . . . . . . . . . . . . . . . . . |
.161 |
Separate App Sound. . . . . . . . . . . . . . . . . . . . . . . |
162 |
Notifications . . . . . . . . . . . . . . . . . . . . . . . . . . . . . . . . |
163 |
Block App Notifications. . . . . . . . . . . . . . . . . . . . |
164 |
Customize App Notifications. . . . . . . . . . . . . . . . |
164 |
Smart Alert. . . . . . . . . . . . . . . . . . . . . . . . . . . . . . . |
164 |
Display. . . . . . . . . . . . . . . . . . . . . . . . . . . . . . . . . . . . . . |
165 |
Screen Brightness......................... |
166 |
Blue Light Filter. . . . . . . . . . . . . . . . . . . . . . . . . . . |
166 |
Screen Mode.............................. |
. 167 |
Screen Resolution. . . . . . . . . . . . . . . . . . . . . . . . . |
. 167 |
Screen Zoom and Font. . . . . . . . . . . . . . . . . . . . . |
. 167 |
Full Screen Apps. . . . . . . . . . . . . . . . . . . . . . . . . . . |
168 |
Easy Mode. . . . . . . . . . . . . . . . . . . . . . . . . . . . . . . . |
168 |
Icon Frames . . . . . . . . . . . . . . . . . . . . . . . . . . . . . . . |
168 |
LED Indicator. . . . . . . . . . . . . . . . . . . . . . . . . . . . . . |
169 |
Table of Contents |
v |
Status Bar. . . . . . . . . . . . . . . . . . . . . . . . . . . . . . . . . |
169 |
Screen Timeout. . . . . . . . . . . . . . . . . . . . . . . . . . . . |
169 |
Block Accidental Touches.. . . . . . . . . . . . . . . . . . |
169 |
Screen Saver. . . . . . . . . . . . . . . . . . . . . . . . . . . . . . |
170 |
Smart Stay . . . . . . . . . . . . . . . . . . . . . . . . . . . . . . . . |
170 |
One-Handed Mode.. . . . . . . . . . . . . . . . . . . . . . . . |
. 171 |
Device Maintenance.. . . . . . . . . . . . . . . . . . . . . . . . . |
.172 |
Quick Optimization. . . . . . . . . . . . . . . . . . . . . . . . |
. 173 |
Battery. . . . . . . . . . . . . . . . . . . . . . . . . . . . . . . . . . . |
. 173 |
Performance Mode. . . . . . . . . . . . . . . . . . . . . . . . |
. 174 |
Storage . . . . . . . . . . . . . . . . . . . . . . . . . . . . . . . . . . . |
.174 |
Memory.. . . . . . . . . . . . . . . . . . . . . . . . . . . . . . . . . . |
.176 |
Language and Input.. . . . . . . . . . . . . . . . . . . . . . . |
.177 |
Date and Time. . . . . . . . . . . . . . . . . . . . . . . . . . . . . |
.181 |
Report Diagnostic Information. . . . . . . . . . . . . . |
.181 |
Reset . . . . . . . . . . . . . . . . . . . . . . . . . . . . . . . . . . . . . |
182 |
Software Update.. . . . . . . . . . . . . . . . . . . . . . . . . . |
184 |
LockScreenandSecurity. . . . . . . . . . . . . . . . . . . . . |
185 |
Screen Lock Types. . . . . . . . . . . . . . . . . . . . . . . . . |
186 |
Lock Screen and AOD Settings . . . . . . . . . . . . . . |
.187 |
Samsung Pass. . . . . . . . . . . . . . . . . . . . . . . . . . . . . |
188 |
Find My Mobile . . . . . . . . . . . . . . . . . . . . . . . . . . . . |
188 |
Unknown Sources.. . . . . . . . . . . . . . . . . . . . . . . . . |
189 |
Secure Folder.. . . . . . . . . . . . . . . . . . . . . . . . . . . . . |
189 |
App Permission Monitor. . . . . . . . . . . . . . . . . . . . |
189 |
Secure Startup. . . . . . . . . . . . . . . . . . . . . . . . . . . . |
189 |
Encrypt SD Card . . . . . . . . . . . . . . . . . . . . . . . . . . . |
190 |
View Passwords. . . . . . . . . . . . . . . . . . . . . . . . . . . |
190 |
Security Update Service . . . . . . . . . . . . . . . . . . . . |
190 |
Device Administration.. . . . . . . . . . . . . . . . . . . . . |
. 191 |
Table of Contents |
vi |
Credential Storage. . . . . . . . . . . . . . . . . . . . . . . . |
. .191 |
Advanced Security Settings.. . . . . . . . . . . . . . . . |
.192 |
Accounts . . . . . . . . . . . . . . . . . . . . . . . . . . . . . . . . . . . |
. 193 |
Samsung Cloud. . . . . . . . . . . . . . . . . . . . . . . . . . . |
. 194 |
My Profile. . . . . . . . . . . . . . . . . . . . . . . . . . . . . . . . |
. 195 |
Add an Account.. . . . . . . . . . . . . . . . . . . . . . . . . . . |
195 |
Backup and Restore.. . . . . . . . . . . . . . . . . . . . . . . |
.197 |
Google Settings. . . . . . . . . . . . . . . . . . . . . . . . . . . |
198 |
Accessibility. . . . . . . . . . . . . . . . . . . . . . . . . . . . . . . . |
. 199 |
Vision.. . . . . . . . . . . . . . . . . . . . . . . . . . . . . . . . . . . |
. 200 |
Hearing. . . . . . . . . . . . . . . . . . . . . . . . . . . . . . . . . . |
. 201 |
Dexterity and Interaction. . . . . . . . . . . . . . . . . . |
. 202 |
More Accessibility Settings . . . . . . . . . . . . . . . . |
. 203 |
Accessibility Services. . . . . . . . . . . . . . . . . . . . . . |
203 |
Other Settings. . . . . . . . . . . . . . . . . . . . . . . . . . . . . . |
. 204 |
Help. . . . . . . . . . . . . . . . . . . . . . . . . . . . . . . . . . . . . |
. 205 |
Manage Game Features . . . . . . . . . . . . . . . . . . . |
. 205 |
Device Assistance App. . . . . . . . . . . . . . . . . . . . . |
205 |
Dual Messenger. . . . . . . . . . . . . . . . . . . . . . . . . . . |
206 |
About Phone . . . . . . . . . . . . . . . . . . . . . . . . . . . . . |
. 206 |
Getting Help. . . . . . . . . . . . . . . . . . . . . . . . . . . . . . . |
. 207 |
Videos . . . . . . . . . . . . . . . . . . . . . . . . . . . . . . . . . . . |
. 208 |
Simulators . . . . . . . . . . . . . . . . . . . . . . . . . . . . . . . |
. 208 |
Tips.. . . . . . . . . . . . . . . . . . . . . . . . . . . . . . . . . . . . . . |
208 |
Samsung Care. . . . . . . . . . . . . . . . . . . . . . . . . . . . |
. 208 |
Legal.. . . . . . . . . . . . . . . . . . . . . . . . . . . . . . . . . . . . . . . |
. 209 |
Legal Information.. . . . . . . . . . . . . . . . . . . . . . . . . |
210 |
Table of Contents |
vii |
Special Features
Learn about your mobile device’s special features.
S Pen
The S Pen™ is a stylus that assists you in performing various functions. For more information, see
“SPenFunctions”onpage36.
Hello Bixby
Bixby responds to your voice commands and can help you understand your settings and set up your Samsung device.
For more information, see “Bixby”onpage47.
Flexible Security
Use your face, fingerprint, or iris to unlock your device.
Face Recognition
Configure facial recognition security to add an extra layer of security when using your device.
For more information, see “FaceRecognition”on page50.
Special Features |
2 |
Fingerprint Scanner
Use your fingerprint as an alternative to entering passwords in certain apps. You can also use your fingerprint to verify your identity when logging in to your Samsung account.
For more information, see “FingerprintScanner”on page51.
Iris Scanner
Use iris recognition as an alternative to entering passwords in certain apps. You can also use your eyes to verify your identity when logging in to your Samsung account.
For more information, see “IrisScanner”onpage53.
Water and Dust Resistance
This device is rated IP68 using the Ingress Protection rating system.
For more information, see “MaintainingWaterandDust Resistance”onpage214.
Special Features |
3 |
Getting Started
Learn about your mobile device hardware, assembly procedures, and how to get started using your new device.
Set Up Your
Device
Learn how to set up your device forthefirsttime.

Assemble Your Device
This section helps you to assemble your device.
Install the SIM Card and a
MemoryCard
When you subscribe to a cellular network, you are provided with a plug-in SIM card. During activation, your SIM card is loaded with your subscription details.
Warning: Small components such as SIM and Memory Cards can pose a choking risk. Please be careful when handling these cards to avoid damaging them.
You can also install an optional microSD™ memory card (not included)to add more memoryspacetoyour device. A memory card can be installed at any time. It is not necessary to install it prior to using the device.
Caution: Be careful when using the removal tool to eject an internal card tray.
1.Insert the removal tool into the hole on the
SIM card/Memorycardtray, andthen push untilthe tray pops out.
2.Place the SIM card on the tray with the gold contacts facing down.
3.Place the memory card on the tray with the gold contacts facing down.
4.Slidethe SIM card/Memorycardtrayback into the slot.
Set Up Your Device |
6 |

Note: Your device is IP68 rated for dust and water resistance. To maintain the water-resistant and dust resistant features of your device, make sure thatthe SIM card/Memorycardtrayopenings are maintained free of dust and water, and the tray is securely inserted prior to any exposure to liquids.
Formore information, see “Maintaining Water and Dust
Resistance”onpage214.
Charge the Battery
Note: You should dry the inside of the charging port before inserting a power connector to charge your device. If the charging port is not fully dry, your device may operate abnormally. For example, it may charge more slowly or overheat. For more information, see
“MaintainingWaterandDustResistance”onpage214.
Your device is powered by a rechargeable, standard Li-Ion battery. A USB charger (charging head and USB cable) is includedwiththe deviceforchargingthe battery from any standard outlet.
The battery comes partially charged. You can use the device while charging.
Note: For fastest charging times, use the Adaptive Fast Charger that came with your device. This charger provides faster charging only when connected to devices that support Adaptive Fast Charging.
1.Insertthe USB cable intothe USB charger/
Accessory port.
Set Up Your Device |
7 |

Caution: Use only charging devices that are approved by Samsung. Samsung accessories are designed for yourdeviceto maximize batterylife. Using other accessories may void your warranty and may cause damage.
2.Connect the USB cable to the charging head, and then plug the charging head into a standard outlet.
3.Unplug the charging head from the outlet and remove the USB cable from the device when charging is complete.
When to Charge the Battery
When the battery is low, your device conserves its remaining battery power by dimming the screen. When the battery level becomes too low, the device automatically turns off.
For a quick check of your battery level:
►► View the battery charge indicator located in the top right cornerofyourdevice’s display.Asolid color ( 

 ) indicates afull charge.
Set Up Your Device |
8 |
While charging, the device and the charger may become hot when using wireless charging or fast charging. This does not affect the device’s lifespan or performance and is in the device’s normal range of operation.
The charger may stop charging if the battery becomes too hot.
If the device heats up while charging the battery:
1.Disconnect the charger from the device and close any running apps.
2.Wait for the device to cool down, and then begin charging the device again.
•If the lower part of the device overheats, check for damage to the connected USB cable. Replace the damaged USB cable with a new Samsung approved cable.
•If using a wireless charger, do not place foreign materials between the device and the wireless charger.

Micro-USB Connector
You can use a Micro-USB cable to connect your device to a computer with the included Micro-USB connector.
Note: The Micro-USB connector does not support On the-Go USB accessories.
FastCharging
Reverse Charging
The included On-the-Go adapter allows you to charge another device through a USB cable.
You can also usethe On-the-Go adapterfortransferring contacts, photos, and other content from an old device. For more information, see “Transfer Data from Your Old
Device”onpage13.
Set Up Your Device |
9 |
Start Using Your Device
Turn Your Device On or Off
The instructions below explain how to turn your device on or off.
To turn the device on:
►► Press and hold the Power key until the device turns on.
To turn the device off:
1.Press and hold the Power key.
2.Tap Power off, and confirm if prompted.
Lock or Unlock Your Device
Use your device’s screen lock features to secure your device. By default, the device locks automatically when the screen times out.
To lock the device:
►► Press the Power key.
The default Screen lock on your device is Swipe.
To choose a secure screen lock, see “Set a Secure Screen
Lock”onpage186.
To unlock the device:
►► Press the Power key or double-tap  Home, and then drag your finger across the screen.
Set Up Your Device |
10 |
Use the Setup Wizard
The first time you turn your device on, a Welcome screen is displayed. It guides you through the basics of setting up your device.
Follow the prompts to choose a default language, connect to a Wi-Fi® network, set up accounts, choose location services, learn about your device’s features, and more.
Google Account
Your new device uses your Google™ Account to fully utilize its Android™ features.
To set up a GoogleAccount onyourdevice, use
Accounts settings.
1.From a Home screen, swipe up to access Apps.
2.Tap  Settings > Cloud and accounts > Accounts.
3.Tap  Addaccount > Google.
Factory Reset Protection
When you sign in to a Google Account on your device, Factory Reset Protection is activated. Factory Reset
Protection (FRP) prevents otherpeoplefrom using your device if it is reset to factory settings without your permission. For example, if your device is lost or stolen and a factory data reset is performed, only someone with your Google Account username and password can use the device.
You will not be able to access the device after a factory data reset ifyou do not haveyourGoogleAccount username and password. For more information, see
“FactoryDataReset”onpage182.
Caution: Before shipping your device back to Samsung or taking it to your nearest Samsung-authorized service center, you should remove your Google Account before resetting the device back to factory settings. For more information, visit samsung.com/us/support/frp.
Set Up Your Device |
11 |

Enable Factory Reset Protection
Adding a Google Account to your device automatically activates the FRP security feature.
Disable Factory Reset Protection
To disable FRP, remove all Google Accounts from the device.
1.From a Home screen, swipe up to access Apps.
2.Tap  Settings > Cloud and accounts > Accounts > Google.
3.Tap  Moreoptions > Remove account.
Samsung Account
Create a Samsung account for access to Samsung content and apps on your device.
To set up a Samsung account on your device, use Accounts settings.
1.From a Home screen, swipe up to access Apps.
2.Tap  Settings > Cloud and accounts > Accounts.
3.Tap  Addaccount > Samsungaccount.
Set Up Your Device |
12 |
Add an Email Account
Use the Email app to view and manage all your email accounts in one app.
To set up an email account on your device, use Accounts settings.
1.From a Home screen, swipe up to access Apps.
2.Tap  Settings > Cloud and accounts > Accounts.
3.Tap  Addaccount > Email.
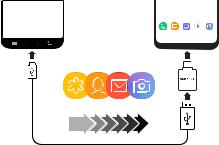
Transfer Data from Your Old Device
Use Smart Switch™ to transfer contacts, photos, and other content from your old device. You can also use the included On-the-Go adapter to copy content quickly and easily from your old device, without installing the Smart Switch app.
Old Device |
New Galaxy |
|
|
Note: The USB option must be set to Media device
(MTP) onthe otherdevice. Transferring contentwith a USB cable may increase battery consumption. Make sure your battery is fully charged.
Set Up Your Device |
13 |
To use Smart Switch:
1.From a Home screen, swipe up to access Apps,
and then tap  Settings > Cloud and accounts >
SmartSwitch.
2.Follow the prompts and select the content to transfer.
Visit samsung.com/smartswitch for more information and to learn how to use the On-the-Go adapter to transfer content faster.
Set Up Your Voicemail
Use the Phone app to set up your voicemail.
1.From a Home screen, tap  Phone, and touch and hold the

 1 key.
2.Follow the tutorial to create a password, record a greeting, and record your name.
For more information on voicemail, see “Voicemail”onpage120.
Set Up Your Device |
14 |

S Pen
The S Pen is a stylus that assists you in performing various functions.
For more information about the functions S Pen can perform, see “SPenFunctions”onpage36.
 S Pen button
Note: To maintain the water-resistant and dust resistant features of your device, make sure that the S Pen slot and opening are both maintainedfree of dust and water, and the pen is securely inserted prior to any exposure to liquids.
Remove S Pen
The S Pen stores inside your device for convenient access.
1.Pushthe S Pen inward and release it.
2.Slidethe S Pen outthe rest ofthewayusingthe notch onthe end ofthe S Pen.
Set Up Your Device |
15 |

Replace the S Pen Tip
You can replacethetip ofthe S Penwiththe included kit.
To replacethetip:
1. Use tweezers to pull out the S Pen tip.
2.Insert the new pen tip and press until it clicks in place.
Set Up Your Device |
16 |
Learn About
Your Device
Learn some of the key features of your mobile device, including the screens and icons, as well as how to navigate the device and enter text using the keyboard.

Front View Earpiece |
|
|
|
|
|
|
|
|
|
|
|
|
|
|
|
Proximity sensors |
|
|
|
|
|
|
Front camera |
|
|
|
|
|
|
||
Iris detection LED |
|
|
|
|
|
|
Iris scanner |
|
|
|
|
|
|
Volume keys
 Power key
Bixby key
 S Pen
S Pen
Devices and software are constantly evolving — the illustrations you see here are for reference only.
Learn About Your Device |
18 |
•Proximity sensor
-- Turns off the screen and disables touch functionality during a call when the device is in close proximity to the body.
-- Turns the screen back on and enables touch functionality during a call when the device is outside a specific range from the body.
•Power key
-- Press to turn the screen on or off.
-- Press and hold to select a power control option.
-- Press twice quickly to launch the camera.
•Volume keys
-- Adjust the volume for ringtones, calls, notifications, and system sounds.
-- In the camera app, press a volume key to take a photo.
•Bixby key
-- Launch Bixby. For more information, see “Bixby” onpage47.
•S Pen
-- Detach the S Pen stylus for a variety of helpful functions. For more information, see “SPenFunctions”onpage36.
Learn About Your Device |
19 |

Back View
Microphone
 Flash
Flash
Dual camera |
|
|
|
|
|
Fingerprint sensor |
|
|
|
||||
Heart rate sensor |
|
|
|
|
|
|
|
|
|
||||
Speaker |
|
|
|
|
|
Headset jack |
|
|
|
|
|
||
Microphone |
|
|
|
|
|
USB charger/Accessory port |
|
|
|
|
Devices and software are constantly evolving — the illustrations you see here are for reference only.
Learn About Your Device |
20 |
Navigation
Learn the basics for navigating through your device.
Touchscreen Navigation
Please note that a touchscreen responds best to a light touch from the pad of your finger or a capacitive stylus. Using excessive force or a metallic object on the touch screen may damage the tempered glass surface and void the warranty.
Tap
Lightly tap items to select or launch them.
•Tapthe keyboardto entercharacters ortext.
•Tap an item to select it.
•Tap an app shortcut to launch the application.
Double-Tap
Lightly tap items twice to select or launch them.
• Double-tap an image to zoom in or out.
Touch and Hold
Touch and hold items to activate them.
•Touch and hold a field to display a pop-up menu of options.
Swipe
Lightly drag your finger vertically or horizontally across the screen.
•Swipe the screen to unlock the device.
•Swipethe screento scrollthroughthe Home screens or menu options.
Learn About Your Device |
21 |

Drag
Touch and hold an item, and then move it to a new location.
•Drag an app shortcut to add it to a Home screen.
•Drag a widget to place it in a new location on a
Home screen.
Pinch and Spread
Pinch the screen using your thumb and forefinger or spread by moving your fingers apart.
•Spread your fingers on the screen to zoom in while viewing a picture or a web page.
•Pinch the screen to zoom out while viewing a picture oraweb page.
Common Options
Many of the following common options are usually available on various screens:
• |
|
|
Moreoptions: Tap to view more menu options for |
|
|
a screen. This often allows you to select items to |
|||
|
delete or share. |
|||
• |
|
|
|
Delete: Tap to select items to delete. |
|
|
|||
|
|
|||
• |
|
|
|
Share: Tap to select items to share, and then |
|
choose a sharing method. |
|||
• Edit: Tap to customize the screen.
•On/Off: Tap to turn the option on ( ) or
) or
off ( ).
).
•  Menu: Taptoviewavailable optionsforthefield.
Learn About Your Device |
22 |
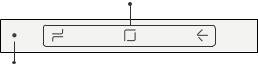
Navigation Bar
The Navigation bar, at the bottom of the screen, displays the navigation keys.
Navigation keys
Hide/Show
FullScreenMode
The navigation keys are hidden in full screen mode. When hidden, you can still use  Home by touching and holding the area of the screen where the icon is normally displayed.
To enter or exit full screen mode:
►► Double-tap the Hide/Show icon to the left of the navigation keys.
Learn About Your Device
To view the navigation keys in full screen mode:
►► Swipe up from the bottom of the screen to display the Navigation bar.
Navigation Bar Settings
You can configure the Navigation bar background color and button layout.
1.From a Home screen, swipe up to access Apps.
2.Tap  Settings > Display > Navigation bar for the following settings:
•Show and hide button: Add a button on the left side of the navigation bar to show or hide the navigation bar.
•Background color: Choose a color for the background of the Navigation bar.
•Hard press Home button: Adjust the amount of pressure needed to touch and hold  Home by moving the slider.
23
Loading...