


 Loading...
SAMSUNG
GalaxyTab S6 Lite
Usermanual

Contents
Features
S Pen | Mobile continuity | Bixby | Biometric security | Dark mode
Gettingstarted
Device layout: Galaxy Tab S6 Lite
Set up your device: Charge the battery | Accessories
Start using your device: Turn on your device | Use the Setup Wizard | Transfer data from an old device | Lock or unlock your device | Side key settings | Accounts | Navigation | Navigation bar | Customize your home screen | Samsung Daily | Bixby | Digital wellbeing and parental controls | Biometric security | Mobile continuity | Multi window | Enter text
Customize your home screen: App icons | Wallpaper | Widgets | Home screen settings | Status bar | Notification panel
CameraandGallery
Camera: Navigate the camera screen | Configure shooting mode | AR Zone | Live focus | Record videos | Camera settings
Gallery: View pictures | Edit pictures | Play video | Edit video | Share pictures and videos | Delete pictures and videos | Group similar images | Create a movie | Take a screenshot | Screen recorder
Mobilecontinuity
Call and text on other devices
Samsungapps
Galaxy Essentials | AR Zone | Bixby | Galaxy Store | PENUP | Samsung Flow | Samsung Kids | SmartThings | Tips | Voice Recorder | Calculator | Calendar | Clock | Contacts | Internet | Messages | My Files | Samsung Notes
1 WIF_P610_EN_UM_TN_TDA_061020_FINAL

Contents
Googleapps
Chrome | Drive | Duo | Gmail | Google | Maps | Photos | Play Movies & TV | Play Store | YouTube | YT Music
Microsoftapps
Outlook | Office | OneDrive
Settings
Connections: Wi-Fi | Bluetooth | Airplane mode | Data usage | Nearbydevice scanning | Connect to a printer | Virtual Private Networks | Private DNS | Ethernet
Customization: Display | Notifications | Sound
Security: Lock screen and security | Face recognition
Accounts: Samsung Cloud | Add an account | Account settings | Remove an account | Users | Backup and restore | Google settings
Backup: Samsung account | Google Account | External storage transfer
Accessibility: Screen Reader | Visibility enhancements | Hearing enhancements | Interaction and dexterity | Advanced settings | Installed services | About Accessibility
Other: Tips | Daily Board | About tablet | Learn more | Legal information
2
Gettingstarted
GalaxyTab S6 Lite
Set up your device
Start using your device
3

Getting started
GalaxyTabS6Lite
Speaker |
|
Headset jack |
Rear camera |
|
Front camera |
|
Microphone |
|
|
||
|
|
Side key
Volume keys
Speaker 
USB charger/Accessory port
4
Getting started
Setupyourdevice
Charge the battery | Accessories
Install microSD card
Place the optional microSD 


 card (sold separately) into
the tray with the gold contacts facing down.
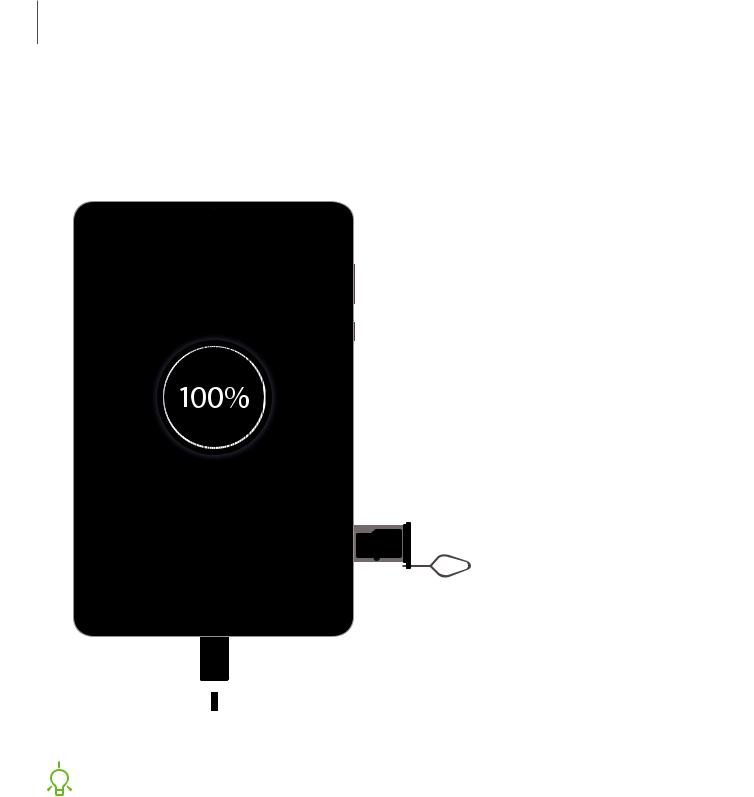
Charge yourdevice


 Before turning on your device, charge it fully.

 NOTE Use only charging devicesandbatteries(if applicable) that are approved by Samsung. Samsung charging devicesandbatteriesare designedfor your device to maximize battery life. Using other charging devicesandbatteriesmay voidyour warranty andmay cause damage.
Devicesandsoftwareareconstantlyevolving— theillustrationsyouseeherearefor referenceonly.
5

Getting started
Charge the battery
Your device ispoweredby a rechargeable battery. A charger (charging headandUSB Type-C cable) isincludedwith the device for charging the battery from a power outlet.

 TIP Whilecharging,thedeviceandthechargermaybecomehotandstop charging.This usuallydoesnotaffectthedevice’slifespanorperformanceandis inthedevice’snormalrangeofoperation.Disconnectthechargerfromthedevice andwaitforthedevicetocooldown.For moreinformation,visit samsung.com/us/support/answer/ANS00076952.
Accessories
Supportedaccessories(soldseparately) can be configuredthrough Settings. This option may only appear after youhave connectedan accessory to your device.
Visit samsung.com/us/mobile/mobile-accessories to learn more.
◌ From Settings, tap Advanced features > Accessories.
Startusingyourdevice
Turn on your device | Use the Setup Wizard | Transfer data from an old device | Lock or unlock your device | Side key settings | Accounts | Navigation | Navigation bar | Customize your home screen | Samsung Daily | Bixby | Digital wellbeing and parental controls | Biometric security | Mobile continuity | Multi window | Enter text
Turn on yourdevice
Use the Side key to turn your device on. Do not use the device if the body iscrackedor broken. Use the device only after it hasbeen repaired.
◌ Pressandholdthe Side key to turn the device on.
• To turn the device off, open the Notification panel, andtap C) Power >
 Power off. Confirm when prompted.
• To restart your device, open the Notification panel, andtap C) Power >  Restart. Confirm when prompted.
6

Getting started

 TIP Youcan also turn your device off by pressing the Side and Volume down keys at the same time. To learn more about powering off your device from Settings, tap
 Advanced features > Side key > How to power off your tablet.
Use the Setup Wizard
The first time youturn your device on, the SetupWizardguidesyouthrough the basics of setting upyour device.
Follow the promptsto choose a default language, connect to a Wi-Fi® network, set up accounts, choose location services, learn about your device’sfeatures, andmore.
Transferdata from an old device
Use Smart Switch™ to transfer contacts, photos, music, videos, messages, notes, calendars, andmore from your olddevice. Smart Switch can transfer your data via USB cable, Wi-Fi, or computer.
Visit samsung.com/us/support/owners/app/smart-switch to learn more.
1.From Settings, tap Accountsand backup > Smart Switch.
2.Follow the promptsandselect the content to transfer.
Visit samsung.com/smartswitch for more information.
7
Getting started
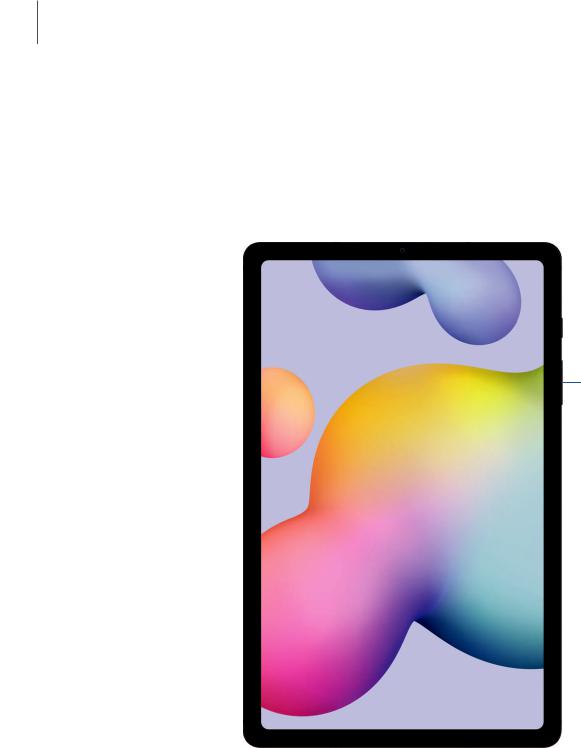
Lock orunlock yourdevice
Use your device’sscreen lock featuresto secure your device. By default, the device locksautomatically when the screen timesout. For more information about screen locks, see Lock screen and security.
Side key
Press to lock. Press to turn on the screen, and then swipe the screen to unlock it.
Devicesandsoftwareareconstantlyevolving— theillustrationsyouseeherearefor referenceonly.
8

Getting started
Side keysettings
Youcan customize the shortcutsassignedto the Side key.
Double press
Choose which feature islaunchedwhen the Side key ispressedtwice.
1.From Settings, tap Advanced features > Side key.
2.Tap Double press to enable thisfeature, andtapan option: • Quick launch camera (default)
• Open Bixby • Open app
Pressandhold
Choose which feature islaunchedwhen youpressandholdthe Side key.
1.From Settings, tap Advanced features > Side key.
2.Under the Pressandholdheading, tapan option:
•Wake Bixby (default)
•Power off menu
Accounts
Set upandmanage your accounts.

 TIP Accountsmay support email, calendars, contacts, andother features. See your carrier for more information.
AddaGoogle Account
Sign in to your Google Account to accessyour Google CloudStorage, appsinstalled from your account, andmake full use of your device’sAndroid™ features.
1.From Settings, tap Accountsand backup > Accounts.
2.Tap +Add account > Google.
9
Getting started

 NOTE When yousign in to a Google Account, Factory Reset Protection (FRP) is activated. FRP requiresyour Google Account information when resetting to factory settings. For more information, see Factory Reset Protection.
AddaSamsungaccount
Sign in to your Samsung account to accessexclusive Samsung content andmake full use of Samsung apps.
1.From Settings, tap Accountsand backup > Accounts.
2.Tap+Add account > Samsung account.

 TIP To quickly accessyour Samsung account, from Settingstape Samsung account profile.
AddanOutlook account
Sign in to your Outlook® account to view andmanage email messages.
1.From Settings, tap Accountsand backup > Accounts.
2.Tap+Add account > Outlook.
10
Getting started
Draganddrop
Touch andholdan item, andthen move it to a new location.
•Drag an appshortcut to addit to a Home screen.
•Drag a widget to place it in a new location.
Devicesandsoftwareareconstantlyevolving— theillustrationsyouseeherearefor referenceonly.
13

Getting started
Zoominandout
Bring your thumbandforefinger together or apart on the screen to zoom in andout.
•Move your thumbandforefinger together on the screen to zoom out.
•Move your thumbandforefinger apart on the screen to zoom in.
Devicesandsoftwareareconstantlyevolving— theillustrationsyouseeherearefor referenceonly.
14

Getting started
Touchandhold
Touch andholditemsto activate them.
•Touch andholda fieldto display a pop-upmenuof options.
•Touch andholda Home screen to customize the Home screen.
Devicesandsoftwareareconstantlyevolving— theillustrationsyouseeherearefor referenceonly.
15


Getting started
 Navigationbuttons
Use buttonsalong the bottom of the screen for quick navigation. Thisisthe default setting.
1. From Settings, tap-~•, ,,~ •-
Display > Navigation bar > Navigation buttons.
2.Tapan option under Button order to choose which side of the screen the Back andRecent appsiconsdisplay.
Full screengestures
Hide the navigation buttonsat the bottom of the screen for an unobstructedscreen experience. Insteadswipe to navigate your device.
|
<![if ! IE]> <![endif]>•- |
|
1. |
<![if ! IE]> <![endif]>~•, -,,~ |
Display > Navigation bar > Full screen gestures to enable |
From Settings, tap |
the feature.
2. Tapan option to customize:
•More options: Choose a gesture type andsensitivity.
•Gesture hints: Display linesat the bottom of the screen where each screen gesture islocated.
•Show button to hide keyboard: Show an icon on the bottom right corner of the screen to hide the keyboardwhen the phone isin portrait mode.
•Block gestureswith S Pen: Prevent the S Pen from making navigation gestures.
Customize yourhome screen
The Home screen isthe starting point for navigating your device. Youcan place your favorite appsandwidgetshere, in addition to setting upadditional Home screens, removing screens, changing the order of screens, andchoosing a main Home screen.
App icons | Wallpaper | Widgets | Home screen settings | Status bar | Notification panel
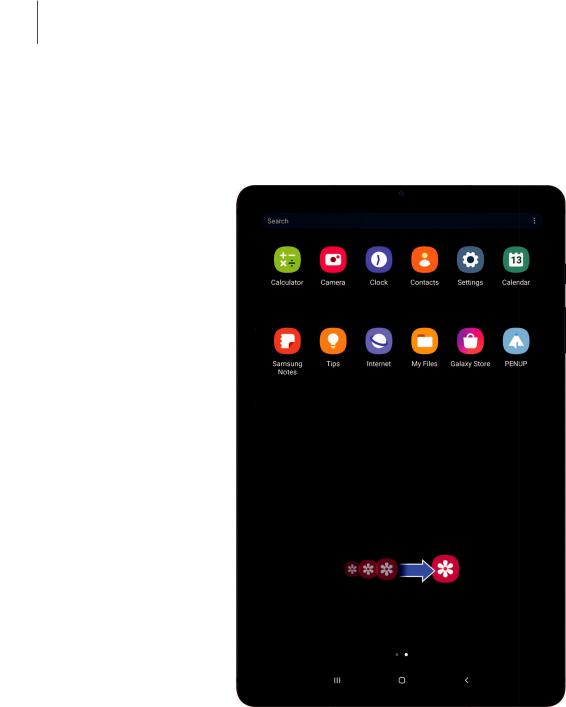
Appicons
Use appiconsto launch an appfrom any Home screen.
◌ From Apps, touch andholdan appicon, andtap D
Add to Home.
17

Getting started
To remove an icon:
◌From a Home screen, touch andholdan appicon, andthen tap Remove from Home.

 NOTE Removing an icon doesnot delete the app, it just removesthe icon from a Home screen.
Wallpaper
Change the look of the Home andLock screensby choosing a favorite picture, video, or preloadedwallpaper.
1.From a Home screen, touch andholdthe screen, andthen tap Wallpaper.
2.Tapone of the following menusfor available wallpapers:
•Mywallpapers: Choose from featuredanddownloadedwallpapers.
•Gallery: Choose picturesandvideossavedin the Gallery app.
•ApplyDark mode to Wallpaper: Enable to apply Dark mode to your wallpaper.
3.Tapa picture or video to choose it. Choose which screen or screensyouwant to apply the wallpaper to.
4.Tap Set on Home screen, Set on Lock screen, or Set on Home and Lock screens
(depending on which screensare applicable).
•If applying a wallpaper to both the Home andLock screens, enable Sync my edits if youwant any editsmade to that wallpaper to be appliedto both screens.
Widgets
Addwidgetsto your home screensfor quick accessto info or apps.
1.From-a Home screen, touch andholdthe screen.
2.Tap •• Widgets, andthen touch andholda widget, drag it to a Home screen, and release it.
18

Getting started
 Customize Widgets
Once youhave addeda widget, youcan customize where it'slocatedandhow it functions.
◌From a Home screen, touch andholda widget, andtapan option:
•l1tRemove from Home: Delete a widget from your screen.
•(I Widget settings: Customize the function or appearance of the widget.
•0 App info: Review the widget usage, permissions, andmore.
Home screensettings
Customize your Home andAppsscreens.
1.From a Home screen, touch andholdthe screen.
2.Tap (IHome screen settings to customize:
•Home screen layout: Set your device to have separate Home andApps screens, or only a Home screen where all appsare located.
•Home screen grid: Choose a layout to determine how iconsare arrangedon the Home screen.
•Appsscreen grid: Choose a layout to determine how iconsare arrangedon the Appsscreen.
•Appsbutton: Adda button to the Home screen for easy accessto the Apps screen.
•App icon badges: Enable to show badgeson appswith active notifications. Youcan also choose the badge style.
•Lock Home screen layout: Prevent itemson the Home screen from being removedor repositioned.
•Add appsto Home screen: Automatically addnewly-downloadedappsto the Home screen.
•Swipe down for notification panel: Enable thisfeature to open the Notification panel by swiping down anywhere on the Home screen.
19
Getting started
•Hide apps: Choose appsto hide from the Home andAppscreens. Return to thisscreen to restore hidden apps. Hidden appsare still installedandcan appear asresultsin Finder searches.
•About Home screen: View version information.
20
Getting started
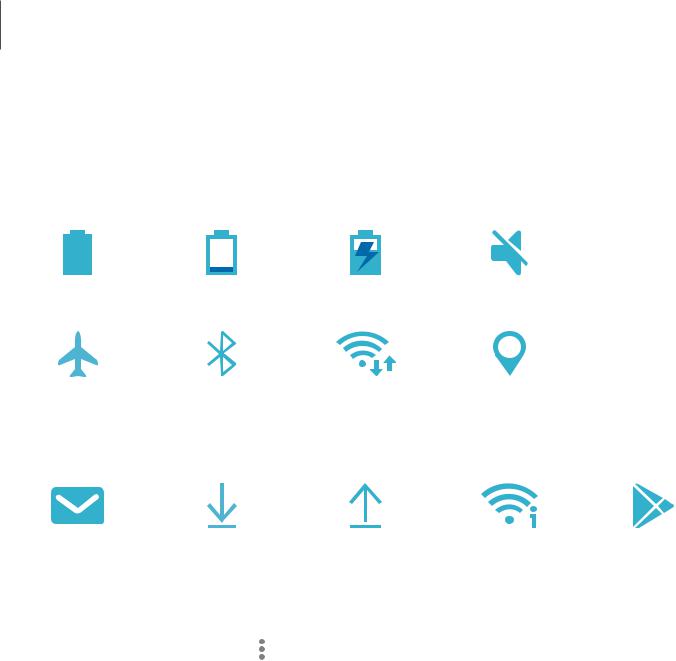
 Statusbar
The Statusbar providesdevice information on the right side andnotification alertson the left.
Status icons
Battery full |
Battery low |
Charging |
Mute |
Airplane mode |
Bluetooth active |
Wi-Fi active |
Location active |
|
Notificationicons |
|
....... |
|
|
|
|
1' |
|
|
|
- |
~~ |
|
|
|
• 1 |
|
||
New email |
- |
Wi-Fi available |
Appupdate |
|
Download |
Upload |
|||
Configure display optionsfor the Statusbar.
◌ From Quick settings, tap ••• More options > Statusbar for the following options:
•Show notification icons: Choose how to display notification iconson the Statusbar.
•Show batterypercentage: Display the battery charge percentage next to the battery icon on the Status bar.
21

Getting started
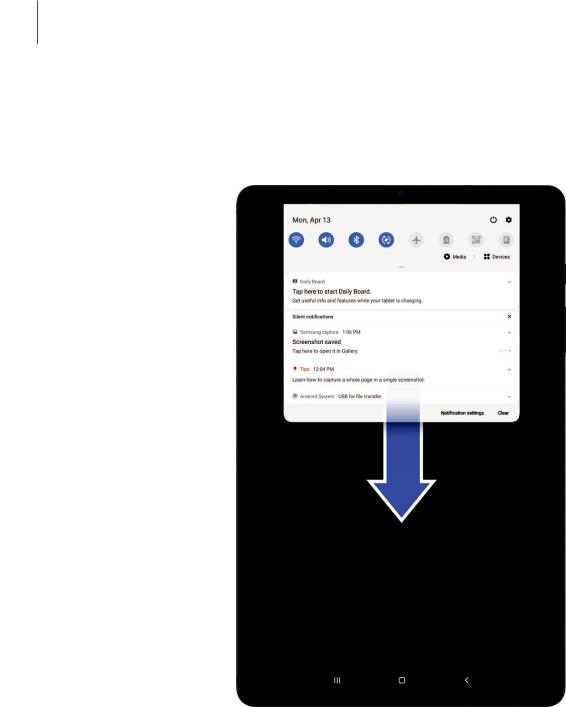
 Viewthe Notificationpanel
Youcan accessthe Notification panel from any screen.
1.Drag the Statusbar down to display the Notification panel.
2.Swipe down the list to see notification details.
•To open an item, tapit.
•To clear a single notification, drag the notification left or right.
•To clear all notifications, tap Clear.
•To customize notifications, tap Notification settings.
3.Drag upwardfrom the bottom of the screen or tap <Back to close the Notification panel.
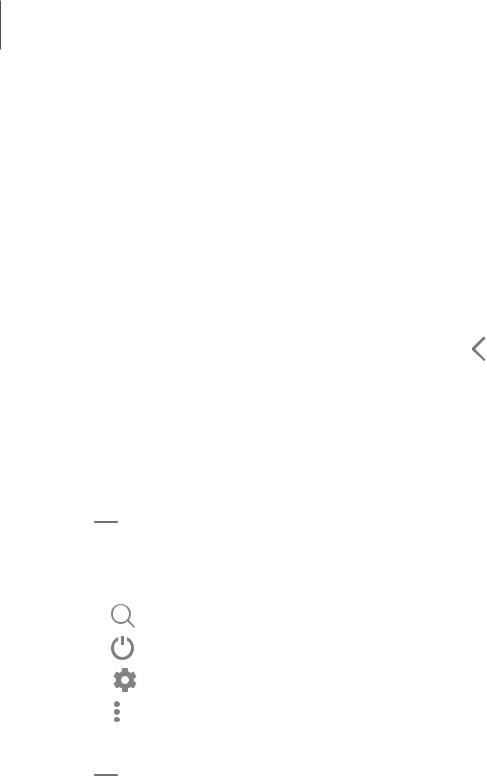
Quicksettings
The Notification panel providesquick accessto device functionsusing Quick settings.
1. |
Drag the Statusbar down to display the Notification panel. |
|||
2. |
Drag |
View all downward. |
||
|
• |
Tapa quick setting icon to turn it on or off. |
||
|
• |
Touch andholda quick setting icon to open the setting. |
||
|
• |
Tap |
Q Finder search to search the device. |
|
|
• |
Tap |
C) Power off for Power off, Restart, andEmergency mode options. |
|
|
• |
Tap |
0 |
Open settings to quickly accessthe device'ssettingsmenu. |
|
|
|||
|
• |
Tap |
• |
|
|
• More options to reorder Quick settingsor to change the button layout. |
|||
|
• |
|
• |
|
|
Drag the Brightnessslider to adjust the screen brightness. |
|||
3. |
Drag |
View all upwardto close Quick settings. |
||
23

Getting started
S Pen
The S Pen providesa variety of helpful functions. Use your S Pen to launch apps, take notes, or draw a picture.
Airview
Hover the S Pen over the screen to preview content or view information about an item on the screen. The following Air view featuresare available:
•Preview an email message before opening it.
•Preview the contentsof a photo album or enlarge a picture.
•Preview a video andnavigate to a specific scene by hovering over the timeline.
•View the name or description of an icon or a button.

 NOTE The preview function isonly available when the S Pen’son-screen pointer isa solidcolor.
Devicesandsoftwareareconstantlyevolving— theillustrationsyouseeherearefor referenceonly.
24
Getting started
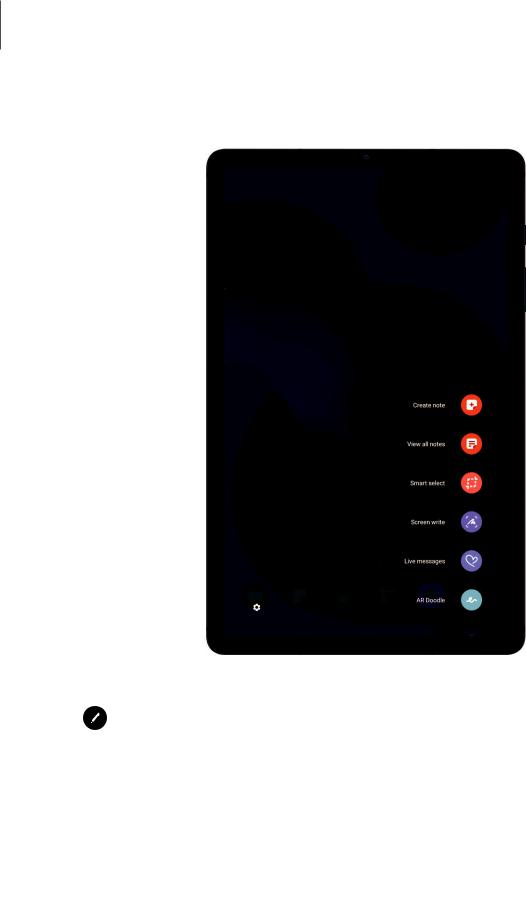
 Aircommand
Settings 
1.Tap0 Air command or holdthe S Pen near the screen so that the pointer appears, andthen pressthe S Pen button once.
2.Tapan option:
• Create note: Launch a new note in the Samsung Notesapp.
• View all notes: Launch the Samsung Notesappandview a listing of the notesyouhave created.
• Smart select: Draw aroundan area of the screen to collect it in the Gallery app.
Devicesandsoftwareareconstantlyevolving— theillustrationsyouseeherearefor referenceonly.
25
Getting started
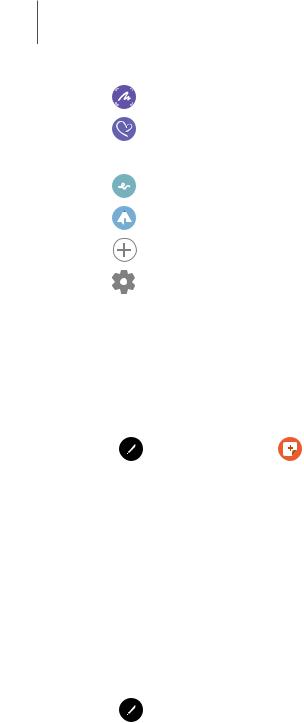
•e Screen write: Capture screenshotsandwrite or draw on them.
•~Live messages: Create a short animatedmessage by drawing or writing
with the S Pen.
•0 AR Doodle: Draw interactive doodlesusing the AR camera feature.
•0 PENUP: Use the S Pen to draw, color, edit, andshare live drawings.
•(±) Add shortcuts: Addmore appsor functionsto the Air commandmenu.
•0 Settings: Customize Air commandby configuring appsandfunctions, and
by changing how the Air commandmenuappears.
Create note
Launch a new note directly in the Samsung Notesapp. For more information, see
Samsung Notes.
◌ Tap0 Air command > GCreate note.
Viewallnotes
Launch the Samsung Notesappandview a listing of the notesyouhave created.
◌ Tap Air command >
 View all notes.
Smart select
The Smart select feature allowsyouto copy content from any screen. Youcan then addit to your Gallery appor share it with your contacts.
1.Tap0 Air command > Smart select.
2.Tapa shape in the menu, andthen drag the S Pen to select content. The following optionsappear:
•Extract text: Identify andextract text from the selectedcontent.
•Pin to screen: Place a shortcut to the collectedcontent on a Home screen.
• Auto select: Allow Smart select to automatically select content to extract.
• Draw: Draw on the capturedcontent.
• Share: Choose a sharing methodto share your content.
3.Tap Save.
Save.
26

Getting started
 Screenwrite
Screen write allowsyouto capture screenshotsandwrite or draw on them.
1.Tap0 Air command > Screen write.
2.The current screen iscaptured, anda pen tool appears. The following editing toolsare provided:
•Crop: Drag the edgesof the screen to cropthe capturedcontent.
•Pen type: Draw on the screenshot. Tapthe Pen icon a secondtime to change the pen tipandsize.
•Color: Change the pen color.
•Thickness: Change the pen stroke.
•Undo: Reverse the last action.
•Redo: Repeat the last action that wasundone.
•Share: Choose a sharing methodto share your content.
3.Tap Save. The content issavedto the Gallery app.

 TIP Holdthe S Pen button to erase your drawingson the screen memo.
27
Getting started
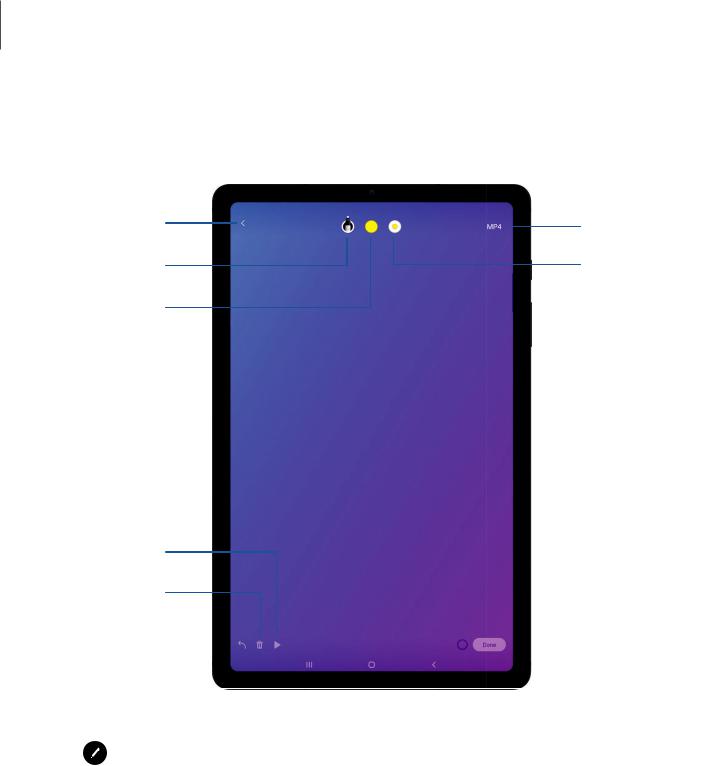
 Live messages
Recordan animateddrawing or written message.
Back |
Format |
Pen effects |
Thickness |
Color |
|
Preview
Start over
Undo 
Drawing
 progress
1.Tap0 Air command > Live messages.
2.Select one of the following backgroundoptions:
•Collection: See all live messagesyouhave created.
•Gallery: Pick an image or video for the background.
•Camera: Capture an image to use for the background.
•Color: Pick a color for the background.
3.Follow the promptsto begin creating your live message.
Devicesandsoftwareareconstantlyevolving— theillustrationsyouseeherearefor referenceonly.
28

Getting started
4.Tap Format to change the file type of your live message to either MP4 or GIF.
5.Tap Done to save.
29
Loading...