


 Loading...
User guide.
T A B L E T
User Manual
Please read this manual before operating your device and keep it for future reference.
|
|
Table of Contents
Special Features. . . . . . . . . . . . . . . . . . . . . . . . . . . . . |
. 1 |
S Pen. . . . . . . . . . . . . . . . . . . . . . . . . . . . . . . . . . . . . . |
. .2 |
Samsung Flow. . . . . . . . . . . . . . . . . . . . . . . . . . . . . . |
. .2 |
Cortana. . . . . . . . . . . . . . . . . . . . . . . . . . . . . . . . . . . . |
. .2 |
Getting Started. . . . . . . . . . . . . . . . . . . . . . . . . . . . . . |
3 |
Set Up Your Device . . . . . . . . . . . . . . . . . . . . . . . . . . . . |
. .4 |
Assemble YourDevice.. . . . . . . . . . . . . . . . . . . . . . . |
.5 |
Set Up YourDevice. . . . . . . . . . . . . . . . . . . . . . . . . . |
.10 |
LearnAboutYourDevice.. . . . . . . . . . . . . . . . . . . . . . |
. 12 |
FrontView. . . . . . . . . . . . . . . . . . . . . . . . . . . . . . . . . |
. 13 |
BackView. . . . . . . . . . . . . . . . . . . . . . . . . . . . . . . . . . |
.14 |
Keyboard Cover. . . . . . . . . . . . . . . . . . . . . . . . . . . . . . |
15 |
Start Screen. . . . . . . . . . . . . . . . . . . . . . . . . . . . . . . . |
20 |
Navigation. . . . . . . . . . . . . . . . . . . . . . . . . . . . . . . . . |
24 |
Action Center.. . . . . . . . . . . . . . . . . . . . . . . . . . . . . . |
26 |
Tablet Mode. . . . . . . . . . . . . . . . . . . . . . . . . . . . . . . . |
28 |
Split ScreenView. . . . . . . . . . . . . . . . . . . . . . . . . . . |
29 |
S Pen. . . . . . . . . . . . . . . . . . . . . . . . . . . . . . . . . . . . . . . |
31 |
AirCommand.. . . . . . . . . . . . . . . . . . . . . . . . . . . . . . |
33 |
EnterText. . . . . . . . . . . . . . . . . . . . . . . . . . . . . . . . . . |
36 |
VZW_W727V_EN_UM_TN_QB7_040517_FINAL
Apps . . . . . . . . . . . . . . . . . . . . . . . . . . . . . . . . . . . . . . . . . . |
38 |
Device Maintenance . . . . . . . . . . . . . . . . . . . . . . . . . . |
.51 |
InstallApps. . . . . . . . . . . . . . . . . . . . . . . . . . . . . . . . |
39 |
System. . . . . . . . . . . . . . . . . . . . . . . . . . . . . . . . . . . . |
52 |
UninstallApps.. . . . . . . . . . . . . . . . . . . . . . . . . . . . . |
39 |
Time and Language. . . . . . . . . . . . . . . . . . . . . . . . . |
53 |
OpenApps. . . . . . . . . . . . . . . . . . . . . . . . . . . . . . . . . |
39 |
Book Settings. . . . . . . . . . . . . . . . . . . . . . . . . . . . . . |
53 |
CloseApps. . . . . . . . . . . . . . . . . . . . . . . . . . . . . . . . . |
39 |
LockScreenandSecurity. . . . . . . . . . . . . . . . . . . . . . |
55 |
Samsung Flow. . . . . . . . . . . . . . . . . . . . . . . . . . . . . . |
40 |
Lock Screen. . . . . . . . . . . . . . . . . . . . . . . . . . . . . . . . |
56 |
Samsung Notes.. . . . . . . . . . . . . . . . . . . . . . . . . . . . |
.41 |
Privacy.. . . . . . . . . . . . . . . . . . . . . . . . . . . . . . . . . . . . |
57 |
Samsung Recovery.. . . . . . . . . . . . . . . . . . . . . . . . . |
42 |
Update and Security. . . . . . . . . . . . . . . . . . . . . . . . |
58 |
Settings . . . . . . . . . . . . . . . . . . . . . . . . . . . . . . . . . . . . . . |
44 |
Accounts . . . . . . . . . . . . . . . . . . . . . . . . . . . . . . . . . . . . . |
60 |
Access Settings |
45 |
Accounts. . . . . . . . . . . . . . . . . . . . . . . . . . . . . . . . . . . |
.61 |
|
|
||
Connections |
46 |
Accessibility. . . . . . . . . . . . . . . . . . . . . . . . . . . . . . . . . . |
62 |
|
|
||
Devices |
47 |
Ease ofAccess. . . . . . . . . . . . . . . . . . . . . . . . . . . . . . |
63 |
|
|
||
Network and Internet. . . . . . . . . . . . . . . . . . . . . . . |
47 |
Getting Help. . . . . . . . . . . . . . . . . . . . . . . . . . . . . . . . . |
64 |
Display. . . . . . . . . . . . . . . . . . . . . . . . . . . . . . . . . . . . . . . |
49 |
Videos. . . . . . . . . . . . . . . . . . . . . . . . . . . . . . . . . . . . . |
65 |
Personalization. . . . . . . . . . . . . . . . . . . . . . . . . . . . . |
50 |
Simulators. . . . . . . . . . . . . . . . . . . . . . . . . . . . . . . . . |
65 |
Table of Contents |
|
iii |
|
Tips.. . . . . . . . . . . . . . . . . . . . . . . . . . . . . . . . . . . . . . . |
65 |
Samsung Support.. . . . . . . . . . . . . . . . . . . . . . . . . . |
65 |
Verizon Glossary. . . . . . . . . . . . . . . . . . . . . . . . . . . . |
65 |
Legal.. . . . . . . . . . . . . . . . . . . . . . . . . . . . . . . . . . . . . . . . . |
66 |
Legal Information.. . . . . . . . . . . . . . . . . . . . . . . . . . |
.67 |
Table of Contents |
iv |
|
Special Features
Learn about your mobile device’s special features.
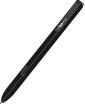
S Pen
The S Pen™ is a stylus that assists you in performing different functions. For more information, see “SPen” onpage31.
Samsung Flow
Easily unlock and sign in to your tablet with a smartphone equipped with a fingerprint scanner.
For more information see “SamsungFlow”onpage40.
Cortana
Cortana is your digital agent. She’ll help you get things done. The more you use Cortana, the more personalized your experience will be.
For more information see “Cortana”onpage22.
Special Features |
2 |
Getting Started
Learn about your mobile device hardware, assembly procedures, and how to get started usingyournewdevice.
Set Up Your
Device
Learn howto set upyourdeviceforthefirsttime.

Assemble Your Device
This section helpsyouto assembleyourdevice.
Install the SIM Card and a
MemoryCard
When you subscribe to a cellular network, you are providedwith a plug-in SIM card. During activation, your SIM card is loaded with your subscription details, such as your Personal Identification Number (PIN), available optional services, and otherfeatures.
Warning: Please be carefulwhen handlingthe SIM card to avoid damaging it. Keep all SIM cards out of reach of small children.
You can also install an optional microSD™, microSDHC™, or microSDXC™ memorycard (not included)to add more memoryspacetoyourdevice.Amemorycard can be installed at anytime. It is not necessaryto install it priorto usingthe device.
Caution: Exercise care when using the removal tool to ejectthe internal SIM card/Memorycardtray.
1.With the tablet face up, insert the card tray removal tool that came with your tablet into the hole of the
SIM card/Memorycardtray.
2.Insert the SIM card in the SIM card tray with the gold contactsfacing up.
Set Up Your Device |
5 |
3.Insert the new microSD card into the microSD card traywiththe gold contactsfacing down.
4.Gentlyclosethe SIM card/Memorycardtray.
Charge the Battery
Beforeturning onyourtablet, charge itfully.
Note: Forfastest chargingtimes, usetheAdaptive Fast Chargerthat camewithyourdevice. This charger provides faster charging only when connected to devicesthat supportAdaptive Fast Charging.
1.Insert the USB cable into the USB charger/
Accessoryport.
2.Connect the USB cable to the charging head, and then plugthe charging head into a standard outlet.
3.Unplug the charging head from the outlet and remove the USB cable from the device when charging is complete.
Caution: Use only charging devices and batteries approved bySamsung. Samsung accessories are designedforyourdeviceto maximize batterylife. Using other accessories may invalidate your warranty and maycause damage.
Set Up Your Device |
6 |

When to Charge the Battery
When the battery is low and only a few minutes of operation remain, the device sounds a warning tone at regularintervals.
In this condition, your device conserves its remaining batterypowerbydimmingthe screen.
When the battery level becomes too low, the device automaticallyturns off.
For a quick check of your battery level:
►► View the battery charge indicator located in the bottom right cornerofyourdevice’s display.Asolid color ( 
 ) indicates afull charge.
While charging, the device and the charger may become hot when using wireless charging or fast charging. This does not affectthe device’s lifespan or performance and is in the device’s normal range of operation.
The charger may stop charging if the battery becomes too hot.
If the device heats up while charging the battery:
1.Disconnect the charger from the device and close anyrunning apps.
2.Wait for the device to cool down, and then begin chargingthe device again.
•If the lower part of the device overheats, checkfordamagetothe connected USB cable.
Replace the damaged USB cable with a new
Samsung approved cable.
Set Up Your Device |
7 |
Battery Saver
Save the battery power by limiting the device’s functions.
1.On the taskbar, tap Start >
  Settings >
System > Battery.
2.Tap the checkmark next to Turn battery saver on automatically if my battery falls below to activate it.
•Drag the slider to the desired remaining battery percentage.
Start Using Your Device
Turn Your Device On or Off
The instructions below explain how to turn your device on oroff.
To turn the device on:
►► Press and hold the Power key until the device turns on.
To turn the device off:
►► Tap Start >
  Power > Shut down.
- or -
In Tablet mode, tap  Power > Shut down.
- or -
Press and hold the Power key until the locked screen appears, and then drag the locked screen downwards.
Set Up Your Device |
8 |
Lock or Unlock Your Device
Use your device’s screen lock features to secure your device.
By default, the device locks automatically when the screentimes out.
To lock the device:
►► Press the Power key.
The default Screen lock onyourdevice is Swipe.
To choose a more secure screen lock, see “Lock Screen” onpage56.
To unlock the device:
►► Press the Power key, and then swipe your finger up the screen.
Restart the Device
To restart the device:
►► Tap  Start > Power > Restart.
- or -
In Tablet mode, tap  Power > Restart.
If your device is frozen and unresponsive:
1.Press and hold the Power key for more than
10 seconds untilthe deviceturns off.
2.Press and hold the Power keyagainto restart it.
Set Up Your Device |
9 |
Set Up Your Device
Use the Set Up Wizard
The first time you turn your device on, a Welcome screen is displayed. It guidesyouthroughthe basics of setting upyourdevice.
Follow the prompts to choose a default language, connect to a Wi-Fi® network, set up accounts, learn aboutyourdevice’sfeatures, and more.
Transferring Data Between Devices
Move audio, video, image, or other types of files betweenyourtablet and a mobile device.
Caution: Do not disconnect the USB cable from the devicewhenyou aretransferringfiles. Doing so may cause data loss ordevice damage.
Note: The devices may not connect properly if they are connectedvia a USB hub. Directlyconnect devicesvia yourdevice’s USB charger/Accessoryport.
1.Connect a mobile device to your tablet using the
USB cable.
2.Transfer files between your tablet and the connected device.
Add an Email Account
You can add an email accounttoyourdevice.
1.On the taskbar, tap Start >
  Settings.
2.Tap Accounts > Email & app accounts.
3.Tap Add an account andfollowthe prompts.
Set Up Your Device |
10 |
Updating the Device
Keepyourdevice upto date bydownloading and installing updates, such as service packs and patches, for the operating system and other Microsoft® apps.
The device is set to download and install updates automatically.
To check for available updates manually:
1.On the taskbar, tap Start >
  Settings.
2.Tap Update&security> Windows update > Checkforupdates.
Set Up Your Device |
11 |
Learn About
Your Device
Learn some of the key features of your mobile device, includingthe screens and icons, aswell as howto navigatethe device and entertext usingthe keyboard.

Front View
Volume key |
|
|
|
|
|
|
|
|
Light sensor |
|
|
|
|
|
|
|
|
||
Powerkey |
|
|
|
|
|
|
|
|
|
|
|
|
|
|
|
|
|
||
Front camera |
|
|
|
|
|
|
|
|
Speaker |
|
|
|
|
|
|
||||
|
|
|
|
|
|
||||
Speaker |
|
|
|
|
|
||||
|
|
||||||||
 Accessory port
 USB charger
 Headset jack
Learn About Your Device |
13 |

Back View
Microphone |
|
|
|
Microphone |
|
|
|||
|
|
|
|
|
Rear camera
Keyboard dock port
Learn About Your Device |
14 |

Keyboard Cover
Stand
Keyboard
Connector
Touchpad
Learn About Your Device |
15 |
Connectingthe devicetothe Keyboard coverallows you to use a traditional keyboard and touchpad. The touchpadwill registerpressure onthe right orleft side, so you can use the touchpad like a mouse. You can also stand your device upright using the stand on the Keyboard cover.
Connecting the Keyboard Cover
1.Connect the keyboard dock port at the bottom of the device to the connector on the Keyboard cover.
2.Attach the stand to the device, and then set the device in position.
Note: Use carewhen connecting and removingthe tablet from the keyboard case. Make sure that the Keyboard Cover is securely attached to your device. If not, check the location of the keyboard dock port and reconnect the Keyboard Cover to your device.
Learn About Your Device |
16 |
Function Keys
Use function keys to easily access features and change settings, such as brightness and volume.
►► Simultaneously press and hold the Fn key and press a function key.
If you lock the Fn key, you can use function keys without pressingthe Fn key.
To lock the Fn key:
►► Tap the Fn Lock key.
Key |
Function |
|
F1 |
Launch Settings. |
|
|
|
|
F2 |
Decreasethe brightness ofthe display. |
|
|
|
|
F3 |
Increase the brightness of the display. |
|
|
|
|
|
Switch betweenthe LCD and an external |
|
F4 |
displaywhen an external displayis |
|
|
connected to the device. |
|
|
|
|
F5 |
Lock the touchpad. |
|
|
|
|
F6 |
Mute or unmute the audio. |
|
|
|
|
F7 |
Decreasethevolume. |
|
|
|
|
F8 |
Increase the volume. |
|
|
|
|
F9 |
Turn the Keyboard light on or off. |
|
|
|
|
F10 |
Openthetaskviewscreen. |
|
|
|
|
F11 |
Enter full screen mode. This function may |
|
not be available depending on the app. |
||
|
||
|
|
|
F12 |
Activate or deactivate Airplane mode. |
|
|
|
Learn About Your Device |
17 |
Touchpad
Use the touchpad to move the cursor or select items. The left and right side of the touchpad function the same as the left and right buttons of a mouse.
Note: Use only your fingers on the touchpad.
Basic Touchpad Functions
Move
To move the cursor, move your finger on the touchpad.
Click
Tap the touchpad.
Double-Click
Double-tapthetouchpad orleft side ofthetouchpad twice.
Right-Click
Tap the right side of the touchpad to perform the right clickfunction.
Drag
To move an item, select and drag it to the target positionwhiletouching and holdingthetouchpad.
Configure Touchpad Gestures
Configure touchpad gestures to use the touchpad more efficiently.
1.Tap  Start >
  Settings > Devices >
Mouse&touchpad.
2.Configure the settings under Touchpad.
Learn About Your Device |
18 |
Loading...