


 Loading...
Samsung Galaxy Note 10 256GB Zilver, Galaxy Note 10 Plus 256GB Zwart, Galaxy Note 10 Lite Zwart User manual
Usermanual

Tableofcontents
Features |
1 |
S Pen |
1 |
Wireless PowerShare |
1 |
Meet Bixby |
1 |
Camera |
1 |
Mobile continuity |
1 |
Cinematic infinity display |
1 |
Getting started |
2 |
Galaxy Note10 |
3 |
Galaxy Note10+ |
4 |
Assemble your device |
5 |
Charge the battery |
6 |
Wireless PowerShare |
7 |
Accessories |
8 |
Start using your device |
8 |
Use the Setup Wizard |
8 |
Transfer data from an old device |
9 |
Lock or unlock your device |
10 |
i |
UNL_STR_N970U_N975U_EN_UM_TN_SGO_080919_FINAL |

Tableofcontents
Side key settings |
11 |
Accounts |
11 |
Set up voicemail |
12 |
Navigation |
13 |
Navigation bar |
18 |
Customize your home screen |
20 |
S Pen |
27 |
Bixby |
36 |
Digital wellbeing |
37 |
Always On Display |
38 |
Flexible security |
39 |
Mobile continuity |
41 |
Multi window |
43 |
Edge screen |
44 |
Enter text |
49 |
Emergency mode |
52 |
Apps |
54 |
Using apps |
55 |
Uninstall or disable apps |
55 |
ii

Tableofcontents
Search for apps |
55 |
Sort apps |
55 |
Create and use folders |
56 |
Game Booster |
56 |
App settings |
57 |
Samsung apps |
58 |
Galaxy Essentials |
58 |
Bixby |
58 |
Galaxy Store |
58 |
Galaxy Wearable |
58 |
Game Launcher |
59 |
Samsung Global Goals |
59 |
PENUP |
59 |
Quick measure |
59 |
Samsung Health |
60 |
Samsung Members |
61 |
Samsung Notes |
62 |
Samsung Pay |
64 |
SmartThings |
65 |
iii

Tableofcontents
Smart Switch |
66 |
Calculator |
67 |
Calendar |
68 |
Camera |
70 |
Clock |
76 |
Contacts |
81 |
Gallery |
86 |
Internet |
92 |
Messages |
95 |
My Files |
97 |
Phone |
99 |
Google apps |
107 |
Chrome |
107 |
Drive |
107 |
Duo |
107 |
Gmail |
107 |
107 |
|
Maps |
108 |
Photos |
108 |
iv

Tableofcontents
Play Movies & TV |
108 |
Play Music |
108 |
Play Store |
108 |
YouTube |
108 |
Microsoft apps |
109 |
Outlook |
109 |
Office Mobile |
110 |
OneDrive |
110 |
Additional apps |
111 |
111 |
|
Netflix |
111 |
Spotify |
111 |
Settings |
112 |
Access Settings |
113 |
Search for Settings |
113 |
Connections |
113 |
Wi-Fi |
113 |
Bluetooth |
115 |
Phone visibility |
116 |
v

Tableofcontents
NFC and payment |
117 |
Airplane mode |
118 |
Data usage |
118 |
Mobile hotspot |
118 |
Tethering |
120 |
Nearby device scanning |
121 |
Connect to a printer |
121 |
MirrorLink |
121 |
Virtual Private Networks |
122 |
Private DNS |
122 |
Ethernet |
123 |
Sounds and vibration |
124 |
Sound mode |
124 |
Vibrations |
125 |
Volume |
125 |
Ringtone |
126 |
Notification sounds |
126 |
System sounds and vibration |
126 |
Dolby Atmos |
127 |
vi

Tableofcontents
Equalizer |
127 |
Headset audio options |
127 |
Adapt sound |
127 |
Separate app sound |
128 |
Notifications |
128 |
Manage notifications |
128 |
Customize app notifications |
129 |
Smart alert |
129 |
Smart pop-up view |
129 |
Display |
129 |
Screen brightness |
129 |
Blue light filter |
130 |
Night mode |
130 |
Screen mode |
130 |
Font size and style |
131 |
Screen zoom |
131 |
Screen resolution |
131 |
Full screen apps |
131 |
Screen timeout |
132 |
vii

Tableofcontents
Accidental touch protection |
132 |
Touch sensitivity |
132 |
Screen saver |
132 |
Reduce animations |
132 |
Lift to wake |
133 |
Double tap to wake |
133 |
Smart stay |
133 |
One-handed mode |
133 |
Device maintenance |
134 |
Quick optimization |
134 |
Battery |
134 |
Storage |
135 |
Memory |
136 |
Device security |
136 |
Language and input |
137 |
Date and time |
139 |
Troubleshooting |
140 |
Lock screen and security |
143 |
Screen lock types |
143 |
viii

Tableofcontents
Google Play Protect |
144 |
Find My Mobile |
144 |
Security update |
145 |
Samsung Pass |
145 |
Install unknown apps |
145 |
Secure Folder |
146 |
Encrypt SD card |
146 |
View passwords |
146 |
Security update service |
147 |
Device administration |
147 |
Credential storage |
147 |
Strong Protection |
147 |
Advanced security settings |
148 |
Location |
148 |
App permissions |
149 |
Send diagnostic data |
149 |
Accounts |
150 |
Samsung Cloud |
150 |
Add an account |
150 |
ix
Tableofcontents
Account settings |
150 |
Remove an account |
151 |
Backup and restore |
151 |
Google settings |
152 |
Accessibility |
152 |
Screen Reader |
152 |
Visibility enhancements |
153 |
Hearing enhancements |
154 |
Interaction and dexterity |
155 |
Advanced settings |
157 |
Installed services |
157 |
Other settings |
158 |
Help |
158 |
Dual Messenger |
158 |
About phone |
158 |
Learn more |
159 |
Videos |
159 |
Smart Simulator |
159 |
Samsung Care |
159 |
x

Tableofcontents
Talk to an agent |
159 |
Tips |
159 |
Legal information |
160 |
Samsung Knox |
160 |
Maintaining water and dust resistance |
161 |
Maintaining dust and water resistance |
161 |
Restricting children’s access to your mobile device |
162 |
Samsung Electronics America, Inc. |
162 |
xi

Features
 S Pen
S Pen
The S Pen is designed for special functions with Samsung Galaxy devices. See S Pen on page 27.
 WirelessPowerShare
Wirelessly charge your Galaxy Buds, Galaxy Watch or even a friend’s phone right from your device. See Wireless PowerShare on page 7.
 MeetBixby
Bixby learns what you like to do and works with your favorite apps and services to help you get more done. See Bixby on page 36.
 Camera
Enjoy a full kit of pro lenses and pro-grade video modes and settings. See Camera on page 70.
 Mobilecontinuity
Transition between your mobile devices and personal computers for messaging, phone calls, receiving notifications, screen mirroring, and sharing multimedia files. See Mobile continuity on page 41.
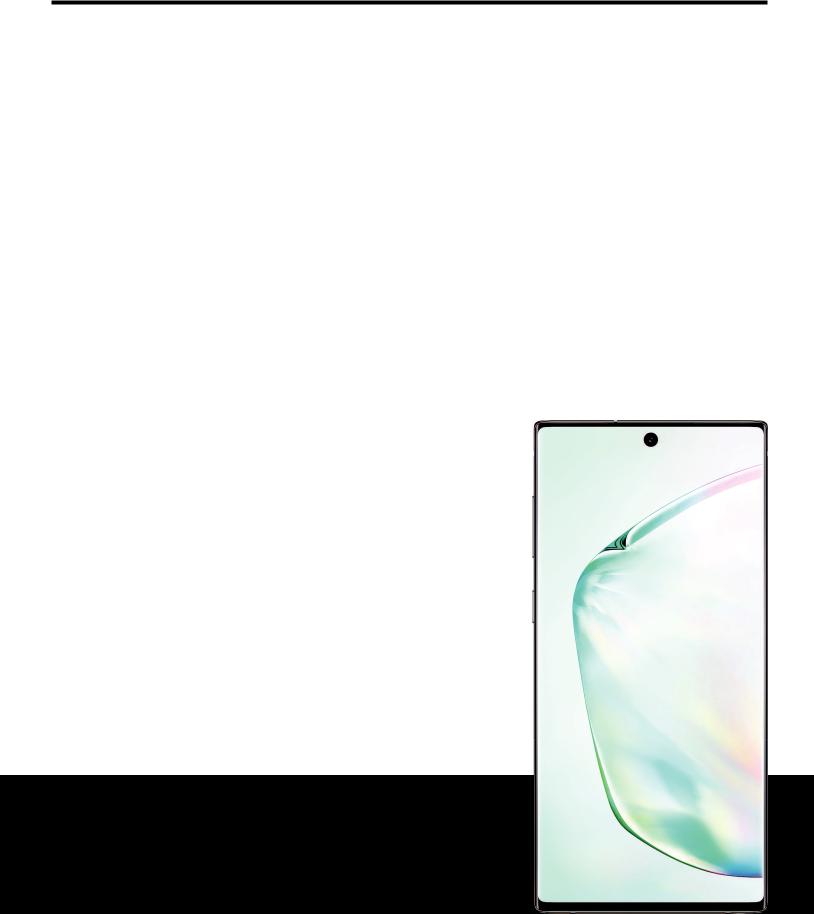
 Cinematicinfinitydisplay
Enjoy every inch of your dynamic AMOLED screen without the interruption of keys or buttons.
1
Getting started
Galaxy Note10
Galaxy Note10+
Assemble your device
Start using your device
2
Gettingstarted
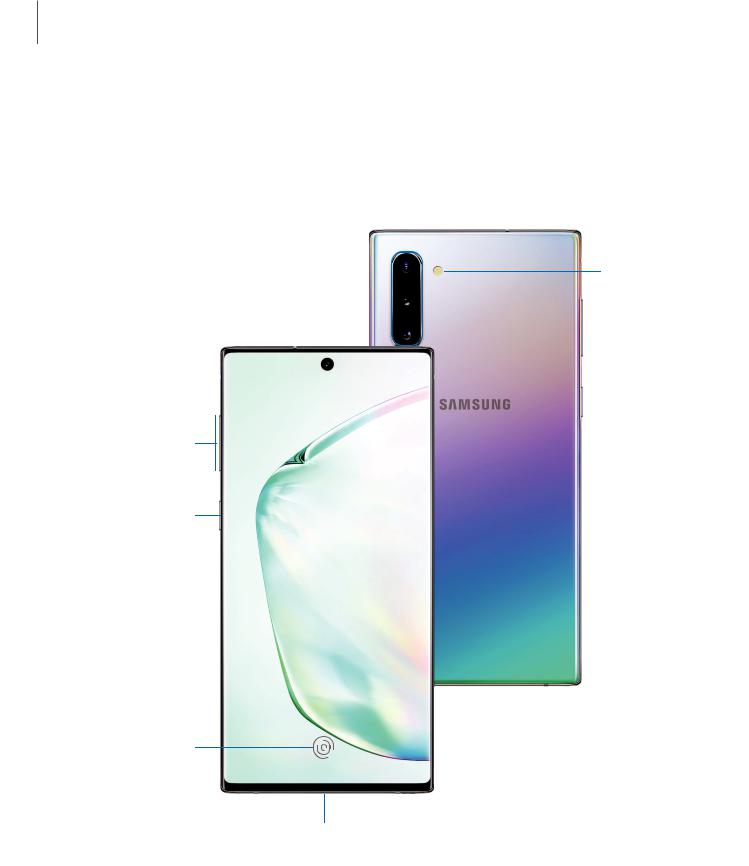
GalaxyNote10
 Rear camera
Flash
Front camera
Volume keys
Side key
Fingerprint
scanner
USB charger/Audio port
Devicesandsoftwareareconstantlyevolving— theillustrationsyouseehereareforreferenceonly.
3

Gettingstarted
GalaxyNote10+
 Rear camera
Flash
Front camera
Volume keys
Side key
Fingerprint
scanner
USB charger/Audio port
Devicesandsoftwareareconstantlyevolving— theillustrationsyouseehereareforreferenceonly.
4
Gettingstarted
Assembleyourdevice
Install SIM/microSD card
Place the SIM card and optional microSD card
(sold separately) into the tray with the gold
contacts facing down.
Charge your device
Before turning on your device, charge it fully.

 NOTE Your device is IP68 rated for dust and water resistance. To maintain the water-resistant and dust-resistant features of your device, make sure that the SIM card/Memory card tray openings are maintained free of dust and water, and the tray is securely inserted prior to any exposure to liquids. For more information, see Maintaining water and dust resistance on page 161.
Devicesandsoftwareareconstantlyevolving— theillustrationsyouseehereareforreferenceonly.
5

Gettingstarted
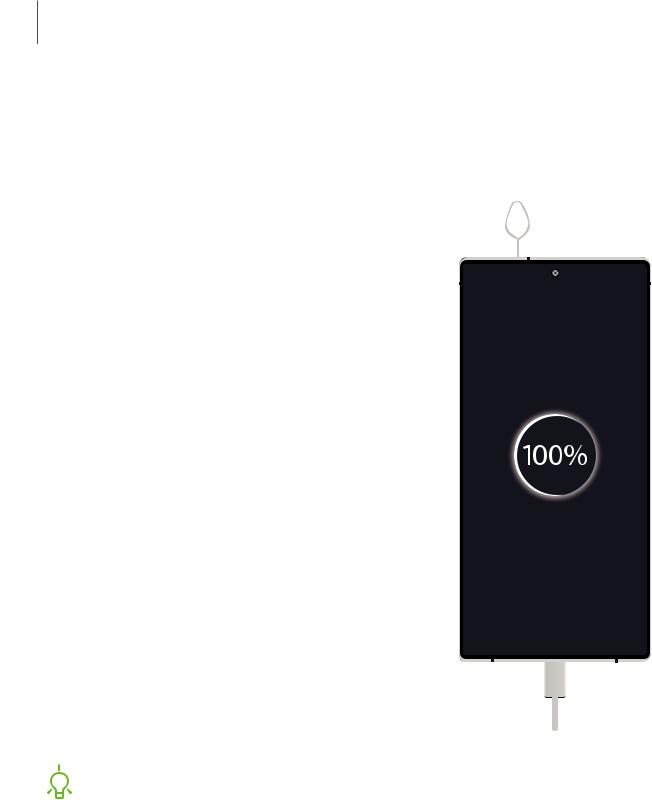
Charge the battery
Your device is powered by a rechargeable battery. A charger (charging head and USB Type-C cable) is included with the device for charging the battery from a power outlet.
While charging, the device and the charger may become hot and stop charging. This usually does not affect the device’s lifespan or performance and is in the device’s normal range of operation.

 TIP Disconnectthe chargerfromthe device andwaitforthe device tocool down.
For more information,visitsamsung.com/us/support/answer/ANS00076952.
6
Gettingstarted
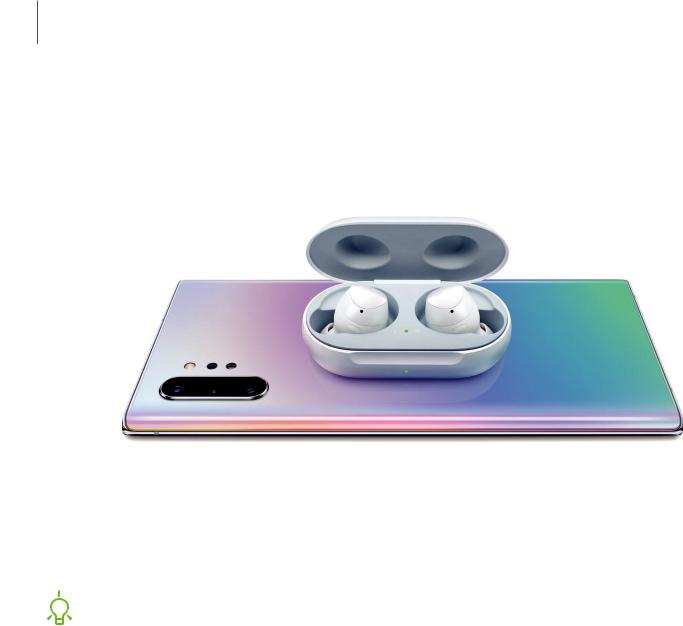
Wireless PowerShare
Wirelessly charge your compatible Samsung devices using your phone. Some features are not available while sharing power.
1.From Quick Settings, tap Wireless PowerShare to enable this feature.
2.With the phone face down, place the compatible device on the back of the phone to charge. A notification sound or vibration occurs when charging begins.

 NOTE Wireless PowerShare works with most Qi-Certified devices. Requires minimum 30% battery to share. Speed and power efficiency of charge varies by device. May not work with some accessories, covers, or other manufacturer’s devices. If you have trouble connecting or charging is slow, remove any cover from each device. May affect call reception or data services, depending on your network environment.
For best results when using Wireless PowerShare, please note:
•Remove any accessories or cover before using the feature. Depending on the type of accessory or cover, Wireless PowerShare may not work properly.
•The location of the wireless charging coil may vary by device, so you may need to adjust the placement to make a connection. When charging starts, a notification or vibration will occur, so the notification will help you know you've made a connection.
Devicesandsoftwareareconstantlyevolving— theillustrationsyouseehereareforreferenceonly.
7

Gettingstarted
•Call reception or data services may be affected, depending on your network environment.
•Charging speed or efficiency can vary depending on device condition or surrounding environment.
•Do not use headphones.
Accessories
Supported accessories (sold separately) can be configured through Settings. This option may only appear after you have connected an accessory to your device.
Visit samsung.com/us/mobile/mobile-accessories to learn more.
◌ From Settings, tap Advanced features > Accessories.
Startusingyourdevice
Use the Side key to turn your device on. Do not use the device if the body is cracked or broken. Use the device only after it has been repaired.
◌ Press and hold the Side key to turn the device on.
• To turn the device off, open the Notification panel, and tap Power >
 Power off. Confirm when prompted.
• To restart your device, open the Notification panel, and tap Power >

 Restart.

 TIP You can also turn your device off by pressing the Side and Volume down keys at the same time. To learn more about powering off your device from Settings, tap
 Advanced features > Side key > How to power off your phone.
Use the Setup Wizard
The first time you turn your device on, the Setup Wizard guides you through the basics of setting up your device.
Follow the prompts to choose a default language, connect to a Wi-Fi® network, set up accounts, choose location services, learn about your device’s features, and more.
8
Gettingstarted
Transferdata from an old device
Use Smart Switch™ to transfer contacts, photos, music, videos, messages, notes, calendars, and more from your old device. Smart Switch can transfer your data via USB cable, Wi-Fi, or computer. You can also use the included On-the-Go adapter to transfer content quickly and easily from your old device without installing the Smart Switch app.
Visit samsung.com/us/support/owners/app/smart-switch to learn more.
1.From Settings, tap Accounts and backup > Smart Switch.
2.Follow the prompts and select the content to transfer.
Old Device |
|
|
|
|
|
|
|
|
|
|
|
New Galaxy |
||||||||||
|
|
|
|
|
|
|
|
|
|
|
|
|
|
|
|
|
|
|
|
|
|
|
|
|
|
|
|
|
|
|
|
|
|
|
|
|
|
|
|
|
|
|
|
|
|
|
|
|
|
|
|
|
|
|
|
|
|
|
|
|
|
|
|
|
|
|
|
|
|
|
|
|
|
|
|
|
|
|
|
|
|
|
|
|
|
|
|
|
|
|
|
|
|
|
|
|
|
|
|
|
|
|
|
|
|
|
|
|
|
|
|
|
|
|

 NOTE The USB option must be set to Media device (MTP) on the other device. Transferring content with a USB cable may increase battery consumption. Make sure your battery is fully charged.
Visit samsung.com/smartswitch for more information and to learn how to use the On-the-Go adapter to transfer content faster.
Devicesandsoftwareareconstantlyevolving— theillustrationsyouseehereareforreferenceonly.
9
Gettingstarted
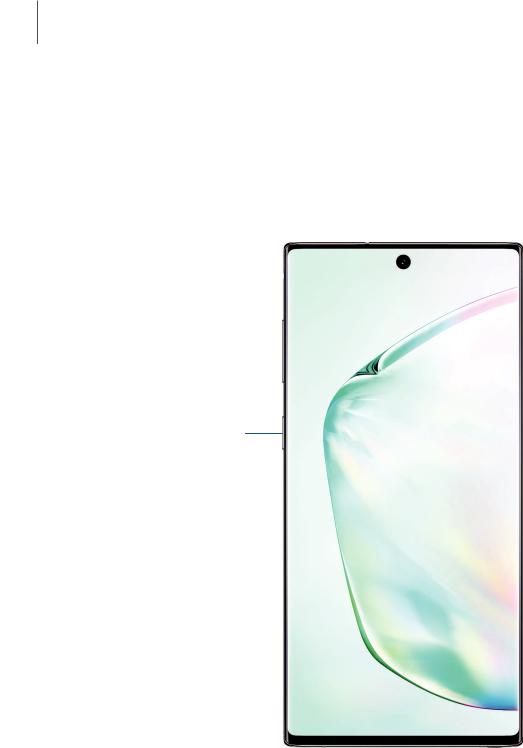
Lock orunlock yourdevice
Use your device’s screen lock features to secure your device. By default, the device locks automatically when the screen times out. For more information about screen locks, see Lock screen and security on page 143.
Side key
Press to lock. Press to turn on the screen, and then swipe the screen to unlock it.
Devicesandsoftwareareconstantlyevolving— theillustrationsyouseehereareforreferenceonly.
10

Gettingstarted
Side keysettings
You can customize the shortcuts assigned to the Side key.
Double press
Choose an option to customize which feature is launched when the Side key is pressed twice.
1.From Settings, tap Advanced features > Side key.
2.Tap Double press to enable this feature, and tap an option: • Quick launch camera (default)
• Open Bixby • Open app
Press and hold
Choose an option to customize which feature is launched when the Side key is pressed and held.
1.From Settings, tap Advanced features > Side key.
2.Under the Press and hold heading, tap an option:
•Wake Bixby (default)
•Power off menu
Accounts
Set up and manage your email accounts, your Google™ Account, and Samsung account.

 TIP Accounts may support email, calendars, contacts, and other features. See your carrier for more information.
Add a Google Account
Sign in to your Google Account to access your Google cloud storage, apps installed from your account, and make full use of your device’s Android™ features.
1.From Settings, tap Accounts and backup > Accounts.
2.Tap Add account > Google.
11

Gettingstarted

 NOTE When you sign in to a Google Account, Factory Reset Protection (FRP) is activated. FRP requires your Google Account information when resetting to factory settings. For more information, see Factory reset protection on page 142.
Add a Samsung account
Sign in to your Samsung account to access exclusive Samsung content and make full use of Samsung apps.
1.From Settings, tap Accounts and backup > Accounts.
2.Tap Add account > Samsung account.

 TIP To quickly access your Samsung account, from Settings tap
 Samsung account.
Add an Outlook account
Sign in to your Outlook account to view and manage email messages.
1.From Settings, tap Accounts and backup > Accounts.
2.Tap Add account > Outlook®.
Set up voicemail
You can set up your voicemail service when you access it for the first time. You can access voicemail through the Phone app.
1.From Phone, touch and hold the
 1 key.
2.Follow the tutorial to create a password, record a greeting, and record your name.
12
Gettingstarted
Navigation
A touch screen responds best to a light touch from the pad of your finger or a capacitive stylus. Using excessive force or a metallic object on the touch screen may damage the tempered glass surface and void the warranty.
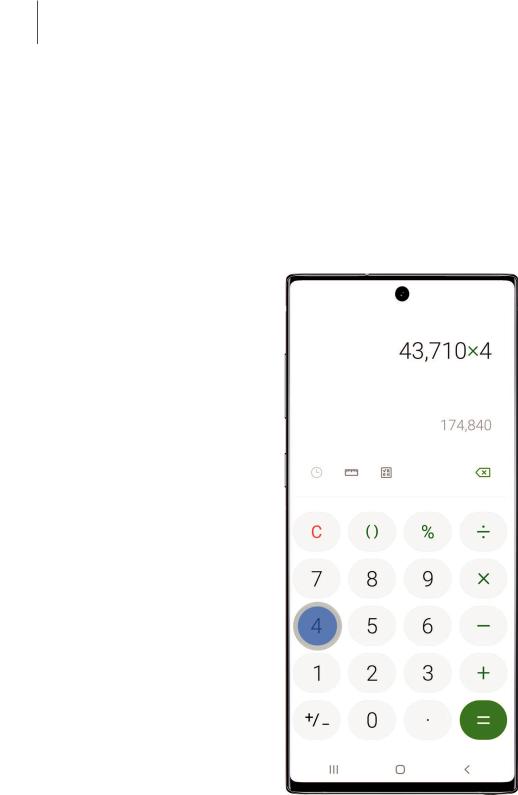
Tap
Lightly touch items to select or launch them.
•Tap an item to select it.
•Double-tap an image to zoom in or out.
Devicesandsoftwareareconstantlyevolving— theillustrationsyouseehereareforreferenceonly.
13
Gettingstarted
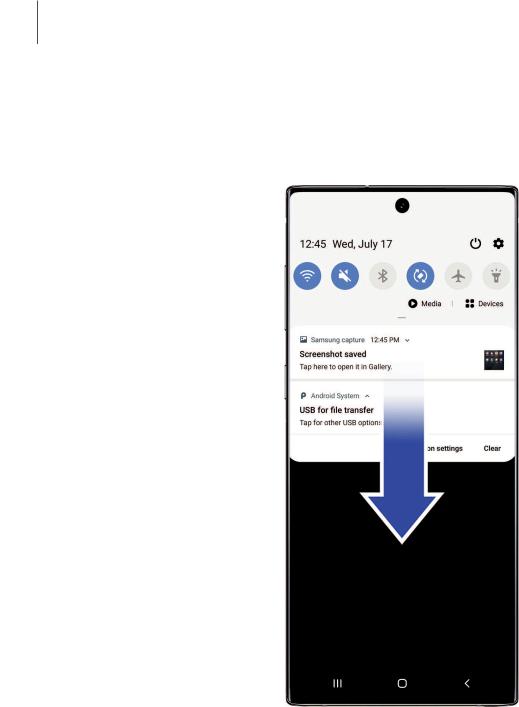
Swipe
Lightly drag your finger across the screen.
•Swipe the screen to unlock the device.
•Swipe the screen to scroll through the Home screens or menu options.
Devicesandsoftwareareconstantlyevolving— theillustrationsyouseehereareforreferenceonly.
14
Gettingstarted
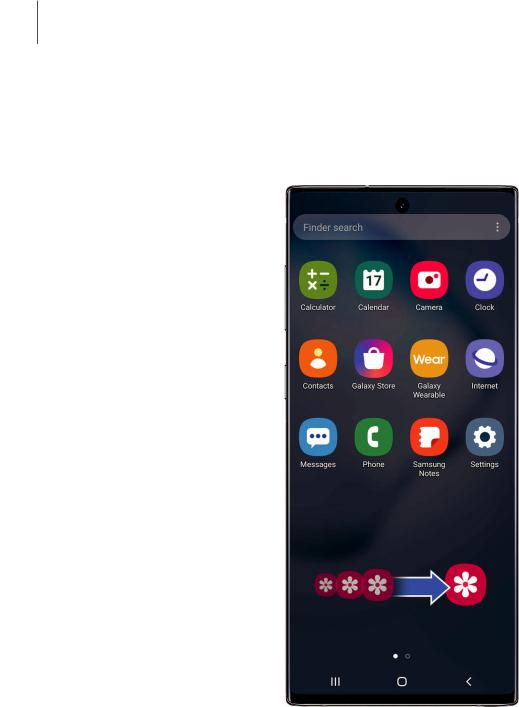
Drag and drop
Touch and hold an item, and then move it to a new location.
•Drag an app shortcut to add it to a Home screen.
•Drag a widget to place it in a new location.
Devicesandsoftwareareconstantlyevolving— theillustrationsyouseehereareforreferenceonly.
15

Gettingstarted
Zoom in and out
Bring your thumb and forefinger together or apart to zoom in and out.
•Bring your thumb and forefinger together on the screen to zoom out.
•Move your thumb and forefinger apart on the screen to zoom in.
Devicesandsoftwareareconstantlyevolving— theillustrationsyouseehereareforreferenceonly.
16

Gettingstarted
Touch and hold
Touch and hold items to activate them.
•Touch and hold a field to display a pop-up menu of options.
•Touch and hold a Home screen to customize the Home screen.
Devicesandsoftwareareconstantlyevolving— theillustrationsyouseehereareforreferenceonly.
17
Gettingstarted
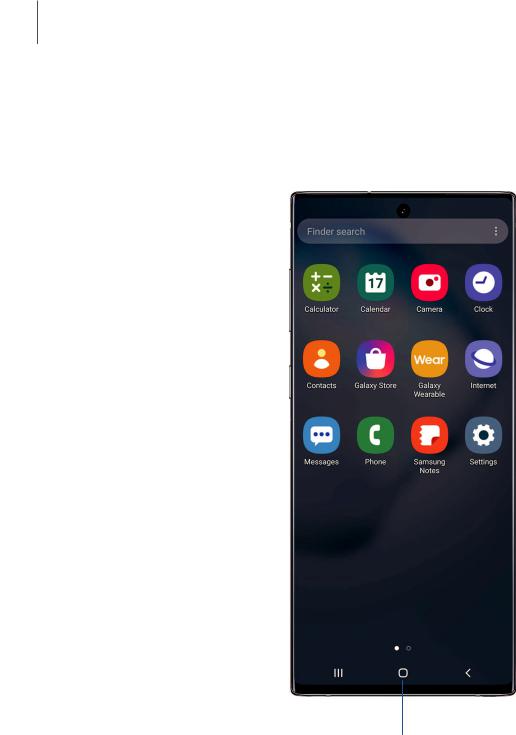
Navigation bar
The Navigation bar, at the bottom of the screen, displays the navigation keys.
Recent apps |
|
|
|
Back |
|
|
Home
Devicesandsoftwareareconstantlyevolving— theillustrationsyouseehereareforreferenceonly.
18
Loading...