


 Loading...
Usermanual

Tableofcontents
Features |
1 |
Bixby |
1 |
Auto workout tracking and run coaching |
1 |
Heart rate monitoring |
1 |
Sleep management |
1 |
Battery and Wireless PowerShare |
2 |
Water and dust resistance |
2 |
Get started |
3 |
LTE model |
4 |
Bluetooth model |
5 |
Assemble your device |
6 |
Charge the battery |
7 |
Wear the Watch |
9 |
Activation |
10 |
Start using your device |
11 |
Galaxy Wearable app |
11 |
Lock or unlock your device |
13 |
Navigation |
14 |
i |
WEA_R82X_R83X_EN_UM_TN_SHH_091119_FINAL |

Tableofcontents
Change the watch face |
18 |
Enter text |
19 |
Quick panel |
21 |
Notifications |
23 |
Water lock mode |
25 |
Do not disturb |
26 |
Theater mode |
26 |
Goodnight mode |
26 |
Daily briefing |
27 |
Apps |
28 |
Using apps |
29 |
Access apps |
29 |
Auto open apps |
29 |
Install apps |
29 |
Sort apps |
29 |
App permissions |
30 |
Recent apps |
30 |
Hide apps |
30 |
Uninstall apps |
30 |
ii

Tableofcontents
Samsung apps |
31 |
Alarm |
31 |
Bixby |
31 |
Calendar |
33 |
Contacts |
33 |
34 |
|
Find My Phone |
35 |
Galaxy Store |
35 |
Gallery |
35 |
Messages |
37 |
Music |
39 |
Phone |
41 |
Reminder |
42 |
Samsung Health |
43 |
Weather |
51 |
World clock |
51 |
Additional apps |
52 |
Spotify |
52 |
iii

Tableofcontents
Settings |
53 |
Access Settings |
54 |
Connections |
54 |
Bluetooth |
54 |
Mobile networks |
54 |
Wi-Fi |
55 |
NFC |
55 |
Connection alerts |
56 |
Airplane mode |
56 |
Data usage |
56 |
Location |
57 |
Connect to a new phone |
57 |
Sound and vibration |
57 |
Sound mode |
57 |
Vibrate with sound |
58 |
Volume |
58 |
Vibration intensity |
58 |
Long vibration |
58 |
Ringtone |
58 |
iv

Tableofcontents
Ringtone vibration |
59 |
Notification sound |
59 |
Notification vibration |
59 |
Touch sounds |
59 |
Hourly chime |
59 |
Display |
60 |
Watch faces |
60 |
Adjust screen brightness |
60 |
Set the screen timeout |
60 |
Show last app |
61 |
Background style |
61 |
Font style |
61 |
Font size |
61 |
Device maintenance |
62 |
Date and time |
62 |
Power saving mode |
62 |
Watch only mode |
63 |
Reset the Watch |
63 |
Watch status |
63 |
v

Tableofcontents
Lock screen and security |
64 |
Set a screen lock |
64 |
Accessibility |
64 |
Screen Reader |
64 |
Visibility enhancements |
65 |
Hearing enhancements |
65 |
Advanced settings |
65 |
Text to speech |
66 |
Other settings |
66 |
Custom shortcut |
66 |
Wake-up gesture |
66 |
Touch wake-up |
66 |
Touch sensitivity |
67 |
Watch info |
67 |
Learn more |
68 |
Videos |
68 |
Tips |
68 |
Smart Simulator |
68 |
Samsung Care |
68 |
vi

Tableofcontents
Talk to an agent |
68 |
Legal information |
69 |
Samsung Knox |
69 |
Maintaining water and dust resistance |
69 |
Restricting children’s access to your mobile device |
70 |
Samsung Electronics America, Inc. |
70 |
vii

Features
Features
 Bixby
Bixby
Bixby responds to your voice commands and can help you understand your settings and set up your device. For more information, see Bixby on page 31.

 Autoworkouttrackingandrun
coaching
Automatically track your exercises and get real-time coaching during your run. For automatic workout tracking, see Auto workout tracking on page 45. For run coaching, see Running coach on page 46.
 Heartratemonitoring
Make your workouts more efficient by configuring your target heart rate zone and monitor your heart rate continuously throughout the day. For more information, see Heart rate on page 46.
 Sleepmanagement
Achieve a better night’s rest with built-in sleep tracking. A sleep algorithm detects when you fall asleep and wake up, graphing the results to help you track your sleep patterns. For more information, see Sleep on page 46.
1

Features
 BatteryandWirelessPowerShare
Go nonstop with a long-lasting battery that lasts for days on a single charge. You can also charge your watch on a Galaxy smartphone equipped with Wireless PowerShare. For more information, see Charge the battery on page 7.
 Wateranddustresistance
This device is rated 5ATM, and passed military specification (MIL-STD-810G) testing. See Maintaining water and dust resistance on page 69.
2
Getstarted
LTE model
Bluetooth model
Assemble your device
Start using your device
3

Get started
LTE model
Atmospheric pressure sensor 
LTE/GPS antenna
Light sensor
Speaker
Touchscreen
Band
Pressure vent
Heart rate  sensor
Back key
Microphone
Home/Power key
Devicesandsoftwareareconstantlyevolving— theillustrationsyouseehereareforreferenceonly.
4

Get started
Bluetooth model
Atmospheric pressure sensor 
GPS antenna
Light sensor
Speaker
Touchscreen
Band
Pressure vent
Heart rate  sensor
Back key
Microphone
Home/Power key
Devicesandsoftwareareconstantlyevolving— theillustrationsyouseehereareforreferenceonly.
5
Get started
Assembleyourdevice
Learn more about your device hardware, assembling and charging, and how to get started using your new device.
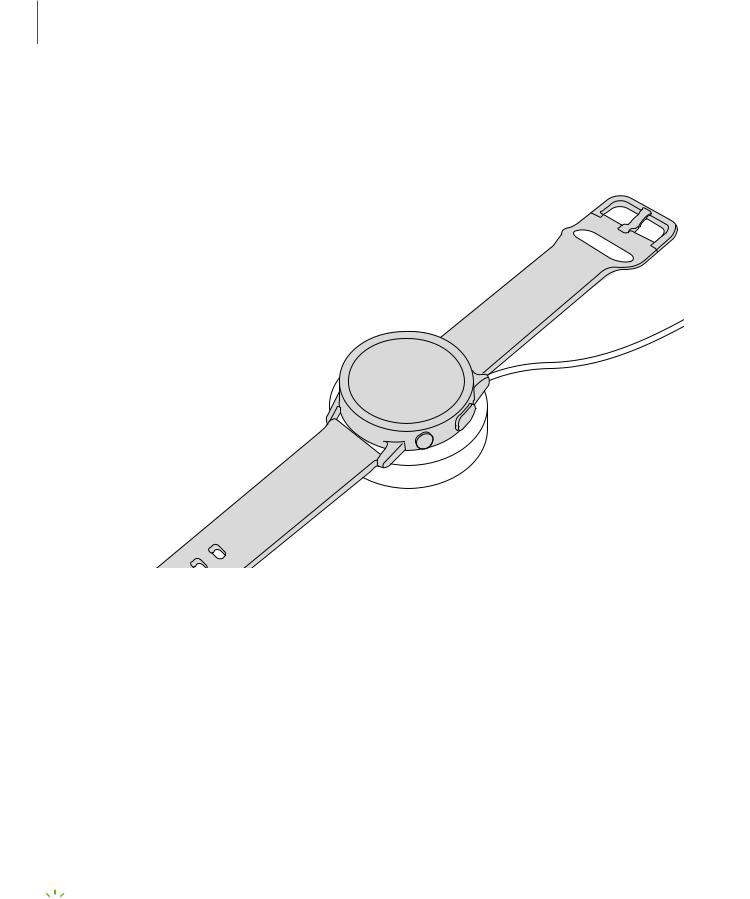
Charge your device
Place the watch on the wireless charging surface.
Devicesandsoftwareareconstantlyevolving— theillustrationsyouseehereareforreferenceonly.
6
Get started
Charge the battery
Your device is powered by a rechargeable battery.
1.Connect the wireless charger to a USB charging port.
2.Place the watch onto the wireless charger, aligning the center of your watch with the center of the wireless charger.
3.After fully charging, disconnect the watch from the wireless charger.
 CAUTION The charging head for plugging the USB cable into a wall outlet is not included. Use only Samsung charging devices rated with an output voltage of 5v and an output current of over 150mA (sold separately). Samsung accessories are designed for your device to maximize battery life. Using other accessories may void your warranty and may cause damage.

 NOTE Prevent the USB charger port and the small end of the charger cable from coming into contact with conductive materials, such as liquids, dust, metal powders, and pencil leads.
Devicesandsoftwareareconstantlyevolving— theillustrationsyouseehereareforreferenceonly.
7

Get started
While charging, the device and the charger may become hot. This does not affect the device’s lifespan or performance and is in the device’s normal range of operation.
Remove the device from the charger and wait for the device to cool down. For more information, visit https://www.samsung.com/us/support/answer/ANS00076952.

 NOTE Do not disassemble, modify, or repair your device. Placing objects, such as magnetic stripe cards, including credit cards, phone cards, passbooks, and boarding passes, next to the device or charger may cause damage from the charger or device’s magnetic field.
8

Get started
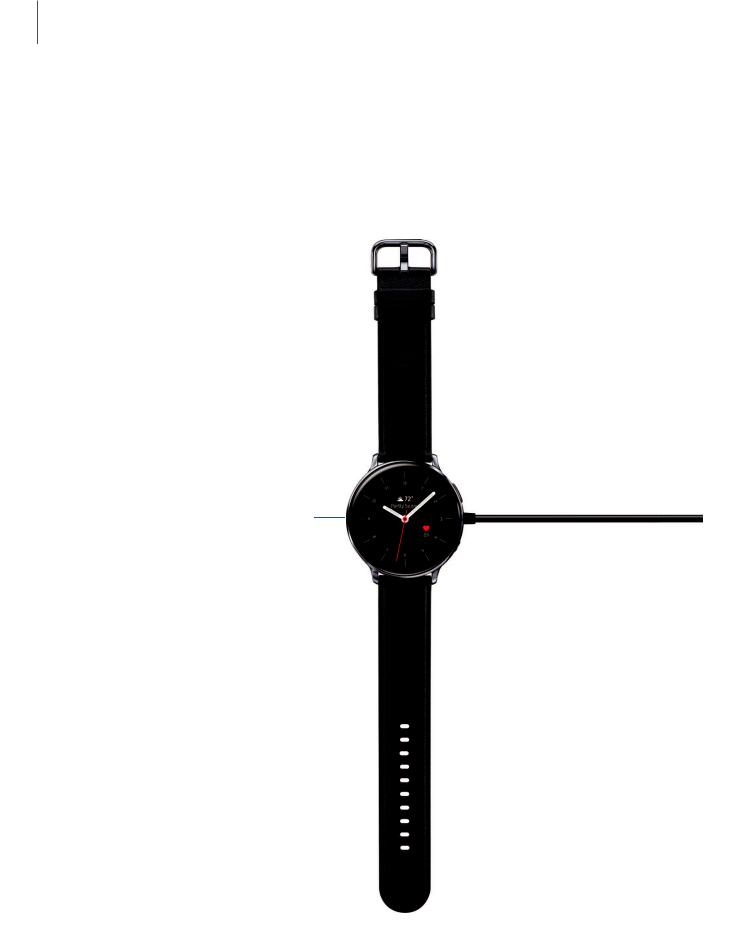
Wearthe Watch
Wrap the watch firmly around your lower arm just above your wrist as shown below. Do not fasten the watch too tightly.
 WARNING Wear the device correctly. If you feel discomfort while using the device, stop using it. If your device becomes hot, please remove it until it cools.
1.Open the buckle and place the strap around your wrist.
2.Fit the strap to your wrist, insert the pin into an adjustment hole, and then secure the buckle to close it.
•Bluetooth: Slide the end of the strap through the buckle and underneath the other strap.
•LTE: Slide the end of the strap through the loop on the other strap.
Strap tips and precautions
•Some people may experience discomfort when wearing the watch for prolonged periods.
•If you have sensitive skin or fasten the watch too tightly, you may feel some discomfort.
Devicesandsoftwareareconstantlyevolving— theillustrationsyouseehereareforreferenceonly.
9

Get started
•Do not expose the straps to very wet conditions. Wet straps can cause skin irritations. Dry the straps first. If you experience skin irritation when wearing the watch, stop wearing it and consult a physician.
Replace the strap
Detach the strap from the watch to replace it with a new one.
To remove the strap:
◌Slide the strap’s spring bar and pull the strap away from the watch. To replace the strap:
◌Insert one end of the spring bar into the lug, slide the spring bar, and connect the new strap.
Activation
The Galaxy Watch Active2 (R825 and R835) are 4G LTE-enabled. Get texts, alerts, make and receive calls, even when you leave your phone behind.
Consult your service provider for more information about activation.
Devicesandsoftwareareconstantlyevolving— theillustrationsyouseehereareforreferenceonly.
10

Get started
Startusingyourdevice
Use the Home/Power key to turn your watch on or off.
◌Press and hold the Home/Power key.
•To turn the watch off, press and hold the Home/Power key, and then tap
Power off.

 TIP To restart the watch, press and hold the Home/Power key for more than seven seconds.
To turn on the screen:
◌ Press the Home/Power key or the Back key.

 TIP You can also turn on the screen by raising your wrist. See Wake-up gesture on page 66.
To turn off the screen:
◌ Cover the screen with your palm.
GalaxyWearable app
To connect your watch to a smartphone, install the Galaxy Wearable app on the smartphone. You can download the app from the Galaxy Store or the Google Play™ store.
Galaxy Wearable is compatible with select devices using Android 5.0 and later with at least 1.5 GB RAM. Supported devices may vary by carrier and device. Some features may not be available. For best results, connect with compatible Samsung Galaxy devices. Visit samsung.com/us/support/owners/app/galaxy-wearable-watch for a list of compatible smartphones.
11

Get started
 Connect the watch to a smartphone
Turn on the watch before connection to your phone.
1.From the Apps screen of the smartphone, tap Galaxy Wearable. If necessary, update the app to the latest version.
2.Tap Start the Journey and select your device.
3.When the Bluetooth® pairing request window is displayed, confirm the passkeys displayed on your watch and smartphone match, and then tap OK.
OK.
4.Follow the prompts to complete the connection.
When the devices are connected, a tutorial is displayed on the watch’s screen. Follow the prompts to the learn basic controls.
Back up data
The watch can only be connected to one smartphone at a time. When you connect the watch to a new smartphone, the watch automatically resets and all data is removed from its memory. Make sure you back up any important data stored on your watch.
1.From Galaxy Wearable, tap the Home tab.
2.Tap Account and backup > Back up and restore > Back up data.
Remote connection
Set the watch to remotely connect to the smartphone when a Bluetooth connection between the devices is not available. With this connection, you can still receive notifications from your smartphone. The watch and smartphone must be connected to the same Wi-Fi® network in order to receive notifications and calls.
To enable or disable this feature:
1.From Galaxy Wearable, tap the Home tab.
2.Tap Account and backup > Remote connection.
12
Get started
 Disconnect
1.From Galaxy Wearable, tap the Home tab.
2.Tap Menu > Disconnect.
Lock orunlock yourdevice
By default your screen is not locked. You can use the screen lock feature to secure your device. See Set a screen lock on page 64.
When enabled, your watch locks when you remove it from your wrist or when the screen times out while you are wearing it.
To unlock the watch:
◌ Press and hold the Home/Power key.
To lock the watch:
◌ Cover the screen with your palm.
13
Get started
Navigation
The touchscreen responds best to a light touch from the pad of your finger. Using excessive force or a metallic object on the touchscreen may damage the tempered glass surface and void the warranty.
Tap
Lightly tap the screen to launch an app or select a menu item.
Devicesandsoftwareareconstantlyevolving— theillustrationsyouseehereareforreferenceonly.
14

Get started
 Swipe
Swipe
Lightly drag your finger vertically or horizontally across the screen to view panels.
Devicesandsoftwareareconstantlyevolving— theillustrationsyouseehereareforreferenceonly.
15

Get started
 Drag
Drag
Touch and hold an item, and then move it to a new location.
Devicesandsoftwareareconstantlyevolving— theillustrationsyouseehereareforreferenceonly.
16
Loading...