


 Loading...
Usermanual

Contents
Features
Bixby | Biometric security | Dark mode
Gettingstarted
Device layout: Galaxy A51
Set up your device: Charge the battery
Start using your device: Turn on your device | Use the Setup Wizard | Transfer data from an old device | Lock or unlock your device | Side key settings | Accounts | Set up voicemail | Navigation | Navigation bar | Customize your home screen | Bixby | Digital wellbeing and parental controls | Always On Display | Biometric security | Mobile continuity | Multi window | Edge screen | Enter text | Emergency mode
Customize your home screen: App icons | Create and use folders | Wallpaper | Themes | Icons | Widgets | Home screen settings | Easy mode | Status bar | Notification panel
CameraandGallery
Camera: Navigate the camera screen | Configure shooting mode | AR Zone | Live focus | Scene optimizer | Record videos | Super Slow-mo | Super steady | Camera settings
Gallery: View pictures | Edit pictures | Play video | Edit video | Share pictures and videos | Delete pictures and videos | Create movie | Take a screenshot
Mobilecontinuity
Link to Windows
Samsungapps
Galaxy Essentials | AR Zone | Bixby | Galaxy Store | Galaxy Wearable | Game Launcher | Samsung Global Goals | SmartThings | Tips | Calculator | Calendar | Clock | Contacts | Internet | Messages | My Files | Phone | Samsung Health | Samsung Notes
1 VZW_A515U_EN_UM_TN_TBC_031820_FINAL

Contents
Googleapps
Chrome | Drive | Duo | Gmail | Google | Google Pay | Maps | Photos | Play Movies & TV | Play Store | YouTube | YT Music
Carrierapps
Call Filter | Cloud | Digital Secure | My Verizon | Visual Voicemail | Message+
Microsoftapps
Outlook | LinkedIn | Office | OneDrive
Settings
Connections: Wi-Fi | Bluetooth | NFC and payment | Airplane mode | Mobile
networks | Data usage | Mobile hotspot | Tethering | Nearby device scanning | Connect to a printer | MirrorLink | Virtual Private Networks | Private DNS | Ethernet
Customization: Display | Notifications | Sounds and vibration
Security: Lock screen and security | Face recognition | Fingerprint scanner
Accounts: Add an account | Account settings | Remove an account | Backup and restore | Google settings
Backup: Google Account | External storage transfer
Accessibility: Screen Reader | Visibility enhancements | Hearing enhancements | Interaction and dexterity | Advanced settings | Installed services | About Accessibility
Other: Tips and help | Dual Messenger | About phone | Learn more | Legal information
2
Gettingstarted
Galaxy A51
Set up your device
Start using your device
3
Gettingstarted
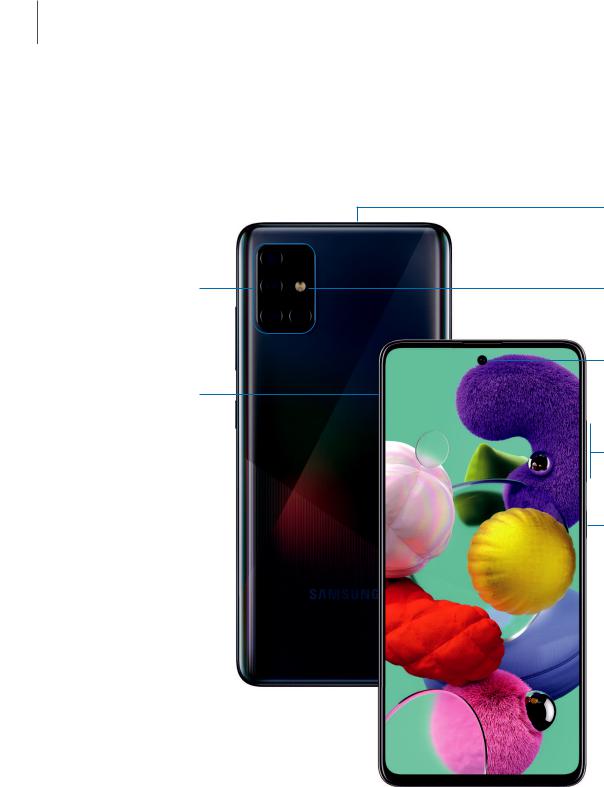
GalaxyA51
Microphone
Rear cameras |
Flash |
Front camera
SIM/microSD card tray
Volume keys
Side key
Headphone jack |
|
|
|
|
|
Speaker |
|
|
|||||
USB charger/Accessory port |
|
|
|
|
|
Microphone |
|
|
|
|
|
Devicesandsoftwareareconstantlyevolving— theillustrationsyouseehereareforreferenceonly.
4
Gettingstarted
Setupyourdevice
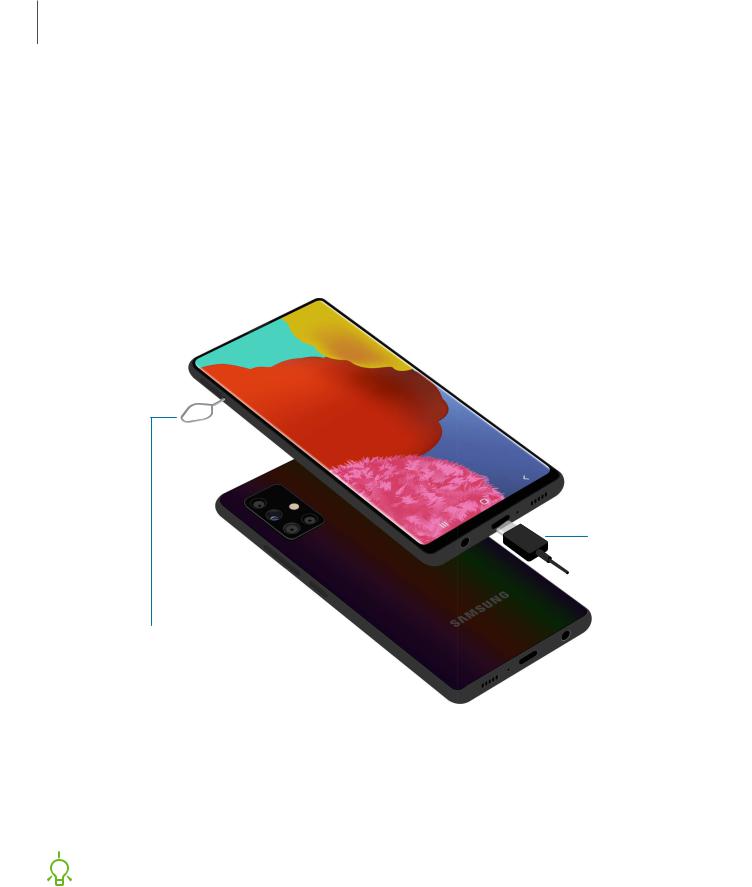
Charge the battery
Your device uses a nano-SIM card. A SIM card may be preinstalled, or you may be able to use your previous SIM card. Contact your carrier for more details.
Charge yourdevice
Before turning on your device, charge it fully.
Install SIM/microSD cards
Place the SIM card and optional microSD card (sold separately) into the tray with the gold contacts facing down.

 NOTE Use only charging devices and batteries (if applicable) that are approved by Samsung. Samsung charging devices and batteries are designed for your device to maximize battery life. Using other charging devices and batteries may void your warranty and may cause damage.
Devicesandsoftwareareconstantlyevolving— theillustrationsyouseehereareforreferenceonly.
5

Gettingstarted
Charge the battery
Your device is powered by a rechargeable battery. A charger (charging head and USB Type-C cable) is included with the device for charging the battery from a power outlet.

 TIP While charging,the device andthe chargermaybecome hotandstop charging.This usuallydoesnotaffectthe device’slifespan orperformance andis in the device’snormal range of operation.Disconnectthe chargerfromthe device andwaitforthe device tocool down.For more information,visit samsung.com/us/support/answer/ANS00076952.
Startusingyourdevice
Turn on your device | Use the Setup Wizard | Transfer data from an old device | Lock or unlock your device | Side key settings | Accounts | Set up voicemail | Navigation | Navigation bar | Customize your home screen | Bixby | Digital wellbeing and parental controls | Always On Display | Biometric security | Mobile continuity | Multi window | Edge screen | Enter text | Emergency mode
Turn on yourdevice
Use the Side key to turn your device on. Do not use the device if the body is cracked or broken. Use the device only after it has been repaired.
◌ Press and hold the Side key to turn the device on.
• To turn the device off, open the Notification panel, and tap Power >
 Power off. Confirm when prompted.
• To restart your device, open the Notification panel, and tap Power >
 Restart. Confirm when prompted.

 TIP You can also turn your device off by pressing the Side and Volume down keys at the same time. To learn more about powering off your device from Settings, tap
 Advanced features > Side key > How to power off your phone.
6

Gettingstarted
Use the Setup Wizard
The first time you turn your device on, the Setup Wizard guides you through the basics of setting up your device.
Follow the prompts to choose a default language, connect to a Wi-Fi® network, set up accounts, choose location services, learn about your device’s features, and more.
Transferdata from an old device
Use Smart Switch™ to transfer contacts, photos, music, videos, messages, notes, calendars, and more from your old device. Smart Switch can transfer your data via USB cable, Wi-Fi, or computer.
Visit samsung.com/us/support/owners/app/smart-switch to learn more.
1.From Settings, tap Accounts and backup > Smart Switch.
2.Follow the prompts and select the content to transfer.
Visit samsung.com/smartswitch for more information.
7

Gettingstarted
Lock orunlock yourdevice
Use your device’s screen lock features to secure your device. By default, the device locks automatically when the screen times out. For more information about screen locks, see Lock screen and security.
Side key
Press to lock. Press to turn on the
screen, and then swipe the screen to unlock it.
Devicesandsoftwareareconstantlyevolving— theillustrationsyouseehereareforreferenceonly.
8

Gettingstarted
Side keysettings
You can customize the shortcuts assigned to the Side key.
Double press
Choose which feature is launched when the Side key is pressed twice.
1.From Settings, tap Advanced features > Side key.
2.Tap Double press to enable this feature, and tap an option: • Quick launch camera (default)
• Open Bixby • Open app
Press and hold
Choose which feature is launched when you press and hold the Side key.
1.From Settings, tap Advanced features > Side key.
2.Under the Press and hold heading, tap an option:
•Wake Bixby (default)
•Power off menu
Accounts
Set up and manage your accounts.

 TIP Accounts may support email, calendars, contacts, and other features. See your carrier for more information.
Add a Google Account
Sign in to your Google Account to access your Google Cloud Storage, apps installed from your account, and make full use of your device’s Android™ features.
1.From Settings, tap Accounts and backup > Accounts.
2.Tap Add account > Google.
9
Gettingstarted

 NOTE When you sign in to a Google Account, Factory Reset Protection (FRP) is activated. FRP requires your Google Account information when resetting to factory settings. For more information, see Factory Reset Protection.
Add a Samsung account
Sign in to your Samsung account to access exclusive Samsung content and make full use of Samsung apps.
1.From Settings, tap Accounts and backup > Accounts.
2.Tap Add account > Samsung account.

 TIP To quickly access your Samsung account, from Settings tap
 Samsung account profile.
Add an Outlook account
Sign in to your Outlook® account to view and manage email messages.
1.From Settings, tap Accounts and backup > Accounts.
2.Tap Add account > Outlook.
Set up voicemail
You can set up your voicemail service when you access it for the first time. You can access voicemail through the Phone app.
1.From Phone, touch and hold the
 1 key.
2.Follow the tutorial to create a password, record a greeting, and record your name.
10

Gettingstarted
Navigation
A touch screen responds best to a light touch from the pad of your finger or a capacitive stylus. Using excessive force or a metallic object on the touch screen may damage the surface of the screen and the damage will not be covered by the warranty.
Tap
Lightly touch items to select or launch them.
•Tap an item to select it.
•Double-tap an image to zoom in or out.
Devicesandsoftwareareconstantlyevolving— theillustrationsyouseehereareforreferenceonly.
11
Gettingstarted
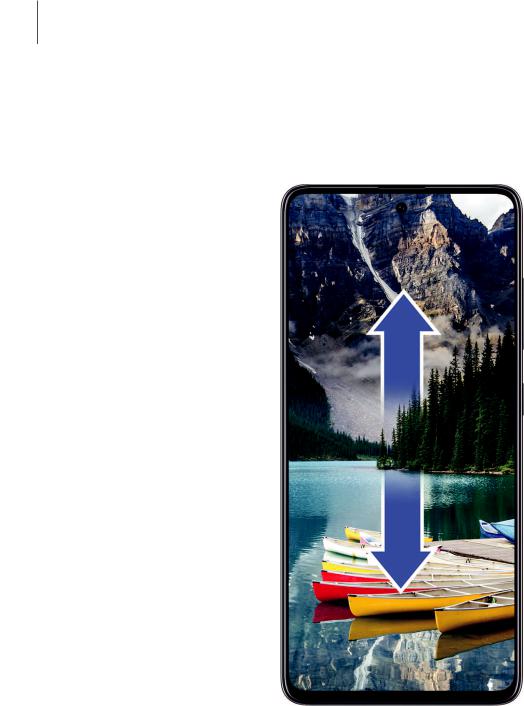
Swipe
Lightly drag your finger across the screen.
•Swipe the screen to unlock the device.
•Swipe the screen to scroll through the Home screens or menu options.
Devicesandsoftwareareconstantlyevolving— theillustrationsyouseehereareforreferenceonly.
12

Gettingstarted
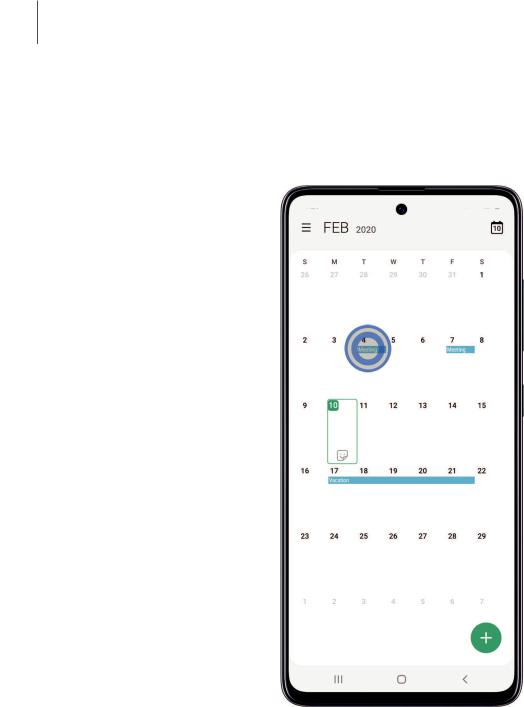
Drag and drop
Touch and hold an item, and then move it to a new location.
•Drag an app shortcut to add it to a Home screen.
•Drag a widget to place it in a new location.
Devicesandsoftwareareconstantlyevolving— theillustrationsyouseehereareforreferenceonly.
13
Gettingstarted
Zoom in and out
Bring your thumb and forefinger together or apart to zoom in and out.
•Move your thumb and forefinger together on the screen to zoom out.
•Move your thumb and forefinger apart on the screen to zoom in.
Devicesandsoftwareareconstantlyevolving— theillustrationsyouseehereareforreferenceonly.
14
Gettingstarted
Touch and hold
Touch and hold items to activate them.
•Touch and hold a field to display a pop-up menu of options.
•Touch and hold a Home screen to customize the Home screen.
Devicesandsoftwareareconstantlyevolving— theillustrationsyouseehereareforreferenceonly.
15
Gettingstarted
Navigation bar
You may navigate your device by using either the navigation buttons or full screen gestures.
Recent apps |
|
|
|
Back |
|
|
Home
Devicesandsoftwareareconstantlyevolving— theillustrationsyouseehereareforreferenceonly.
16

Gettingstarted
 Navigation buttons
Change how the navigation icons appear along the bottom of the screen.
◌From Settings, tap
 Display > Navigation bar. The following options are available:
•Navigation buttons: Show the three navigation icons along the bottom of the screen.
–Button order: Swap the order of the Back and Recent apps icons.
•Full screen gestures: Hide the navigation icons for an unobstructed screen experience, and use screen gestures to navigate. The following options are available:
–More options: Configure additional options for Full screen gestures.
–Gesture hints: Display lines at the bottom of the screen where each screen gesture is located.
–Show button to hide keyboard: Show an icon on the bottom right corner of the screen to hide the keyboard when the phone is in portrait mode.
Full screen gestures options
Customize your Full screen gestures even further by adjusting the sensitivity and enabling different types of gestures.
◌From Settings, tap
 Display > Navigation bar > Full screen gestures > More options for the following:
•Swipe from bottom: Swipe up from three different areas at the bottom of the screen to go back, go to the Home screen, or view recent apps. You can also swipe up and hold the screen to use your device assistance app.
•Swipe from sides and bottom: Swipe inward from either side of the screen to go back, swipe up from the bottom of the screen to go to the Home screen, and swipe up and hold the screen to view your recent apps.
–Back gesture sensitivity: Drag the slider to adjust your device’s sensitivity to detecting back gestures.
17

Gettingstarted
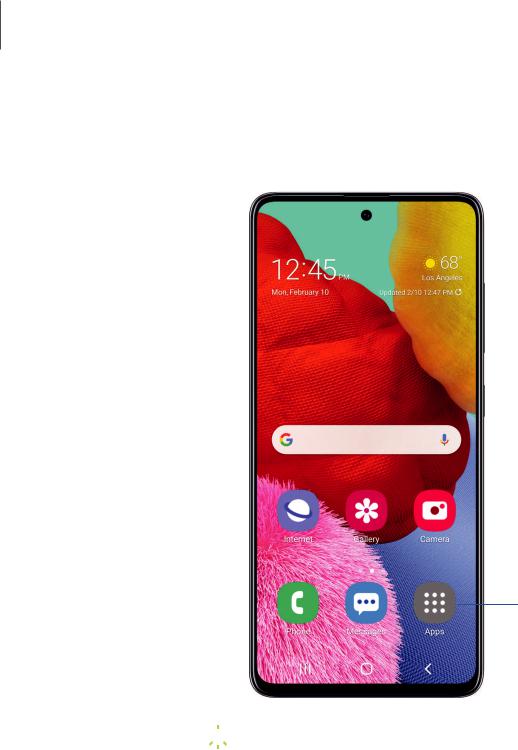
Customize yourhome screen
The Home screen is the starting point for navigating your device. You can place your favorite apps and widgets here, in addition to setting up additional Home screens, removing screens, changing the order of screens, and choosing a main Home screen.
App icons | Create and use folders | Wallpaper | Themes | Icons | Widgets | Home screen settings | Easy mode | Status bar | Notification panel
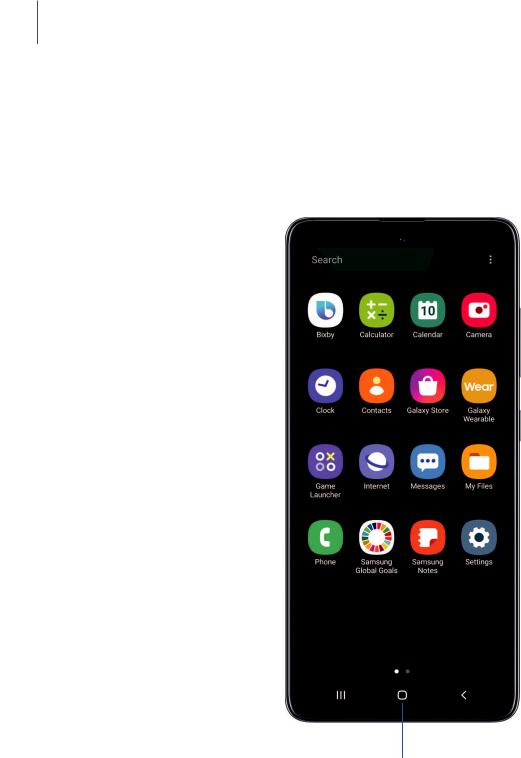
App icons
Use app icons to launch an app from any Home screen.
◌From Apps, touch and hold an app icon, and tap Add to Home. To remove an icon:
◌From a Home screen, touch and hold an app icon, and then tap Remove from Home.

 NOTE Removing an icon does not delete the app, it just removes the icon from a Home screen.
Use folders
Organize App shortcuts in folders on an Apps screen or Home screen. For more information, see Create and use folders.
Wallpaper
Change the look of the Home and Lock screens by choosing a favorite picture, video, or preloaded wallpaper.
1.From a Home screen, touch and hold the screen, and then tap Wallpaper.
2.Tap one of the following menus for available wallpapers:
•My wallpapers: Choose from featured and downloaded wallpapers.
•Gallery: Choose pictures and videos saved in the Gallery app.
•Wallpaper services: Enable additional features including guide page and Dynamic Lock screen.
•Apply Dark mode to Wallpaper: Enable to apply Dark mode to your wallpaper.
18

Gettingstarted
•Explore more wallpapers: Find and download more wallpapers from Galaxy Themes.
3.Tap a picture or video to choose it.
•If choosing a single picture, choose which screen or screens you want to apply the wallpaper to.
•Videos and multiple pictures can only be applied to the Lock screen.
•If choosing videos or pictures from the Gallery, tap on one or more items, and then tap Done.
4.Tap Set on Home screen, Set on Lock screen, or Set on Home and Lock screens
(depending on which screens are applicable).
•If applying a wallpaper to both the Home and Lock screens, enable Sync my edits if you want any edits made to that wallpaper to be applied to both screens.
Themes
Set a theme to be applied to your Home and Lock screens, wallpapers, and app icons.
1.From a Home screen, touch and hold the screen.
2.Tap Themes to customize.
3.Tap a theme to preview and download it to My themes.
4.Tap  My page > Themes to see downloaded themes.
5.Tap a theme, and then tap Apply to apply the selected theme.
Icons
Apply different icon sets to replace the default icons.
1.From a Home screen, touch and hold the screen.
2.Tap Themes > Icons to customize.
3.Tap an icon set to preview and download it to My icons.
4.Tap  My page > Icons to see downloaded icons.
5.Tap an icon, and then tap Apply to apply the selected icon set.
19
Gettingstarted
 Widgets
Add widgets to your home screens for quick access to info or apps.
1.From a Home screen, touch and hold the screen.
2.Tap Widgets, and then touch and hold a widget, drag it to a Home screen, and release it.
Customize Widgets
Once you have added a widget, you can customize where it's located and how it functions.
◌From a Home screen, touch and hold a widget, and tap an option:
• Remove from Home: Delete a widget from your screen.
• Widget settings: Customize the function or appearance of the widget.
• App info: Review the widget usage, permissions, and more.
Home screen settings
Customize your Home and Apps screens.
1.From a Home screen, touch and hold the screen.
2.Tap Home screen settings to customize:
•Home screen layout: Set your device to have separate Home and Apps screens, or only a Home screen where all apps are located.
•Home screen grid: Choose a layout to determine how icons are arranged on the Home screen.
•Apps screen grid: Choose a layout to determine how icons are arranged on the Apps screen.
•Apps button: Add a button to the Home screen for easy access to the Apps screen.
•App icon badges: Enable to show badges on apps with active notifications. You can also choose the badge style.
•Lock Home screen layout: Prevent items on the Home screen from being removed or repositioned.
20

Gettingstarted
•Add apps to Home screen: Automatically add newly-downloaded apps to the Home screen.
•Swipe down for notification panel: Enable this feature to open the Notification panel by swiping down anywhere on the Home screen.
•Rotate to landscape mode: Rotate the Home screen automatically when your device’s orientation is changed from portrait to landscape.
•Hide apps: Choose apps to hide from the Home and App screens. Return to this screen to restore hidden apps. Hidden apps are still installed and can appear as results in Finder searches.
•About Home screen: View version information.
21
Gettingstarted
 Easy mode
The Easy mode layout has larger text and icons, making for a more straightforward visual experience. Switch between the default screen layout and a simpler layout.
Apps list
1.From Settings, tap
 Display > Easy mode.
2.Tap to enable this feature. The following options appear:
•Touch and hold delay: Set how long it takes for a continuous touch to be recognized as a touch and hold.
•High contrast keyboard: Choose a keyboard with high contrast colors.
Devicesandsoftwareareconstantlyevolving— theillustrationsyouseehereareforreferenceonly.
22
Gettingstarted
 Status bar
The Status bar provides device information on the right side and notification alerts on the left.
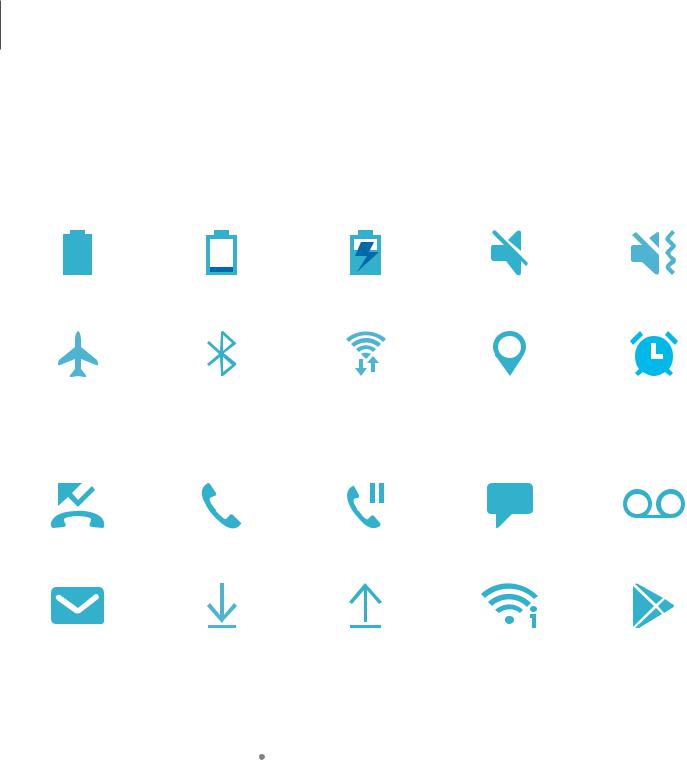
Status icons
Battery full |
Battery low |
Charging |
Mute |
Vibrate |
Airplane mode Bluetooth active Wi-Fi active |
Location active |
Alarm |
Notification icons |
|
|
Missed calls Call in progress Call on hold |
New message |
Voicemail |
New email Download Upload Wi-Fi available App update
Configure display options for the Status bar.
◌From Quick settings, tap  More options > Status bar for the following options:
•Show notification icons: Choose how to display notification icons on the Status bar.
•Show battery percentage: Display the battery charge percentage next to the battery icon on the Status bar.
23
Gettingstarted
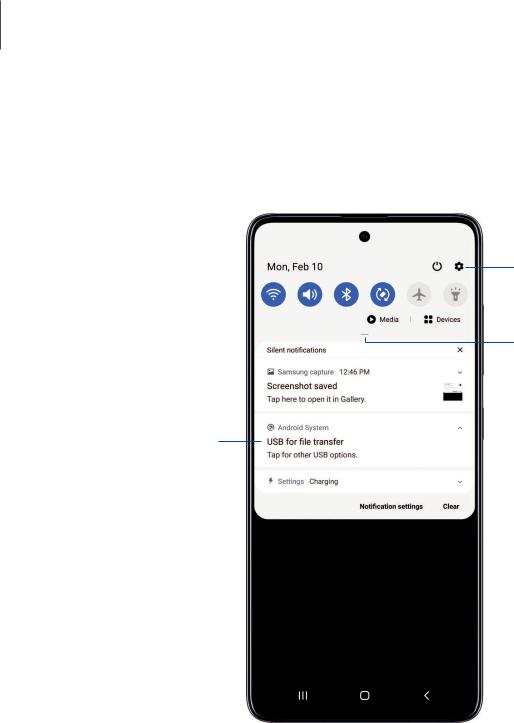
 Notification panel
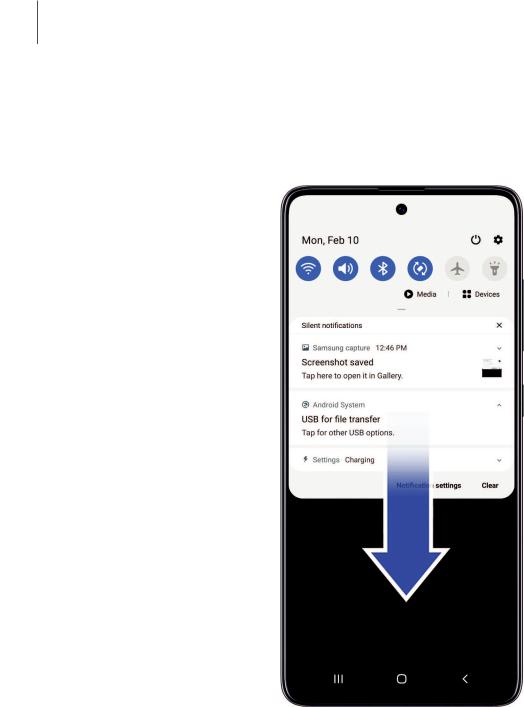
For quick access to notifications, settings, and more, simply open the Notification panel.
Device settings
Quick settings
View all
Notification cards
Devicesandsoftwareareconstantlyevolving— theillustrationsyouseehereareforreferenceonly.
24

Gettingstarted
 View the Notification panel
You can access the Notification panel from any screen.
1.Drag the Status bar down to display the Notification panel.
2.Swipe down the list to see notification details.
•To open an item, tap it.
•To clear a single notification, drag the notification left or right.
•To clear all notifications, tap Clear.
•To customize notifications, tap Notification settings.
3.Drag upward from the bottom of the screen or tap Back to close the Notification panel.
Quick settings
The Notification panel also provides quick access to device functions using Quick settings.
1.Drag the Status bar down to display the Notification panel.
2.Drag  View all downward.
•Tap a quick setting icon to turn it on or off.
•Touch and hold a quick setting icon to open the setting.
•Tap Finder search to search the device.
•Tap Power off for Power off, Restart, and Emergency mode options.
•Tap  Open settings to quickly access the device's settings menu.
•Tap  More options to reorder Quick settings or to change the button layout.
3.Drag  View all upward to close Quick settings.
25

Gettingstarted
Bixby
Bixby is a virtual assistant that learns, evolves, and adapts to you. It learns your routines, helps you set up reminders based on time and location, and is built in to your favorite apps. Visit samsung.com/us/support/owners/app/Bixby for more information.
The Bixby Home page displays customized content based on your interactions. Bixby learns from your usage patterns and will suggest content you may like.
◌ From a Home screen, swipe right or press and hold the Side key.

 TIP You can also access Bixby from the Apps list.
Bixby Routines
You can use Bixby to show you information or change device settings based on where you are and what you are doing.
◌ From Settings, tap Advanced features > Bixby Routines.
Bixby Vision
Bixby is integrated with your Camera, Gallery, and Internet apps to give you a deeper understanding of what you see. It provides contextual icons for translation, QR code detection, landmark recognition, or shopping.
Camera
Bixby Vision is available on the Camera viewfinder to help understand what you see.
◌ From Camera, tap More > Bixby Vision and follow the prompts.
Gallery
Bixby Vision can be used on pictures and images saved in the Gallery app.
1.From Gallery, tap a picture to view it.
2.Tap Bixby Vision and follow the prompts.
26

Gettingstarted
 Internet
Bixby Vision can help you find out more about an image you find in the Internet app.
1.From Internet, touch and hold an image until a pop-up menu is displayed.
2.Tap Bixby Vision and follow the prompts.
Digital wellbeing and parental controls
You can monitor and manage your digital habits by getting a daily view of how frequently you use apps, how many notifications you receive, and how often you check your device. You can also set your device to help you wind down before going to bed.
◌From Settings, tap Digital wellbeing and parental controls for the following features:
•Screen time: Tap the time value in the dashboard for details on how long each app has been opened and used today.
•Notifications: Tap to see how many notifications have been received from each app today.
•Unlocks: Tap to see how many times each app has been opened today.
•Your goals: Set up screen time and unlock goals and view your daily averages.
•App timers: Set a daily limit for how long you use each app.
•Focus mode: Configure times and activities to avoid distractions from your phone.
•Wind down: Enable to turn the screen to grayscale and limit notifications before going to bed.
•Parental controls: Supervise your children’s digital life with Google’s Family Link app. You can choose apps, set content filters, keep an eye on screen time, and set screen time limits.
27

Gettingstarted
Always On Display
View missed calls and message alerts, check the time and date, and view other customized information without unlocking your device using Always On Display (AOD).
1.From Settings, tap Lock screen > Always On Display.
2.Tap to enable the feature, and then set the following options:
•Choose when to show a clock and notifications on the screen when your device is not in use: Tap to show, Show always, or Show as scheduled.
•Clock style: Change the style and color options for the clock on the Lock screen and Always on Display.
•Show music information: Show music details when the FaceWidgets music controller is in use.
•Rotate screen to: Display the AOD in portrait or landscape mode.
•Auto brightness: Automatically adjust the brightness of Always On Display.
•About Always On Display: View the current software version and license information.

 NOTE Some display settings can appear on both the Lock screen and Always On Display.
AOD themes
Apply custom themes for Always On Display.
1.From a Home screen, touch and hold the screen, and tap Themes > AODs.
•Tap an AOD to preview and download it to My Always On Displays.
2.Tap  My page > AODs to see downloaded AODs.
3.Tap an AOD, and then tap Apply.
28

Gettingstarted
Biometricsecurity
Use biometrics to securely unlock your device and log in to accounts.
Face recognition
You can enable Face Recognition to unlock your screen. To use your face to unlock your device, you must set a pattern, PIN, or password.
•Face recognition is less secure than Pattern, PIN, or Password. Your device could be unlocked by someone or something that looks like your image.
•Some conditions may affect face recognition, including wearing glasses, hats, beards, or heavy make-up.
•When registering your face, ensure that you are in a well-lit area and the camera lens is clean.
1.From Settings, tap Biometrics and security > Face recognition.
2.Follow the prompts to register your face.
Face recognition management
Customize how face recognition works.
◌From Settings, tap Biometrics and security > Face recognition.
•Remove face data: Delete existing faces.
•Add alternative look: Enhance face recognition by adding an alternative appearance.
•Face unlock: Enable or disable face recognition security.
•Stay on Lock screen: When you unlock your device with face recognition, stay on the Lock screen until you swipe the screen.
•Faster recognition: Turn on for faster face recognition. Turn off to increase security and make it harder to unlock using an image or video of your likeness.
•Require open eyes: Facial recognition will only recognize your face when your eyes are open.
29
Loading...