


TRC-447
© 2004 RadioShack Corporation.
All Rights Reserved.
RadioShack and R adio Sh ack .c om
are trademarks used by
RadioShack Corporation.
OWNER’S MANUAL —
Please read before using this equipment.
www.radioshack.com
SM
Thank you for purchasing the RadioShack 40-Channel Mobile CB with Weather Alert. It
provides for communication on the citizen’s radio band, lets you tune to local and national
weather service broadcasts, and lets you connect an optional PA speaker to use the public
address function. You can monitor the sound of CB or weather alert over a PA system while in
PA monitor mode. It has the maximum legal power output for the greatest available range, and
a built-in PLL (phase-locked loop) frequency synthesizer provides consistent, exact tuning.
CB radio provides hours of fun and entertainment! Listen and talk to people from all over the
country while traveling, and make new friends along routes that you regularly travel. It is also a
great way to keep informed of local emergencies, such as traffic accidents, road blocks,
weather alerts and so on.
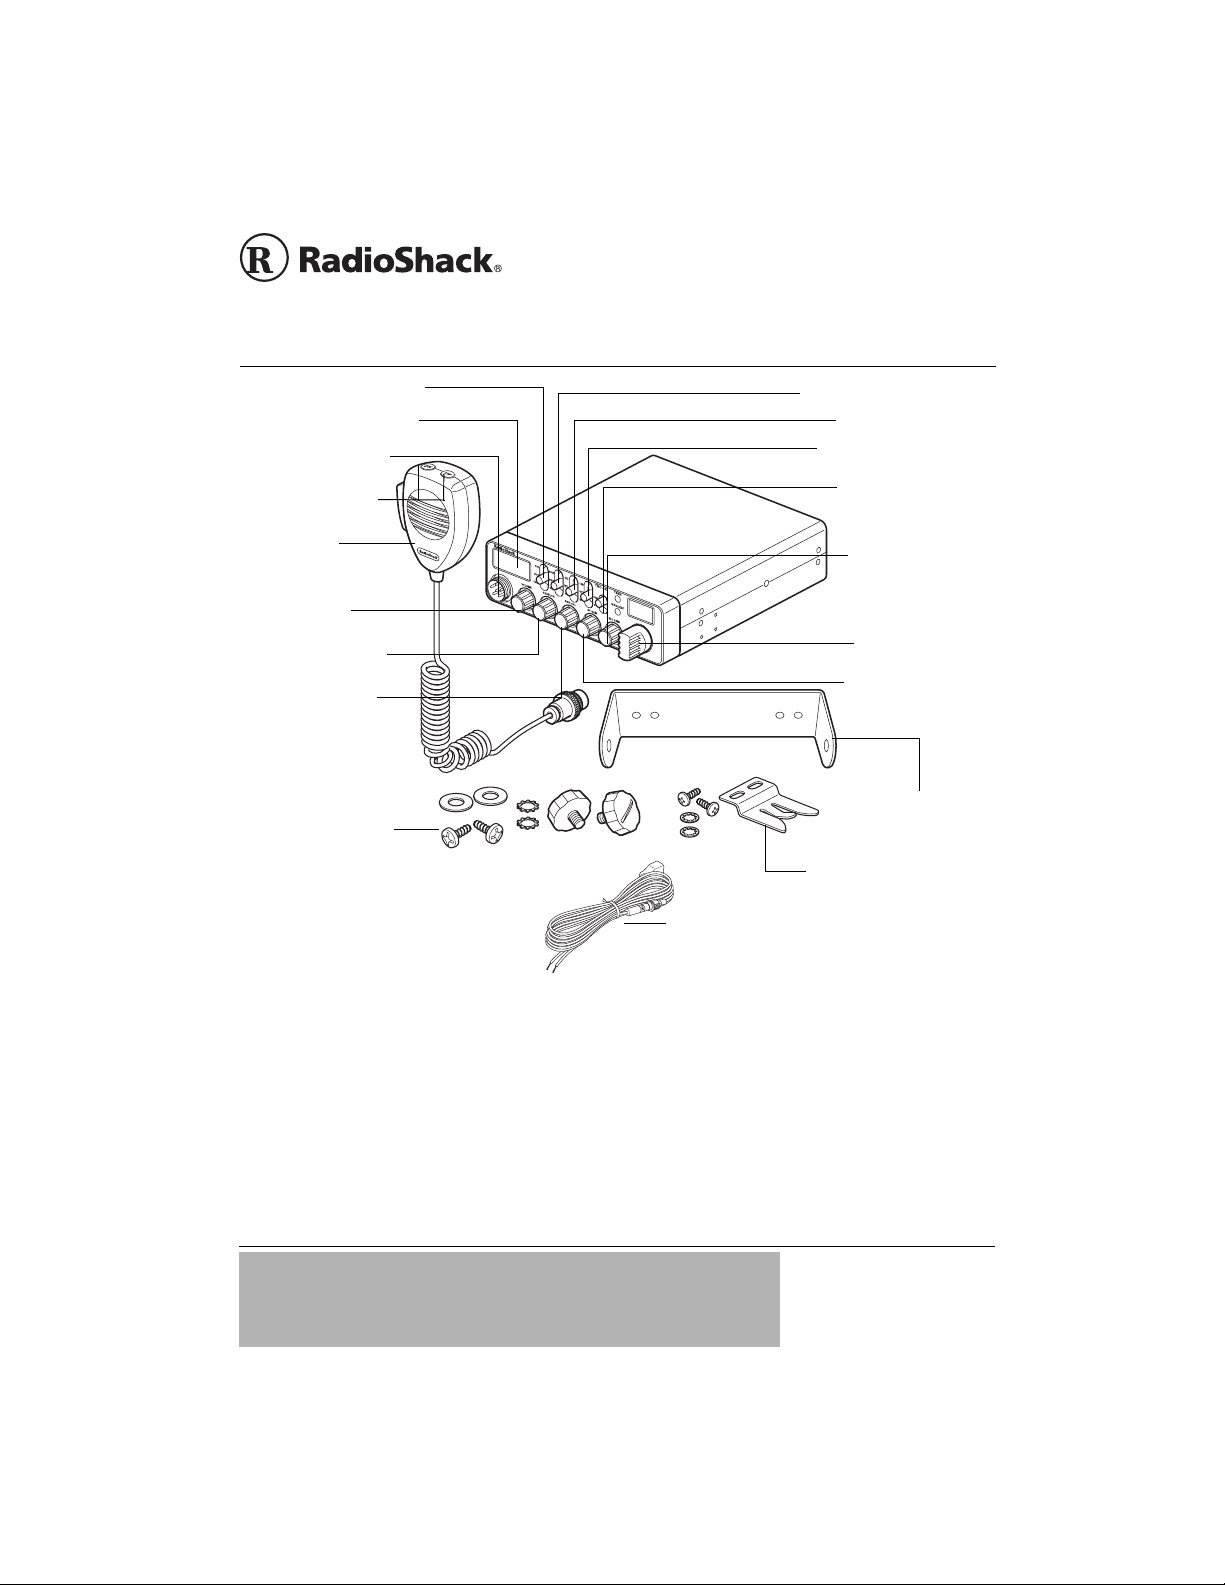
DC Cable
CH9/NOR/CH19 (
Page 6)
OFF/VOLUME
Signal Meter (Page 10)
SQUELCH (Page 6)
Microphone Jack
S/RF/SWR/CAL (Page 1
0)
CB/WX/PA (Page 6
)
NB/OFF/MON (Page 1
0)
DUAL/OFF (Page 7
)
MIC GAIN (Page 7
/
13)
SWR CAL (Page
10)
Rotate to tune to
a channel
RF GAIN (Page 6)
Microphone
Microphone Holder and
mounting hardware
Mounting Bracke
t
Mounting hardware
UP/DN (Page 6)
Deluxe Chrome-Faced
40-Channel Mobile CB
with Weather Alert
!
IMPORTANT
!
If an icon appears at the end of a paragraph, go to the box on that page
with the corresponding icon for pertinent information.
o
— Warning — Caution Ô — Note
21-1576
2
BEFORE USING YOUR RADIO
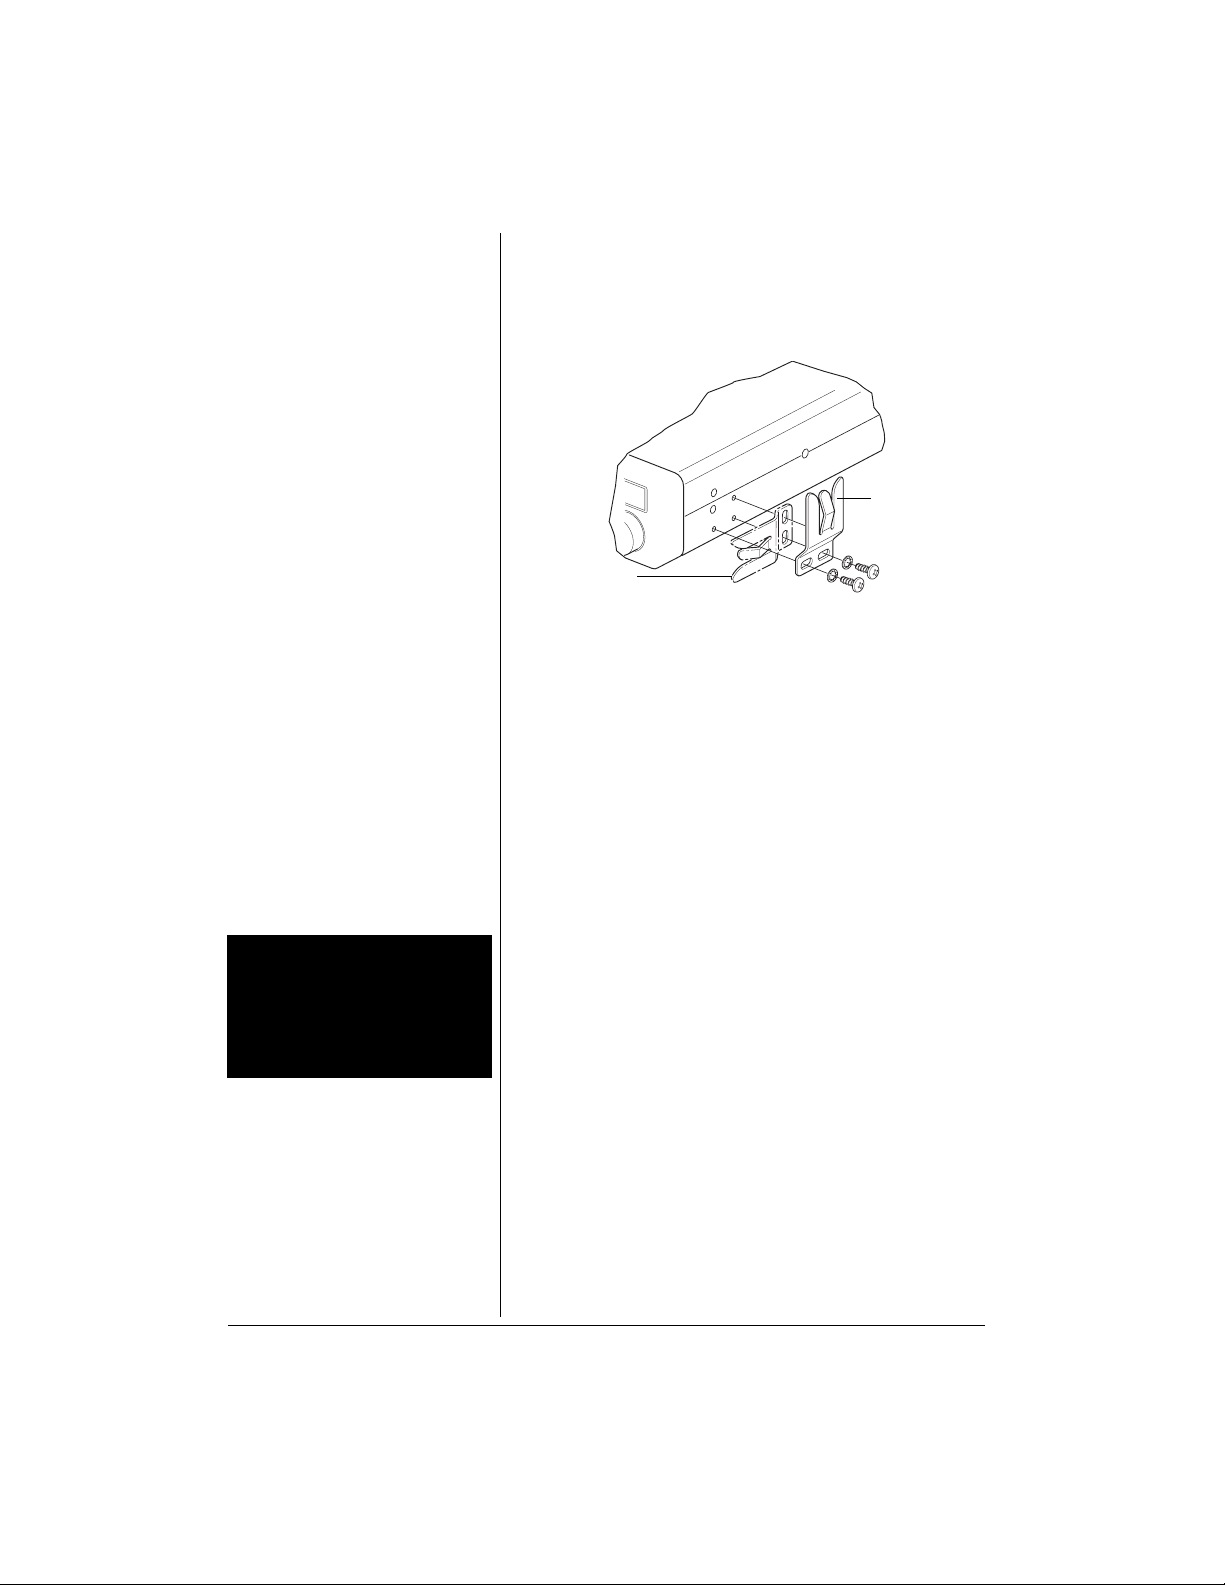
MOUNT THE MICROPHONE HOLDER
You can attach the microphone holder to either side of the
CB, horizontally or vertically as sho wn.
To attach the microphone holder somewhere else, follow
these steps.
1. Use the microphone holder as a template to mark the
positions for the screws at the desired loca tio n.
2. At the marked positions, dri ll a hole slightl y smaller than
the mounti ng screws. Do not drill into anything behind
the mounting surface.
3. Attach the microphone holder using the supplied
machine screw s and lockwashers.
MOUNT THE CB
Find a convenie nt locati on in your vehicle to mount your CB.
If you are uncomfortable mounting the CB yourself, we
suggest you consult with your vehicle service center or
automotive dealer for assistance.
o
Select a mounting location where:
• you can easily reach the CB.
• wires and cables are clear of the vehicle’s pedals or
other moving parts.
• the CB is not directly in front of heating vents.
• all wires and cables can reach their connection points.
1. Use the mounting bracket as a template to mark the
positions for the screws on the mounting surface.
Vertical
Horizontal
o
WARNING
o
Mount the CB securely to avoid
damage to the CB or vehicle, and to
avoid injury to anyone in the vehicle
during sudden starts or stops.
CONTENTS
Before Using Your Radio ............ 2
Mount the Microphone Holder 2
Mount the CB . ......................... 2
Connect the Microphone ......... 3
Install an Antenna ................... 3
Connect to Vehicle
Battery Power ................ . ........ 4
Setup as a Base Station ......... 5
Connect Speakers .................. 6
Using Your CB Radio ................. 6
Receiving ................................ 6
Transmitting ............................ 7
Common 10-Codes ................. 8
CB Operation Tips ................. . 9
Maximum Range ..................... 9
Reducing Noise .................... 10
Standing Wave Ratio (SWR) . 10
Listening to the Weather Band . 12
Digital Weather Alert ............. 12
Using Public Address Mode ..... 13
Using the PA Monitor
Function....... ......................... . 13
Replacing the Fuse .................. 14
Troubleshooting ....................... 15
FCC Information ....................... 15
Specificatio ns .................. ......... 16
3
2. At the marked positions, dri ll a hole slightl y smaller than
the mounting screws. Do not drill into objects behind
the mounting surface.
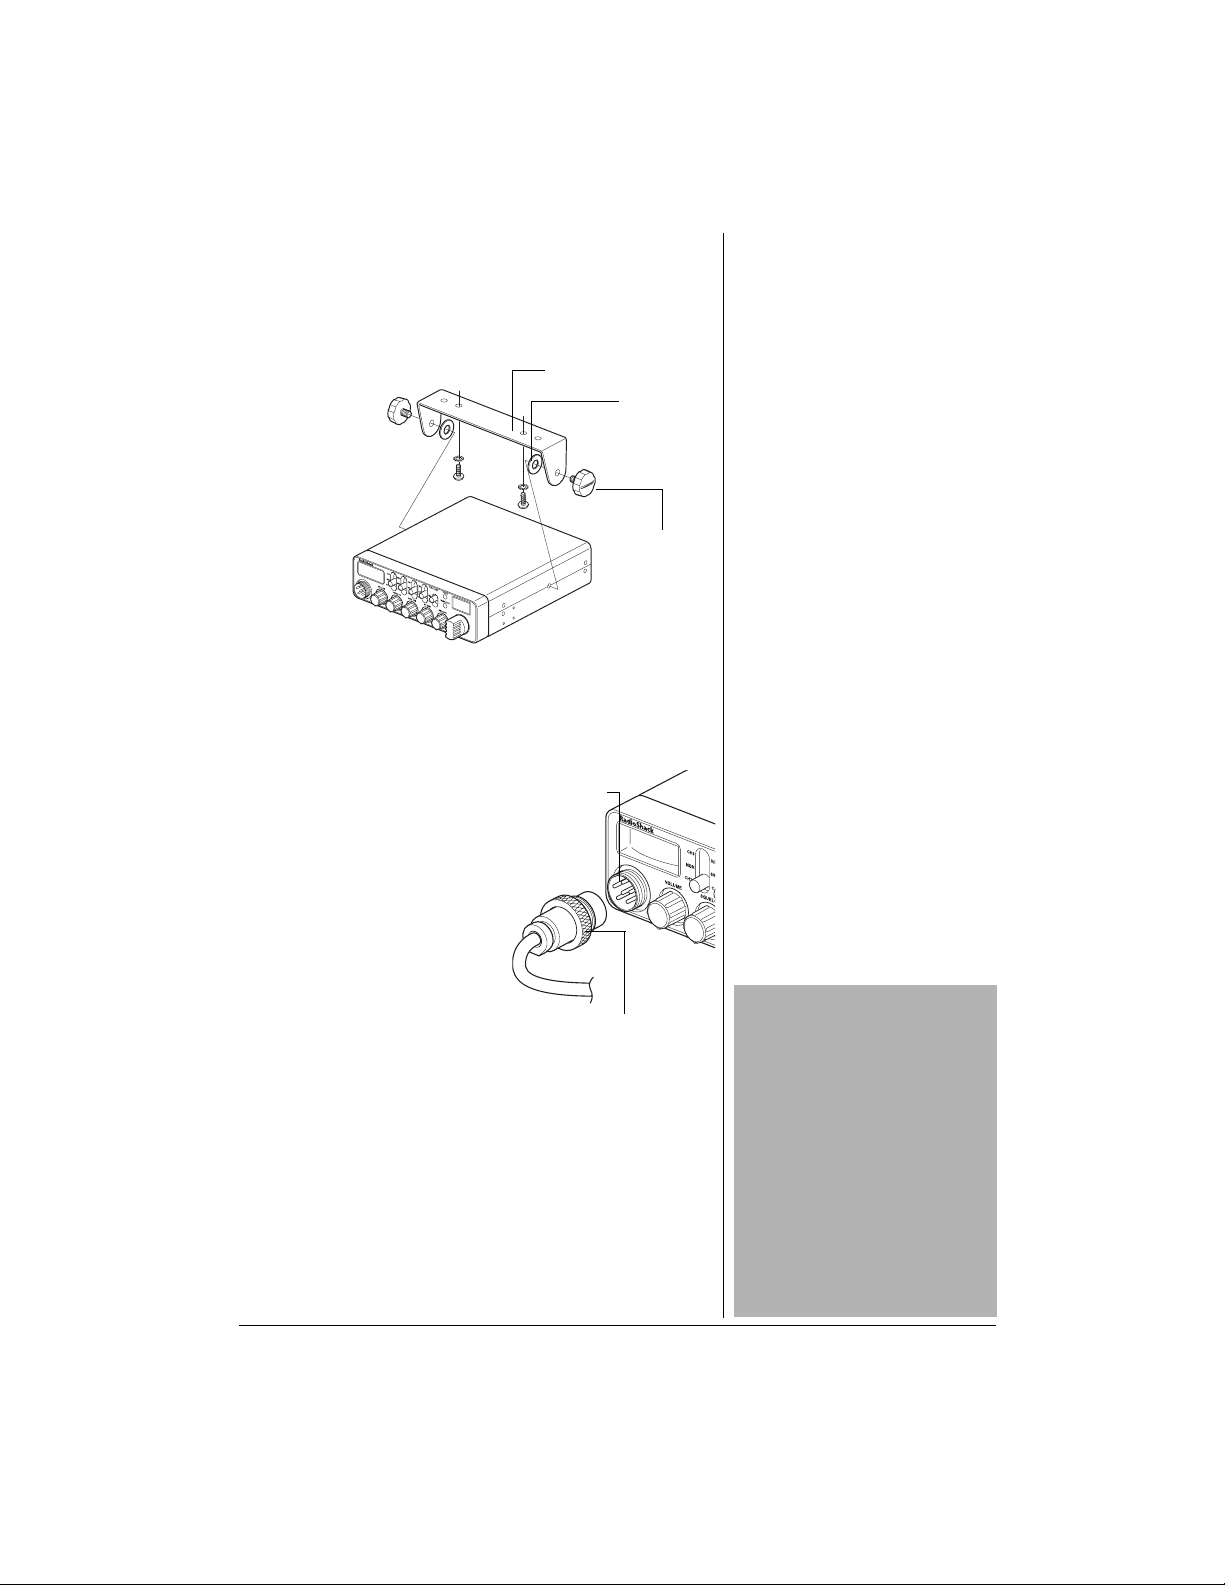
3. Secure the mounting bracket to the mounting surface
with the supplied screws and lockwashers.
4. Attach the CB to the mountin g bracket with the sup plied
rubber washers and mounting knobs.
CONNECT THE MICROPHONE
1. Align the holes inside the
microphone’s plug with the
pins in the microphone jack
and insert the plug.
2. Turn the plug’s locking nut
clockwise to secure it.
3. Slide the microphone onto
the holder.
4. To disconnect the
microphone, unscrew the
locking nut and pull the
microphone plug toward you. Do not pull the
microphone cable.
INSTALL AN ANTENNA
There are many differen t typ es of ant enn as for mobile CBs.
Dual band antennas provide optimum reception of CB and
WX channels. Yo ur local RadioShac k se ll s a wi de v arie ty of
antennas. When choosing an antenna, keep in mind that for
the best performance you should mount the antenna:
• as high as possible.
Mounting
Knobs
Mounting Bracket
Rubber
Washers
Microphone
Jack
Locking Nut
CAUTION
• To prevent damage to your CB
,
do not attempt to transmit
without an antenna attached.
• Do not run the cable over sharp
edges or moving parts that
might damage it.
• Do not run the cable next to
power cables or other CB
antenna cables.
• Do not run the cable through a
vehicle's engine compartment
or other areas that produce
extreme heat.
4
• as far as possible from sources of electrical noise.
• vertically.
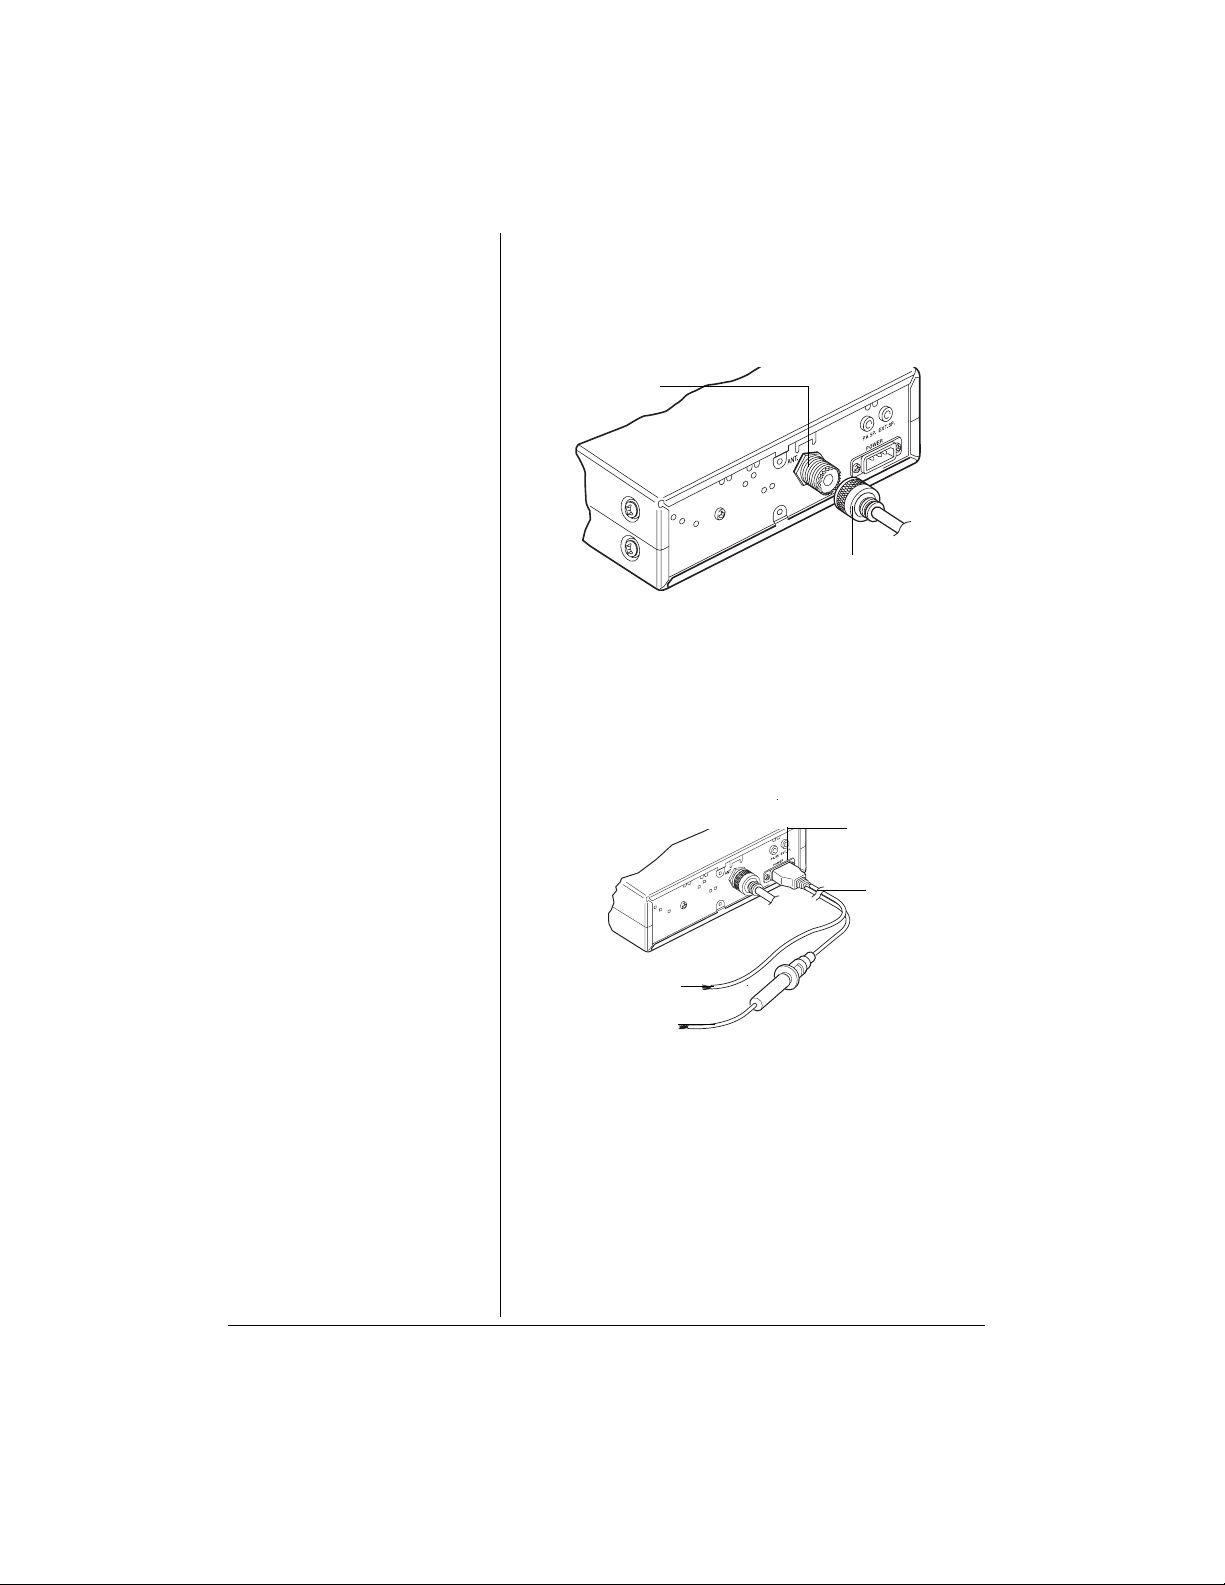
1. Follow the antenna’s mounting instructions.
2. Route the antenna cable to the C B radio and co nnect it
to the ANT. jack.
CONNECT TO VEHICLE BATTERY POWER
You can power your CB from your vehicle's battery or from
a standard AC outlet with an optional DC power supply. For
instructions on using AC power, see “Setup as a Base
Station” on Page 5.
1. Connect the supplied DC cable to the radio’s
POWER jack.
2. Connect the cable’s black wire to your vehicle’s
negative battery terminal (–), or to a metal part of the
vehicle’s frame that is not insulated by a plastic part.
3. Connect the cable’s red wire (with in-line fuse) to a
voltage source that turns on and off with your vehicle’s
ignition switch, such as a spare accessory terminal in
your vehicle’ s fuse box. T his a ssure s yo u that the C B is
turned off when you turn off the igntion.
A
NT. Jack
Antenna Cable
Red
Black
DC cable
POWER
Jack
5
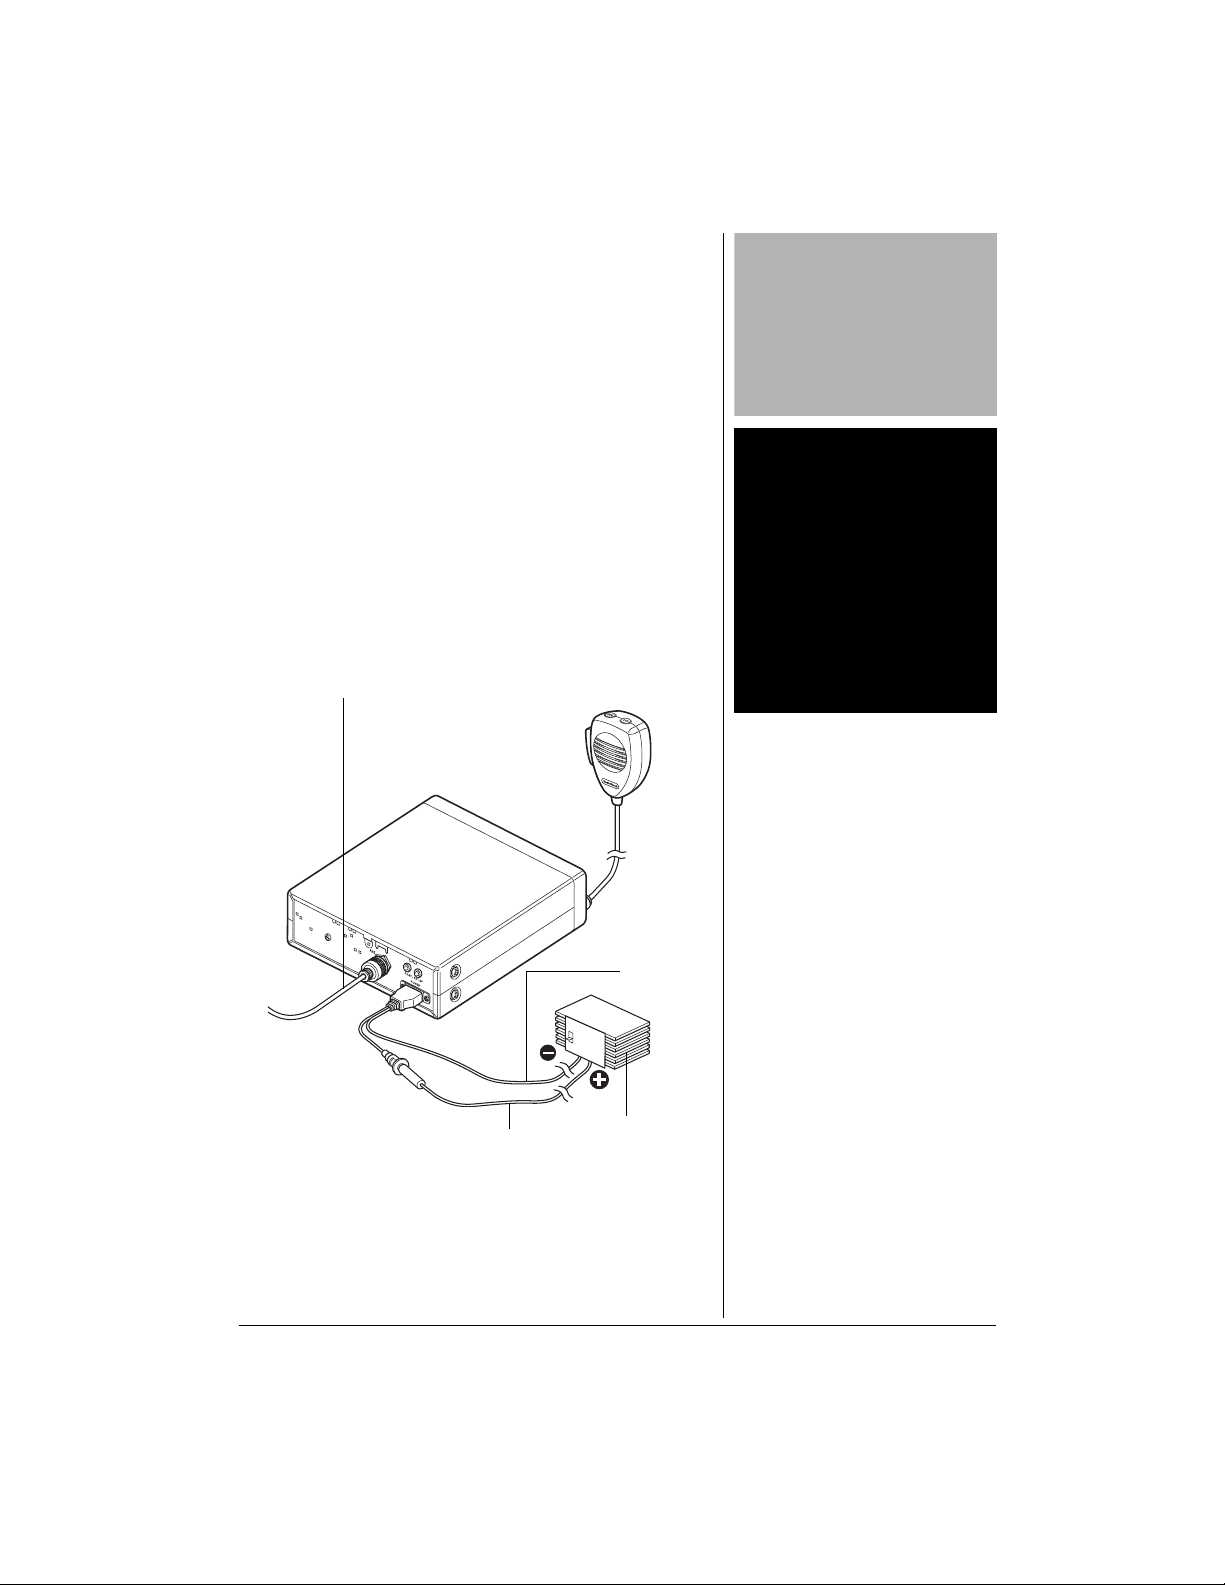
SETUP AS A BASE STATION
This CB can be used as a base station with a DC power
source. Your local RadioShack store carries a wide
selection of base station antennas, coaxial antenna cable,
connectors, and base station power supplies. For base
station installation, you need the following items:
• a 12-volt DC power supply.
• base station antenna.
• coaxial antenna cable and connectors.
1. Mount the base station antenna as described in its
owner’s manual.
o
2. Connect the cable from your antenna to the ANT. jack
on the back of the CB.
3. Connect the supplied cable’s black wire to the DC
power supply’s negative (–) terminal.
4. Connect the cable’s red wire to the DC power supply’s
positive (+) terminal.
5. Plug the DC power supply into a standa rd AC outl et.
CAUTION
Most 12-volt DC power supplies
plug into a standard AC outlet to
produce DC power. Before
connecting your CB to a 12-volt DC
power supply, read and follow the
instructions included with the
power supply.
o
WARNING
o
Use extreme caution when you
install or remove a base station
CB antenna. If the antenna starts
to fall, let it go! It could contact
overhead power lines. If the
antenna touches the power line,
your contact with the antenna,
mast, cable, or guy wires can
cause electrocution and death.
Call the power company to
remove the antenna. DO NOT
attempt to do so yourself.
DC Power
Supply
Black
Wire
Red Wire
Antenna cable to
ANT. Jack
 Loading...