


40-1994.fm Page 1 Wednesday, August 11, 1999 8:11 AM


 OPTIMUS


XTS 36 MINI SPEAKER |
Cat. No. 40-1994 |
SPECIFICATIONS |
|
Frequency Response |
140 Hz— 20 kHz |
Power Handling |
15 watts (RMS) |
Maximum Power |
30 watts |
Impedance |
8 Ω |
Speaker Complement |
3” (7.62 cm) full range |
Enclosure: |
Sealed high density plastic cabinet for |
|
extended bass response |
Dimensions: |
55/8 ¥ 39/16 ¥ 3 3/8 Inches (HWD) |
|
(14.2 × 9.0 × 8.5 cm ) |
Shipping Weight: |
1.4 lbs. (0.6 kg) |
CONNECTING THE SPEAKER
You need speaker wire (not supplied) to connect the speaker to your receiver or amplifier. We recommend you use wire that is color-cod- ed or marked on one side. Use 18-gauge or larger speaker wire for distances up to 50 feet. For greater distances, use 16-gauge wire. Your local Radio Shack store has a wide selection of speaker wire.
Note: For maximum bass response and the best overall performance, be sure the polarities match when you connect the speaker to the receiver or amplifier (positive to positive and negative to negative).
1.With the speaker in its appropriate location, measure the distance from the speaker to the receiver or amplifier. Then route the proper length of speaker wire from the speaker to the receiver or amplifier.
Cautions:
•Avoid routing the speaker wire near other electrical wires.
•Do not nail or staple the speaker wire.
2.Split apart 4 inches of speaker wire on each end.
3.Strip 1/4 inch of insulation from each wire’s end. Then twist the ends of the wire to secure any loose strands.
1/4 |
Inch |
|
|
Speaker Wires |
|
Inches |
|
4 |
|
4.While pressing and holding down the black (negative) terminal tab on the back of the speaker, insert one end of the negative bare wire into the opening. Then release the tab.
© 1995 Tandy Corporation.
All Rights Reserved.
Optimus and Radio Shack are registered trademarks used by Tandy Corporation.
40-1994.fm Page 2 Wednesday, August 11, 1999 8:11 AM
5.Repeat Step 4 to insert one end of the positive bare wire into the red (positive) terminal on the back of the speaker.
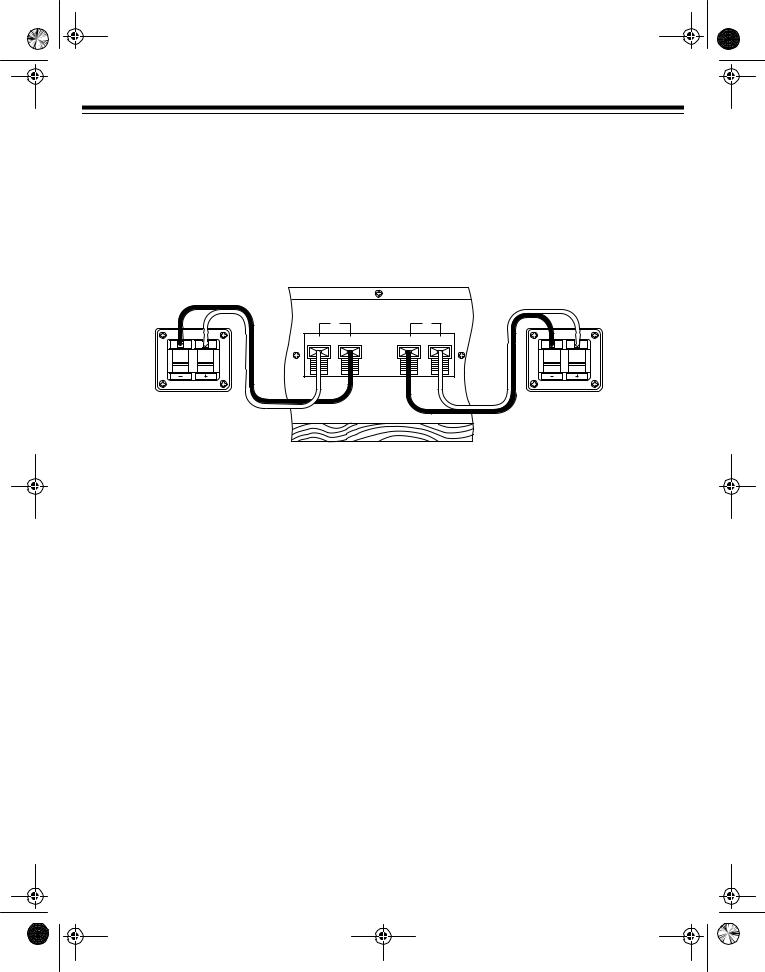
6.Using the wire’s color coding as a guide, insert the other end of the negative bare wire into your receiver or amplifier’s negative (–) speaker terminal.
7.Repeat Step 6 to connect the other end of the positive bare wire into your receiver or amplifier’s positive (+) speaker terminal.
8.You can place the speaker on a desk, shelf, or table. You can also hang it on a wall using the keyhole slot on the back of the speaker.
|
R |
|
L |
+ |
– |
– |
+ |
Connections for Two Speakers
RADIO SHACK
A Division of Tandy Corporation
Fort Worth, Texas 76102
7A5 |
Printed in Malaysia |
 Loading...