


SL-PD347
Table of contents
 Loading...
Panasonic
Compact Disc Changer
^ ...f
^ ^ iV-f/
I ' '■ , ■' ' ^ ''il- ’
1/5 -
’■ i ■. '■. ^ f' K x i : ■
/ - \
SL-PD347
Operating Instructions
Before connecting, operating or adjusting this product, please read
these instructions completely.
GNl
COMMCT
DIGITAL AUDIO
RQT1959-L

Thank you for purchasing this product.
For optimum performance and safety, please read
these instructions carefully.
Contents
Suggestions for Safety
Notes of Placement...............................................3
Preparations
Front Panei Controls and Functions...................5
Basic Operating Procedure..................................7
Sequential Play .....................................................8
Direct Access Piay
Program Play
Delete Play ..........................................................13
..........................................................
.....................................................
.........................................
.............................................
10
11
CAUTION!
THIS PRODUCT UTILIZES A LASER.
USE OF CONTROLS OR ADJUSTMENTS OR PER
FORMANCE OF PROCEDURES OTHER THAN THOSE
SPECIFIED HEREIN MAY RESULT IN HAZARDOUS
RADIATION EXPOSURE.
DO NOT OPEN COVERS AND DO NOT REPAIR YOUR
SELF. REFER SERVICING TO QUALIFIED PERSONNEL.
DANGER-Invisibla
laser radiation whan
AVOID DIRECT EX
POSURE TO BEAM.
(Inside of product)
3
4
Random Play ......................................................15
Spiral Play
Special Features
Before Moving ....................................................22
Concerning Compact Discs ..............................23
Maintenance........................................................23
Technical Specifications....................................23
Troubleshooting Guide
...........................................................
................................................
........................
Back Cover
17
18
■■jg,
■r

Suggestions for Safety
■ Use a standard AC wall outlet
1. Use from an AC power source of high voltage, such as that
used for an air conditioner, is very dangerous.
A fire might be caused by such a connection.
2. A DC power source cannot be used.
Be sure to check the power source carefully, especially on a
ship or other place where DC is used.
■ Grasp the plug when disconnecting the power
supply cord
1. Wet hands are dangerous.
A dangerous electric shock may result If the plug is touched by
wet hands.
2. Never place heavy Items on top of the power supply cord,
nor force it to bend sharply.
■ Place the unit where it will be well ventilated
Place this unit at least 10 cm (4") away from wall surfaces, etc.
■ Avoid places such as the following:
In direct sunlight or in other places where the temperature is
high.
In places where there is excessive vibration or humidity.
Such conditions might damage the cabinet and/or other component
parts and thereby shorten the unit’s service life.
■ Be sure to place the unit on a flat, level surface
If the surface is inclined, a malfunction may result.
■ Never attempt to repair nor reconstruct this
unit
A serious electric shock might occur if this unit is repaired, dis
assembled or reconstructed by unauthorized persons, or if the
internal parts are accidentally touched.
■ Take particular care if children are present
Never permit children to put anything, especiaiiy metal, inside this
unit. A serious eiectric shock or malfunction could occur if articles
such as coins, needles, screwdrivers, etc. are inserted through the
ventiiation holes, etc. of this unit.
■ If water is spilled on the unit
Be extremely careful if water is spilled on the unit, because a fire or
serious electric shock might occur. Immediately disconnect the
power cord plug, and consult with your dealer.
■ Avoid spray-type insecticides
Insecticides might cause cracks or “cloudiness" in the cabinet and
plastic parts of this unit. The gas used in such sprays might,
moreover, be ignited suddenly.
■ Never use alcohol or paint thinner
These and similar chemicals should never be used, because they
might cause flaking or cloudiness of the cabinet finish.
■ Disconnect the power supply cord if the unit
will not be used for a long time
If the unit is left for a long time with the power ON, this not only will
shorten its useful operation life, but also may cause other trouble.
■ If trouble occurs
If, during operation, the sound is interrupted or indicators no longer
illuminate, or if an abnormal odour or smoke is detected, imme
diately disconnect the power cord plug, and contact with your
dealer or an Authorized Service Center.
Notes of Placement
■ This unit is a precision instrument. Be sure to place it on a
flat surface.
a Avoid places such as the following:
•Near any equipment or device that generates strong magnetism
•On any heat-generating equipment or device, or in any place
where the temperature is high (SS^C or higher)
•Extremely cold place (5“C or below)
•Near a tuner or TV {It may cause noise in the broadcast, or
disturbance of the TV picture.)
■ When carrying or storing the unit, handle it with care so it is
not subjected to any strong bumps.
Always remove the disc before storing the unit for any period of
time.
■ To avoid problems due to vibration
•Do not place a book or similar object under this unit.
•Do not route the connection cables (of this or other units) across
the operation panel, across the top, or under the unit.
Preparations
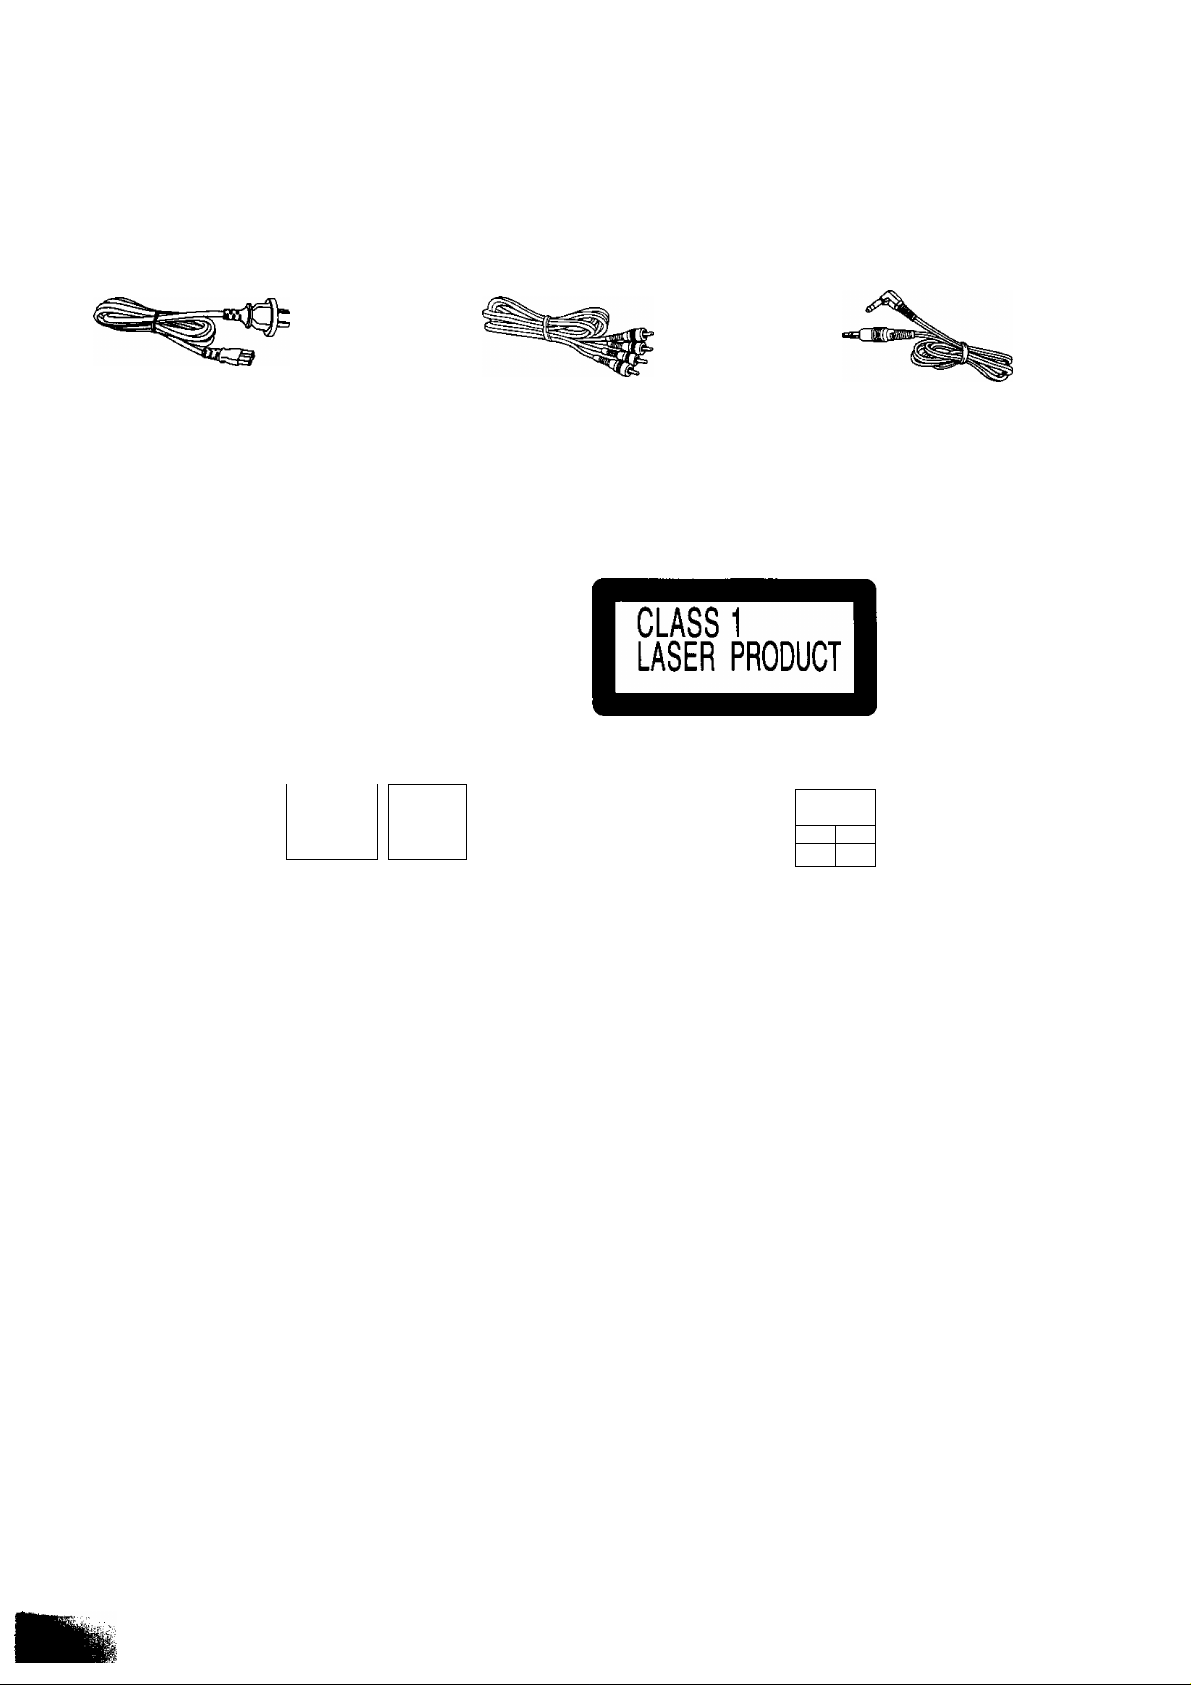
Supplied accessories
Check the packing carton for these accessories.
AC power supply cord ..........................1 pc. Stereo connection cable......................1 pc.
Connections
Before connecting the changer to your audio system, be sure that
the power of the changer and all other system components are
turned to STANDBY.
Rear panel of
this changer
------
(CD)
[r] rn
-------
---------
REMOTE
-
9
(red)(white)
(L)-
(R).
(white)
(red)
Remote control cable
AC IN-
°\
Household AC
0
outlet
...........................
1 pc.
1
Connect the stereo connection cable (in
cluded) to CD terminal of Panasonic compact
audio system.
To operate with the remote control, connect
the remote control cable (included) to the RE
MOTE terminal of Panasonic compact audio
system.
The operations such as play, stop, skip etc. can be
operated by remote control included with Panasonic
compact audio system. For details, refer to the operat
ing instructions of the system to be used.
Connect the power supply cord (included) to
the household AC outlet or to AC OUTLET of
Panasonic component.

Front Panel Controls and Functions
© Power "STANDBY 6/ON” switch
(POWER K STANDBY c!) m ON)
Press to switch the unit from on to standby mode or vice
versa. In standby mode, the unit is still consuming a small
amount of power.
© ID scan button (ID SCAN)
Press to activate the ID (identify) scan function.
(See page 18.)
@ Disc trays (1-5)
You can load up to five discs, one disc per one tray.
(See page 7.)
® Program mode button (PROGRAM MODE)
The mode changes as follows each time the button is pressed,
(See pages 11-14.)
Sequential Program Delete
(D Search buttons (-4-4 SEARCH ►►)
Press to move forward or backward through the tracks on the
disc. (See page 19.)
(6) Skip buttons (hd^SKIP^>H)
Use to skip to the beginning of the track. (See page 20.)
© Disc buttons (Disc 1-5)
Use to select desired disc. (See pages 10,11 and 13.)
(§) Time mode select button (TIME MODE)
Use to select the desired time mode. Each time you press the
button, the display information will change as follows.
1. Track number and its elapsed play time of the current track.
2. Total remaining time on the disc.
3. Track number and remaining time of the current track.
4. Total elapsed play time on the disc.
(See page 21.)
@ Spirai button (SPiRAL)
Press to play the first tracks on all the loaded discs in se
quence, followed by the second tracks on all the discs, and so
on. (See page 17.)
® Random mode button (RANDOM MODE)
The mode changes as follows each time the button is pressed.
(See pages 15-16.)
Sequential
0 Repeat button (REPEAT)
Press to repeat tracks. (See page 19.)
D
® Loading drawer
You can load and unload discs when this drawer is open.
® Stop button (■ STOP) (See page 9.)
(Jj) Pause button (I I PAUSE) (See page 9.)
© Play button ( [>' PLAY) (See pages 7 and 8.)
Disc skip button (Disc SKiP)
Use to rotate the disc tray. (See pages 8 and 20.)
@ Loading drawer open/close button
( ^ OPEN/CLOSE)
One disc .CM j
random
■> Full random
D

Front Panel Controls and Functions
(continued)
Display section
® Disc indicators ( <i> ~ <5> )
The indicator corresponding to the playing disc flashes.
In the program play mode, programmed disc indicators will
illuminate. In the delete play mode, disc indicators to be de
leted will go out.
@ Disc number display
Shows the number (1-5) of disc.
@ Track number display
Shows the number (up to 99) of track.
@) ID scan indicator (SCAN)
Lights in the ID scan mode.
@ Time/program sequence display
Shows the elapsed playing time of the track in play.
Also shows the program sequence in the program play mode,
and the sequence you entered in the delete play mode.
@) Delete play indicator (DEL)
Lights in the delete play mode.
@ Program play indicator (PGM)
Lights in the program play mode.
@ Play mode indicators (TTT ) (Fig. 1)
Each indicator points to the following play modes:
SPIRAL: Spiral play
ONE: One disc random play
FULL: Full random play
@ Repeat Indicator ([HS])
Lights when the repeat function is activated.
@ Pause indicator (II)
Lights in the pause mode.
Play indicator (P>)
Lights in the play mode.

Basic Operating Procedure
1 Press POWER to switch on the power.
2 Press OPEN/CLOSE to open the loading
drawer.
3 Load the disc(s) on the disc tray(s).
Do not load 8 cm (3") and 12 cm (5”) discs on the same disc
tray.
The number (1 -5) by the disc tray indicates the disc number.
DISC SKIP
o
^ o"o
2*4
u
H
4 Press OPEN/CLOSE again to close the load
ing drawer.
•You can skip this step by pressing PLAY.
The loading drawer will be closed automatically then play will
start.
• Do not attempt to close the drawer by hand. Be sure to press
OPEN/CLOSE.
5 Press PLAY.
CAUTION;
Do not move this changer with a compact disc inside the unit.
If a disc comes off the disc tray, it might be scratched or the
changer might become incapable of playing. Refer to page
22 before moving the unit.
After loading discs on the two disc trays at the front position,
press DISC SKIP to move the carousel. Different two disc
trays wili be at the front position each time DISC SKIP is
pressed.
Note;
Do not touch the carousel nor the loading drawer while
it is moving.
Do not turn the carousel forcibly by hand because it
may fail to operate normally.

Sequential Play
Sequential play involves playing all the five discs on the five-disc
tray in sequence beginning with the first track on the disc at the
playing position.
OPEN/CLOSE
Before beginning, follow steps 1-4 of “Basic Op
erating Procedure” on page 7.
1 Press DISC SKIP to select the desired disc.
Pressing DISC SKIP will move the carousel by one position.
Disc number at the playing position
<1><2><3X4>C5> r n n n n - n n
. . . DISC 1
2 Press PLAY to start.
The play indicator will illuminate and sequential play will start.
The disc indicator corresponding to the disc being
played flashes. Track number in play
C1><2><3><4><
...
Play indicator
The changer plays all the tracks on all the discs in order and
stops automatically when the last track on the last disc finishes
playing.
The first disc will be at the playing position.
^ uu - uu
f TRACK MIN SEC
5> r
/
*■ DISC
f TMCtt
Elapsed play time
n-n i
U‘ U 1
MN SEC
■ To exchange discs during play
(T) Press OPEN/CLOSE to open the loading drawer.
(g) Press DISC SKIP to rotate the disc trays and exchange the
discs.
The carousel will move by one position. Pressing again moves
the carousel in the opposite direction by two disc trays.
@ Press OPEN/CLOSE to close the loading drawer.
If you play a disc with the loading drawer open, the changer will stop
when the last track on the current disc finishes playing.
8
Loading...